Archives for March 2012

Chicken and Waffle Sandwiches

We had an awesome weekend. Got some yard work done, ran some errands, went to church, and had some friends over. Oh and I ran 5 miles! It felt really great too. I love runs like that.

How was your weekend?

I eat healthy most of the time. Even on the weekends when I “splurge” I find that I can’t help by choose the healthiest options. It’s a blessing and a curse I guess. Sometimes I try to substitute things for other things that just don’t turn out right. For instance, you just can’t use I Can’t Believe It’s Not Butter Fat Free in place of regular butter. It will burn and ruin whatever you’re using it for. But there are tons of other ways to make shortcuts that I use on an everyday basis. Did you catch my post about swapping mushrooms for meat? That’s a great example!

Sometimes I crave ridiculous stuff like those little chocolate covered Hostess donuts. You know the ones. OH MY are they delicious. I have no doubt that I could sit and eat an entire bag in one sitting. Or how about those cheese fries at Outback? They are so incredibly amazing. I remember when I used to go eat there and order those as an appetizer AND a meal on top of that.

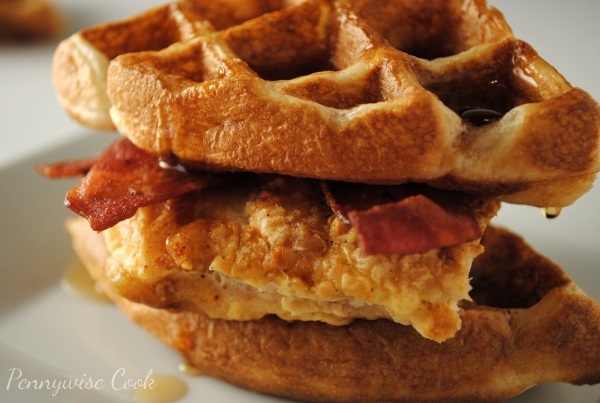
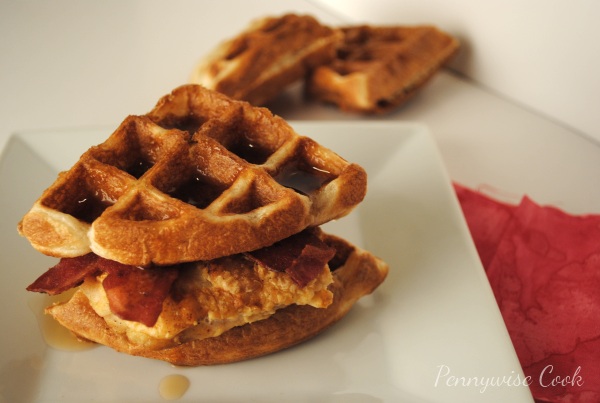
The other night I was craving a southern sandwich that is maybe a little foreign to some. A chicken and waffle sandwich. A normal sandwich like this consists of crispy fried chicken sandwiches between two waffles and slathered with maple syrup. So insanely delicious.

I decided to whip these up for the fam that night and they satisfied my craving and were really tasty! If you’ve never tried one of these and want a lighter version you might try this out for yourself. They are so yummy. These are more like mini sandwiches since I used 1/2 a Belgian waffle for each. However, each sandwich does have half a chicken breast and along with the waffle they are actually quite filling!
Chicken and Waffle Sandwiches

4 Sandwiches

Chicken and Waffle Sandwiches

A lightened up version of the Chicken and Waffle Sandwich.

Ingredients

  • 2 Belgian Waffles
  • 2 Chicken Breasts
  • 1/3 c. Egg Substitute or 1 Egg
  • 1/2 c. Flour
  • 1 Tsp. Kosher Salt
  • 1 Tsp Paprika
  • 1/4 Tsp. Pepper
  • 1/4 c. Olive Oil
  • 4 Pieces Turkey Bacon
  • Sugar Free Syrup

Method

  1. Mix the flour, kosher salt, paprika, and pepper together and place on a plate.
  2. Heat the olive oil in a skillet over medium high heat.
  3. Dredge chicken breast in the egg then in the flour and seasonings. Place in skillet and brown until crispy. About 4-5 minutes on each side.
  4. Cut each chicken breast in half and place on 1/4 of Belgian waffle. Tear 1 piece of bacon in half and place on chicken then top with another 1/4 of Belgian waffle.
  5. Pour syrup over the top and eat!

Notes

I used Batter Blaster to make my Beligan waffles, but feel free to use your favorite batter recipe or premade mix.

To cook your bacon quickly, place the 4 pieces on a paper towel and microwave for 1-2 minutes until you reach desired crispiness.

http://www.pennywisecook.com/chicken-and-waffle-sandwiches/


Like this post? SHARE it!

Related Posts Plugin for WordPress, Blogger...

Fun with Stuff that Jiggles

You know what I’m talking about!

One of my favorite snacks of all time is Jell-O. It brings me back to childhood and always reminds me of Jigglers no matter what shape it’s in. Though we don’t make it nearly as much as we should, it’s one of those snacks that takes time therefore we often pass it up. It’s silly since there is a speedy method, but we’re impatient.

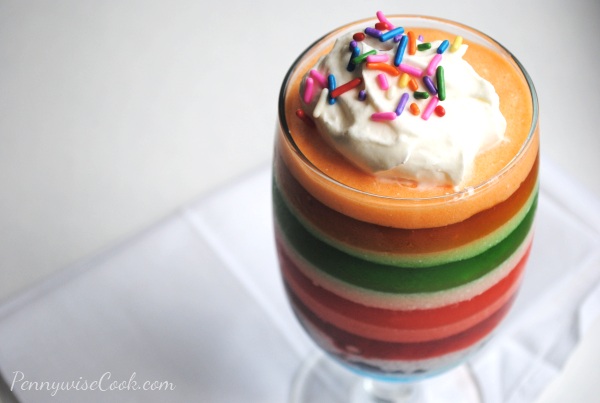
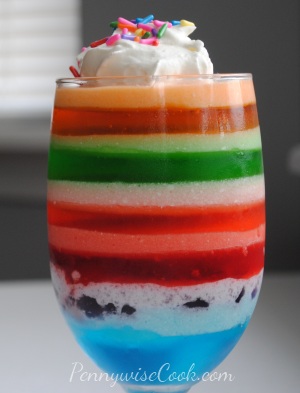
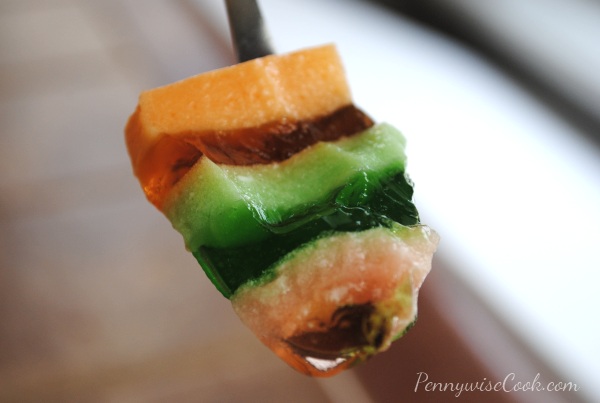
As you may know, I’ve been on Pinterest. I can’t get away from that place. Someone really needs to put some type of timer on there for how long you can be on it per day. Or maybe I just need to have self control….. Nah, that’s an awful idea. 🙂 I came across this rainbow Jell-O over at Glorious Treats and immediately thought of my Addie. She is all about rainbows and bright colors so this was perfect for a mother-daughter project. We are still novices at these treats so ours didn’t turn out as perfect as Glorious Treats did. But we’ll get better. Addie will make sure of it!

I’m not going to lie, it took some time. Each layer has to set before the next can be applied. Even with the speedy method it seemed to take a while. You see the bottom layer there? Where the purple kinda stepped into the blue’s kool-aid? Yep. That’s where we got a little impatient. As we went on you can see that we learned out lesson and to make sure they set properly before moving on.

When picking out your Jell-O, there aren’t as many flavor options in sugar-free. So you’ll have to get a little crazy and get the kind full of sugar in order to have pretty colors. Unless your store is just a lot cooler than mine and they have a lot of sugar-free flavors.

I will tell you, the regular Jell-O didn’t set as fast or as well as the sugar-free. The blue and purple in that picture were regular and needed a lot more time that the others. Just FYI.

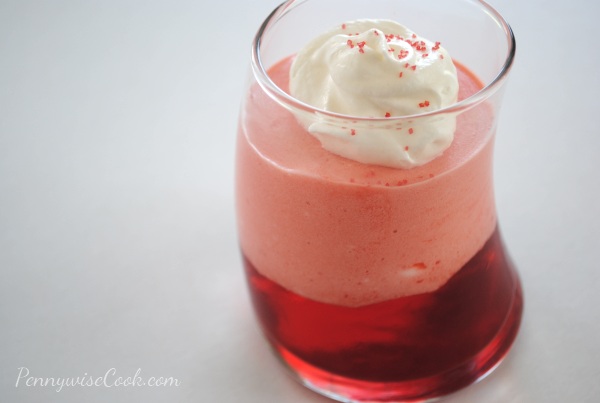
With some of the leftover red that we had, I made up this little parfait. The lighter color is simply already made Jell-O with a little cool whip stirred in. This was such a refreshing treat! I think my most favorite part of these snacks is that they are sweet and satisfy my craving for something sweet. Yet all the while they are low calorie and healthy! But don’t tell the kiddos.

How about making some JellO Treats of your own?

Fun with Stuff that Jiggles

Fun with Stuff that Jiggles

Springtime is here! Celebrate the beautiful colors blooming with this colorful way to make Jell-O!

Ingredients

  • 1 (small) Box of Jell-O for how many colors you'd like to make
  • 1 Tub of Cool Whip
  • Glasses to pour Jell-O into (I'd say at least 3)

Method

  1. Prepare your first flavor according to the speedy method on the package. Pour a little into the bottom of each glass. Divide it among however many glasses you have. Leave about 1/3 of it to combine with cool whip.
  2. Place those glasses in the refrigerator to set. Meanwhile mix 1/4- 1/3 cup cool whip with the leftover Jell-O. When glasses in the refrigerator have set most of the way, pour a little of the cool whip Jell-O into each of those glasses.
  3. Continue this method until you have used all of your colors.
  4. You can add a dollop of cool whip to the top and sprinkles if you'd like!

Notes

Like I said before, I'd recommend only using sugar-free Jell-O. Just make sure that you don't rush it. They each need time to set to look pretty 🙂

If you are extremely impatient you can place it in the freezer to get it to set a little faster. We did this with a couple of the flavors. Just note that it sets really fast.

http://www.pennywisecook.com/fun-with-stuff-that-jiggles/


Like this post? SHARE it!

Related Posts Plugin for WordPress, Blogger...

Frugal DIY: Coffee Filter Flowers


I’ve really been working on spending more time away from the computer. I think that looking at a computer screen and being so deep into social media and facebook (etc.) can really start to drain your brain. I find that spending part of my day completely unplugged really helps me to just feel better overall and that I can devote time to family and fun.

My mom called me Becky Homecky the other day….. I’d never actually heard that phrase before. She was surprised, but I honestly hadn’t. I knew what it meant immediately and I would consider it a compliment. Thanks mom! But as I pondered what exactly that meant, I began to think that I’m not really a Becky Homecky after all. I just like to cook. I HATE to clean. I intensely despise doing the dishes, but I like vacumming. Kinda weird huh?

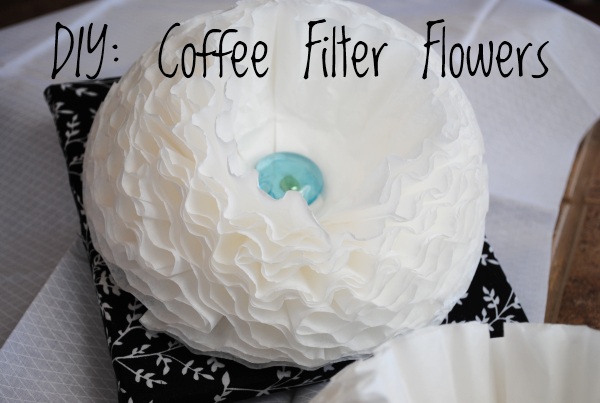
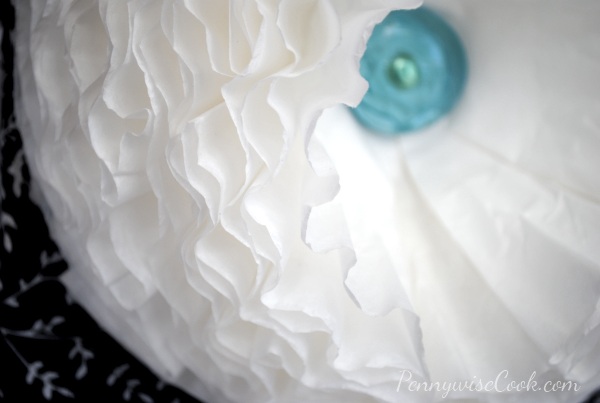
I came across this idea for Coffee Filter Flowers on Creature Comforts and got a little giddy about this craft because I thought hey, I can totally do that! So I did. These are so super easy and they make me feel like a true Becky Homecky, y’all.

Coffee filters cost what? Like $1 at the dollar store! You can’t beat that price for a homemade flower.

What you need:

22 Coffee Filters
Metal Brads or Brass Fasteners (I found them at Walmart for around $2.50)
Button, jewel, or ornament for the center (I used marble jewels that I got at Dollar Tree)

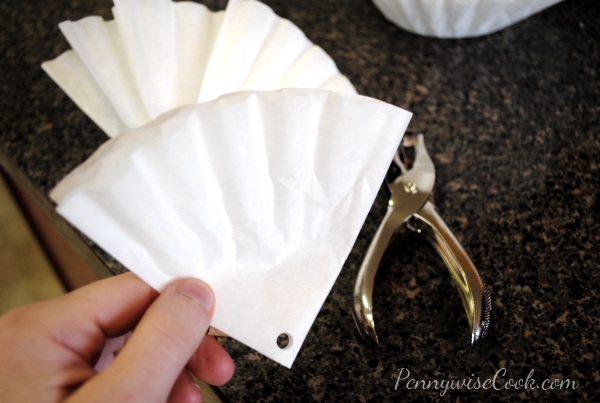
1) Fold the filter in half. Then in half again. Punch a hole with a handheld puncher and then place the brad through.

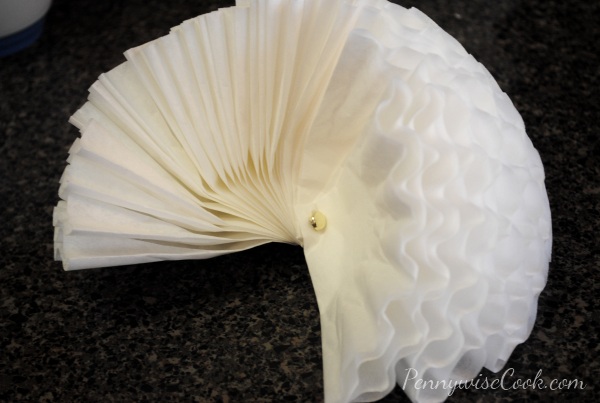
2) Continue doing this for all 22 of your coffee filters, fanning them out as you go. Don’t worry about it being perfect, you’ll be able to fix it at the end.

3) Once you’ve got them all together, bend the brad on the back and fluff and organize the flower like you desire.

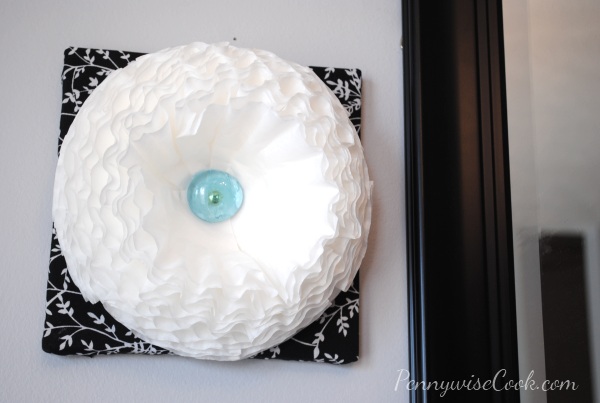
4) Hot glue your jewel or ornament to the middle to keep it all together and finish off your flower.

If you want to make a hanging pom pom with these, you simply tie a string to the back of the brad and hot glue two of these together. Beautiful decorations for a party!

I hung a couple of these up next to the mirror in our kitchen. I just glued the flower to a small canvas ($1 at Dollar Tree) that I covered with a little fabric. It was fun. I got to use my staple gun. I always feel powerful with my staple gun. 🙂

You can also dye these to be any color you’d like. Place a little latex paint (your choice of color) into a bowl and water it down well. Dip the coffee filters into the water until it absorbs the color. Let it dry and assemble the flowers like above.

I’m going to have a party this summer and I plan to make a bunch of these to hang around that match the theme. I’ll be sure to take pictures!


Like this post? SHARE it!

Related Posts Plugin for WordPress, Blogger...

Gimme S’more Cookies

So I got a sweet tooth the other day. Actually, I get sweet teeth everyday. But by now, I’m sure you’ve figured that one out.

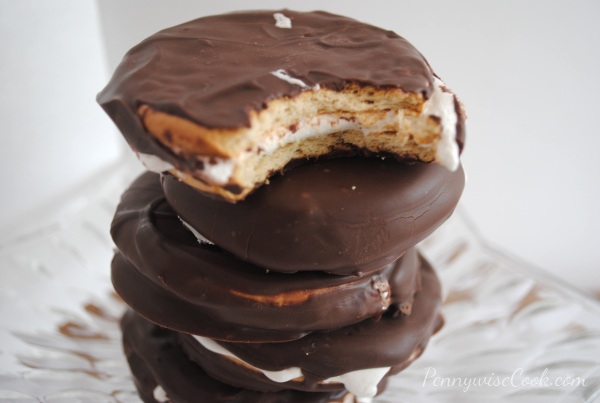
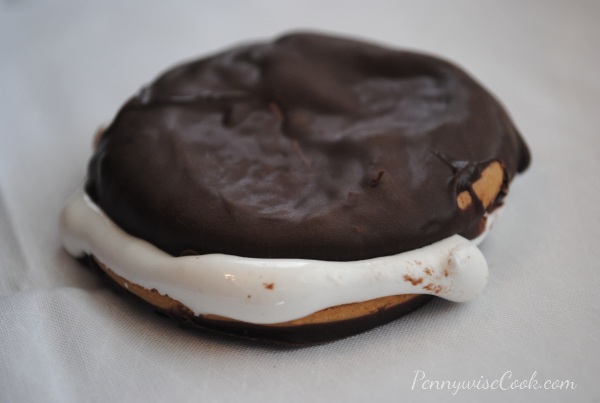
My latest sweet tooth led me to recreate homemade moon pies. You know, those graham cracker-y, marshmallow-y, chocolate-y cookie cake thingys that are incredibly yummy. They go really well with RC Colas too. They have a festival not too far from me called The RC and Moon Pie Festival. No joke. Each year, they create the world’s largest moon pie and it’s huge! There are sack races, hula hoop contests, and even live blue grass music. Everything that you’d expect from a quaint little festival. It’s really a lot of fun. If you’re in the Nashville area, it’s June 16th this year if you’d like to check it out.

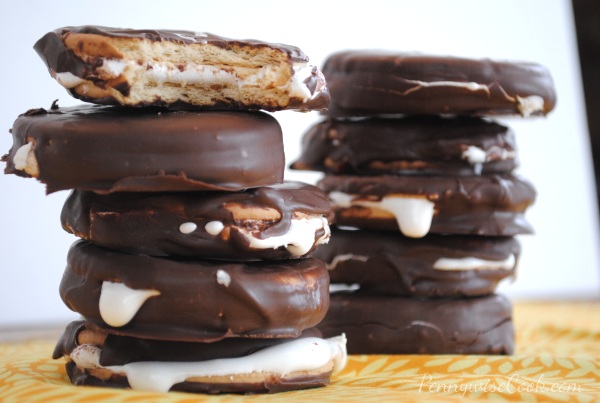
The funny thing about this moon pie recipe adventure is that I didn’t end up making moon pie cookies. I was fully expecting the cookies to soften a little, but alas they did not. They tasted much more like S’mores instead. And I’m not going to lie, this accidental recipe was fantastic!

I think that my favorite part was that it didn’t cost a bundle to make these. The ingredient that cost the most was the Dolci Frutta Hard Shell Chocolate at $2.98. I found the round cookies at Dollar Tree. I believe they are called “Maria” cookies. I also got my marshmallow cream there. So all in all these cost about $5 to make. These cookies would make an awesome sleep over snack! And no need for a camp fire. Those can be dangerous anyways. 😉

These are incredibly easy, but most likely won’t last long if you leave them around.

Gimme S’more Cookies

Gimme S’more Cookies

Forget the fire and whip up some of these Gimme S'more Cookies!

Ingredients

  • 1 Package Round "Maria" Cookies (Or Shortbread Cookies)
  • 1 Tub Marshmallow Cream
  • 1 8 oz Canister Dolci Frutta Hard Shell Chocolate

Method

  1. Spread about 1 and 1/2 tablespoons marshmallow cream between two cookies. Repeat until all the cookies are gone. Place in the refrigerator for 45 minutes to 1 hour.
  2. Line a baking sheet with wax paper. (Or lay it out on the counter)
  3. Heat up Dolci Frutta according to the directions on the package.
  4. Take cookies out of the refrigerator and dip into chocolate. Place on wax paper and let cool.

Notes

It's necessary to put these into the refrigerator before dipping them so that the cookie and marshmallow can kinda fuse together and harden that way.

If you can't find the Maria cookies, even regular graham crackers would work just find. You'll have square cookies instead of round. Any sweet cookie would work just fine. These were fairly large.

http://www.pennywisecook.com/gimme-smore-cookies/


Like this post? SHARE it!

Related Posts Plugin for WordPress, Blogger...

Sticky Sesame Chicken

I have always been a huge fan of Chinese food. I absolutely love garlic, onions, soy sauce, you name it. The combination that is used in that ethnicity is just my kind of flavor. And what most people don’t realize is that a lot Chinese dishes are simple to make. There are two things in recipes that I look at to decide if I want to make it.

1) Does it contain ingredients that I would have on-hand or that I would actually buy and use later?
This is what makes it frugal. You don’t want to have to make a special trip to a crazy store 30 minutes away to use that ingredient just once.

2) Is the recipe simple with steps that are easy to follow?
I’m all about simple. If a recipe contains a bunch of steps that are difficult, I usually move on. I’m ok with maybe one challenging step in a recipe, but the more challenging the more time it takes and the less simple that it becomes. And we all know that time is very important too. With two kiddos and a hungry husband, there’s not a moment to spare when getting dinner on the table.

If you’ve been following this blog for a while, then you know I’m a big fan of Hungry Girl. I love her use of resources and out of the box thinking when it comes to making meals healthier. I found this recipe for Sesame Chicken over there and I was a bit turned off by the ingredients to be honest. There are a total of 15- 16 ingredients in this recipe. Yeah, exactly. It doesn’t sound like one of those easy recipes, but after actually seeing what the ingredients were I quickly changed my tune.

With the combination of regular everyday ingredients that you might have on hand, you can whip up this super yummy Sticky Sesame Chicken! I’m serious too, it’s healthy but it’s also amazing! The only drawback to this recipe is the time it takes to coat each piece of chicken. Just make sure that you give yourself plenty of time to do that when preparing this recipe.

Recipe adapted from Hungry Girl.

Sticky Sesame Chicken

2 Servings

Serving Size: 1 Cup

288

Sticky Sesame Chicken

Make your own yummy Sesame Chicken just like your favorite Chinese restaurant without all the extra fat!

Ingredients

  • 10 oz Boneless Skinless Chicken Tenders, chopped into bite-sized pieces
  • 1/8 tsp. salt
  • 1/8 tsp. black pepper
  • 1/4 cup fat-free liquid egg substitute
  • 1/4 cup whole-wheat flour, divided
  • 1/4 cup fat-free chicken broth
  • 1 tbsp. cornstarch
  • 2 tbsp. sugar-free pancake syrup
  • 2 tbsp. seasoned rice vinegar
  • 1 tbsp. ketchup
  • 1/2 tbsp. lite/low-sodium soy sauce
  • 1/2 tsp. sesame oil (I used olive oil)
  • 1/2 tsp. crushed garlic
  • 1 tsp. sesame seeds
  • 2 tbsp. thinly sliced scallions (optional)

Method

  1. Preheat oven to 375 degrees. Spray a baking sheet with cooking spray and set aside.
  2. Place chicken in a bowl, season with salt and pepper, and cover with egg substitute. Toss to coat and set aside.
  3. Place 2 tbsp. flour in another bowl. Use a fork to transfer half of the chicken to the flour bowl, allowing excess egg substitute to drain back into the egg bowl. Thoroughly coat chicken with flour, and then transfer to the baking sheet. Wipe the bowl clean, and then do it again with remaining flour and chicken.
  4. Bake chicken in the oven until cooked, about 10 minutes.
  5. Meanwhile, combine broth with cornstarch in a small nonstick pot and stir to dissolve. Add the syrup, vinegar, ketchup, soy sauce, oil, and garlic. Mix well and bring to medium heat on the stove. Stirring often, cook until thick, 2 - 3 minutes. Set aside.
  6. Place cooked chicken in a bowl, top with sauce, and toss to coat. Sprinkle with sesame seeds.
  7. Top with scallions or crushed red pepper if desired and serve!

Notes

This recipe is made for 2 people, but I had more than 10 oz of chicken so I added a little of each ingredient to make it go further for our family. I used vegetable oil instead of sesame oil and it turned out just fine. So don't fret if you don't have that. Make sure that your chicken is nice and warm when you serve it with the sauce. I found that it gets cold pretty quickly.

http://www.pennywisecook.com/sticky-sesame-chicken/


Like this post? SHARE it!

Related Posts Plugin for WordPress, Blogger...

Easy Chocolate Peanut Butter Fudge

We had a very good day today. Britton, my 9 month old, was in a very pleasant mood the entire day. And you know that always keeps momma in a good mood too. It was goregeous outside today so Addie got to play outside for quite  long time. And this was probably the first time that Britton ever got to go outside for a length of time. She absolutely loved it! Minus actually having to touch the grass (we kept her on a blanket), she was all about the outdoors. Her favorite part was the wind.

It was such a nice reminder of how we should take a minute every now and then to enjoy the small things in life. Like wind on our face and the sound of birds chirping. I know I sound a little silly, but I’m totally serious. With spring time around us, it’s such a beautiful time to really enjoy nature and the simpler things.

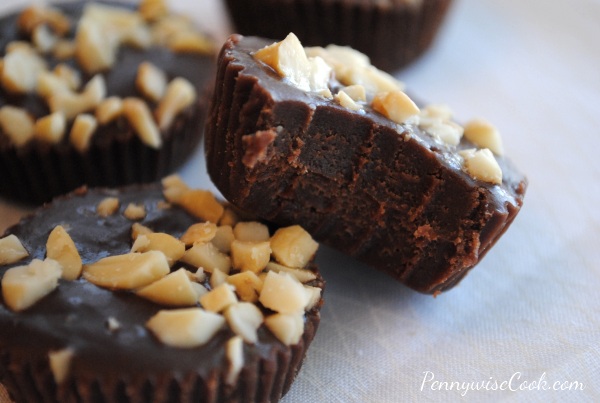
You know what else that I love anytime of year? FUDGE! I’m pretty sure that fudge is the cure-all for just about anything. It’s like an instant pick-me-up. There’s just something about that creamy and smooth texture that makes it enjoyable. I made a recipe for Two-Ingredient Peanut Butter Fudge over on Saving with Amy a while back. It only calls for two ingredients which makes it not only easy, but also extremely affordable as well. I decided to make up my own little recipe with this one as a base to kinda spice it up and make it a little fancier.

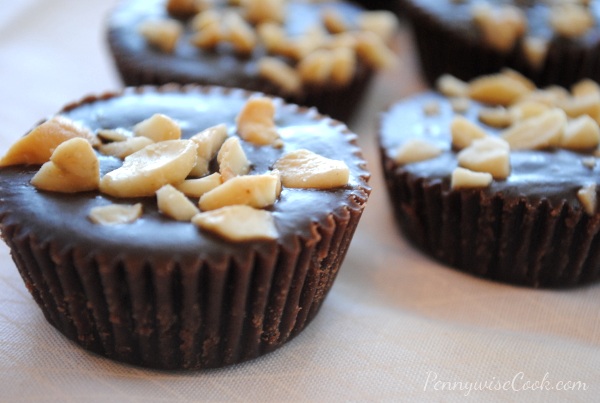
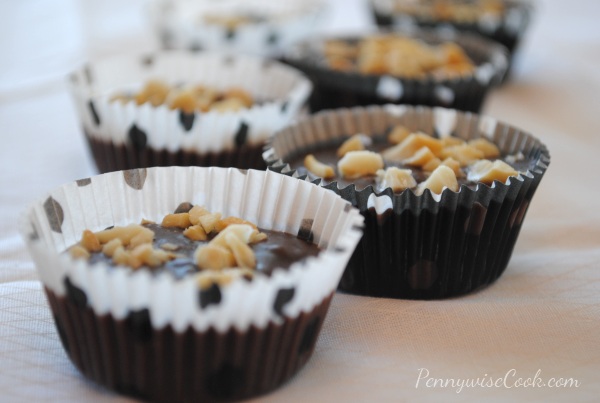
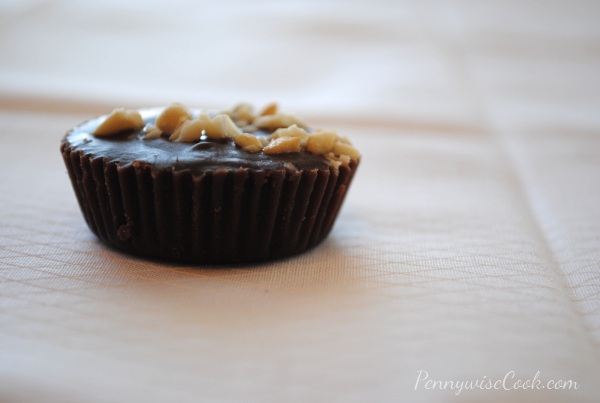
Mini muffin liners make the best fudge wrappers! They make them like little Reeses cups which is also really easy for serving. No sticky fingers and they look pretty too.

The two ingredient method works well, but it doesn’t stay firm for long periods of time. In putting together this Chocolate Peanut Butter Fudge, I wanted to add something to make it thicker and also keep it firmer. So I ended up adding some chocolate chips and cornstarch to the equation. I think it did a world of good for this fudge. And as you see, I fancied it up a bit with chopped cashews on top. This was the best fudge I’ve made! You might just like it too.

One of favorite things about this recipe is that you can actually make it healthy by using reduced fat peanut butter and use sugar free frosting! I haven’t tried this recipe with natural peanut butter before so I’m not sure that it will have the same consistency.

Easy Chocolate Peanut Butter Fudge

Easy Chocolate Peanut Butter Fudge

This super easy recipe for fudge is tasty, smooth, and perfect for "one of those days". Or any day!

Ingredients

  • 1 18 oz Jar Peanut Butter (Creamy or Crunchy)
  • 1 16 oz Tub Chocolate Frosting
  • 1/3 C. Chocolate Chips
  • 1 Tsp Cornstarch
  • 1 Tsp Water
  • Chopped Cashew or Walnuts (Optional)

Method

  1. Place peanut butter and chocolate frosting into a large bowl. Microwave for 1 minute. Remove and stir. Microwave for 1 more minute.
  2. Meanwhile, dissolve the cornstarch into the tsp of water.
  3. Melt chocolate chips in a double boiler (or microwave them to melt)
  4. Remove the fudge mixture from the microwave and stir in the cornstarch and melted chocolate chips.
  5. Pour into mini muffin liners or pan. Top with chopped nuts.
  6. Freeze for 45 minutes to help set quickly.

Notes

Melting the chocolate chips isn't a must. I haven't tried leaving them whole, but I'm sure that it would be tasty even if they didn't melt. Freezing the fudge is not absolutely necessary, but I find it helps it to set better. The peanut butter that you use is completely up to you. I love creamy because it makes the fudge smooth, but by all means if you like things crunchy, crunchy peanut butter works just as well.

http://www.pennywisecook.com/easy-chocolate-peanut-butter-fudge/


Like this post? SHARE it!

Related Posts Plugin for WordPress, Blogger...

Lasagna Cupcakes

What’s the one thing that you always have to hand at all times? Milk? Cheese? Perhaps a tub of ice cream? 😉

One of my important things to have in my fridge these days is wonton wrappers. You’ve probably seen them in your grocery store before. I encourage you to pick some up the next time you’re at the store. They usually run around $2.99 for a package (give or take a little). They are so incredibly versatile when it comes to making small foods. Yes, that’s been one of my obsessions lately. Anything teeny tiny and can fit in your palm. I mean come on, how cute are cupcakes? What about Meatloaf Cupcakes? If you haven’t gotten a chance to make those yet, you’re missing out!

I first came across these Lasagna Cupcakes reading up low calorie recipes in the Hungry Girl cookbook. I was floored when I found them and could not wait to make some up. They turned out beautiful and quite tasty (even to the hubby), but they were a little bit spinach-y. I like spinach more than I ever have, but only when it’s nicely camouflaged and hidden. I don’t even mind seeing my food green because of spinach, but it just can’t taste like spinach.

So I came up with my own version of this main dish cupcake and it was fabulous!

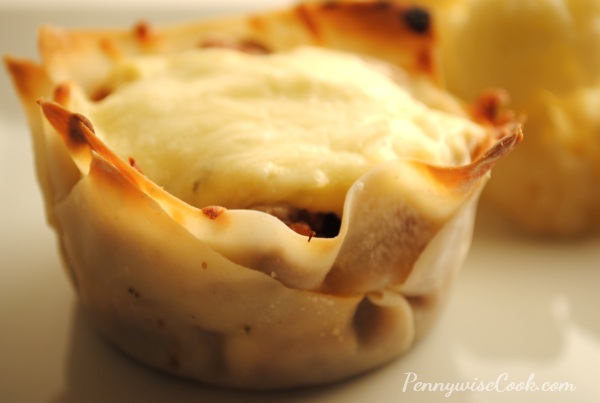
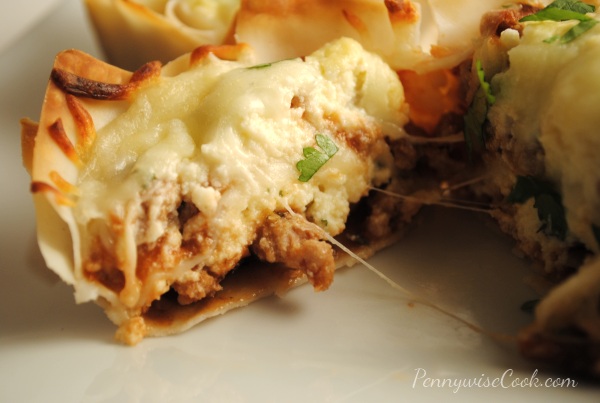
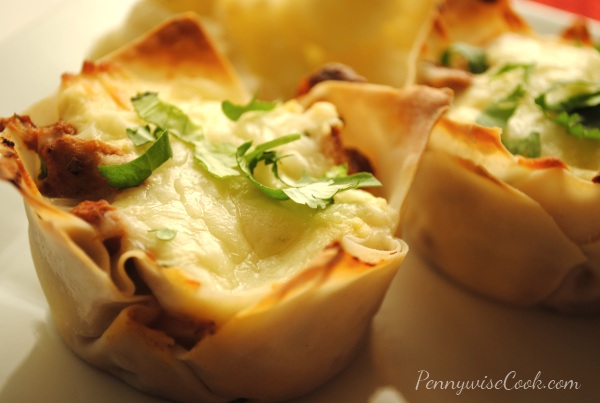
On the outside, these are adorable and so incredibly cute, but on the inside they actually taste like mini lasagna. Two words come to mind- portion control. These are the perfect idea for a party or having company over. They look like a million bucks, but it’s basically the same as lasagna without the noodles and in tiny form. Most everything is cute in tiny form and kids love that which makes this a kid-friendly dish as well!

Putting the wonton wrappers on added more prep time, so just be aware of that. But other than prep time, this is an easy meal. Serve it up along side a salad and corn and you’ve got a meal.

Lasagna Cupcakes

Lasagna Cupcakes

Ingredients

  • 1/2 Pound Ground Turkey or Extra Lean Beef
  • 1 c. Ricotta Cheese
  • 1 and 1/2 c. Mozzarella Cheese, divided
  • 1 c. Parmesan Cheese
  • 1 8 oz Can Tomato Sauce
  • 1 Large Egg or 1/4 c. Egg Substitute
  • 1 Medium Onion, Chopped
  • 1 Tsp Garlic
  • 24 Wonton Wrappers
  • 1 Tsp Italian Seasoning
  • 1/4 Tsp Salt
  • 1/8 Tsp Pepper

Method

  1. Preheat the oven to 375 degrees.
  2. Over medium-high heat, brown ground turkey, onion, garlic, salt and pepper until meat is no longer pink. Add in tomato sauce and simmer for about 5 minutes.
  3. Spray a muffin pan with cooking spray and set aside.
  4. Meanwhile, mix ricotta cheese and egg.
  5. Place a wonton in each muffin well bringing it up along the sides.
  6. Distribute 1/2 the ricotta mixture among the cups.Smooth them out with a spoon.
  7. Top those layers with 1/2 the meat mixture and evenly distribute. Add 1 tbsp mozzarella cheese on top of each meat mixture.
  8. Place another wonton wrapper in each cup.
  9. Repeat those steps and then bake them for about 10 minutes or until the cheese is all melted.
http://www.pennywisecook.com/883/


Like this post? SHARE it!

Related Posts Plugin for WordPress, Blogger...

Berry Tasty Blueberry Cheesecake

I know that the title of this post is a little cheesy. Lookie there I did it again. I crack myself up! I hope that your weekend was nice! I always love lazy Saturdays. After about 10 of them in row where we had something that we wanted to organize, clean, etc. it’s nice to have one that is spent just doing whatever. Like painting toenails or taking a walk. Or doing the laundry which is technically still cleaning, but instead of actually taking them out the dryer you leave them so you don’t have to fold them.

My latest laundry epiphany is that we actually have a laundry basket! Came across it in the closet the other day. Those are quite handy when transporting clothes from one room to another you know. Don’t you just hate when you go to pick up a pile of clothes from the bed or floor that one sock that likes to jump ship? Then you lean down (with your hands full of clothes) to pick up that one sock and then more things fall from the pile?

I sometimes feel like that about things in life. It’s like you work so hard to organize your house, plans, relationships (etc), only to have pieces of it fall apart. But you know what? If you put it off, you’re just stuck with stinky laundry so you have to deal with it some time! Wow, leave it to this mom to compare life to a pile of dirty laundry.

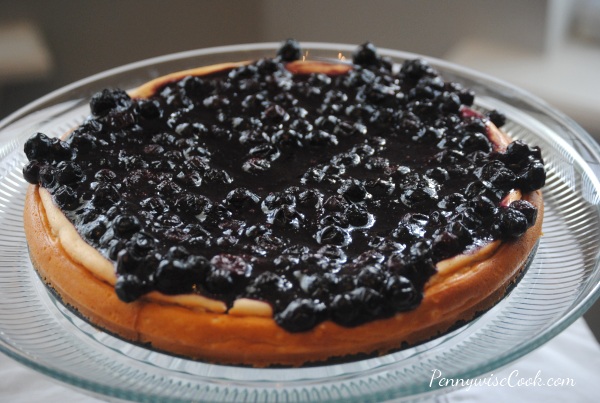
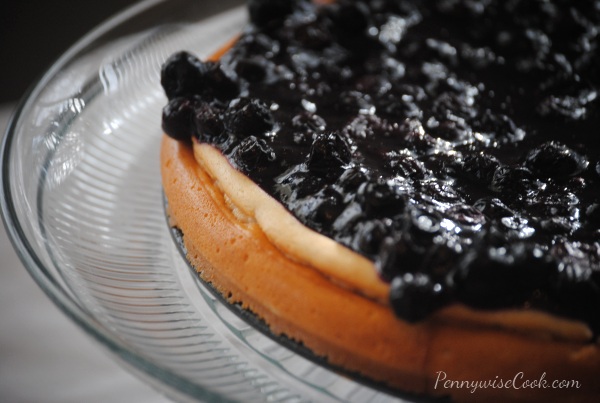
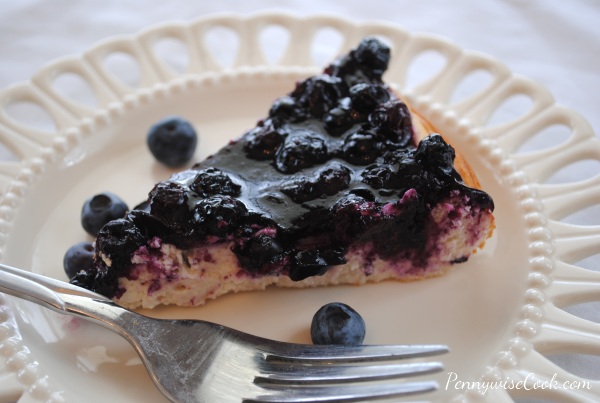
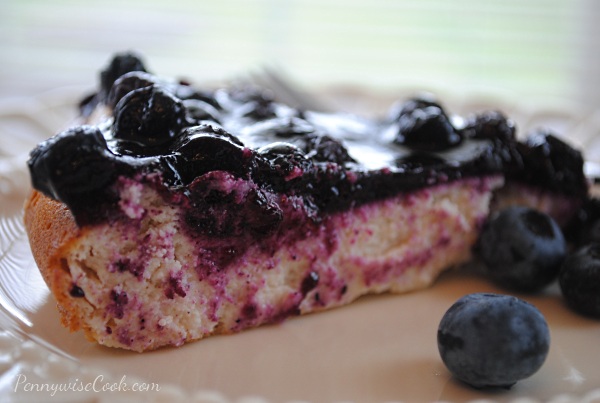
Ok on to the cheesecake! Oh yeah, creamy and light cheeeesecake…with blueberries on top!

I have to admit, I’ve never made a cheesecake that goes in the oven before this. Most of them are made of puddings and cream cheese and are just refrigerated. Don’t get me wrong, those are yummy. But I just kinda wanted to make one completely from scratch and feel that sense of accomplishment.

Blueberry Cheesecake

To the drawing board (aka Pinterest and Google) I went! I searched for a recipe that didn’t seem to difficult, but presented a fair challenge. And as always, I wanted something that was lower in calories and healthier than most. I ended up finding this recipe over at Hungry Girl and boy am I glad that I found it! This recipe was not only easy, but it also tasted like a million bucks.

We had my mom and stepdad over for dinner one night and I served this for dessert. They never figured out that it was a healthy version of an otherwise unhealthy cheesecake. I love recipes like that.

Recipe courtesy of Hungry Girl.

Berry Tasty Blueberry Cheesecake

8 Slices

Serving Size: 1 Slice

168

Berry Tasty Blueberry Cheesecake

This light and fluffy cheesecake is topped with very berry blueberries and is sure to impress!

Ingredients

    For the Cheesecake
  • 16 oz. fat-free cream cheese, room temperature
  • 1/2 cup granulated sugar
  • 1 tsp. vanilla extract
  • 6 oz. (about 3/4 cup) fat-free vanilla Greek yogurt, room temperature
  • 3 large egg whites or 1/2 cup liquid egg whites, room temperature
  • 2 tbsp. lemon juice, room temperature
  • 2 tbsp. all-purpose flour
  • 1/4 tsp. cinnamon
  • For the Topping
  • 2 cups frozen unsweetened blueberries
  • 2 tbsp. granulated sugar
  • 1 tbsp. cornstarch
  • 1/4 tsp. cinnamon
  • Dash salt

Method

  1. Preheat oven to 350 degrees. Spray a 9? springform pan with nonstick spray and set aside.
  2. Combine cream cheese, sugar, and vanilla extract in a large bowl. With an electric mixer, beat until smooth.Gradually add yogurt, egg whites, lemon juice, flour, and cinnamon. Beat until thoroughly mixed, about 2 minutes. Evenly pour mixture into the pan.
  3. Bake 40 – 45 minutes, until firm. Set cheesecake aside and allow to cool in the pan.
  4. Meanwhile, bring a medium-sized pot to medium-high heat. Add all topping ingredients. Add 1/2 cup cold water and mix well. Bring mixture to a boil, and then reduce heat to low. Stirring occasionally, simmer until the mixture is thick and gooey, 2 – 3 minutes. Remove from heat and let cool.
  5. Once both the cheesecake and the topping have completely cooled, evenly pour the topping over the cheesecake in the pan. Refrigerate for at least 1 hour, until fully chilled.
  6. Enjoy!

Notes

Be sure to let all of your cold ingredients come to room temp before incorporating them. This helps to prevent your cheesecake from cracking. I learned this one the hard way!

http://www.pennywisecook.com/berry-tasty-blueberry-cheesecake/


Like this post? SHARE it!

Related Posts Plugin for WordPress, Blogger...

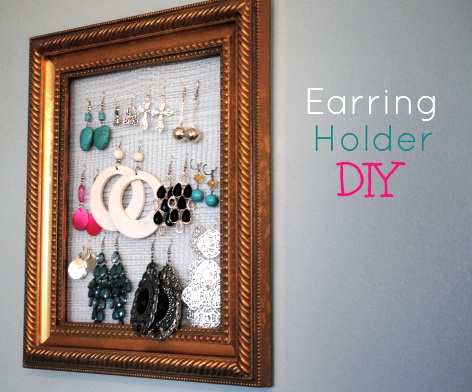
DIY Framed Earring Holder

For anyone who knows me, they know that I’m a huge earrings fan. I don’t spend much money on my earrings because they always get lost (or taken and sat on by my oldest). When you buy a pair to match all your outfits they start to pile up and it’s just plain hard not to lose them. Especially when you have a frantic and frazzled mind like myself. I’ve been keeping them in a little box for the last few months and it’s working out ok, but to be honest no more will fit. It’s that full. What prompted this project was a friend on mine on facebook who made one with chicken wire. I love the look of that, but I’d much rather work with fabric than wire. I’ve seen a few DIY projects on how to create an earring holder yourself so I thought I’d give it a shot.

And yay, here’s me with some of my dagglier earrings. I know I posted a picture of myself (with Cynthia Sass) yesterday, I promise I’m not full of myself. Just let me know if you get tired of seeing my mug. 😉 The pictures that I have to document this project are darker than I wanted them to be, I apologize. Like I’ve said before, I’m trying to get used to this photography thang and it’s still a work in progress.

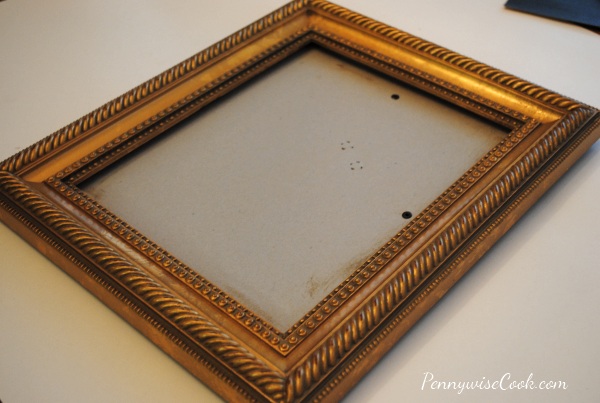
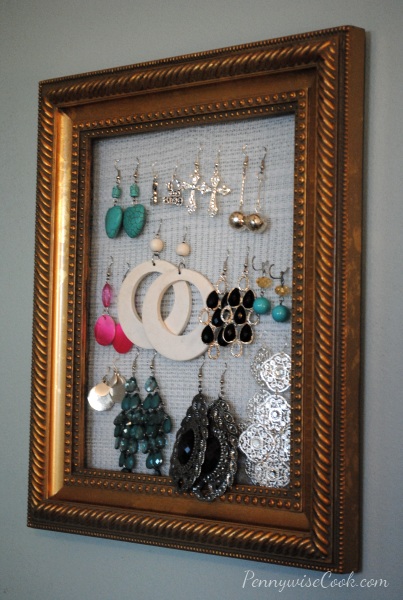
Here’s the frame I found at Goodwill for $1.99 (woot!). It’s surprising, but they have really gone up on their frames. Most of the others that I found were at least $4.99 each. Sadly enough, you can do better than that at Walmart these days so why waste your time getting one used anyhow? Back to the frame- this one was in perfect condition so I went for it. It’s an 8X10, but you can use any size that you’d like. It all depends on how many earrings you plan to hold. And you may have one at home that you don’t use anymore, that’s even cheaper and super smart.

When I got home, the intention was to paint it brown to match the furniture in our bedroom but after holding it up in the room it actually fit it quite nicely even being gold.

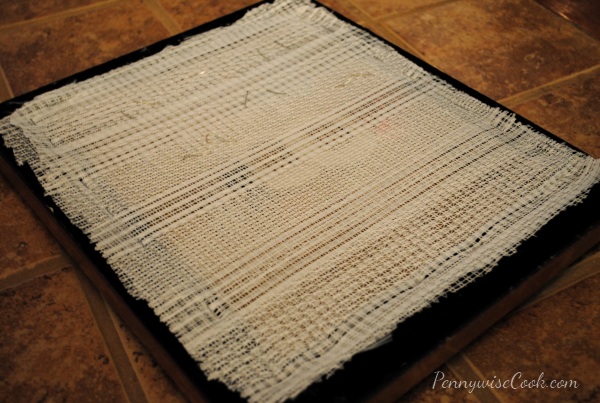
I also picked up these really ugly, yet perfect curtains to be the backing for the earring holder. They seriously were hideous, but they were white and hole-y so I thought they would work well. I removed the back of the frame and using a staple gun, I just pulled and stapled the curtain fabric tightly across the back of the frame. I actually did a double layer of the fabric to thicken it up a bit and give the earrings a little more to cling to.

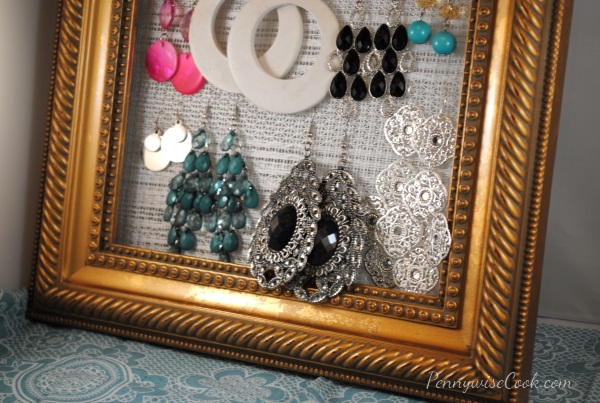
It turned out as good as I could have hoped. Speaking of hope, I’m praying that all of my earrings are going to fit on this thing! My husband thinks I’m going to have to make another one. I’m afraid that I might have to as well.

Cost breakdown:

Frame- $1.99
Curtain- $2.49
Total= $4.48

I love the way that this looks on our wall. It’s almost like an antique with a modern twist. Shabby Chic we’ll call it! And the sky is the limit on the fabrics and frames that you could get to match your decor. That’s what I love about DIY projects. Sure you can go out and buy something already completed, but sometimes you have to make sacrifices because things aren’t always customized for you.

I know this isn’t a “recipe” per say, but I’m going to put it in this format in case you want to print it out. It’s simple enough, but I know how having it on paper can make things easier sometimes!

If you know someone who might like this DIY project, be sure to Pin It below!!

DIY Earring Holder

DIY Earring Holder

Ingredients

  • Frame- Your Choice of Size
  • Fabric for the Back- Ex. Lace, Mesh, Burlap, Etc.
  • Staple Gun
  • Paint (Optional)

Method

  1. If necessary, paint the frame FIRST to the color of your choice.
  2. Remove the backing from your frame. (Keep in mind that if your frame's hanging mechanism is on the backing, you'll need to find another way to have it later.)
  3. Cut your fabric to just more than the size of your frame. Stretch it tight and staple it to the frame along the edges.
  4. Attach your earrings and you're done!

Notes

If you don't have or want to invest in a staple gun, you may be able to use a hot glue gun as well. That may work in a pinch, but a staple gun is recommended for maximum support.

http://www.pennywisecook.com/diy-framed-earring-holder/


Like this post? SHARE it!

Related Posts Plugin for WordPress, Blogger...

Discover the Swapability of Mushrooms

I’ve got to tell you, I’ve been branching out. Yes, I’ve crossed over into the category of folks that like to eat fungus! It’s only been recently that I realized that I liked them. It was kinda one of those situations where you stay away from something because you think you won’t like it. I was wrong! Cooked the right way, mushrooms can really be very tasty!

I recently got to meet Cynthia Sass, a Registered Dietitian you may have seen on TV or in magazines. She’s been on all of my favorite daytime shows and I was floored to meet her and just chat about healthy eating. We had a conversation about substituting things in your meals and snacks to make them more nutritious. There is nothing like enjoying a meal that is good for you without sacrificing taste. It actually is possible!

For instance, instead of loading up brownies with oil and sugar, try using black beans instead. You’re bumping up the protein and nixing the butter and oil, without losing the chocolatey taste. Or how about that pot of chili? Instead of ground hamburger meat, try slicing up mushrooms and throwing those in. Amazingly enough, you can also enjoy the swapability of mushrooms in burgers and on pizza. Mushrooms give the same feeling of being full without packing on the calories. Just cook them up the same way that you would meat!

Did you know that it’s National Nutrition Month? The Mushroom Council, a US group of mushroom growers are celebrating the month of March by helping to “get your plate in shape” with healthier options that include mushrooms. Because they are so low in calories, they make a great addition or replacement for several meat dishes. It’s what they call “swapability”. I think that I’ll be trying them in tacos soon. Mushrooms are affordable as well which makes them all the more appealing to use as a healthy alternative.

Eager to learn how to swap out or adding mushrooms in your next dish? Here’s how:

  1. Chop the mushrooms up to match the consistency of ground beef or turkey.
  2. Cook and season them up the same way you would with the meat. (ie- Worcestershire sauce, onions, etc.)
  3. Combine the meat with the mushrooms and use it to complete your recipe!

And of course if you’re going to completely swap them out, just add more mushrooms and don’t use the meat.

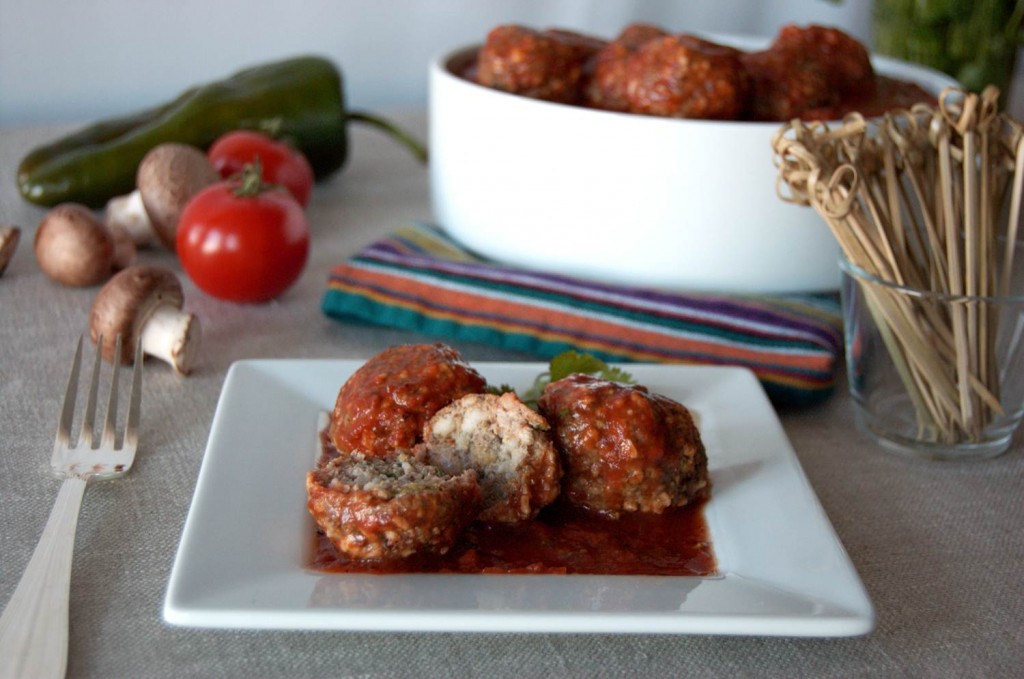
You can find lots of amazing recipes that include mushrooms including Chocolate Chili, Mushroom Flatbread, and pictured below, Cremini and Pork Meatballs. All of which sound incredibly yummy!

Did You Know? Mushroom Facts

Mushrooms are not only fat free, but they are also low in calories.

Their flavorful umami content allows for less salt to be used in a dish, without compromising taste

Mushrooms are the ONLY fresh fruit or vegetable with Vitamin D

Mushrooms provide B vitamins, including riboflavin, niacin, and pantothenic acid; B vitamins help to provide energy by breaking down proteins, fats and carbohydrates

Have you been enlightened yet? I know that I have! It’s incredible how such an ugly vegetable can be so nutritious and tasty at the same time.

For all of you Twitter-ers, you’ll want to join #Mushrooms Twitter Party on March 12th at 8pm PT! Awesome prizes will be given away and of course a little talk about this low-cal veggie- the mushroom! Use the hash tag #Mushrooms. You can RSVP and get more information HERE.

This is a sponsored post written by me on behalf of National Nutrition Month with the Mushroom Council. I was compensated for this post, but all opinions are 100% my own and honest.


Like this post? SHARE it!

Related Posts Plugin for WordPress, Blogger...