One thing that you may not know about me is that I have an obsession with mugs. No, not with faces, but with the ceramic formations that hold the most incredible substance that keeps me going every day, coffee. I only started to drink coffee about a year and a 1/2 ago and yet it sucked me in so fast that I didn’t even know what was happening!
I now enjoy scouring flea markets, thrift stores, and any other places finding the most unique and eclectic mugs that I can. I’d call it a “hobby”, but that would be giving in and I’m afraid that my obsession would deepen so I’m just going to pretend that it’s just something that I do.
When I noticed that there wasn’t any place to put regular glasses in my cabinet, I decided that something need to be done.
I needed a place just for mugs. After all, they are worthy.
So I thought up this mug holder idea and got to work. I knew that I wanted it to be inexpensive and semi-simple to make since I’m no carpenter. Brace yourself, I took a lot of photos for this one…
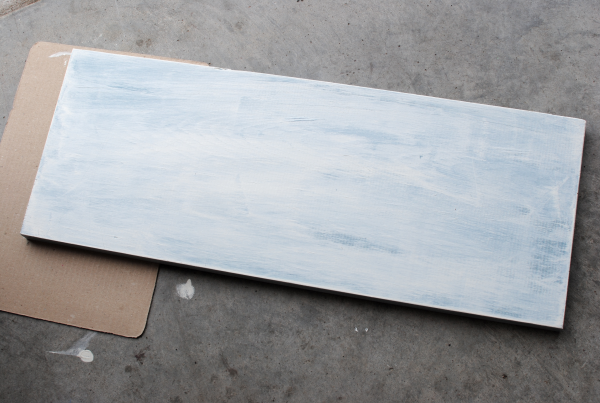
I started with cheap board from Lowes. I had them cut it to 2 feet so that it would fit on the side of my cabinet. I didn’t want anything too thick, but I wanted it thick enough to hold screw hooks well. I believe this board is 1 inch thick which turned out just right. I painted the board with a light blue before lightly painting over it with an off-white. Then I sanded it a bit to distress it.
And in the process I got paint on the garage floor. It needed some color anyways.
I found this fantastic technique for transferring text onto wood at Elm Street Life. It doesn’t get any simpler than your printer, a pencil, and a pen.
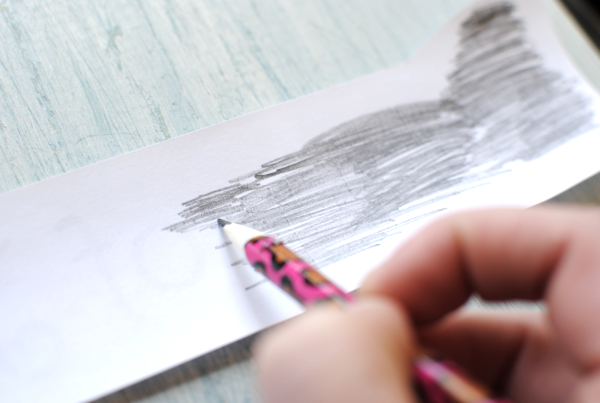
Print off the text of your choice from your printer. No need for reversing the text or anything. Cut out most of the white surrounding the text. Then using a lead pencil, color the back of each letter like the picture above. The need for a cheetah print pencil is not necessary, but it helps to make you feel awesome.
I may have gone a bit overkill, but here’s what it will look like on the back.
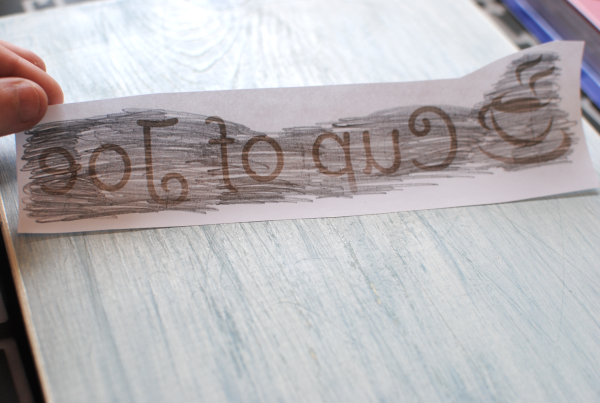
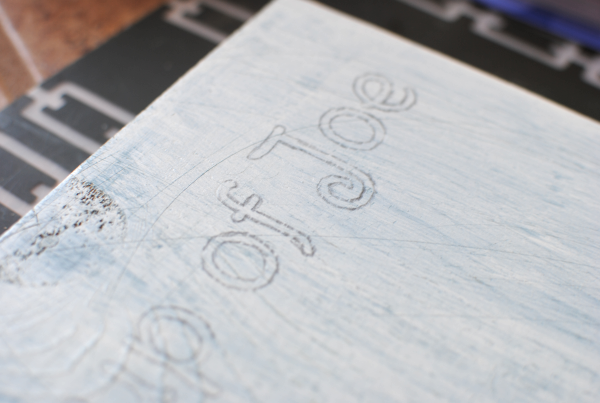
Tape your words lightly to your wood so it won’t try coming up on you. Using a pen, trace around each letter firmly. The lead will transfer to the wood and you’ll be left with an outline of your words.
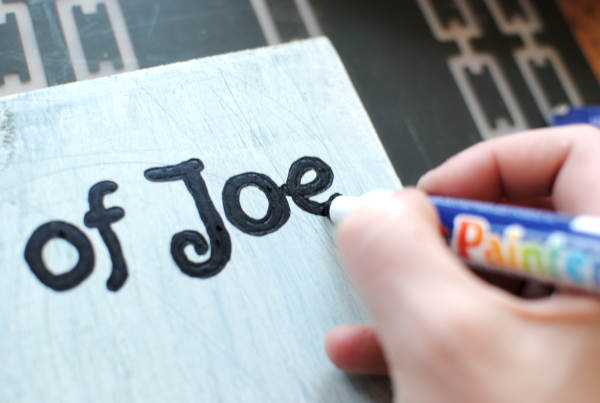
Like this! Then you can use a brush (if you’re brave) or a paint pen to fill in the outline. They actually make an assortment of paint pens these days which is nice. Just remember that it doesn’t have to be perfect. You can always sand it a little and if you’re going for a vintage feel anyways, it wouldn’t look perfect either.
Use your paint pen to go around the letters and then fill them in. When buying your paint pens, be sure to look at what kind of tip you are getting. Some are made for calligraphy and others for painting. I don’t suggest the calligraphy tips for this.
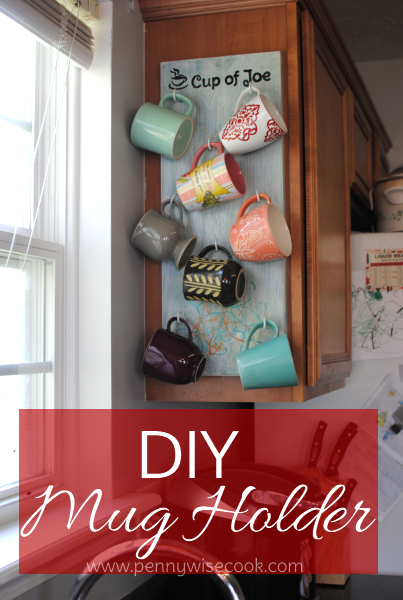
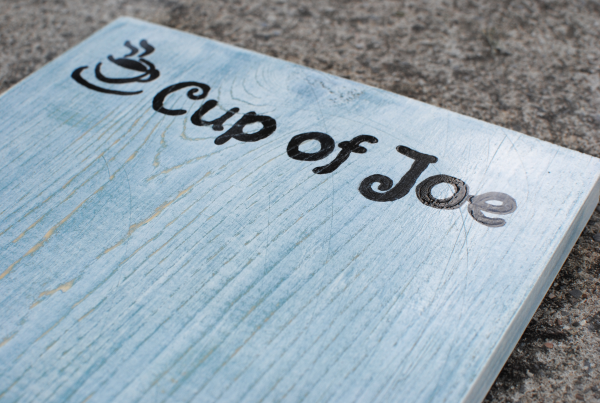
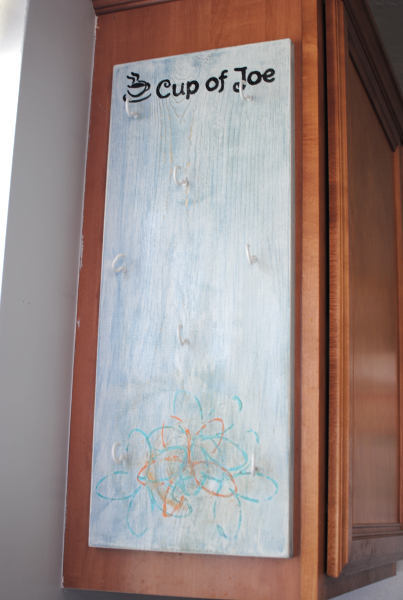
Tah dah! We have a board. We have text on the board. now we just need hooks and mugs for our mug holder!
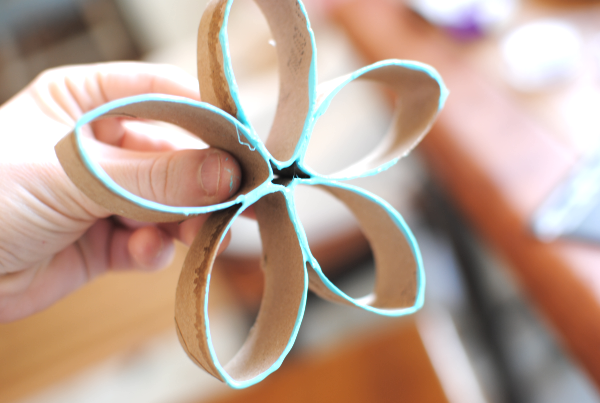
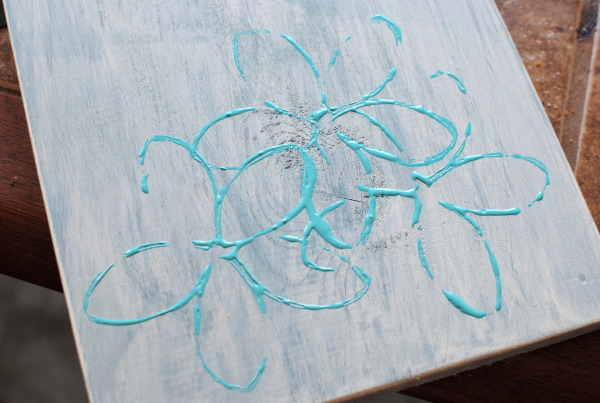
You may have seen my post on Toilet Paper Roll Art. It’s quite genius and is so simple and fun. I used a paper towel roll to create this flower and then dipped it into some of my favorite aqua paint.
I gave the board a little detail with my flowers and I even added an orange one on top to give it some more color.
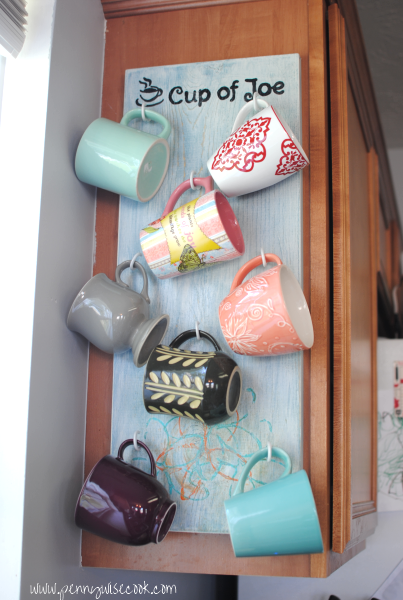
I let it dry and then screwed in the hooks in an unexpected way. Or at least it was unexpected to my husband. He thought I would have made it a little more uniform, but as I started hooking them in, it seemed to make more room with them being offset this way.
UPDATE: We hung this by screwing screws directly through the backside of the cabinet into the board itself. We used 4 screws total and it holds just fine.
And there you have it! A simple yet cute way to display your coffee mug obsession (if you have one) and to give your cabinets a little more room.
It’s not just functional, but it looks really cool too. We’re going to make one for my husband’s mugs for the other side too.
Happy DIYing!

Like this post? SHARE it!
 |





What a great idea! And so much better than under the cabinets where they always get knocked off! Thanks for sharing
This is so cute Amy. I love all the pictures too!
omg i love this! i cant wait to add a bit of character to our new place! thank you!
What did you use to fasten the board to your cabinet? This is such a great idea!
Thanks so much Murf! We just screwed it in directly from inside the cabinets. We used about 4 of them to be safe.
Thank you! It’s definitely a neat way to show off your mugs and it’s nice to make the extra space too!
Thank you so much Melissa! I really appreciate that!
My landlord might not be too happy with me if I make holes in his cabinets. lol I wonder if there is another way I can fasten it. Hmmmm…. Will have to think about it for awhile. I could really use the cupboard space this would save!
That is a good point! You could hang it on a wall of your landlord would allow that.
This is a great idea! I’m definitely making this my next diy project. How did you hang the board on the side of your cabinet?
Hey Keya! Thank you so much!
I hung it by screwing it in from the inside of the cabinet. I think we used 4. One at each corner. It’s held up great that way!
Amy
LOVE THIS! I too have way too many cups. I actually have so many that I rotate them by the season. But I love this idea to free up some cabinet space. Gonna get right on it. Thanks for the inspiration.
I love this idea! I am also obsessed with mugs, many of which I painted myself. What a great idea to clear out cabinet space AND display them for all to see! I absolutely must do this!
Love that rotating idea. I should really consider that myself!
Thanks Melissa! We share the same obsession. I find myself picking them up everywhere and feeling a certain attachment to my very favorites! Lol
I LOVE this! I could have written your first paragraph–coffee mugs are an obsession for me too. This will be perfect in our new house. Next DIY project, here I come! Thanks
I love this!!! I’ve been trying to figure out what to do with my over abundance of mugs (I had one of my favorites fall out of my (overly) stuffed cupboard and break :’-( I’m thinking this is going to be a “do SOON” project Thank you for sharing.
We share the same obsession….I love mugs! I’ll definitely be making this. Thanks for sharing.
You’re so welcome Christi! I’ve had that exact thing happen and it’s sad. Especially if its a special mug. But you know, all of them are special in some way
Haha Jenna! Definitely let me know how it comes out!
hello,
i love this idea. i was wondering what you used to hang it on the cabinet?
Thank you,
Nita
Hi Nita!
Thanks so much! I’ve got to edit this post and add that very answer.
We screwed it into the cabinet from the inside. We used 4 screws total and it holds fine.
Amy
How do you attach the board to the cabinet?
Heya i am for the first time here. I came across this board and I find
It really useful & it helped me out a lot. I hope to give
something back and aid others like you helped me.
You could use some command strips by 3M. They can be removed easily and hold well.
I love this idea! It’s a great way to free up space in my cabinet and looks cool! Thanks for the tutorial! I love the pics!
I love this idea! It is a gray way to free up space in my cabinet and it looks cool! Thanks for the tutorial! I love the pics!
How to you hang the wood onto the cabinet? My husband will not let me glue or nail into our cabinets, so I am trying to figure out how I can do this.
Hey, thanks for the article, I really value short articles concerning workout video
clips specifically the ones consist of insanity, or Zumba Fitness.
I especially like yours and your blog motif.
It would be really terrific if you could possibly write an
additional workout video clip post, and I’ll return and review it. I’m certain the readers
will certainly additionally be interested in checking out concerning George
St. Pierre’s RushFit, and the women will certainly such as Jillian Michaels physical fitness video clips. Thanks highly for the, and I’ll
will certainly be back.
Since I rent I will make mine to hang on the front of my cabinet door by hooks over the door top.
Thanks for the solution to all my cups taking up valuable and limited shelf space!
Get the over-the-door hooks for kitchen cabinets and hang it from the hooks. I rent and that is what I will do. It has to be on the door of the cabinet not the side.
I must thank you for the efforts you have put in penning this site.
I really hope to check out the same high-grade blog posts by you later on as well.
In fact, your creative writing abilities has inspired me to get
my own site now
Thank you so much for sharing this! I’m making mine now, mine says “Cafe de Amy” instead of “Cup of Joe” ..lol.
Love that Cafe de Amy! I should have made mine say that very thing! I’m going to make another one for my other cabinet, so maybe that’s what I’ll do there. Let me know how it turned out!
I would love to make this! How did you hang your creation though? I live in an apartment and don’t want to damage the cabinets…? Thanks!
Jada, I screwed it directly into the cabinet from the backside. I had someone else ask about how to hang it because they were in apt too. I’m not exactly sure how you could attach it and hope for it to be sturdy enough. You might could hang it on the wall with command products that come off easily? Just brainstorming here.
I love this idea! Going to also use it in our RV for mugs…there is never enoughnspace. I’m going to use the mug hooks that have the clips that close over the hook this way they won’t come off when driving.
This will be my next project!! Awesome idea! Thanks for sharing
hi!,I love your writing very so much! proportion we
keep in touch extra approximately your post on AOL? I require a specialist on this house to solve my problem.
Maybe that is you! Having a look forward to peer you.
Great idea, thanks for sharing!
I found this idea on Pinterest awhile ago and loved it! I made my own version this weekend. I painted the board black, covered it in a clear coat of crackle paint, then topped it with a cream color, and put the words “but first, coffee” at the top. I spray painted my hooks with a bronzed black color. I absolutely love how it turned out. This was such a genius idea and I never would have thought of it had I not come upon your tutorial!
Rain gutter filter is available in different sizes and shapes.
I wish I could have posted a picture of the action packed drain cleansing
process, but the camera doesn’t capture much of that
from the surface. wood: apply a thin coat of 1:1 vegetable oil
and vinegar and rub in well.
Not to mention a plumber is expected to have liability insurance and be well trained to prevent
or correct any potential problems that could occur during a service call.
For example, you can turn on water lines and allow them to run.
Not only is renter insurance a good idea, your landlord may ask for additional items to be included in your insurance policy.
Hi I was looking at pics on Google and this came up after further I noticed this which is super freaky to me your kitchen us exactly like mine like to a tee the fridge worth the space above between the top of the fridge and cabinets then the same window and sink placement it’s all the sane other than the color of the cabinets and wall. My kitchen is in nc I’m guessing this one’s is too or in that region it was just weird and cool at the same time
That is too funny! My kitchen wasn’t in NC though. Maybe similar plans from similar builders!
I’m thinking of attaching a wire to the board and screws into the top of the cabinet. That way if I ever want to switch things out there will be no holes in my cabinet!
Love love this idea . Thanks
Hi- I was wondering what size mug hooks you used?
I ordered 1 & 1/4th inch hooks for our Corelle mugs & they are too small…suggestions?
I want to make this same type of thing
Hi Jenna! I’m sorry your hooks didn’t work out! I’m not exactly sure what size these were. I know they came in a plastic package from the hanging supplies at Walmart. I’m sorry I’m not more help!
-Amy
This is the best thing that has ever happened to me, and
I hope that it can do the same for you. The importance and effectiveness of homework for K-12
students is always the most vigorously debated by all stakeholders: students, teachers, parents and education experts.
If you have a properly constructed image in your email, 5-10 times more people will click on the link
and view your video.
Good article and straight to the point. I am
not sure if this is actually the best place to ask but do you
guys have any ideea where to get some professional writers?
Thanks
Wonderful items from you, man. I’ve keep in mind your stuff previous to and
you’re just extremely fantastic. I actually like what you
have acquired here, certainly like what you are stating and the
way by which you assert it. You’re making it entertaining and you continue to take care of to keep it smart.
I can not wait to read far more from you. This is really a terrific site.