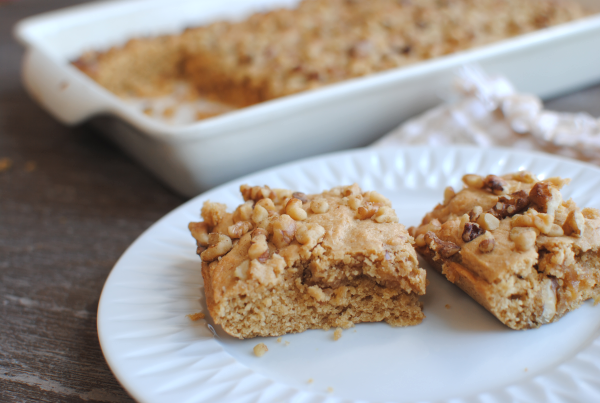
Peanut Butter Brownies

I’m getting this yummy recipe up a bit late in the day. I apologize for my tardiness! But in my defense, I ran a half marathon this weekend. And when I said I ran, I mean I literally ran the entire time. My goal was to 1) finish and 2) not to walk at all. Needless to say, I was practicing the method of sitting for 24 hours or so after the race. I kid you not, I could barely walk that night! In the picture above, I was excited to put the 13.1 on my van.

It’s recipes like this one that are the reason that I run to begin with…

My daughter asked me the other day why I always make things with peanut butter. It got me thinking about how much I really do make things with peanut butter and she is exactly right. I have a deep love for the stuff.

Exhibit A:

I don’t think that’s too much peanut butter, do you?

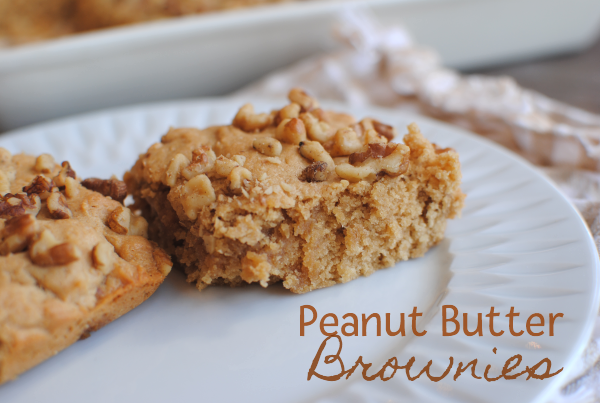
I don’t ever think I’ve gotten opposition to making brownies in this house. In fact, every time I make them you can bet that they will be gone within a day. I have nothing at all against chocolate brownies, but my innovative mind was seeking a twist on regular brownies. Of course! What better than peanut butter to spice things up!

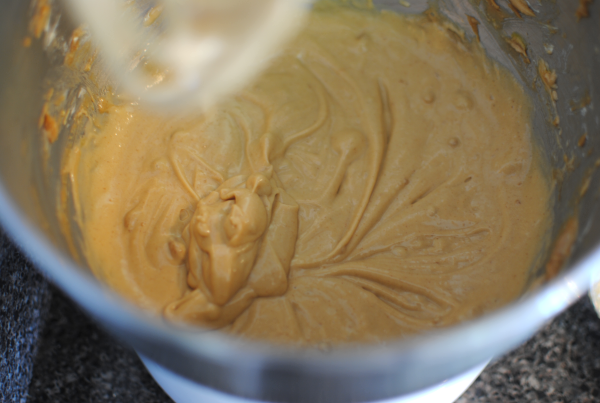
These brownies are really easy to make. The kiddos will surely want to help you out in the kitchen with these. And if not, they will definitely enjoy eating them! The batter is thick like you would expect a peanut butter batter to be. And there aren’t a billion ingredients so you won’t be stuck in the kitchen all day whipping them up.

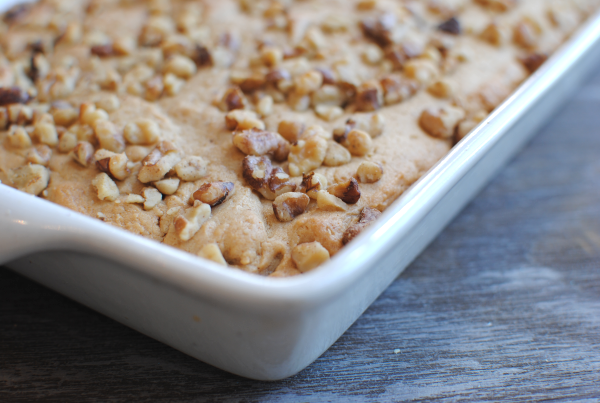
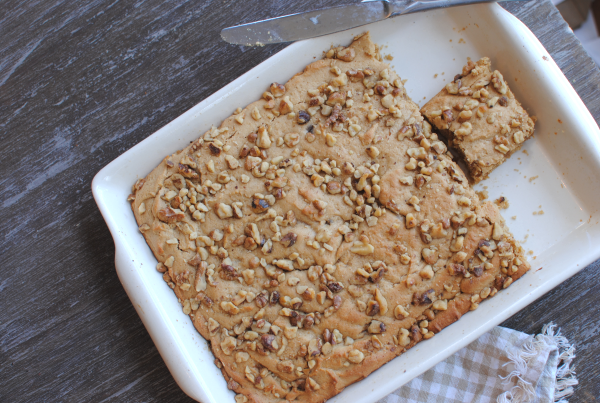
The recipe calls for nuts on the top, but if your family isn’t fond of nuts, simply leave them off. I’ve always been under the impression that my Addie liked nuts. It was only after making these that I learned that she does not, in fact, like nuts. She brushed them off this go round, but I’ll leave them off next time.

I can’t wait to make these again. They really hit the spot when you’re craving that peanut buttery goodness.

Recipe adapted from Family Living: Our Favorite Cookies Cookbook.

Peanut Butter Brownies
Recipe Type: Dessert, Snack, Bar
Author: Adapted from Family Living: Our Favorite Cookies Cookbook
Brownies aren’t always chocolate! Try this peanut butter version for a unique twist.
Ingredients
  • 3/4 c. Creamy Peanut Butter
  • 1/2 c. Butter, softened
  • 1 and 1/2 c. Firmly Packed Brown Sugar
  • 1 egg
  • 2 Egg Whites
  • 2 Tsp Vanilla Extract
  • 1 c. All-purpose Flour
  • 1/2 c. White Whole Wheat Flour
  • 1 and 1/2 tsp Baking Powder
  • 1/8 tsp Salt
  • 1/2 c. Chopped Peanuts (optional)
Instructions
  1. Preheat oven to 375°.
  2. In a large mixing bowl, cream the peanut butter with the butter and brown sugar. Add eggs and vanilla and beat until smooth.
  3. In a bowl, mix the flours, baking powder and salt together. Slowly add the dry ingredients to the wet ingredients. Blend well.
  4. Grease a 9×13 baking dish. Spread batter into pan and sprinkle with peanuts (optional).
  5. Bake for 15- 18 minutes until the edges begin to brown. Cool.
Notes

I used a little white whole wheat flour for my brownies to bump up the nutrition, but it’s perfectly fine to use only all-purpose. You would just use 1 and 1/2 c. total.

Also, feel free to use whatever nuts that you have on-hand. I actually used walnuts because I was out of peanuts. Almonds or cashews would be lovely too.


Like this post? SHARE it!

Related Posts Plugin for WordPress, Blogger...

After School Snack: Frozen Peanut Butter Bananas

These days school is jam-packed full of learning, extra-curriculars, and even a taddy little bit of fun. They’ve even moved lunch time up for many kiddos to make room for other activities. Some children eat lunch at 10:00! What is this world coming to? But they are waking up at the crack of dawn so an early lunch isn’t so bad. But as parents we must be prepared to hear those impending words each afternoon….

I’m huuuuuungry. Can I have a snack?

Can you blame them? They have been busy for 7 HOURS. All of that icky math and science can really work up an appetite you know? The least that we can do is give them a snack. Here’s a simple snack idea for your busy student (or hungry parent!).

Start by cutting up a couple ripe bananas into bite-size pieces.

Microwave 1/4 cup creamy peanut butter and stir in 1/2 tbsp cocoa powder.

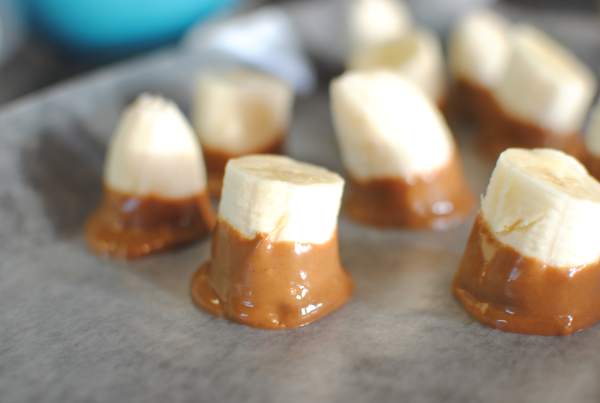
Dip each banana piece into the peanut butter and set on wax paper.

You can drizzle any leftovers on the tops if you’d like.

Freeze for at least an hour and you’re done!

Bing bang bong and you’ve got a very tasty (and healthy) snack! It’s a nice little change from chocolate-covered bananas. The peanut butter actually adds nutritional value with it’s healthy fats and boost of protein. Not to mention the potassium in the banana itself. But who cares about all that? The peanut buttery goodness with a hint of cocoa is super yummy!

Here they are after they are frozen. The peanut butter gets hard, but not as hard as chocolate would so you’ll want to eat them pretty quickly after removing them from the freezer. Ie- don’t leave them sitting around for long periods of time.

YUM!

After School Snack: Frozen Peanut Butter Bananas
Recipe Type: Snack, Dessert
Author: Pennywise Cook
Frozen peanut butter bananas create a healthy afternoon snack!
Ingredients
  • 2 Bananas, Cut into bite-size pieces
  • 1/4 c. Creamy Peanut Butter
  • 1/2 tbsp Cocoa Powder
Instructions
  1. Place peanut butter in a microwave-safe bowl. Heat for about 30 seconds to melt. Stir in cocoa powder until mixed well.
  2. Dip banana pieces into peanut butter and place on wax paper. Drizzle remaining peanut butter over top if desired.
  3. Freeze for at least an hour. Preferably 3-5 hours or longer.


Like this post? SHARE it!

Related Posts Plugin for WordPress, Blogger...

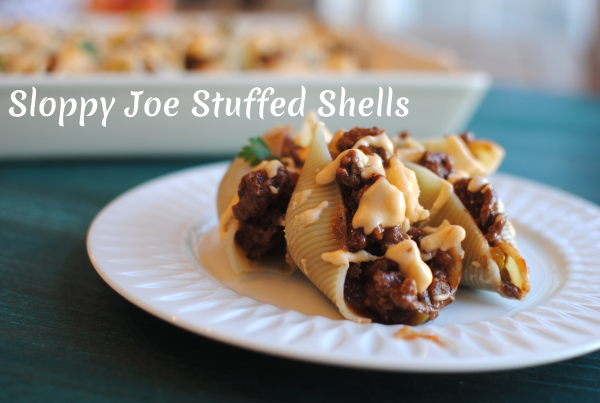
Sloppy Joe Stuffed Shells

I am always on the lookout for ways to change up everyday meals. Meatloaf and pizza are good. Don’t get me wrong. But sometimes, they just get old and boring. I have a lot of fun experimenting with food. It’s kind of a hobby of mine. It’s why this blog exists!

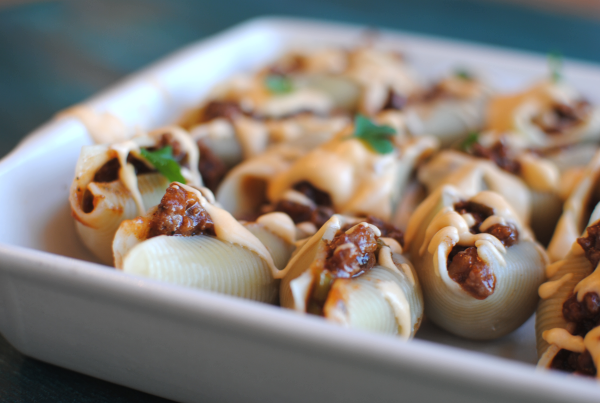
Stuffed shells are a family favorite. There are so many variations and concoctions that you can stuff them with. My latest creation? Sloppy Joe Stuffed Shells.

Sloppy Joes are so simple to whip up on a week night for dinner, but guess what? They are sloppy! (whodathunkit?) I was thinking that if we could eat them in shells, they might stay contained and actually be easy to eat.

Hey, we could get rid of that sloppy and just call them Joes! Joe Stuffed Shells……hmmm. Nah. You could possibly call them Not-So-Sloppy Joe Stuffed Shells. That’s too long. I give up. We’ll stick with Sloppy Joe Stuffed Shells.

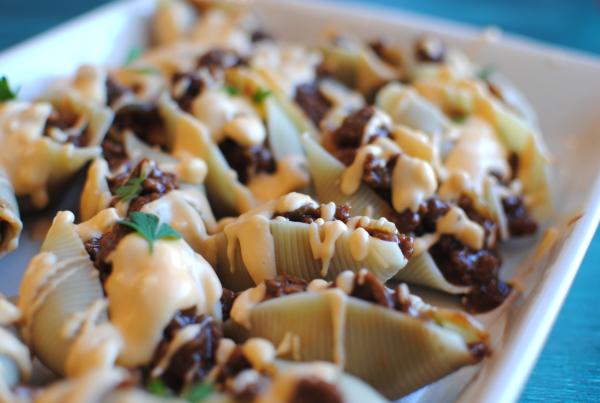
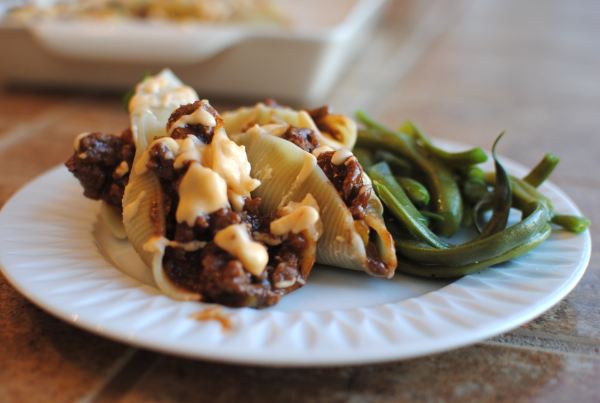
These aren’t made with the canned Sloppy Joe sauce. It’s homemade and extra easy. I even got to use a green pepper from my garden in it. I’m sure that you’re wondering about the cheese sauce on top there. Well, you see, my husband likes to add cheese to just about everything. And following suit, he asked if I could drizzle some cheese sauce on top of the shells too. I did this for him. Feel free to add it if you like, but they are still just as great without the cheese sauce.

Just as I suspected, these were quite neat to eat! Much neater than a messy old Sloppy Joe Sandwich. My husband isn’t a huge fan of Sloppy Joes themselves. We came to the conclusion after this meal that it was in fact, because they are sloppy. The shells make it really easy to keep all the yummy and sweet meat inside. Which means that you’ll most likely end up eating them with your fingers.

We did and we’re not ashamed!

The best part about this meal is that it’s super affordable. With the meat of your choice (ie ground beef, ground turkey, even chicken!), a few handy sauces, and simple spices, these shells comes together in no time and don’t even require baking.

Sloppy Joe Stuffed Shells
Recipe Type: Main Dish,
Author: Pennywise Cook
Believe it or not, Sloppy Joes don’t have to be sloppy when you make them in shells like this!
Ingredients
  • 1/2 Package Jumbo Shells (you can make an entire box, but you won’t need it)
  • 1 lb Extra lean Ground Beef
  • 1/2 c. Onion, chopped
  • 1/2 c. Green Onion, Chopped
  • 1 Clove Garlic, minced
  • 1/4 tsp salt
  • 1/2 c. Ketchup
  • 1/2 c. BBQ sauce (your choice)
  • 2 tbsp Brown Sugar (I used Splenda Brown)
  • 1/2 tsp Italian Seasoning
  • For Cheese Sauce
  • 2 tbsp Butter
  • 1/4 c. Skim Milk
  • 4 oz Cream Cheese
  • 1 c. Shredded Cheddar Cheese (Reduced Fat)
Instructions
  1. Prepare noodles according to package. Drain and set aside to cool.
  2. In a large skillet, brown ground beef with onion and green pepper. Drain and add in all other ingredients. Simmer for 5-10 minutes or until warmed through.
  3. Stuff shells with meat mixture.
  4. For cheese sauce- melt butter in a small sauce pan. Add the skim milk. Melt in the cream cheese stirring until smooth. Add in shredded cheese until melted and smooth. Drizzle over stuffed shells.
Notes

These could even make little appetizers at a party!


Like this post? SHARE it!

Related Posts Plugin for WordPress, Blogger...

Slow Cooker Mexican Lasagna

I’m not always a patient person.

Ok, I take that back. I’m never a patient person.

I know it’s a virtue and all, but why did something so difficult have to be a virtue? Couldn’t one of the virtues be to eat lots of chocolate? I could really follow that virtue without any hesitation.

The crockpot is my best friend when it comes to impatience. You all know how much I really love that thing. Popping dinner into the crockpot in the morning and not looking at it again until that evening when it’s time to eat is truly the best way to go.

I got a hankering the other night.

A mexican hankering.

I honestly wanted this mexican lasagna that my friend Laurie has made for me a few times. It’s really tasty and seemed easy enough to make. But since I’m cursed with impatience, instead of giving her a call or even a text message, I just made up my own in hopes to coming somewhere close to her’s. I kinda had inklings on what ingredients might have been in it so I just went to work adding things as I thought would taste good.

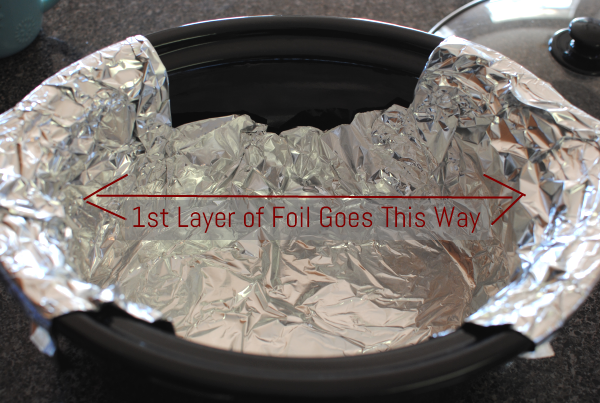
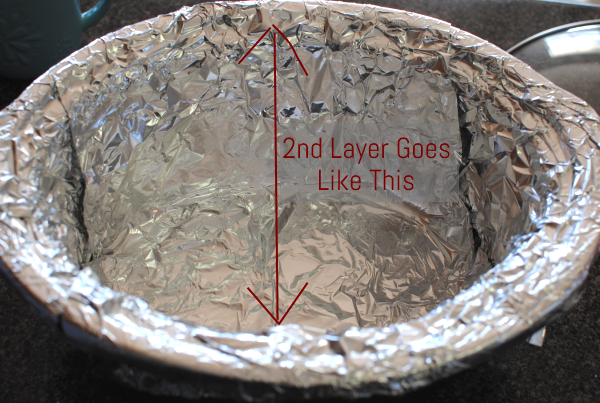
I want to introduce you to the Slow Cooker Sling. No, it’s not something that you have to go out and buy at Bed, Bath, and Beyond. It’s something you can make in 2 seconds. This is the easiest way to remove your mexican lasagna without mess. It also makes it super easy to cut into pretty pie pieces.

Take a piece of long foil LONGER than your crockpot and let the ends hang out. Push it into the crockpot and form it into all the nooks and crannies.

Then take another layer of foil and go the other way with it. Depending on your crockpot, it may not need to be as long as the first piece. Once again, form it into your nooks and crannies. We wouldn’t want to leave any nooks or crannies out!

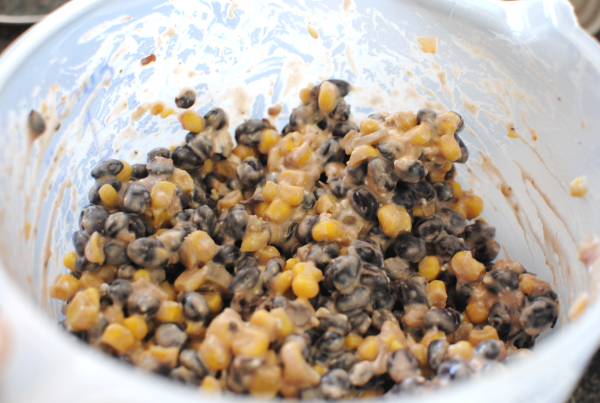
Then it’s time to whip up the filling for our lasagna. This is SO simple and incredibly tasty. It took everything in me to keep from eating all the filling. Unlike some crockpot meals, you’ll be happy to know that there is NO chopping and NO browning of meat in these steps.

That means it’s really easy y’all.

Flash forward past your laborious mexican lasagna stacking and it’s ready for the easy part…waiting. But the waiting is easy! Go play outside or enjoy a movie, or go to work. You know, whatever you normally do.

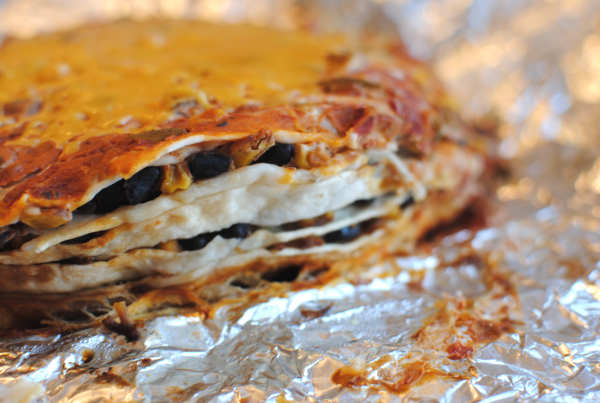
When you come home, plop a little shredded cheese on top to melt up and get ooey gooey. Then use your handy foil sling to pull it out.

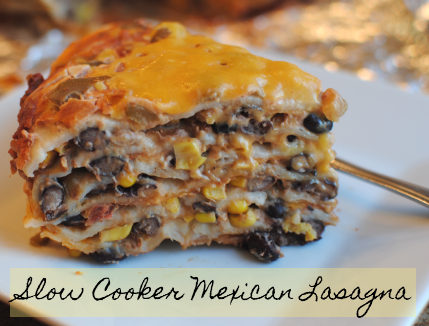
NOTICE: Objects on foil are bigger than they appear! It may seem small when you first get it out, but I assure you, when you start to slice it into pieces it will be much bigger.

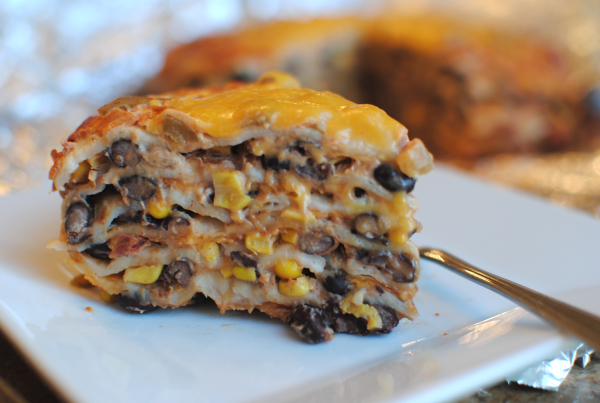
Yeah, like this big. Each and every single bite is heavenly.

When I first started making this I was considering calling it Mile High Enchilada Pie because it slices like pie. But when my daughter was describing it, she said “Momma, is this pasta?”. That’s how soft the tortillas get. They are almost like pasta which taste a lot like noodles and hence the “lasagna” name.

I don’t know if this is exactly like my friend Laurie’s but it’s quite tasty anyways! We ate every single leftover and I will be making this one on a regular basis!

Let me know if you make this. I’d love to hear your thoughts!

Slow Cooker Mexican Lasanga
Recipe Type: Main Dish, Slow Cooker
Author: Pennywise Cook
No cutting, no chopping, no browning, no baking. Just a simple slow cooker mexican lasagna for a busy weeknight meal!
Ingredients
  • 28 oz Can Black Beans
  • 4 oz Cream Cheese, Softened
  • 1 can Corn
  • 1 Jar Salsa, Divided
  • 1/4 tsp Cumin
  • 1/2 tsp Chili Powder
  • Dash Salt
  • 6 Flour Tortillas
  • 1 and 1/2 c. Shredded Cheese- Divided
  • 1/4 c. Sour Cream
Instructions
  1. Begin by creating your foil sling in the bottom of your crockpot.
  2. In a large bowl mix the filling together- black beans, cream cheese, corn, 1/3 c. salsa, cumin, chili powder, and salt.
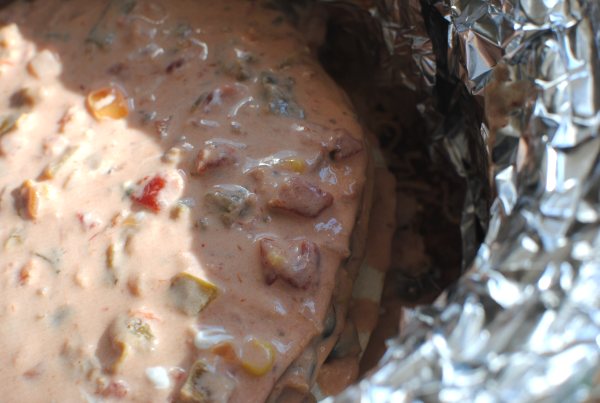
  3. In bottom of the crockpot pour 2/3 c. salsa. Place 1 tortilla on bottom. Top with 1/2 c. filling, then 1/4 c. shredded cheese.
  4. Layer another tortilla then 1/2 c. filling and another 1/4 c. shredded cheese. Continue until you have a total of 5 layers and 6 total tortillas. End with the tortilla.
  5. On top, mix the rest of the jar of salsa with 1/4 c. sour cream to create a creamy mixture. Cover and cook on low for 6-8 hours.
  6. When close to done cooking, top with 1/4 c. shredded cheese and allow to melt. Remove with sling and slice into pieces to serve.
Notes

You can adjust how hot or mild you make this by using your preferred heat salsa.


Like this post? SHARE it!

Related Posts Plugin for WordPress, Blogger...

No-Bake S’mores Pie

Fall is here! On our trip these past couple of weekends I noticed the trees a changin’ and they are just beautiful. It was especially beautiful driving through the mountains in Chattanooga. I love looking down on huge valleys just covered in autumn-colored fall trees. Makes the drive more enjoyable for sure!

Along with the leaves falling and cooler weather, campfires are sure to follow! In fact, we’re thinking about having a family night this weekend around our fire pit. The feel of cool, crisp air mixed with a crackling fire and marshmallows just can’t be beat in the fall. And you can bet that some fall treats will be eaten! S’mores are my all-time favorite campfire food. I enjoy a roasted hot dog every now and then. And popcorn in those foil packages are fun, but s’mores are the real deal.

Even before the weather even pretended to cool off, I got a hankerin’ for a s’more. Somehow, instead of creating just 1 s’more, I ended up creating this pie. That’s ok. I’d rather have an entire pie than 1 s’more anyways.

So this pie is super simple. I wanted to make it a little better for you, so instead of using creams, I opted for a nonfat yogurt. Of course after using an entire bag of chocolate chips, it doesn’t really matter. But hey, at least I make the effort right?

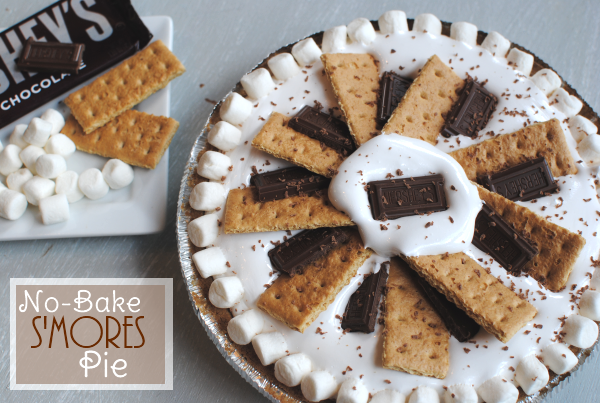
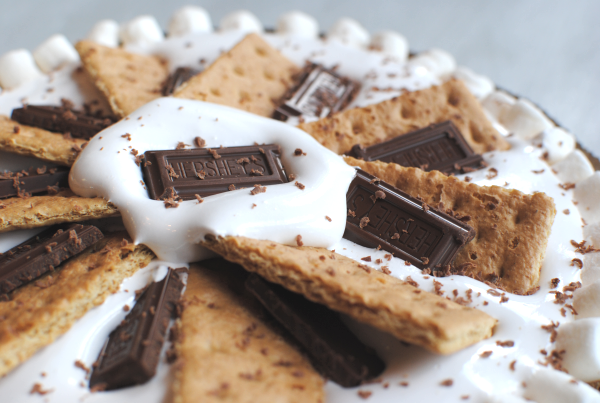
All the prettiness on the top is completely optional. I had just bought the ingredients for my s’more so I had them and thought why not make the pie look pretty? So depending on how pretty you make yours look, you’re talking between 4 and 6 ingredients. Most of which are highly inexpensive and easy to work with. This pie would be a GREAT thing to bring to a cookout get together.

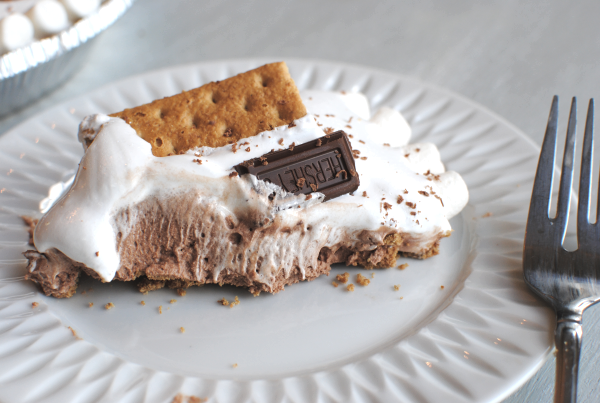
The one thing that I will point out is that the yogurt does give the chocolate filling a bit of a tang. Clearly this was my sacrifice for making something better for you. My daughter noticed this immediately, but it didn’t bother my husband. If you think you might not like that, try using heavy cream instead. Should taste great and give the same type consistency.

Here’s how to make it:

No-Bake S’mores Pie
Recipe Type: Dessert
Author: Pennywise Cook
You don’t have to make a fire to have s’mores! Try this easy pie to satisfy your craving!
Ingredients
  • 1 Graham Cracker Crust (reduced fat)
  • 1 Bag Semi-Sweet Chocolate Chips (12 oz)
  • 1 c. Plain, Nonfat Yogurt (or heavy cream)
  • 1 tub Marshmallow Cream
  • 2 c. Mini-marshmallows- Optional
  • 5 Graham Crackers for Topping- Optional
  • 1 Hershey Bar for Topping- Optional
Instructions
  1. In a large microwavable bowl, place the chocolate chips and 1 cup yogurt. Microwave on 50% power for 5 minutes. Remove and jiggle the bowl getting the chocolate chips to move around without stirring. Return to microwave and heat on 100% powder in 15-30 second increments until the chips begin to melt. Stir until smooth. Place in the refrigerator for at least 1 hour- 2 hours.
  2. Chocolate mixture should be cold. Place in a mixing bowl and whip until the chocolate turns a light brown color. Whip for about 5 minutes on high. Pour into graham cracker crust.
  3. Top with marshmallow cream (though you may not need the entire tub). Top with chocolate pieces and graham crackers if you wish and line the outside with mini marshmallows.

Like this post? SHARE it!

Related Posts Plugin for WordPress, Blogger...

Breaking Away from Busy & OMG It’s October?!

We are back in one piece after a couple of different road trips. The first going south and the second going north. Do you ever get on one of those I have to get out of here kicks? I think that’s what must have been going through my head to schedule two different trips within a week of each other. That and fall break, so it’s not completely my fault.

The picture above is from my husband and I’s trip to Atlanta. The picture itself was taken at the Sundial Restaurant in the Peachtree Westin Hotel right smack-dab in the middle of downtown. Beautiful place and spectacular view to say the least. If you’ve never been there before, the restaurant SPINS. Yes, it spins! In 1 hour of dining there, you’ll get a full view of the entire Atlanta skyline. In this picture, if you look reeeeeeal close, you can see Stone Mountain! So cool huh?

The food was terrific. The service was wonderful. However, I do recommend going at lunch for 2 reasons: 1) you can actually SEE more when its light outside 2) because it’s like 75% cheaper to eat there for lunch than at dinner. I remember looking through their menu seeing something for as much at $80 (1 entree) at night. Most of the food was $20 (1 entree) or less during lunch.

It’s highly worth it to eat here if you’re headed to Atlanta!

Our next adventure involved the entire family and took us up to Ohio. Using my fantastic Groupon, I was able to score 2 nights including lunch for over $300 off the regular price at the Great Wolf Lodge in Mason, OH. Not bad if I do say so myself.

This was our first “real” family vacation that didn’t involve us visiting someone or bringing someone along to help. To be honest, I was actually quite worried about how we were going to hold up, but it turned out to be a fantastic and fun family trip!

The resort itself was so nice. The staff was friendly and very helpful. 1 and 1/2 hours into the trip we realized that we had forgotten our pack n’ play for our little one to sleep in. The Great Wolf Lodge had those and they were complimentary! They really did think of everything. All the way down to the story time every night. The wolf characters came out to see the kiddos and all of this combined with the incredible WATER PARK meant that the girls were completely pooped by the end of the day. The water park was huge and had something for all of us. There were slides that young kiddos could go down. There were slides just for the older kids including a water coaster! That was pretty scary if I do say so myself. And we really enjoyed the “toilet slide”. It starts with a very steep drop and then basically flushes and swirls you backwards down a tube. Sounds kinda silly, but it was fun!

Aside from the random fire alarm that went off the first night, we really enjoyed our stay. My oldest has even stated that she wished that she “lived at The Great Wolf Lodge”. I see a trip back there (or to a different location) soon.

I come back from all of our adventures to find out that it’s OCTOBER already! Geez, where have I been?

You want to know something really sad? I was walking to my van the other day and realized that I still had my Rudolph nose attached to the hood. Yeah, big red nose in October. You can see how out of touch with time that I am!

After being away for a while, we needed some things at the store. Addie found this lovely monkey mask on the Halloween aisle (yes, it’s that time!) and wanted me to take her picture in it and “put it on facebook”. Her words, not mine. Wow.

So now I’m ready to slow it down. Breathe a little. Step into fall and enjoy some cooler weather, crisp apples, fall colors, and yummy fall food.

Who else is with me?


Like this post? SHARE it!

Related Posts Plugin for WordPress, Blogger...

Making A Memory Last Forever

Back years ago when I first found out that I was having my first baby, I remember anxiously waiting to find out what the gender was so that I could go out and buy baby clothes. I know that some people don’t like to find out what they are having, but I was excited to get in the mind set of what to expect.

Would I be having tea parties or GI Joe wars? Would I be looking at blue paint or pink? Would I buy plaid pants or flower dresses? This was life-changing information people! The night before we found out the gender, it was like Christmas Eve. I could barely sleep.

The big day arrived and we found out that it was going to be a GIRL! Though I didn’t exactly share how much I really wanted a girl, I was so excited that I would have a princess to spoil. I went out shopping and bought the cutest little halter top romper pictured above. We learned a lot from our baby education classes, including the fact that it’s important to watch the dyes and scents found in the fabrics that baby clothes are made with. Not to mention how rough some of those fabrics can be before that first trip through the wash.

I bought my very first bottle of Dreft within days of buying that sweet outfit. Though the romper was one of my favorites, there were lots more outfits that I bought along with it. A entire load of laundry was in order and Dreft was the detergent of choice!

What do you bet that when we found out we were having another girl 4 years later that I would bust out this very outfit for her to wear. I love its blue color because it went so well with their baby blue eyes. Years later, Dreft has kept it looking just like the day that I bought it. Even after the spit up, pureed carrots, and many messes from 2 babies, it’s remained adorable and dear to my heart. Even if it is missing a snap. 😉 I hope to keep this little outfit forever to remember just how small they were.

These days, Dreft is the most recommended laundry detergent by pediatricians. No wonder, it softens and cleans baby’s clothes gently while triumphantly getting rid of those stinkin’ green pea stains. My favorite part was always that the bottle lasted forever! You can wash like a billion pieces of baby clothes in one load. I never worried about my investment in Dreft because it went a long way for sure. And you know it’s good when a product has been around for over 75 years y’all!

Whether you’re a first timer or the greatest, grandest mother of them all, there’s on thing moms have agreed on for over 75 years- Dreft makes your little one’s fabric feel as clean and soft as can be.

This is a sponsored conversation written by me on behalf of Dreft. As a part of this program I received the product, the opinions and text are all mine.


Like this post? SHARE it!

Related Posts Plugin for WordPress, Blogger...

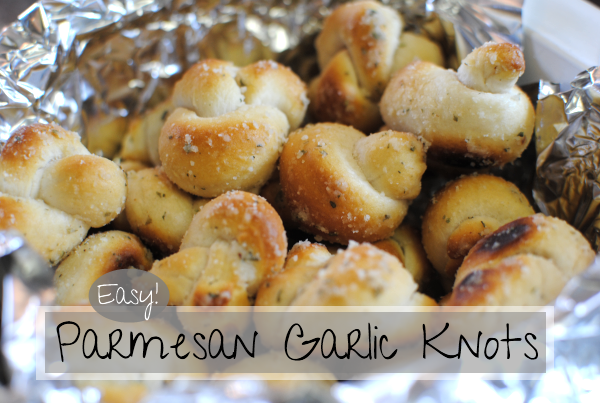
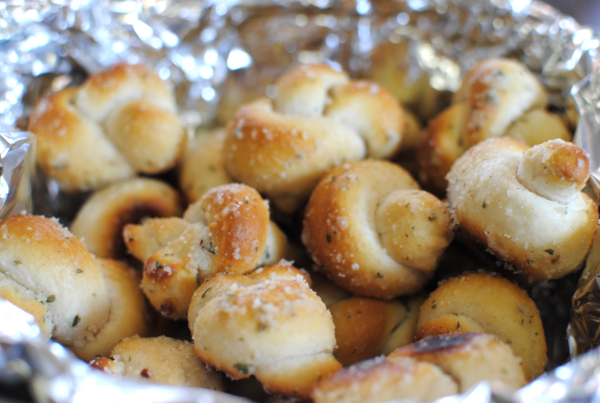
Parmesan Garlic Knots

I think I could probably put the word easy in front of just about every recipe that I share with you. I usually don’t attempt or create anything that involves too much work. I don’t have the time or the patience most days to waste on a drawn-out recipe so I enjoy when I can crank something out easily.

My mom has been on an easy recipe kick recently and shared some killer monkey bread with me the last time we visited. Easy is a pretty relative term when it comes to cooking. What might seem easy to one might just be heavy labor to another, but today’s recipe folks is for anyone’s definition of easy. Mom said that she had made a couple different versions of pull-apart bread and one was a savory version that included Parmesan cheese and garlic. I’m not sure that there’s anything better than those two in combination. I loved that idea and it was only a matter of when to make it.

Her monkey bread recipe was so simple and the savory version carried the same instructions with different ingredients.

Preheat your oven to 400°. Line a baking sheet with parchment paper or perhaps spray with nonstick spray.

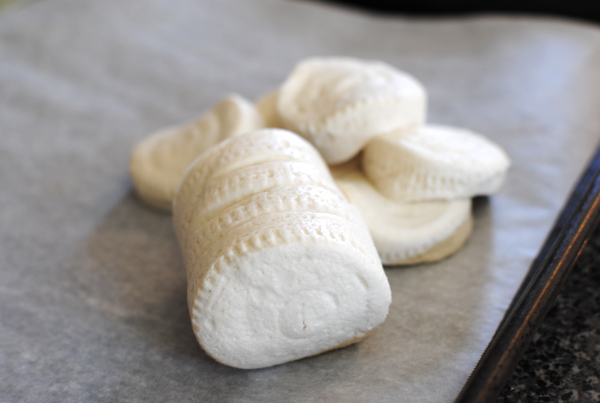
Start out with refrigerated biscuit dough. Let’s not judge here. You do it too. Pop them all out of the can.

My lovely assistant, Addie helped me with the next step. Depending on how big you want your knots you can cut the biscuits in half or leave them whole. I cut mine in half to make slightly smaller knots.

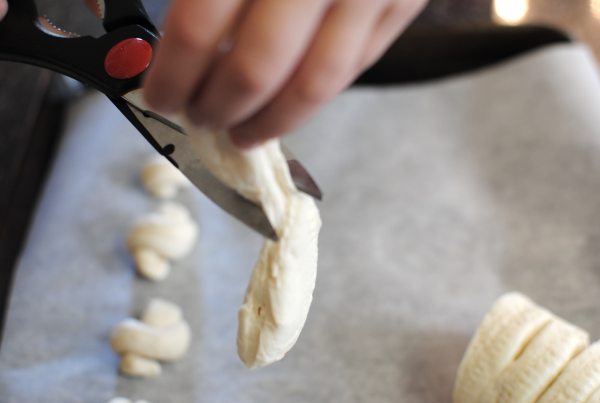
Roll out the dough into a rope.


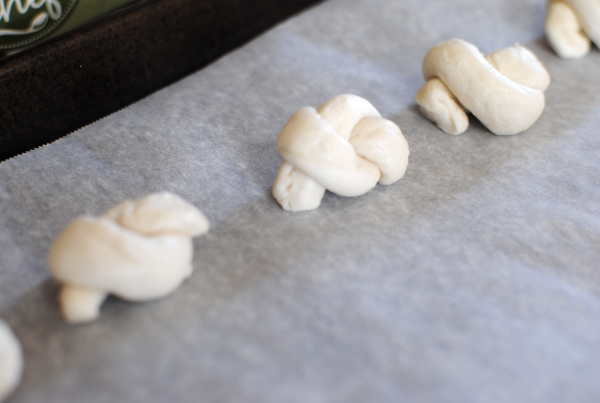
Then in all literalness, tie the ropes into knots. And don’t worry about them being perfect and pretty. They are going to puff up and get eaten, who cares?!

Try to place them with the ends facing down. Then its time to bake them according to the dough’s package. About 8 minutes should do. I found myself checking over and over again because I made my knots smaller. The bottoms ended up slightly dark brown.

While they are cooking, make up the coating. In a large ziploc bag, throw together Parmesan cheese, garlic powder, parsley flakes, Italian seasoning, and oil. My mom used butter for her’s, but I went a slightly healthier way with a mix of olive oil and canola oil.

As soon as they come out of the oven, let them cool for just a second (so they don’t melt the bag) and then while they are still warm, toss them in the cheese mixture. The warmth helps the cheese to stick to them.

They are SO tasty! I took them to a get together the other night and everyone kept saying that they wanted the recipe. There’s almost nothing to them that it seems silly to call it a recipe. Enjoy!

This recipe is thanks to my mommy and with a little help from Spark People.

Parmesan Garlic Knots
Recipe Type: Side Dish, Appetizer, Snack
Author: Pennywise Cook
Turn a simple can of biscuits into a masterpiece fit for any dish by making these Parmesan Garlic Knots!
Ingredients
  • 1 Package Refrigerated Biscuit Dough
  • 2 Tbsp Canola Oil
  • 2 Tbsp Extra Virgin Olive Oil
  • 3 Tbsp Grated Parmesan Cheese
  • 1 Tsp Italian Seasoning
  • 1/2 Tsp Garlic Powder
Instructions
  1. Preheat oven to 400°.
  2. Cut each biscuit in half for smaller knots or use whole for larger. Roll each piece into a long rope. Tie into a knot and place onto a parchment lined baking sheet. Place ends down on sheet.
  3. Bake according to package or about 8 minutes until golden.
  4. Meanwhile mix all other ingredients in a large ziploc bag.
  5. Remove knots from oven and allow to cool slightly. While still warm, toss the knots in the cheese mixture until coated thoroughly.
Notes

The cheese mixture did slightly get clogged up in the bottom of my ziploc bag so if you want to avoid that, you can just toss them in a large bowl.

The go really great with spaghetti or pasta!


Like this post? SHARE it!

Related Posts Plugin for WordPress, Blogger...

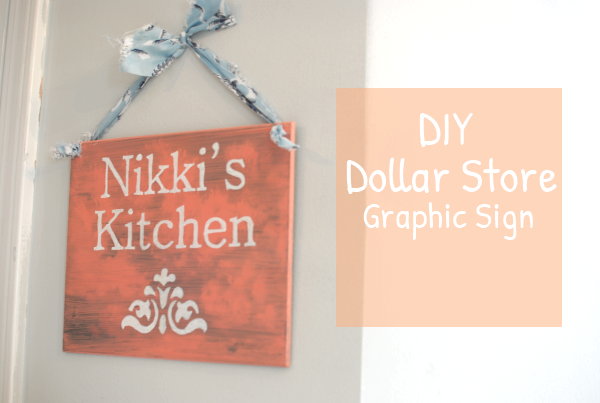
DIY Dollar Store Graphic Sign

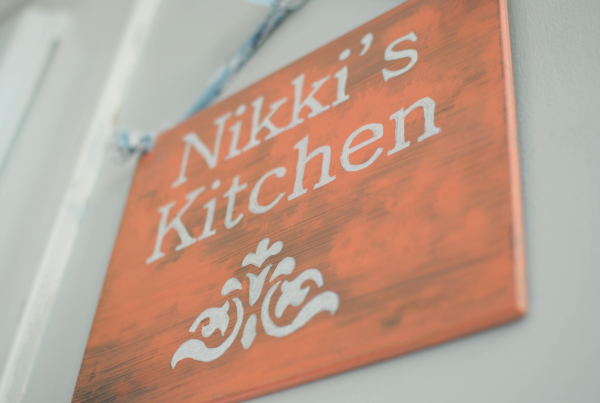
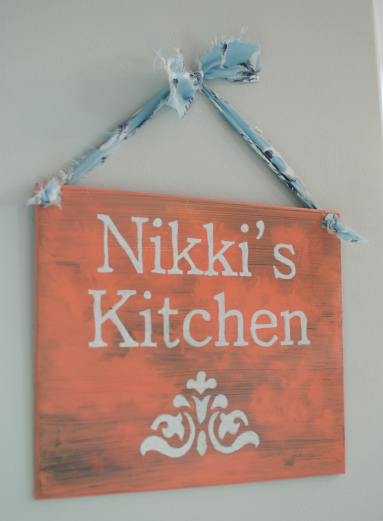
I’m crossing my fingers that my friend Nikki is not reading this. Not that I don’t want her reading my blog, but she’ll know how much I spent on her birthday present! Money-wise it was literally just $1. That’s all that it cost me to whip this sign up.

How much is a homemade personalized sign for a special friend worth? Worth all the love that was put into it when it was made. 🙂

I was scrambling at the last minute to figure out what to get her. She’s been into cooking lately, so I knew I wanted to do something for the kitchen. My crafty side kicked in and I knew this was what I wanted to make. Knowing I already had the paint and brushes, I knew that I wasn’t really going to need much to make this so I stopped into Dollar Tree to find some type of board or plaque to make the sign from.

The plaque that I chose was of this hideous flower bouquet. It was almost metallic in nature. But it was getting painted over, so I didn’t mind. You can see in this picture that the underlying picture still came through. No matter how many coats I gave this, it still showed up. That’s alright! I think it still turned out pretty cool with a bit of a cloud affect.

To get the lettering on the sign, I used the same technique that I used on my Coffee Mug Holder. Very simple process that just takes a little time, but not money. You use your printer to select your favorite fonts.

And the hanging fabric was just some leftover from a chair recover that I did. You could use a shoelace, yarn, or just whatever you have laying around. I used a stencil that I had for the bottom, but you can find graphics online that can be used for this.

Want to make your own sign? Many of these things you may have on-hand already. Here are step by step instructions.

What you’ll need:

  • Board or plaque for making the sign on.
  • Paint
  • Paint Brushes
  • Printer and paper for making your text and graphics
  • Pencil
  • Ballpoint pen
  • Paint Pen
  • Yarn, shoelace, fabric for hanging
  • Clear Topcoat Spray (optional)

Instructions

1) Start by giving your board or plaque a few coats of your selected paint. Let dry completely.

2) Using your computer and Word or word processing program, choose your text and graphics and their correct size for your sign. You may need to hold them up a few times to the board to get it right. Cut the words out as a whole. Do not cut each letter out separately.

3) Turn the words over and using a pencil, color over the backside of each letter.

4) When your board is dry, lightly tape your word in place how you want them on the board. Use the ballpoint pen to outline each letter. The pencil lead will be transferred to the board. Carefully remove the tape and word.

5) Use your paint pen to carefully fill in the letters. It may take you some time to get used to staying in the lines.

6) If you choose to use a topcoat, spray it down and allow it to dry before moving on.

7) Using a drill or screw, create a hole in each side of your board. My board was ridiculously hard but I managed to screw in a screw and use that hole to pull my fabric through. Pull the fabric, yarn, or whatever you are going to hang it with through these holes. Make a knot so they cannot slip through. Tie the two pieces together in the middle for hanging.

That’s all there is to it! I hope I didn’t leave anything out. Most of the time I just do these things without thinking so typing it out into steps takes some getting used to. I hope you enjoyed this tutorial. Let me know if you make your own Dollar Store sign and if you do, I’d love for you to share a photo of it on the Pennywise Cook facebook page!


Like this post? SHARE it!

Related Posts Plugin for WordPress, Blogger...

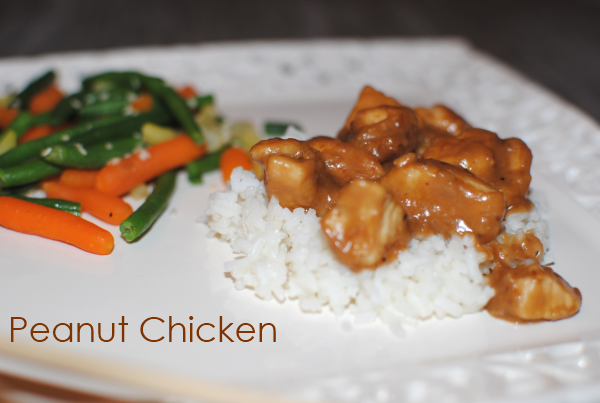
Easy Peanut Chicken

How was your weekend? Is it really Monday already? The weekend just goes by way too fast. It’s Saturday morning and you’re thinking oh this is nice, I still have Sunday. Then all of the sudden it’s Sunday night and you’re like crap, tomorrow is Monday. Such is life.

I have some good news for you. Well actually, it’s a good recipe for you. It’s definitely good news for those of you who enjoy a little Asian flare. This recipe is via Coach Nicole at Spark People. Which means it’s healthy too! Always a bonus when you like something AND it’s not sky high with calories.

I’m a bad food blogger. I didn’t take many pictures and the ones that I did take are very dark. It was a late night, what can I say. Natural light is very hard to come by when you’re eating dinner at 8:00. So please enjoy the one halfway decent picture that I have for you. 🙂

My family LOVED this chicken. You’ve probably gotten to know a little about my family by now (they’re picky) and so you know that this is big! The only real complaint I have with this sauce recipe is that it doesn’t make very much. I would definitely suggest that you double it if you’re feeding a family of 4. Also, you’ll want to make sure and eat it soon after making it. I placed the sauce in my crockpot while we went to the Y and when we came back it had kinda thickened up in consistency.

This meal came together really fast. No really, it was extremely quick to make. Browning the chicken was the most time-consuming step. And you know how fast you can brown up bite-size pieces of chicken.

Isn’t it nice to learn from someone else’s mistakes?

Easy Peanut Chicken
Recipe Type: Sauce, Main Dish
Author: Coach Nicole (Spark People)
Don’t sacrifice flavor to make something healthy. Enjoy creamy peanut sauce with your chicken in minutes!
Ingredients
  • 1/4 c. Peanut Butter (creamy)
  • 2 tbsp Soy Sauce (low-sodium is best)
  • 1-2 Garlic Cloves, Minced
  • 1/8 tsp Ground Ginger (optional)
  • 1/3 c. Warm Water
  • 2 Fresh Chicken Breasts, Cut into bite-size pieces
  • Salt & Pepper to taste
  • 1 tbsp olive oil
Instructions
  1. Heat olive oil over medium-high heat. Season chicken pieces with salt and pepper and cook until browned.
  2. In a small bowl, whisk together all sauce ingredients. Pour over chicken and heat through.
  3. Serve over rice!
Notes

Like I said in the post, I would suggest doubling the recipe. I also added a little bit more water (maybe 2 tbsp) to make it just a little runnier. You can adjust that to your liking.

If you like a little crunch, you can also add a few peanuts to your chicken in the end.

This would also be very tasty with tofu, veggies, or just plain pasta!


Like this post? SHARE it!

Related Posts Plugin for WordPress, Blogger...