Baked Lemon Berry Donuts

Ok so those of you who have been reading for a while probably know that I’m a health nut. So after reading the title of this post, you might just be thinking that I’m out of my mind for sharing a recipe for donuts. Well, the keyword in my title is “baked”. You see, donuts are diet devils. I don’t go near them with a 50 foot pole.

That was until I discovered donut bake pans. Now I’ll gladly go within 3 feet of them. No, I still don’t like to get too close. Too much of a good thing can be bad, you know.

There’s really no guilt involved with these donuts. There’s only around 100 calories (104 to be exact) per donut. And we’re not talking about those mini donuts. It’s the big ones y’all! And don’t fret if you don’t have a donut pan. When I first began my quest to make homemade baked donuts, I could not find a pan anywhere to save my life. I ended up getting one online. Then about 2 weeks later, my mom hit the mother-load at a thrift store where she purchased 2 of them for less than $1.

Isn’t that how life works? You can’t find what you’re looking for when you’re looking for it. But when you aren’t looking for it, it’s everywhere.

Sometimes I say, screw life and use a muffin tin! 🙂

This recipe is slightly adapted from Chef Meg’s recipe. I made her blueberry version a while back, but now that the blueberries have skyrocketed in price at the store, I figured strawberries would be a good substitution and would be very tasty with lemon. Don’t worry, the lemon isn’t overpowering. Just the right amount to compliment the strawberries.

Try them out yourself!

Baked Lemon Berry Donuts
Recipe Type: Dessert, Snack
Author: Adapted Slightly from Chef Meg’s recipe at Spark People..
Have one last taste of summer with these Baked Lemon Berry Donuts!
Ingredients
  • 1/2 c. white (or brown if you don’t have white) whole wheat flour
  • 1/2 c. all-purpose flour
  • 1/3 c. sugar
  • 3/4 tsp baking powder
  • 3/4 tsp baking soda
  • 1/4 tsp salt
  • 1 egg
  • 1/2 c. plain nonfat yogurt
  • 1 tbsp canola oil
  • Zest of 1 lemon + 1 tbsp lemon juice
  • 1 and 1/2 c. fresh strawberries, chopped
  • TOPPING
  • 1 tbsp + 1 tsp sugar
  • Zest of 1 lemon
Instructions
  1. Preheat oven to 375°.
  2. Spray donut pan with cooking spray and set aside.
  3. Combine all the dry ingredients in a large bowl. Combine all wet ingredients, except for strawberries in another bowl. Stir the wet ingredients into the dry until just combined.
  4. Gently fold in the strawberries.
  5. For standard donuts, use 2 tbsp of batter for each donut. For the mini-size, use 1 tbsp.
  6. Bake for 10 minutes.
  7. Meanwhile, combine the sugar and lemon zest in a mini food processor until mixed. Place in a large ziploc bag.
  8. Remove donuts from oven and working 1 at a time, shake the donut around in the bag of lemon sugar. Place each on a wire rack to cool.
Notes

It works best to shake them in the lemon sugar when they are still warm. But be careful, they are hot when they first come out and the strawberries are super hot. Give them just a little bit of time to cool.

This will make about 10 regular size donuts or 20 of the mini size.


Like this post? SHARE it!

Related Posts Plugin for WordPress, Blogger...

Church, Tomatoes, Atlanta, and Giveaway!

120817_Neuberg_A_22
Creative Commons License photo credit: weisserstier

The last update about church from me was that we were still searching. Searching, searching, and more searching. It has honestly felt like it was never going to get us anywhere. It’s tough hauling the kids around to different churches. That wouldn’t be so bad if Addie didn’t get exposed to super fun churches where they have indoor playgrounds and THAT is the expectation that is in her mind from now on.

No church will ever be as good to her as the one with the indoor playground. Thanks, church that will remain anonymous. It wasn’t even a bad church either, just not for us.

The funny thing is that the very first church that we tried right after we left our last one will most likely become our new church home. It’s as if we wasted a bunch of time looking elsewhere. But I realize this is a journey. Sometimes you have to see what else is out there before you can really know how extraordinary something actually is. Our decision to plant roots at this church isn’t completely set in stone, but we are planning to attend their classes on the church’s history, getting involved, and meeting the people there. I must say, it feels relieving to think we might not have to look any further. I felt homeless without a permanent place.

There are things that I feel that I’m “settling” on. However, I always think that I’m just a weeeeeeee bit picky too. And after all, it’s just a building and my relationship with the Lord is way beyond that building.

Say hi to my perfect little tomato! This very tomato was grown in my garden. Aren’t you proud? I have actually been able to create something edible! I pick on myself, but my garden has actually been doing really well. I got a couple of squash from it before I had a huge lot of bugs come along and kill that plant. But my green bell peppers, snap beans, and tomatoes have been doing really well. It took forever for the tomatoes to actually turn red, but now that they have started it seems there are 3 or 4 of them turning red per day!

We’ve been eating fresh snap beans a lot and those are just fantastic when they are so fresh. I’ve gotten some really nice compliments from the family about those. I can’t help but take a little pride in my little raised garden. I’m planning to make it ever better next year.

IMG_5696
Creative Commons License photo credit: natetheape21

It’s been a while since hubby and I got to go on a little overnight getaway so we are taking a trip to Atlanta soon. I’m very excited to get away from reality for a couple days and hopefully rewind a bit. I haven’t been to Atlanta since I was a kid, so it’ll be an entirely different experience as an adult I’m sure. We don’t have a huge load of plans while we’re there. There’s only so much you can do in a couple of days, but I do plan to go to Ikea! I’ve never been there before *gasp* so that is one of the highlights of the whole trip.

Of course, thrift stores won’t be out of the question either. We’re going to try and take Marta anytime that we go close to downtown. If it’s anything like our Nashville traffic, you won’t find me driving in it. And parking, don’t get me started. I refuse to pay crazy prices to park!

Have any suggestions for a frugal Atlanta getaway? Or suggestions for places we should go or visit or EAT? Please leave a comment with it! We’ll take any help we can get!

And lastly y’all, I’m feeling generous. So how about a giveaway? Just in time for tailgating and football parties, check out this Omaha Steaks Grilling package!

One of you extremely lucky readers is going to win this Omaha Steaks Spring into Savings Grilling Package which includes:

  • (4) 6 oz. top sirloins
  • (4) boneless chicken breasts (1 lb. total)
  • (4) 4 oz. Omaha Steaks burgers
  • (8) 3 oz. gourmet jumbo franks
  • (10) potatoes au gratin

I got this same package this year and it is awesome. I love the quality of their meats!

So how do you win?

Mandatory entry: Leave a comment on this post just saying hi or what’s up. Or you could leave a suggestion about Atlanta for me!

Optional Additional Entries:

  • Like Pennywise Cook on facebook. Leave a comment on this post telling me that you did/are.
  • Follow Pennywise Cook on twitter. Leave a comment on this post telling me that you did/are.
  • Follow Pennywise Cook on pinterest. Leave a comment on this post telling me that you did/are.
  • Subscribe to Pennywise Cook’s daily recipe via email. Leave a comment on this post telling me that you did/are.

This giveaway will end on Friday, September 21st at 11:59pm CT. I will select a winner at random via And the Winner Is WordPress Plugin and they will be contacted on Saturday, September 22nd and they will have 24 hours to respond. If I have not heard back from them, I will name a new winner. The winner’s prize will come via mail so a mailing address will be necessary for shipping. This giveaway is only open to those in the USA. This giveaway is being provided by Pennywise Cook with no affiliation with Omaha Steaks.


Like this post? SHARE it!

Related Posts Plugin for WordPress, Blogger...

Easy Roasted Broccoli

When I was a kid, I never remember thinking I really want broccoli. In fact, I don’t really remember eating it ever as a kid. The word itself had some type of unappealing association with it so we just never spoke of it. Props to my mom for not shoving it down my throat! Luckily I grew up to love it and I’ve passed on that love to my daughter. Though she won’t touch most things that are green, broccoli is something that she will gladly gobble up in a moment’s notice.

Parental mission, accomplished.

We like to make broccoli many ways around here. Steamed, chopped, swimming in cheese sauce, and in a plethora of casseroles. But mostly, it’s easiest to just roast it to go along with a meal.

When you get a good price on a head of broccoli, stock up and make it for dinner. And if you need an idea for how to make it, consider this roasting method if you haven’t tried this before. It’s quite tasty.

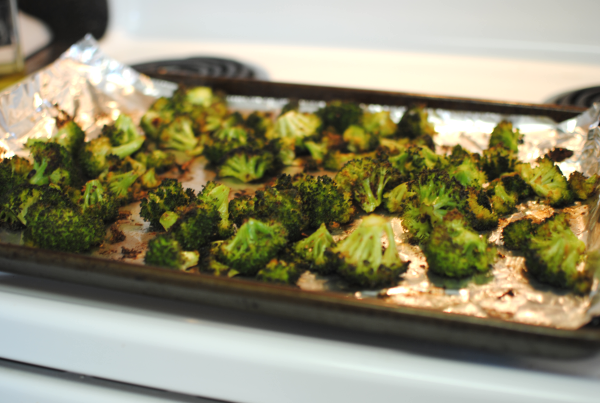
Cut up the head into bite-size pieces. Throw it in a bowl with some salt, garlic (oooooooh, aaaaaahhhhh), chili powder, and of course olive oil. Toss it up and pop it in the oven to get roasted and toasted.

What comes out of the oven is nothing short of amazing. Yummy, flavorful broccoli.

It’s that simple and frugal too!

Easy Roasted Broccoli
Recipe Type: Side Dish, Vegetable
Author: Pennywise Cook
This simple method for roasting broccoli makes for an easy side dish that’s full of flavor!
Ingredients
  • 4 c. Fresh Broccoli (Cut into bite-size pieces)
  • 1/4 Tsp Salt
  • 1 Tsp Chili Powder
  • 4 Cloves Garlic, Minced
  • 1/4 c. Olive Oil
Instructions
  1. Preheat oven to 425°.
  2. In a large bowl, combine all the ingredients and toss well.
  3. Place on a foil-lined cookie sheet. Bake for 20-22 minutes flipping once halfway through cooking.

Like this post? SHARE it!

Related Posts Plugin for WordPress, Blogger...

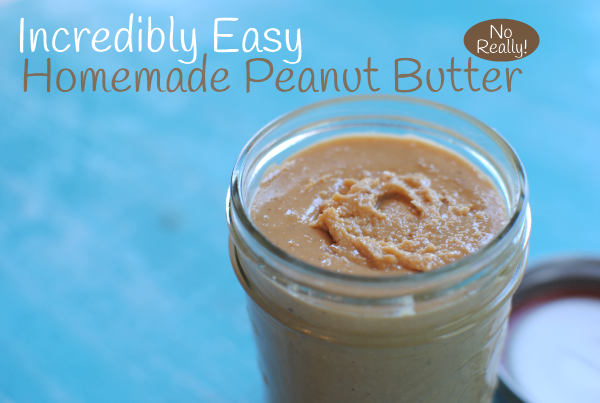
Incredibly Easy Homemade Peanut Butter

How was your weekend? Mine was FABULOUS! Yes, for once I have to say that every single moment was enjoyable. Friday was an impromptu family night which consisted of homemade tacos (mommy didn’t have to “cook”), settling in to watch The Lorax (highly recommended!), and finished off with sundaes complete with cherries on top. Saturday was pretty leisurely. We went to the pet shop to see the animals (cheap entertainment for sure) and ended at Chick-fil-A where we used coupons for FREE Icedreams and played in the playplace. Does a frugal family weekend get any better?

And of course, church on Sunday morning. Which I might have an update on our search coming up so be sure to look for that. Months of searching may have led us right back where we began. Funny how God works, isn’t it?

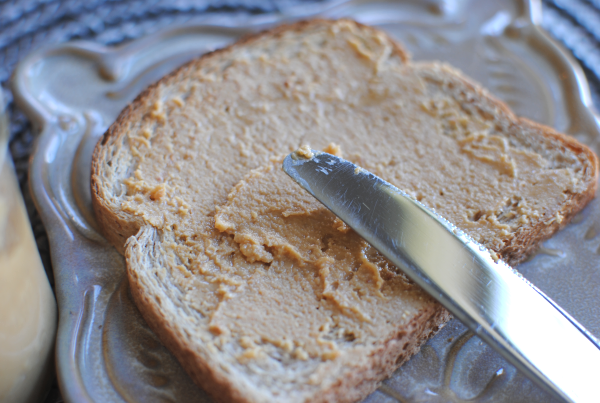
I was excited to find a deal on peanuts recently as part of the Publix BOGO sale recently. One thing on my list to try and make was peanut butter. It’s seriously been on my list for like months. Now that I’ve made it, I feel like an imbecile because of how simple it is. I would have been making my own peanut butter for months had I known how easy it really is.

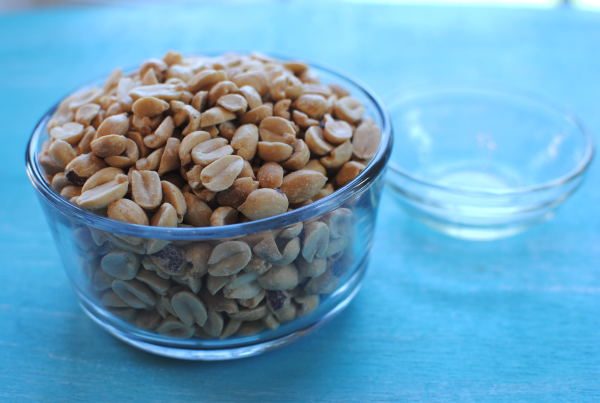
THIS is all you need to make it. Peanuts (DUH), a little bit of oil (whatever kind you have: peanut, canola, vegetable, it really doesn’t matter) and a dash of salt which didn’t make it in my picture. Other optional ingredients include cocoa powder, honey, sugar, brown sugar.

You’ll also want to have a food processor and something to store your homemade peanut butter in.

See what I’m saying? Simplicity at it’s finest here folks.

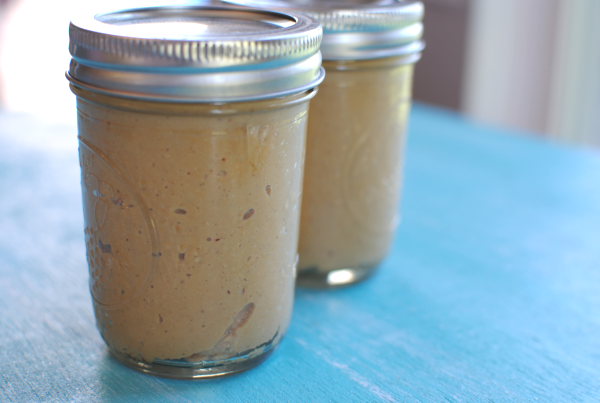
I stored mine in some pint-size mason jars that I had. It’s worked out well. 1 jar of peanuts made me 2 of these jars of peanut butter.

My girls are in absolute love with this peanut butter. I even overheard Addie saying to her daddy yesterday that “I really love momma’s peanut butter. It’s goooooooooood.” I was glowing from the other room y’all. I hardly ever get compliments like that. The only criticism that I received from the hubby was that it might need just a tad bit more salt. I was holding off on too much in case it became too salty. But I know to add just a tad more next time.

Storage: Your peanut butter isn’t equipped with shelf stabilizing ingredients so it will need to be refrigerated. It will last in the refrigerator for up to 4 weeks. (If your family lets it last that long!) You can also FREEZE it! Place it in an airtight container and freeze for up to 6 months. Just be sure to let it thaw before you use it again.

Are you ready to impress your family with your own homemade peanut butter?

Incredibly Easy Homemade Peanut Butter
Recipe Type: Sauce, Condiment
Author: Pennywise Cook
You’ll never believe how simple it really is to create your own peanut butter at home!
Ingredients
  • 2 Cups Unsalted, Dry-Roasted Peanuts
  • 1 Tsp Oil (peanut, canola, etc.)
  • Dash Salt
Instructions
  1. In a food processor, combine peanuts, oil, and salt. Process until desired consistency and smooth.
Notes

It may take a couple of minutes for the peanuts to come to a desirable consistency. They first get chopped, then they begin to really form a paste and then butter.

The oil is completely optional as well. If you’re going for a more natural peanut butter, the peanuts actually have their own oil so it’s not absolutely necessary to add the oil. Just makes for a smoother butter.


Like this post? SHARE it!

Related Posts Plugin for WordPress, Blogger...

Taco Stuffed Peppers

Preface- Sorry for so many red pepper recipes. It was not planned this way, but makes a nice theme anyways. 🙂

Have you ever noticed how when you place the word pizza in a recipe title, it’s usually a big hit. I find that tacos are a very close second. It’s hard not to like something with the flavor of pizza or tacos inside. And when it’s time to get the kids eating a little better, you have to get creative in what you fix.

I debuted stuffed peppers with my family only within the past year. Hubby has never been fond of sweet peppers before. It’s key that the filling be really great to get him to eat it. Popping the peppers in the oven for a little bit of time before filling them will get them started in the cooking process and soften them up just a bit.

The taco filling inside these babies is SO yummy. Onions, beef (or turkey), taco seasoning, and corn provide the perfect taco-y-ness. I just love the words that I make up. Don’t you? That one almost sounds like one my 5 year old would make up!

It’s really the cream cheese that makes them so tasty. I think, anyways.

You can top them with whatever taco fixin’s you’d normally like. The sky’s the limit! I had mine with lettuce and sour cream.

One tip that seemed to make it easier for me was to cut both ends off your peppers. Normally I’d leave the bottom but because there were seeds still hiding and since I don’t like to eat the tough ends, it only made sends to cut it flat on the bottom. Just be sure to use a spatula to carefully move it onto your plate without losing the yummy filling.

These peppers weren’t as soft as I would like them to be. Next time I’ll be making sure that I leave them to cook a bit longer. I used a knife to cut the pepper into strips to eat with my filling. But in a perfect world, the pepper would be much softer and easy to use a fork to gather bites along with the filling.

Enjoy the recipe!

Taco Stuffed Peppers
Recipe Type: Main Dish
Author: Pennywise Cook
Shake up your taco night with stuffed peppers instead!
Ingredients
  • 4 Red Bell Peppers
  • 1 lb Lean Ground Beef
  • 1 Medium Onion, Chopped
  • 1 Pkg Taco Seasoning
  • 1/4 Water
  • 1 Can Whole Kernel Corn
  • 4 oz Cream Cheese
  • 1/2 Cup Shredded Reduced-Fat Cheddar Cheese
Instructions
  1. Preheat oven to 350°.
  2. Cut ends off bell peppers and remove seeds. Place in baking dish and bake for 15 minutes.
  3. In a skillet over medium-high heat, brown ground beef with onion. Once browned, reduce heat. Stir in taco seasoning, water, corn, and cream cheese. Mix well and simmer until cream cheese is completely melted.
  4. Meanwhile, remove peppers from oven and fill each with equal amounts filling. Bake for 30 minutes.
  5. Remove from oven and top with equal amounts shredded cheese. Return to oven to bake for another 10 minutes.
  6. Cool.

Like this post? SHARE it!

Related Posts Plugin for WordPress, Blogger...

Roasted Red Pepper Basil Meatloaf

I’ve told you before how I don’t make meatloaf very often. I’m working on that now that I have been made aware that my family apparently loves it. Who knew?!

My garden has been very fertile in the basil department lately so I knew that I had to whip something up that involved sweet and fragrant basil. I’m not sure why meatloaf came to mind, but it did, so I went with it. Determined to get away from that stereotypical ketchup flavor, I decided to go with something else that shared the same fiery red color.

Red peppers. Yes. Those would be perfect.

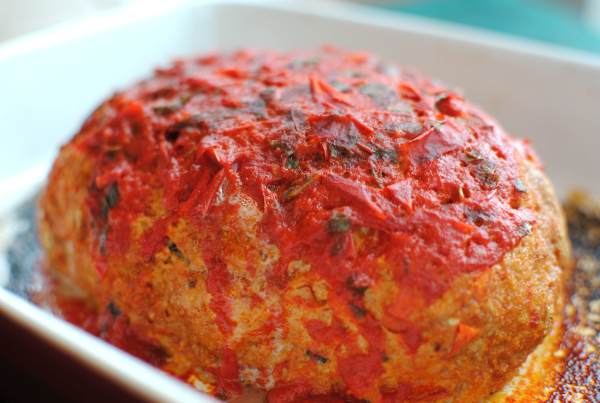
But going off the result of a recent stuffed red pepper experiment in my home, I knew that they would have to be roasted and pretty much beyond recognition. At least for this family to eat them. So I pulverized them. Or in other words, pureed them along with the basil and made a sauce to go inside and on top of my meatloaf.

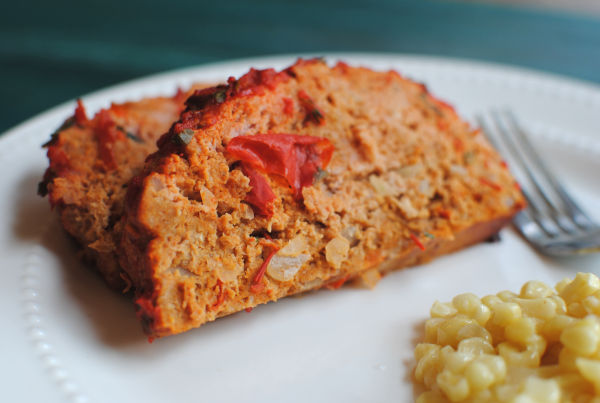
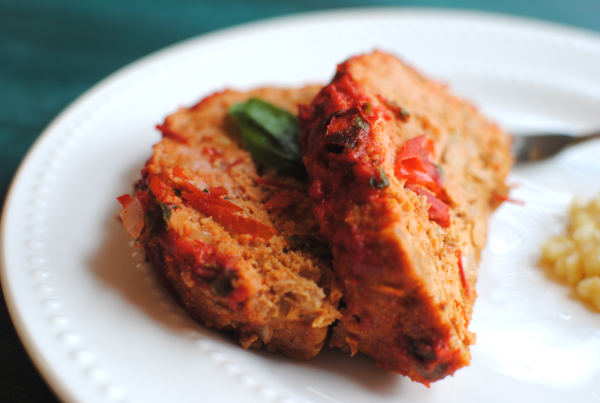
The result was nothing short of amazing. They took the bait y’all! I watched my 5 year old an entire piece of this meatloaf. I kid you not.

Albeit, she did say when she was finished “mommy, I didn’t like this meatloaf but I ate it all.” Hmmm, makes a lot of sense. It’s not as if I was forcing her to eat it! Nevertheless, my husband even ate the leftovers for lunch the next day so it must have been at least edible otherwise he would’ve left it there “for others to eat”.

The only issue I’d have to say I had with this meatloaf was the sauce needed a little pep. Maybe just a little more salt and pepper and I could’ve pureed it just a tad bit more. But aside from that, I was fairly impressed with its fanciness compared to your average ketchup meatloaf. (Even though that’s also very tasty!)

If you’re brave enough to try this one or your family, or perhaps need a change from ketchup you might try this one out!

Enjoy!

Roasted Red Pepper Basil Meatloaf
Recipe Type: Main Dish
Author: Pennywise Cook
A change from your everyday ketchup meatloaf, this one lends its fanciness from roasted red peppers and fragrant basil!
Ingredients
  • 1 lb Ground Turkey
  • 1/2 c. Onion, Finely Chopped- Minced
  • 1 Egg White
  • 4 Large Basil Leaves, Chopped (or about 3 tbsp)
  • Dash salt & pepper
  • 2 Tsp Minced Garlic
  • 1 Jar Roasted Red Peppers
  • 1 and 1/2 c. Bread Crumbs
Instructions
  1. Preheat oven to 350°.
  2. In a food processor or blender, puree the red peppers and basil together along with salt & pepper.(Should make about 1 cup sauce)
  3. In a large bowl, combine ground turkey, onion, garlic, egg white, basil, bread crumbs, and 1/2 red pepper sauce.
  4. Form into a loaf in a small baking dish or loaf pan.
  5. Bake for 40 minutes. Remove from oven and pour the other 1/2 c. red pepper sauce over top.
  6. Continue baking for another 15 minutes or so. Internal temp should reach at least 170°.
Notes

Feel free to play with the spices in this one!


Like this post? SHARE it!

Related Posts Plugin for WordPress, Blogger...

Broccoli Cheese Soup

How was your 3-day weekend? Get a little R&R in? I was kinda forced into some R&R this weekend when a very random illness struck. It wasn’t something that had been going around as far as I know, but thankfully it’s going away fairly quickly. We didn’t have big plans for the holiday so it was nice to have some time to just be lazy.

One of my favorite comfort foods is broccoli cheese soup. There is just nothing like the thick, cheesy, stick-to-your-ribs soup. Especially when it starts to get cold outside. But honestly, I could care less what time of year it is. I’ll eat it any day!

There are some really great recipes out there for this kinda soup. Just about anywhere you look, somebody has their own version. But they all come down to the same ingredients: broccoli and cheese! Most of which contain Velveeta. There’s nothing wrong with that, but sometimes I do like to skip the processed blocks of cheese and use the good stuff. So I adapted my potato soup recipe to include a little more cheese and swapped out the potatoes to create this yummy version of broccoli cheese soup!

I also added barley for added fiber!

This has got to be one of the easiest soups out there to make. It tastes like it’s slow-cooked but only takes minutes. My absolute favorite kind of recipes.

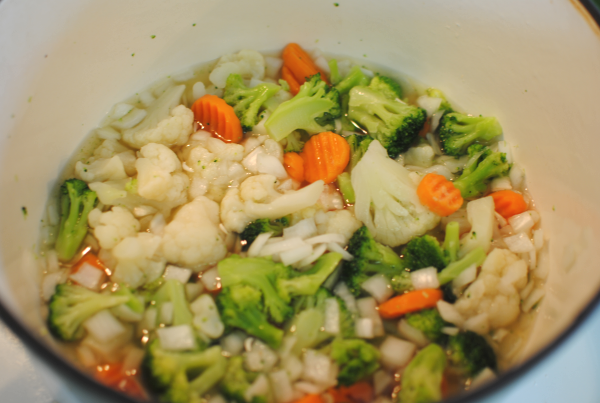
You start with a 16 oz package of frozen broccoli and carrots, broccoli and cauliflower, or broccoli and both! Whatever you can find at the store for cheap. Throw that into a pot along with a chopped onion, your barley, and can of chicken broth. The veggies just simmer away. Believe it or not, but this is the most time-consuming part of the entire process! (Besides chopping the onion, of course)

Whisk together cornstarch and part of a can of evaporated milk to begin your thickening agent and add that in.

We’re starting to get creamy y’all.

Pour in the rest of your milk and then it’s time to get cheesy.

Oh yeah. Cheeeeeeeeese always makes things better.

That’s 2 cups right there. Let that melt and you’re ready to serve! This goes really great in a bread bowl or along with some yummy rolls.

I’m not sure why it makes me happy to know that there’s no Velveeta in it, but it does! Somehow it just feels healthier.

I’m sure there’s a recipe that you love or that you’ve heard of. I urge you to give this one a try next time you’re in the mood for a warm, broccoli cheese soup.

Broccoli Cheese Soup
Recipe Type: Main Dish, Soup
Author: Pennywise Cook
It is possible to make broccoli cheese soup without Velveeta! Try this recipe for a tasty alternative!
Ingredients
  • 16 oz Package Frozen Broccoli (or variation of broccoli and cauliflower or carrots)
  • 1 Medium onion, chopped
  • 1 can Reduced-sodium, fat-free chicken broth
  • 1/4 c. Barley (Kroger has this for around $1)
  • Dash pepper
  • 3 tbsp cornstarch
  • 1 can fat-free evaporated milk, divided
  • 2 c. reduced-fat shredded cheddar cheese
Instructions
  1. In a large pot, combine frozen veggies, onion, chicken broth, barley, and pepper. Bring to boil, then simmer for about 20 minutes.
  2. Combine 3 tbsp cornstarch with 1/4 c. evaporated milk. Pour into veggie mixture and stir well. Pour in the rest of the evaporated milk. Bring to a boil and let cook for about 2 minutes.
  3. Remove from heat. Stir in cheese and serve!
Notes

Makes a great meal for having a vegetarian friend over!


Like this post? SHARE it!

Related Posts Plugin for WordPress, Blogger...

Making Space in a Crowded Kitchen

When we purchased our home years ago, we planned for our little family to grow. It did indeed grow. We went from 1 to 2 sweet children and there were space sacrifices made. For instance my stockpile closet in the guest bedroom/office became my sweet baby’s closet. Which also meant that my guest bedroom/office became the nursery.

Needless to say, we’ve become quite the masters at utilizing the space that we have fairly efficiently. And then one day after moving my stockpile into my kitchen cabinets, I realized that there just was not enough space. To be honest, I don’t think that I would EVER have enough space for all the cool gadgets, cookware, and ingredients I’d like to store in my kitchen. But we do the best that we can to make room.

One our kitchen wall, we had a very lovely large black mirror hung over the buffet. This buffet used to contain a huge hutch for our china cabinet, but in the process of de-cluttering and minimizing it got the boot. Back to the mirror.

It was huge and made the wall basically unusable. With cans and pots (and my obsessive mug collection) popping out of the cabinets (almost literally), I decided it was time for a change.

Here’s what I did! 3 simple shelves in place of the mirror gave me space and a place to show off some of my favorite kitchen treasures. I’m fairly sure that when I first brought this idea to my husband that he thought I was silly. But after it came together, he came around.

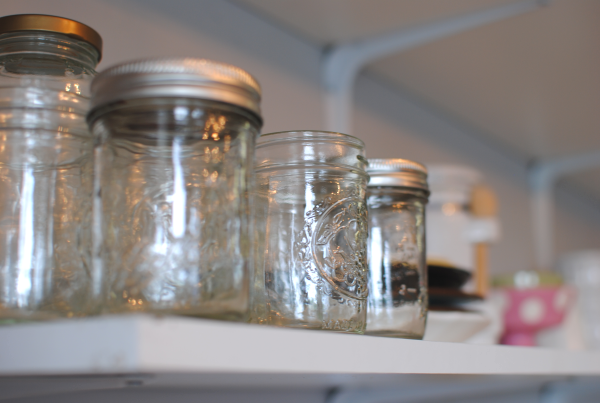
I love how the shelves made some of the most mundane things like these glass jars look sparkly and special. These would otherwise just be locked away in a dark cabinet and only seen when in use.

Or this trifle bowl. It’s a beautiful vision now with it’s showcase position on the shelves.

Even the canisters holding my tri-color pasta seem to demand more attention.

I enjoy looking at the things that once caused me much grief when I opened and closed my cabinets. And now my matching plate and bowl set are living in harmony in their cozy cabinet without the clutter of mix-n-match thrift store finds cramping their style. But little do they know they were Dollar Tree finds themselves! Shhh, we won’t tell them…

For now we’ll enjoy our extra space. For now that is, until my mugs take over and that is a very big possibility.

I hope that this might inspire you if you are becoming crowded in your own kitchen. Get creative, inventive, and don’t give up!


Like this post? SHARE it!

Related Posts Plugin for WordPress, Blogger...

Southwestern Black Bean Omelet

My mission lately is to make sure that I eat all 3 meals. I have a tendency to get busy with the girls, cleaning the house, or perhaps blogging my favorite recipes with you and just completely lose track of time and meals. That’s coming to an end because I’m on a mission to find filling, yet easy breakfasts and lunches. I’ve been making one that I wanted to share since I find it really tasty.

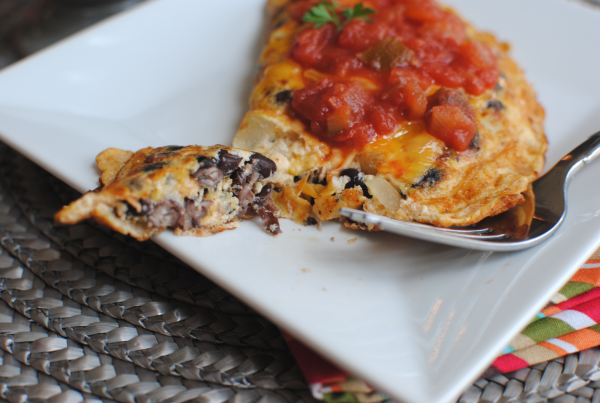
This Southwestern Black Bean Omelet is filling and tasty, but also low in calories. I figured it up and there are just 160 calories in this entire omelet! That even includes the cheese, which is where almost half of the calories come from. You could easily knock off even more calories by using reduced-fat cheese.

My favorite thing about this omelet is that it’s super fast to make. It takes no time at all to whip up but leaves you feeling satisfied. With the protein from the egg beaters and the fiber and antioxidants from the black beans, it’s also very healthy.

I find myself eating this for lunch more than I do for breakfast! If you’re looking to change up your everyday lunch or breakfast, you might try this out.

Check out the recipe below and enjoy!

Southwestern Black Bean Omelet
Recipe Type: Breakfast, Lunch
Author: Pennywise Cook
This black bean omelet is not only filling and tasty, but it’s healthy too!
Ingredients
  • 1/3 c. Egg Substitute
  • 2 Tbsp Chopped Onion
  • 1/4 c. Black Beans
  • 1/8 Tsp Chili Powder
  • 2 Tbsp Shredded Cheddar Cheese, Divided
  • 1 Tbsp Salsa
  • Salt & Pepper to Taste
  • Cooking Spray
Instructions
  1. Heat a skillet over medium-low heat. Combine the egg, onion, black beans, salt & pepper, and chili powder in a bowl. Spray skillet with cooking spray then pour in the egg mixture. Immediately sprinkle with 1 tbsp shredded cheese. Let cook for 4-5 minute until the edges start to firm.
  2. Flip and the omelet in half and top other tbsp of cheese. Cook for about another 2 minutes until cheese is melted. Remove from skillet, top with salsa and serve!
Notes

Save the rest of your canned black beans and leftover onion for another day to make another omelet!


Like this post? SHARE it!

Related Posts Plugin for WordPress, Blogger...

Oven “Fried” Pickles

Pickles.

I love the heck out of some good old fashioned dill pickles. They’ve saved me through diets when all I wanted was something to crunch that contained little calories. They’ve saved me through pregnancies when I just wanted something high in sodium. They’ve saved me through times when I just wanted to be reeeeeal bad and eat something deep fried. I’d have to say that they’ve always had my back.

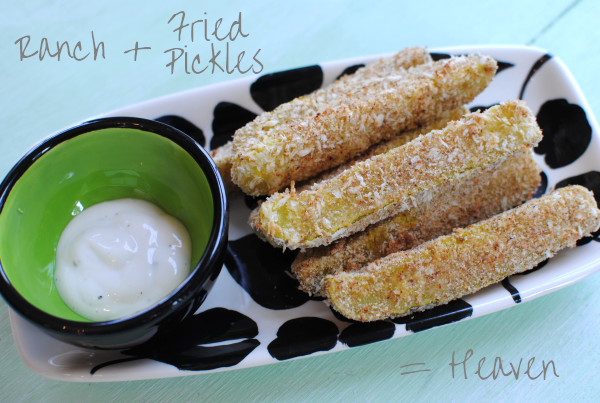
My favorite way to eat pickles? Oh covered in batter and fried to a golden brown and served with a spicy ranch sauce. But since I have this slight (but I really mean huge) aversion to eating fried things, I don’t make or order them too often.

I decided I wanted some “fried” pickles but I didn’t actually want to fry them. Which usually means hello mister oven!

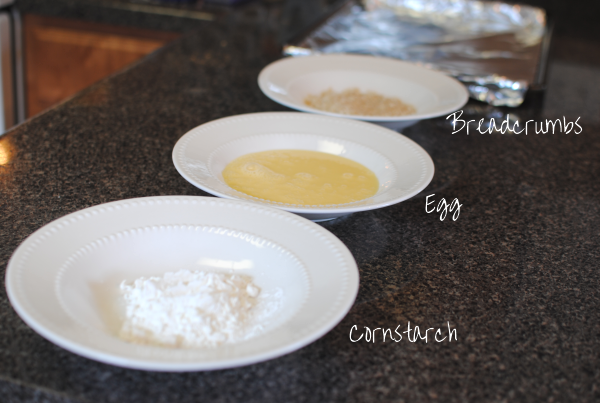
So to begin, we start with a pickle assembly line. Just experience from baking things with coatings on them, I knew that cornstarch was going to be necessary. Then you have your egg substitute, or regular egg if you’re feeling wild. But I promise, you won’t be able to tell if you just use the substitute. It will keep the calories lower this way. Next are a mixture of plain bread crumbs, panko breadcrumbs, and garlic powder. Then you have your pan lined with foil ready for its pickle partners!

Oh and by the way, pickles themselves are needed too. They just didn’t make it into my pictures yet. 🙂

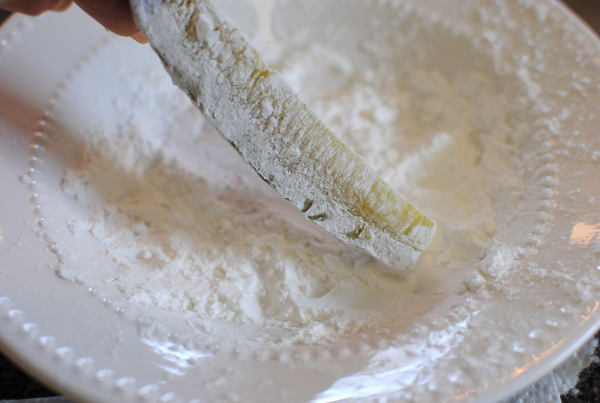
So start off with dipping your pickle in the cornstarch, making sure to shake off the excess.

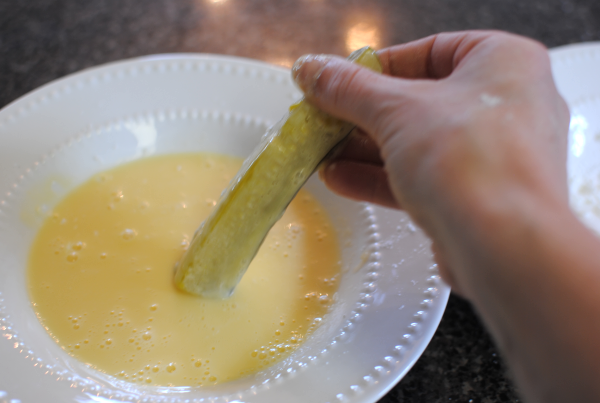
Take your cornstarched pickle and dredge it through the egg.

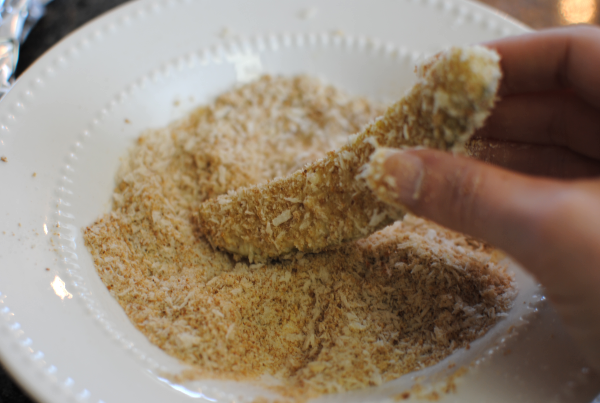
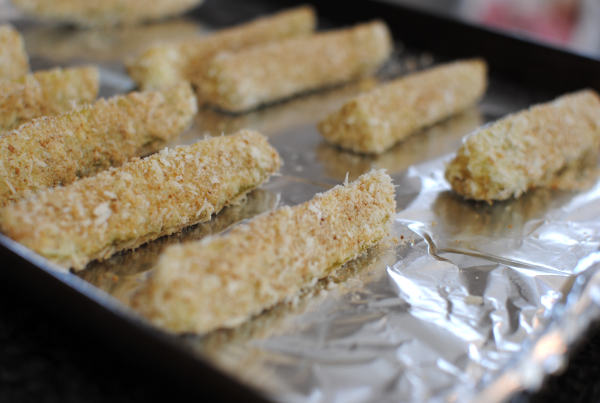
Here comes the crunchy part. Then roll it around in the breadcrumbs and place it on the foil lined baking sheet.

Oh look. Now you have all your ducks pickles in a row. Now bake those ducks pickles!

I felt no guilt at all indulging in these “fried” pickles. The pickles themselves are practically calorieless and the breading is used in moderation making these are great snack even for the serious dieter. Plus, the only cost that I had was buying the pickles themselves. They were $1 at Aldi so those didn’t even break the bank. Other than that, you might even have all the ingredients in your pantry right now.

Check out the recipe below.

Oven “Fried” Pickles
Recipe Type: Snack, Appetizer,
Author: Pennywise Cook
You can have the best of both worlds with these oven “fried” pickles. Satisfy your fried pickle craving without the shame or guilt.
Ingredients
  • 1 Jar Dill Pickle Spears, Drained and dried well on paper towels
  • 4 Tbsp Cornstarch
  • 1/2 c. Egg Substitute
  • 4 Tbsp Panko Breadcrums
  • 4 Tbsp Plain Breadcrumbs
  • 1/2 Tsp Garlic Powder
Instructions
  1. Preheat oven to 450 degrees. In a shallow dish, mix together breadcrumbs and garlic powder. Place the egg in another shallow bowl and the cornstarch in another shallow bowl. Line a baking sheet with foil.
  2. Coat the spear in cornstarch, then shake off excess. Dredge through the egg substitute, then coat with the breadcrumbs.Place on baking sheet.
  3. Once all around on the sheet, very lightly spray the tops. Bake for 12 minutes turning them once every 4 minutes (total of 3 times) so that each side (there are 3!) gets a good brown.
  4. Serve with your favorite low-cal ranch and you have yourself a snack!
Notes

This would also work with the sandwich slices or regular chip versions. However, be prepared for it to take forever to dredge and dip!


Like this post? SHARE it!

Related Posts Plugin for WordPress, Blogger...