Easy Mandarin Chicken

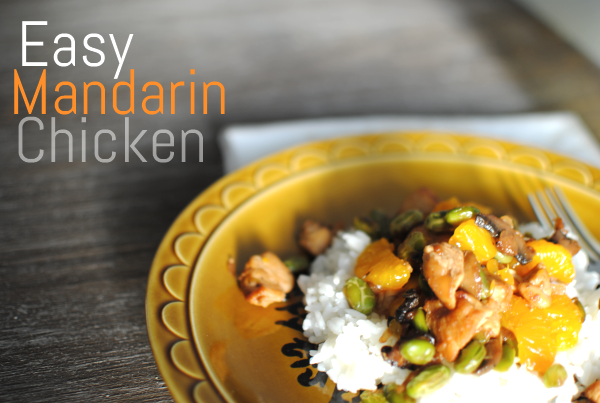
My girls have recently discovered mandarin oranges. Ever since I was a kid, I’ve always loved fruit in any form. Even canned fruit strikes my fancy every now and then. I picked up a few cans of mandarin oranges the other day to see if my girls would enjoy it as much as I used to. I think ended up rekindling my love for the fruit myself. And as expected, they absolutely loved them. I really need to find myself a good sale to stock up on them.

In keeping with their latest obsession, I decided to make something that showcased two things that I know they’ll both like. Chicken and the new-found love, mandarin oranges.

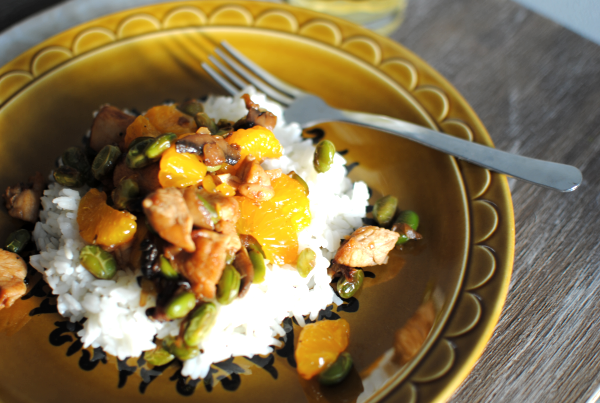
To my utmost surprise, my ENTIRE family (including my incredibly picky husband and 5-year old) loved this meal! The 1-year old even cleaned her plate.Β  I cleaned mine and an entire 2nd plate as well. Hubby was really concerned about the sweet oranges being used with savory chicken, but when he was done he told me that he thought it worked really well together. SCORE!

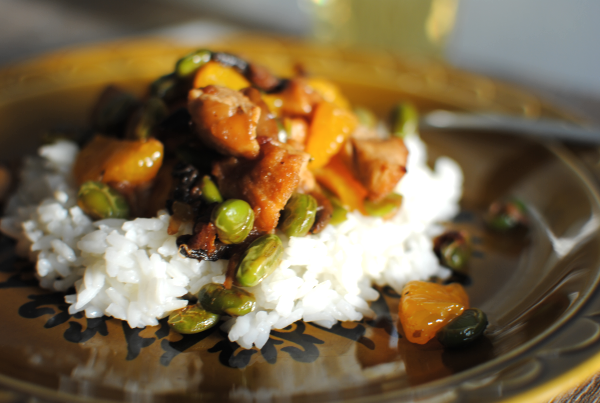
I used edemame to kick up the nutrition and hid mushrooms with the onions. The mushrooms were quite stealth and the kiddos loved the edemame! In fact, Addie asked me at one point what kinda beans they were. I told her edemame and she replied “I really like edemame!”.

Those are words that I never expected to come out of my 5-year old’s mouth…

By the time dinner was over, I was floored. This was a meal that the whole family loved and it was actually healthy and good for them. That only happens in my dreams and on commercials doesn’t it?

Recipe adapted from 366 Low-Fat Brand-Name Recipes in Minutes Cookbook.

Easy Mandarin Chicken
Recipe Type: Main Dish
In just minutes, you’ll have a mouth-watering Asian meal with little effort!
Ingredients
  • 1 11 oz Can Mandarin Oranges
  • 2 & 1/2 tbsp Soy Sauce
  • 2 Boneless, Skinless Chicken Breasts, Cut into Bite-size Pieces
  • 1 Tbsp Canola Oil
  • 1/4 Tsp Garlic Powder
  • 1 Cup Chopped Onion
  • 1 & 1/2 c. Frozen Edemame
  • 8 Baby Bella Mushrooms, Sliced
Instructions
  1. Drain oranges, reserving 3 tbsp of the liquid. Mix together the reserved liquid with the soy sauce and set aside.
  2. Heat oil in a large skillet and cook chicken in the oil over medium-high heat until chicken is no longer pink. Remove chicken from skillet. Add in the onions, edemame and mushrooms. Cook until onions are tender.
  3. Add the chicken back in along with the soy sauce mixture. Cook and stir to heat all of it through.
  4. Gently stir in the mandarin oranges right before serving.
  5. Goes well over rice!
Notes

If your group is not a fan of edemame, you can always use frozen snap peas in their place.

Teriyaki sauce can also be substituted in soy sauce’s place.

The addition of a couple drop of sesame oil would also make a nice addition.

Be prepared for a quick meal! This one takes no time at all to whip up!


Like this post? SHARE it!

Related Posts Plugin for WordPress, Blogger...

Slow Cooker Corn on the Cob

So I told you how I’ve been keeping things on the easy side the last few weeks. With Addie starting kindergarten and with family in town off and on these last couple weeks, the cooking has been a little out of routine. Out of routine meaning that I didn’t want to bore my guests with my food portraiture and involvement with my food. So I opted for easy yet tasty.

The other day I was talking to my mom about the Crockpot Baked Potatoes when she mentioned that she had also used her Crockpot to make up some corn on the cob. We usually just pop our corn on the grill when we’re grilling out, but it’s been so hot lately that we haven’t wanted to be outside for more than 10 minutes. Though, it’s FINALLY beginning to cool down just a bit around here. So to save a little propane and heat from the stove or oven, I decided to throw some ears in my slow cooker.

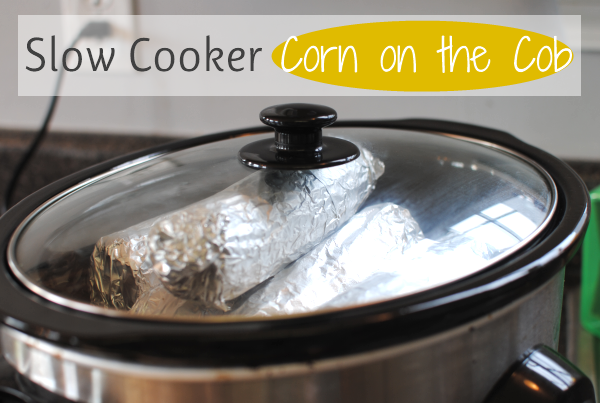
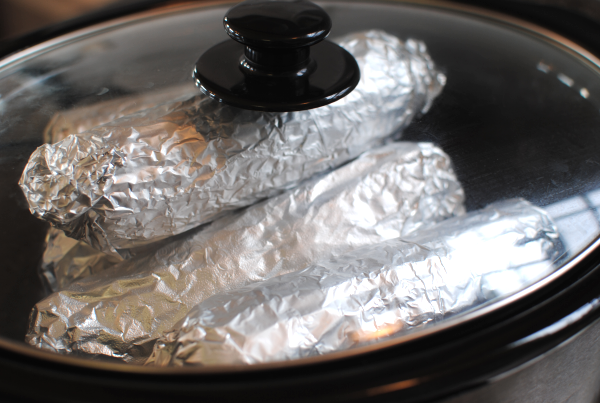
I seasoned them up with a little mayo concoction that I put together, then rolled them up in foil and placed them straight down into the slow cooker. I didn’t add water, I didn’t put anything inside to raise them away from the sides. I didn’t do anything at all, but just let them go. It worked great! The steam from the moisture in the corn is what cooks it.

With sweet corn being so cheap (in places not affected by the droughts), it’s an easy and tasty side dish for just about anything. Plus you can use corn on the cob to make up creamed corn, corn bread or muffins, and more. If you need cooked corn for a recipe and want it fresh, throw some ears into your slow cooker overnight and in the morning you’ll be ready with slow cooked and perfect corn!

Slow Cooker Corn on the Cob
Recipe Type: Side Dish, Crockpot
Author: Pennywise Cook (and Momma!)
Another shortcut idea that makes corn as simple as 1,2, 3 to make!
Ingredients
  • 4 Ears Corn on the Cob
  • 2 Tbsp Reduced Fat Mayonnaise
  • 1/4 Tsp Garlic Powder
  • 1/4 Tsp Onion Powder
  • Dash Salt and Pepper
Instructions
  1. Whip ingredients together and rub 1/4 mixture onto each ear of corn. Wrap in foil and place in slow cooker. Cook on lowest setting for 4-6 hours.
Notes

I used the low setting on my slow cooker, but if you have a “warm” you might consider using that for longer cook times.


Like this post? SHARE it!

Related Posts Plugin for WordPress, Blogger...

Life Is Like An Onion…

…you peel it off one layer at a time and sometimes you weep.

A quote from Carl Sandburg and boy he wasn’t kidding! It’s almost impossible for me to cut an onion without tearing up. Well it just depends on the circumstances. If the onion is very small, sometimes I can manage to chop without weeping.

But the tears aren’t the only problem that I have with onions. My favorite grocery stores like Aldi and Save-A-Lot tend to have 2-3 pound bags of onions on sale a lot. I find that I need a couple onions for my meals during the week and then I don’t use the last 4 or 5 and they go bad! Then the very next week, I’d need more onions and I’d grab another bag and the cycle continued. The frugalista inside me won’t let me just buy how many onions I know I need so just buying a few isn’t an option.

But those days are over folks. This is one of those “duh” tips that I’m sharing today. Even if you’ve thought about it, this might just make you wanna go ahead and actually do it.

Go ahead, buy that bulk bag of onions and feel no shame. Know that not one of those onions will go unused. Know that you have weeks and even months to create a masterpiece with those flavorful veggies.

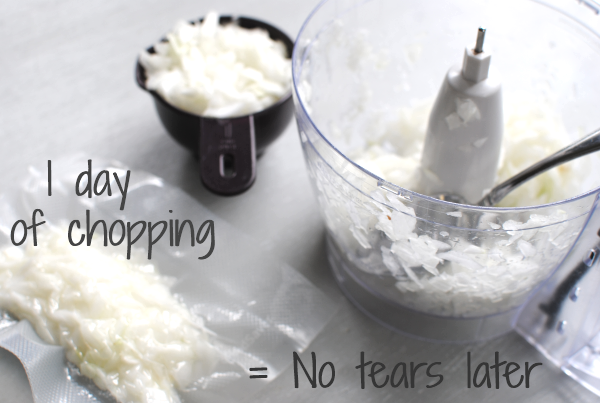
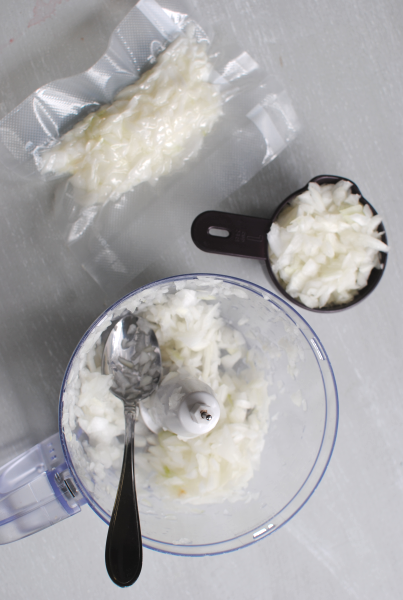
Bust out the food processor and pop your onions in. Chop them up to your liking and then place them in a freezer bag, making sure to remove all the air.

I measured mine into 1 cup portions since that’s the frequent amount that I use. After my day 30 minutes of chopping, I ended up with 12 cups of pre-chopped onions ready to place into a tasty meal. I’ve already used a couple of the portions and I didn’t even thaw them to use them.Β  Though some recipes may need them to be thawed.

So there you have it. A simple tip from a simple mind. Save your time, tears, and most of all MONEY.

And by the way, this would also work with anything other vegetable that you use frequently of course. πŸ™‚


Like this post? SHARE it!

Related Posts Plugin for WordPress, Blogger...

Slow Cooker Pizza Dip

It’s almost football season. Are you jumping up and down? Or are you grunting at the thought of all the money you’ll be spending on beer and the time you’ll lose with hubby because he’s glued to the tube?

We are not sports folk.

My husband could care less about who is playing what or when the game is on. Frankly, neither am I. But there is one thing that I do enjoy and it’s game food. I love making snacks and treats for the big game even though I probably won’t even lay one eye on the TV set. I’ve even thought about having a mock football party just to make cute little treats.

Is that silly? Maybe, but not really if you know how much I love food.

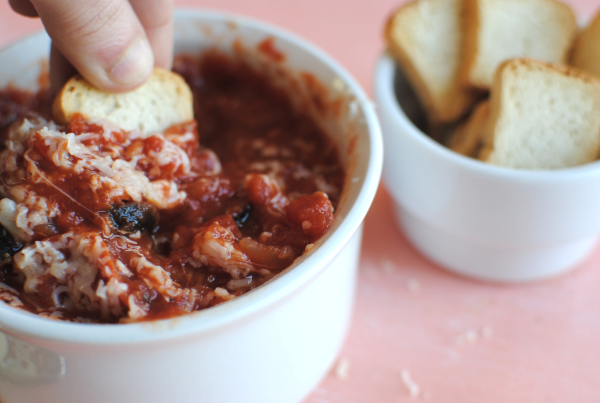
This Pizza Dip is so easy. No crazy ingredients needed and your crockpot does all of the work. You may have seen recipes for Pizza Dip before, but most of them contain cream cheese. Nothing wrong with that, but often times it can add just a bit of fat and calories that aren’t always necessary. I’ve adapted this from the Fix It and Forget It Lightly Cookbook.

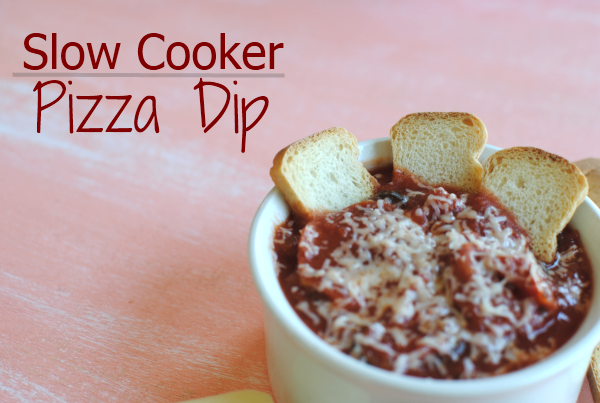
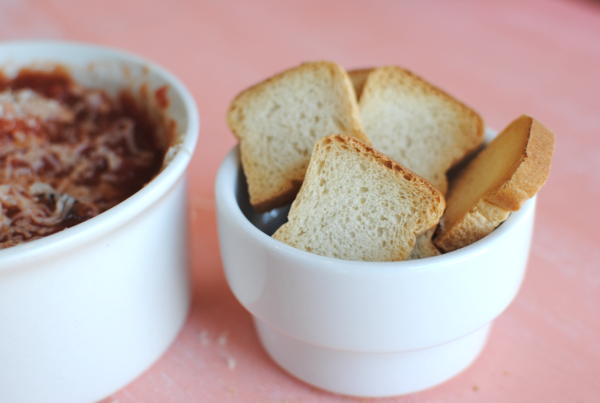
I made this dip recently for a gathering that I had. I had no idea what to serve it with, so I just grabbed some of those little toasts that you find in the deli section of the grocery store. They are like a $1 and are so incredibly cute! I think this is the absolutely best thing to serve this dip with. If you can’t find them, I think that little crunchy bread sticks would also do the trick.

The best part about this dip? It’s low in calories! Less than 100 calories per serving and you can feel absolutely no guilt for eating it. I even used turkey pepperoni to keep it lean. Top it with a little shredded mozzarella and it’s just like eating a pizza but without all of that breading to weigh you down.

It’s the perfect game day snack! Even if you’re not going to watch the game…

Slow Cooker Pizza Dip
Recipe Type: Crockpot, Dip, Side Dish, Appetizer
Author: Pennywise Cook
The satisfaction of pizza without all of the calories and perfect to make for a get together!
Ingredients
  • 28 oz Can Crushed Tomatoes
  • 1 Small Can Sliced Black Olives
  • 1 c. Onion, Chopped
  • 5 oz Turkey Pepperoni, Chopped (or the mini version)
  • 1 and 1/2 tsp Italian Seasoning
  • 1 Tsp Garlic, Minced
  • Shredded Mozzarella Cheese for Sprinkling
Instructions
  1. Combine all ingredients in a slow cooker and cook on low for 2-4 hours.
Notes

My crockpot tends to overheat things, so I have even made this and put my crockpot on warm before and it worked just fine. It also made it possible for me to cook it longer without overcooking it.


Like this post? SHARE it!

Related Posts Plugin for WordPress, Blogger...

Cake Mix Pudding Cookies

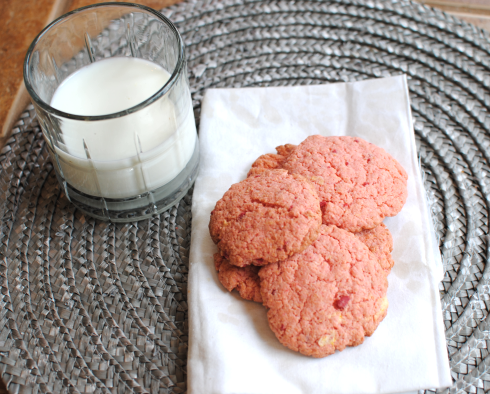
I’ve been on one of those simple kicks lately. You know, when you just want to make things involving little ingredients (and little money) that don’t take much time or effort? Yeah, those dishes make life so much easier. I posted some yummy Strawberry Cake Mix Cookies a while back. They are oh so incredibly yummy I must say.

Not to take away from their tastiness, but I decided to fiddle with that recipe a bit. I omitted the cool whip, egg, and powdered sugar. Then I replaced the egg and cool whip with cream cheese, and the powdered sugar with pudding mix! Much less time to prepare and the possibilities are endless.

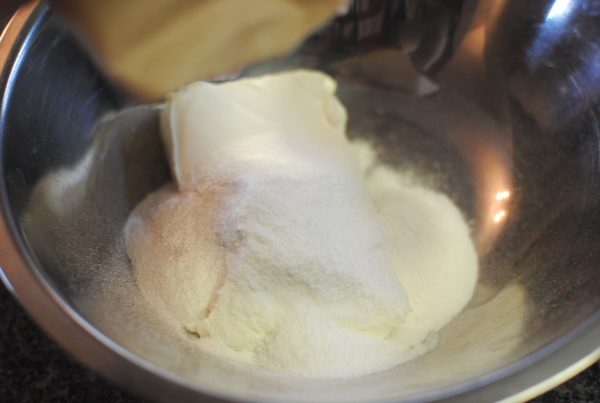
I think my favorite part was that I could put it all in one bowl, pop them on a baking sheet and bake. You simply mix softened cream cheese (I use the 1/3 less fat one) with the pudding of your choice (I used sugar-free french vanilla). Just THINK of those possibilities. I’m so excited to try different flavors. Then slowly blend in the cake mix of your choice.

I went the strawberry route. I thought that the cream cheese and strawberry thing would make them like strawberry cheesecake. But I should have used cheesecake pudding mix. Will do that next time for sure!

The one tip that I will give you to make your life easier when making these, is to flatten them into cookie form before placing them on the cookie sheet. Treat this more like a sugar cookie. They will not rise or go far from how you place them on the cookie sheet. You could flatten the dough out on the counter and then cut perfect little circles out.

If you make a flavor of these, will you share it with me? I’d love new ideas for other kinds!

Cake Mix Pudding Cookies
Recipe Type: Cookies, Dessert
Author: Pennywise Cook
Serves: About 24 Cookies
3 Ingredients and 12 minutes later you have the best cookies with little effort!
Ingredients
  • 1 Box Cake Mix (Your Choice)
  • 1 Box Instant Pudding Mix (Your Choice- Even Sugar Free!)
  • 1 8 oz Package Cream Cheese, Softened
Instructions
  1. Preheat oven to 375 degrees. Cream together the cream cheese and pudding mix. Slowly mix in the cake mix.
  2. Form into balls and then into 2 inch flat cookies and place on greased cookie sheet.
  3. Bake 12 minutes or until they begin to brown.
  4. Let cool and serve!

Like this post? SHARE it!

Related Posts Plugin for WordPress, Blogger...

Sugar-Crusted Blueberry Muffins

I’ve always been a fan of blueberry muffins. You’d never know it. I can probably count on 1 hand the times that I’ve ever made them from scratch. The box mixes just make lifeΒ  so much easier don’t they? Sure, but do they give as much satisfaction as saying that you “made them from scratch”? Sometimes it really just doesn’t matter though. You’re tired, the kids are hungry, you just want a muffin!Β  A very sweet friend of mine mentioned how much she loved Perkin’s muffins the other day. There’s one in my hometown where we visit often, but there aren’t any around here.

Apparently their Mammoth Blueberry Muffins are to die for.

My sweet friend seemed like she needed a little pick me up, so I decided to check around for a copy cat recipe of their famous muffins and whip some up. To my dismay, none of them really seemed to sound like they actually mimicked Perkin’s muffins. I decided to shy away from getting them just like Perkin’s and come up with my own kinda muffins.

These turned out so absolutely fantastic! I really love when that happens. The stress of trial and error is surpassed with success. And boy were these a success. The breading part of these muffins is almost cakey thanks to a secret ingredient (which is not so secret anymore), sour cream. Not exactly something you’d expect to pair with blueberries, but tasty all the same. They boast a gooey blueberry jam filling and that’s in addition to the blueberries themselves, dispersed among the batter. What could top these better than a coating of sugar that has baked into a crust on top of the blueberry goodness?

A smear of butter while they are still warm, maybe.

Oh and I forgot to mention that these are in fact, mammoth. The batter only made 6 of a huge pan of muffins. So you’ll either have to make a second batch or prepare to share.

Sugar-Crusted Blueberry Muffins
Recipe Type: Breakfast, Dessert
Author: Pennywise Cook
Ingredients
  • For the Muffins
  • 2 cups flour
  • 1 cup sugar
  • 1 tsp baking soda
  • 1 tsp baking powder
  • 1 tsp vanilla
  • 1/2 tsp lemon extract
  • 2 eggs
  • 1 c sour cream
  • 1 cup blueberries
  • For the Filling
  • 1/4 c blueberries
  • 1/4 tsp cornstarch
  • 1 1/2 tsp sugar
  • For the Topping
  • 1/4 Tsp Sugar
Instructions
  1. Preheat oven to 375 degrees.
  2. Combine all muffin ingredients except blueberries in a bowl and mix well. Stir in1 c. blueberries.
  3. Meanwhile, microwave 1/4 c. blueberries with cornsstarch and sugar for 20 seconds at 50% power. Remove, much and stir and then continue microwaving for increments of 20 seconds until thicken and jam-like.
  4. Pour muffin batter in large, 6-ct muffin pan and create small wells in each.
  5. Using a piping bag or ziploc bag, fill each muffin’s well with filling.
  6. Sprinkle each with 1/4 tsp sugar.
  7. Bake for 22 minutes or until tops are golden brown.
Notes

Note- if you use smaller muffin tins, you may need to adjust your cooking times down.


Like this post? SHARE it!

Related Posts Plugin for WordPress, Blogger...

DIY Large Graphic Wall Sign

Since my hubby was out of town for a few days, I must admit that I’ve been quite lax on cooking. It’s nice to take a break from it every now and then. In fact, our meals for the last few days have been mainly out of the most clever invention ever…..the microwave. I’m really not sure where I would be without it.

I’m back up and cooking now so you know I’ve got some good recipes on the way. But for now, I have a really cool DIY project for you that my husband and I did one weekend. I LOVE our sign! I look at it every morning when I wake up and every night when I go to bed. Shoot, I look at it when I walk in the room and when I’m walking out.

It demands attention. I love statement pieces like that.

I wanted to make one of these as cheap as I possibly could because 1) I’m just a cheapo and 2) because I like a challenge. I priced a lot of the materials at a few different stores. My main concern was the lettering. I wanted letters that weren’t too boring and I knew that I needed a lot of each. To my surprise, a pack with just 4 E’s was $8 bucks! And that wasn’t even a cute font either. There was no way that I was going to pay $40 for just the letters.

So I opened up Microsoft Word and went to work. πŸ™‚

You may remember me mentioning one of my favorite Bible verses when I shared my Random Acts of Kindness. If not, here it is again.

But the fruit of the Spirit is love, joy, peace, patience, kindness, goodness, faith,gentleness, self-control. Against such things there is no law.

– Galatians 5:22-23

Those words pack a wallop don’t they? Can you imagine practicing each one every single day? Seems to me that I need a reminder because it’s just not easy. So I decided that those words would make a great sign for our bedroom wall. Here’s how we did it…

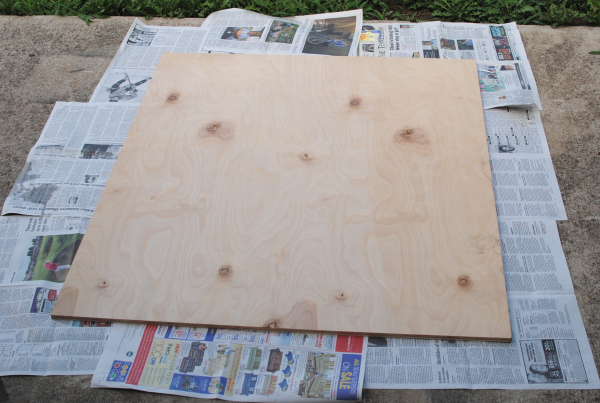
It all began with a very large piece of untreated white wood from Lowes. This one cost me approximately $13. It was a HUGE board and I even had 8 inches cut off of it to make it more rectangular.

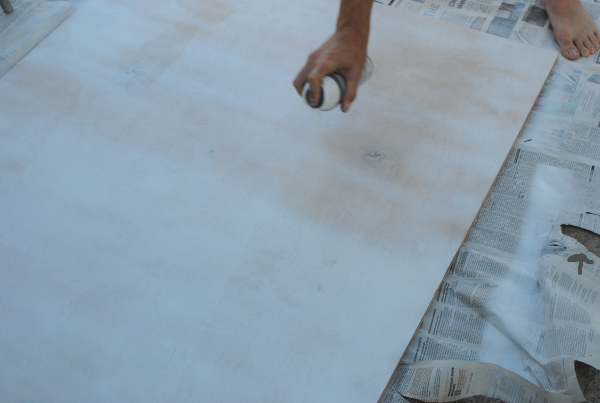
Then we used a $3 can of white spray paint to be the base of the sign. It’s essentially what the color of the letters will be when we’re done. I considered using latex paint to do this project, but in the end I figured that spray paint would be quicker with more coverage.

See that arrow there on the right of the picture? That is where the newspaper became attached to hubby’s foot because he stepped in wet spray paint. Moral of the story? Don’t spray in bare feet. πŸ™‚

I didn’t take any pictures of the next step because it wasn’t a happy time. Cutting out a billion paper letters including many with holes is not fun. I’ll spare you the sweet talk and be honest with you. It’s work, but it’s cheaper and highly worth saving $40. At least to me and my cheap brain.

So we cut out the letters and taped each one down using only tape on the backside of the letters. Sorry that this picture is so dark. By the time that we got the letters done it was dark. I knew this wasn’t exactly the best way to do it, but I also knew that I could try to make it work. Where there’s a will, there’s a way you know. πŸ˜‰

The next morning, I got out my 2nd can of $4 spray paint from Lowes and went to town going over the letters. I loved this color. It Valspar Satin Interior called Thorny Brush. Perfect color for my bedroom. As I was spraying, I could tell that the spray paint was going under my tape a bit. There was definitely more work to be done…

Here’s a close-up of what the letters turned out like once the paint was dry. See the spots where the tape was? It really bothered me so I went over all of the letters with a small brush and some leftover white paint that I had.

That wasn’t a very fun process either. I totally forgot to take a picture of it. But I did remember to take a finished product shot! Here’s what it looks like all pretty and on the wall. We used plain jane screws to attach it straight to the wall. We’ve been having things with chain from the ceilings around here lately so that crossed our mind. But I didn’t want the sign just hanging and knocking against the wall, so we went with the easy route.

We aren’t professionals by any means so I’m sure that most could probably make theirs look a lot better. But for only about $20 and a little hard work, it’s a beautiful reminder on our bedroom wall! We LOVE it!

What do YOU think of it? I’d love to hear!


Like this post? SHARE it!

Related Posts Plugin for WordPress, Blogger...

3-Ingredient Lady Fingers

Y’all know I’m a big fan of my sweets. Did you see yesterday’s recipe? I especially love recipes that don’t include many ingredients. In most cases that means that it will cost less to make and it will take less time. Cheaper and I can eat it sooner? My kinda recipe.

I can’t take credit for these sweeties today. I found this one inside the Fite for Your Life II cookbook by Janis Forbes Fite, RN. It’s a really good cookbook for low-fat and simple recipes. And she’s from my home town!

These are SO simple and perfect for a brunch, baby shower, or tea. Very light and airy and made out of things you probably have on-hand. It starts with day old white bread. Now I’m not going to lie. My bread wasn’t old. In fact, I bought it the day that I made these. So I just popped them into the toaster for a taddy bit to get them a little “stale”. Worked like a charm, but had me considering the need for a 4-piece toaster. It took a while to toast up all that bread.

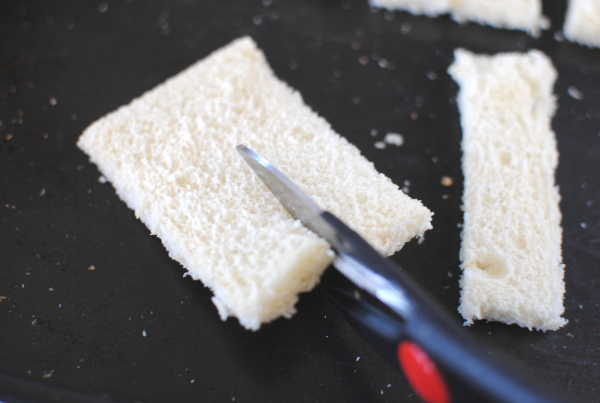
So, start by cutting the crust off every piece. This will leave you with a lot of leftover crusts. You can simply eat them as you cut them off as I did. Or consider some of the options below:

  • Pop them into the food processor to make your own bread crumbs.
  • Dip them in melted butter and sprinkle with cinnamon and brown sugar, then bake at 350 degrees for 20 minutes or so. Tasty sweet treat!
  • Use them to make stuffing (or dressing as we call it in the south)
  • Use them to make bread pudding.
  • Freeze for later to make any of the above!

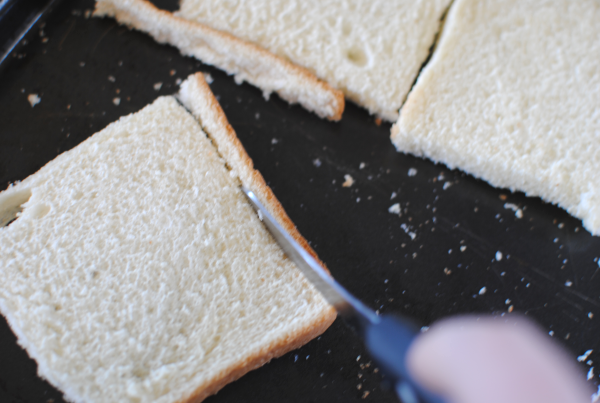
Cut each piece into 3 “fingers”. I used my kitchen shears and that worked really well to get straight pieces. Nobody wants a crooked finger! πŸ˜‰

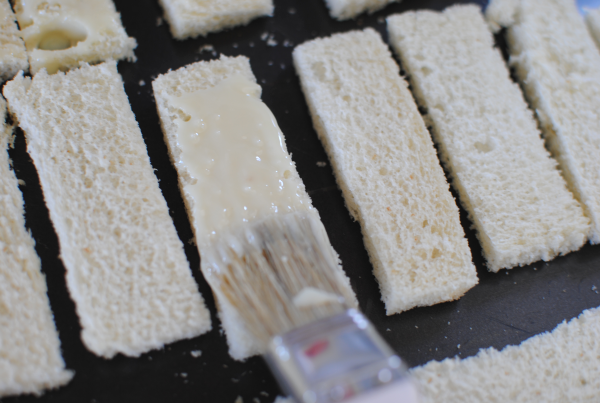
Enter, sweetened condensed milk. The fat-free kind that is. Using a pastry brush or whatever kinda brush you’d like, spread a generous amount onto each piece. This is what gives it that yummy sweetness.

Sprinkle on some brown sugah too…

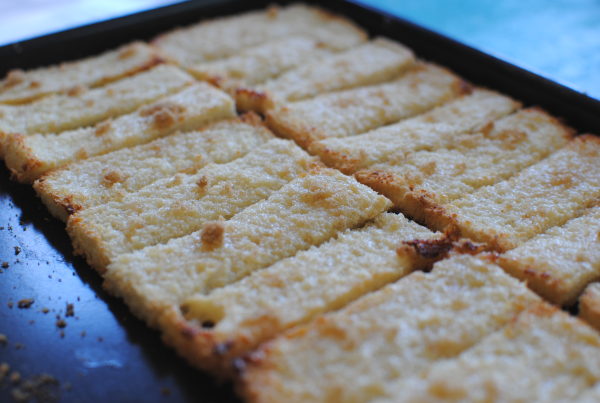
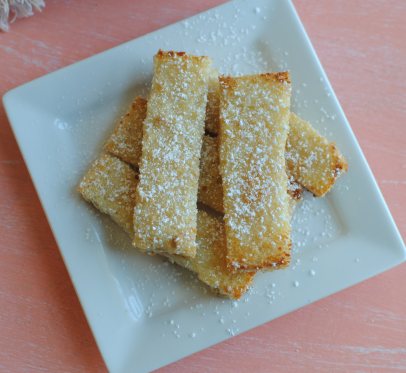
Oh yeah. Pop those loves into the oven and let them get all brown and crusty.

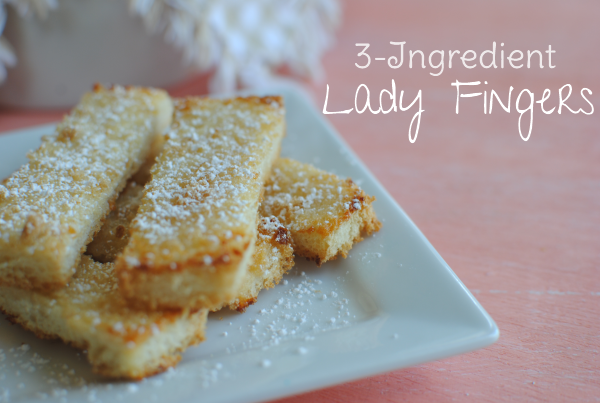
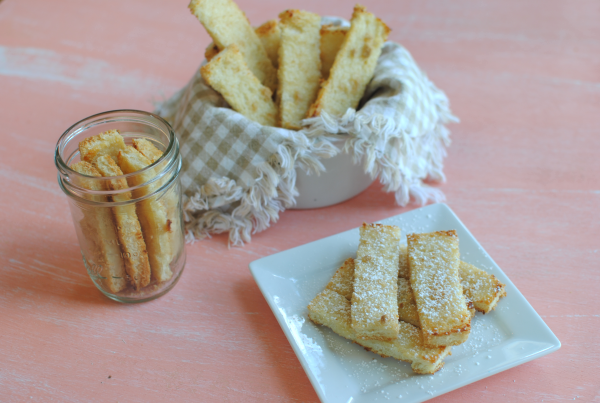
And if you’re like me, you’ll sprinkle on a little powdered sugar just because. They are so good! Maybe not exactly like other Lady Fingers that you’ve had. But hey, with plain old (literally) white bread and a couple other simple ingredients, you just can’t beat it.

3-Ingredient Lady Fingers
Recipe Type: Dessert, Snack
Author: Fite for Your Life II Cookbook- Janis Forbes Fite, RN
Using day old white bread, sweetened condensed milk, and brown sugar you can create Lady Fingers in no time flat.
Ingredients
  • Day Old White Bread
  • Sweetened Condensed Milk (Fat-Free)
  • Brown Sugar
Instructions
  1. Preheat oven to 350 degrees. Trim the crust off bread. Cut each piece into 3 fingers.
  2. Brush each generously with sweetened condensed milk. Sprinkle each with brown sugar.
  3. Bake for 10 minutes or so until golden and bubbly.
Notes

The reason there are no specifics amounts listed on this recipe is because it is completely up to you how many you make. I didn’t use an entire loaf of bread or an entire can of sweetened condensed milk. 1 can will go a very long way. You can probably make 50- 100 with 1 can.

Store in an air-tight container or bag.


Like this post? SHARE it!

Related Posts Plugin for WordPress, Blogger...

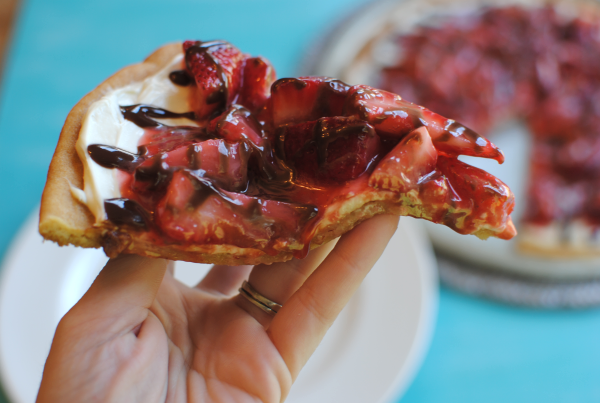
Chocolate-Covered Strawberry Pizza

There are two things that you’ll notice right off the bat about the picture above. 1) That it’s pizza and 2) there are strawberries on that pizza! But the one thing you won’t exactly pick up from that picture is that crust isn’t just any crust.

It’s COOKIE.

Yes, we’re talking a soft and sweet tasty cookie to make the base for this incredible dessert pizza. And who needs tomato sauce when you can have a vanilla cream cheese sauce on top of your cookie crust? And instead of anchovies or ridiculous pepperoni, let’s top it with strawberries and then drizzle those with creamy chocolate ganache shall we?

And the next step is to make sure to alert the others in your household that it’s there. Otherwise you might find yourself eating this entire pizza yourself.

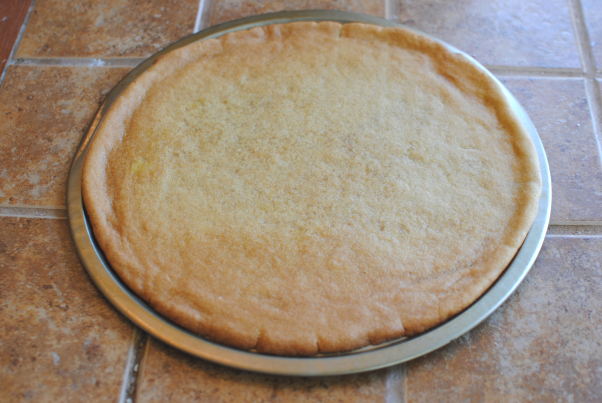
It all starts with something extremely easy, (dare I say) store-bought sugar cookie dough. I got lazy and this whole idea came to me when I was staring at the cookie dough section at the store. So feel free to make yours from scratch if you wish. I’m sure it will make it all that much tastier.

Simply place it onto a pizza pan and flatten away. Bake it according to the directions on the package or your recipe, you overachiever. πŸ˜‰ I left mine just a tad bit soft so that it would still have some give similar to breaded crust.

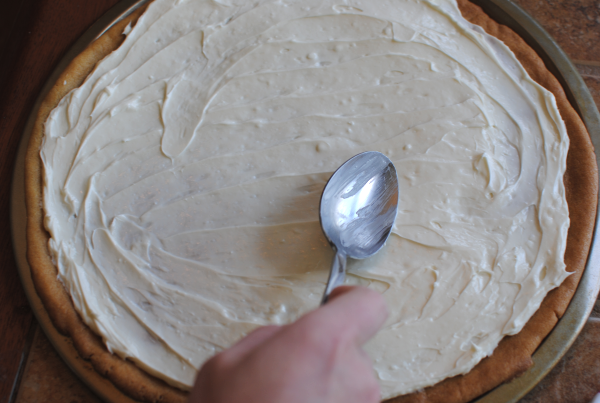
Then using a spoon that you’ve clearly been licking, spread the yummy vanilla cream cheese onto your crust.

After making up your strawberry sauce, spoon it onto your cream cheese and get ready for the chocolate baby.

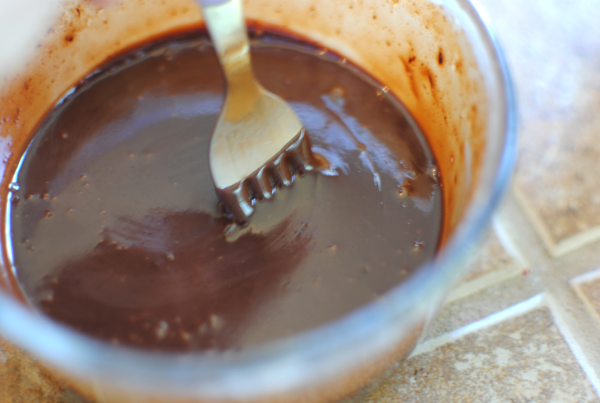
This chocolate ganache is as simple as it gets. Cream and semi-sweet chocolate chips are a match made in heaven. Drizzled over strawberries on this pizza, they are heavenly for sure.

Do you see what I’m talking about? It just doesn’t get any better than this.

Well maybe it does. If you had a piece like this in your hand! Check out Aldi and their strawberry deals. They always have them cheap!

Chocolate-Covered Strawberry Pizza
Recipe Type: Dessert, Pizza
Author: Pennywise Cook
Pizza isn’t just dinner anymore, it’s dessert too!
Ingredients
  • 1 Package Sugar Cookie Dough
  • 2 Cups Capped, Hulled, and Chopped Stawberries
  • 1 8 oz Package Cream Cheese (I use 1/3 less fat kind)- Softened
  • 1/2 Cup Splenda + 1 and 1/2 Tbsp Splenda
  • 1/2 Cup Heavy Cream
  • 1/4 Semi-Sweet Chocolate Chips
  • 2 Tbsp Water
  • 1 Tsp Cornstarch
  • 1/2 Tsp Vanilla Extract
Instructions
  1. Prepare cookie dough according to directions, but place on pizza pan to cook. Let cool.
  2. Meanwhile, whip cream cheese, vanilla, and 1/2 c. Splenda together. Spread onto cooled cookie crust.
  3. In a small saucepan, combine 1 and 1/2 tbsp Splenda, strawberries, water, and cornstarch. Bring to boil, then simmer for 5-6 minutes. Let cool.
  4. Pour over cream cheese taking care to not cover the entire cream cheese area.
  5. In a microwave safe dish, heat cream for 1 minute or until boiling. Place chocolate chips in cream and let sit for 2 minutes. Begin to shake the bowl allowing the chips to begin to melt. Don’t stir just yet. Microwave another minute, then stir together. Allow to cool for a bit.
  6. Drizzle chocolate over pizza. Cut into slices and serve!
  7. Keep refrigerated.

Like this post? SHARE it!

Related Posts Plugin for WordPress, Blogger...

Hair Cuts, Ear Infections, and Squash

Yes, I’m still around. Is my sanity? No, but I’m making it.

My husband left for a business trip just as a double ear infection set in on my little one. Not sure why this particular one has decided to be the worst, but I think we might be over the worst of it. My children always tend to run really high fevers no matter what they have so I immediately jump to high alert trying to figure out what it is. It usually ends in a doctor visit and the impending It’s a virus and it’ll have to run it’s course from the doc. Or it ends in antibiotics and horrible diaper rash from the other impending situation….diarrhea. Oh the joys of motherhood, right?

On a less runny note….

I

HAVE

SQUASH!

Forgive my excitement, but one of my tomato plants died and I should’ve had a funeral for it. Instead, the result was a tiny tomato that was so small that my mom thought I was growing grape tomatoes. When “harvesting” my one little tomato, I asked my oldest to carefully take it inside. She proceeded to throw it in the air and exclaim that “she can play ball with it!” My heart sunk and then I calmly removed my poor little tomato from her fingers and took it inside. You’ll be glad to know that it survived the game of catch and that it’s sitting on my kitchen counter.

I can’t even eat it. It’s too special.

Sooooooooo, long story short. I have actual squash growing now! I have a few of them, actually. Isn’t it cute? I’m so proud. You may remember that I hated on bees because of their lack of help in my squash growing processes. I think they must have read that post and sent out their queen bee to do some quality control on my garden. I can’t wait to make up some of that yummy oven “fried” squash from my own garden!

Hair cut…yes I got one. It’s very, very, very, very, very (plus about a million more verys) short. Probably the shortest that I’ve ever gotten it cut. Probably not even as short as you would think, but short to me anyways. I also got highlights because it came with my Plum District package. It was a fantastic deal. $52 for shampoo, conditioning treatment, cut, and partial highlight. I had Plum Dollars so I actually didn’t have to pay anything at all. Which made it ok that I’ve already dyed it back to brown.

Yes, I couldn’t stand the highlights. I’m ridiculous and wishy washy I know. But it was free and the highlights washed me out.

So there’s an update on my life. I hope that all of that didn’t bore you…

I’m very random aren’t I? How is your week going? SHARE with ME! πŸ™‚


Like this post? SHARE it!

Related Posts Plugin for WordPress, Blogger...