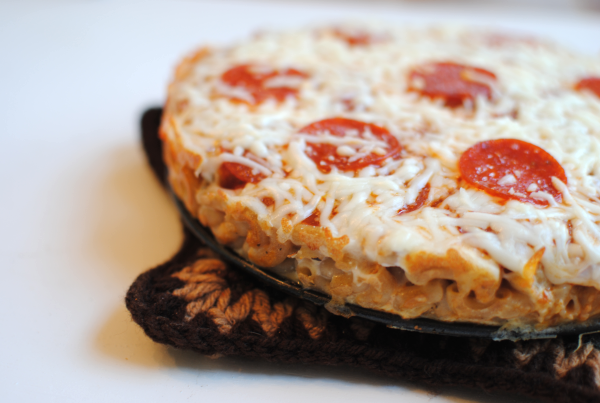
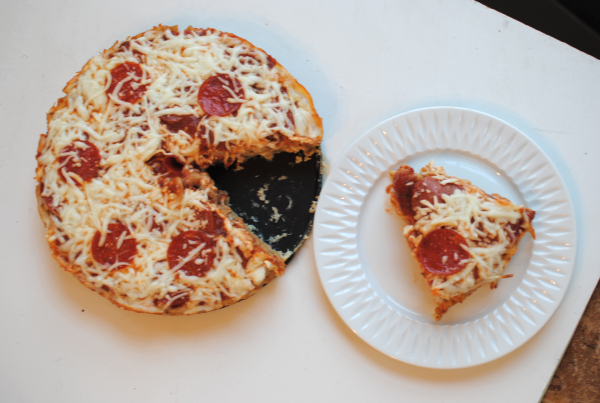
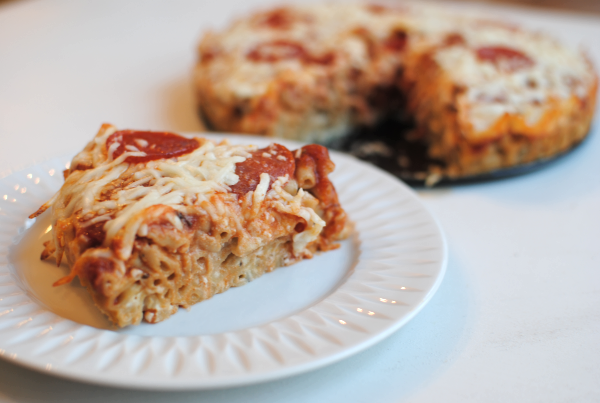
Macaroni Crust Pizza

One of the cheapest meals that I know how to make is pasta. You can always find a deal on dry pasta just about anywhere you go. Have a coupon? That’s even better! My favorite is when Publix puts pasta BOGO and you can get it next to nothing. I usually stock up and when I need something quick or easy during the week, it’s a no-brainer.

My favorite part of pasta is that it is SO versatile. You can basically make it into anything or put anything in it. This is what makes it so great for budget meals and for those who have picky eaters in the fam.

I can’t take credit for today’s recipe. I adapted this recipe from The Dieter’s Cookbook from 1982. I can’t believe that I’ve never thought of this. I’ve made pizza pasta many times before, but never thought of making macaroni the “crust” of a pizza. I cannot stress to you how much my family liked this. Easy, cheap, and incredibly tasty you really do have to try this one y’all!

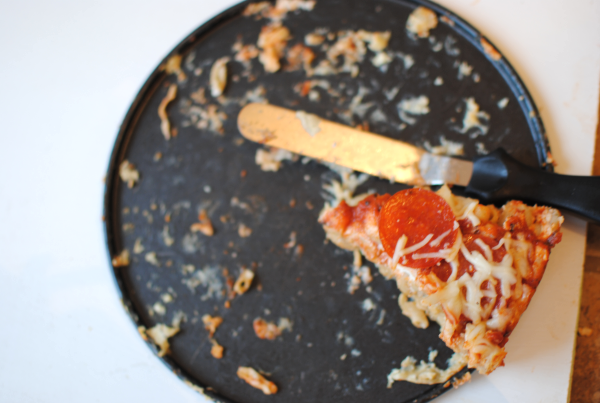
I take that back. Remember how I said that I couldn’t describe to you how much my family liked this? Well instead, here’s an illustration! This is all that was left from one sitting of this Macaroni Crust Pizza. It is that good.

And it’s actually a decent recipe for those watching their calories. Well, as long as you don’t eat as much as we did. 🙂

Just make it. Then come back here and leave a comment about your family’s reaction!

Macaroni Crust Pizza
Recipe Type: Main Dish, Pasta
Author: Pennywise Cook adapted from The Dieter’s Cookbook 1982
This cheap and easy meal is a tasty twist on regular pizza!
Ingredients
  • 2 c. Elbow Macaroni
  • 2 Eggs, Beaten
  • 1/2 c. Mozzarella Cheese
  • 1/4 c. Parmesan Cheese, Grated
  • 2 oz Pepperoni
  • 1/4 c. Skim Milk
  • 1/2 Tsp Dried Basil
  • 1/2 Tsp Dried Oregano
  • 1/8 Tsp Pepper
  • For Topping
  • 1 Egg, Beaten
  • 1/2 c. Reduced-Fat Ricotta Cheese
  • 1 Jar (8 oz) Pizza Sauce
  • 1 c. Mozzarella Cheese
Instructions
  1. Preheat oven to 375 degrees. In a large saucepan, cook macaroni according to package. Drain well.
  2. In a mixing bowl, combine 2 eggs, 1/2 c. mozzarella cheese, Parmesan Cheese, milk, basil, milk, and pepper. Add macaroni to this mixture and combine well.
  3. In a greased springform pan, place the macaroni mixture into a “crust” form. Bake for 10 minutes.
  4. Meanwhile, in a bowl combine the 1 egg and ricotta cheese. Once “crust” is out of the oven, pour this mixture over the top and evenly spread. Pour the pizza sauce over the top and sprinkle with mozzarella cheese. Top with pepperoni.
  5. Return to oven for 10- 15 minutes or until heated through. Let stand 10 minutes before slicing.
Notes

This could easily be made without any meat for vegetarians!


Like this post? SHARE it!

Related Posts Plugin for WordPress, Blogger...

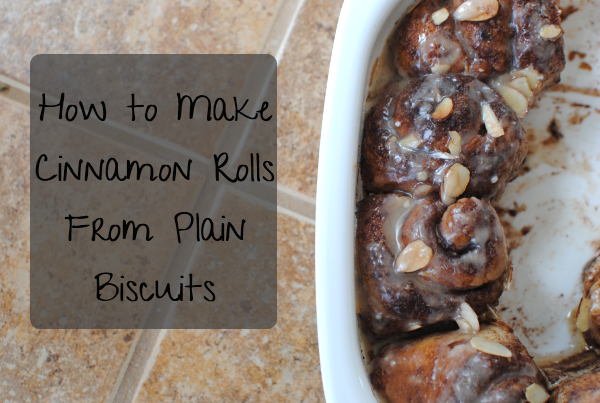
{Kitchen Tip} Cinnamon Rolls from Plain Biscuits

I told you yesterday about my surprise party and sudden house guests. I was so excited to have them since I don’t get to see my sister, niece, and nephew very often. It’s always so fun when cousins get together. They got to have a sleep over and to our surprise, they actually went to bed before midnight.

In the morning, I wanted to make up some breakfast for everyone but I wasn’t sure if cocoa pebbles would fit the bill. So I scoured my refrigerated and found some biscuits that I had gotten for cheap when they were on sale. You know those Pillsbury ones go on sale for $1 all the time and you can get them even cheaper with coupons. I assessed my bacon and egg situation and alas, there just wasn’t enough to make a real breakfast.

I checked out Google and adapted this recipe from Healthy and Homemade’s idea for cinnamon rolls made out of regular biscuits. I had all of the ingredients and didn’t have to make up any special dough which really cut down on the time.

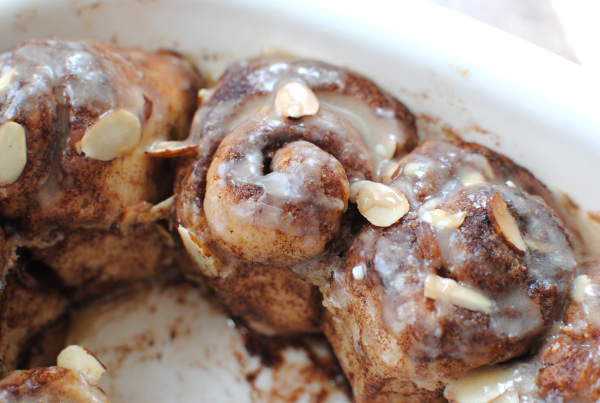
They were so easy and the perfect breakfast in a pinch. We don’t eat cinnamon rolls too often around here so we don’t usually have them in the refrigerator. But for times like this when you need a last minute breakfast, this recipe is perfect.

{Kitchen Tip} Cinnamon Rolls from Plain Biscuits
Recipe Type: Breakfast, Brunch
Author: Adapted from Healthy and Homemade
Cook time: 20 mins
Total time: 20 mins
Need a fancy breakfast in a pinch? Whip out the biscuits and make your own cinnamon rolls!
Ingredients
  • For the Cinnamon Rolls
  • 7.5 oz Can of Biscuits
  • 2 Tbsp Butter, Melted (I used Blue Bonnet Light)
  • 2 Tbsp Sugar
  • 1 Tbsp Cinnamon
  • Sliced Almonds for Topping
  • For the Glaze
  • 1/2 c. Powdered Sugar
  • 1 and 1/2 Tbsp Skim Milk
  • 1/2 Tsp Vanilla Extract
  • 1/2 Tsp Creamy Peanut Butter
Instructions
  1. Preheat oven to 350 degrees. Mix together the cinnamon and sugar and place on a plate.
  2. Open dough and roll out each biscuit into a long cylinder. Dip into butter and then into cinnamon sugar. Gently roll into a pinwheel and place in a greased baking dish.
  3. Follow the same steps until you have finished with all biscuits.
  4. If you have leftover butter and sugar, mix together and pour over the top of the cinnamon rolls.
  5. Bake for 20 minutes.
  6. Meanwhile combine glaze ingredients in a small bowl and brush over cinnamon rolls when they are done.
Notes

You may be wondering about that little bit of peanut butter that made it’s way into the glaze ingredients. I added this for depth of flavor and it was very subtle but yummy. My husband didn’t even notice it until I pointed it out, but he really liked it.


Like this post? SHARE it!

Related Posts Plugin for WordPress, Blogger...

The iPhone Diaries: Kids & TV

Good Tuesday to ya! I’m excited to start a new series of sorts called The iPhone Diaries with you guys. I think it will be an awesome way for you to see me as I am and for me to share my thoughts, blurbs, and other things that come to my frantic mind with you. I also hope that it will encourage you to share your thoughts with me! I really treasure others advice, especially when it comes to this thang called motherhood.

Which brings me to today’s iPhone Diary…..

But first, here are some things that you must note about this vlog:

  • I do not have on makeup and therefore I am in mommy mode. Talk about real. This is what I look like most days.
  • Yes, I have a country accent. It’s part of my southern charm. 🙂
  • It’s taken from my iphone so the cinematography might not be up to par.

Please leave comments! I’d love to know your thoughts!


Like this post? SHARE it!

Related Posts Plugin for WordPress, Blogger...

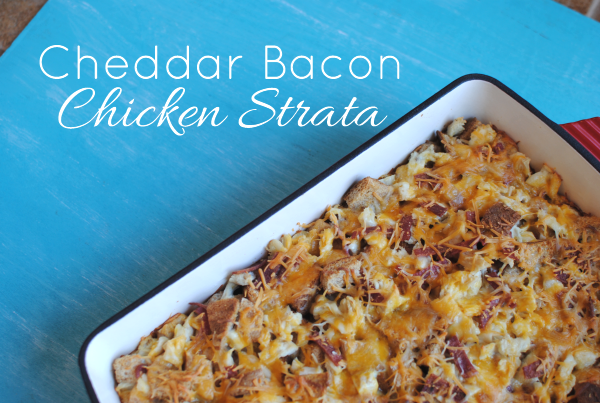
Cheddar Bacon Chicken Strata

Over the weekend, my husband threw me a surprise birthday party. My birthday was Wednesday so I wasn’t expecting anything, but I knew that something was going on. He made up a very silly story to cover up why he didn’t get me mug hooks one day when he went out to “get some fresh air”. He came back and I asked for my mug hooks and he said that Lowes had a hook shortage. LOL Of all places on earth to have a hook shortage.

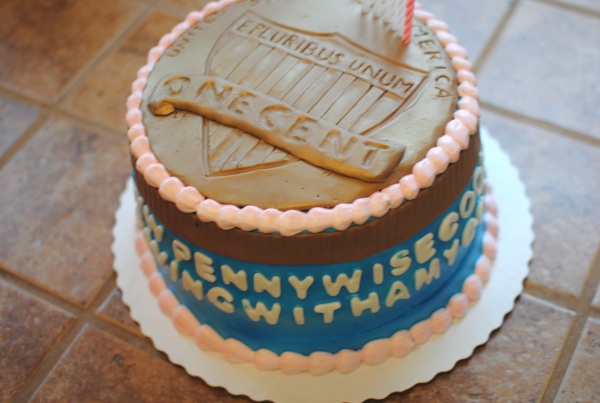
He surprised me with a big party, my sister and the kiddos came all the way from 2 hours away, and this fabulous cake.

What do you think? Is that not so thoughtful and perfect? The penny idea was spot on. I reached over and pinched my penny…cake a few times. 🙂

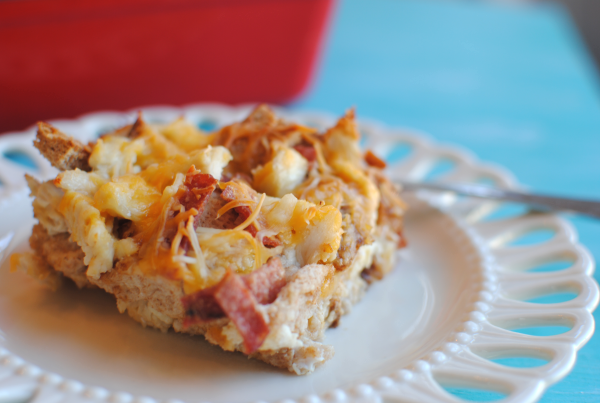
One meal idea that I always know will be a winner on basically any night of the week is breakfast. I love to cook breakfast for dinner because I know that there will be absolutely no opposition to eggs, bacon, biscuits, cheese, and all of that yummy stuff. It’s so effortless to whip up and makes the house smell incredible.

I found this recipe over at Spark People and decided to add a little bacon to it. Because if you ask me, that was the only thing missing from it. I used turkey bacon as to not add too much more fat. It’s got about 207 calories per serving without the bacon and since I didn’t use that much bacon so I don’t think that it tainted the calories that much.

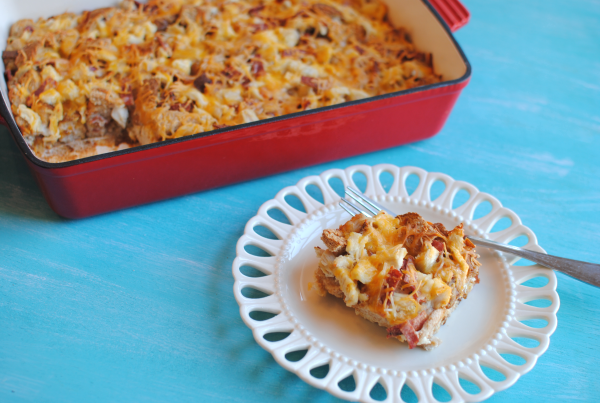
Believe me, you cannot tell that this dish is lower calorie. I mean just look at that. Having chicken in it makes more filling so you won’t have to feel as if you’re not providing enough substance if you make it for dinner.

My favorite part? It’s kinda like a crockpot meal. You put it all together in the morning (or the night before for breakfast or brunch) and let it set and get it’s yumminess on all day. Then when you’re ready to eat, pop it in the oven and bake it to perfection. Simple as pie!

And like I said, it makes my life easier when I know that everyone in my family will like it!

Cheddar Bacon Chicken Strata
Recipe Type: Breakfast, Brunch, Main Dish
Author: Adapted from Spark People Recipes BOWLER729
Perfect for brunch (or dinner), this easy strata is a great make ahead meal that will please even the pickiest eaters.
Ingredients
  • 10 Slices Whole Wheat Bread, Cubed
  • 1 and 1/2 c. Fat Free Cheddar Cheese
  • 1 and 1/2 c. Cooked Chicken, Cubed
  • 8 Pieces Turkey Bacon, Crumbled
  • 5 Egg Whites
  • 2 c. Skim Milk
Instructions
  1. Place half of bread cubes into bottom of a 9×13 greased dish. Add 1/2 of cubed chicken and half of turkey bacon. Top this layer with 1 cup of shredded cheese.
  2. Add other half of bread crumbs, chicken, and bacon.
  3. Beat eggs with the milk and evenly pour over to moisten. Top with remaining 1/2 cup cheese.
  4. Cover and refrigerate for at least 2 hours to overnight.
  5. Preheat oven to 325 degrees. Bake for 45 minutes or until a knife inserted comes out clean.
  6. Let stand 10 minutes before serving.

Like this post? SHARE it!

Related Posts Plugin for WordPress, Blogger...

Peanut Butter Choco-Banana Ice Cream

I am an absolute ice cream fanatic. There, I said it. It’s in my top favorite sweets out there. I have issues practicing portion control when a tub is placed in front of me. So as you can imagine, I try not to get into that position very often.

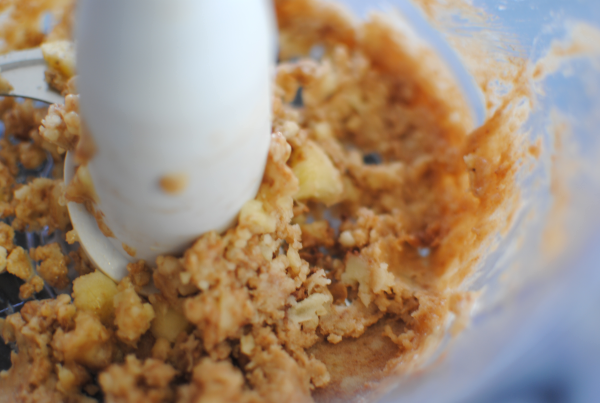
A while back, I shared a recipe for 1-Ingredient Banana Ice Cream over at Saving with Amy. For ice cream lovers like myself, this is quite a discovery that makes eating ice cream a little less guilt-stricken. You see, all it takes to make a batch of creamy and smooth no-add sugar banana ice cream is to freeze a few sliced bananas and then pop them into a food processor!  I know, right?

I can just feel you saying SHUT UP!


But around here, where there’s banana you’ll almost always find peanut butter. They go together like milk and cookies or Lucy and Ethel……..

….or perhaps me and ice cream.

I have a history of pairing peanut butter and banana together.

Exhibit A:

If you’re a fan of the duo, those are some recipes you could try.

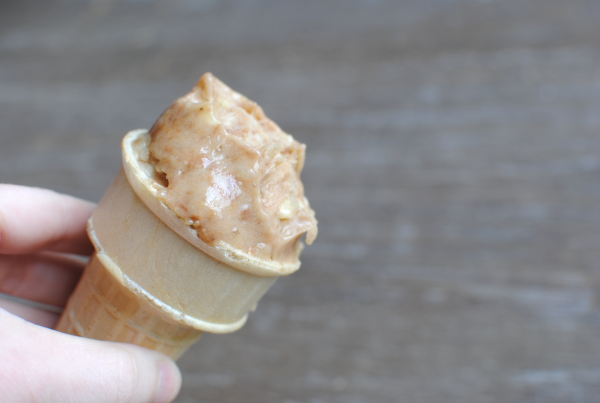
Not only did I add in some peanut butter, I also added in another fave of mine…chocolate! There is nothing better than the combination of those three in harmony taking a dip in my ice cream cone. So soft and creamy.

That’s the stuff! And I just love that this is available whenever I’m ready. The bananas can be frozen for weeks or sometimes even months in the freezer and then popped out to be made into ice cream when you have a craving. And of course, you probably have a little powdered cocoa in the pantry along with some peanut butter.

3- Ingredient Peanut Butter Choco-Banana Ice Cream
Recipe Type: Dessert, Ice Cream
Author: Pennywise Cook
The base of this natural ice cream is simply frozen bananas. Add in some yummy touches like peanut butter and cocoa for an extra treat!
Ingredients
  • 2 Cups Frozen Banana Slices
  • 1 Heaping Tbsp Peanut Butter (creamy)
  • 2 Tsp Cocoa Powder
Instructions
  1. Place the bananas in a food processor and pulse until the bananas start to break up. Add in the peanut butter and cocoa.
  2. Process until small beads are created then scoop into bowl and ice cream and serve!
Notes

I must admit that these are complete estimates for the peanut butter and cocoa. I did not measure exactly but I don’t see how you could really mess this one up. 🙂


Like this post? SHARE it!

Related Posts Plugin for WordPress, Blogger...

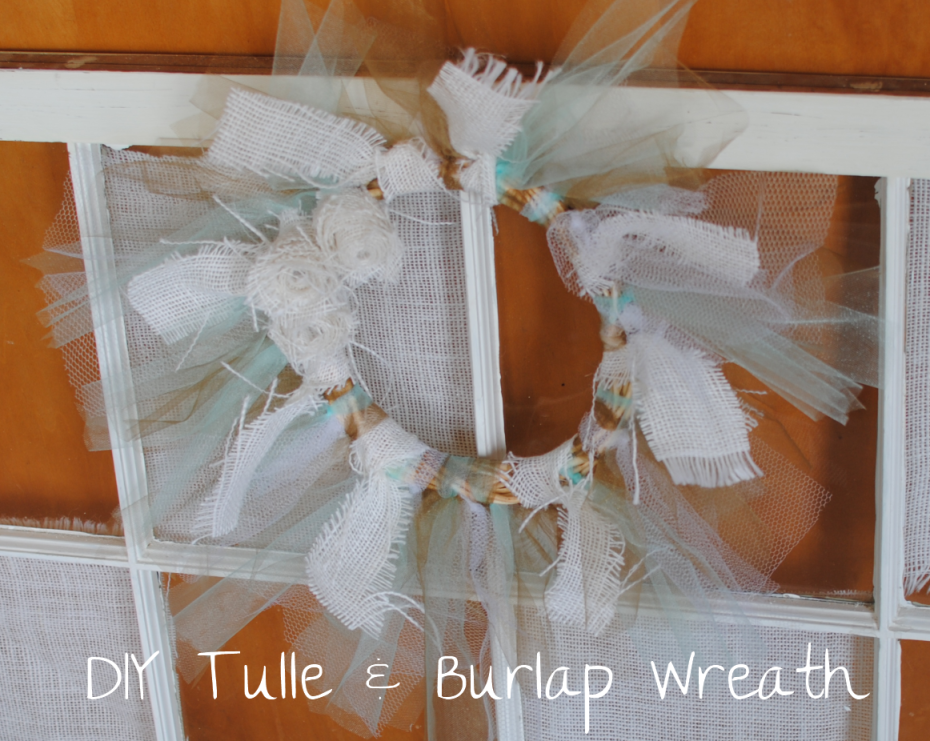
DIY Tulle and Burlap Wreath

I’m at the Dollar Tree a LOT y’all. There is one really close to my house and that’s part of the reason why. The other reason is because they have things for $1 that would most likely cost you more going anywhere else. I could be their spokesperson. I would totally do it for free dollar merchandise too. Maybe a Dollar Tree head honcho is reading this right now and wants to put me in a commercial. I would be ok with that.

I made this wreath a couple of weeks ago using one of those wicker beginning wreaths that you can find at Dollar Tree. I see them there all the time and keep thinking that I could use them in some way and I finally figured out how. I’ve been on a window kick here lately since we’ve been redoing our living room. Hanging random windows from the ceiling is so much fun and a change from plain old pictures hanging on the wall.

Tulle is a very affordable way to make arrangements, wreaths, and other crafts for home decor. It’s usually around $1 per yard at Walmart.  And my new favorite fabric is burlap. It’s so rustic and imperfect. Even with it’s strings hanging down, it’s still nice to look at.

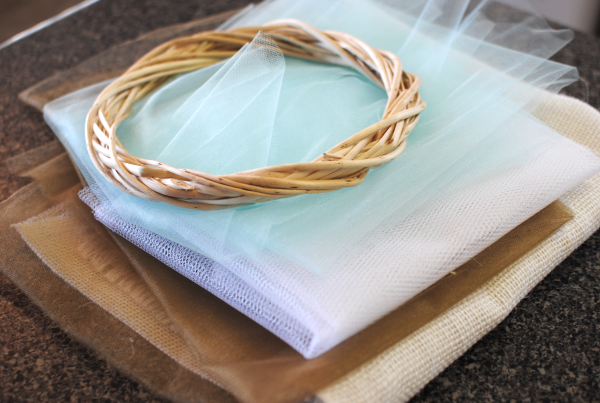
What you’ll need:

1 Wicker beginning wreath
3 Yards Tulle in the color of your choice
1/2 yard Burlap in color of your choice

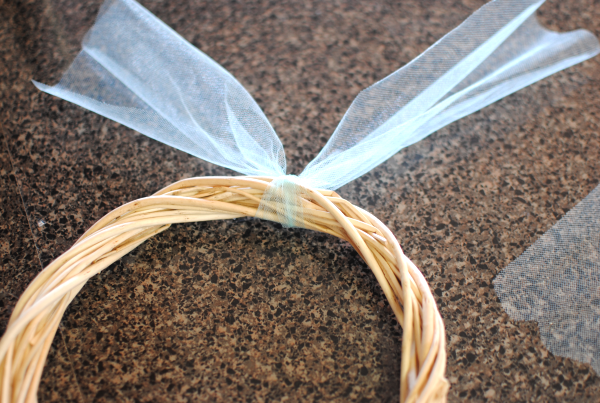
It’s SO simple. Cut your tulle into strips that are the same size. About 2-3 inches wide. You just tie bows and then make a second knot.

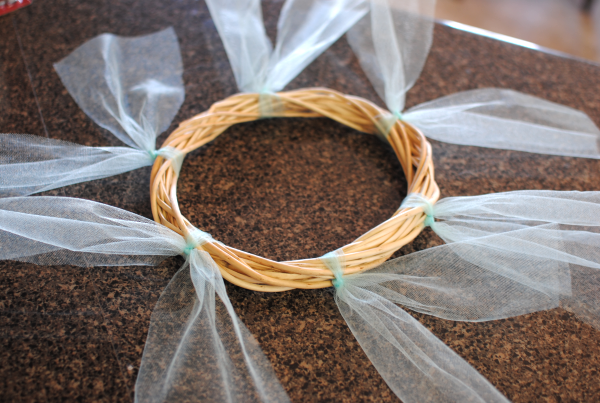
Tie them evenly dispersed around the wreath. Then you can come back with a second color to go in between to add more depth.

Keep going adding in colors where you think they might fit best. It will really start to fill out and then you can add in your burlap ties to make it a little more rustic. I didn’t go too crazy with the burlap strips because a little goes a long way.

But when I was finished I thought it needed a little more burlap so I made up a few burlap roses by simply rolling it up unevenly. They aren’t perfect but they do resemble roses so they will work.

The wreath looks wonderful on my window that I painted and distressed a little. I also added a little burlap behind a few of the panes to tie it all together.

I hope you enjoyed this DIY project. It’s SO easy and it looks just fabulous wherever you put it.

Enjoy!


Like this post? SHARE it!

Related Posts Plugin for WordPress, Blogger...

Friday’s Frugal Finds 7/13

I’m going to start a post on Fridays to highlight some of the deals that I find across the web. I will try to keep them cooking related, but sometimes freebies are worth pointing out so you may find a few of those thrown in as well.

Online Deals

Tanga’s Kitchen Delight Sale through 7/15

  • Top Chef 7″ Santoku Knife $12.95 (reg. $35)
  • Ronco 3 Electric Food Dehydrator Tray $23.99
  • Genius Chef 9-in-1 Cooking Machine $64.99 (bake, boil, fry, slow cook, cook rice/pasta, express rice, steam, stew and reheat)

Houseware Deals (Today Only)

  • KitchenAid 14-Piece Prep Set $40: includes colander; can opener, 4 cup measuring cup; 5 piece measuring spoon set in 1/4, 1/2, and 1 teaspoon, and 1/2 and 1 tablespoon increments; 4 piece measuring spoon set in 1/4, 1/3, 1/2, and 1 cup increments; utility whisk, and kitchen shears

Amazon

Freebies

Fabulous Coupons

  • $.55 off ANY Goober Product- That peanut butter and jelly in one stuff!
  • $.75 off Philadelphia Indulgence Spreads- This stuff is ridiculously amazing.
  • $5 off $25 Purchase at Dollar General for 7/14 only
  • $1.10 off TWO Mott’s Applesauce Singles
  • Up to $1.60 off ONE Smart Balance Spreadable Butter
  • $1.50 off any TWO Select K-Cup Packs

Like this post? SHARE it!

Related Posts Plugin for WordPress, Blogger...

Marshmallow Glazed Oatmeal Muffins

It’s Friday the 13th! Who is up for a Jason marathon? Not me, but the thought sounded fun anyways. 🙂

I always have good intentions, don’t you? It’s funny how things can sometimes work out completely different than you really intend them to. For instance, some days I plan my entire day around cleaning the house. The perfect example of a good intention. And then some unforeseen, crazy, busyness takes over and the dishes pile up while the laundry remains unfolded. But I take comfort in knowing that I really did plan on making my house spotless…. That is, until I can’t see my floor because it’s covered in toys.

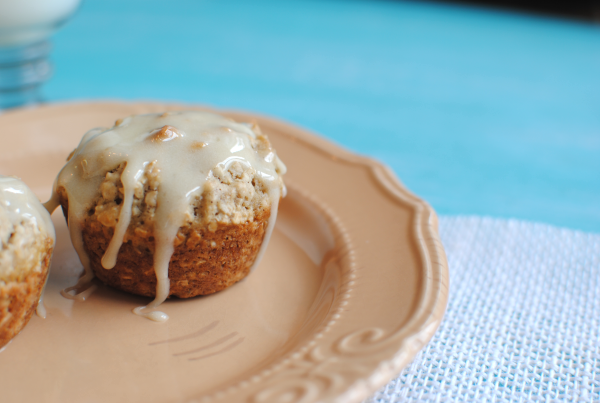
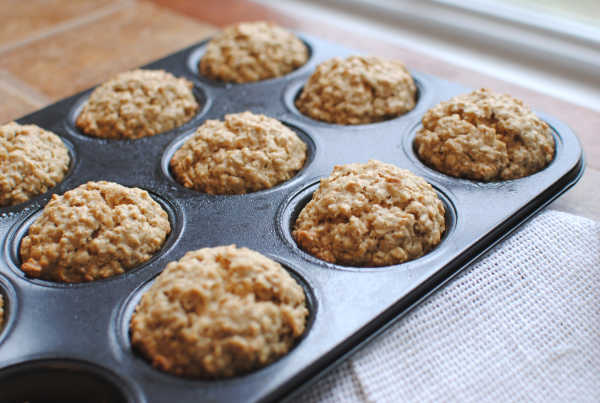
My first intention for this recipe today was to make homemade oatmeal cream pies. And then my second intention was to make oatmeal cream pie cupcakes. They eventually turned into more of a muffin and instead of the everyday marshmallow cream filling, I decided to glaze them. Though they ended up completely different than what I had intended, I must say that they are fabulous just the same!

It might just be impossible to dislike oatmeal muffins. Even those who don’t like oatmeal usually like oatmeal muffins. And if they don’t then they are really missing out my friends. They are dense (the muffins, not the people who dislike them) and yet still so cakey and muffiny. You like those words there don’t you?

Believe it or not, these are actually not that bad calorie-wise. I did what I could to create them with low calorie ingredients, including the glaze. So you won’t have to feel too bad for inhaling a few. The glaze firms up a bit and starts to get back to it’s marshmallow form after they have sat for a bit. My Addie kept laughing because she would get a marshmallow mustache after taking bites.

Just perfect for breakfast or perhaps a brunch, they do have a certain oatmeal cream pie-esqe taste to them. They definitely satisfy my sweet tooth and yet are so filling that I don’t need anything else for breakfast. Except for MILK. You will need milk for sure.

So how do you think my intentions turned out?

Question of the day: Can you count how many times I used any variation of the word intention in this post?

Marshmallow Glazed Oatmeal Muffins
Recipe Type: Breakfast
Author: Pennywise Cook
Prep time: 10 mins
Cook time: 13 mins
Total time: 23 mins
Serves: 11
This muffin recipe intended to mimic oatmeal cream pies takes the famous snack to a whole new level.
Ingredients
  • For the Oatmeal Muffins
  • 6 tbsp butter (I use Blue Bonnet Light)
  • 1/4 c. Unsweetened Applesauce
  • 1/2 c. Brown Sugar
  • 1/2 c. Granulated Sugar
  • 3 Egg Whites
  • 1 Tsp Vanilla
  • 1 and 1/2 c. all-purpose flour
  • 1 Tsp Baking Soda
  • 1/2 Tsp Cinnamon
  • 1/2 Tsp Salt
  • 2 Cups Oats (Quick Cooking)
  • For the Marshmallow Glaze
  • 2 c. Marshmallows (big or little)
  • 2 Tbsp Skim Milk
  • 2 Tbsp butter
  • 1/4 c. Powdered Sugar
Instructions
  1. Preheat oven to 350 degrees. Cream together butter, sugars, and applesauce. Add in egg whites and vanilla.
  2. Sift flour, baking soda, cinnamon and salt together. Slowly add to sugar mixture and beat until combined.
  3. Stir in the oats. Using an ice cream scoop, scoop equal amounts into greased muffin tin.
  4. Bake 13 minutes or until golden brown.
  5. Meanwhile, in a saucepan place the butter, skim milk and marshmallows and cook over medium heat stirring constantly. Once the marshmallows are completely melted and smooth, stir in the powdered sugar.
  6. Remove muffins from oven and place on cooling rack with wax paper underneath. Carefully glaze each muffin and allow to cool.
Notes

This recipe will make about 11 muffins, maybe 12 if you make your batter go further.


Like this post? SHARE it!

Related Posts Plugin for WordPress, Blogger...

I’m Getting a Face Lift!

No, not that kinda of face lift. The kind that makes a blog such as Pennywise Cook cuter and easier to navigate and love even more!

I hope that you’ll bear with me while the changes are being made today. If you notice things a little out of place or a little wonky, know that this is probably what you would expect to see if you came to my house about now and that the websites changes are the reason for it. (Both the messiness of my house AND my blog) I’m super excited about the new site layout and can’t wait to hear what you think!

By the way, we are actually seeing what they call RAIN today! Praise God, I thought that we might never see it again. I don’t have to water my garden today. I’m so darn excited. 🙂


Like this post? SHARE it!

Related Posts Plugin for WordPress, Blogger...

Crockpot French Dip Paninis

I met a sweet girl the other day who was pretty far along in her pregnancy. She already had a little boy and was expecting a brand new little girl soon. We got into talking about cooking (as I cannot help but do) and she described her desire to cook but the lack of time that she had to devote to it. I told her about my love for the crockpot and she made a statement that had my jaw on the floor. She said that she had only ever made one meal in the crockpot.

I know, I know. You can pick your jaw up off the floor now.

It is a little hard to believe, but I think that the norm may be that people think that crockpot means work. When in reality, it’s the opposite. When I’m planning my meals for the week, I plan crockpot meals on those nights that I know will be hectic and too busy for cooking up a meal. If I was smart, I’d make a crockpot meal every night because inevitably most nights end up crazy around here. But the nights that I do make them, it makes life oh so much easier.

Take these super yummy French Dip Paninis for instance. A french dip is definitely a slow cooking process. What makes them so dadgum yummy is that they are tender and juicy so the crockpot is the absolutely perfect way for making the perfect french dip.

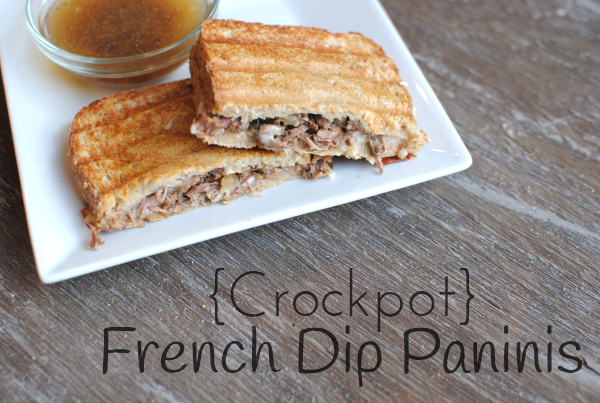
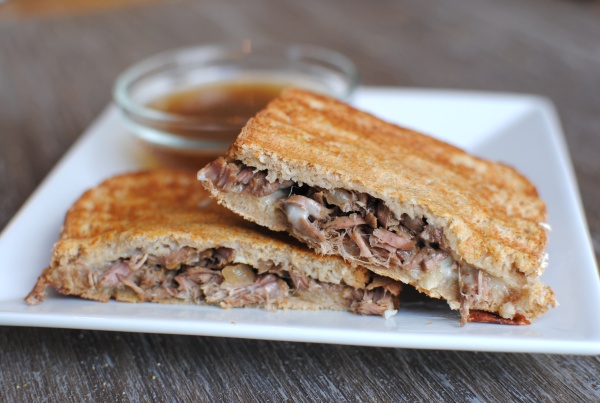
Looking at this panini, you’d never even know that it was packed full of slow cooked, juicy, tender beef and covered in melted provolone cheese…

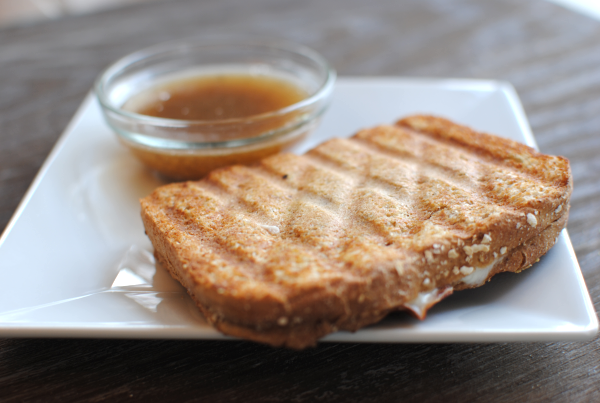
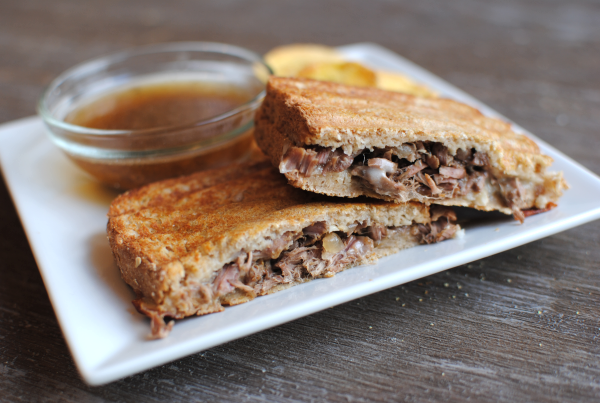
Ah yes, here’s a better view. You can even see a few onions peeking out. I originally planned these to be crockpot subs, but alas the clearance onion buns that I got at Walmart that day were molded by the time I was putting sandwiches together! So I settled on our wheat bread and sprayed it a few times with I Can’t Believe It’s Not Butter. Then I grilled it a few moments on the George Foreman grill.

No need for an expensive panini press, use your George!

And when it comes to meat to make these french dips, use whatever you can find cheap at the store. I used sirloin tip steak this time, but I may use chuck roast next time. I just grab whatever I can find a good deal on. After the slow cooking, it will all pretty much taste the same.

These are a huge hit and a go-to meal for those nights when you don’t want to do any real work in the kitchen.

Crockpot French Dip Paninis
Recipe Type: Main Dish, Crockpot, Lunch
Author: Pennywise Cook
A french dip is as easy as pie when you make them in your crockpot!
Ingredients
  • 1.25- 1.5 lbs Cut of Beef (Your Choice)- Could use Round Steak, Chuck Roast, Sirloin Tip, etc.
  • 2 c. Low-Sodim Beef Broth
  • 1 Medium Onion, Sliced to Thick Rounds
  • 2 Cloves Garlic, Roughly Chopped
  • 2 Tbsp Worcestershire Sauce
  • Salt and Pepper
  • 1/2 Tsp Italian Seasoning
  • 8 Slices Wheat Bread
  • 4 Slices Provolone Cheese
  • Butter Spray
Instructions
  1. Placed onions into the bottom of crockpot. Mix together beef broth, garlic, Worcestershire sauce, salt, pepper, and Italian seasoning.
  2. Place beef onto onions and pour broth mixture over beef.
  3. Let cook on low for 5-6 hours. 30 minutes or so before eating, take out beef and shred and continue cooking.
  4. To make panini, place a scoopful of beef (drained) onto piece of bread. Top with a slice of cheese then second piece of bread. Spray a few times with butter spray on each piece then place on panini press or George grill for a minute or two.
Notes

To be completely honest, I can’t remember if I used 1 or 2 cups of beef broth. I’m pretty sure that I came back and added that second cup because I was concerned that the beef needed more liquid to cook in. You might add 1 cup and see if that is enough and if not add the 2nd cup. Forgive me, forgot to update my recipe as I was going along.

You could also use a can of beef consume in place of the beef broth for a thicker consistency. I plan to try that out very soon. If you do before I do, let me know what you think!


Like this post? SHARE it!

Related Posts Plugin for WordPress, Blogger...