Chili Cheese Fry Cupcakes

I think it’s about time that I shared a bad recipe with you. No, not bad as in it tastes like crap, but bad as in naughty. Oh yeah, you know what I’m talking about.

Try chili CHEESE fries. I’m feeling naughty just typing those words. Every now and then I like to take a break from my vegetable eating, low fat loving, and calorie watching to just make something so incredibly yummy that my toes curl. These Chili Cheese Fry Cupcakes come pretty darn close.

As you’d expect, I used ground turkey which makes me feel just a taddy bit better about them. I also used part skim low-moisture cheese which is also a little better. Besides that, all bets were off.

I started off by microwaving some store-bought steak fries until they were soft. Next time I will be making the fries from scratch in order for them to be softer. These ended up a bit crunchier than I would have preferred, but they were smothered in chili and cheese so I can’t complain too much.

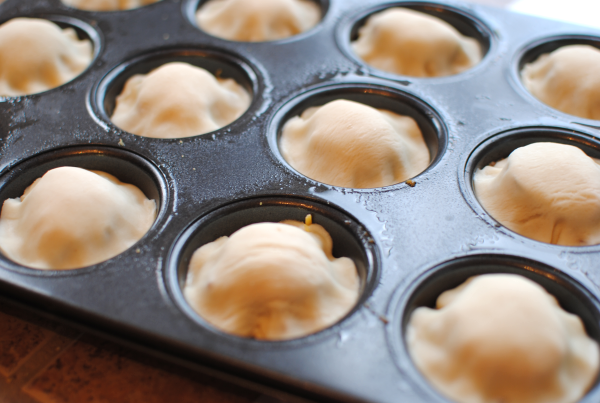
Once the fries are softened, you squish them into muffin tin wells to make the base of your “cupcake”. Believe it or not, but your muffin tin will take an entire bag of steak fries. Then it’s a matter of baking them a bit and letting them cool a minute before topping them with your fantastically easy homemade chili and melty cheese.

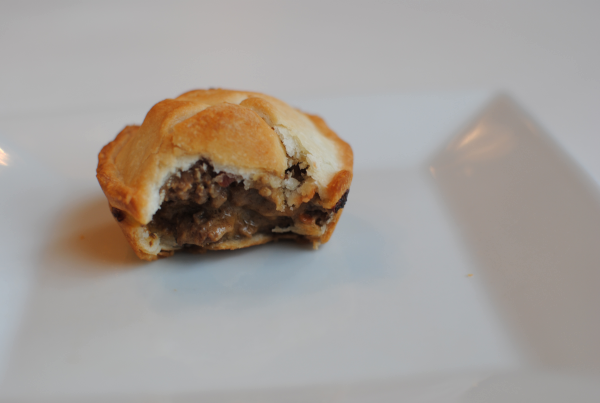
The result is nothing short of amazing. You have fries, chili, and cheese all in your hand. The only thing that could make this better would be….well,…….sour cream. (Which I unfortunately did not have otherwise I would have put a dollop on these)

I got the idea for these gems over at 1 Fine Cookie. I made the chili part up myself in an attempt to make it fast and wow did it come out well!

Chili Cheese Fry Cupcakes

Chili Cheese Fry Cupcakes

These cupcakes are anything but dainty. Chili, cheese, and fries come together to create the ultimate savory cupcake.

Ingredients

  • 1 Package Frozen Steak Fries (or create your own fries)
  • 1 Pound Ground Turkey
  • 1 Can Ranch Style Beans
  • 1 medium Onion, Chopped
  • 1 Can Rotel
  • 1 Tsp Chili Powder
  • 1 Tsp Garlic, Minced
  • Salt and Pepper to Taste
  • 2 Cups Shredded Cheddar Cheese

Method

  1. Preheat oven to 375 degrees.
  2. On a large microwavable plate, microwave steak fries for about 4 minutes or until soft. (You may have to do this in batches) Let cool.
  3. Squish and flatten equals amounts of fries into the muffin tin wells.
  4. Bake fries for about 25- 30 minutes. Do not overbake or else they will be hard as a rock.
  5. Meanwhile, brown ground beef with onion and garlic.
  6. Add in beans, rotel, chili powder, and salt and pepper to taste.
  7. Once potatoes are done, removed from muffin tin and allow to cool.
  8. Place a spoonful of chili on each of the fries. Next top with equal amounts shredded cheese.
  9. If desired, place cupcakes in the oven to allow the cheese to melt for a moment or two.
  10. Serve with sour cream and green onions if preferred!

Notes

If you do plan to make your own potato fries (I will do this next time!), parboil your fries a bit before placing them in the oven to crispy a little. Then squish them into the muffin tins before baking them one last time.

http://www.pennywisecook.com/chili-cheese-fry-cupcakes/


Like this post? SHARE it!

Related Posts Plugin for WordPress, Blogger...

Crockpot Hot Fudge Cake

We got bikes this weekend. I haven’t been on a bike since I was in high school. I had forgotten how much fun they are! But I also had forgotten how they can make your legs burn. As a runner I guess I figured they would be easier than running, but I may be wrong on that. Hills were killing me on my first 10 minutes on my new bike. It could be due to make lack of cycling experience or perhaps the fact that I was pulling a trailer filled with almost 70 pounds of child inside! Either way I’m looking forward to getting better at it and enjoying family time with them.

I like to run and I love going to the gym so any other exercise is just bonus. Bonus for working off extra desserts like this one here. Oh yeah, this most amazing CROCKPOT hot fudge cake! Cake is already good, but let’s talk about how EASY making it in the crockpot is.

Mix the ingredients.

Add them to your crockpot.

And cook it for a few hours.

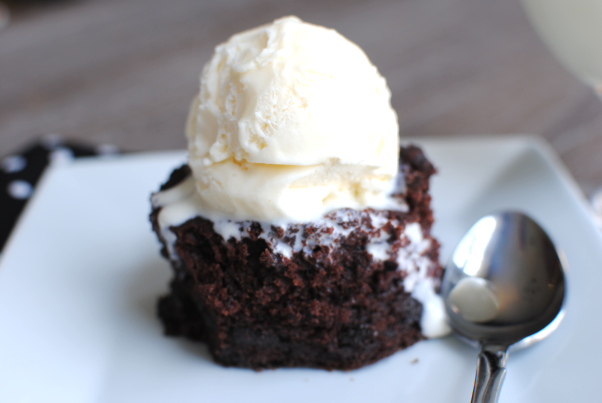
When you’re done, you’ll have a thick, yet fluffy and chocolate-y and ridiculously divine cake worthy of a massive scoop of vanilla ice cream.

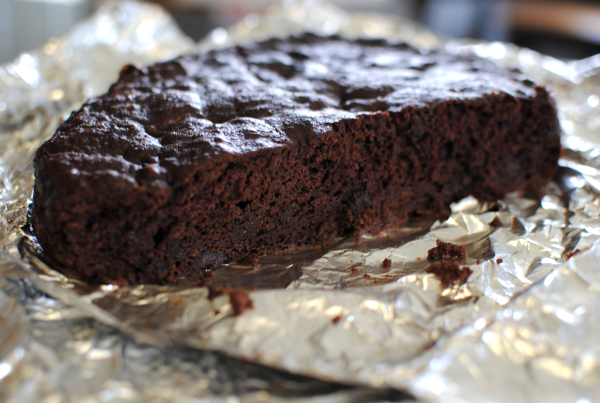
Lining your crockpot with foil is a great idea for this recipe. Not only does it make it easy to remove the cake, but it also reduces the need for cleaning.

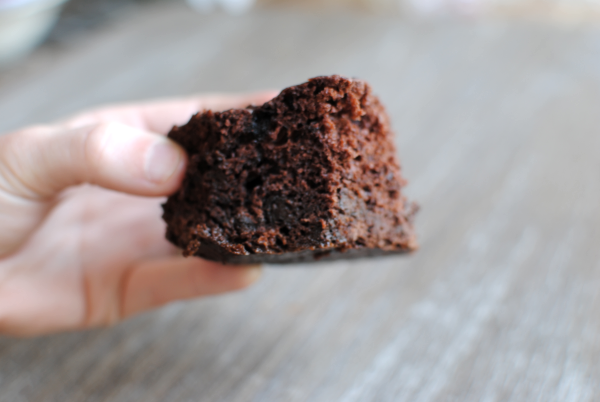
Do you see how thick that cake is? I’m not sure if this picture really captures how thick it is.

There, that’s better. THIS picture really gives a good view of the incredible mountain of cake that your crockpot will produce!

And oh wow is it yummy. Way too yummy actually. And it only gets better the longer that it hangs out in the foil.

I have a little secret to share about this cake. It’s actually healthy too. Made without any oil or butter and using ingredients that are low in sugar and calories, you can eat this without feeling too much guilt. My husband ate this for a few days before I told him it was a “healthy” cake. He was very surprised to hear that it was.

Recipe found at MyFitnessPal.

Crockpot Hot Fudge Cake

Crockpot Hot Fudge Cake

Warm, gooey, hot fudge cake that you create in your crockpot!

Ingredients

  • 1 box Devil's food cake mix
  • 8 oz plain Greek yogurt
  • 1 box sugar free chocolate pudding
  • 4 egg whites
  • 3/4 cup unsweetened applesauce
  • 3/4 cup semi-sweet chocolate chips
  • 1 cup water

Method

  1. Mix all ingredients in a large bowl until combined. Do NOT overmix.
  2. Grease crock pot (all the way up - it rises a lot!) OR make a sling out of foil for easy cleanup and removal.
  3. Cook on high for 3-4 hours. 4 hours worked well for me.
  4. Scoop into bowl while warm and add ice cream or frozen yogurt!

Notes

To make warm the next day, cut a piece and place in the microwave for about 30 seconds.

http://www.pennywisecook.com/crockpot-hot-fudge-cake/


Like this post? SHARE it!

Related Posts Plugin for WordPress, Blogger...

Freezer Peanut Butter and Jelly Sandwiches

School is either out or almost out in most places. Just because school is out doesn’t mean that you can quit making lunches. The familiar I’m huuuuuuuuuuuungry will haunt you if you do! Well come to think of it, that will haunt you even if you do make lunches. Whether you work or you don’t, it’s always a good idea to make life easier by taking a few shortcuts.

I had my precious Britton about this time last year. 1 year on Friday to be exact. In preparation for my hands being tied up breastfeeding or changing diapers, I knew that I had to take a few shortcuts in order to keep myself sane. So I decided to make up a bunch of PB & J sandwiches and freeze them for a quick lunch for Addie. This shortcut basically was a Godsend during the first 2 months. I was struggling with breastfeeding and getting used to those sleepless nights again so every little bit helped.

I’ve done some “mom math” for you to approximate the handiness of this shortcut.

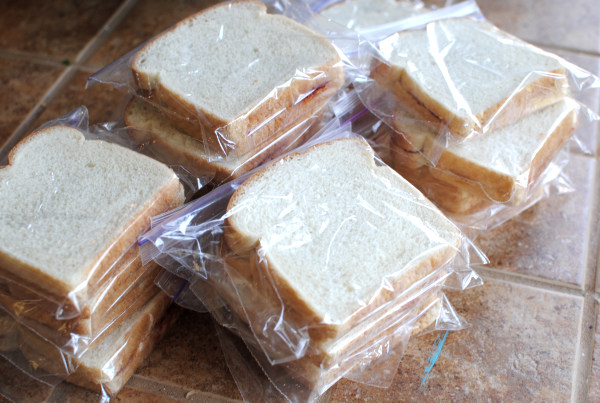
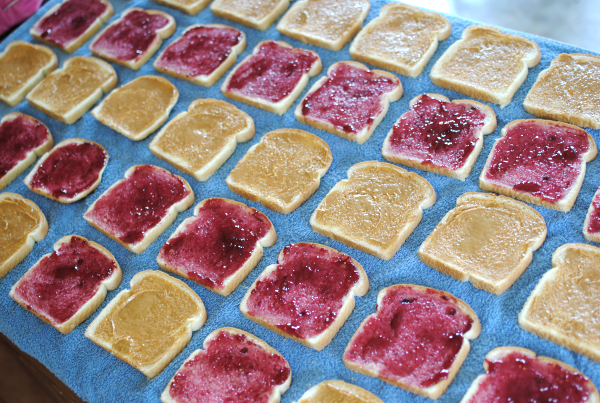
It’s quite simple really. Everyone knows how to make a PB&J. Make a bunch at once and you’re set for practically a month! This math only calculates for using 2 loaves of bread, but technically I think you could get 3 out of it. I had quite a bit of peanut butter and jelly left over after using up the bread loaves.

This is really the only word to describe how freezing PB&Js can make your life. I couldn’t help myself from making a word with my sandwiches. Humor me please.

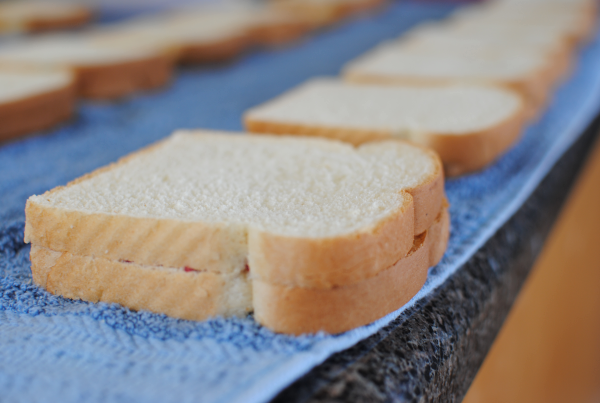
I don’t think that I’ve ever been so excited about a counter full of bread slices in my life. They represent time to me. Time that I can be washing dishes. Time that I can be eating my own lunch. Time that I could be sitting for a split second. You know, the important things.

Here are some questions that you might have about freezing PB&J Sandwiches:

Do you make them any special way for freezing?
Nope! Make them like you would regularly enjoy your PB&Js and pop them into a ziploc freezer bag.

Do they become soggy when you heat them up in the microwave?
This depends. If you overheat them, the jelly side does tend to become soggy so it’s imperative that you don’t overheat them.

How long do you reheat them in the microwave?
Depending on your microwave, this would be around 12 seconds. It’s better to have them a tad cold than overheated and soggy.

What if I am placing the frozen PB&J into a lunchbox for later that day?
The sandwich will simply thaw out on it’s own and most likely be just right at lunchtime!

I’m actually on a freezer cooking journey right now. Not necessarily for dinners, but for breakfasts and lunches. There is just not enough time in the day to create elaborate dishes for those meals so why waste your day doing so? Take shortcuts to make your life easier during the day and then create something amazing for dinner instead.

Can’t wait to share with you some other meals that I’ve stocked my freezer with! But this one just might change your life.


Like this post? SHARE it!

Related Posts Plugin for WordPress, Blogger...

Easy Sausage and Cheese Biscuits

It was a busy weekend here. Hence the lack of the DIY and kitchen tip for you. I had the most amazing craft to share with you, but I have been so exhausted that every free moment has been used just plain sitting. You know how those weekends go. Today’s recipe is one that can practically save breakfast on days just as I described.

While it’s fairly simple to prepare a bowl of Froot Loops in the morning, it’s not always filling. The sugary cereal usually makes my oldest hungry within about 20 minutes. Looking for some freezer breakfast ideas the other night I ended up settling on a biscuit idea that I was sure would satisfy and kick start the mornings will something yummy.

Biscuits packed with meaty sausage and cheese.

I could’ve gone to my mom and gotten a family recipe for special biscuits. I could’ve gone to Google for a tasty biscuit recipe that was effortless. But to be honest with you, I ended up using the recipe for drop biscuits on the back of my off-brand Bisquik box and just adding what I wanted to it!

They turned out absolutely perfect. So simple, yet so tasty. My favorite kind of recipes!

These make the perfect freezer breakfast on the go! Or just on a lazy morning when you don’t feel like making anything. That just so happens to be most mornings around here. Especially lately because Britton has decided that she is an early bird. I’m not yet used to such early mornings just yet, but it’s good to know that I have something like these biscuits to just pop in the microwave for a quick bite for breakfast.

Easy Sausage and Cheese Biscuits

Easy Sausage and Cheese Biscuits

Adding hearty ingredients like sausage and cheese to an everyday biscuit make a great kick start to your morning!

Ingredients

  • 2 1/4 c. Bisquik Baking Mix
  • 2/3 c. Milk
  • 1 lb Turkey Breakfast Sausage
  • 3/4 c. Shredded Cheddar Cheese
  • 1 1/2 tsp garlic, minced

Method

  1. Preheat oven to 450 degrees.
  2. Mix all ingredients in a medium bowl until combined.
  3. Drop dough by the teaspoonful onto a lightly-greased baking sheet.
  4. Bake for 8-10 minutes or until golden brown.

Notes

To freeze, let cool completely then place in a ziploc or freezer bag. To thaw, pop in the microwave for around 5 seconds.

http://www.pennywisecook.com/easy-sausage-and-cheese-biscuits/


Like this post? SHARE it!

Related Posts Plugin for WordPress, Blogger...

In Search of a Church

Saint Nicholas church at Georgioupoli, Crete, Greece
 photo credit: michalispolakis

When I was a kid I was raised going to church each Sunday. My dad was a Christian singer and my mom played the keyboard. Having our entire Sunday busy with church actives was familiar and a part of our family life. Discussing dreams and hopes for our children, the main objective is for them to know God on a personal level.

When our first baby girl Addie was small, some close friends of ours asked us to come with them to church. They knew we had not been a member anywhere and really need a church family. From the first time that we went we knew it was the place for us. Though based in a school building and brought alive each Sunday by people lugging things from a trailer, it did not matter. We were called there. For 4 years we experienced joy, made friends, saw God’s works firsthand. I was even baptized a second time in front of our church family.

This past year a few things changed in the church. Nothing and no one that we had any problems with. The changes just made us reevaluate where God wanted us to be. After all we were driving almost 20 miles each way every Sunday and every other Wednesday for small groups. All of our friends were there so get togethers and gatherings are always that way. It never bothered us before and still doesn’t (much). But our 11 month old (if she could talk) might tell you otherwise. She has issues riding in the car at night. We are working on this and I’m sure it’s just a phase.

So we have been on a search for a church closer to home to which we can call our church home. It has been so much more difficult than I ever could have imagined. Considering that we had only ever been to the one church as a couple and as a family, we have never experienced the church search before. And I never realized how picky that we are about what we want in a church. This post is merely a confession. I feel like talking about it for once and we would really love your prayers.

Prayers for my mind to be opened to churches that might be out of my comfort zone. Prayers for God to show us where we are meant to be.

Have you ever had trouble finding a church? What lead to your final decision? I’d love to hear your stories!


Like this post? SHARE it!

Related Posts Plugin for WordPress, Blogger...

Easy Taco Pizza

My littlest baby, Britton has begun to walk! And things are quickly changing around here. I’m running to take things out of her mouth that I wasn’t expecting her to be able to reach. I’m running to help her up when she stumbles. I’m basically, running. I love every minute of it. It’s so precious to see her starting her independence, but then come wobbling back to me so we can snuggle. I really love this age!

My other, on the other hand, is very much independent. She loves to help out in the kitchen and is finally helping out with cleaning her room. Well, that is with a little coaxing, bribing, and other shameless attempts to get her to clean. I do love meals that we can all make as a family so that everyone feels like they contributed.

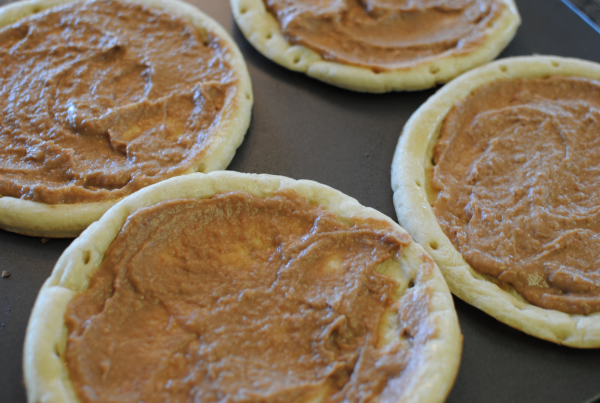
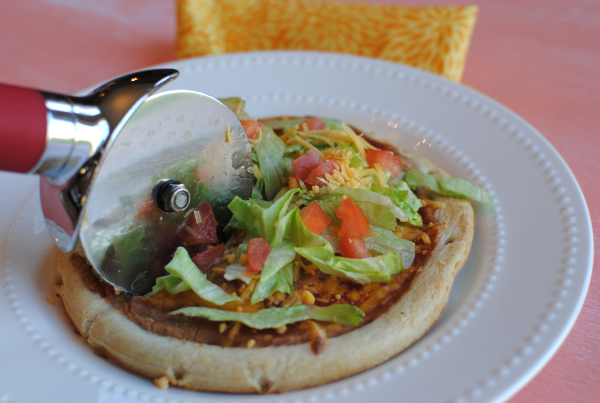
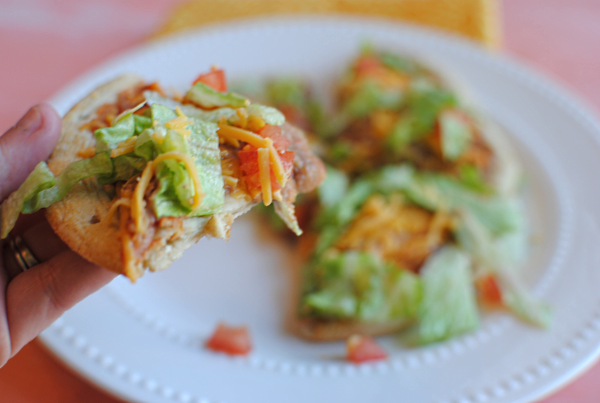
Today’s recipe is a very simple one and you may already make this at your house. But if you don’t and want a quick and easy meal that everyone will love, you might want to make this soon! My mom and I have recently noticed that Dollar Tree carries 2 packs of smaller pizza crusts, for $1 of course. I’ve been experimenting with all kinds of things to do with these crusts because they are so darn cheap. I thought….Taco Pizza! My husband hadn’t had it in so long that he had forgotten what all it included, but he was thrilled to find out what went on these beauties….beans.

Yes beans are the single ingredient that make these pizzas taste like a taco. Well, that and the…..

Salsa. Those two take the place of your everyday pizza’s tomato sauce.

Then it’s just a matter of adding all the yummy stuff that your family likes on your tacos. A good amount of cheese, some tomatoes, and lettuce are a great choice. Even a dollop of sour cream.

You can either buy your refried beans or you can buy pinto beans and create your own with your own flavors. Heat up the pinto beans, place in a food processor with garlic, cumin, and chili powder. Either way, you should be able to find them for $1 or less. In fact, this whole meal should cost you less than $5 in total! I only had to buy 1 tomato to chop up for the top. I didn’t really even need that much since my family doesn’t really like them. But I enjoyed it.

You can most definitely make one big pizza with these ingredients instead of the smaller ones. I just have a very picky family so it’s easiest this way to please everyone.

Easy Taco Pizza

Easy Taco Pizza

Simple taco pizzas that the whole family will love!

Ingredients

  • 4 Small Pizza Crusts (or make your own!)
  • 1 Can Refried Beans
  • 1 Cup Salsa, Divided
  • 1 and 1/2 Cups Shredded Cheddar Cheese + 1/4 cup for topping
  • 1 Cup Lettuce
  • 1 Tomato, Chopped

Method

  1. Preheat oven to 350 degrees or the temp suggested by your pizza crust.
  2. Start by brushing your pizza crusts with olive oil.
  3. Equally disperse the refried beans among the 4 pizza crusts. Next equally disperse salsa.
  4. Add a layer of equals amounts of cheddar cheese to the tops.
  5. Bake pizzas for 8-10 minutes or the amount suggested by your pizza crust.
  6. When pizzas are finished, add equal amounts of lettuce and tomato to each pizza and top each equally with the remaining 1/4 c cheddar cheese.

Notes

There are endless possibilities to these pizzas. Add black beans, corn, chicken, taco meat, chilis, peppers, whatever you'd like! The refried beans are a must though!

http://www.pennywisecook.com/easy-taco-pizza/


Like this post? SHARE it!

Related Posts Plugin for WordPress, Blogger...

Alfredo Pie

You’ll have to excuse the simplicity of this recipe’s name. I just couldn’t really come up with much more. Some days I can spout off big glamorous recipe names and others I am left bumbling like an idiot.

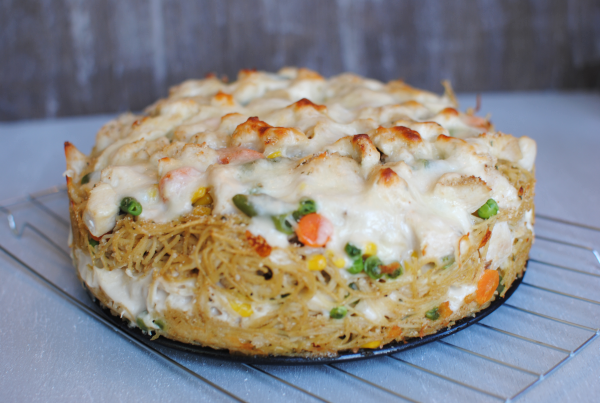
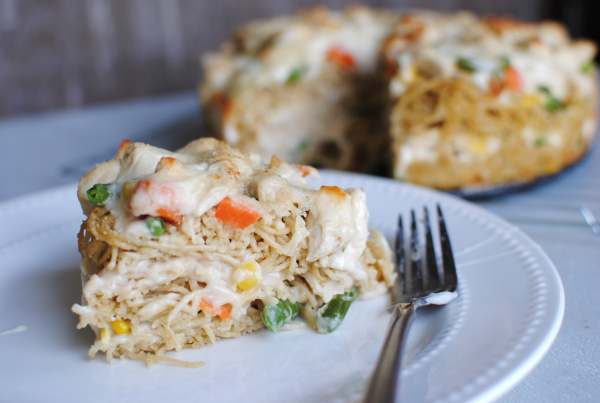
I’ve grown quite fond of my springform pan as of lately. Most people only break theirs out when they are making a cake or cheesecake or something sweet, but I have recently discovered that it has so many other uses in the savory realm too. I got the idea back in the winter while making Cappelini Al Forno from Giada’s recipe. We absolutely adore that yummy baked spaghetti so why not go the alfredo route and get creamy on it?

I tried to make this recipe as simple as possible with things that I’ve gotten cheap with coupons or that I had stockpiled. For instance, I didn’t bother making homemade alfredo, I used up jars that I had in the pantry. I also used Bird’s Eye Steamfresh Veggies and they were steamed and ready for the recipe in minutes! And of course, the pasta was next to nothing and I have oodles of that. Most everything else are things that you are bound to have in your pantry or refrigerator.

Don’t fret if you don’t have a springform pan. Using a round casserole dish or even a rectangular dish will work just fine too. It may not as pretty, but it will work! Just be sure to grease it really well.

I honestly just kinda made this up as I went along. You can definitely feel free to experiment with your own tastes and ideas. This turned out really fabulous this way. I couldn’t breathe when we got done with dinner. I ate way too much of this!

Go ahead, have a go at this one and you might even have your kiddos eating their vegetables.

Alfredo Pie

Alfredo Pie

Alfredo gets a makeover in this creamy pasta pie!

Ingredients

  • 1 lb Thin Spaghetti
  • 1 Jar Alfredo Sauce
  • 2 Boneless, Skinless Chicken Breasts, cut into bite-size pieces
  • 2 Tsp Garlic, Minced
  • 1 Bag Frozen Mixed Vegetables
  • Bread Crumbs
  • 1/4 Cup Parmesan Cheese
  • Mozzarella Cheese
  • 1 Egg, lightly beaten
  • 1 Tsp Parsley, Dried
  • 2 Tbsp Butter

Method

  1. Preheat oven to 350 degrees.
  2. In a skillet, cook chicken breast with garlic over medium heat until no longer pink.
  3. Meanwhile cook spaghetti just under 1 minute from what the package suggests.
  4. Cook frozen mixed veggies according to their packaging.
  5. When noodles are done, place them in a large bowl along with 1/3 c. breadcrumbs, egg, and 1/4 c. Parmesan cheese. Using tongs mix well.
  6. Add a sprinkle of breadcrumbs to the bottom of a greased springform pan.
  7. Place 1/3 of noodle mixture into the bottom. Pour 1/3 of the alfredo sauce over noodles.
  8. Next add a layer of veggies, then 2 tbsp of breadcrumbs, then 1/3 of the chicken, then sprinkle with layer of mozzarella cheese.
  9. Repeat this until you have 3 layers ending with mozzarella cheese.
  10. Bake 25-30 minutes or until top begins to brown.
  11. Let cool before removing sides of pan.
http://www.pennywisecook.com/alfredo-pie/

P.S.- Have a recipe name suggestion? I’d love to hear it! Leave a comment below.


Like this post? SHARE it!

Related Posts Plugin for WordPress, Blogger...

Mini Cheeseburger Pies

When my husband and I were dating like a million years ago (or so it feels), we actually went on dates to McDonald’s. Not only were both incredibly cheap tightwads, but my husband had a crazy obsession with none other than…..dom dom dom, McDonald’s! Yes, he was (and still is) a cheeseburger fanatic. I even had a cheeseburger birthday cake made a couple years ago. Needless to say that he is all-American and loves his American food.

He’s not always easy to please, but as long as he gets his cheeseburger every now and then he’s good! In honor of him, I made up these amazing Mini Cheeseburger Pies that honestly was a little unplanned. It was one of those days when I was feeling experimental and I was on a path to one idea and ended up with another. I’m glad that this is where I ended up! These were sooooo good.

Using store bought pie crusts that I got 2 for $1.99 at Aldi, I filled them with a cheeseburger filling and topped them with whatever each family member wanted. My daughter Addie has just realized that she likes pickles. (I know right? Where has she been?! Pickles are yummy.) So she got those on her’s.

See? How adorable. What a great idea for a party. These aren’t too small but they also aren’t huge either so they could be used an appetizer also.

They are so simple too. I have a good feeling these would also freeze well.

Mini Cheeseburger Pies

Mini Cheeseburger Pies

This miniature version of cheeseburger pie is a perfect appetizer or party food!

Ingredients

  • 1 lb Ground Beef
  • 2 Premade Pie Crusts (or homemade if you prefer)
  • 1 Medium Onion, Chopped
  • 2 Tbsp Worcestershire Sauce
  • 1 Tbsp Ketchup
  • 1 Tbsp Djon or Yellow Mustard (whichever you prefer)
  • 2 Tsp Garlic, Minced
  • 4 oz Velveeta Cheese
  • Salt and Pepper
  • Bacon Pieces (Optional)

Method

  1. Preheat over to 450 degrees.
  2. In a large skillet over medium-high heat, brown mean with onion and garlic. Drain.
  3. Add worcestershire sauce, ketchup, mustard, and Velveeta. Stir until combined.
  4. Meanwhile, using a glass or biscuit cutter, cut 2 and 3/4 inch circles out of pie crusts. Place circles into a greased muffin tin using the leftover scraps to piece together more.
  5. Fill each crust with equal amounts of meat filling. Add bacon pieces last if desired.
  6. Place a second pie crust circle on top of each pie and press down around the edges to help it seal.
  7. Cut a T slit in the tops to prevent them from bubbling up.
  8. Bake for 12 minutes or until golden brown.
  9. Serve with your favorite cheeseburger condiments!
http://www.pennywisecook.com/mini-cheeseburger-pies/


Like this post? SHARE it!

Related Posts Plugin for WordPress, Blogger...

Sugar Cookie Ice Cream Bowls

I was busy making up cookies for Addie’s 5th birthday last week. Which by the way, I am still in shock that I have a 5 year-old. Doesn’t seem possible that she is already that big. I’m going to try to get over it and not have a mini meltdown. Instead, I’ll just eat a SUGAR COOKIE BOWL full of ice cream! I got the idea from this picture. Pretty self explanatory.

Yeah, it’s quite an epiphany. Eating ice cream out of a cookie? I’m totally down with that. I think the only thing better than that would be eating ice cream out of a brownie. Hmmm, I’m getting ideas….

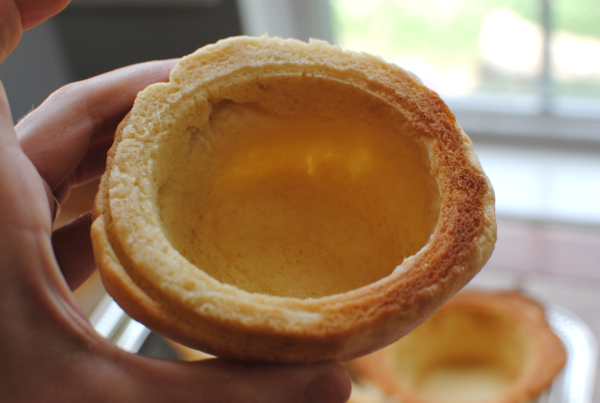
It’s best to have a good batch of sugar cookie dough to use. I found the BEST recipe last week and it worked like a charm. You simply lay the dough over the muffin tin cups and bake as usual.

You can also cut the dough using the top of a glass to get a perfect circle. Or you can just wing it like I did. I even had to patch a few up. It didn’t matter though because they still baked up fine.

Tah dah! Oh yeah, it’s a bowl that’s a sugar cookie. Incredible isn’t it? This is where you place your ice cream…

Or even fruit if you’re being good….

Sugar Cookie recipe courtesy of Spark People.

Sugar Cookie Ice Cream Bowls

Sugar Cookie Ice Cream Bowls

Eat your ice cream out of a sugar cookie!

Ingredients

  • 1 1/2 cups - granulated sugar
  • 2/3 cup - butter (or shortening - half of each is recommended)
  • 2 whole eggs
  • 2 Tbsp - 2% milk
  • 1 tsp. - vanilla extract
  • 3 1/4 cups - white flour
  • 2 1/2 tsp - baking powder
  • 1/2 tsp - salt

Method

  1. Cream butter and sugar together in a large bowl. Add eggs, extract, and milk and mix well.
  2. Mix dry ingredients with a wire wisk in a medium bowl. Add dry ingredients to wet ingredients in large bowl. Mix until combined well.
  3. With hands, shape dough into a ball. Wrap with plastic wrap and refrigerate for 2-3 hours.
  4. Meanwhile, preheat oven to 400 degrees F.
  5. Lightly grease muffin tins. Roll half or 1/3 of the dough at a time on a floured surface. Keep the rest in the fridge.
  6. Roll dough to 1/8-1/4 inch thick.
  7. Flour a glass or cup and cut shapes. Re-roll trimmings and reshape. Place over muffin tin wells making sure to cover the whole thing with no holes.
  8. Bake for 8 min or until light brown.

Notes

You are free to use whatever sugar cookies your prefer, even store bought. I just found this recipe to be really great to molding and rolling.

It's not a bad idea to make your dough the night before and roll it out in the morning. The colder it is, the easier it is to work with.

This works with chocolate chip cookie dough too!

This recipe makes a LOT of dough (like 72 cookies depending on your size) so if you only plan on making a few, half this recipe.

http://www.pennywisecook.com/sugar-cookie-ice-cream-bowls/


Like this post? SHARE it!

Related Posts Plugin for WordPress, Blogger...

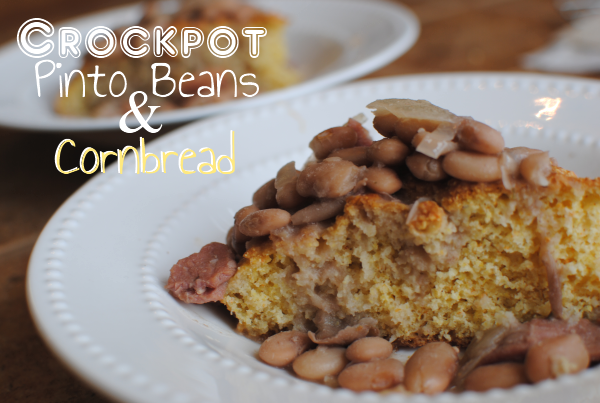
Crockpot Pinto Beans and Cornbread

There are a lot of meals that I remember my momma making when we were growing up. Some that I liked and some that I (as a kid with immature taste buds) I could have lived without. Of course, it’s the ones that I liked that I remember the most and now make for my family. This is one of those meals.

I want to start by pointing out that no, the cornbread is not cooked in the crockpot with the beans. Unfortunately, you’ll have to do some hard labor and bake your cornbread in the oven. When I made this the other night, I found a new cornbread recipe and it is absolutely divine. It’s so divine, that I plan on giving it it’s very own post. So stay tuned for that.

As I was saying, this meal takes me back to those comforting nights as a kid. Coming in from playing outside all day to have warm, hearty pinto beans served with crusty cornbread. They make the most amazing combination. This isn’t really even a “summer” dish, but I still make it in the summer anyways.

Start by soaking your bag of pinto beans in a big bowl overnight. This will soften them up and get them better prepared for cooking. This may sound like a difficult task, but really it’s not. Place your beans in a bowl covered in water and go to bed. Easy peasy!

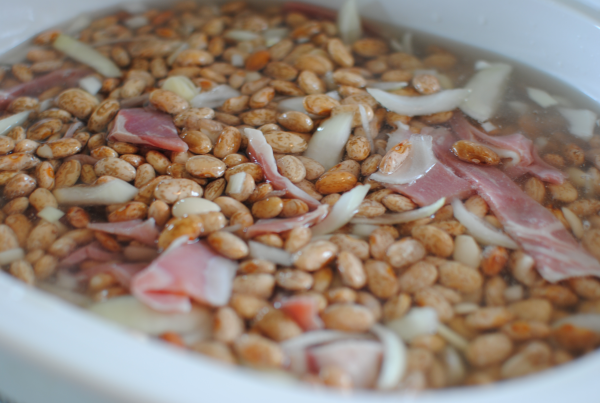
Then the next morning, drain that water and throw the beans in your crockpot with a chopped onion or two along with some nice and salty country ham pieces. DON’T season them yet. Since they are still quite hard, they won’t absorb any of that seasoning just yet so hold off on that salt and pepper.

Oh yeah, you can see where this is going.

In the meantime, between checking your email and watching Grey’s Anatomy (all that very important stuff that you do), bake up a batch of your favorite cornbread. Like I said, I have an amazing recipe that I will be sharing, but for now I have to leave you on the edge of your seat.

So bake that up and set it aside until your ready to eat up. You are now free to season the beans too!

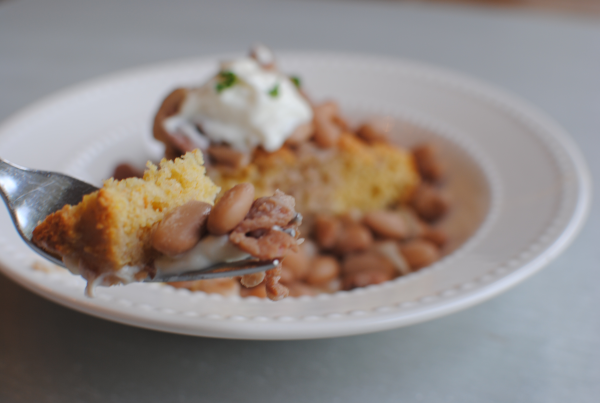
After a few hours you’ll have an incredible meal.

Crockpot Pinto Beans and Cornbread

Crockpot Pinto Beans and Cornbread

Hearty and comforting, pinto beans and cornbread make a match made in heaven.

Ingredients

  • 1 Bag Dry Pinto Beans
  • 1 Small Package Country Ham Pieces
  • 2 Medium Onions, Chopped
  • 1 Batch Cornbread (Your Choice)
  • Salt and Pepper to Taste

Method

  1. The night before you plan to eat your meal, place your pinto beans in a large bowl and cover with water. Let sit overnight.
  2. The next morning, drain beans and place in the crockpot along with chopped onions and country ham pieces. Fill crockpot with an inch or 2 of water above the beans. Let cook on low for 6-8 hours or high for 4-6 hours.
  3. Meanwhile prepare your cornbread of choice. Season beans with salt and pepper once they have been cooking and their lines have disappeared.
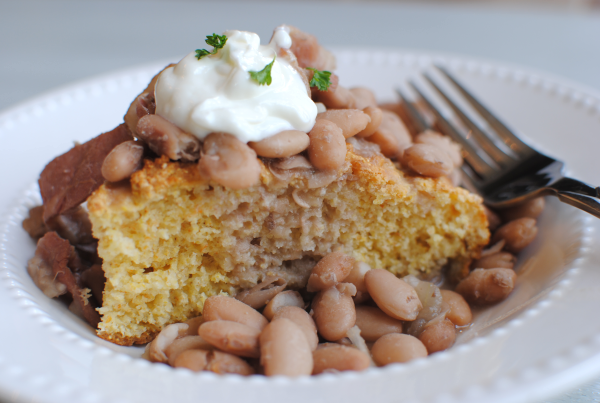
  4. To serve, pour beans over cornbread and let the juices soak in.

Notes

You'll notice that a couple of my pictures have sour cream on them. That was something new I was trying. Some people like sour cream on their pinto beans so I thought I'd try it out. It was eh to me. I could take it or leave it really.

Sometimes I even place my cornbread down in a mug and pour the beans over it in the mug. This is honestly one of the best ways to eat it!

http://www.pennywisecook.com/crockpot-pinto-beans-and-cornbread/


Like this post? SHARE it!

Related Posts Plugin for WordPress, Blogger...