In The Garden Cupcakes

I’m not much of a gardener. Most every spring I get an artificial green thumb. I like to waltz around thinking I’m going to make my flower beds and yard look amazing. It usually leads to removing about a third of the weeds and then throwing mulch on top of the rest. At least they look pretty for a little while!

Although I will say that this spring I’ve decided to stop pretending and actually attempt to grow something that I might use that way I’m accountable. I’ve started an herb garden in pots. Which Addie insists it’s not a garden because it’s not in the ground, but I beg to differ. Aside from that, what you see above is probably about as close to a green thumb as I’m going to get.

How about In The Garden Cupcakes? Aren’t they adorable? I found these little planter pots at Dollar Tree and they where 3 for $1!

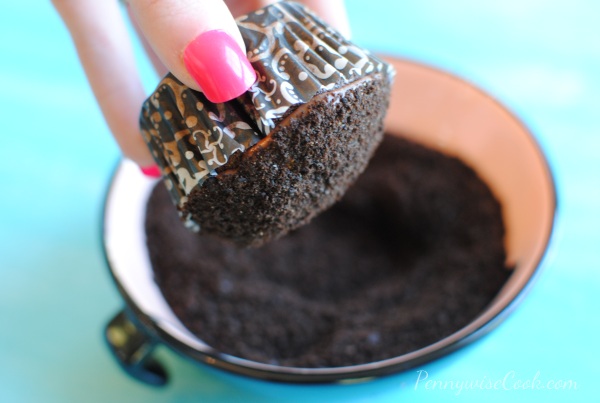
I simply made up some chocolate cupcakes (see recipe below) and frosted them. Then I dipped their tops in crushed oreo cookies like so. Before you go thinking wow are her nails so pretty, they are fake. I love those boxed nails! Cheaper than going to a salon and great in a pinch.

After getting them good and “dirty”, I made these little sprouts out of all things….Airheads! Remember those? I just cut them into small pieces and rolled them until they look semi-close to a sprout. Simple!

And then of course, I placed them into these adorable little planters. So fun and the neighborhood kids just loved them. Make these for a party and hand out the planters with them so they can each decorate one with their name. Or hoard them and keep them for another batch of these beauties.

I found this cupcake recipe over at Spark People. It’s actually healthy and only has about 110 calories per cupcake. That’s not including your frosting so keep that in mind. The frosting that I used on this cupcake was AMAZING and is my new favorite. But you’ll have to wait to get that recipe. I’ve got to have something to keep you coming back! πŸ˜‰

And of course you can use whatever cupcake recipe you’d like. I’m just sharing with you the one that I used this go round.

In The Garden Cupcakes

In The Garden Cupcakes

Perfect for a party or outside gathering, these In The Garden Cupcakes make the perfect addition. Crushed up Oreos create the look of dirt and small planters complete the look.

Ingredients

  • 1 3/4 cups flour
  • 1 1/2 tsp baking soda
  • 1 tsp salt
  • 3/4 cup applesauce
  • 1/4 cup margarine (softened)
  • 1 cup splenda
  • 1/4 cup sugar
  • 1/4 cup brown sugar
  • 3 eggwhites
  • 1/2 cup skim milk
  • 1 tsp Vanilla ext
  • 2 TBSP coffee
  • 1 cup semisweet chocolate chips
  • Chocolate Frosting of Your Choice (even Betty Crocker will work!)
  • Small planters (clean)
  • 1 Cup Crushed Oreos
  • Green Airheads cut into around sixths

Method

  1. Preheat oven 350 degrees.
  2. Sift flour, baking soda, and salt. Set aside.
  3. Melt semisweet chocolate chips and coffee in double boiler. Let cool slightly.
  4. Cream butter, applesauce, splenda, sugar, brown sugar, and eggwhites. Add melted
  5. Add flour mixture. Mix well. Add vanilla ext. Add milk slowly until well blended.
  6. Pour in cupcake liners and bake for 25-35 minutes or until toothpick comes out clean.
  7. Let cool then frosting with your choice of chocolate frosting.
  8. Dip each cupcake in crushed oreos then place in planters.
  9. Roll each Airhead up and then bend at a 90 degree angle and then stick into the bottom of your cupcake.

Notes

This cupcake recipe makes 24 cupcakes, but you can half the recipe if you don't have that many planters.

Even though this is a "healthy" recipe, I've gotten very good reviews from it!

http://www.pennywisecook.com/in-the-garden-cupcakes/


Like this post? SHARE it!

Related Posts Plugin for WordPress, Blogger...

3-Ingredient Crockpot Ranch Porkchops

With busy nights, there are at least 3 nights per week that I plan on making a crockpot meal. I usually try to think of nights like soccer practice or small group when I know I’m not going to have time to cook up a big meal. My crockpot is like my best friend. It really does bring joy and happiness to my life. (Insert mushy crockpot love song here)

Take Easter for instance. We didn’t have a single plan (for once in our life). However, I was not about to spend the entire day cooking a meal. We really wanted to spend the day together enjoying each other’s company. Once again my crockpot stepped in to make life easy. I popped an entire chicken into it stuffed with rosemary and garlic and just let it go. 6 hours later after we were done playing outside, watching a little TV, and essentially getting a little tired of each other (what? doesn’t everybody?), the chicken was perfectly cooked and ready for our Easter dinner.

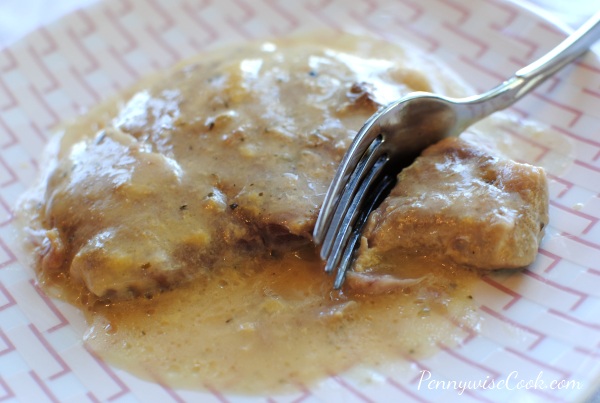
These porkchops are one of my new favorites for crockpot recipes! Only 3 ingredients and they are simply to most moist and tasty porkchops I might have ever had. No exaggeration.

I’m so thankful to have come across this recipe at Living Laughing and Loving!

You simply MUST try it!

3-Ingredient Crockpot Ranch Porkchops

3-Ingredient Crockpot Ranch Porkchops

With only 3 ingredients you can create the most moist and tasty porkchops ever!

Ingredients

  • Pork Chops
  • Ranch Seasoning Dry Mix Packet
  • 1 can Cream of Chicken plus 1 can water as needed (or 2 cans cream of chicken)

Method

  1. Combine all 3 ingredients in your crockpot and mix well.
  2. Cook on low for 4-6 hours.

Notes

I used only 1 can of cream of chicken with the 1 can water and it turned out perfect!

I cook 4 porkchops with this recipe.

This will also freeze well. Place all of the raw ingredients in a freezer bag together then run under warm water before placing in the crockpot when you're ready to cook!

http://www.pennywisecook.com/3-ingredient-crockpot-ranch-porkchops/


Like this post? SHARE it!

Related Posts Plugin for WordPress, Blogger...

1-Minute Emergency Cake

I feel I should say Happy Tax Day or something, but for some reason it doesn’t feel right. There is most definitely no happy when it comes to taxes for me. We always owe because I’m “self-employed”. But I hope that many of you got a large refund and do have a Happy Tax Day.

I have done you a grave disservice, I have to admit. I have not yet shared with you one of my most favorite nighttime snacks. I’ve told a handful of my friends and every single one wondered where this unknown marvel was all of their life. As was I the first time I learned of this simple yet incredible treat that I have now named “Emergency Cake”.

We all have our emergencies don’t we? Tax Day maybe? The idiot who cut us off in traffic this morning. The rude cashier who didn’t accept our coupon at the store. Or perhaps your emergency is that it’s Tuesday. Whatever it is, I have the cure.

It’s called Emergency Cake. And it will come to your rescue.

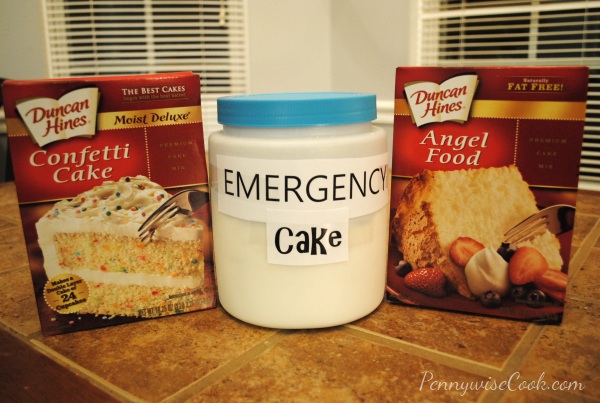
You see, you only need two ingredients to make up weeks worth of this Emergency Cake. A box of Angel Food Cake and a box of your desired flavor cake. Mix them together and keep them in a container. I bought this storage container at Dollar Tree to keep my cake mix in. I actually have two of these, one for confetti cake and one for devil’s food cake.

As if only needing two ingredients wasn’t enough, it gets better. I’m a little impatient sometimes, especially during my cake emergencies. It only takes 1 minute to have a piece of cake ready for your face.

You might have heard of this being called 3-2-1 cake. That’s another way that you can remember how to make it. Although every single time we make it (which is a lot!), my husband proceeds to ask me how.

  • 3 tablespoons of your cake mix
  • 2 tablespoons of water
  • 1 minute in the microwave

You can make this in a mug or a little dessert cup like I have here.

You have cake in a pinch and yet you won’t have to worry about a cake staring you in the face the next day. These aren’t the largest pieces of cake that you’ve ever had. But with a little whipped cream on top with sprinkles or chocolate chips, they are plenty. Although my husband would argue otherwise. He doubles the recipe most days.

Unfortunately, I’ve come to the conclusion that I have emergencies every night and therefore have to eat emergency cake. πŸ™‚ You might just have the same issue!

You will be happy to know that it’s not bad in calories. One piece has around 50 calories depending on your cake mixes. And of course whatever you add to the top.

Let me know if you have an emergency tonight and how your cake turned out!

The Hidden Pantry shared this awesome recipe and I did some research to find out it was originally a Weight Watchers recipe which means it definitely can’t be all that bad on your diet!


Like this post? SHARE it!

Related Posts Plugin for WordPress, Blogger...

Crockpot Italian Beef Sandwiches

We had a most fantastic weekend. My mom came into town and we did one of our favorite pass times…shopping. Thrift shopping always makes for a great day doesn’t it? To top it off, my oldest had her very first soccer game. She has been looking forward to that moment for weeks. She did so good! I’ve never been so proud of her.

Not too long ago, I went on a Crockpot recipe mission. I have recipes that I’ve been making for years, but sometimes you just want to try something new and different. The Simple Dollar shared a few low ingredient recipes that caught my eye. This Shredded Beef Recipe sounded easy, fairly cheap, and right up my alley. So I put my own little twist on it and came up with these really tasty Italian Beef Sandwiches.

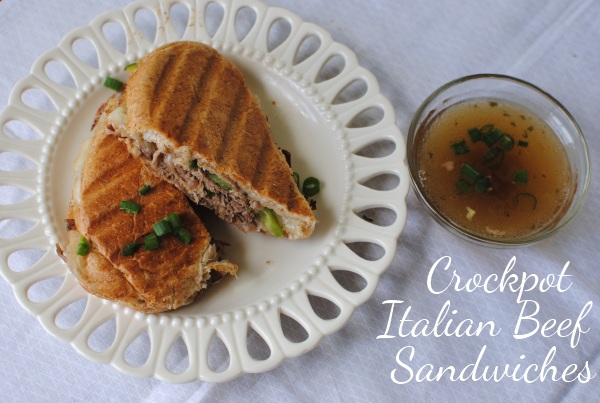
In thinking up a few changes to the shredded beef, I decided to make it a panini-style sandwich by adding provolone cheese and then popping it on the grill and flattening it.The most expensive ingredient was the brisket. I got the hoagie rolls on sale at Kroger and of course the green bell pepper was less than $1. The provolone cheese was around $2.99 at Aldi.

It was a hit around here and I hope that you like them too!

Adapted from The Simple Dollar‘s recipe.

Crockpot Italian Beef Sandwiches

Crockpot Italian Beef Sandwiches

Use your slow cooker to create yummy Italian Beef Sandwiches.

Ingredients

  • 2 pounds beef brisket
  • 1 tablespoon olive oil
  • 2 1/2 cups beef broth or beef stock
  • 2 cloves minced garlic
  • 1 chopped red onion
  • 1 Green Bell Pepper, sliced into long strips
  • 6 Slices Provolone Cheese
  • Spray Butter
  • 6 Hoagie Buns

Method

  1. Place all ingredients in the crockpot except for cheese and buns. Cook on low for 6-8 hours or on high for 4-6 hours.
  2. In the last 30 minutes, shred the beef and place back in crockpot.
  3. Place cheese on each bun and then place shredded beef. Spray with butter spray and grill on George Foreman or panini press until toasted.
  4. Serve with leftover sauce/broth from cockpot.

Notes

If you like your bell peppers a little crunchy, wait until later on in the cooking time to place them in the crockpot.

http://www.pennywisecook.com/crockpot-italian-beef-sandwiches/


Like this post? SHARE it!

Related Posts Plugin for WordPress, Blogger...

Crockpot Broccoli Beef

Happy Friday the 13th! Time for a Jason movie marathon. πŸ™‚

I. Love. Chinese Food.

I don’t eat it too often because if I choose to eat Chinese food, I have to go to a buffet. And let’s face it, there is no control when you walk into a Chinese buffet. All inhibitions are out the window along with your diet and healthy-eating mantra. Plus, depending on the buffet, they aren’t exactly the most sanitary places. I’m not above them but choose to stay away because of my lack of self-control in the presence of combinations of soy sauce, teriyaki sauce and lo mein noodles.

It’s like my crytonite.

That and a TON of other things.

My mom loves Chinese too and for her birthday we put together a Chinese themed party. We made Crockpot Broccoli Beef and it was a-maz-ing. Everyone was asking for the recipe.

The sad part? I can’t find it anywhere! I’ve searched high and low. I’ve Googled until I could Google no longer. I just cannot locate this incredible recipe. So when my craving for this yummy beef and veggie mixture hit a few days ago, I just winged it. And it turned out pretty great! I really LOVE how easy it is.

Serve this over lo mein noodles or just eat it like it is.

…..And save yourself a trip to the buffet.

Crockpot Broccoli Beef

Crockpot Broccoli Beef

Chinese food at home is simple! Make up a yummy batch of Broccoli Beef in your crockpot while you work (or play).

Ingredients

  • 1 lb Round Thin Steak (or similar thin cut); Cut into bite size pieces
  • 2 Large Bunches Broccoli, chopped into pieces
  • 1 Medium Onion, Cut into wedges
  • 2 Carrots, Shaved into thins strips
  • 1 Package Brown Gravy Mix
  • 1 - 1 and 1/2 c. Water
  • 1 Tbsp Teriyaki Sauce
  • 1 Tsp Sesame Oil

Method

  1. Place all ingredients except for the broccoli into the slow cooker and combine. Cook on high for 4 hours or on low for 6-8 hours.
  2. In the last 30 minutes, add in the broccoli.
  3. Serve!

Notes

I really can't add much, it's simple!

http://www.pennywisecook.com/crockpot-broccoli-beef/

How often do you go to Chinese buffets?


Like this post? SHARE it!

Related Posts Plugin for WordPress, Blogger...

Blissful Oatmeal Raisin Cookies

Back at the end of February I attended my 3rd Blissdom Conference. It’s a conference for us blogging geeks. Not only is it a bunch of fun, but I always learn a thing or two as well. And I especially love hanging out with my blogger friends and meeting the sponsors. They are always so fantastic to us.

I made my way around to all of the booths and spoke with many of them. I told you about meeting Cynthia Sass. She is such a sweetheart and inspiration. And then I could hardly contain myself, I got to meet a real California Raisin.

It was all smiles and very friendly, but it didn’t say a whole lot. I was thankful to have gotten a hug from such a huge celebrity. It took time out of it’s very busy raisin schedule to pose for a picture with me. I also really appreciated how natural and genuine it was. Because you know, those raisins are simply grapes dried in the run, right?

The California Raisins were a sponsor there at Blissdom this year. They had the most amazing booth with the coolest kitchen. And they also had these incredible oatmeal raisin cookies. When I think of oatmeal raisin cookies, I expect to see 5 maybe 6 raisins in the cookie. But these cookies had a TON of them. Come to find out, they also had NO added sugar. They were all natural, soft, delicious, and I completely fell in love.

Of course you know I had to make them….

I had to make them really soon.

So I did. And I call them Blissful Oatmeal Raisin Cookies. One other little secret about these cookies…..they also contain an apple. It’s just another unique and natural way to add a little sweetness without having to add sugar. It also keeps them extremely moist which makes these nice and soft. They also don’t take long to cook which makes it all the easier to enjoy them quickly.

These are really yummy when they are just out of the oven and warm.

Since they are natural, they have a very nice flavor. Not overly sweet like some cookies can be. If you were naughty, you might add a handful of chocolate chips into this batter. But I’m not gonna force you. πŸ˜‰

This recipe comes from the California Raisins Let’s Keep It Real Campaign. You can learn more there about how raisins are a good choice for eating healthy and nutrients.

Blissful Oatmeal Raisin Cookies

Blissful Oatmeal Raisin Cookies

Try these amazing oatmeal raisin cookies and feel good about it because they contain no added sugar!

Ingredients

  • 2 cups California raisins
  • Β½ cup peeled, cored and chopped apples (we used granny smith)
  • 1 cup water
  • Β½ cup butter
  • 1 cup flour
  • 1 teaspoon baking soda
  • 1 teaspoon vanilla extract
  • 1 cup cooking oats
  • 2 eggs (beaten)
  • 5 tablespoons honey

Method

  1. In a medium saucepan, combine the raisins, apples and water. Bring to a boil and cook for 3 minutes. Remove from the heat and stir in the butter. Set aside to cool.
  2. In a medium bowl, stir together the flour and baking soda. Stir in the vanilla, eggs, and the apple mixture until well blended. Fold in the oats and honey.
  3. Scoop the dough into a greased cookie sheet. Press the cookies down and bake at 325 degrees for approx. 8-10 minutes.

Notes

This recipe makes 3 dozen cookies!

http://www.pennywisecook.com/blissful-oatmeal-raisin-cookies/


Like this post? SHARE it!

Related Posts Plugin for WordPress, Blogger...

Crusty Overnight Bread

We always have bread in the house. It doesn’t matter what kind, my family eats it up. Max always squishes his bread into these little balls. Ever since I’ve known him he has done this. And ever since Addie was born she doesn’t eat a piece of bread without having daddy make it into a bread ball. To each their own I guess.

You may have noticed that I’ve started some bread-making adventures. The first was this 4-Ingredient Artisan Bread. We really enjoyed that bread. And I especially liked that the recipe makes 2 loaves instead of just one. Then later I came across this Crusty Bread recipe over at Simply So Good. You make up the dough at night and let it sit until morning and then bake. I’ve dubbed it Overnight Bread here at our house.

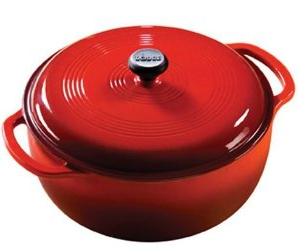
Some things of note before you get excited- you do actually have to do a few things in the morning. There’s about an hour worth of cooking involved. And you will need to have a heavy duty dutch oven pot with a lid to make this bread. Don’t ask me why. I’m sure that it has something to do with the heating process inside the pot, but I’m not a scientist. Don’t expect me to explain the world! πŸ™‚

This is a picture of one. You may be able to find a good deal on a Dutch Oven at Amazon HERE. I’ve had one for years and have no idea how much I paid for it.

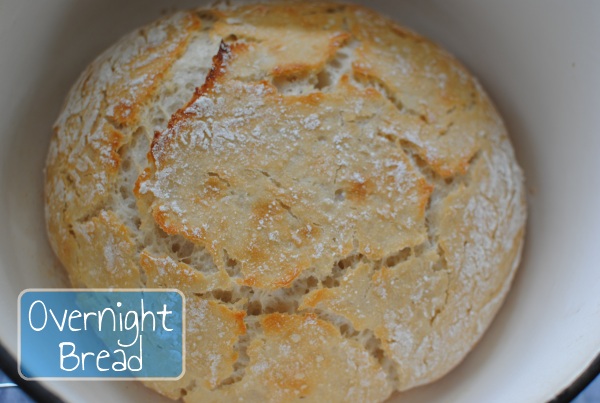
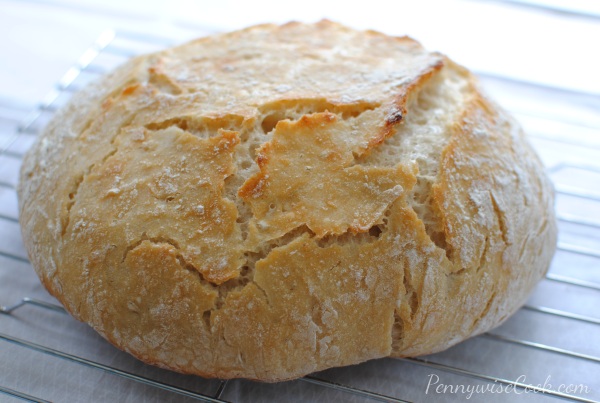
That’s not the moon! It’s a fresh loaf of Overnight Bread. The very first time I made this, it was gone by the next day. It’s nice and crusty and goes well with soups and pasta. Come to think of it, it goes well with just about anything. I love warm bread right out of the oven with butter.

I’m sure that many of you have made bread before and these are pretty general ingredients. But if you’re not a big bread maker you’ll be glad to know that using only 4 ingredients, one of which is water, it’s really simple (any CHEAP) to whip up. All you need is flour, yeast, salt and water. How much simpler does it get? And the flavor additions are endless! I’ve only tried one variation and it turned out AMAZING!

I made up this loaf with sun-dried tomatoes, garlic salt with parsley flakes, and parmesan cheese. To my surprise, even my non-tomato-eating family absolutely loved it. And I’m talking to the point that it was gone before the day was even over! Of course topping it cheese, who wouldn’t dig in?

Are you ready to make bread yet?

Recipe from Simply So Good.

Crusty Overnight Bread

Crusty Overnight Bread

Prepare this easy bread before you go to bead and bake in the morning!

Ingredients

  • 3 cups unbleached all purpose flour
  • 1 3/4 teaspoons salt
  • 1/2 teaspoon yeast
  • 1 1/2 cups water

Method

  1. In a large mixing bowl, whisk together flour, salt and yeast. Add water and mix until a shaggy mixture forms.
  2. Cover bowl with plastic wrap and set aside for 12 - 18 hours. Overnight is easiest!
  3. In the morning, heat oven to 450 degrees. When the oven has reached 450 degrees place a cast iron pot with a lid in the oven and heat the pot for 30 minutes. Meanwhile, pour dough onto a heavily floured surface and shape into a ball. Cover with plastic wrap and let set while the pot is heating.
  4. Remove hot pot from the oven and drop in the dough. Cover and return to oven for 30 minutes.
  5. After 30 minutes remove the lid and bake an additional 15 minutes. Remove bread from oven and place on a cooling rack to cool.

Notes

Don't worry about having the perfect bread dough ball. It may look a mess, but magic happens overnight and it will look much better in the morning.

Just be sure there are no big cracks or folds in your dough. I found these aren't mixed well sometimes and once baked you'll end up with a mouth full of flour.

http://www.pennywisecook.com/crusty-overnight-bread/


Like this post? SHARE it!

Related Posts Plugin for WordPress, Blogger...

How to Make Homemade Marshmallows

Any which way that you present a marshmallow to me, I will eat it. I love them big, small, melted, torched, as a cream, in a frosting- you name it! I’ve been that way since I was a kid.

My grandmother used to buy bags of the mini marshmallows and stick them in the freezer. I would always sneak in there and get a handful or two at a time and munch on them. I can’t tell you how many times I’ve ate an entire half bag of them. Probably enough times to be ashamed if I told you. πŸ˜‰

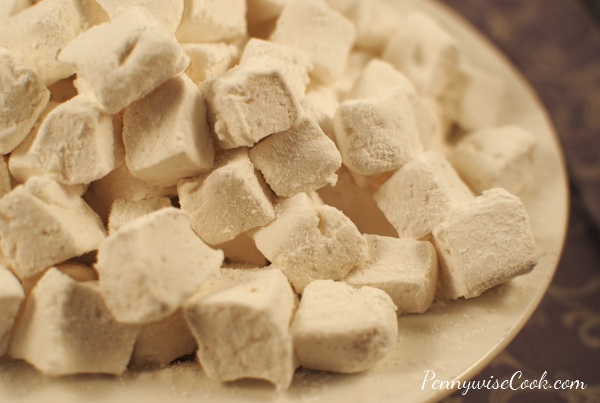
Even after my love for marshmallows as a child, you’d be surprised that I never have once tried to make them as an adult……until now. I had absolutely no idea how easy they were. And the taste? Wow! Store bought has nothing on the homemade taste. Soft and creamy, there is just nothing like them. I first got the inspiration after watching an episode of Barefoot Contessa. Anyone else watch that? I’m a fan.

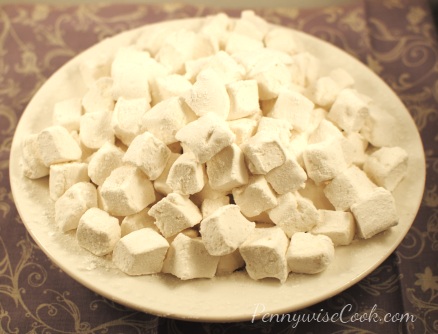
You’ll have to excuse my pictures. Still learning the lighting tricks. Anywho, most of the recipes that I’ve seen call for you to cut them into big cubes, but I cut mine into smaller cubes to mimic the mini marshmallows. It was a good and bad thing. Even though they were small, I ate more to make it for it!

I actually had everything that I needed to make these in my pantry already, minus the light corn syrup. The only other ingredient that some might not have is the unflavored gelatin. It’s fairly inexpensive and usually comes in packs of 4 and you just need 3 and 1/2 envelopes for this recipe.

My first impression of this process? Very sticky and messy! But not so much that I would never make them again. After boiling the sugar and corn syrup (etc) you have to transfer the mixture to your pan and that’s when it gets sticky. These fluffy sweet clouds are worth the trouble. You’ll be glad to know that it’s very easy to clean though! I was surprised how easily the sugary mess dissolved and cleaned up. Besides that, I can’t see why I haven’t made them before. What a great present these would make around the holidays. You could make up a big batch and wrap them in pretty cellophane. Cheap and easy!

Recipe from Smitten Kitchen.

Easy Homemade Marshmallows

Easy Homemade Marshmallows

Marshmallows are readily available at the grocery store, but the ones you create at home are more tasty and surprisingly easier than you think.

Ingredients

  • 1 cup confectioners’ sugar
  • 3 1/2 envelopes (2 tablespoons plus 2 1/2 teaspoons) unflavored gelatin
  • 1 cup cold water, divided
  • 2 cups granulated sugar
  • 1/2 cup light corn syrup
  • 1/4 teaspoon salt
  • 2 large egg whites
  • 1 tablespoon vanilla

Method

  1. Oil the bottom and sides of a 9x13 dish and then dust with powdered sugar.
  2. In the bowl of a standing mixer or a large bowl, sprinkle the gelatin over 1/2 c. cold water and let stand to soften.
  3. Meanwhile, in a large saucepan cook sugar, corn syrup, 1/2 c. cold water, and salt over low heat stirring with a wooden spoon until the sugar dissolves. Then increase the heat to moderate and boil without stirring until a candy thermometer reaches 240 degrees. This will take about 12 minutes.
  4. Remove the pan from heat and pour of the gelatin mixture, stirring until the gelatin is dissolved.
  5. With standing or hand mixer, beat on high until white and thick and nearly tripled in volume. 6 minutes if using a stand mixer, 10 minutes if using a hand mixer.
  6. In a separate bowl with clean beats, beat the egg whites until stiff peaks form. Mix the egg whites and vanilla to the sugar/gelatin mixture until just combined.
  7. Pour mixture into baking pan. Sift 1/4 c. powdered sugar over the top.
  8. Chill for at least 3 hours, until firm.
  9. Run a knife along the edges and cut into desired size. Roll each cube into powdered sugar to keep them from being sticky.
  10. Store in an airtight container for up to 1 week.

Notes

I didn't have a candy thermometer so I just boiled the mixture for exactly 12 minutes and it worked like a charm. If you have one it will be more precise, but don't fret if not.

I used a pair of scissors to cut my cubes at the end. I sprayed them with non-stick spray first. Depending on how small you want them, it takes some time cutting them up so this really helped since they are so sticky.

Once you roll them into the powdered sugar, you'll want to kinda shake the excess off. We found that leaving too much on them made them taste like a big bunch of powdered sugar.

http://www.pennywisecook.com/making-homemade-marshmallows/


Like this post? SHARE it!

Related Posts Plugin for WordPress, Blogger...

Bacon Cheddar Mini Meatloaves

My husband is one of those meat and potatoes kinda guys. He’s not too much into anything green or red that might have grown on a plant. You know, anything especially “healthy” for you. Since we’ve been married he’s starting to come around. And with a little coercion I’ve been able to get to eat things his momma probably thought he’s never stick in his mouth!

Every now and then I like to cook him something that he won’t look at funny or smell first. πŸ˜‰ Like I was telling you the other day, Max’s parents were here and his dad is eating low carb so I also wanted to make something that was going to fit his diet. I settled on these amazing mini meatloaves.

You will have to excuse how ridiculous these look. I don’t have one of those cute little loaf pans and apparently I’m not very good at making them look like loaves. They kinda look like oval hamburger patties don’t they? And technically these would make great hamburger patties too! But the one thing that separates these from being a hamburger is that I have officially dubbed these…..meatloaf. So there. πŸ™‚

I don’t make meatloaf very often, but every now and then we just want a big hunk of meat don’t we? These will do just the trick and can be made with whatever level of meat you prefer to buy. You could even use ground turkey or chicken. For these I used 1/2 ground round and 1/2 ground turkey in fact.

With only around 300 calories per mini meatloaf you can’t go wrong! See all of those little specks of cheese in there? Yeah that’s speckled throughout each entire meatloaf along with onions and a surprising twist- reduced fat Ritz crackers. You don’t have to use the brand-name of course. Just whatever you can find cheap or have on-hand.

These are super delicious and incredibly easy too. Even the hubby was satisfied with his hunk of bacon-y and cheesy meat. One of my favorite things about making them mini instead of regular size is that they cooked up faster. I didn’t need the entire 40 minutes to get these finished. Quicker meals mean happier hungry folks!

Recipe from Taste of Home.

Bacon Cheddar Mini Meatloaves

4 Servings

Serving Size: 1 Mini Meatloaf

Bacon Cheddar Mini Meatloaves

Nothing is more comforting than a bacon and cheese meatloaf!

Ingredients

  • 4 egg whites
  • 1/2 cup crushed reduced-fat Ritz crackers (about 13 crackers)
  • 1/3 cup plus 8 teaspoons shredded reduced-fat cheddar cheese, divided
  • 1/4 cup chopped onion
  • 1/2 teaspoon salt
  • 1/4 teaspoon pepper
  • 1 pound lean ground beef (90% lean)
  • 2 turkey bacon strips, cut in half

Method

  1. Preheat oven to 350 degrees.
  2. In a big bowl, combine the egg whites, crackers, 1/3 c. cheese, onion, salt, and pepper. Crumble the beef of that and mix well.
  3. Shape into 4 small loaves and place on a greased baking dish. Top each with a piece of bacon.
  4. Bake for 35- 40 minutes or until there is no more pink. Temperature should be 160 degrees. Sprinkle with remaining cheese and bake for another 2-3 minutes for the cheese to melt.

Notes

I added 1/2 pound of ground turkey and a tad more of the other ingredients so I would end up with 6 meatloaves.

If you have a mini loaf pan, this would be a great time to use it!

In place of the crackers, you could easily use plain bread crumbs if you have them.

And if you have a picky eater, you can leave out the onions.

http://www.pennywisecook.com/bacon-cheddar-mini-meatloaves/

Question of the day:

Do you make meatloaf frequently?


Like this post? SHARE it!

Related Posts Plugin for WordPress, Blogger...

Natural Lemon Vanilla Home Air Freshener


My sense of smell has always been top notch. Since having kids, it’s heightened and probably doubled in sensitivity. It’s a blessing and a curse. I can smell a dirty diaper from a mile away and I’m thankful sometimes to have a stuffy nose to get a break from that every now and then. Our house is fairly small and it doesn’t take much to make it stink.

I know the old saying, but I’ve made up a new one today. When life hands you lemons, you make air freshener. That’s got a nice ring to it doesn’t it? Lemons truly are a miracle fruit. With their sourness they conquer flavor in a host of different dishes. You can also use them to clean or turn around and throw them in a cocktail. But did you know they make a fantastic air freshener?

I had a few lemons sitting around that were going to go bad soon so I was looking for ways to use them up. I came across this home scent idea at Our Everyday Dinners and decided to give it a whirl. I didn’t have any rosemary at the time so I left that out. You would not believe how amazing this made our home smell!

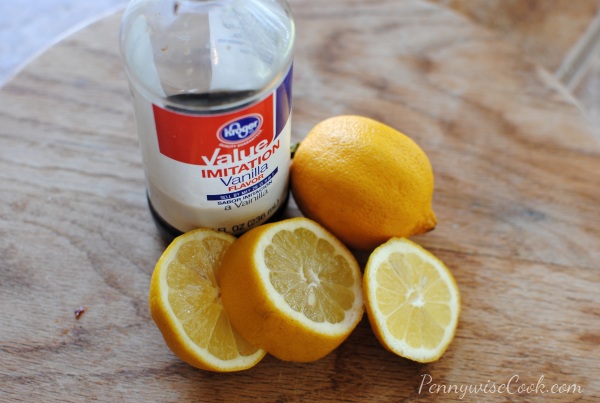
There are only 2 ingredients needed and you’re set. Lemons and vanilla extract. And of course, you can add the rosemary too!

You start by filling a medium sauce pot up with water. Cut 3 lemons in half and place in the water. Add in 1 teaspoon of vanilla extract. Bring to boil and then simmer until all the water is gone.

Simple as pie!

Within around an hour, your pot will look something like this. The moisture has all been sucked out, but your home smells lovely!

When I first put this on to simmer, my husband walked into the kitchen (following his nose) and asked where that smell was a couple of times. He overlooked the saucepan and I eventually told him that it was on the stove.

It’s such a fresh and tangy, yet sweet and creamy smell that the vanilla and lemon combine to make. It’s a great way to use up lemons that are going bad.

Let me know if you try it!


Like this post? SHARE it!

Related Posts Plugin for WordPress, Blogger...