Easter Treats Week: Tootsie Roll Easter Nests

I can’t believe that next Sunday is already Easter. And how about this weather folks? Did we totally skip winter this year? Last year it was so late, so this year it feels quite early. I guess that’s alright, because we get to do Easter crafts! I love the colors of Easter. Spring-y and fun, they just lift spirits and make you smile. So I thought I would do a mini-series this week on cute little treats that you can make at home for Easter! While I do believe in the real meaning of Easter, I do love to indulge in some fun with eggs and bunnies for the kiddos.

These little treats were so easy and turned out so cute. I picked up most of the ingredients for about $3 at Dollar Tree.

I started out by placing the Tootsie Rolls between two sheets of wax paper. I microwaved them until just soft. You don’t want them to melt otherwise they will be too sticky and you won’t be able to get them off the wax paper.

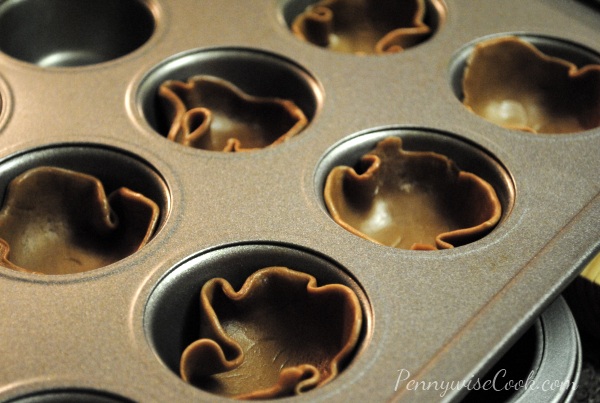
Once they are softened, squish them until fairly thin. Line a mini muffin pan with them and let them ruffle around the edges. I then placed them in the refrigerator for a bit to harden a little.

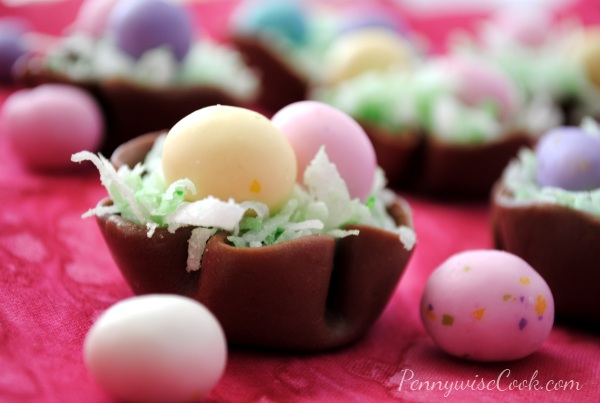
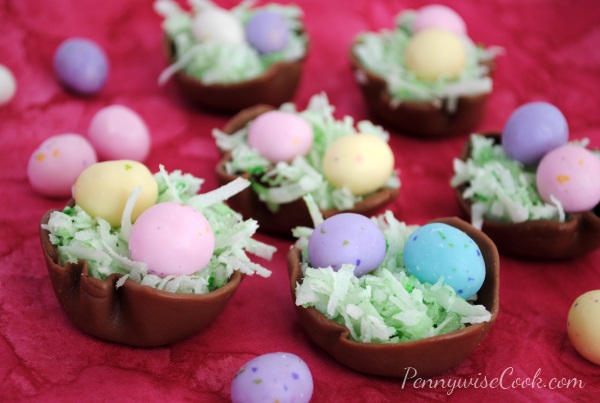
I added a couple of drops of green food coloring to some shredded coconut (bought at Dollar Tree) and plopped a couple of malted milk eggs to the top and tah dah!

After very little effort, you have these little Easter nests that are as tasty as they are cute. I think they would make a nice addition to our Easter egg hunt this year!

Do let me know if you make these!

What are your Easter plans this year?


Like this post? SHARE it!

Related Posts Plugin for WordPress, Blogger...

Simple Omelet Muffins

Even on the weekends, we’re not big breakfast people around here. Yes I know it’s the most important meal of the day, but the morning is also the most important time of day (especially on the weekends) to be lazy! I’d rather cook a big breakfast for dinner than get up and slave in the morning. Yes I would consider pouring a bowl of Cap ‘N Crunch slaving too! πŸ™‚

However, I saw something on Pinterest a while back that really sparked my interest. It was for “Eggs Baked in Ham Cups“. We just kinda adapted it to our liking. I like my omelets scrambled with lots of yummy sausage and bacon and cheese!

Place your slices of lunchmeat into the muffin tin along with your favorite egg fixin’s and you’ve got an omelet muffin. Super yummy and my favorite part- cheap! I found the smaller packages of smoked turkey breast (and other types) at Kroger for around $.97. These would make such great little additions to a fancy brunch.

You can add or take away whatever you’d like when putting together your omelet muffins, but I’ll share how I made mine in case you need the inspiration.

Simple Omelet Muffins

Simple Omelet Muffins

A simple way to change up your morning omelet by making it a muffin.

Ingredients

  • 12 Slices Lunch meat (Ham or Turkey are great)
  • 4 Eggs (beaten)
  • Chopped Bacon or Bacon Bits
  • 3-4 Links Sausage, Cooked and Crumbled
  • 1/4 c. Shredded Cheddar Cheese

Method

  1. Preheat the oven to 375 degrees. Spray your muffin pan with nonstick cooking spray.
  2. Place a piece of lunch meat into the muffin cups. Let them ruffle up around the edges.
  3. Fill each cup with equal amounts of beaten egg, followed by equal amounts of bacon bits, sausage, and cheese.
  4. Bake for around 15 minutes until your eggs are firm.
http://www.pennywisecook.com/simple-omelet-muffins/


Like this post? SHARE it!

Related Posts Plugin for WordPress, Blogger...

Tutorial: No-Sew Fabric Flowers

I’ve never really considered myself a very crafty person. I’ve always wanted to be one of those people just whipping the coolest things up with only a needle and thread. My mother-in-law and her mother crochet really well and they are always making the most incredible and detailed things. From doilies to sweaters and shrugs, they have got the craft thing down. Me on the other hand, you’d never want to wear the sweater that I have crocheted.

Have you seen people walking around with super cute little flowers all over the place? Seems like everyone has one on their headbands or pinned to their shirts. With spring here, I wanted to bloom too! Little did I know that these cute little flowers are actually quite simple to make. I think I could use a sewing machine if my life depended on it, but it doesn’t so I just won’t. πŸ˜‰ Anywho, these flowers ladies and gentlemen are darling and fun to make. The day I found out about them (Ruffles and Stuff), I made 3. The next day I made 2 more. Soon, I’ll have one for every outfit!
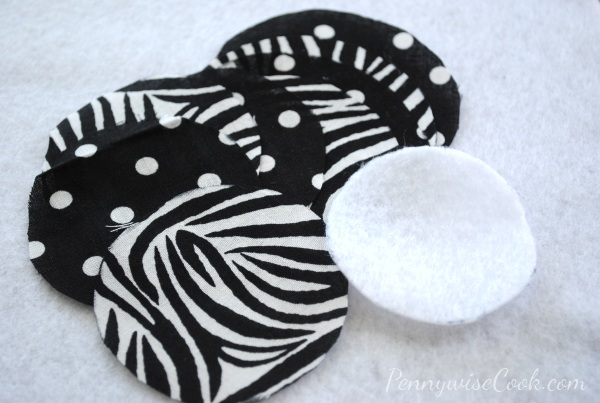
Let’s start with how to make them:


What You Need:

  • 7-8 Equal Size Fabric Circles- Walmart carries 1/4th yard pieces of the cutest fabric in squares for only $.97! You can make lots of these flowers with them. My circles are 3 inches.
  • 1 Smaller Felt Circle (about half the size of the others)
  • Hot glue gun
  • Hair Clip or Barrett (Optional depending on the use)
  • Scissors

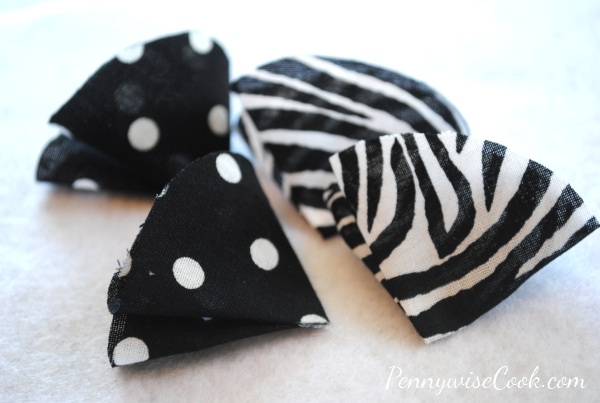
1) Start out by folding a circle in half, then in half again. They will look like this. I usually put a drop of glue in the very corner just to keep it together, but it’s not completely necessary.

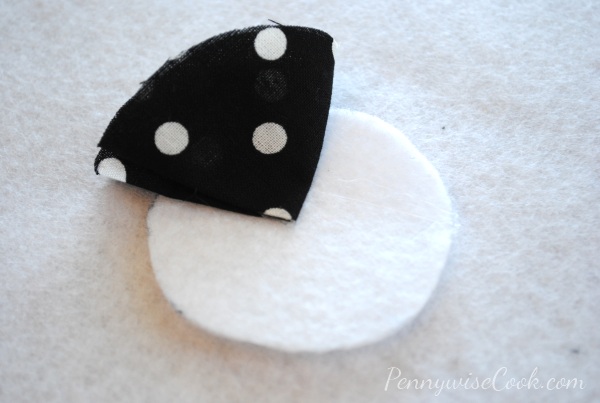
2) Glue that circle to the middle of the felt circle taking up 1/4th of it.

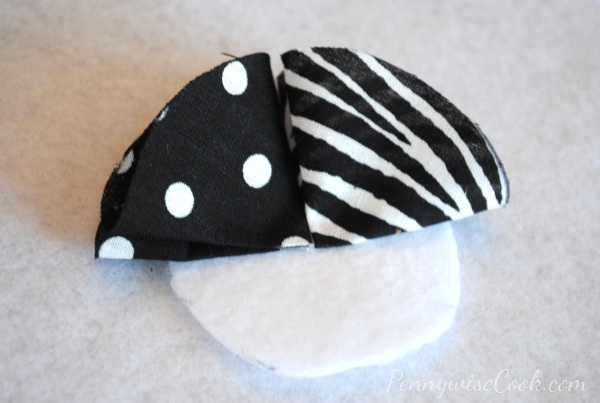
3) Continue this with the next 3 until you have 4 circles glued to that felt.

It will look like this…….TAH DAH!

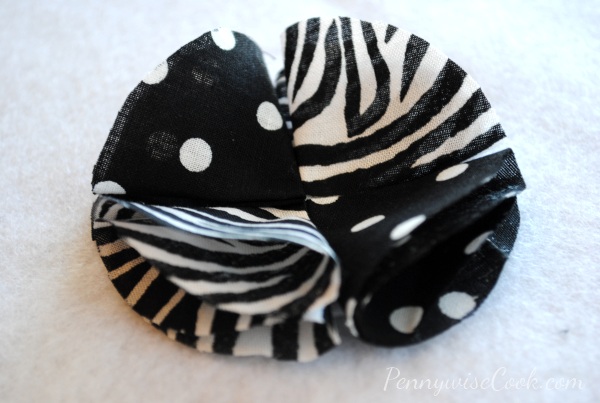
4) Once that layer is done, offset the next layer and glue it on top of the last.

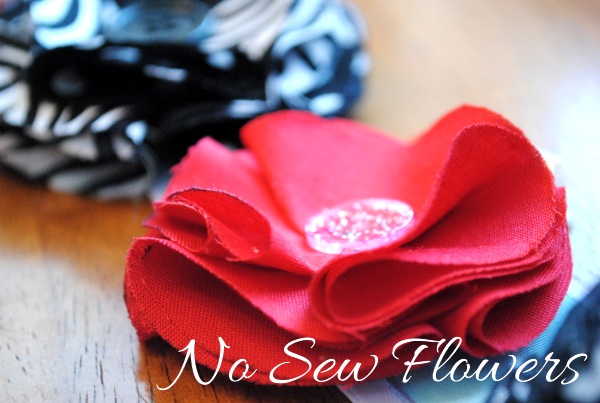
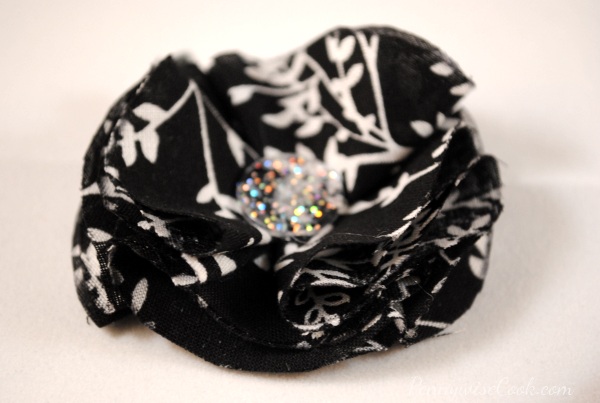
5) Glue on your button or fancy bead and fluff to your perfection. Then glue on your hair clip if necessary.

It will end up looking somewhat like this. Yours may be prettier!

Note- I didn’t take a picture of this, but if you are gluing on a hair clip be sure to glue felt to felt. Meaning cut a little piece of felt, attach it to the clip, then attach it to the back of the flower. This will ensure that it stays glued well to the flower.

And when you’re done, you have to go get your 4 year-old to model it for you like Addie did. πŸ™‚

Super adorable and the color and fabric possibilities are endless. Plus, I really love that these are really inexpensive to make. Just from my experience, here’s an idea of what things will cost to make these.

  • Fabric: $.97 (makes several)
  • Felt: $.20 (makes several)
  • Mini Glue Gun (if you don’t have one): $3.00
  • Hair Clips: $2.00 (makes several)

All in all, you’re looking at less than $10 to make several homemade flowers. Plus, you get to pick out exactly what you want, not settling for something that you don’t at a store somewhere.

Now, go! Make some incredible no sew fabric flowers that are better looking than mine. πŸ™‚


Like this post? SHARE it!

Related Posts Plugin for WordPress, Blogger...

No-Bake Strawberry Icebox Cake

It’s been a bit of a crazy week around here. It’s like it appointment season or something. We’ve had all kinds of appointments lately. And that means driving around a lot of leaving the house a complete mess between events and plans. That ended today. I was determined to get this place in order. When it gets warmer outside I always get a bit crazy on the house. There’s something in the air that compels me to do this.

Do you do a big spring clean?

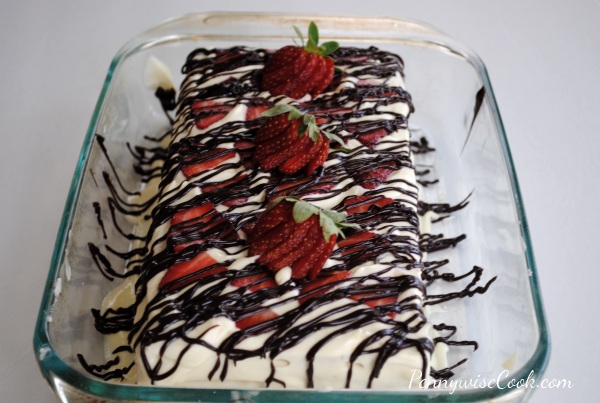
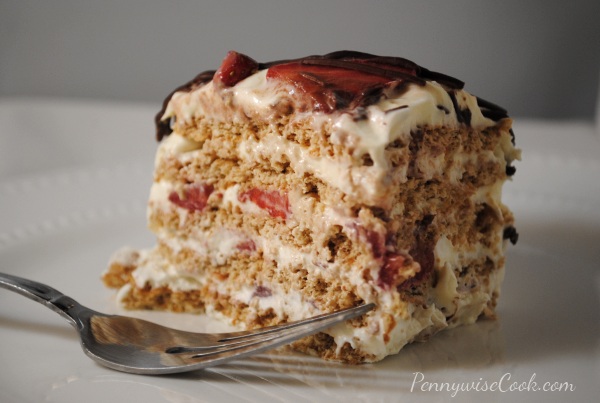
You know it’s spring when strawberries start getting cheaper. Aldi had them priced at $.49 the other day when I was in there. I about fell out on the floor when I saw that price. So of course, I did my little happy dance walking out with a few pounds of fresh strawberries. I knew I had to make something incredible. I came across this amazing looking No-Bake Strawberry Icebox Cake at The Kitchn and I immediately knew this was what I was going to whip up. It just does not get better than a cool, refreshing cake with strawberries, whipped cream, graham crackers all drizzled with chocolate. I made a few changes to that recipe to make it a little easier.

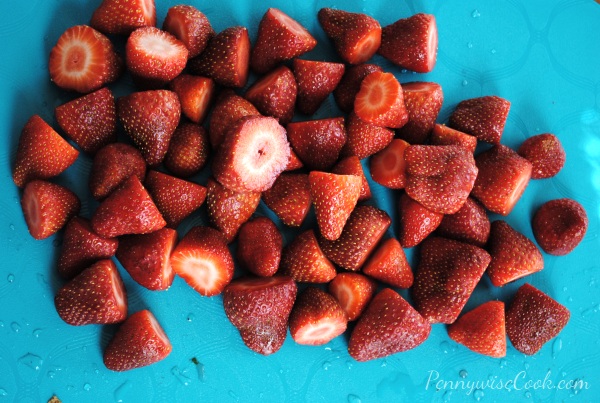
Strawberries are such a beautiful site aren’t they? I was cutting their stems off and just had to snap this picture. Can’t you almost taste them? Reminds me of summer.

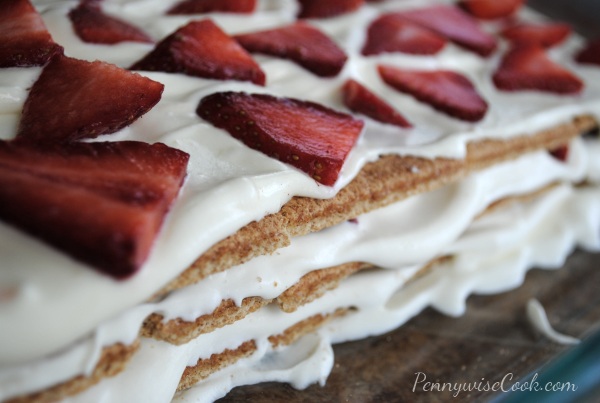
This cake is SO incredibly easy to make. I think it’s kinda funny that it’s called a cake. It doesn’t need any eggs, sugar, or even flour. It’s a simple process of layering a yummy combination of pudding and whipped cream with slices of fresh strawberries and graham crackers. That’s pretty much it! The idea is that as this sits in the refrigerator (“icebox”) that the graham crackers will soften up and become like cake. And they do!

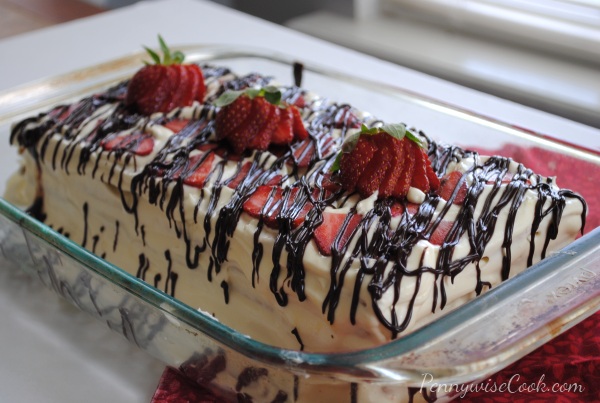
Here’s a picture to give you an idea. This cake just simply doesn’t last at my house. It makes a HUGE 9×13 pan of yumminess, but we always go through it within a couple days. I don’t feel bad though, I always use reduced fat graham crackers, sugar free whipped cream, and sugar free pudding mix. So you could call this healthy too!

This cake makes a really great dessert to serve when you have company. It looks fancy, tastes amazing, won’t bust your diet, and best of all you won’t break a sweat making it! I highly encourage you to try this one. You won’t regret it, I promise!

Adapted from The Kitchn’s recipe.

No-Bake Strawberry Icebox Cake

No-Bake Strawberry Icebox Cake

This yummy No-Bake Strawberry Icebox Cake is easy, fun, and especially yummy. Looks fancy without a lot of work!

Ingredients

  • 1 pound fresh strawberries, washed
  • 1 tub whipped cream, divided
  • 1 Package Vanilla (or your choice of white pudding)
  • 2 Cups Cold Milk
  • 24 whole graham crackers
  • 1/4 c. semi sweet chocolate chips

Method

  1. Take a couple of the best looking strawberries out for garnish later on. Remove the stems and cut the strawberries into thin slices.
  2. Make up the pudding according to the package. Most will call for 2 cups cold milk. Place in the refrigerator to set a few minutes. Once thickened, gently fold in the whipped cream. Reserve 2 tablespoons for the chocolate topping.
  3. Spread a spoonful of the whipped cream on the bottom of a 9x13 pan. Place 5 graham crackers across in a line.
  4. Lightly cover the graham crackers with more whipped cream. Add a single layer of strawberries across. Then top them with more graham crackers. Repeat this process until you have 4 layers. On the 4th layer use the rest of the whipped cream leftover by covering the sides if desired. Finish the layers off with strawberries.
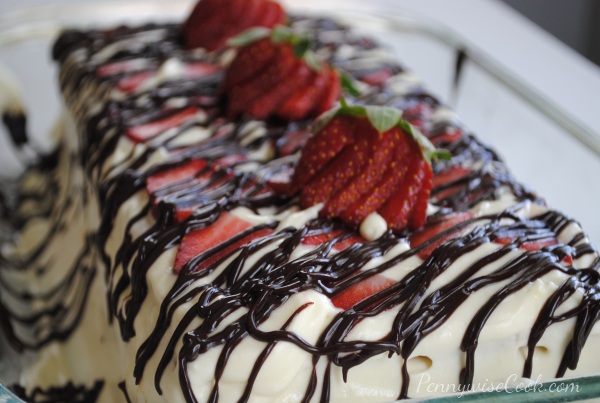
  5. For the topping, melt the chocolate chips in a double boiler. You could also microwave them if you feel confident. Mix in the 2 tablespoons of whipped cream that was reserved until smooth and shiny. Place the chocolate into a ziploc bag and snip off the very tip. Drizzle the chocolate across the cake.
  6. Top with your whole strawberries for garnish and refrigerate cake for at least 4 hours.

Notes

When it comes to pudding for this cake, I think white chocolate is a winner! You could also use cheesecake. That might be really yummy too.

Note- I don't completely cover each layer in strawberries. I just evenly distribute a little here and there. The other recipe called for 2 pounds, but I liked it just fine with 1 pound.

Feel free to use whatever type chocolate chips that you'd like. I'm going to be making one of these soon with white chocolate chips. I think that would be yummy with the white chocolate pudding.

http://www.pennywisecook.com/no-bake-strawberry-icebox-cake/


Like this post? SHARE it!

Related Posts Plugin for WordPress, Blogger...

4 Ingredient Artisan Bread

My mom used to have a bread business that she ran out of our home. I remember the smell of fresh bread baking in the oven. It’s the most glorious smell. Not to mention that it tastes amazing too.

I’m not a bread baker, but every now and then I get the itch to make up a loaf. Instead of entertaining the idea of laboring to make it myself, I usually just buy a fresh made loaf at my local grocery store’s bakery counter. Not this time. I became a bread warrior on a random Tuesday afternoon and decided it was time.

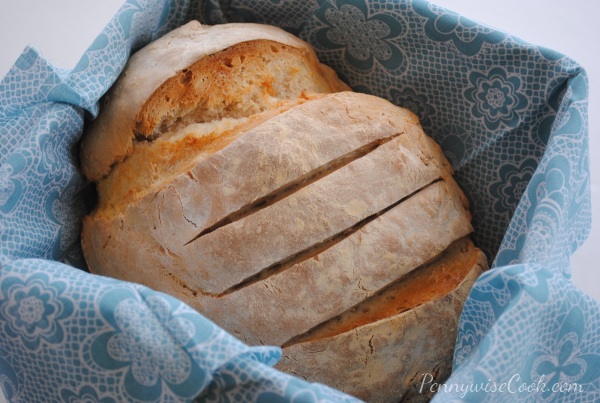
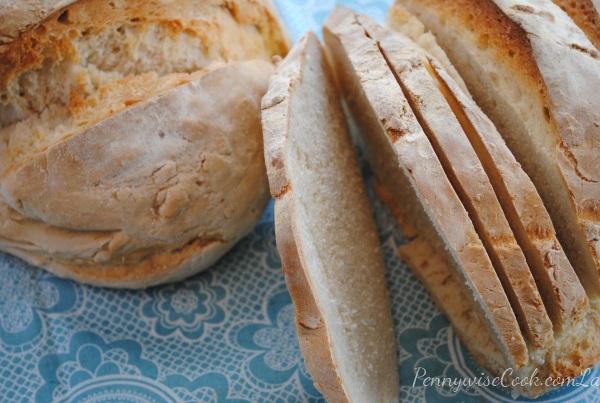
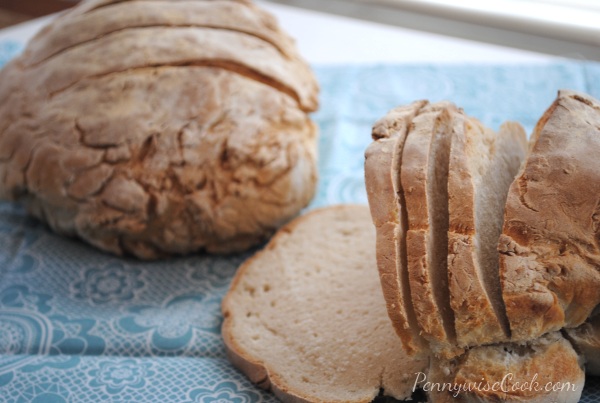
This 4 Ingredient Artisan Bread recipe was super easy, especially with my KitchenAid mixer and dough hook. Love that thing! The “labor” wasn’t near as bad as I would have expected with homemade bread. The waiting for the rising was the worst part, but I have kiddos that keep me occupied so I survived the waiting.

This bread made the perfect complement to our warm meal that night. It made two loaves and I shared the other with our neighbor.

Recipe thanks to JoCooks!

4 Ingredient Artisan Bread

4 Ingredient Artisan Bread

This easy recipe is great for making a nice crusty bread for soup!

Ingredients

  • 3 cups of lukewarm water
  • 1 1/2 tbsp active dry yeast
  • 1 1/2 tbsp salt
  • 6 1/2 cups all purpose flour

Method

  1. In a medium bowl add the warm water, salt and yeast and stir together.
  2. In the bowl of your mixer add all the flour, then pour the yeast mixture over the flour and mix using the dough hook of your mixer, until it’s all well incorporated.
  3. Place the dough in a large plastic container, it needs room to rise, and put the lid on it, but do not close completely, there needs to be one corner left open to let the gases escape. You could also use a large bowl, covered well with plastic wrap and poke a couple small holes in the top using toothpicks.
  4. Let the dough rise for 2 hours.
  5. The dough will be very sticky and elastic. It is recommended to bake this on a stone, however a regular baking sheet will work just fine. Cover the baking sheet, or stone with parchment paper.
  6. Add some flour to your hands, and divide the dough in two pieces. Add more flour to your hands as necessary. Shape the dough into the desired shape for your bread and place it seam down on the baking sheet. Sprinkle some more flour on top of the loaves. Let the loaves rest for another 30 minutes so that they can rise a bit.
  7. Preheat oven to 450 F degrees. Before placing the bread in the oven, add a pan with a cup of water and place it in the bottom rack. Slash the top of your bread, to allow gases to escape.
  8. Bake for 30 to 35 minutes. The water will allow for the bread to form a nice crusty top.
  9. Cool before serving.
http://www.pennywisecook.com/4-ingredient-artisan-bread/

Save on the ingredients in this recipe:

  • $0.40/1 Fleischmann’s Yeast, exp. 4/8/12 (SS 12/04/11)
  • $0.40/1 Fleischmann’s Yeast, exp. 4/15/12 (SS 11/06/11)
  • $1/1 Ultragrain All-Purpose Flour with Whole Grain, exp. 4/30/12 (SS 11/06/11 R)

Like this post? SHARE it!

Related Posts Plugin for WordPress, Blogger...

Milky Way Granola Bars

You guys know how I get my cravings. Usually they spark a recipe invention and interesting concoctions. They are sometimes fabulous and other times complete fails. The other night I got a wild hair. I came across a recipe for making cookies out of Reeses cups and an egg. So I thought I wonder if I can do the same with Milky Ways. Had I been using my brain it would have been obvious that the Milky Ways wouldn’t work because they are caramel and chocolate rather than peanut butter, but I had tunnel vision and was a bit determined.

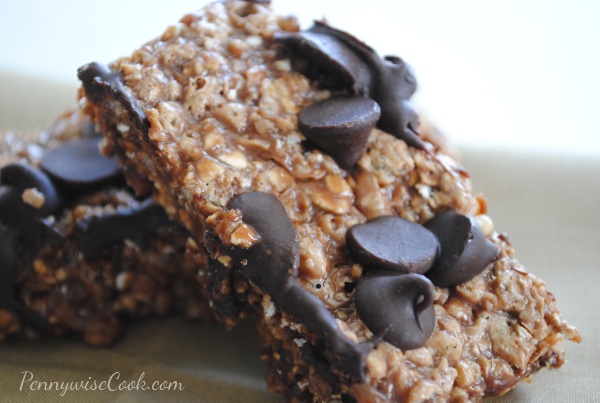
So I set out to create Milky Way cookies by placing 24 fun-size Milky Way candy bars into the food processor with one egg. The result? very smooth and creamy chocolate-y and caramel-y mush. There was no way this was making a cookie. So I got innovative and created these granola bars out of the mush and boy were they tasty!

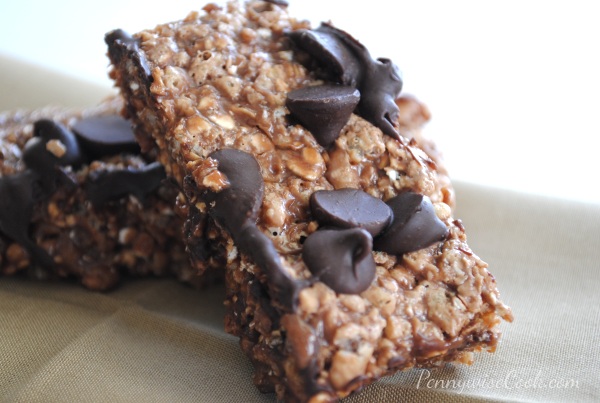
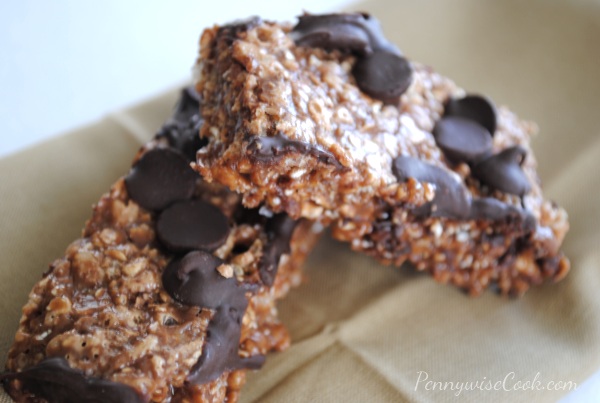
These Milky Way Granola Bars kinda resemble Little Debbie Star Crunches if you’ve ever had those. They are some of my favorite cookies.

Crunchy with a touch of caramel and chocolate, these aren’t your average granola bars. Don’t expect them to fill you up with protein or replace a meal, these aren’t exactly healthy. But we can pretend they are since they are, after all…..granola bars.

Milky Way Granola Bars

Milky Way Granola Bars

A twist on your average granola bar, these are indulgent and include a favorite candy bar!

Ingredients

  • 3 Packages of Fun-Size Milky Way Candy Bars (24 Total)
  • 2 c. Rice Krispies
  • 1 c. Quick Cooking Oats
  • 1 Egg
  • 1/4 c. Chocolate Chips

Method

  1. Preheat oven to 350 degrees. Spray a baking dish with nonstick cooking spray and set aside.
  2. Unwrap all the Milk Way candy bars and place in a microwave safe bowl. Microwave for about 45 seconds or until a little soft. You don't want to get them melted just a little softened so you can chop them in the food processor.
  3. Place the candy bars in the food processor and chop until there are no longer any big pieces. Add the egg and chop until smooth.
  4. In a large bowl, pour the smooth candy bar mixture along with the rice krispies and oats and mix well. Flatten into your baking dish using the back of your spoon.
  5. Sprinkle the chocolate chips evenly across.
  6. Bake for about 12 minutes. Let cool completely before cutting.

Notes

When flattening these into your baking dish, I find it helps to spray the back of my spoon or hand with cooking spray before hand. It keeps them from sticking.

After they bake, you might place them in the freezer or refrigerator for 15 minutes to give them a head start on hardening if you are in a hurry.

I find these stay together pretty well.

http://www.pennywisecook.com/milky-way-granola-bars/


Like this post? SHARE it!

Related Posts Plugin for WordPress, Blogger...

Chicken and Waffle Sandwiches

We had an awesome weekend. Got some yard work done, ran some errands, went to church, and had some friends over. Oh and I ran 5 miles! It felt really great too. I love runs like that.

How was your weekend?

I eat healthy most of the time. Even on the weekends when I “splurge” I find that I can’t help by choose the healthiest options. It’s a blessing and a curse I guess. Sometimes I try to substitute things for other things that just don’t turn out right. For instance, you just can’t use I Can’t Believe It’s Not Butter Fat Free in place of regular butter. It will burn and ruin whatever you’re using it for. But there are tons of other ways to make shortcuts that I use on an everyday basis. Did you catch my post about swapping mushrooms for meat? That’s a great example!

Sometimes I crave ridiculous stuff like those little chocolate covered Hostess donuts. You know the ones. OH MY are they delicious. I have no doubt that I could sit and eat an entire bag in one sitting. Or how about those cheese fries at Outback? They are so incredibly amazing. I remember when I used to go eat there and order those as an appetizer AND a meal on top of that.

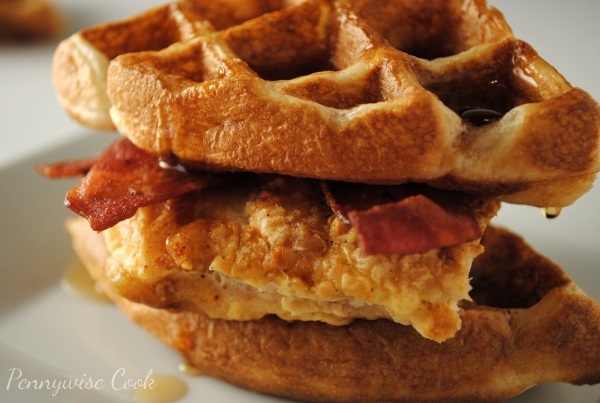
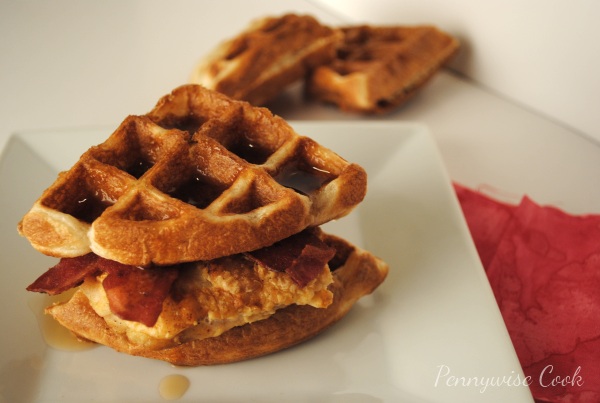
The other night I was craving a southern sandwich that is maybe a little foreign to some. A chicken and waffle sandwich. A normal sandwich like this consists of crispy fried chicken sandwiches between two waffles and slathered with maple syrup. So insanely delicious.

I decided to whip these up for the fam that night and they satisfied my craving and were really tasty! If you’ve never tried one of these and want a lighter version you might try this out for yourself. They are so yummy. These are more like mini sandwiches since I used 1/2 a Belgian waffle for each. However, each sandwich does have half a chicken breast and along with the waffle they are actually quite filling!

Chicken and Waffle Sandwiches

4 Sandwiches

Chicken and Waffle Sandwiches

A lightened up version of the Chicken and Waffle Sandwich.

Ingredients

  • 2 Belgian Waffles
  • 2 Chicken Breasts
  • 1/3 c. Egg Substitute or 1 Egg
  • 1/2 c. Flour
  • 1 Tsp. Kosher Salt
  • 1 Tsp Paprika
  • 1/4 Tsp. Pepper
  • 1/4 c. Olive Oil
  • 4 Pieces Turkey Bacon
  • Sugar Free Syrup

Method

  1. Mix the flour, kosher salt, paprika, and pepper together and place on a plate.
  2. Heat the olive oil in a skillet over medium high heat.
  3. Dredge chicken breast in the egg then in the flour and seasonings. Place in skillet and brown until crispy. About 4-5 minutes on each side.
  4. Cut each chicken breast in half and place on 1/4 of Belgian waffle. Tear 1 piece of bacon in half and place on chicken then top with another 1/4 of Belgian waffle.
  5. Pour syrup over the top and eat!

Notes

I used Batter Blaster to make my Beligan waffles, but feel free to use your favorite batter recipe or premade mix.

To cook your bacon quickly, place the 4 pieces on a paper towel and microwave for 1-2 minutes until you reach desired crispiness.

http://www.pennywisecook.com/chicken-and-waffle-sandwiches/


Like this post? SHARE it!

Related Posts Plugin for WordPress, Blogger...

Fun with Stuff that Jiggles

You know what I’m talking about!

One of my favorite snacks of all time is Jell-O. It brings me back to childhood and always reminds me of Jigglers no matter what shape it’s in. Though we don’t make it nearly as much as we should, it’s one of those snacks that takes time therefore we often pass it up. It’s silly since there is a speedy method, but we’re impatient.

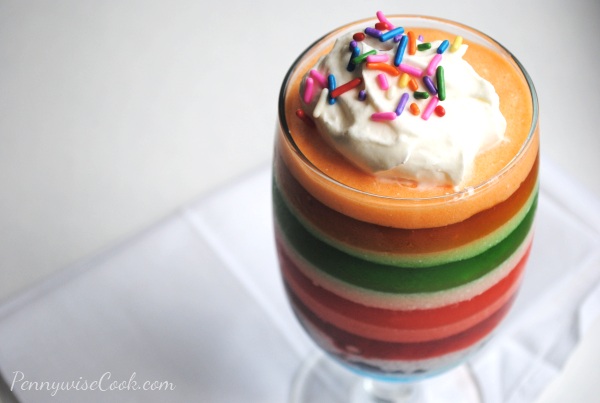
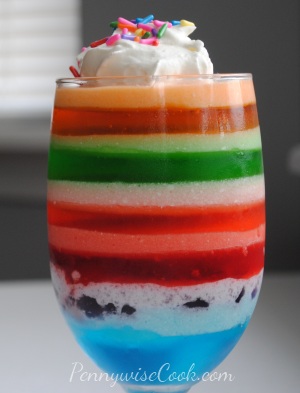
As you may know, I’ve been on Pinterest. I can’t get away from that place. Someone really needs to put some type of timer on there for how long you can be on it per day. Or maybe I just need to have self control….. Nah, that’s an awful idea. πŸ™‚ I came across this rainbow Jell-O over at Glorious Treats and immediately thought of my Addie. She is all about rainbows and bright colors so this was perfect for a mother-daughter project. We are still novices at these treats so ours didn’t turn out as perfect as Glorious Treats did. But we’ll get better. Addie will make sure of it!

I’m not going to lie, it took some time. Each layer has to set before the next can be applied. Even with the speedy method it seemed to take a while. You see the bottom layer there? Where the purple kinda stepped into the blue’s kool-aid? Yep. That’s where we got a little impatient. As we went on you can see that we learned out lesson and to make sure they set properly before moving on.

When picking out your Jell-O, there aren’t as many flavor options in sugar-free. So you’ll have to get a little crazy and get the kind full of sugar in order to have pretty colors. Unless your store is just a lot cooler than mine and they have a lot of sugar-free flavors.

I will tell you, the regular Jell-O didn’t set as fast or as well as the sugar-free. The blue and purple in that picture were regular and needed a lot more time that the others. Just FYI.

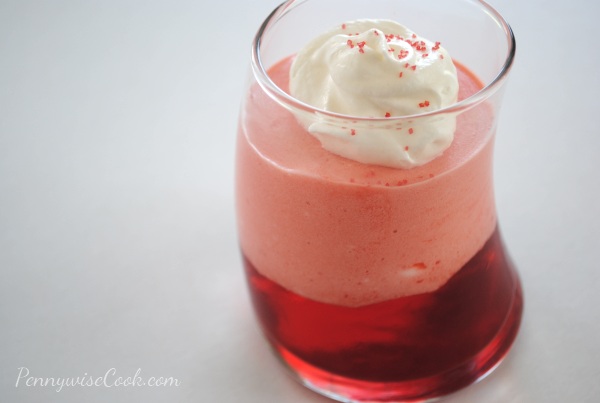
With some of the leftover red that we had, I made up this little parfait. The lighter color is simply already made Jell-O with a little cool whip stirred in. This was such a refreshing treat! I think my most favorite part of these snacks is that they are sweet and satisfy my craving for something sweet. Yet all the while they are low calorie and healthy! But don’t tell the kiddos.

How about making some JellO Treats of your own?

Fun with Stuff that Jiggles

Fun with Stuff that Jiggles

Springtime is here! Celebrate the beautiful colors blooming with this colorful way to make Jell-O!

Ingredients

  • 1 (small) Box of Jell-O for how many colors you'd like to make
  • 1 Tub of Cool Whip
  • Glasses to pour Jell-O into (I'd say at least 3)

Method

  1. Prepare your first flavor according to the speedy method on the package. Pour a little into the bottom of each glass. Divide it among however many glasses you have. Leave about 1/3 of it to combine with cool whip.
  2. Place those glasses in the refrigerator to set. Meanwhile mix 1/4- 1/3 cup cool whip with the leftover Jell-O. When glasses in the refrigerator have set most of the way, pour a little of the cool whip Jell-O into each of those glasses.
  3. Continue this method until you have used all of your colors.
  4. You can add a dollop of cool whip to the top and sprinkles if you'd like!

Notes

Like I said before, I'd recommend only using sugar-free Jell-O. Just make sure that you don't rush it. They each need time to set to look pretty πŸ™‚

If you are extremely impatient you can place it in the freezer to get it to set a little faster. We did this with a couple of the flavors. Just note that it sets really fast.

http://www.pennywisecook.com/fun-with-stuff-that-jiggles/


Like this post? SHARE it!

Related Posts Plugin for WordPress, Blogger...

Frugal DIY: Coffee Filter Flowers


I’ve really been working on spending more time away from the computer. I think that looking at a computer screen and being so deep into social media and facebook (etc.) can really start to drain your brain. I find that spending part of my day completely unplugged really helps me to just feel better overall and that I can devote time to family and fun.

My mom called me Becky Homecky the other day….. I’d never actually heard that phrase before. She was surprised, but I honestly hadn’t. I knew what it meant immediately and I would consider it a compliment. Thanks mom! But as I pondered what exactly that meant, I began to think that I’m not really a Becky Homecky after all. I just like to cook. I HATE to clean. I intensely despise doing the dishes, but I like vacumming. Kinda weird huh?

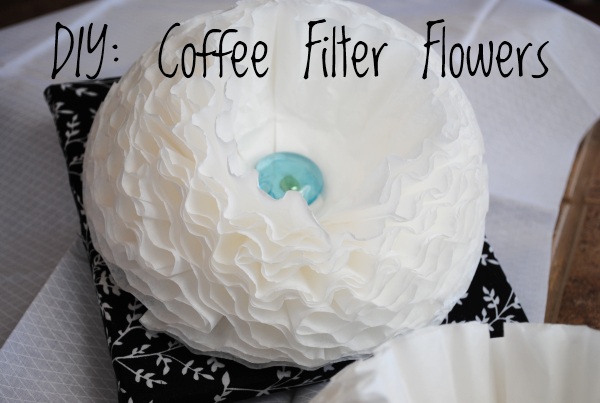
I came across this idea for Coffee Filter Flowers on Creature Comforts and got a little giddy about this craft because I thought hey, I can totally do that! So I did. These are so super easy and they make me feel like a true Becky Homecky, y’all.

Coffee filters cost what? Like $1 at the dollar store! You can’t beat that price for a homemade flower.

What you need:

22 Coffee Filters
Metal Brads or Brass Fasteners (I found them at Walmart for around $2.50)
Button, jewel, or ornament for the center (I used marble jewels that I got at Dollar Tree)

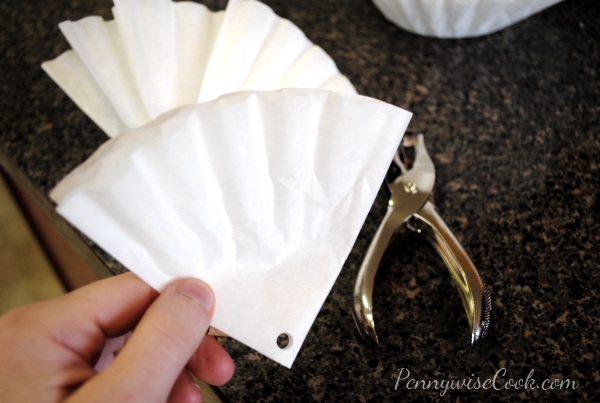
1) Fold the filter in half. Then in half again. Punch a hole with a handheld puncher and then place the brad through.

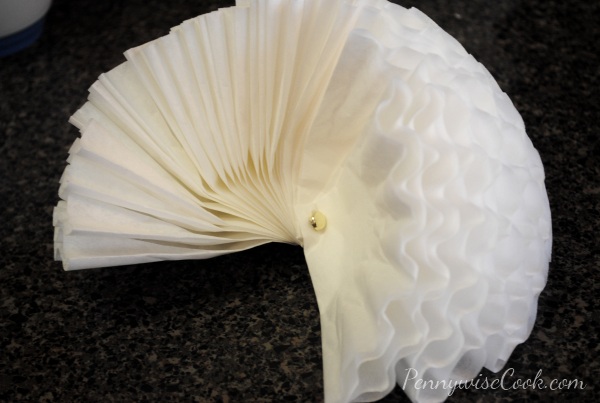
2) Continue doing this for all 22 of your coffee filters, fanning them out as you go. Don’t worry about it being perfect, you’ll be able to fix it at the end.

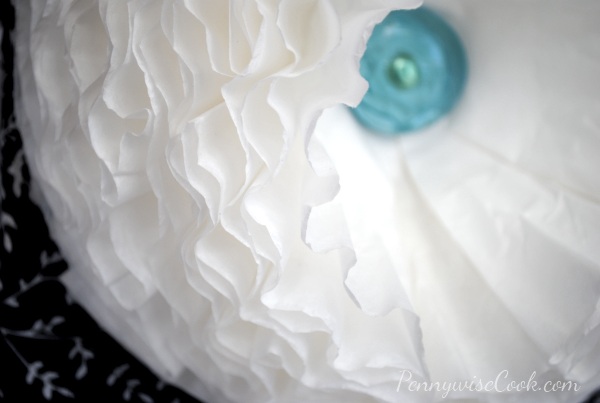
3) Once you’ve got them all together, bend the brad on the back and fluff and organize the flower like you desire.

4) Hot glue your jewel or ornament to the middle to keep it all together and finish off your flower.

If you want to make a hanging pom pom with these, you simply tie a string to the back of the brad and hot glue two of these together. Beautiful decorations for a party!

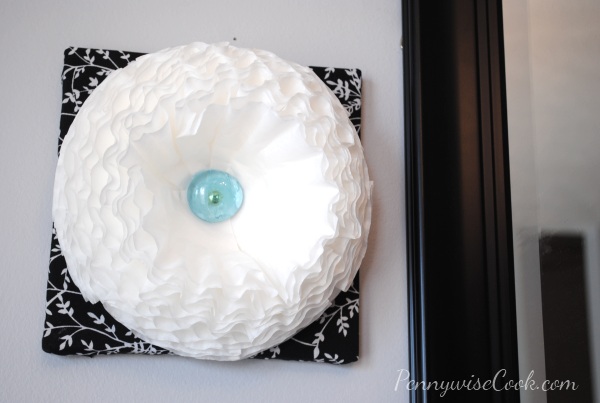
I hung a couple of these up next to the mirror in our kitchen. I just glued the flower to a small canvas ($1 at Dollar Tree) that I covered with a little fabric. It was fun. I got to use my staple gun. I always feel powerful with my staple gun. πŸ™‚

You can also dye these to be any color you’d like. Place a little latex paint (your choice of color) into a bowl and water it down well. Dip the coffee filters into the water until it absorbs the color. Let it dry and assemble the flowers like above.

I’m going to have a party this summer and I plan to make a bunch of these to hang around that match the theme. I’ll be sure to take pictures!


Like this post? SHARE it!

Related Posts Plugin for WordPress, Blogger...

Gimme S’more Cookies

So I got a sweet tooth the other day. Actually, I get sweet teeth everyday. But by now, I’m sure you’ve figured that one out.

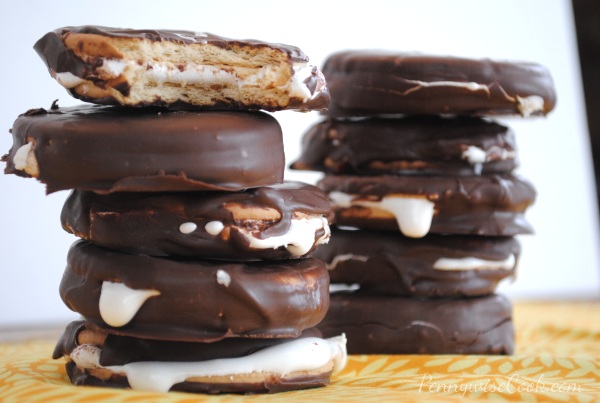
My latest sweet tooth led me to recreate homemade moon pies. You know, those graham cracker-y, marshmallow-y, chocolate-y cookie cake thingys that are incredibly yummy. They go really well with RC Colas too. They have a festival not too far from me called The RC and Moon Pie Festival. No joke. Each year, they create the world’s largest moon pie and it’s huge! There are sack races, hula hoop contests, and even live blue grass music. Everything that you’d expect from a quaint little festival. It’s really a lot of fun. If you’re in the Nashville area, it’s June 16th this year if you’d like to check it out.

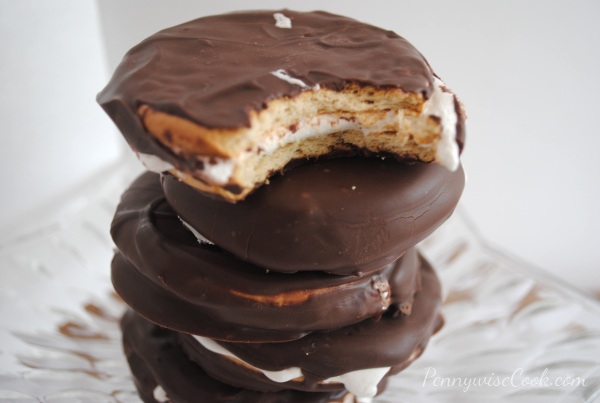
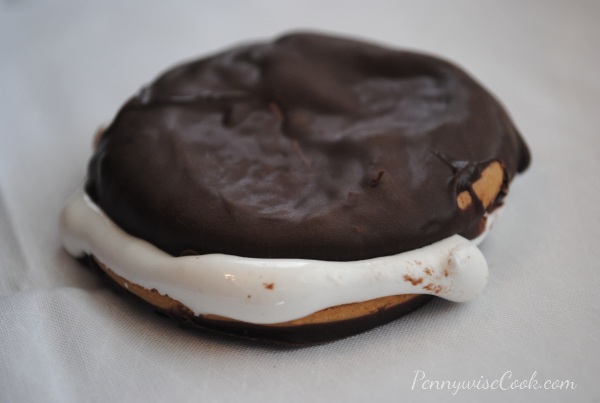
The funny thing about this moon pie recipe adventure is that I didn’t end up making moon pie cookies. I was fully expecting the cookies to soften a little, but alas they did not. They tasted much more like S’mores instead. And I’m not going to lie, this accidental recipe was fantastic!

I think that my favorite part was that it didn’t cost a bundle to make these. The ingredient that cost the most was the Dolci Frutta Hard Shell Chocolate at $2.98. I found the round cookies at Dollar Tree. I believe they are called “Maria” cookies. I also got my marshmallow cream there. So all in all these cost about $5 to make. These cookies would make an awesome sleep over snack! And no need for a camp fire. Those can be dangerous anyways. πŸ˜‰

These are incredibly easy, but most likely won’t last long if you leave them around.

Gimme S’more Cookies

Gimme S’more Cookies

Forget the fire and whip up some of these Gimme S'more Cookies!

Ingredients

  • 1 Package Round "Maria" Cookies (Or Shortbread Cookies)
  • 1 Tub Marshmallow Cream
  • 1 8 oz Canister Dolci Frutta Hard Shell Chocolate

Method

  1. Spread about 1 and 1/2 tablespoons marshmallow cream between two cookies. Repeat until all the cookies are gone. Place in the refrigerator for 45 minutes to 1 hour.
  2. Line a baking sheet with wax paper. (Or lay it out on the counter)
  3. Heat up Dolci Frutta according to the directions on the package.
  4. Take cookies out of the refrigerator and dip into chocolate. Place on wax paper and let cool.

Notes

It's necessary to put these into the refrigerator before dipping them so that the cookie and marshmallow can kinda fuse together and harden that way.

If you can't find the Maria cookies, even regular graham crackers would work just find. You'll have square cookies instead of round. Any sweet cookie would work just fine. These were fairly large.

http://www.pennywisecook.com/gimme-smore-cookies/


Like this post? SHARE it!

Related Posts Plugin for WordPress, Blogger...