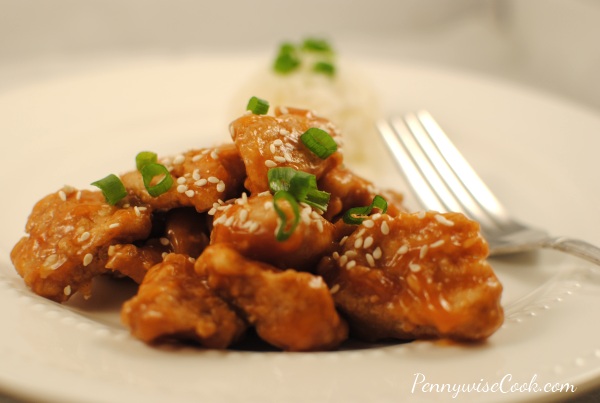
Sticky Sesame Chicken

I have always been a huge fan of Chinese food. I absolutely love garlic, onions, soy sauce, you name it. The combination that is used in that ethnicity is just my kind of flavor. And what most people don’t realize is that a lot Chinese dishes are simple to make. There are two things in recipes that I look at to decide if I want to make it.

1) Does it contain ingredients that I would have on-hand or that I would actually buy and use later?
This is what makes it frugal. You don’t want to have to make a special trip to a crazy store 30 minutes away to use that ingredient just once.

2) Is the recipe simple with steps that are easy to follow?
I’m all about simple. If a recipe contains a bunch of steps that are difficult, I usually move on. I’m ok with maybe one challenging step in a recipe, but the more challenging the more time it takes and the less simple that it becomes. And we all know that time is very important too. With two kiddos and a hungry husband, there’s not a moment to spare when getting dinner on the table.

If you’ve been following this blog for a while, then you know I’m a big fan of Hungry Girl. I love her use of resources and out of the box thinking when it comes to making meals healthier. I found this recipe for Sesame Chicken over there and I was a bit turned off by the ingredients to be honest. There are a total of 15- 16 ingredients in this recipe. Yeah, exactly. It doesn’t sound like one of those easy recipes, but after actually seeing what the ingredients were I quickly changed my tune.

With the combination of regular everyday ingredients that you might have on hand, you can whip up this super yummy Sticky Sesame Chicken! I’m serious too, it’s healthy but it’s also amazing! The only drawback to this recipe is the time it takes to coat each piece of chicken. Just make sure that you give yourself plenty of time to do that when preparing this recipe.

Recipe adapted from Hungry Girl.
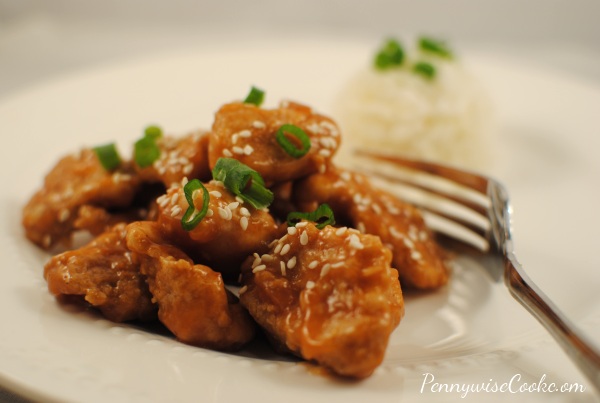
Sticky Sesame Chicken

2 Servings

Serving Size: 1 Cup

288

Sticky Sesame Chicken

Make your own yummy Sesame Chicken just like your favorite Chinese restaurant without all the extra fat!

Ingredients

  • 10 oz Boneless Skinless Chicken Tenders, chopped into bite-sized pieces
  • 1/8 tsp. salt
  • 1/8 tsp. black pepper
  • 1/4 cup fat-free liquid egg substitute
  • 1/4 cup whole-wheat flour, divided
  • 1/4 cup fat-free chicken broth
  • 1 tbsp. cornstarch
  • 2 tbsp. sugar-free pancake syrup
  • 2 tbsp. seasoned rice vinegar
  • 1 tbsp. ketchup
  • 1/2 tbsp. lite/low-sodium soy sauce
  • 1/2 tsp. sesame oil (I used olive oil)
  • 1/2 tsp. crushed garlic
  • 1 tsp. sesame seeds
  • 2 tbsp. thinly sliced scallions (optional)

Method

  1. Preheat oven to 375 degrees. Spray a baking sheet with cooking spray and set aside.
  2. Place chicken in a bowl, season with salt and pepper, and cover with egg substitute. Toss to coat and set aside.
  3. Place 2 tbsp. flour in another bowl. Use a fork to transfer half of the chicken to the flour bowl, allowing excess egg substitute to drain back into the egg bowl. Thoroughly coat chicken with flour, and then transfer to the baking sheet. Wipe the bowl clean, and then do it again with remaining flour and chicken.
  4. Bake chicken in the oven until cooked, about 10 minutes.
  5. Meanwhile, combine broth with cornstarch in a small nonstick pot and stir to dissolve. Add the syrup, vinegar, ketchup, soy sauce, oil, and garlic. Mix well and bring to medium heat on the stove. Stirring often, cook until thick, 2 - 3 minutes. Set aside.
  6. Place cooked chicken in a bowl, top with sauce, and toss to coat. Sprinkle with sesame seeds.
  7. Top with scallions or crushed red pepper if desired and serve!

Notes

This recipe is made for 2 people, but I had more than 10 oz of chicken so I added a little of each ingredient to make it go further for our family. I used vegetable oil instead of sesame oil and it turned out just fine. So don't fret if you don't have that. Make sure that your chicken is nice and warm when you serve it with the sauce. I found that it gets cold pretty quickly.

http://www.pennywisecook.com/sticky-sesame-chicken/


Like this post? SHARE it!

Related Posts Plugin for WordPress, Blogger...

Easy Chocolate Peanut Butter Fudge

We had a very good day today. Britton, my 9 month old, was in a very pleasant mood the entire day. And you know that always keeps momma in a good mood too. It was goregeous outside today so Addie got to play outside for quite  long time. And this was probably the first time that Britton ever got to go outside for a length of time. She absolutely loved it! Minus actually having to touch the grass (we kept her on a blanket), she was all about the outdoors. Her favorite part was the wind.

It was such a nice reminder of how we should take a minute every now and then to enjoy the small things in life. Like wind on our face and the sound of birds chirping. I know I sound a little silly, but I’m totally serious. With spring time around us, it’s such a beautiful time to really enjoy nature and the simpler things.

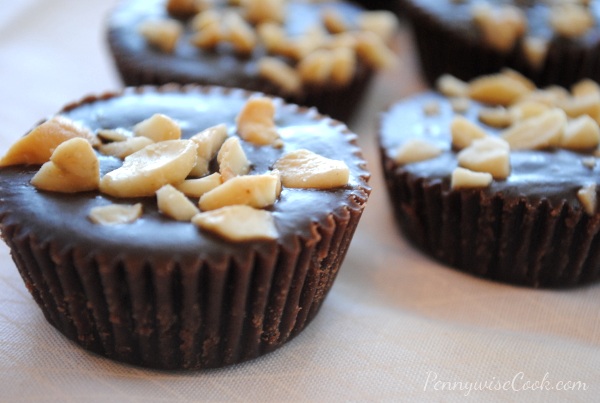
You know what else that I love anytime of year? FUDGE! I’m pretty sure that fudge is the cure-all for just about anything. It’s like an instant pick-me-up. There’s just something about that creamy and smooth texture that makes it enjoyable. I made a recipe for Two-Ingredient Peanut Butter Fudge over on Saving with Amy a while back. It only calls for two ingredients which makes it not only easy, but also extremely affordable as well. I decided to make up my own little recipe with this one as a base to kinda spice it up and make it a little fancier.

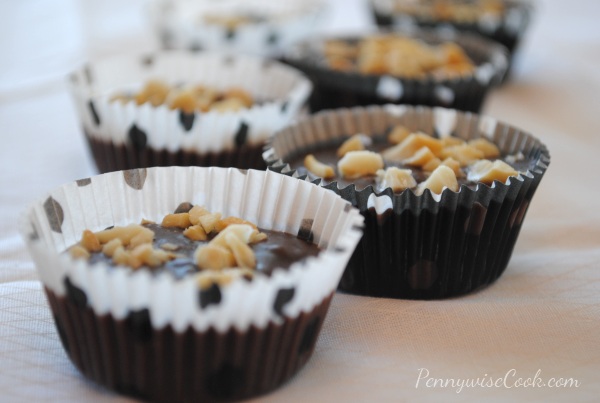
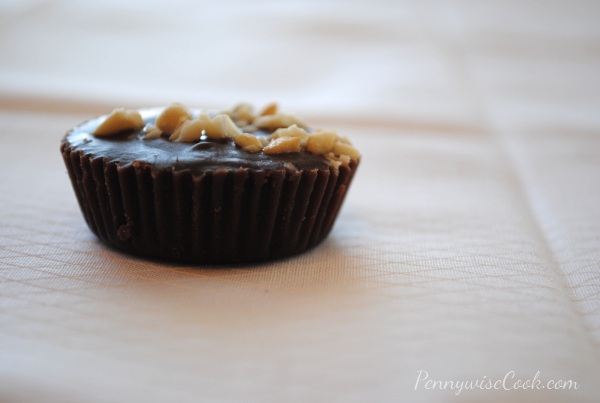
Mini muffin liners make the best fudge wrappers! They make them like little Reeses cups which is also really easy for serving. No sticky fingers and they look pretty too.

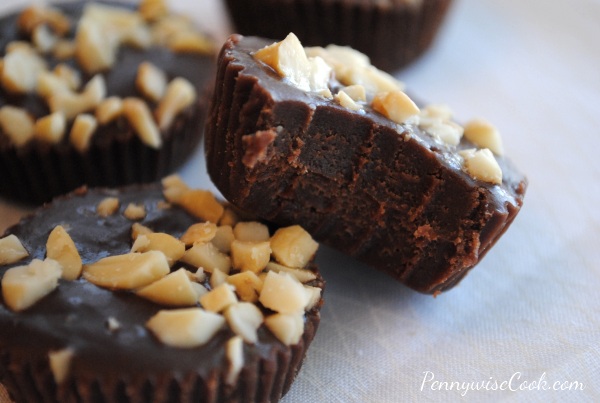
The two ingredient method works well, but it doesn’t stay firm for long periods of time. In putting together this Chocolate Peanut Butter Fudge, I wanted to add something to make it thicker and also keep it firmer. So I ended up adding some chocolate chips and cornstarch to the equation. I think it did a world of good for this fudge. And as you see, I fancied it up a bit with chopped cashews on top. This was the best fudge I’ve made! You might just like it too.

One of favorite things about this recipe is that you can actually make it healthy by using reduced fat peanut butter and use sugar free frosting! I haven’t tried this recipe with natural peanut butter before so I’m not sure that it will have the same consistency.

Easy Chocolate Peanut Butter Fudge

Easy Chocolate Peanut Butter Fudge

This super easy recipe for fudge is tasty, smooth, and perfect for "one of those days". Or any day!

Ingredients

  • 1 18 oz Jar Peanut Butter (Creamy or Crunchy)
  • 1 16 oz Tub Chocolate Frosting
  • 1/3 C. Chocolate Chips
  • 1 Tsp Cornstarch
  • 1 Tsp Water
  • Chopped Cashew or Walnuts (Optional)

Method

  1. Place peanut butter and chocolate frosting into a large bowl. Microwave for 1 minute. Remove and stir. Microwave for 1 more minute.
  2. Meanwhile, dissolve the cornstarch into the tsp of water.
  3. Melt chocolate chips in a double boiler (or microwave them to melt)
  4. Remove the fudge mixture from the microwave and stir in the cornstarch and melted chocolate chips.
  5. Pour into mini muffin liners or pan. Top with chopped nuts.
  6. Freeze for 45 minutes to help set quickly.

Notes

Melting the chocolate chips isn't a must. I haven't tried leaving them whole, but I'm sure that it would be tasty even if they didn't melt. Freezing the fudge is not absolutely necessary, but I find it helps it to set better. The peanut butter that you use is completely up to you. I love creamy because it makes the fudge smooth, but by all means if you like things crunchy, crunchy peanut butter works just as well.

http://www.pennywisecook.com/easy-chocolate-peanut-butter-fudge/


Like this post? SHARE it!

Related Posts Plugin for WordPress, Blogger...

Lasagna Cupcakes

What’s the one thing that you always have to hand at all times? Milk? Cheese? Perhaps a tub of ice cream? 😉

One of my important things to have in my fridge these days is wonton wrappers. You’ve probably seen them in your grocery store before. I encourage you to pick some up the next time you’re at the store. They usually run around $2.99 for a package (give or take a little). They are so incredibly versatile when it comes to making small foods. Yes, that’s been one of my obsessions lately. Anything teeny tiny and can fit in your palm. I mean come on, how cute are cupcakes? What about Meatloaf Cupcakes? If you haven’t gotten a chance to make those yet, you’re missing out!

I first came across these Lasagna Cupcakes reading up low calorie recipes in the Hungry Girl cookbook. I was floored when I found them and could not wait to make some up. They turned out beautiful and quite tasty (even to the hubby), but they were a little bit spinach-y. I like spinach more than I ever have, but only when it’s nicely camouflaged and hidden. I don’t even mind seeing my food green because of spinach, but it just can’t taste like spinach.

So I came up with my own version of this main dish cupcake and it was fabulous!

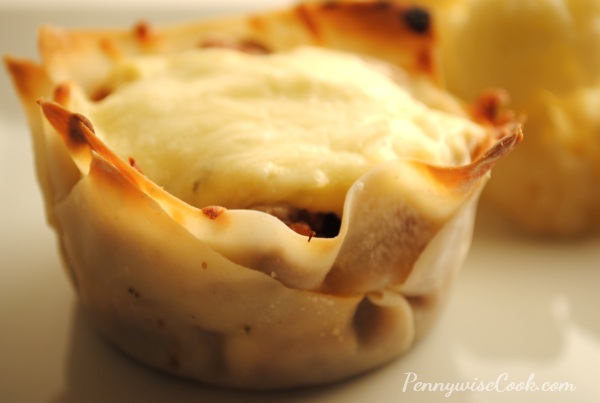
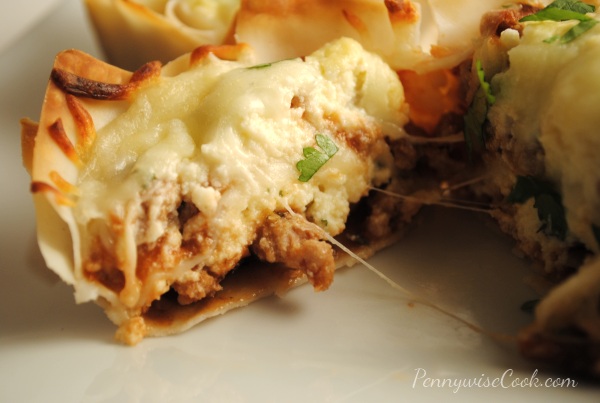
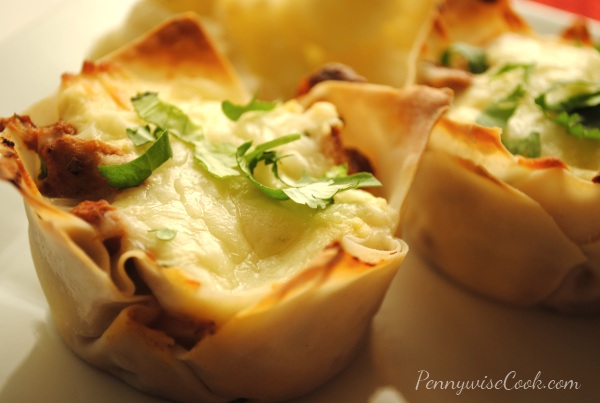
On the outside, these are adorable and so incredibly cute, but on the inside they actually taste like mini lasagna. Two words come to mind- portion control. These are the perfect idea for a party or having company over. They look like a million bucks, but it’s basically the same as lasagna without the noodles and in tiny form. Most everything is cute in tiny form and kids love that which makes this a kid-friendly dish as well!

Putting the wonton wrappers on added more prep time, so just be aware of that. But other than prep time, this is an easy meal. Serve it up along side a salad and corn and you’ve got a meal.

Lasagna Cupcakes

Lasagna Cupcakes

Ingredients

  • 1/2 Pound Ground Turkey or Extra Lean Beef
  • 1 c. Ricotta Cheese
  • 1 and 1/2 c. Mozzarella Cheese, divided
  • 1 c. Parmesan Cheese
  • 1 8 oz Can Tomato Sauce
  • 1 Large Egg or 1/4 c. Egg Substitute
  • 1 Medium Onion, Chopped
  • 1 Tsp Garlic
  • 24 Wonton Wrappers
  • 1 Tsp Italian Seasoning
  • 1/4 Tsp Salt
  • 1/8 Tsp Pepper

Method

  1. Preheat the oven to 375 degrees.
  2. Over medium-high heat, brown ground turkey, onion, garlic, salt and pepper until meat is no longer pink. Add in tomato sauce and simmer for about 5 minutes.
  3. Spray a muffin pan with cooking spray and set aside.
  4. Meanwhile, mix ricotta cheese and egg.
  5. Place a wonton in each muffin well bringing it up along the sides.
  6. Distribute 1/2 the ricotta mixture among the cups.Smooth them out with a spoon.
  7. Top those layers with 1/2 the meat mixture and evenly distribute. Add 1 tbsp mozzarella cheese on top of each meat mixture.
  8. Place another wonton wrapper in each cup.
  9. Repeat those steps and then bake them for about 10 minutes or until the cheese is all melted.
http://www.pennywisecook.com/883/


Like this post? SHARE it!

Related Posts Plugin for WordPress, Blogger...

Berry Tasty Blueberry Cheesecake

I know that the title of this post is a little cheesy. Lookie there I did it again. I crack myself up! I hope that your weekend was nice! I always love lazy Saturdays. After about 10 of them in row where we had something that we wanted to organize, clean, etc. it’s nice to have one that is spent just doing whatever. Like painting toenails or taking a walk. Or doing the laundry which is technically still cleaning, but instead of actually taking them out the dryer you leave them so you don’t have to fold them.

My latest laundry epiphany is that we actually have a laundry basket! Came across it in the closet the other day. Those are quite handy when transporting clothes from one room to another you know. Don’t you just hate when you go to pick up a pile of clothes from the bed or floor that one sock that likes to jump ship? Then you lean down (with your hands full of clothes) to pick up that one sock and then more things fall from the pile?

I sometimes feel like that about things in life. It’s like you work so hard to organize your house, plans, relationships (etc), only to have pieces of it fall apart. But you know what? If you put it off, you’re just stuck with stinky laundry so you have to deal with it some time! Wow, leave it to this mom to compare life to a pile of dirty laundry.

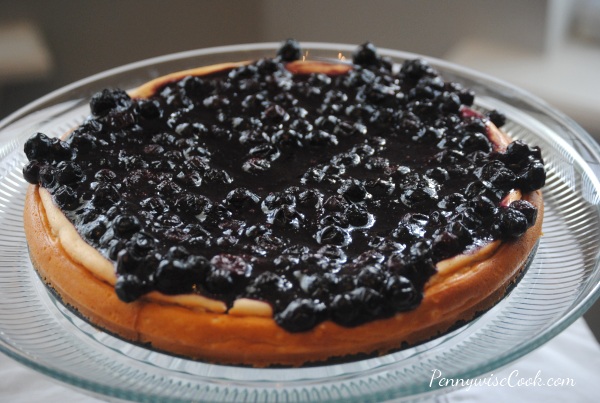
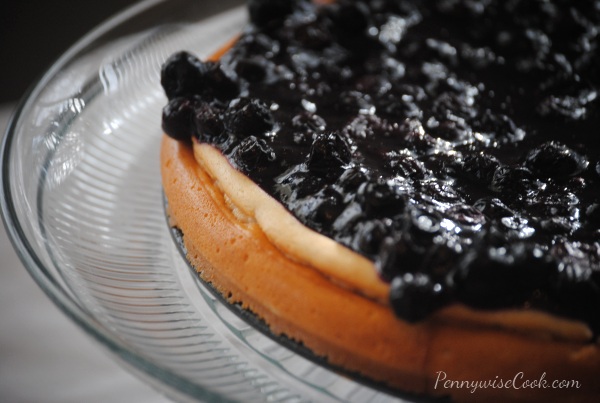
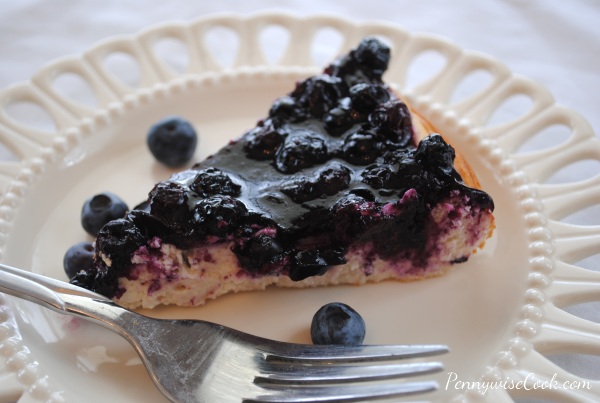
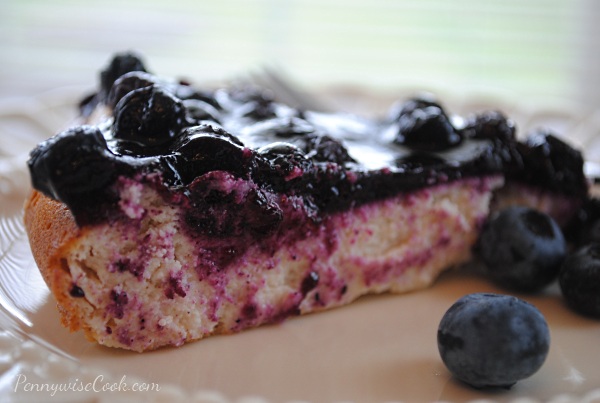
Ok on to the cheesecake! Oh yeah, creamy and light cheeeesecake…with blueberries on top!

I have to admit, I’ve never made a cheesecake that goes in the oven before this. Most of them are made of puddings and cream cheese and are just refrigerated. Don’t get me wrong, those are yummy. But I just kinda wanted to make one completely from scratch and feel that sense of accomplishment.

Blueberry Cheesecake

To the drawing board (aka Pinterest and Google) I went! I searched for a recipe that didn’t seem to difficult, but presented a fair challenge. And as always, I wanted something that was lower in calories and healthier than most. I ended up finding this recipe over at Hungry Girl and boy am I glad that I found it! This recipe was not only easy, but it also tasted like a million bucks.

We had my mom and stepdad over for dinner one night and I served this for dessert. They never figured out that it was a healthy version of an otherwise unhealthy cheesecake. I love recipes like that.

Recipe courtesy of Hungry Girl.

Berry Tasty Blueberry Cheesecake

8 Slices

Serving Size: 1 Slice

168

Berry Tasty Blueberry Cheesecake

This light and fluffy cheesecake is topped with very berry blueberries and is sure to impress!

Ingredients

    For the Cheesecake
  • 16 oz. fat-free cream cheese, room temperature
  • 1/2 cup granulated sugar
  • 1 tsp. vanilla extract
  • 6 oz. (about 3/4 cup) fat-free vanilla Greek yogurt, room temperature
  • 3 large egg whites or 1/2 cup liquid egg whites, room temperature
  • 2 tbsp. lemon juice, room temperature
  • 2 tbsp. all-purpose flour
  • 1/4 tsp. cinnamon
  • For the Topping
  • 2 cups frozen unsweetened blueberries
  • 2 tbsp. granulated sugar
  • 1 tbsp. cornstarch
  • 1/4 tsp. cinnamon
  • Dash salt

Method

  1. Preheat oven to 350 degrees. Spray a 9? springform pan with nonstick spray and set aside.
  2. Combine cream cheese, sugar, and vanilla extract in a large bowl. With an electric mixer, beat until smooth.Gradually add yogurt, egg whites, lemon juice, flour, and cinnamon. Beat until thoroughly mixed, about 2 minutes. Evenly pour mixture into the pan.
  3. Bake 40 – 45 minutes, until firm. Set cheesecake aside and allow to cool in the pan.
  4. Meanwhile, bring a medium-sized pot to medium-high heat. Add all topping ingredients. Add 1/2 cup cold water and mix well. Bring mixture to a boil, and then reduce heat to low. Stirring occasionally, simmer until the mixture is thick and gooey, 2 – 3 minutes. Remove from heat and let cool.
  5. Once both the cheesecake and the topping have completely cooled, evenly pour the topping over the cheesecake in the pan. Refrigerate for at least 1 hour, until fully chilled.
  6. Enjoy!

Notes

Be sure to let all of your cold ingredients come to room temp before incorporating them. This helps to prevent your cheesecake from cracking. I learned this one the hard way!

http://www.pennywisecook.com/berry-tasty-blueberry-cheesecake/


Like this post? SHARE it!

Related Posts Plugin for WordPress, Blogger...

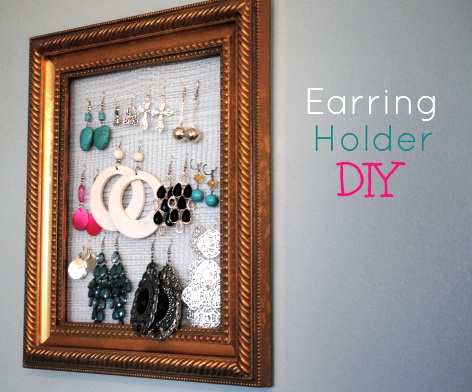
DIY Framed Earring Holder

For anyone who knows me, they know that I’m a huge earrings fan. I don’t spend much money on my earrings because they always get lost (or taken and sat on by my oldest). When you buy a pair to match all your outfits they start to pile up and it’s just plain hard not to lose them. Especially when you have a frantic and frazzled mind like myself. I’ve been keeping them in a little box for the last few months and it’s working out ok, but to be honest no more will fit. It’s that full. What prompted this project was a friend on mine on facebook who made one with chicken wire. I love the look of that, but I’d much rather work with fabric than wire. I’ve seen a few DIY projects on how to create an earring holder yourself so I thought I’d give it a shot.

And yay, here’s me with some of my dagglier earrings. I know I posted a picture of myself (with Cynthia Sass) yesterday, I promise I’m not full of myself. Just let me know if you get tired of seeing my mug. 😉 The pictures that I have to document this project are darker than I wanted them to be, I apologize. Like I’ve said before, I’m trying to get used to this photography thang and it’s still a work in progress.

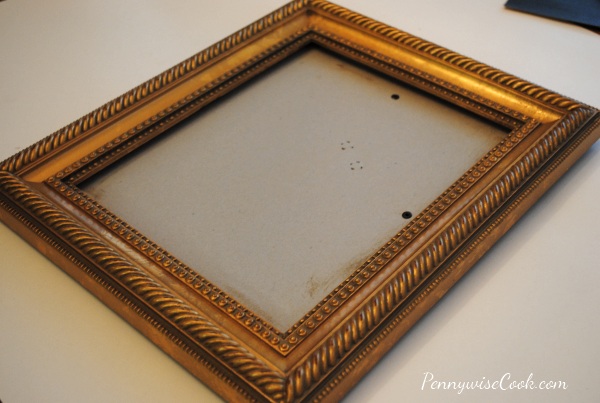
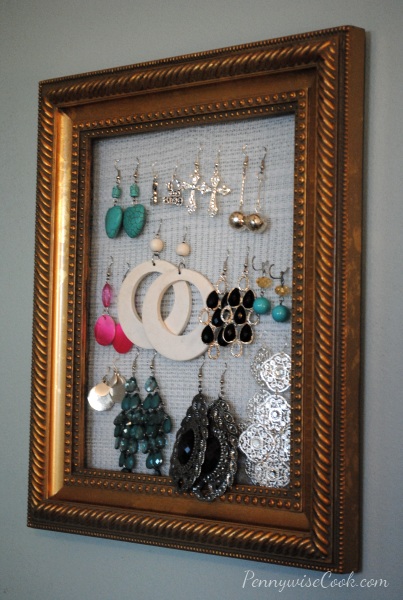
Here’s the frame I found at Goodwill for $1.99 (woot!). It’s surprising, but they have really gone up on their frames. Most of the others that I found were at least $4.99 each. Sadly enough, you can do better than that at Walmart these days so why waste your time getting one used anyhow? Back to the frame- this one was in perfect condition so I went for it. It’s an 8X10, but you can use any size that you’d like. It all depends on how many earrings you plan to hold. And you may have one at home that you don’t use anymore, that’s even cheaper and super smart.

When I got home, the intention was to paint it brown to match the furniture in our bedroom but after holding it up in the room it actually fit it quite nicely even being gold.

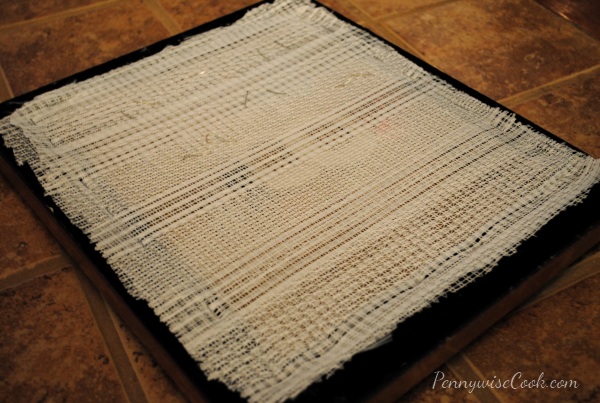
I also picked up these really ugly, yet perfect curtains to be the backing for the earring holder. They seriously were hideous, but they were white and hole-y so I thought they would work well. I removed the back of the frame and using a staple gun, I just pulled and stapled the curtain fabric tightly across the back of the frame. I actually did a double layer of the fabric to thicken it up a bit and give the earrings a little more to cling to.

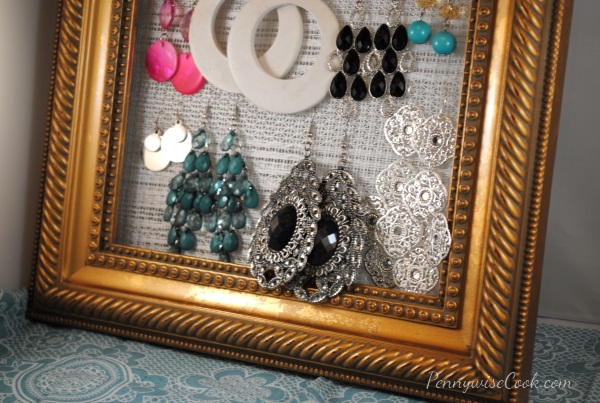
It turned out as good as I could have hoped. Speaking of hope, I’m praying that all of my earrings are going to fit on this thing! My husband thinks I’m going to have to make another one. I’m afraid that I might have to as well.

Cost breakdown:

Frame- $1.99
Curtain- $2.49
Total= $4.48

I love the way that this looks on our wall. It’s almost like an antique with a modern twist. Shabby Chic we’ll call it! And the sky is the limit on the fabrics and frames that you could get to match your decor. That’s what I love about DIY projects. Sure you can go out and buy something already completed, but sometimes you have to make sacrifices because things aren’t always customized for you.

I know this isn’t a “recipe” per say, but I’m going to put it in this format in case you want to print it out. It’s simple enough, but I know how having it on paper can make things easier sometimes!

If you know someone who might like this DIY project, be sure to Pin It below!!

DIY Earring Holder

DIY Earring Holder

Ingredients

  • Frame- Your Choice of Size
  • Fabric for the Back- Ex. Lace, Mesh, Burlap, Etc.
  • Staple Gun
  • Paint (Optional)

Method

  1. If necessary, paint the frame FIRST to the color of your choice.
  2. Remove the backing from your frame. (Keep in mind that if your frame's hanging mechanism is on the backing, you'll need to find another way to have it later.)
  3. Cut your fabric to just more than the size of your frame. Stretch it tight and staple it to the frame along the edges.
  4. Attach your earrings and you're done!

Notes

If you don't have or want to invest in a staple gun, you may be able to use a hot glue gun as well. That may work in a pinch, but a staple gun is recommended for maximum support.

http://www.pennywisecook.com/diy-framed-earring-holder/


Like this post? SHARE it!

Related Posts Plugin for WordPress, Blogger...

Discover the Swapability of Mushrooms

I’ve got to tell you, I’ve been branching out. Yes, I’ve crossed over into the category of folks that like to eat fungus! It’s only been recently that I realized that I liked them. It was kinda one of those situations where you stay away from something because you think you won’t like it. I was wrong! Cooked the right way, mushrooms can really be very tasty!

I recently got to meet Cynthia Sass, a Registered Dietitian you may have seen on TV or in magazines. She’s been on all of my favorite daytime shows and I was floored to meet her and just chat about healthy eating. We had a conversation about substituting things in your meals and snacks to make them more nutritious. There is nothing like enjoying a meal that is good for you without sacrificing taste. It actually is possible!

For instance, instead of loading up brownies with oil and sugar, try using black beans instead. You’re bumping up the protein and nixing the butter and oil, without losing the chocolatey taste. Or how about that pot of chili? Instead of ground hamburger meat, try slicing up mushrooms and throwing those in. Amazingly enough, you can also enjoy the swapability of mushrooms in burgers and on pizza. Mushrooms give the same feeling of being full without packing on the calories. Just cook them up the same way that you would meat!

Did you know that it’s National Nutrition Month? The Mushroom Council, a US group of mushroom growers are celebrating the month of March by helping to “get your plate in shape” with healthier options that include mushrooms. Because they are so low in calories, they make a great addition or replacement for several meat dishes. It’s what they call “swapability”. I think that I’ll be trying them in tacos soon. Mushrooms are affordable as well which makes them all the more appealing to use as a healthy alternative.

Eager to learn how to swap out or adding mushrooms in your next dish? Here’s how:

  1. Chop the mushrooms up to match the consistency of ground beef or turkey.
  2. Cook and season them up the same way you would with the meat. (ie- Worcestershire sauce, onions, etc.)
  3. Combine the meat with the mushrooms and use it to complete your recipe!

And of course if you’re going to completely swap them out, just add more mushrooms and don’t use the meat.

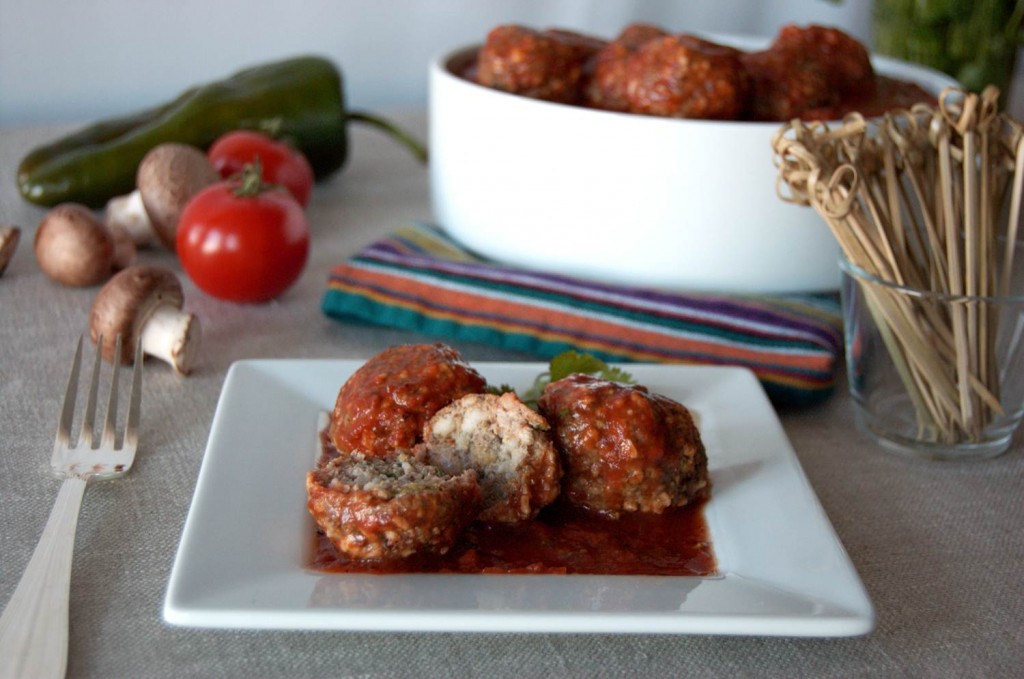
You can find lots of amazing recipes that include mushrooms including Chocolate Chili, Mushroom Flatbread, and pictured below, Cremini and Pork Meatballs. All of which sound incredibly yummy!

Did You Know? Mushroom Facts

Mushrooms are not only fat free, but they are also low in calories.

Their flavorful umami content allows for less salt to be used in a dish, without compromising taste

Mushrooms are the ONLY fresh fruit or vegetable with Vitamin D

Mushrooms provide B vitamins, including riboflavin, niacin, and pantothenic acid; B vitamins help to provide energy by breaking down proteins, fats and carbohydrates

Have you been enlightened yet? I know that I have! It’s incredible how such an ugly vegetable can be so nutritious and tasty at the same time.

For all of you Twitter-ers, you’ll want to join #Mushrooms Twitter Party on March 12th at 8pm PT! Awesome prizes will be given away and of course a little talk about this low-cal veggie- the mushroom! Use the hash tag #Mushrooms. You can RSVP and get more information HERE.

This is a sponsored post written by me on behalf of National Nutrition Month with the Mushroom Council. I was compensated for this post, but all opinions are 100% my own and honest.


Like this post? SHARE it!

Related Posts Plugin for WordPress, Blogger...

Mini White Bread Cinnamon Rolls

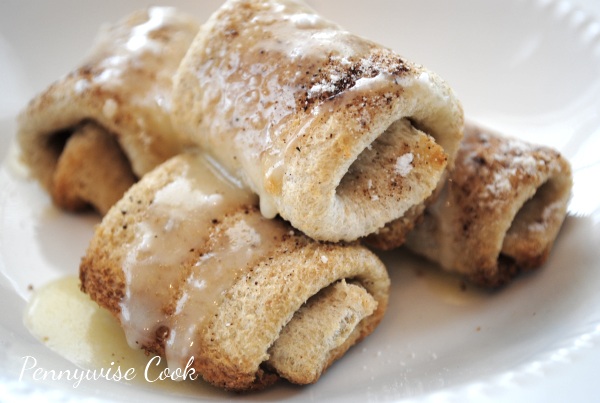
So who knew that the best thing since sliced bread would be itself? I really love finding ways to use things that I already have around my house to make easy and awesome snacks. I would totally put these into the awesome category. I mean they are cinnamon rolls made from regular old plain jane white bread. Before you get too excited, just note that these aren’t as magnificent as Grands!, they are small and dainty. But they will definitely suffice in a pinch and make the kiddos just as happy for sure.

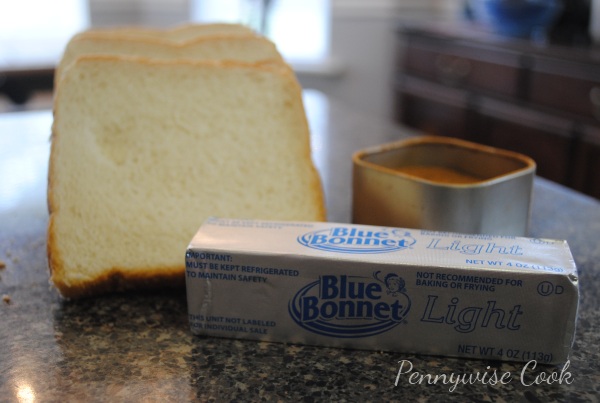
Ya got your butter, your cinnamon sugar, and your loaf of bread. And if you want that yummy glaze for them you’ll also need powdered sugar that’s not pictured here. Use your magic wand (I have one, don’t you?) and voila! Cinnamon rolls!

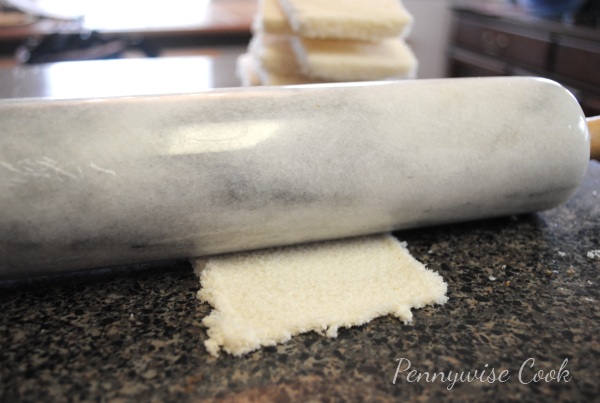
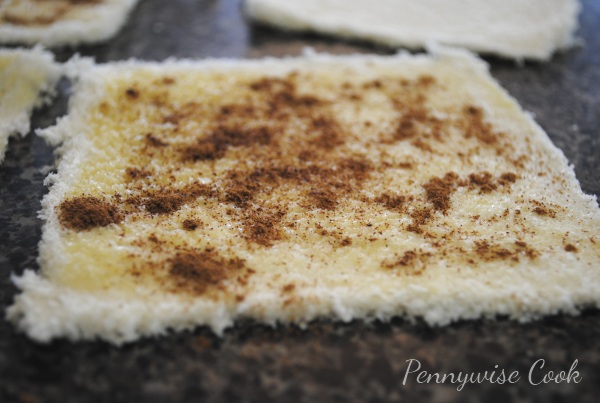
Cut the crust off of each slice of bread and use a rolling pin or heavy can to flatten them out. The better you are at cutting the crusts off, the more roll you’ll have. I’m not amazing at it, but I’m working on it. Get them nice and flat, then use a brush or something like that to brush on some melted butter. You don’t want them to be swimming in it, but just enough to coat. Something for the cinnamon sugar to stick to.

Then sprinkle the cinnamon sugar to your liking on the buttered and flattened bread. It is already looking fabulous. Fold each edge into the center and then roll them up. Place on a greased cookie sheet or in a muffin pan. I used a muffin pan to make sure they didn’t try to roll on me.

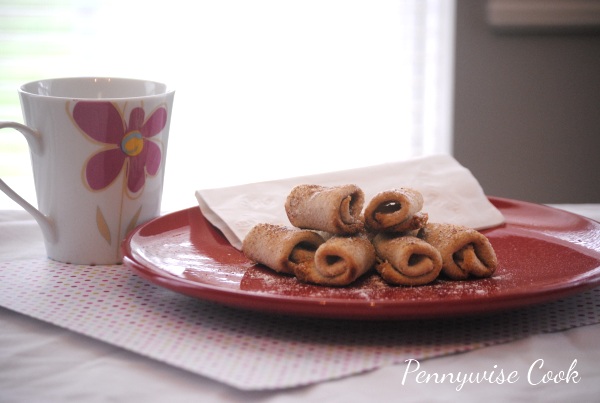
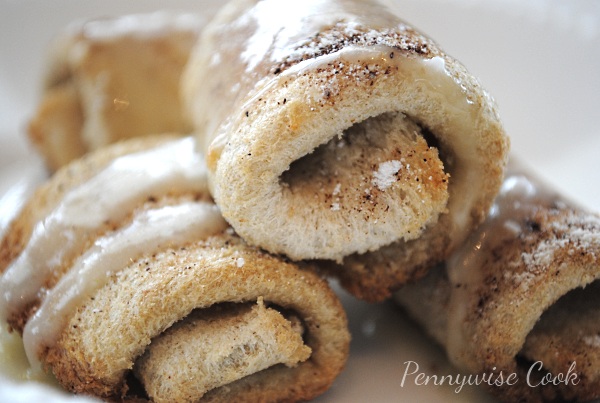
After baking them at 375 degrees for a little while, they come out crusty on the outside and little soft on the inside. Mix some of the melted butter with powdered sugar and you have a yummy butter glaze to drizzle over the top.

Recipe courtesy of Circle B Kitchen

White Bread Cinnamon Rolls

White Bread Cinnamon Rolls

Out of Pillsbury sweet rolls? Have a loaf of bread? Make your own mini cinnamon rolls in no time with this easy fix. Only 4 ingredients!

Ingredients

  • A dozen or so slices of soft white bread
  • Melted Butter (1/2 c. should be plenty)
  • Cinnamon Sugar
  • Powdered Sugar (optional for glaze)

Method

  1. Preheat oven to 375 degrees.
  2. Cut the crusts off the pieces of bread. Roll very thin with rolling pin or can.
  3. Brush both sides of the bread with melted butter. Then sprinkle one side with cinnamon sugar.
  4. Fold each side of the bread into the center, then roll up.
  5. Place onto greased cookie sheet or muffin tin. Bake for 15-20 minutes until they start to turn golden.
  6. Add powdered sugar to the leftover melted butter for glaze and drizzle over the top.

Notes

You can freeze these too! Although, they don’t stick around long enough to get frozen here.

http://www.pennywisecook.com/mini-white-bread-cinnamon-rolls/


Like this post? SHARE it!

Related Posts Plugin for WordPress, Blogger...

Peanut Butter & Banana Chocolate Chunk Cookies

I spend a lot of time in the kitchen. I really do. I love to experiment and create and when something turns out right, I feel a bit of accomplishment. Don’t you? I also have times when I follow a recipe to the letter and it comes out completely inedible. When this happens, I like to think that my kitchen might just be part of some freak gravitational or atmospheric region that causes my recipes to flop. But when it comes down to it, sometimes recipes just don’t work out. Of course it’s usually something small like a little too much of something or a little too little. I consider this to be learning and it often times gives me ideas.

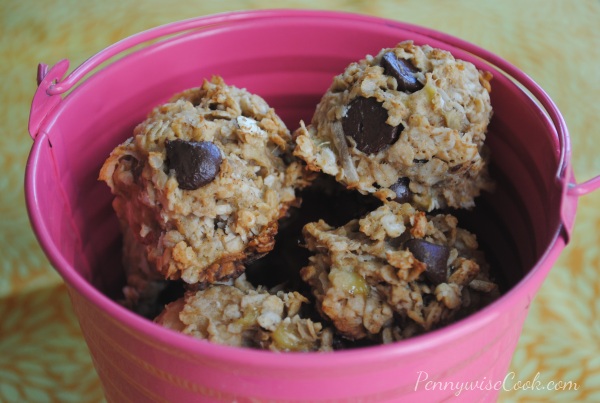
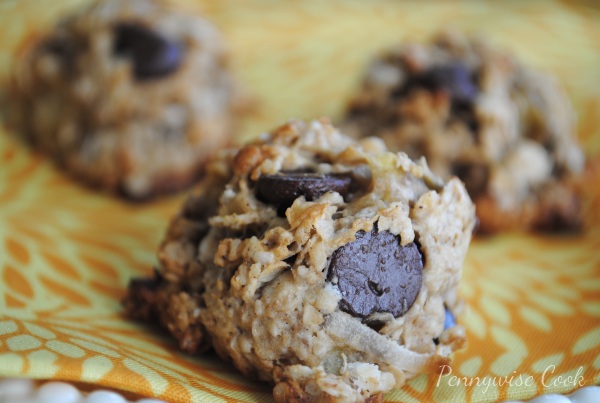
The cookies that I am sharing (found over at The Family Kitchen but originally from 101 Cookbooks) with you today are not flops, but they remind me of flops because they are basically a bunch of yummy ingredients that just so happen to be put together to create a really yummy cookie. Everything you want in a cookie and more.

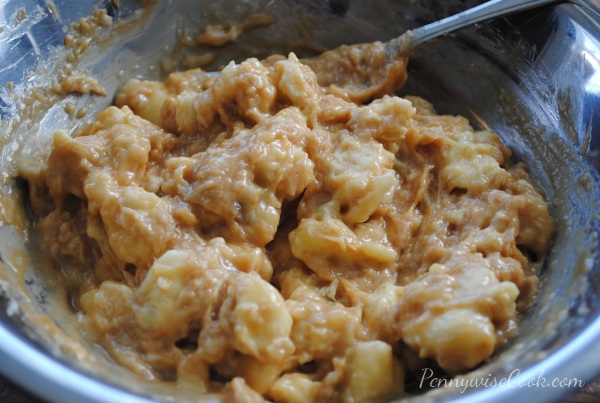
Just look at that bowl’s contents. Couldn’t you just dive right in?. Are you a peanut butter and banana fan? Oh you know I am! I’m starting to think about those Whole Wheat Peanut Butter & Banana Pancakes that I made. These cookies bring in a new ingredient that can only make those two even better- chocolate chips. There’s even a little coconut hidden in there. But shhhh don’t tell anyone. My husband still doesn’t know that these have coconut in them. It’s such a small amount and completely optional, but I think it adds a little something.

Peanut Butter & Banana Chocolate Chunk Cookies

Peanut Butter & Banana Chocolate Chunk Cookies

Peanut Butter's best friend banana got together with chocolate to create a craving-busting cookie!

Ingredients

  • 3 large, very ripe bananas
  • 1/2 cup peanut butter (preferably natural)
  • 1/4 cup canola or olive oil
  • 1 tsp. vanilla extract
  • 2 cups old-fashioned quick oats
  • 1/3 cup shredded coconut (optional)
  • 1 tsp. baking powder
  • 1/4 tsp. cinnamon
  • 1/4 tsp. salt
  • 1/2 – 1 cup chopped dark chocolate or chocolate chips

Method

  1. Preheat oven to 350?F.
  2. In a large bowl mash bananas with the peanut butter, oil and vanilla.
  3. In a different bowl stir together the oats, coconut, baking powder, cinnamon and salt. Add the dry ingredients to the wet ingredients along with the chocolate and stir until combined.
  4. Drop spoonfuls of dough onto a parchment or Silpat lined baking sheet, or one that is sprayed with nonstick spray, and bake for 12-14 minutes, until just set.

Notes

If you want these to come out flatter more like cookie, then you'll need to flatten when placing them on baking sheet. They don't rise very much and pretty much keep their shape the whole time. Makes 2 and 1/2 dozen cookies.

http://www.pennywisecook.com/peanut-butter-banana-chocolate-chunk-cookies/

I was really impressed with these. They’ll make regular appearances around here.


Like this post? SHARE it!

Related Posts Plugin for WordPress, Blogger...

Homemade Instant Potato Gnocchi

Feeling a bit adventurous? How about homemade gnocchi? You can do it with a little help from Betty Crocker. Believe me, if I can do this anyone can!

Gnocchi is beginning to be found at many restaurants these days. It’s a very fluffy potato pasta that is incredibly indulgent and yummy. I’ve been buying it pre-made for a few years and it wasn’t until recently that I got up enough courage to attempt it myself. Mind you, I’ve never made any type of pasta before. I decided to give it a try and to my surprise, I found out that I do have the ability to create these fluffy potato pillows of yummy goodness! You most certainly can too and I encourage you to do it!

The version that I’m going to give you will make it super easy for you to give it a try. It’s made with instant potatoes instead of having to peel and boil and mash real potatoes.

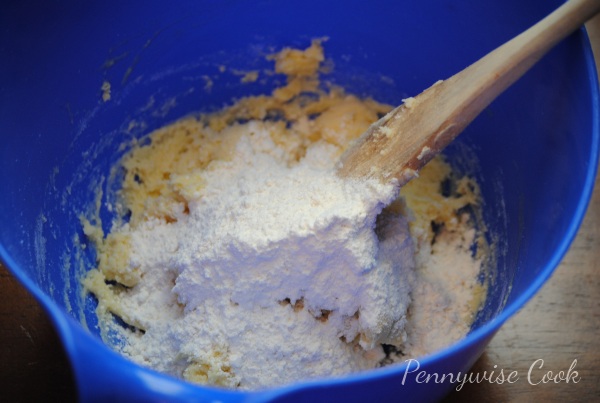
Start out by mixing dry potato flakes (instant potatoes) with water and then adding an egg and a little bit of salt. Can you believe that you’re almost done?! That’s how easy it is to make these!

Next, you add in the flour slowly which starts to turn the potatoes into dough.

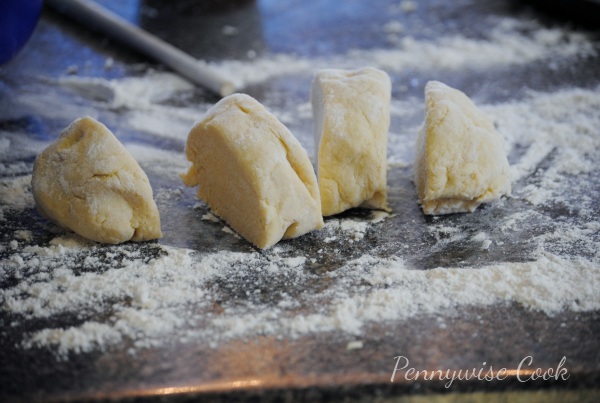
You knead the dough and then divide it into sections for rolling out.

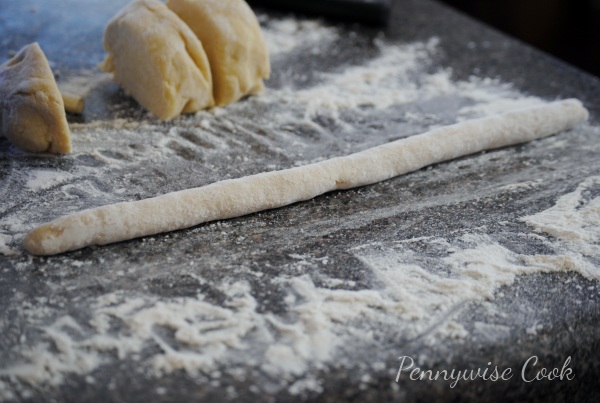
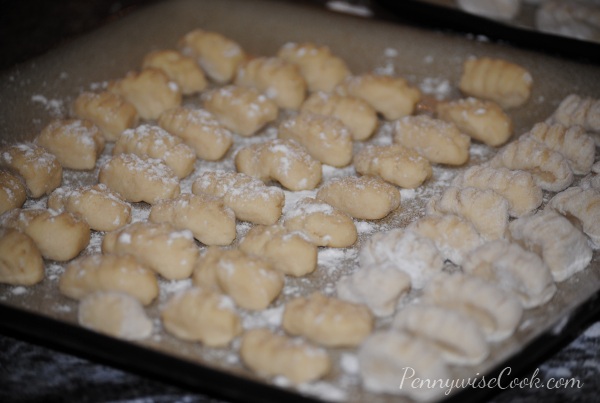
Roll each section into long cylinders the size of your thumb. Then cut into small bite-size pieces.

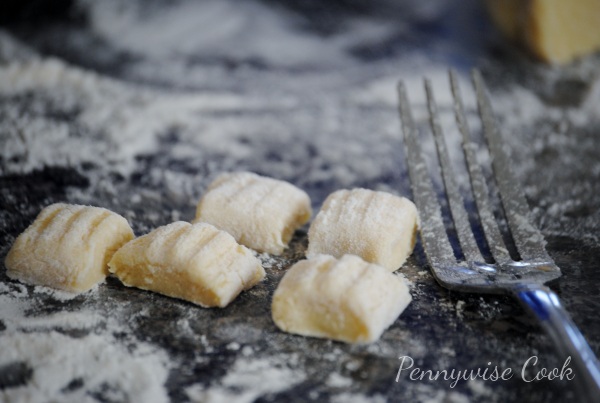
Use your fork to make imprinted lines across the gnocchi. This is how your yummy sauce will stick to them. Then you can shape them to look more like gnocchi which is generally more round and not squared. Don’t get hung up on the shape. They will taste like gnocchi no matter what shape they are in. They are wonderful served with a tomato basil sauce, cheese sauce, or brown butter sauce.

Or you could always toss into Zesty Zucchini and Squash Over Gnocchi!

Recipe courtesy of Food.com

Homemade Instant Potato Gnocchi

Homemade Instant Potato Gnocchi

Ingredients

  • 2/3 c. Dry Instant Potatoes
  • 2/3 c. Boiling Water
  • 1 Egg at Room Temp, beaten slightly
  • 1/2 Tsp Salt
  • 1 1/2 c. All-Purpose Flour

Method

  1. In a medium bowl, stir instant potatoes into boiling water until blended.
  2. Fold the egg and salt in.
  3. Slowly add in the flour, a third at a time. Dough will become thick and won’t stick to the bowl anymore.
  4. Place the dough on a well-floured surface and knead well. You want it to not stick to anything, but you don’t want to add too much flour. The thicker the dough the denser your pasta will be.
  5. Cut the dough into 4 sections. Roll each section into cylinder rolls about the thickness of your thumb. Cut them into bite-size pieces.
  6. Using your fork tines, make indentions on the gnocchi and form to your liking.
  7. To cook- place gnocchi into boiling salted water. Do not crowd the pot. Gnocchi is done when it floats to the top.
  8. Serve with your favorite sauce.
http://www.pennywisecook.com/easy-homemade-potato-gnocchi/

Simple enough and you can say that you made it from “scratch” without hesitation. 😉


Like this post? SHARE it!

Related Posts Plugin for WordPress, Blogger...

Incredible Salted Caramel Brownies

I hope you enjoyed your weekend. We had a BLAST on our anniversary trip to Memphis. We got a massage and got to eat at two of our favorite places in the world- Bahama Breeze and Benihana. We don’t have either of those around here so it’s rare that we get to go. They did not disappoint! I only strive to have my chicken fried rice come out even halfway close to Benihana’s. It’s fabulous.

I’m not scared of heights (I think), but our hotel room was on the 22nd floor. I had a little trouble going close to the window though because it was straight down it seemed. If you’re ever in the Memphis area, I do recommend the Hilton. The service was incredible and everything was perfect.

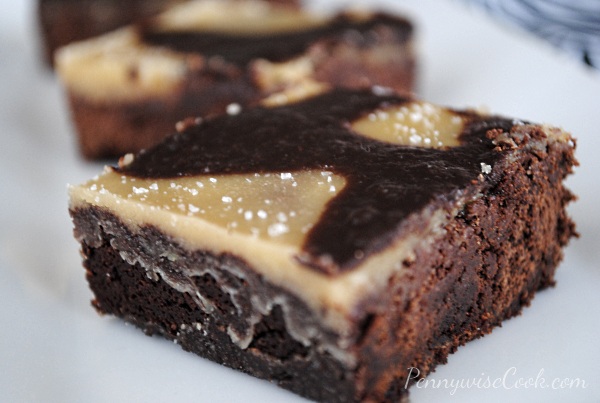
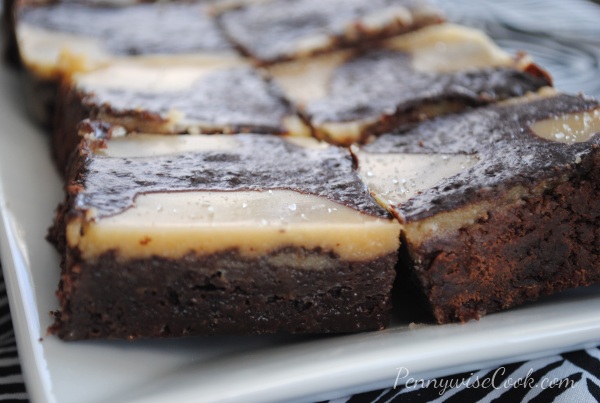
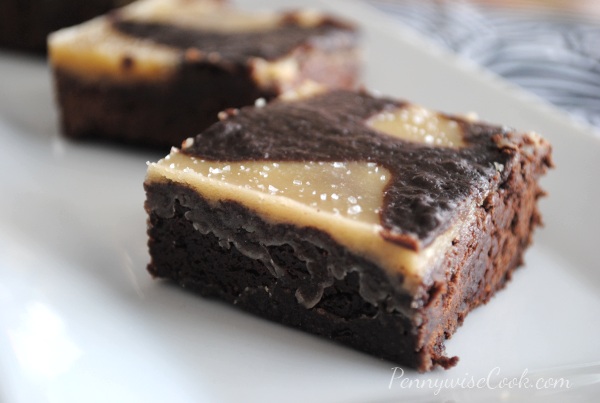
You know something else that’s perfect? Brownies! Not just any brownies either, Salted Caramel Brownies. I made these last week and I’m sitting here wishing there were some left. I can’t tell you that these are low calorie because that would just be telling a fib. But I can tell you that they are low-ER calorie. How’s that for satisfaction? One of these babies only has 180 calories. And believe me, one is plenty. (Yeah right)

I found these brownies over on Pinterest. If you’re not following me yet, you really should. I want to follow you back too! It only took one glance at them to know that I had to make them. As I clicked the picture and prepared myself to view a recipe that was loaded with calories, I was really surprised to see that this is a Cooking Light recipe. I was more than excited when I realized that there weren’t 500 calories per brownie.

My brownies didn’t end up looking exactly like the picture in the recipe and from the reviews it seems that no one has gotten them to look as pretty as the picture. However, who cares? They are so tasty and that’s all that matters. Salted caramel on top of a delicious chocolate brownie? I’m not sure that it gets any better than that.

Recipe courtesy of MyRecipes.

Salted Caramel Brownies

Salted Caramel Brownies

A salty caramel version of your every day brownie.

Ingredients

    For the Brownies
  • 3 19/50 ounces all-purpose flour (about 3/4 cup)
  • 1 cup granulated sugar
  • 3/4 cup unsweetened cocoa
  • 1/2 cup packed brown sugar
  • 1/2 teaspoon baking powder
  • 6 tablespoons butter, melted
  • 2 large eggs
  • 1 teaspoon vanilla extract
  • Cooking spray
  • For the Topping
  • 1/4 cup butter
  • 1/4 cup packed brown sugar
  • 3 1/2 tablespoons evaporated fat-free milk, divided
  • 1/4 teaspoon vanilla extract
  • 1/2 cup powdered sugar
  • 1 ounce bittersweet chocolate, coarsely chopped
  • 1/8 teaspoon coarse sea salt

Method

  1. Preheat oven to 350°.
  2. Combine flour, sugar, cocoa, brown sugar and baking soda in a large bowl, stirring well. Combine 6 tablespoons butter, eggs, and 1 teaspoon vanilla. Add butter mixture to flour mixture; stir.
  3. Scrape batter into a square baking pan coated with cooking spray.
  4. Bake for 19 minutes or until a toothpick comes out with moist crumbs clinging. Cool in pan on a wire rack.
  5. Melt 1/4 cup butter in a saucepan over medium heat. Add 1/4 cup brown sugar and 1 1/2 tablespoons milk; cook 2 minutes.
  6. Remove from heat. Add vanilla and powdered sugar; stir until smooth. Spread mixture evenly over cooled brownies. Let stand 20 minutes or until set.
  7. Combine 2 tablespoons milk and chocolate in a microwave-safe bowl; microwave on HIGH for 45 seconds or until melted, stirring after 20 seconds. Stir until smooth; drizzle over caramel.
  8. Sprinkle with sea salt; let stand until set. Cut into squares.

Notes

You can add more salt as you see fit. I think I ended up adding about a tablespoon since I like things a bit salty when mixed with sweet.

http://www.pennywisecook.com/incredible-salted-caramel-brownies/

There are the perfect thing to bring along to a cookout or gathering. They will most definitely be a hit!


Like this post? SHARE it!

Related Posts Plugin for WordPress, Blogger...