Doughless Pizza Crust

I’m not sure what it is, but lately I’ve had a thing for making things out of other things. Mostly healthier things that you wouldn’t expect. For instance, my recent discovery of chickpeas being used to make cookie dough dip- completely unexpected. I’ve used cauliflower to make mashed potatoes. I’ve even been toying with the thought of using tofu in a few dishes here lately, but haven’t brought myself around just yet. I’ll be sure to let you know when I do. I’ve always been under the impression that pigs would fly or hell would freeze over before my husband put tofu in his mouth. He has yet to catch on to my sneaky ways though *evil laugh*.

As you know, I’m a pinterest fanatic. I found a recipe at Eat Drink Smile for Cauliflower Pizza Crust. Even though I like things to be made healthy, I was less than enthused about the thought of using cauliflower to make the crust of my pizza. However, I consider pizza to be the devil in food form sometimes. I NEVER eat pizza. It’s greasy, full of bread and cheese, and taunts me to eat more. I always feel awful after I eat it, like I just ate the entirety of a large cow. I know, I’m exaggerating. But you get the point now don’t you?

So when I found this recipe I thought I can just try it out and see. It was either going to be very good or very bad. I blog here before you tonight to tell you that I (along with my picky-eating hubby and 4 year old daughter) give this cauliflower pizza crust my complete and utter stamp of approval! If you have a food processor or blender it takes no time at all and is fantastic, especially if you’re not into eating carbs and want a healthier version of pizza. It’s obviously not your average flour pizza crust, but it doesn’t taste like it contains cauliflower either.

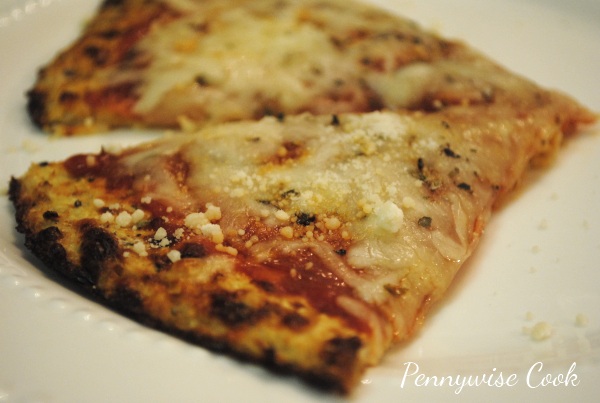
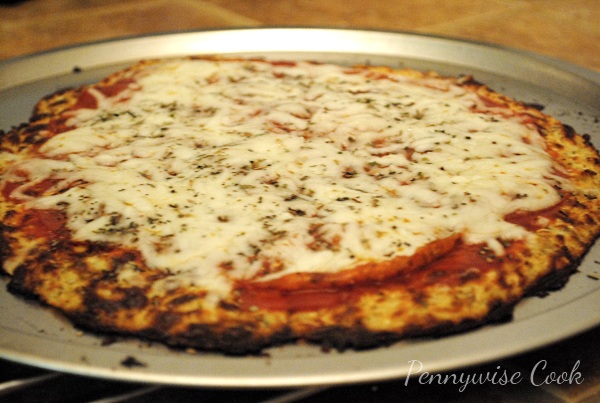
We made the traditional pepperoni pizza. You can’t see the pepperoni because I hid it under the cheese. I used the very large ones so that the entire pizza was covered in them. Our pizza didn’t actually turn out quite as burnt around the edges as this picture looks. It was pretty brown though because I was attempting to get the crust crispier. This type of crust will not be majorly crispy like most pizzas that you might be used to. One head of cauliflower makes 3 crusts and they aren’t huge, so they are fairly thin. I didn’t mind. We get to eat PIZZA!

We made this a couple other times since the first and it turned out the same. I think I’m going to work on figuring out a way to get it a bit crispier. Either way, this recipe is a keeper and will surely make it possible for us to have pizza a lot more frequently.

Recipe courtesy of Eat. Drink. Smile
Doughless Pizza Crust

Doughless Pizza Crust

A healthy alternative to high carb pizza dough, this cauliflower pizza crust will make you want more. I promise!

Ingredients

  • 1 c. Cooked, Riced Flower
  • 1 c. Shredded Mozzarella Cheese
  • 1 Egg, Beaten (I actually used egg whites only and it worked just fine)
  • 1 Tsp Dried Oregano
  • 1/2 Tsp Minced Garlic
  • 1/2 Tsp Garlic Salt
  • Olive Oil (Optional)
  • Pizza Sauce and Toppings of Your Choice

Method

  1. “Rice” the cauliflower by removing the stems and leaves and chopping the florets into chunks. Add the florets into the food processor and pulse until it looks like grain. Don’t over pulse or it will puree the cauliflower. Place the riced cauliflower into a microwave safe bowl and microwave for 8 minutes. No need to add any water. The cauliflower contains enough water to help it cook. One head of riced cauliflower will make approximately 3 pizza crusts to use immediately or to place in the refrigerator to use within one week.
  2. Preheat the oven to 450 degrees. Spray cookie sheet with non-stick cooking spray.
  3. In a medium bowl, stir together 1 cup riced cauliflower, 1 cup mozzarella and 1 egg. Add the oregano, garlic salt and minced garlic. Mix well, then transfer to cookie sheet. Use your hands to pat out into a 9? circle. Optional: Spray with cooking spray or brush with olive oil to help with the browning process.
  4. Bake crust for 15 minutes.
  5. Remove from the oven and top with toppings of choice.
  6. Turn on broiler and let heat up. Place pizza under broiler for approximately 3-4 minutes or until cheese has melted.

Notes

Your toppings should be completely cooked since you’re only broiling for a few minutes.

http://www.pennywisecook.com/doughless-pizza-crust/

And do let me know if you try this and how it turns out for you. I want to know that I’m not crazy in thinking this is actually comparable to regular pizza!


Like this post? SHARE it!

Related Posts Plugin for WordPress, Blogger...

Kid-Friendly Craft: Celery Art

Happy Saturday everyone! It’s been a busy week around here. I’m currently attending the Blissdom conference here in Nashville, TN at the beautiful Gaylord Opryland Hotel. It’s super swanky. I think I’m finally understanding the layout of this hotel. It only took me 3 years to figure it out. It’s HUGE! It reminds me of the Titanic for some reason. I think it’s the beauty and how some of the outside looks rounded like a boat.

But I digress…

Addie and I love doing crafts together. Addie loves not eating her vegetables. Put those two together and you have celery art! I mean come on, if you’re not going to use your veggies for nutrition and nutrients, use them for a beautiful painting right? I saw this idea in the recent issue of Family Fun and I thought how genius!

I guess I’ve never really cut celery up like this and realized how much it does sorta resemble a flower.

Add some paint and you can really see it! It’s really that simple to do. Because there aren’t really a ton of steps, kids actually pay attention long enough enjoy this craft!

This craft is especially good for using up that celery that is on the brink of going bad. Grab some paint (whatever you have on hand) and get to dipping those veggies!

The result is pretty Celery flowers that are even frame worthy! We did actually frame ours, but I didn’t get a picture yet. I may have to come back and add that later for you.

How-To: To begin, remove one stalk for making the “leaves”. Then cut your celery stalk about halfway down. Where it’s bulkiest is best. You don’t want to be too close to the top or your flower will be small. You may have to hold the celery firmly to keep the pieces from trying to move around when making the print. And to make the cute little leaves, simply use your single stalk. Also, be sure to stamp the celery a couple practice times before doing the “real thing”. The paint can often be very thick on some pieces right after you dip.

Have fun!


Like this post? SHARE it!

Related Posts Plugin for WordPress, Blogger...

Chocolate Cherry Coke Cupcakes

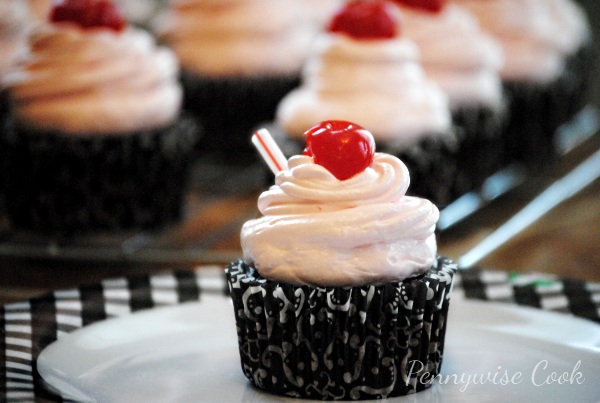
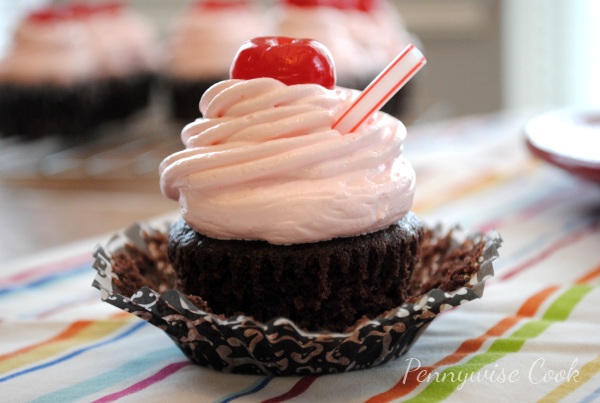
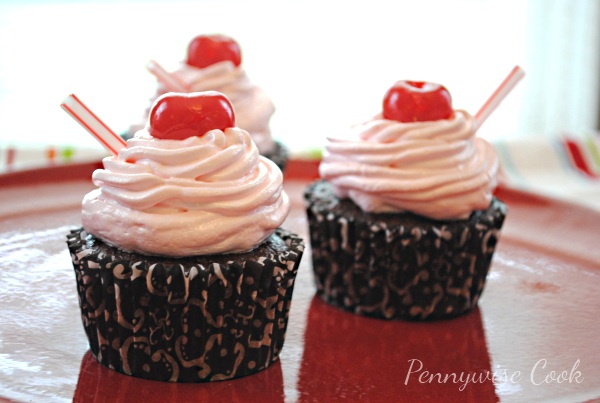
Cupcakes will always be one of my most favorite things to make, ever. Individual cakes? Come on. How can you not love your own little cake with icing and all? What about a Cherry Coke Cupcake? And how about let’s make it chocolate too! I think that sounds like a fantastic combination. This cupcake ended up quite cherry-y. A lot more than I had planned, but it was quite tasty. One I will definitely make again.

It wasn’t until I set out to make these cupcakes that I realized how hard it was to find Cherry Coke these days. I used to drink it a lot in high school and it was pretty easy to find. I had to settle on Wild Cherry Pepsi to make these, so they may come out a bit different for those who are actually able to find Cherry Coke. Oh and just a little secret, I also used DIET Pepsi Wild Cherry. This made these a little better on the calorie side. You know me, always making things a bit healthier. I also used egg white substitute instead of plain old egg whites, but feel free to use real egg whites.

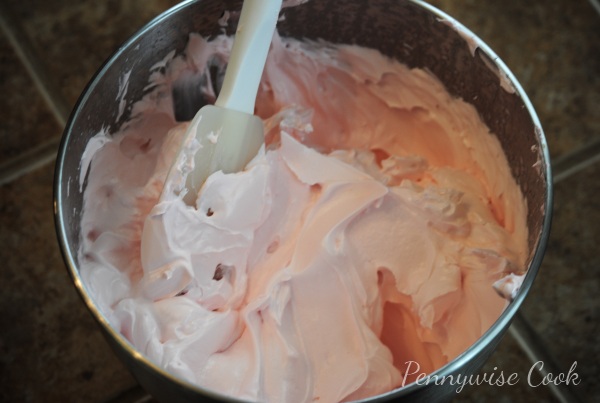
The frosting on these babies is a very fluffy cherry frosting with BIG taste. I really enjoyed using something other than your everyday buttercream. Sometimes that can be so heavy.

Made with mainly egg whites, boiled and then whipped, this frosting was very easy to pipe onto the cupcakes and made for a very pretty color! It was fantastic. I’ll be using it again.

You most definitely don’t have to make yours as diet as I did. After all, you’re already making cupcakes. It’s just in my nature to get my food as low in calories as possible. Any little shortcuts that I can make without sacrificing taste makes me happy!

Chocolate Cherry Coke Cupcakes

Chocolate Cherry Coke Cupcakes

Cherry coke lover? These cupcakes are the perfect combination of chocolate and cherry coke with a healthy twist!

Ingredients

  • Box Devils Food Cake Mix (Your preference)
  • 2 Egg Whites (Or substitute)
  • 12 oz Cherry Coke (Or Diet)
  • Maraschino Cherries (for topping)
  • 1-1/2 cups sugar
  • 4 egg whites
  • 1/4 cup water
  • 1/4 cup maraschino cherry juice
  • 1/2 teaspoon cream of tartar
  • 1 teaspoon vanilla extract
  • 1/2 teaspoon cherry extract or 1/4 teaspoon almond extract

Method

    For The Cupcakes
  1. Mix cake mix, egg whites, and cherry coke in a bowl. Pour into cupcake liners and bake according to cake mix directions. Simple!
  2. For The Cherry Frosting
  3. In a heavy saucepan, mix the sugar, egg whites, water, cherry juice and cream of tartar. Mix on a low speed with hand mixer for 1 minute. Continue to beat on low over low heat until mix reach 160 degrees on a candy thermometer. This will take about 10 minutes.
  4. Transfer to heavy-duty stand mixer bowl. Add the extracts. Beat on high until stiff peaks form. This will take about 7 minutes.
  5. Frost the cupcakes.
  6. Add your cherries and you’re done!
http://www.pennywisecook.com/chocolate-cherry-coke-cupcakes/


Like this post? SHARE it!

Related Posts Plugin for WordPress, Blogger...

Chocolate and Peanut Butter Pretzel Bars

I’m one of those sweet and salty folks. I’d like to say that I’m more sweet than anything, but I have a salty side too. Who doesn’t? I’m the kinda gal who might enjoy a really indulgent piece of cheesecake and then have to go eat a cracker to offset the sweet. I think I got this from my momma. She always does this.

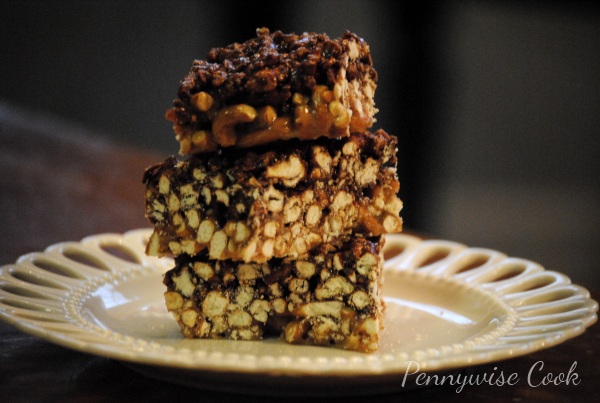
I threw this recipe together one day when I was craving something rice krispie treats. I had some pretzels in the cabinet and thought how fitting for a sweet and salty kinda bar to combine marshmallows and pretzels? And of course, peanut butter and chocolate are the only other two ingredients that could make this that much more incredible. Within about 10 minutes, I created these bars and they were fantastic. With only 5 ingredients, you can’t go wrong. I love the crunch that you get in every bite. Some may not like that about these, but if you’re a crunchy kinda person, I think you’ll enjoy them.

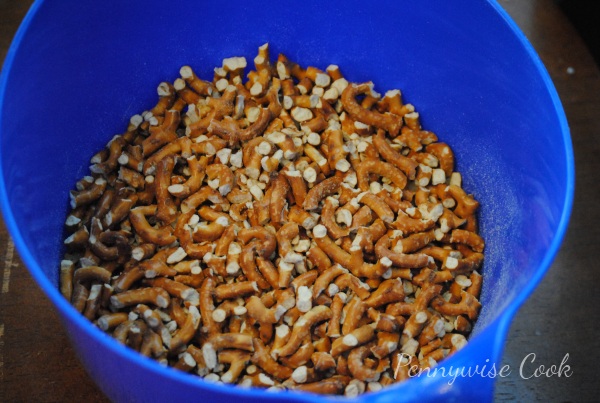
Not really knowing what I was going to do with these ingredients, I threw a bag of pretzels in a bowl and broke them up. You can get them super finely crushed if you prefer. To keep it light and avoid any extra buttery calories, I refrained from adding anything to them.

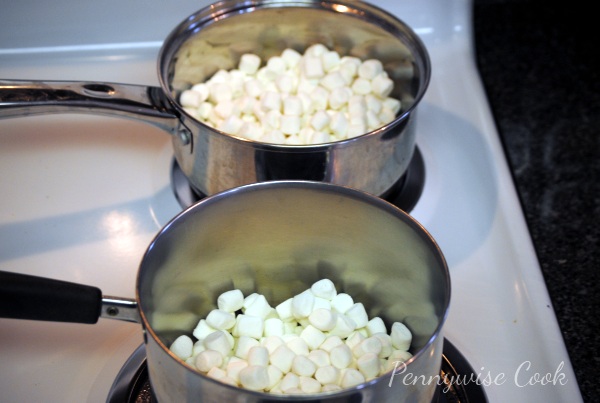
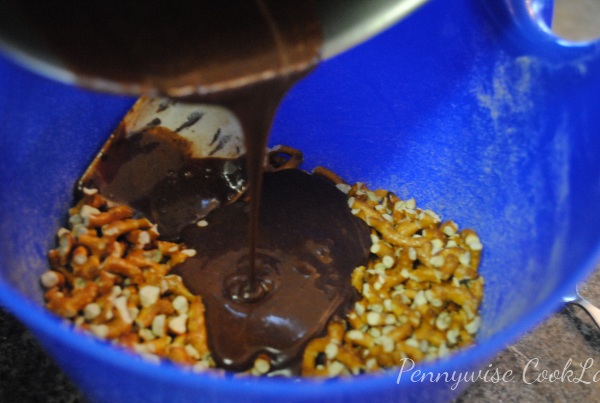
Next, I got two pots heating up each with half a bag of mini marshmallows inside to melt. Peanut butter in one and chocolate chips in the other. I must warn you though, it will take every bit of willpower that you have inside to not eat the entire batch of peanut butter marshmallow mixture.

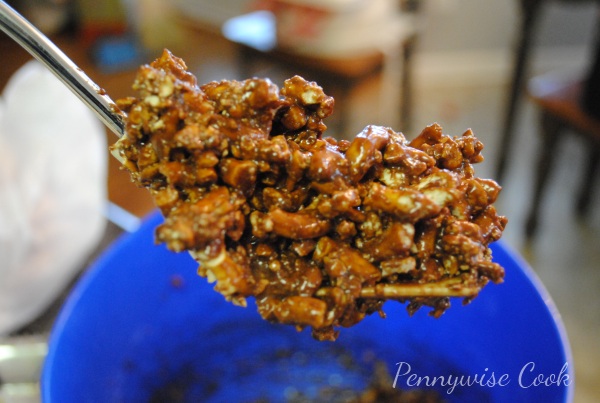
After putting half the crushed pretzels into a second bowl, pour the chocolate/marshmallow mixture into one pretzels bowl and the peanut butter mixture into the other.

At this point, there is no chance of fighting the willpower. Just take a bite of the chocolatey pretzels. I’ll forgive you.

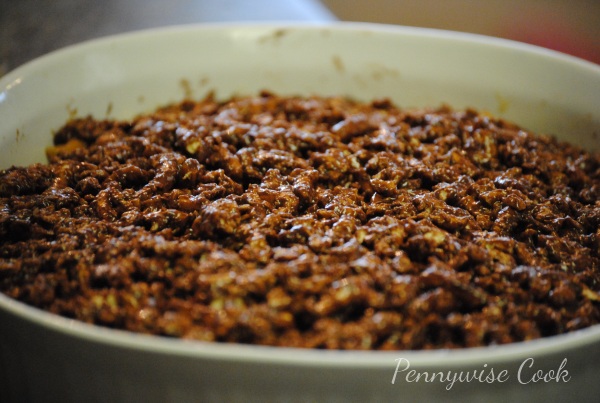
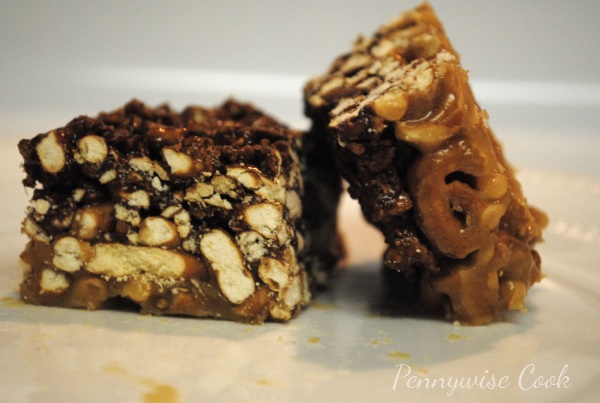
Flatten both mixtures into a pan starting with the peanut butter on bottom and then following with the chocolate. I used a shallow oval dish. Let sit in the refrigerator for a bit to set and you’re done!

Chocolate and Peanut Butter Pretzel Bars

Chocolate and Peanut Butter Pretzel Bars

Get that sweet and salty yumminess in one bite with these chocolate and peanut butter pretzel bars!

Ingredients

  • 1/2 c. Milk, divided
  • 1 Bag Mini Marshmallows
  • 1/3 c. Peanut Butter
  • 1/3 c. Semi-sweet Chocolate Chips
  • 1 12 oz Bag Pretzels, You can use any kind- sticks or twists

Method

  1. Crush the pretzels up either in a bowl or in a ziploc bag. Place into two medium-size bowls.
  2. In two sauce pans, place half the bag of marshmallows in each along with 1/4 cup milk. Melt them until almost smooth.
  3. Add in the peanut butter to one sauce pan and the chocolate chips to the other.
  4. Once mixed well, add peanut butter mixture to one bowl of pretzels and chocolate to the other. Mix well.
  5. Flatten the peanut butter pretzels to the bottom of a greased square dish. Then flatten the chocolate pretzels on top of that.
  6. Place in the refrigerator to set. Cut into squares and serve!
http://www.pennywisecook.com/chocolate-and-peanut-butter-pretzel-bars/


Like this post? SHARE it!

Related Posts Plugin for WordPress, Blogger...

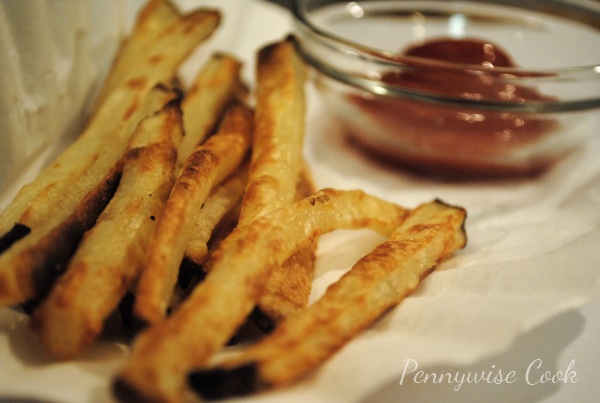
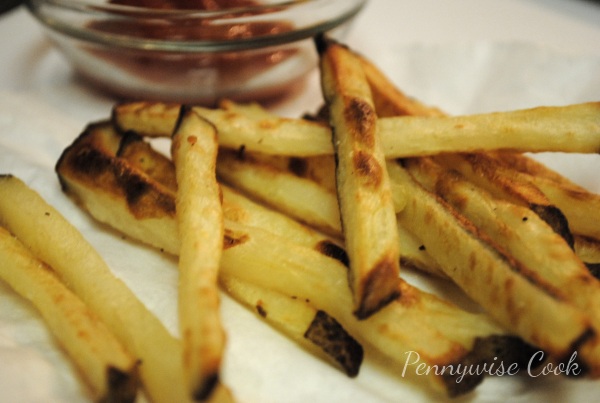
Crispy Homemade Oven Fries

There is but one food that I know for sure that both my husband and oldest daughter will eat- fries. I can also be positive that there won’t be even one left in the pan when dinner is over. The problem lies with trying to find the perfect method for getting them exactly the way we like them, crispy. Time and time again I would attempt a few different methods that only ended up with huge pieces of potato with spots of crispiness but mostly just soggy. Don’t get me wrong, I still ate them but deep down I wished they were crispier. Don’t we all? While we’ll never truly figure out the technique that McDonald’s has for the perfect french fry (or do you know? can you share?), we can try to get as close as possible.

There were two things different about this recipe than most that I’ve tried. 1) you boil the cut fries before you bake them and 2) you broil them towards the end to give them that extra crunch. Somebody has been using their noggin!

While I’m not completely sure this is the absolute best that home fries can be made, this is most definitely the BEST home fries that I’ve ever made! And the crispiest too. Try it for yourself and let me know what you think or any suggestions you may have. These would make a great side dish for Easy Black Bean Burgers.

Life’s Ambrosia recipe

Crispy Homemade Oven Fries

Crispy Homemade Oven Fries

A trick for making your homemade oven fries crispier!

Ingredients

  • 2 pounds of russet potatoes (about 5 potatoes); peel or unpeel them, your choice! Slice into 1/2 strips
  • Water for Boiling
  • 1 Tsp Salt
  • 2 Tbsp Olive Oil
  • 1 Tbsp Seasoned Salt
  • Cooking Spray

Method

  1. Preheat oven to 400 degrees.
  2. In a big pot, place sliced potatoes into water and bring to a boil. Once boiling, add salt. Cook the potatoes until they are about 3/4 the way done. This should take about 4 minutes. Stick your fork in one- should still be a little tough to remove it. However, you don’t want to over cook them, otherwise they may end up too soft.
  3. Remove from heat and strain, then run under cold water to stop the cooking process. Pat dry with paper towels.
  4. In a large bowl, toss the fries with olive oil and seasoned salt. Spray a cookie sheet with cooking spray and place fries in a single layer.
  5. Cook for 15 minutes. Remove from oven and flip them over. Return to oven to cook for an additional 10 minutes.
  6. Set your oven to broil and let get completely heated. Broil the fries for 5 minutes or until you are happy with the crispiness.

Notes

The biggest thing is the watch the fries once you begin to broil them. They can burn very easy so it’s very important to keep an eye on them during this process. This recipe can be easily adjusted and there are tons of ways to make them by adding other seasonings!

http://www.pennywisecook.com/crispy-homemade-oven-fries/

Let me know how they turn out for you!


Like this post? SHARE it!

Related Posts Plugin for WordPress, Blogger...

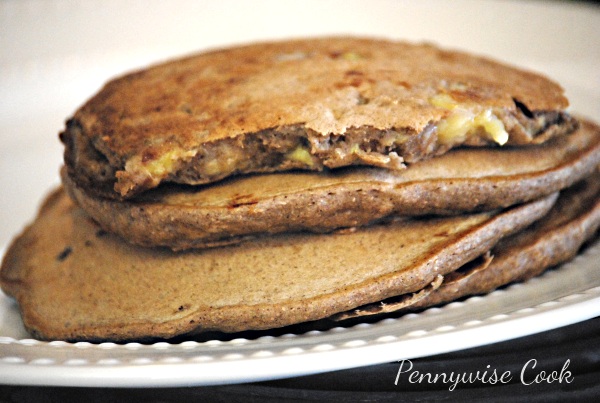
Whole Wheat Peanut Butter and Banana Pancakes

Most mornings I have to start with my cup of coffee. While I think it’s mostly a mind thing, somehow my body thinks that I really need that caffeine to get my day started. Days that I skip it, I feel as though my days are off. We’ve been out of k-cups lately so I’ve been using my little refillable k-cup to make it. The funny part is that we had these grounds in a container for so long, I can’t remember if they are regular or decaf (from when I was pregnant). So at this moment, I could be fueling my day with decaf. Heck, I’d never even know it!

There have been some fabulous prices on bananas lately. Not sure if it’s a bumper crop or what the case is but most stores (even Walmart) have come down significantly on bananas. Aldi holds steady around $.44 per pound most weeks. Kroger and Walmart have both had them for $.38 per pound recently around here and I can’t help but find something to make with bananas when they are that cheap. They are so good for you and can be used in so many recipes. Like these pancakes for instance. Whole Wheat Peanut Butter and BANANA Pancakes to be exact! They are oh so incredibly yummy. I can’t find the blog where I originally got this recipe, but I did find an exact replica over at Food.com.

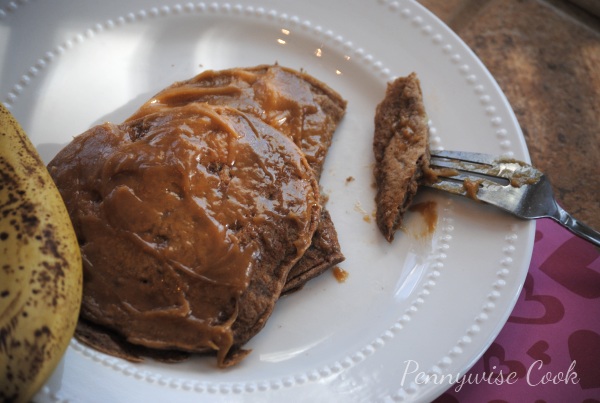
These are very good at hiding their nutritiousness. I don’t think that hubby or my 4 year old even blinked an eye at the fact that they were mainly whole wheat. I think the mixture of spices and creamy banana worked very well together and created a pancake that I think even Elvis himself would have approved of. It’s amazing how much these taste just like a peanut butter and banana sandwich!

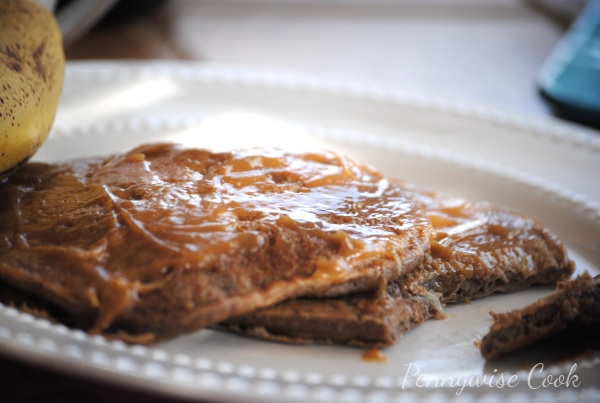
When it came the syrup, I wasn’t really into cooking anything else. Around here, most mornings my breakfast consists of a cup of yogurt on the go. So I just mixed up some creamy peanut butter with my sugar free syrup to spread over top and it worked beautifully (thankfully). I will admit that the ingredients do seem like a lot of work. But for the occasional Saturday morning, I can totally see whipping up these scrumptious babies.

Recipe courtesy of Food.com

Whole Wheat Peanut Butter and Banana Pancakes

Whole Wheat Peanut Butter and Banana Pancakes

Pancakes similar to a peanut butter and banana sandwich with a healthy twist. Even the king would approve!

Ingredients

  • 3/4 c. Whole Wheat Flour
  • 1/4 c. All-Purpose Flour
  • 2 Tbsp Splenda
  • 1/8 Tsp Salt
  • 1.5 Tsp Cinnamon
  • 1 Tsp Cocoa Powder
  • 1.5 Tsp Baking Powder
  • 1.5 Tsp Vanilla Extract
  • 1/2 c. Water
  • 12 c. Skim Milk
  • 2 Ripe Bananas
  • 1/4 c. Egg Substitute

Method

  1. Add the whole wheat flour, all-purpose flour, splenda, salt, cinnamon, cocoa powder, and baking powder to a bowl and mix well. Be sure to sift the whole wheat flour, it can get clumpy.
  2. Mash up the bananas.
  3. Add the rest of the ingredients to the dry ingredients.
  4. Spray your griddle or skillet with non-stick cooking spray and heat to medium.
  5. Cook the pancakes until they start to bubble and then flip. Cook for another 1-2 minutes and continue in batches until done.
http://www.pennywisecook.com/whole-wheat-peanut-butter-and-banana-pancakes-oh-yes/


Like this post? SHARE it!

Related Posts Plugin for WordPress, Blogger...

$50 Amazon Gift Card Giveaway

I’m so excited to be posting my first giveaway here on Pennywise Cook! I hope that you have been enjoying the recipes as much as I am. I appreciate all of your kind words and comments. I love having this outlet for sharing my favorite recipes now. Just like with coupons and saving money, I’ve gotten to the point where I’m calling my mom, sister, and friends all the time sharing awesome recipes! You know what I’m talking about I’m sure. You find something wonderful, you just can’t keep it to yourself. And goodness, you can’t imagine how much my husband hears. 😉

So to kick off Pennywise Cook’s launch and I guess to celebrate a place for me to share, I have a giveaway! Have you been eying cookware or utensils lately? Chances are that Amazon has what you are looking for. And at a darn good price too! So I thought what better of a giveaway than an Amazon Gift Card! Spend on something you need, save it for a gift, or just blow it! Whoever wins can do whatever they please with their gift card.

_________________________________________________________

$50 Amazon Gift Card Giveaway
(Tell you friends!)

Mandatory Entry: Leave a comment on this post with your thoughts about Pennywise Cook! Tell me what you think about the colors, the layout, the recipes, whatever!

Optional Additional Entries:

This giveaway will end on Wednesday, February 29th at midnight CT. I will contact the winner on Thursday, March 1st and they will have 24 hours to respond. If I have not heard from them I will name a new winner.

This giveaway is in no way affiliated with Amazon. I am providing the winner with a $50 Amazon Gift Card.


Like this post? SHARE it!

Related Posts Plugin for WordPress, Blogger...

Turkey Meatloaf Cupcakes

I’ve never been a meatloaf kinda person. I can’t even recall a single time that I’ve made it for my husband. I have an issue with putting meat in the form of a loaf. Why I don’t mind it in the form of meatballs or now cupcakes is something that we can ponder on. Yes, the other day I came across this recipe at First Look, Then Cook and immediately added it to my list of things to conquer. I have a new obsession with small food these days and this is right up my alley.

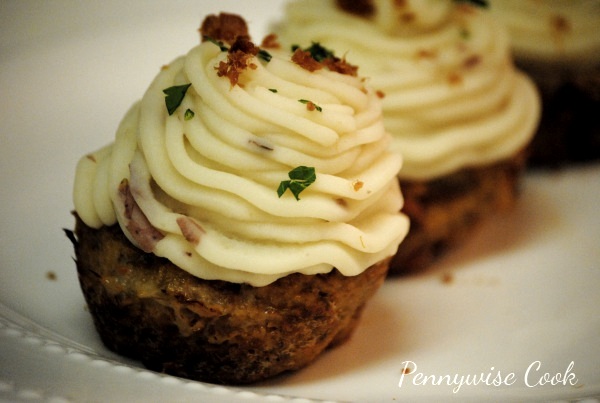
I was pretty much giddy to make these and I ran it by my husband to see what he thought of this. He’s quite the picky eater, so I also kinda wanted to prepare him. Without any hesitation, he proceeded to give me a disgusted look. The words meatloaf and cupcake in the same sentence really threw him for a loop. 😉 I then explained that no, these were meatloaf flavored cupcakes, they are literally meatloaf in the form of a cupcake with mashed potato “frosting”. He was on board then.

The night that I made these, everyone cleaned their plates. Even Addie who we usually have to set food aside (that she has to eat) for devoured hers. She doesn’t usually even like mashed potatoes, but she did that night! I didn’t make the mashed potatoes from scratch, by the way. Took a little help from the store and Betty Crocker. It was a heck of a lot easier that way! Of course, you can make your own mashed potatoes. My sister did and had fabulous results. I made mine with ground turkey, but feel free to use any ground meat that you have on hand.

You can also make these ahead of time to freeze them. Make the meat mixture (do not cook) and place the pan in the freezer for about 2 hours to keep their form. Once firm, place them in bags. To cook, bake at 350 degrees for about 30-40 minutes until temp inside is 160 degrees.

Turkey Meatloaf Cupcakes

Turkey Meatloaf Cupcakes

A spin on traditional meatloaf with a tasty yet fancy presentation!

Ingredients

  • 1 lb Ground Turkey
  • 1 c. Onion, Finely Chopped
  • 1/2 c. Carrot, Finely Chopped
  • 2 Cloves Garlic, Minced
  • 2/3 c. Ketchup, divided
  • 1/2 tsp Oregano, Dried
  • 1 Tbsp Olive Oil
  • 1/2 Tsp Worcestershire Sauce
  • 1/4 Egg Substitute or 1 Egg
  • 2/3 c. Plain Bread Crumbs
  • Salt & Pepper to Taste
  • Cooking Spray
  • Betty Crocker Potatoes for Topping (Or make your own)
  • Bacon Pieces for Topping (optional)
  • Parsley or Chives for Topping (optional)

Method

  1. Preheat Oven to 350 degrees.
  2. Saute onion, carrot, garlic and oregano in olive oil. About 2 minutes until softened. Let cool.
  3. Combine the onion mixture, 1/4 cup ketchup, and all remaining ingredients except cooking spray in a bowl. Get well incorporated.
  4. Spray muffin pan with cooking spray. Place meat mixture into the muffin cups and top each with 2 tsp ketchup (or a good circle around the top).
  5. Bake for 25- 30 minutes or until brown and the internal temp is 160.
  6. Top meatloaf cupcakes with mashed potatoes. Use a piping bag with large star tip or cut the tip of a Ziploc bag to pipe.
  7. Sprinkle with toppings and serve.

Notes

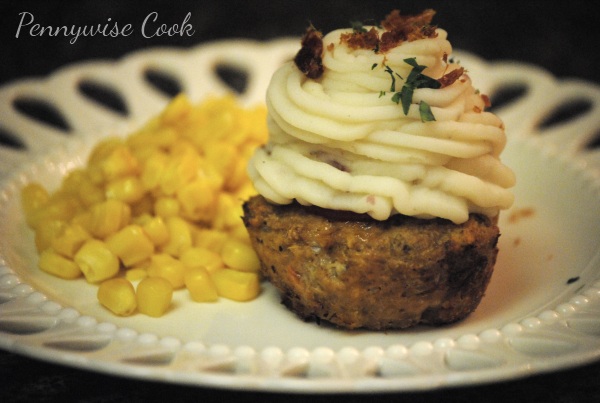
I served them with corn and Addie came up with a fabulous idea to put her corn on top of the cupcakes. She was calling it “sprinkles”. 🙂 These will for sure be a regular on our menu!
http://www.pennywisecook.com/turkey-meatloaf-cupcakes/


Like this post? SHARE it!

Related Posts Plugin for WordPress, Blogger...

Frugal Kitchen Tip: Freezing Fresh Herbs

Standing there in the produce section seeing all of those fresh herbs, I think to myself, I’d buy tons of that if it would stay fresh longer. There is no doubt that fresh herbs add a lot to a dish. I love the crisp bite and beautiful green color that parsley can add to just about any meal. I was watching Barefoot Contessa the other day and she shared this amazingly genius tip for storing fresh herbs. I usually buy it for a particular dish and then it goes bad before I can ever use it again. Then I go and buy some again for the next meal. It’s a continuous cycle that can really get costly.

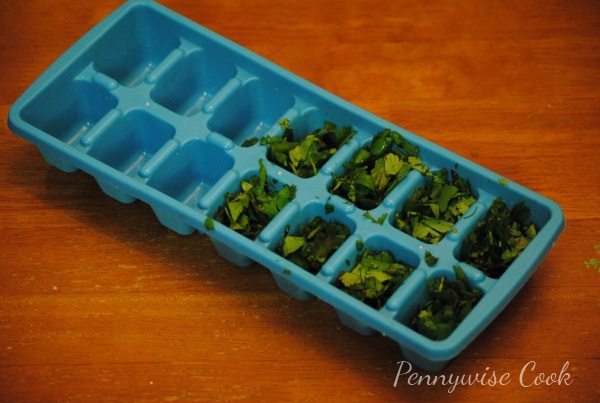
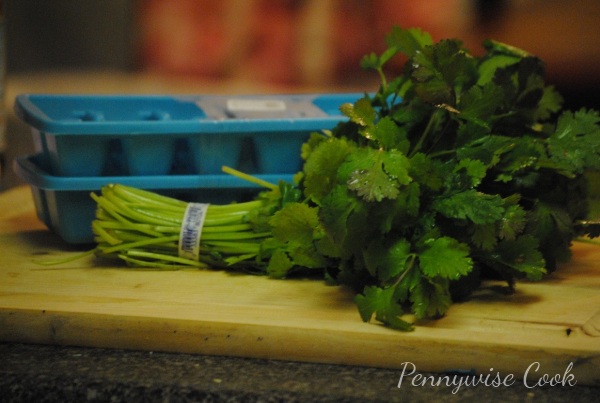
Here’s a trick for FREEZING your herbs and having them on hand for quickly adding them to your meal. You will need ice cube trays for freezing the herbs in. You can find these just about anywhere including Dollar Tree. They sell two in a pack for $1.

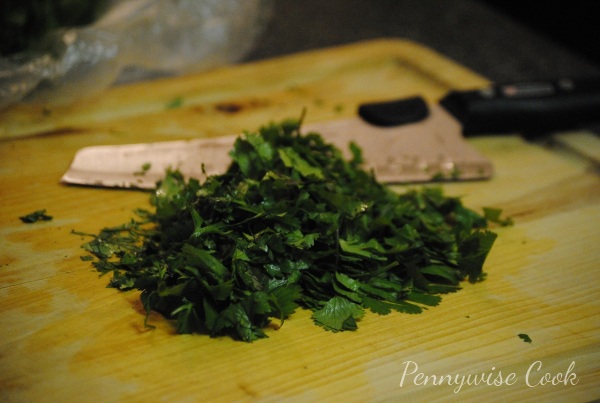
Rinse the herbs and dry well with a paper towel. Then roughly chop them up.

Spoon the chopped herbs into the ice cube tray and add a drop or two of water on top. Pop them in the freezer and voila! The next time that you have a meal requiring a fresh handful of herbs, pop some of your frozen herbs out and throw them in.

I have found that they generally keep their shape and color even after freezing. Barefoot Contessa didn’t mention adding a drop or two of water to the herbs in the ice cube tray, but I find this helps to keep them together more in the freezing process. If the meal you are using your herbs in isn’t a hot one (whether in the oven or on the stove) then you may want to thaw the herbs a little before hand. Otherwise, it thaws fairly fast in most. And I don’t recommend keeping them frozen for more than a few months. They do tend to lose color after a few months. But a few months is better than a few days in the refrigerator!


Like this post? SHARE it!

Related Posts Plugin for WordPress, Blogger...

Instant Cakeification: Chocolate Cake In A Mug

Has it been one of those weeks? It’s Friday, so I hereby declare that it will get better. And to celebrate Friday in all it’s glory, I think that you need a nice and chocolately piece of cake. How about it? It’s almost impossible to refrain from eating chocolate cake if it’s in my house. This is the exact reason that I just don’t make it often! You start with a really small piece trying to be good. Next thing you know, you’ve eaten the entire cake in a matter of two days and you feel horrible. At least that’s how it goes around here. Either that or I’m having to fight my husband away from the cake every 5 minutes.

But sometimes you just need a good, gooey, yummy piece of chocolate cake to satisfy that sweet tooth or to make your day (or late night) a little better. What if I told you that you could have your cake, and eat it too? Eat it and really enjoy it without guilt and without having to look at an entire cake sitting around afterwards. Yeah, that’s my kinda cake. Enter Chocolate Cake in a Mug! This clever little invention has been around for years, but somehow I missed the boat and am just now hearing about it. Two servings of chocolatey, gooey, delicious, indulgent chocolate cake in a matter of minutes without guilt and without a cake staring at you the next day. Sign me up!

After trying out a variety of recipes (it’s research you know, so I tried a LOT of them), I found one that I think is the best! There are a bunch of different recipes for cake in a mug, many of which just didn’t do it for me. With this one, from beginning to end you know the best way to get this cake to come out perfect each time. I made it as healthy as possible and you can’t even tell. Top it with a little powdered sugar or whipped topping and you have yourself a SWEET treat at any hour. No really, you can even eat this as a midnight snack. I give you permission. This has become a favorite snack of mine and my husband’s.

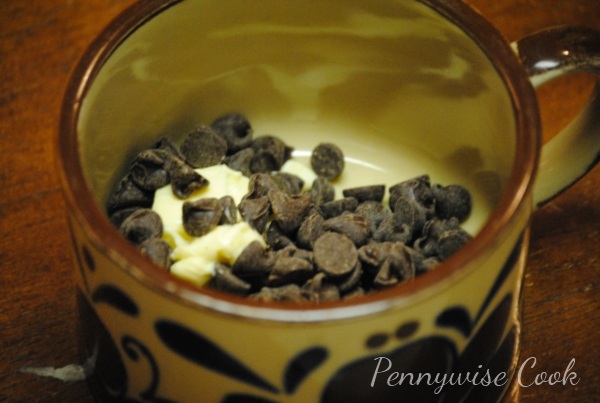
Using your widest and biggest mug, start out by melting 3 tbsp of chocolate chips into a tbsp of butter. I used Fat Free I Can’t Believe It’s Not Butter and it worked well! Mix that together well and add in 2 tbsp light or reduced fat sour cream (or substitute applesauce) and then 3 tbsp of skim milk. Then mix in 1 egg or egg substitute and 1/2 tsp vanilla extract. It’s recommended that you use a fork and I agree that this makes it easier!

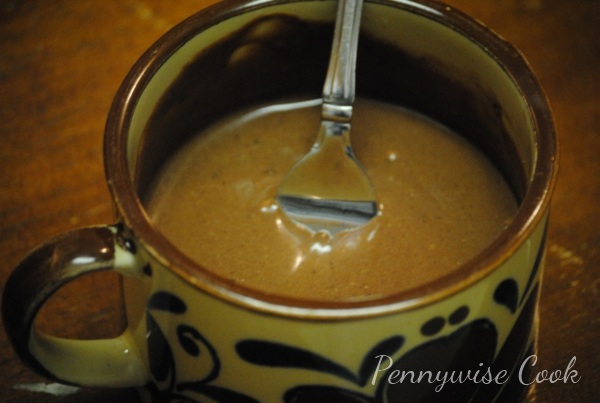
It’s going to look kinda like this once you’ve gotten all of that mixed together. Kinda runny because it’s missing the sugar and flour!

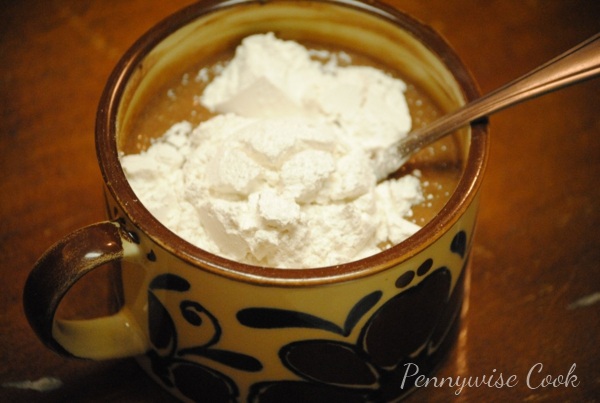
And finally, mix in 3 tbsp splenda and 4 tbsp flour. I used cake flour for a fluffier texture, but of course you can use what you have on hand.

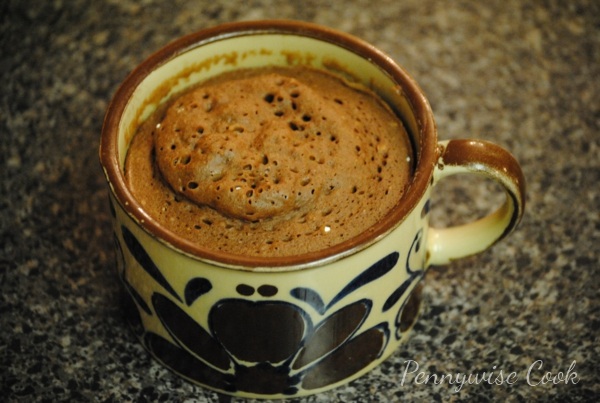
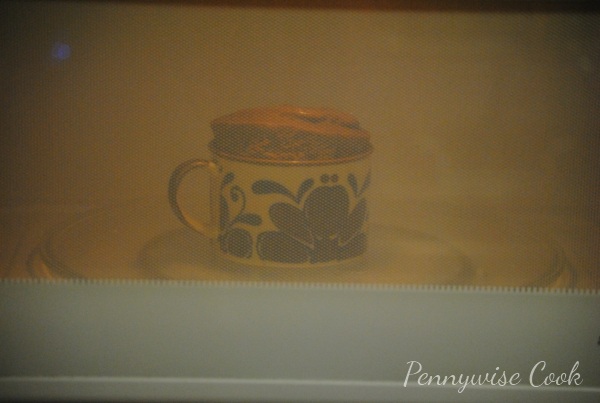
In the microwave, it tends to rise up like this. Don’t worry, I haven’t had one escape from my mug yet.

How easy was that?

Recipe courtesy of Urban Domestic Diva

Chocolate Cake In A Mug

Chocolate Cake In A Mug

Chocolate cake on-demand from your microwave!

Ingredients

  • 1 Tbsp. butter
  • 3 Tbsp. semi-sweet chocolate chips
  • 2 Tbsp. light sour cream
  • 3 Tbsp. Skim Milk
  • 1 egg substitute
  • 1/2 tsp. vanilla extract
  • 3 Tbsp. Splenda
  • 4 Tbsp. Flour

Method

  1. Melt chocolate chips into butter for 30 seconds in microwave. Mix well with a fork.
  2. Add in the sour cream and milk. Mix well.
  3. Next, add the egg and vanilla extract. Whip for a fluffy texture.
  4. Now add the Splenda and combine well.
  5. Lastly, add in the flour and make sure that all ingredients are incorporated well.
  6. Microwave for 2:30- 3 minutes. Times depend on your microwave. (Mine is perfect at 3 minutes)
  7. Top with powdered sugar or whipped topping and enjoy!

Notes

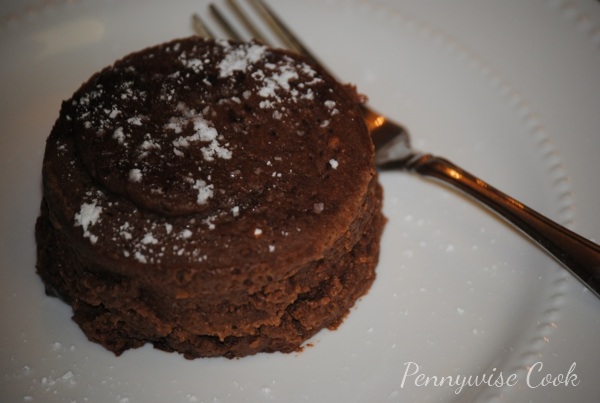
You can eat this right out of the mug or invert onto a plate like we do. Makes it easier for sharing.

http://www.pennywisecook.com/instant-cakeification-chocolate-cake-in-a-mug/

Now, take your cake and go watch Hot in Cleveland!

Do any of you watch that show? It’s my favorite!


Like this post? SHARE it!

Related Posts Plugin for WordPress, Blogger...