Great Gift Ideas From Best Buy This Christmas

I am not completely sure that I have processed the fact that it is already time for CHRISTMAS! Have you? I guess whether I’ve processed it or not, I have to get ready for it. And I’m ok with that, because I LOVE Christmas. The magic and joy that it brings to everybody’s heart. The cookies and milk. Cocoa by the fire. It’s all so cozy and warm and it’s hard to be down during the holidays. 

However, with all that said, it can be stressful figuring out what to get everyone. There is some good stuff out there this year. It keeps getting better and better doesn’t it? From the tablets to the coolest new toys for the kiddos, there is so much to choose from. And I am a big fan of shopping online. I like going into stores to get my hands on things and hold them. Read their box and all that fun stuff. But there is something to be said about sitting on my couch in my pj’s with a cup of coffee and having my purchase shipped to me!

If you’re still working on some ideas for gifts, I have got some awesome ideas for you! Best Buy always has the latest and greatest gift ideas and at at an affordable price.

Hang onto your seat while I stun you with a few killer gift ideas..

With Expert Service and Unbeatable Price these top gifts are on my list this Holiday and here’s why they should be on yours:

Xbox ONE

Xbox One is the place for games.

What is Xbox One?

Xbox One was built by gamers, for gamers. With the best exclusive titles (Halo, Sunset Overdrive), the biggest blockbusters (Assassinā€™s Creed and Call of Duty) the hottest sports franchises (Madden 15, FIFA 15, NBA 2K15) and top family titles (Fantasia: Music Evolved, Just Dance 15, Skylanders) Xbox One takes gaming to a whole new level.

In addition to being a great gaming console, Xbox one connects consumers unlike any other device.  Xbox One enables access to the latest TV shows and movies through your favorite apps.  With Xbox One all of your media is at your fingertips when you want it.

Many of the bundles are $50 off right now and on sale. Perfect time to check them out! Find all the Xbox One deals here.

JBL Speakers and Headphones

JBL Charge 2 Portable Bluetooth Speaker

These are definitely on my list. Between the twin passive radiators for deep bass, the massive 6000mAh battery and the hands-free conference speakerphone the key benefit is the Bluetooth Social Mode which allows up to three different users to take their turns to play their own playlists on a single speaker. 

You can use these anywhere! Take them outside when you’re washing the car. Take them to the beach when you’re getting your tan on. Set it out during your Christmas party. My portable speakers are a must these days.

JBL Flip 2 Wireless Portable Stereo Speaker

Aside from the dual performance-tuned JBL drivers and a built-in bass port, the key benefit of the JBL Flip 2 is the SoundClear echo and noise cancellation combined with the state-of the art microphone system to pick up calls on the speaker.

Such an awesome gift idea. I hope my hubby is reading this. I really want one of these! šŸ™‚

JBL Reflect Earbud Headphones

Now THESE are cool. You can walk up to 40 FEET away from your device while wearing these. Sweat proof ergonomic design.  With a 5 hour rechargeable battery and a reach of about 40 feet, the JBL Reflect BTā€™s key benefit is the design of the ergonomic eartips along with the built-in magnets which keep your buds on standby without loose cables.

Find all of the JBL holiday gift ideas at Best Buy here.

Garmin and TomTom

Both Garmin and TomTom have some stellar GPS options. Perfect for a gift this holiday season. Who DOESN’T want to not get lost? Ok, that is a bit confusing sounding. Who WANTS to not get lost? Oh, you know what I mean…

There are 3 GPS devices that I want to highlight for you. Each has it’s own specs. Check them out below.

Garmin 52LM

  • 5.0ā€ display
  • Maps of 49 U.S. states, plus lifetime map updates1
  • Lane assist with junction view
  • Displays speed limit and accurate arrival time
  • Easily find addresses and millions of points of interest
  • Spoken turn-by-turn directions

Garmin 2597LMT

  • 5.0ā€ display
  • Maps of 49 U.S. states, plus lifetime map updates1
  • Lane assist with junction view
  • Displays speed limit and accurate arrival time
  • Easily find addresses and millions of points of interest
  • Spoken turn-by-turn directions

TomTom Go 50s

  • Lifetime TomTom Traffic: Drive with TomTom Traffic for the lifetime of your device
  • Lifetime Maps (US, Canada, Mexico): Always drive with the latest map
  • 3D Maps. See buildings and landmarks in stunning 3D
  • 5″ touchscreen with advanced lane guidance

You can find all the Garmin and TomTom GPS devices at Best Buy here.

I’m still crossing my fingers hoping that my hubby is reading this. After all, it’s #HintingSeason! Be sure to check out Best Buy!

The reviewer has been compensated in the form of a Best Buy Gift Card and/or received the product/service at a reduced price or for free. All opinions expressed are 100% my own.


Like this post? SHARE it!

Related Posts Plugin for WordPress, Blogger...

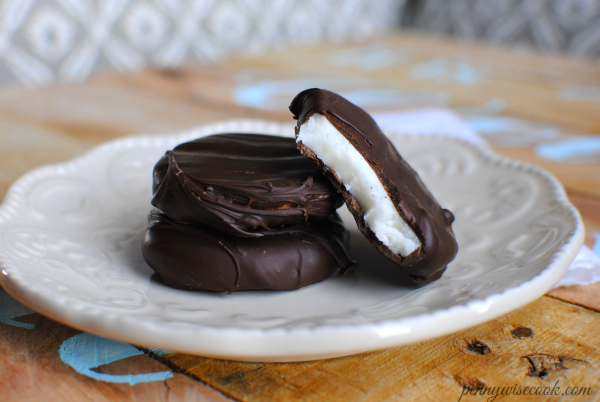
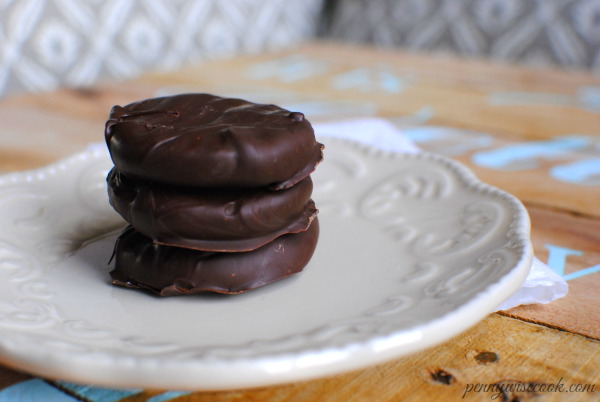
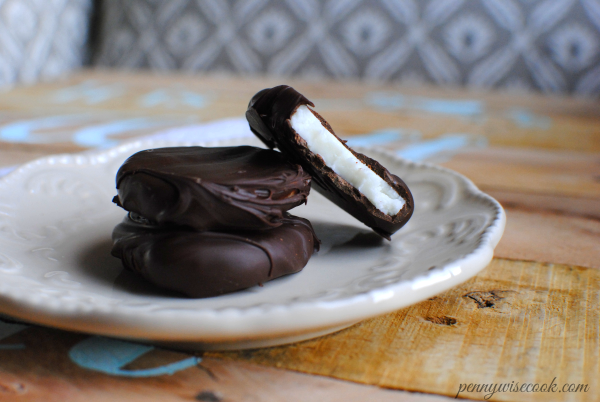
Homemade Peppermint Patties

Peppermint Patties 2

How was your Thanksgiving? Get enough turkey and dressing? What about family, did you get enough of them? I love spending time with my family both immediate and extended. I can’t wait until Christmas! Right before Thanksgiving break I had this bright idea that I could create homemade peppermint patties. I always love a challenge. If you remember back a couple of years ago, I attempted to make a bunch of homemade candy bars. I made Homemade Butterfingers, Homemade 3 Musketeers, Homemade Kit-Kats, and  Homemade Reeses Cups. All 3 of those were a success!

..And then I attempted the Milky Way and it was a disaster. I tried more than once even, and it just wasn’t happening. I gave up.

So maybe this is a way to redeem myself by making peppermint patties? Either way, I’m happy with the results and I can’t wait to share them with you!

Peppermint Patties 3

Do you remember my Candy Cane Brownies from last year? They are SO good and you must make some if you haven’t. My husband has been known to eat entire pans of them… I was getting ready to make them for Thanksgiving. There’s a layer of these brownies that consists of a thick  peppermint-y dough and I thought why not try to make this dough into peppermint patties? You could simply shape it and then dip it in chocolate!

So I did. 

Peppermint Patties 1

I’m going to be honest with you. The first TWO times I made them, I failed. I couldn’t figure it out and I almost gave up on these too. I decided that it could be the butter I was using. Some recipes it makes no difference if you use real butter or not. Others, you absolutely HAVE TO use real butter. THIS is one of the latter recipes. I thought it had something to do with the fact that the butter was melted or not. So I tried my artificial butter melted and then softened and both times, I failed. Blah. 

And then when I had the butter realization, it worked!

The moral of this butter story? USE REAL BUTTER.

Peppermint Patties 4

 I have had rave reviews about these. They are so smooth and creamy and remind me so much of the holidays. They would make great gifts.

Let me know if you try them!

Homemade Peppermint Patties
Write a review
Print
Ingredients
  1. 2 & 1/2 c. Powdered Sugar + some for dusting
  2. 7 tbsp butter, melted
  3. 1 & 1/2 tbsp heavy cream
  4. 1 tsp Peppermint Extract
  5. 4 c. Chocolate Chips (2 12 oz bags)
Instructions
  1. Beat powdered sugar with heavy cream and peppermint extract. Make sure to scrape the bowl. Slowly add in melted butter. Mixture should become like dough.
  2. Remove from bowl and knead. Sprinkle a little powdered onto counter surface. Knead dough until smooth.
  3. Roll out dough until fairly thin. Use something circular to cut out small circles. Place on wax paper and onto flat surface. Freeze circles for at least a couple of hours.
  4. After circles are frozen, remove from freezer and let sit out for a few minutes.
  5. Melt chocolate chips over double boiler or in microwave.
  6. Dip circles in chocolate and place on wax paper to set.
Notes
  1. Make sure that you slowly add in the butter. Once the mixture becomes a dough, if it's too runny or sticky, add in some powdered sugar to thicken it up.
  2. You can add more or less peppermint extract depending on how peppermint-y that you like it.
  3. I found that keeping them in the refrigerator keeps the insides more firm and more true to a real peppermint patty.
  4. You can make these bigger or smaller depending on your preference. I used the bottom of a piping tip the first time and they were a little bigger than I would prefer. You can use whatever you have around the house to make them the size you'd like.
Adapted from McCormick
Pennywise Cook http://www.pennywisecook.com/


Like this post? SHARE it!

Related Posts Plugin for WordPress, Blogger...

Turkey and Dressing Enchiladas

Turkey Dressing Enchilada 2

 When I think of Thanksgiving, the very first thought that comes to mind is FOOD. I think that’s what most people think of. I mean that’s what it was all about back in the day. The Pilgrims and the Indians shared a meal together to show their thanks for helping them to survive once they arrived in America. They gathered around FOOD. 

Food is almost always the centerpiece. Birthdays (cake), Christmas (cookies and Ham), showers (finger foods), potlucks (things covered in butter or cheese), etc. You get the idea. We are a culture that is built around enjoying our food.

As a mom now, I also see the other part of it. It’s also about the time that you put into it all. Blood, sweat, and turkey tears at Thanksgiving!

Luckily, I have a recipe for you today that might just present an alternative to the usual Thanksgiving all-day affair. It’s not your everyday, full-blown turkey extravaganza, but it’s pretty and would make a great meal if you’re having people over around the holidays. And if you’re not in the mood for spending hours in the kitchen on a normally very busy day, this might be right up your alley too!

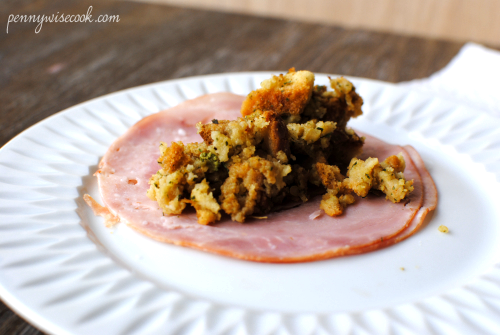
Dressing on Ham

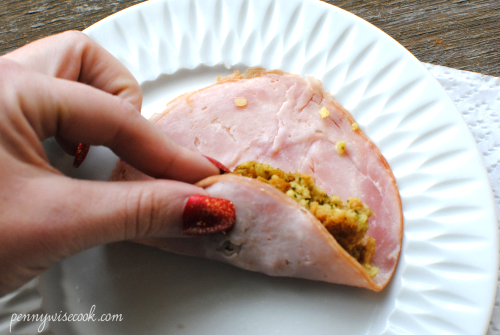
Turkey and dressing go hand in hand. Why not snuggle them up close together? (For the record, this is actually a picture of ham and dressing) Prepare your dressing according to the package or recipe and then lay out sliced turkey (or ham). Plop your dressing right down in the middle. They’re going to warm up real nice together in the oven…

Ham Roll Up

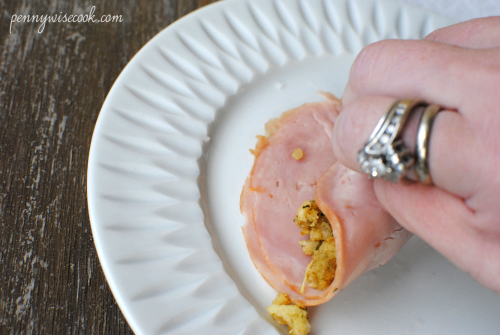
Rolling Up

It’s time to cuddle y’all! Tightly roll inward trying to keep that dressing from falling out the sides. If it falls out, just stuff that dressing right back into the sides.

Before Gravy

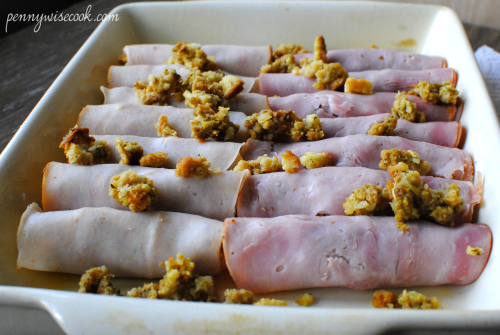
We had some leftover dressing, so I just sprinkled it all over the top. I have turkey on the left here and ham on the right. I normally make this with turkey, but I had a request from the hubs to try it with ham. 

Pouring Gravy

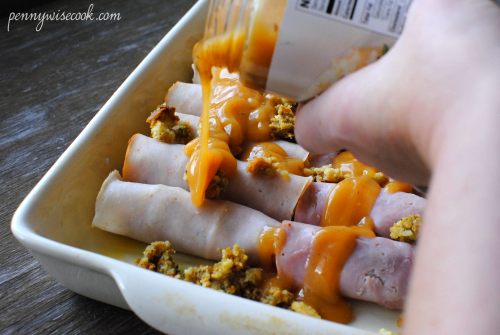
Using your favorite turkey gravy (yes you can just make it too!), pour it ALL over the top of your rolls. Oh my goodness, this is when it gets sooooo tasty!

Pre Cooking

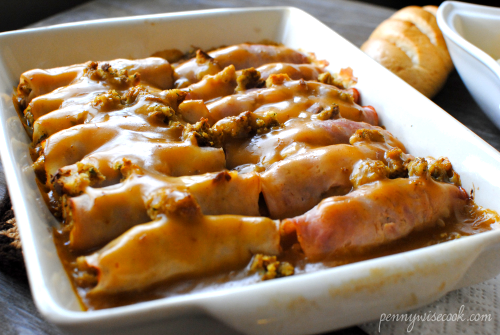
This is what it looks like right before you pop it into the oven. 

Turkey…

Dressing…

Gravy…

…all in one yummy delicious place.

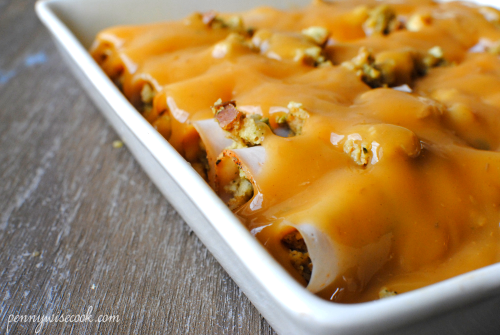
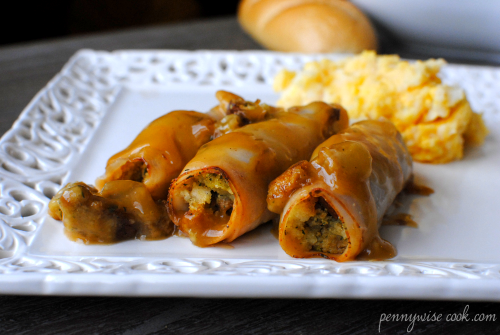
Turkey Dressing Enchiladas

Turkey Dressing Enchilada 1

It’s a beautiful presentation and worthy of company. I make it for my family and every time I say I need to have somebody over so I can make this for them!

I haven’t tried yet, but I think it would be yummy to add in some cranberry sauce to a few. What gorgeous color that would add to the dish!

Make this yourself and let me know what you think!

Turkey and Dressing Enchiladas
A simple dish made with simple ingredients, but doesn't actually look like it was simple to make! Turkey and dressing make a special cuddle in the oven to create this tasty dish!
Write a review
Print
Ingredients
  1. 1 (6 oz) box dressing- Or make your own!
  2. 1 (12 oz) jar or can turkey gravy- Or make your own!
  3. 14-16 pieces of thick-sliced deli turkey
Instructions
  1. Preheat oven to 350Ā°.
  2. Make dressing according to package (or recipe) directions. Let cool.
  3. Drop a large spoonful onto a slice of turkey. Roll inward tightly and place seam side down in a casserole dish. Repeat until all slices are stuffed and rolled.
  4. Pour gravy over all of the rolls evenly.
  5. Bake 25-30 minutes.
Notes
  1. I have made this with both think and thick turkey slices. If I am using thinner pieces, I double them up.
  2. We used ham with some of them this time around. It was a hit!
  3. Feel free to make your own dressing and gravy (especially if you already planning to do so), this is just a quicker way!
Adapted from The Four Ingredient Cookbook
Pennywise Cook http://www.pennywisecook.com/

Like this post? SHARE it!

Related Posts Plugin for WordPress, Blogger...

#DisneyKids Preschool Playdate!

Table


I received free products in order to host the Disney Kids Preschool Playdate. The opinions are 100% my own.

Now that school is back in session, playdates are at an all-time low. At least around here. Even if my preschooler isn’t going to school tomorrow, her sister is and that makes it a school night. My youngest doesn’t need school as an incentive to waking up early though. Noooooo, she wakes up like clockwork around daybreak. Keeps mommy on her toes! 

…and full of coffee!

My preschooler, most of the time, is very independent. But she really likes to be around others. She likes to pretend with others and do puzzles. She likes to read books. You know what else she likes? 

Princesses!

I was recently chosen to host a Disney Side Disney Kids Preschool Playdate and I was stoked. I’m sure that my little one would have been too, but I chose to keep it a secret until the very day of! This turned out to be a fantastic decision. She was completely surprised!

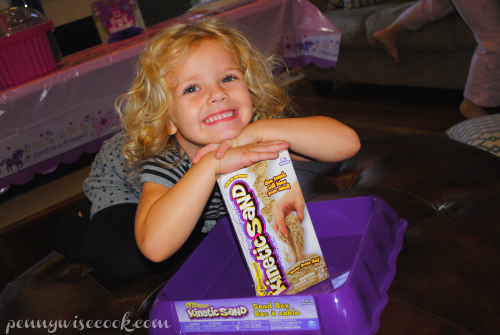
Kinetic Sand

I was sent a HUGE box of amazing Disney decorations, treats, and fun for the kiddos to enjoy. This was her with the Kinetic Sand. This stuff is SO cool y’all. 

It’s kinetic meaning it sticks to itself and not to you! It oozes, moves and melts right before your eyes. It flows through your fingers like a slow-moving liquid, but leaves them completely dry. Kinetic Sand stimulates children’s creative skills allowing them to create anything they can imagine over and over again. Kinetic Sand never dries out and is gluten free. This soft and stretchy sand easily cleans up while delivering non-stop fun! It’s squeezable sand you can’t put down. Feel the difference with Kinetic Sand! Made for kids ages 3+

I must admit that I had almost more fun with it than her, but I promise I shared.

Kinetic Sand Play

They couldn’t stay away! It’s so smooth and molds to whatever shape you want to make. And the Kinetic thing, it’s awesome. To watch it ooze out of your hand and fall it’s almost therapeutic.

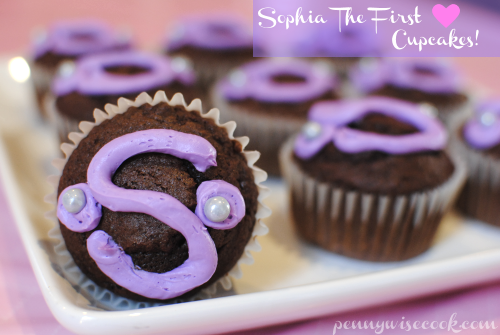
Sophia The First Cupcakes

With the majority of decor we received being Sophia The First, I decided to make these cupcakes to match! Knowing that these were preschoolers, I decided to go easy on the frosting, keeping naptimes in mind.

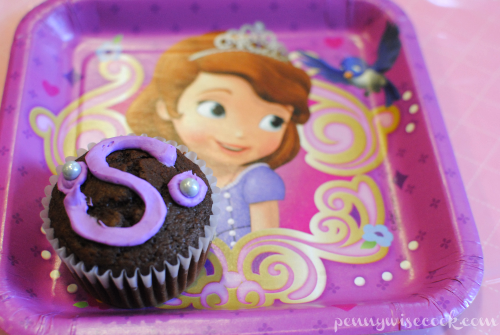
Cupcake on Sophia the First Plate

They turned out cute, didn’t they!

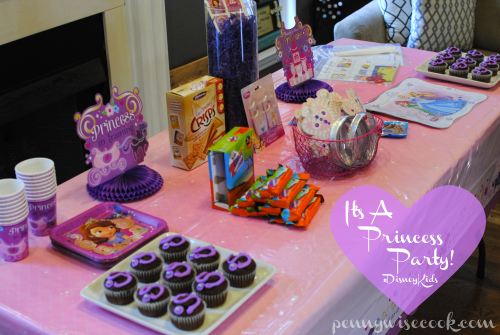
Princess Party

By the time that I unpacked all the goodies, it looked like a grand princess affair! All the kiddos were so excited and their eyes lit up when they walked in to find this waiting on them. It was magical!

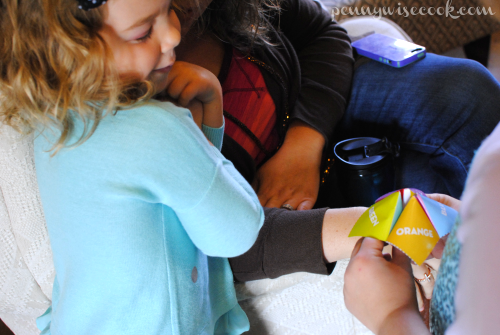
Fortune Teller Craft

We did a few fun activities that were provided and they loved this “Which Disney Junoir Character Are You” Fortune Teller game. The name says it all. Guess who I was EVERY time? Handy Manny! The girls were so happy when they got Sophia The First!

Edible Crafts

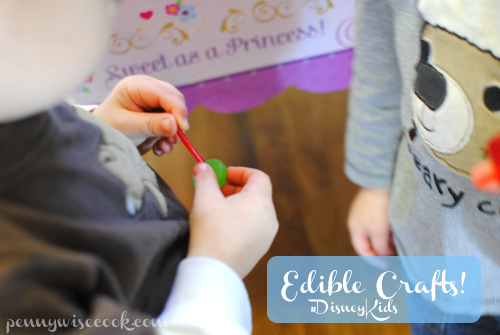
We also made an edible craft! Which when you’re this with preschoolers, you should know that there is more edible-ness happening than crafting. We used licorice laces as the string and Lifesaver Gummies and Froot Loops as beads. They suggested mini marshmallows, but we couldn’t make those work. 

So we just ate them!

Edible Crafts 2

Here’s my sweetie and her bracelet! (Eaten seconds later)

Snacktime!

As if they needed more sugar, we breaked for snack time! I was provided with these cute Disney Princess placemats which helped to keep cupcake crumbs contained.

Princess in Tiara

After snack time, we all put on our tiaras and played Twirling Tiaras. It’s basically a freeze dance where you play music and freeze when the music stopped. It was so much for everyone that we had to play twice!

We had an incredible time at our #DisneyKids Preschool Playdate y’all. Much needed for my preschool princess. She is still reeling from the fun she had and still plays with her Kinetic Sand and Mega Bloks toy!

_______________________________________________________________________________________________

This post was brought to you on behalf of Walt Disney World Resort and MomSelect. All opinions expressed are 100% mine. I was provided with free product in exchange for this post.


Like this post? SHARE it!

Related Posts Plugin for WordPress, Blogger...

13 Thanksgiving Side Dish Ideas

13 Thanksgiving Side Dish Ideas

There are years when Thanksgiving draws near and I completely go blank when coming up with a menu. There are always staples that everyone expects to be on the table each year, but sometimes you just want some inspiration. I have come up with some yummy side dishes in this post consisting of 13 Thanksgiving Side Dish Ideas. Check them out! 

P.S.- *whispers* You can really make these anytime of year!

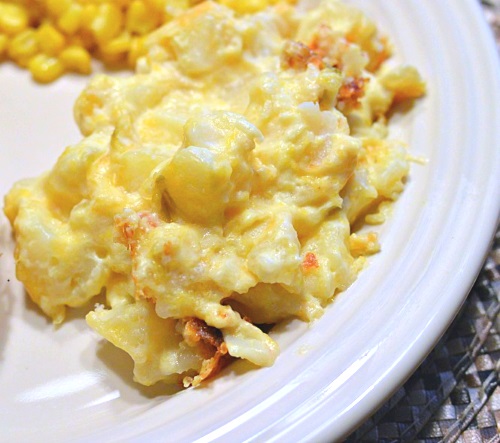
Hashbrown Casserole

Get a little taste of the country with Easy Cheesy Hashbrown Casserole. Comfort food at it’s best!

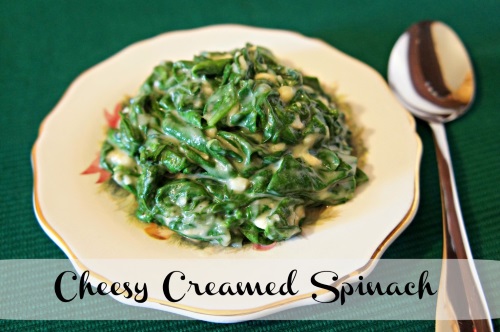
Creamed Spinach

Your kiddos might even enjoy this Cheesy Creamed Spinach this year!

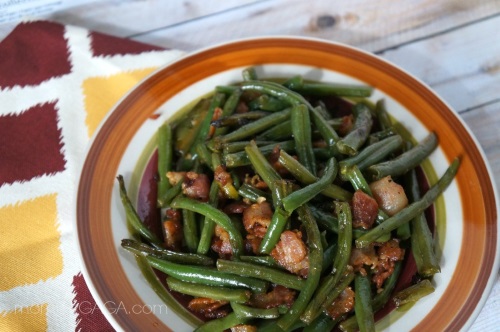
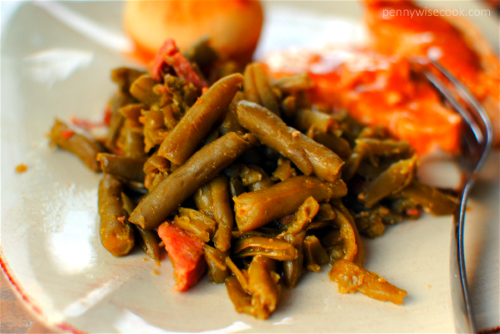
Bacon Green Beans

Can you go wrong with this Bacon and Green Beans Saute?

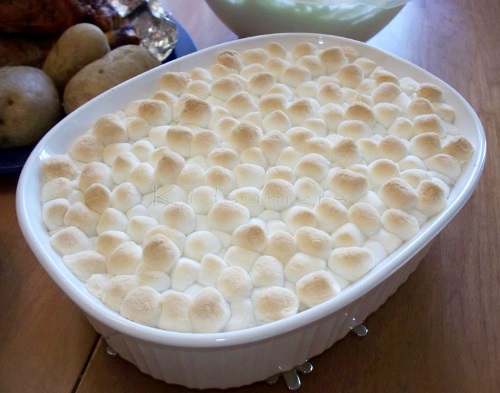
Sweet Potato Casserole

Is Thanksgiving even Thanksgiving without Sweet Potato Casserole?

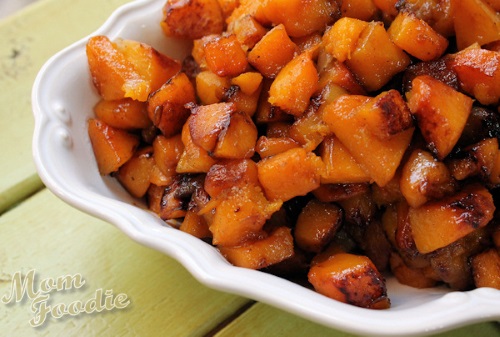
Butternut Squash

This Roasted Apple Butternut Squash with Maple Cardamom Glaze looks amazing!


Slow Cooker Green Beans

Save yourself some time with these 2-Ingredient Slow Cooker Green Beans. SO tasty!

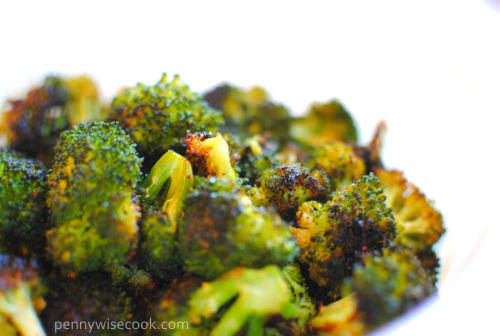
Roasted Broccoli

Here’s a healthy spin. Roasted Broccoli is an easy side dish!

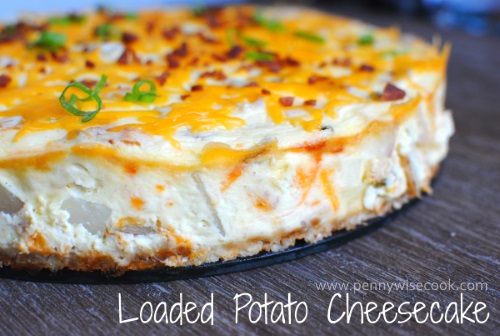
Loaded Potato Cheesecake

This one is to die for. Loaded Potato CHEESECAKE! Need I say more?

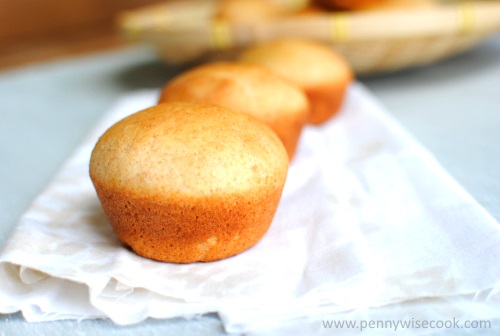
Dinner Rolls

What’s a Thanksgiving feast without rolls? Check out these Perfect Wheat Dinner Rolls!

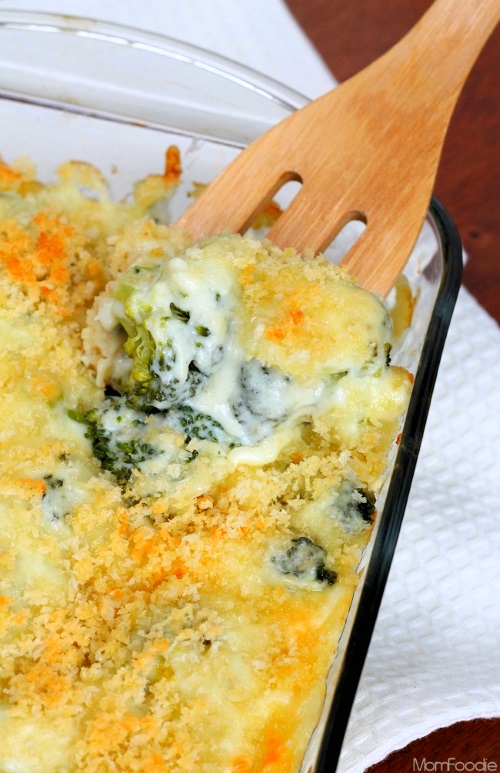
Broccoli Casserole

This Super Cheesy Broccoli Casserole looks so tasty!

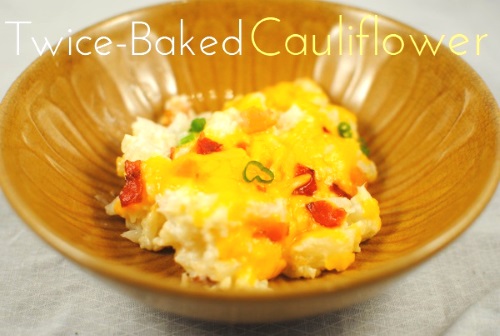
Twice Baked Cauliflower

This Twice-Baked Cauliflower is great for those watching their carbs!

Mashed potatoes

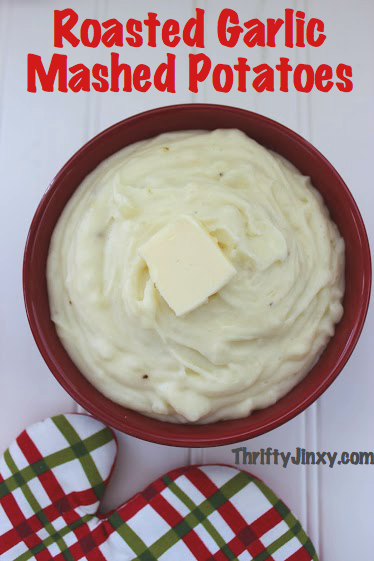
And of course, you can’t forget the mashed potatoes! This recipe for Roasted Garlic Mashed Potatoes is a great addition to turkey and dressing!

Traditional Green Been Casserole

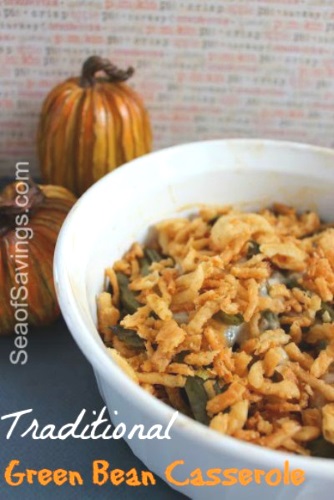
You can’t go wrong with Traditional Green Bean Casserole!


Like this post? SHARE it!

Related Posts Plugin for WordPress, Blogger...

Apple Dip

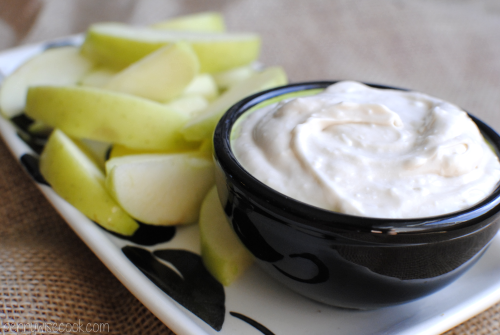
Apple Dip 1

 When I was young, our neighbor had an apple tree in their yard. I remember first finding out that the tree had apples on it. I ran over there and picked me one and took a big bite out of it. And then I realized…this was no regular apple tree. It was a tree of crab apples. Have you ever had a crab apple? They are not so good. Very sour, hard, and give you a sore tummy. 

Now regular apples, I love. I’m more of a green apple eater than red, but I’ll eat whatever I can get. And I adore dips for my apples. Just a big dollop of peanut butter and a juicy slice of apple can make my day.

Fall is the season when apples are ready for harvest. Though I find them just as juicy and fresh anytime of year at the grocery store. And they don’t seem to vary too much in price, which is nice.

I’ve got a dip for you today that you’re going to love. After we ran out of apples, we used our fingers to scrape the rest of the dip off the bowl. It’s so good.

Apple Dip 2

This dip is very similar to 2-Ingredient Fruit Dip, but the ingredients are a little different.

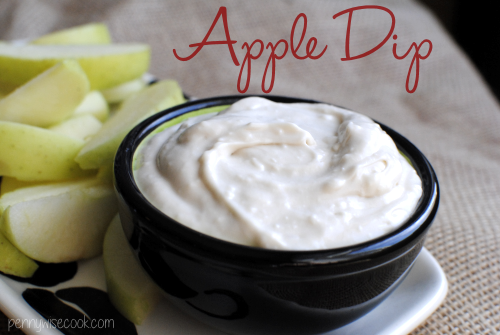
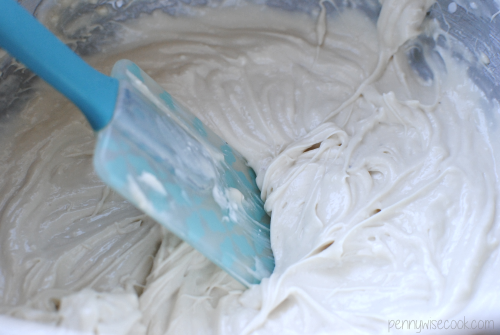
It’s a simple mixture of cream cheese (you know its going to be good), brown sugar, vanilla extract, and sour cream. Yeah, that sour cream gives it a creaminess. Love it.

Apple Dip

I love this dip for get togethers. It would be really great to buy a bunch of different types of apples, slice them, and put them on a platter with this dip in the middle. You would have so many colors! 

Just make sure that you don’t get any crab apples.

Oh yeah and, you don’t just have to eat this with apples. It’s amazing with any fruit! The recipe was originally called “Caramel Fruit Dip”, so I was going to pair it with apples thinking, you know, apples and caramel are wonderful together. After eating it, it does not have that caramel taste I was expecting. But it is still a wonderful partner for apples!

Apple Dip
Write a review
Print
Ingredients
  1. 1 (8 oz) pkg Cream Cheese, Softened
  2. 1/2 c. Brown sugar
  3. 1 tsp Vanilla
  4. 1 c. Sour cream
Instructions
  1. Mix all ingredients together with mixer and chill. Serve!
Notes
  1. I used 1/3 less fat cream cheese and fat free sour cream and this still tasted wonderful!
Adapted from The Four Ingredient Cookbook
Pennywise Cook http://www.pennywisecook.com/

Like this post? SHARE it!

Related Posts Plugin for WordPress, Blogger...

Chocolate Ice Box Pie {4 Ingredients}

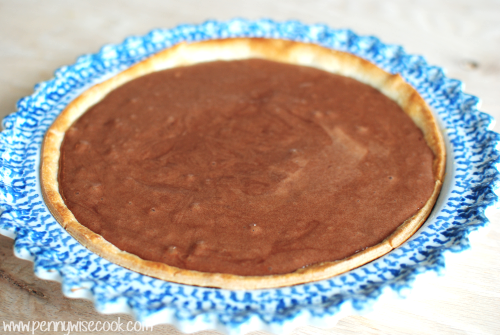
Chocolate Icebox Pie 5

I’m not sure that the weather realizes that it’s almost November. Somebody really oughta tell it that it’s a little late this year. We are just now seeing the leaves change. And the temp? We haven’t had many cold snaps and just the other day it was close to 90 again. Welcome to good ole Tennessee!

I’m mostly ready for the bugs to leave us alone. I’ve had to set up one of my Fruit Fly Traps. After seeing about five of them near the sink I told the hubby that it’s time to get one made up and set out. After a couple of hours we counted them to find out that the five we thought we had was really closer to 50. Um, ew!


I’m sorry y’all. It appears that our family has a thing for desserts. You might have noticed that by my last three recipes. I’ve said it before and I’ll say it again- dessert is my best bribing tool. Why wouldn’t I make it?! Though sometimes I find it hard to keep up with demand. Trying to get better at it since I’ve discovered its power. 

This pie has quickly become a hubby favorite. Requested many times and made just as many times because of how easy it truly is. Y’all know me and my few ingredient recipes. This one?

Just four ingredients.

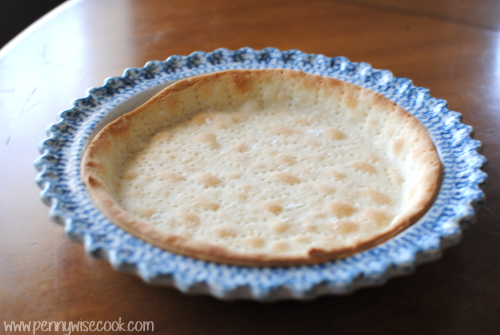
Chocolate Icebox Pie 1

The first is none other than a pie crust. Easy to make yourself if you’re in the mood. Easier to purchase at the store when you’re not in the mood.

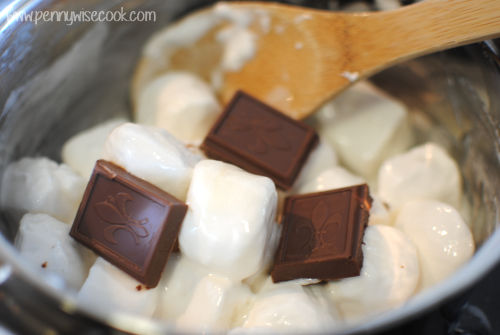
Chocolate Icebox Pie 2

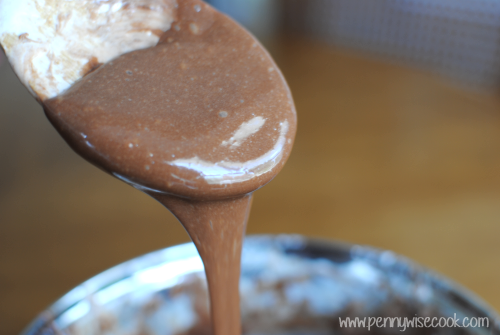
The next two ingredients include some very tasty staples that totally make me want a s’more right now. An 8 ounce chocolate bar and pile of jumbo marshmallows. You melt them down until they are good and combined. The original recipe didn’t call for anything to help them along, but I have been using a tablespoon or so of milk.

Chocolate Icebox Pie 3

After they combine, they look like this. Ooey, gooey, yummy goodness.

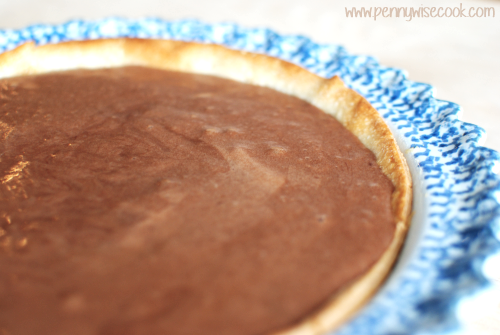
You let this mixture cool a little and then fold in a tub of whipped cream. Pour this mixture into your pre-baked pie crust and refrigerate a little while.

Chocolate Icebox Pie 4

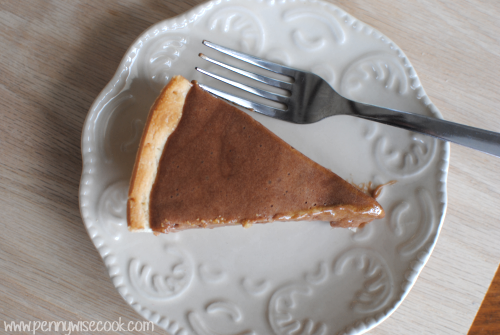
Oh goodness y’all. It’s sooooo good.

I think a lot of its charm comes from how easy it is. Do you feel that way? When things are easier all of the sudden they are that much more amazing? It’s like getting things free. You give me something FREE, I’m going to be uber excited about that thang.

Chocolate Icebox Pie 6

You have to try it.

You just do.

Chocolate Icebox Pie
Write a review
Print
Ingredients
  1. Pie crust (pre-baked)
  2. 20 large marshmallows
  3. 1 (8 oz) chocolate bar
  4. 1 (8 oz) tub whipped topping
  5. 1 tbsp (or so) milk
Instructions
  1. Melt marshmallows and chocolate bar with milk over low heat or in a double boiler. Cool partially.
  2. Fold in whipped topping.
  3. Place in pie shell.
  4. Chill.
Adapted from The Four Ingredient Cookbook
Pennywise Cook http://www.pennywisecook.com/

Like this post? SHARE it!

Related Posts Plugin for WordPress, Blogger...

More Love For Your Loyalty!

This post brought to you by LuvsĀ®. The content and opinions expressed below are that of Pennywise Cook.

Luvs_logo_zps3ce3f248

Let’s cut the crap. Or contain it anyways. Like inside a diaper. A good one.

I remember when I was a new mom I had absolutely NO clue what a good diaper was. There were so many brands, price points, absorbency options, sizes, stretches, and the list goes on. How in the world is a mom really supposed to pick a brand? For me it all came down to 2 things:

1) Price. You know me. I’m all about the best quality at the best price. 

2) Quality. That’s something that you just can’t skimp on when it comes to diapers. I mean, who wants to be awoken in the middle of the night with a screaming baby who is flooded in pee? Not me!

So with those two things in mind, I obviously went to the experts to help me decide. It wasn’t commercials. It wasn’t coupons. It wasn’t my baby book that suggested a great diaper. It was OTHER MOMS! They are the ones deep in the diaper-changing trenches trying them all out to find what works for them. Most of the ones that I talked with agreed that LuvsĀ® were the best! They ticked both of my boxes. That’s where my luuuuuuuv for LuvsĀ® began. I became what you might call a loyal LuvsĀ® lover. Both of my girls are LuvsĀ® babies. They are super absorbent. No joke. We have had some doozies at my house. For real.

What about you? Have you tried LuvsĀ® before?

Do you know about The LuvsĀ® Club Loyalty Program? Well, let me just tell you about it in case you haven’t!

  • It’s FREE to join.
  • Members receive the latest LuvsĀ® offers and savings (coupons!).
  • They also have baby-related news, helpful tips, and articles for your parenting enjoyment and info.
  • You will be entered into the LuvsĀ® Club Sweepstakes for a chance to win a $1000 gift card!

I signed up and it took me literally about a minute! Register for the #LuvsClub so that you can be entered the LuvsĀ® Club Sweepstakes and be entered for a chance to win a $1000 gift card! Think about all the diapers you could buy with that. 

The drawing will be held April of 2015.

Visit Sponsor's Site


Like this post? SHARE it!

Related Posts Plugin for WordPress, Blogger...

Easy Homemade Ice Cream Cake

Ice-Cream-Cake-Pic

Ever since I can remember I’ve been a fan of ice cream. Not just your everyday fan. We’re talking I have to have it quite often kinda fan. Not just once every now and then.

I inherited this strong love for ice cream from my dad. He taught me how to eat it straight from the tub with a fork.

Yes, a fork. 

I’ll never really understand why he liked to use a fork, but I’m almost 100% certain that it tastes better with a fork. #dontwaskmewhy

If you crave ice cream, then you might be in the mood for an ice cream cake come time for your birthday. 

Or just to stuff your face with on a random Tuesday night…

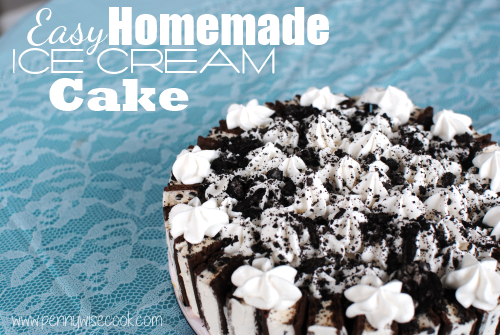
Check out this SIMPLE and awesome recipe for creating a beautiful ice cream cakey masterpiece. It looks like it came from DQ itself. I posted this recently over at Gathering Grain, but I thought it would be kind of me to let y’all in on the awesomeness as well.

Wax-Paper-Springform-Pan

 One thing you’ll most definitely need is a springform pan. If you don’t have one, you’ll want to get one. I use them for all sorts of things these days. It’s my magic tool for making things pretty. Amazon has a CuisinArt 9-inch Springform Pan for just $13.95.

Or you could just check your local thrift store next time you’re in there.

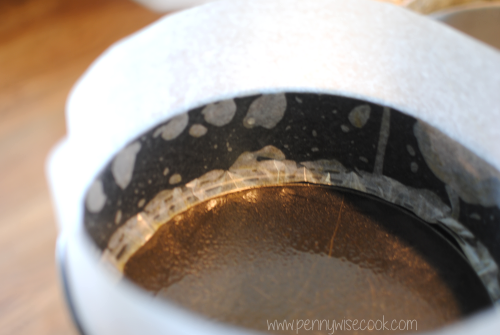
Coat your pan with non-stick cooking spray. Then place a strip of wax paper around the sides. This makes it so much easier when it’s time to take it out of the pan. It just peels off leaving it beautiful around the outside.

*Note*- Though I didn’t have this issue, a friend of mine still had some trouble with the edges sticking to the wax paper so you might even spray the top of the wax paper if you’re concerned.

Ice-Cream-Sandwich-Ring

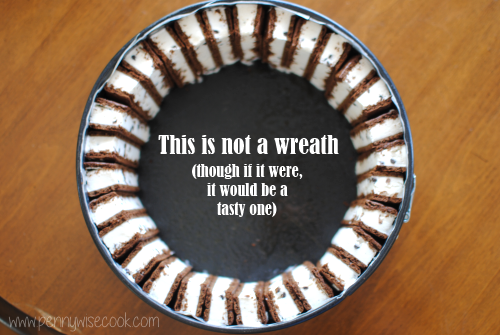
And now, with the magic of blogging (not TV y’all because Lord knows I’m not Pioneer Woman), this is what you’ll come up with after you place your ice cream sandwiches. 

Cut them longways in half and then cut each of those halves in half again. This will give you 4 pieces per sandwich. Um k?

Filled-cake

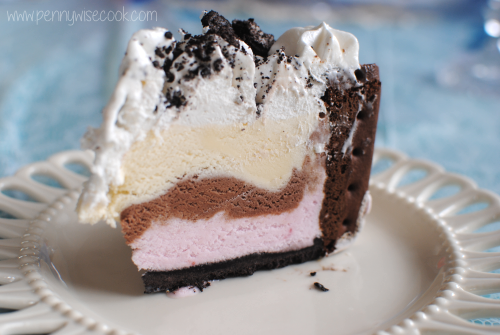
Once again, we’re going to fast forward. You will make an easy oreo crust for the bottom and then spoon in softened ice cream (whatever flavor you choose!). I used 3 different flavors to get the neopolitan affect.

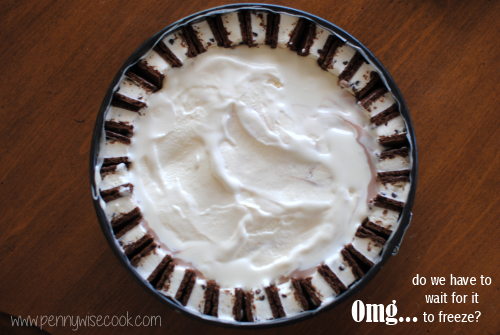
Pop into the fridge and then dollop some whipped cream and crushed cookies on top. Let set a little bit and then serve!

Or sit on your couch, use your fork, and go to town.

 Piece-of-Cake

A picture of the middle. Isn’t it pretty? It is amazingly tasty too. You’ll just have to try it for yourself!

Homemade Ice Cream Cake
A simple yet amazingly beautiful ice cream cake made in your very own kitchen.
Write a review
Print
Ingredients
  1. 18 chocolate sandwich cookies (Oreos)
  2. 1 tbsp milk
  3. 8-10 ice cream sandwiches (depending on the size of your pan)
  4. 3 pints ice cream of your choice
  5. 1 8 oz container whipped topping, thawed
Instructions
  1. Begin by removing your ice cream from the freezer. Let thaw and once its soft around the edges, transfer to bowls so the middle can thaw. Give it a good stir.
  2. Meanwhile, throw 15 chocolate sandwich cookies in a food processor to crush finely. You can also do this by hand if you don't have a food processor. I usually do this ahead of time to save time when assembling the cake. Once crushed, mix in the tablespoon of milk to create a crust mixture.
  3. Coat the bottom and sides of a springform pan with cooking spray. Cut a thick strip of wax paper and place it around the edges of the pan. The cooking spray will help it to stick. Cut any excess off the top.
  4. Cut each ice cream sandwich into 4ths and place standing up around the edges of the pan. It will appear like a wreath.
  5. Using your created crust mixture, press into the bottom of the pan evening it out all the way around.
  6. Pour your softened ice cream into the middle of the pan. Smooth out evenly. Continue with the other 2 pints of ice cream.
  7. At this point, I like to place my cakes into the freeze for about 30 minutes or so to firm up a bit before adding the whipped topping.
  8. Take out of the freezer and using a piping bag and tip or simply a ziploc bag with the tip cut, fill with whipped topping and add dollops all of the top of the cake.
  9. Crush your last 3 chocolate sandwich cookies and sprinkle over the top.
  10. Freeze for a couple of hours (or best overnight) and serve!
Adapted from Gathering Grain
Pennywise Cook http://www.pennywisecook.com/

Like this post? SHARE it!

Related Posts Plugin for WordPress, Blogger...

Family Christian Dress Like A Veggie Event

veggie-tales-event2[1] copy

I cook with them quite often, but I must admit that I’ve never dressed like one. If the “you are what you eat” thing were true, I would most definitely be an edamame bean.

Or a cob of corn.

Or broccoli.

Honestly, I would probably be a new breed of veggie. Like a tomcobbrocame. This would be pronounced: Tom-cob-broc-ah-may. I’m so good at this that I could start a new language. Veggie language! YES!

Let’s move on shall we?

I know you guys are always looking for a good deal and also for a FREEBIE so I wanted to share this awesome contest happening through Family Christian stores! This may take some creativity so put your thinking caps on.

We are huge VeggieTales fans around here. I have been since I was young. I sound like an old fart referring to when I was young, don’t I? I’ve been a fan for a long time, but not too long if you know what I mean. ANYWHO! Family Christian is proud to announce their Dress Like A Veggie Event at ALL of their locations!

Here are the details:

When: Friday, October 31st 2014
Where: At ALL Family Christian Stores (find a location near you)
What to do: Dress like a veggie, take a photo in-store, post it to their Twitter and/or Instagram using the hastag #FCVeggies and tagging @FamilyChristian

The grand prize winner will receive a $250 gift card to Family Christian. FIVE runner ups will receive $50 appreciation certificates.

Your child does NOT have to dress like a VeggieTales veggie, just any veggie to qualify. You must have at least ONE child dressed up to enter the contest. 

And ALL children that stop by during the Dress Like A Veggie Event will receive small goodies!

You can find some great costume inspiration on this Pinterest board. I know you guys are creative so see what you can come up with! This is so exciting, I know my girls are going to be stoked.

They’ve always wanted to dress up like a cucumber you know…they just never knew it.

This post is written by me on behalf of myself and Family Christian Stores. All opinions expressed are 100% mine.


Like this post? SHARE it!

Related Posts Plugin for WordPress, Blogger...