Target: Capri Sun Super V for $.33 Per Pack

First of all, did you realize that you can print coupons from Pennywise Cook? Take a gander at the navigation bar at the top and hover over the coupons tab and there are TONS of them to choose from! I’m going to work on doing a better job of showing you some of the most fab ones that pop up.

I will begin with this $1 off any ONE Capri Sun 100% Juice or Super V coupon. At Target, you can grab these for only $.33 after the following little coupon maneuver. You will need to be able to print your coupons from 2 computers since there is a limit of 2 coupons per computer.

Buy (3) Capri Sun Super V Packs $3 each (on sale)= $9 Use (3) $1/1 printables= $6 Receive FREE $5 Target Gift Card Final Price= $1 or $.33 each!

Yes, my inner Saving with Amy has been raring her head lately since we are trying to save money. You may see a few more deals like these! I hope that you enjoy them.

Thanks to The Coupon Centsation for the deal!


Like this post? SHARE it!

Related Posts Plugin for WordPress, Blogger...

Ideas for the Lunchbox: Grilled Cheese Rollups

The budget cuts aren’t just for the US government these days. Here at our house, we’re working on a new budget with the intent to save as much as humanly possible! I’ve always considered us a money-minded and frugal family, but we are working to try and be even more watchful about unnecessary spending.

Man, I really do sound like the US government now.

What is more frugal than a grilled cheese sandwich? Hmmm, I wonder if grilled cheese could be the answer to the US’s debt crisis?! Maybe if all the lawmakers up in Washington would agree to eat them, then we could start saving some REAL money around here. They could put them in their lunchboxes. Now THAT would be a sight!

I saw this idea over at Chin Deep as I was preparing some ideas for Addie’s lunchbox. I can’t claim I came up with these gems, but I knew I had to make them as she has recently found a deep love for grilled cheese. She gets that from her father. I hated them as a kid!

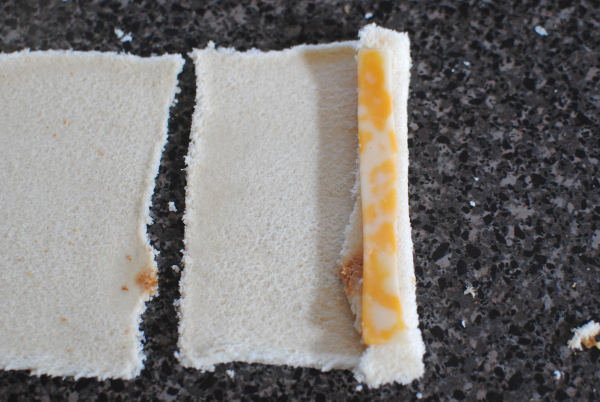
It all starts with some plain and simple sandwich bread. Whatever you can find or afford. Cut off all of the crust leaving as much of the meat of the bread as you can. You’ll also need the sliced cheese of your choice. I cut mine in half and then cut those halves 2 more times to equal about 8 small pieces from each slice.

It’s a pretty simple process. I spared you most of the step by step pictures as to not insult your intelligence. Place a piece of cheese on the very end. Roll. Add another little piece. Roll. And continue in this manner until you’ve come to the end of the bread. I used about 4 pieces for each of mine. Yours may differ depending on the size of your bread.

You can use a little bit of water on the end to help attach it and close it up for frying.

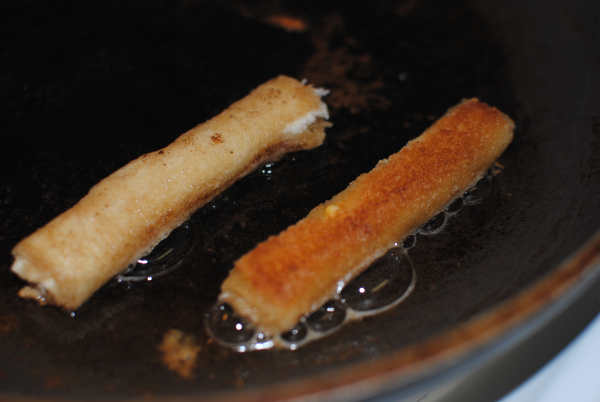
Heat up 2 tbsp of butter over medium heat.

This is where things get hot. The butter absorbs, the cheese melts, and the bread browns! It’s heavenly. It’s around 2 minutes or less on each side. You’ll just need to watch it and determine your favorite color of brown. 🙂

As a side note: you may need more butter depending on how many of these you are planning to make. The butter does absorb pretty quick so it’s possible you’ll have to refill a few times.

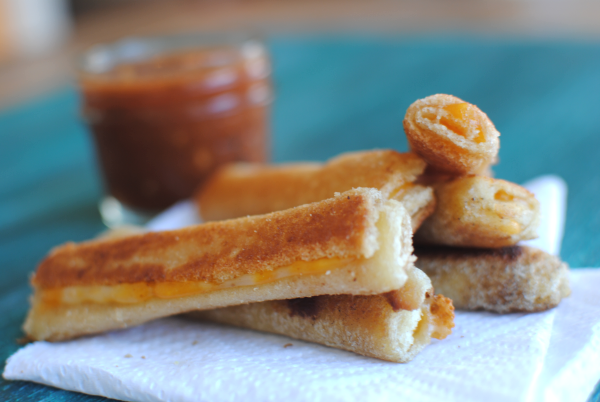
Voila! These are so simple and tasty. They would be great for eating with my Homemade Tomato Soup! These would also make a great finger food for a kid’s party.

UPDATE: After seeing how these fared in her lunchbox, we have decided that putting them in the microwave for a few seconds before placing them in the lunchbox helps. My Addie doesn’t prefer them to be cold, but room temp is fine. We’re going to keep trying and figure out a way to make them work. And if you have any ideas, they are surely welcome!

Ideas for the Lunchbox: Grilled Cheese Rollups

Recipe Type: Snack, Lunchbox

Cuisine: American

Author: Adapted a little from Chin Deep

A new way to enjoy grilled cheese and the perfect idea for the lunchbox!

Ingredients

  • 6 pieces white bread
  • 3 pieces sliced cheese of your choice
  • 2 tbsp butter
  • Tomato soup or marina sauce for dipping (optional)

Instructions

  1. Remove the crusts from your bread leaving as much as you possibly can.
  2. Roll them flat with a rolling pin or with your preferred method of flattening.
  3. Cut your slices of cheese into smaller little slits. I was able to get about 8 out of each of my slices.
  4. Heat 2 tbsp butter in a skillet over medium heat.
  5. Layout your bread and place a piece of cheese longways on the edge of the bread. Roll inward. Place another piece of cheese and then roll inward again. Until you’ve come to the end of your bread. Using a little bit of water, try to crimp the end so it attaches and closes up the rollup. It doesn’t have to be perfect, it just helps the frying process.
  6. Place the rollups in the skillet and fry each side for about 2 minutes or until desired brownness.
  7. Let cool on paper towels and serve with tomato soup or marina sauce!


Like this post? SHARE it!

Related Posts Plugin for WordPress, Blogger...

Free Gooseberry Patch Kindle Cookbook!

With Thanksgiving only weeks away now (how is that EVEN possible?), the red carpet has been rolled out for all those yummy cobblers and pies!

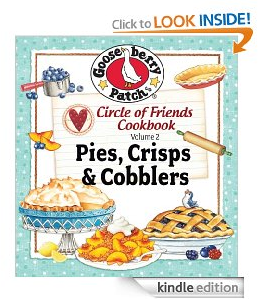
I just came across this Gooseberry Patch Pies, Crisps, & Cobblers Kindle Book at Amazon for FREE. Anytime I come across these, I always download them straight to my iPad or Amazon Cloud for reference during the holidays or whenever. You can’t have too much ammunition in your cooking arsenal can you?

It’s normally just $.99 anyways, but free is always better right?

This post may contain affiliate links. For more information, please review my disclosure policy.

Like this post? SHARE it!

Related Posts Plugin for WordPress, Blogger...

Making The First Birthday A Smash!

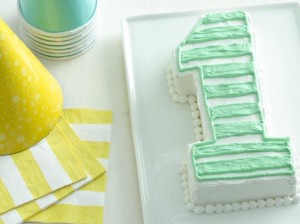
(Photo Courtesy of Betty Crocker)

I can remember back to both my girls’ 1st birthday parties. I spent lots of time figuring out the perfect theme, the decor, the guest list, and of course the food. I loved choosing these things because, let’s face it, I thought they were cute, not necessarily because my daughters even cared. But hey, that’s the fun of it right? By the way, if you need a few Mickey Mouse Clubhouse party ideas, there are some pretty fantastic ones HERE.

And then there’s this…

Oh yeah, now we’re talking! Let’s just be honest with ourselves. 1st birthdays are mainly about one thing and one thing only. Watching a child dig right into a massive mound of sugary, gooey, frosting-laced cake! We don’t concern ourselves with the mess that will be made, the hyped-up 1 year old full of sugar who will probably have a major meltdown in a couple of hours, or even the work that goes into making the smash cake. It’s all about the memory of that moment. And it’s a good one!

According to a recent survey that Betty Crocker did, 58% of moms said that the smash cake was the most memorable part of their precious one’s birthday party. I have to say that I’m with that 58%. I can remember both of my girls’ moment of smash cake bliss. It’s something that I will treasure forever.

If your little one has their first birthday coming up, chances are you’ve been thinking about party details. I love some of the ideas that Betty Crocker has for smash cakes. I especially like the No. 1 Cutout Cake at the top of this post! You can find out how to make that and many others HERE.

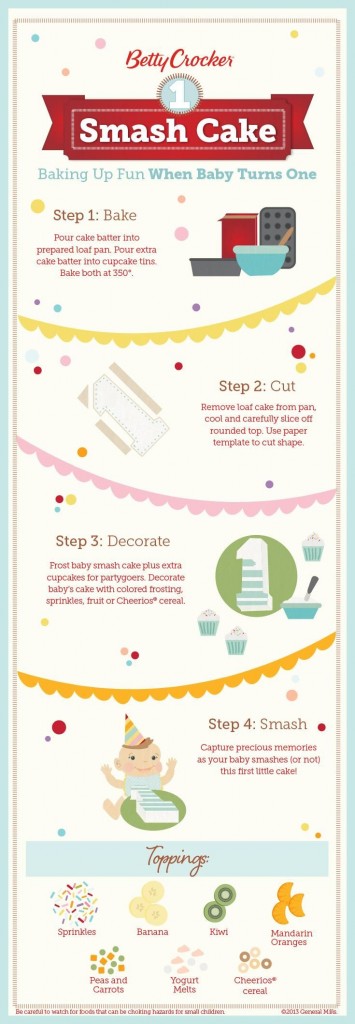
The infographic below also has some good ideas for whipping up a birthday smash cake.

Whatever kinda cake or decorations that you choose to create or have at your little one’s special birthday party, just remember that it’s all about the memories! Take lots of pictures, involve your loved ones, and DON’T STRESS! They only have a 1st birthday once and the memories will last a lifetime.

This is a sponsored post written by me on behalf of Betty Crocker. All opinions expressed are 100% my own.


Like this post? SHARE it!

Related Posts Plugin for WordPress, Blogger...

Eclair Cake- It’s So Stinkin’ Good

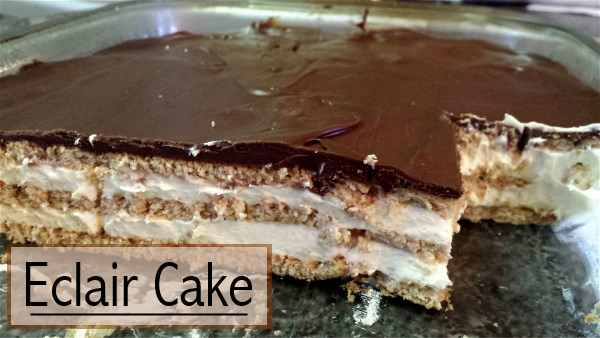
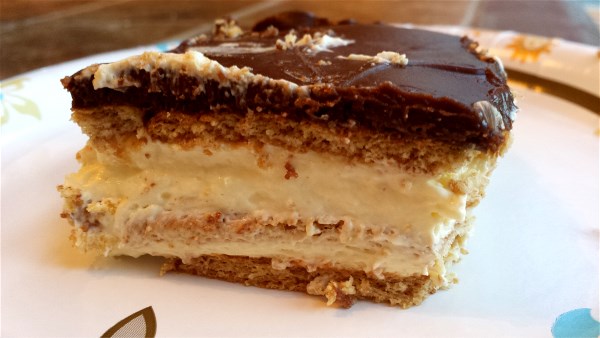
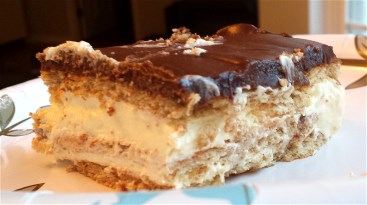
Let me begin by apologizing for the lower-than-normal quality pictures. You have to understand that I’ve made this cake a few times in the past few weeks and it was brought to my attention that I had to share it with you and therefore, I haven’t gotten a chance to take better pictures. Not to mention that each time I make it, the entire cake is gone before I can come close to taking pictures.

It’s that good y’all…

My mom had a recipe in her collection from years and years ago for Eclair Cake and she just raved about it. She used to have it all the time, but hadn’t made it in a long time. I recently came across a recipe that seemed similar and decided to make it for a family that we were taking a meal to. I knew my family wasn’t going to be happy with me if I left them out so I made one for us too.

Man oh man was this cake a hit! But I should’ve known because this cake is awfully similar to the Strawberry Icebox Cake that I make. There is just something about graham crackers and pudding in the refrigerator.

I think that the best part about this cake (aside from how amazingly tasty it is) is how easy it is to make! 5 ingredients, 10 minutes, and BOOM I’m mom and wife of the year.

And to think, you didn’t even have to turn on the oven!

Make this cake. This is an order. You will not be upset. I promise.

The only difference in my mom’s recipe and this one is basically the frosting part. Her’s had a bunch of ingredients and required extra refrigeration. I’m sure it tasted amazing, but I really like the use of frosting and according to my husband and girls, it’s the very best part!

Eclair Cake- It’s So Stinkin’ Good

Recipe Type: Dessert

Author: Pennywise Cook

This no-bake Eclair cake will be gone in no time!

Ingredients

  • 1 Package Honey Graham Crackers
  • 2 Packages Instant French Vanilla Pudding
  • 3 c. Cold Milk
  • 1 (8 oz) Tub Whipped Cream
  • 1 tub Chocolate Frosting

Instructions

  1. In a mixing bowl, combine 2 packages french vanilla pudding and milk. Mix until completely dissolved, about 1-2 minutes. Fold in whipped cream until combined well.
  2. Meanwhile, line a 9×13 dish with graham crackers.
  3. Pour half of the pudding mixture over the graham crackers and spread evenly.
  4. Place another layer of graham crackers. Pour the rest of the pudding mixture over the top of the second layer and spread evenly.
  5. Place another layer of graham crackers on top.
  6. Take the top off the frosting and remove the foil cover. Place the tub in the microwave for 40 seconds or until melted.
  7. Pour over the last graham cracker layer and spread evenly.
  8. Place in the refrigerator for 1-2 hours and serve!

I could not find where I originally found this recipe (so sorry!), but the same one is found at All Recipes.


Like this post? SHARE it!

Related Posts Plugin for WordPress, Blogger...

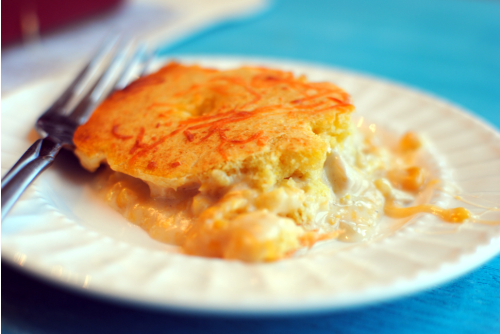
Cheesy Chicken and Cornbread Casserole


What is it about the word casserole? What exactly is a casserole? Let me consult The Google: a kind of stew or side dish that is cooked slowly in an oven. Though these days, almost anything can be considered a casserole. It doesn’t even matter the ingredients, does it?

Have some tomatoes and potatoes? Throw them in a dish, bake and you have a tomato potato casserole! I think that’s why I like casseroles so much. They are so forgiving. Well, most of them anyways. I’ve had my share of casserole failures… I just love that they are so simple and quick. Throw together what you have on-hand and bake at 350 degrees and you’ve got dinner. Casseroles were made for weeknights when momma has to grow a 3rd arm to get everything done. Who am I kidding? I grow my 3rd arm around 8am each day at breakfast…

Especially now that school has started, dinner isn’t always first thing on my mind. School doesn’t just mean the start of classes. It can also mean sports, extra-curriculars, homework, Bible study, and anything else that you can possible occupy lots of time with. My girls are still young so I’m not always a chicken with my head cut off, but I do have to say that 1st grade homework is no joke! It may not be hard, but keeping my 1st grader focused can be a chore.

Enough to build up an appetite…

For a casserole maybe?

I’ve always been a fan of those casseroles where you top it with a bread of some sort. We always used to make the chili with the cornbread on top when we were newlyweds. I’m going to be honest here and admit that it was from a box, but don’t judge. Who hasn’t made a gourmet dinner from a box while they were a newlywed? I’m also going to admit that I use boxed meals here at least once a week. You can’t have a 2 year-old and not make a little mac and cheese from a box. You just can’t. Well I can’t anyways.

Casseroles! Yes, casseroles. This one was a result of throwing together a lot of things that we really enjoy and doing everything that I could to avoid putting in those “cream of” soups”. It seems like every casserole contains that ingredient.

Not this one! I used fresh chicken, but if you have leftover rotisserie chicken or perhaps some grilled chicken, this would be an awesome way to use it up. Otherwise whatever kinda chicken you can find on sale will work. I’m all about cheap. Though I’m not sure that the canned stuff…

You can find a ton of ideas for casseroles over at Country Crock. Some interesting facts about Country Crock:

  • Have 0g trans fat per serving
  • Contain no partially hydrogenated oils (Yipee!)
  • Have no cholesterol
  • Are 70% less fat than butter per serving (WOW)
  • Have 30% fewer calories than butter per serving

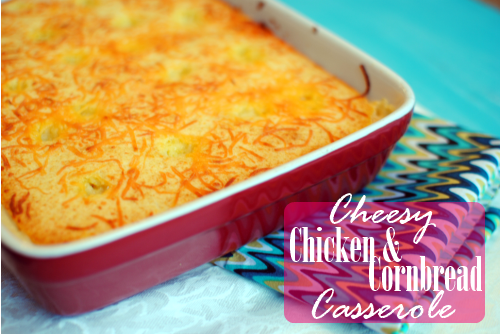
Cheesy Chicken and Cornbread Casserole
Recipe Type: Main Dish, Chicken
Author: Pennywise Cook
Who doesn’t enjoy a simple and quick chicken casserole?
Ingredients
  • 3/4 lb Chicken Breast/Tenders, cut into bite-size pieces (about 3 breasts)
  • 1 tsp garlic, minced
  • 1 tsp dried onion
  • 1 tbsp olive oil
  • 1 10.5 oz can cream corn
  • 1 c. shredded cheddar cheese + 1/4. c for topping (if desired)
  • 1 c. sour cream
  • 1 tbsp butter, cut into small pieces for dotting the top (if desired)
  • cornbread mix created according to package
  • s & p to taste
Instructions
  1. Preheat oven to degree listed on cornbread mix. Spray a 9×13 dish with non-stick cooking spray.
  2. Heat olive oil in a skillet over medium high heat. Add in chicken, garlic, onion, and s&p. Cook until chicken is not longer pink.
  3. Meanwhile, in a large bowl, combine cream corn, 1 c. cheddar cheese and sour cream until well mixed. Add in chicken. (Now would be a great time to create your cornbread batter!)
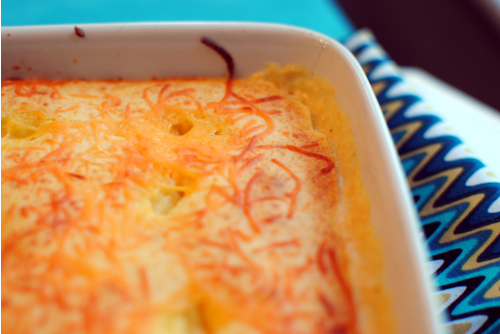
  4. Pour mixture into 9×13 dish and spread evenly. Top with cornbread batter and spread evenly. Sprinkle with the other 1/4 c. cheddar cheese and dot with butter.
  5. Place in oven and cook the time listed on your cornbread mix.
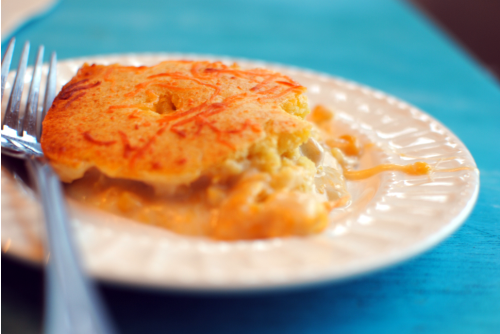
  6. Remove from oven, let cool, and serve!
Notes

You are more than welcome to make your own cornbread for the top, just be sure to have the ingredients necessary when you start you casserole!

I used a slightly smaller dish than a 9×13 for mine. I can’t tell you what size because I honestly have no idea, but I think that a 9×13 will be similar. If not, then a square dish might work. I have yet to try this in a different size dish.


I was selected for this opportunity as a member of Clever Girls Collective and the content and opinions expressed here are all my own.


Like this post? SHARE it!

Related Posts Plugin for WordPress, Blogger...

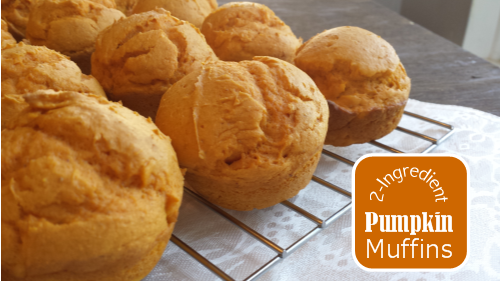
2-Ingredient Pumpkin Muffins

Alright, fess up all you pumpkin junkies. I see you everywhere drinking your Starbucks Pumpkin Spice Lattes and  swirling your Pumpkin Spice coffee creamer and eating your Pumpkin Pie ice cream. We are only 9 days into the month of September and you’re  already in full swing.

If only seeing a pumpkin meant that the weather automatically got cooler!

Now, I think one of the smartest inventions was pumpkin in a can. Gone are the days of needing to cut open a pumpkin and scrape all of the insides to create a puree for recipes.

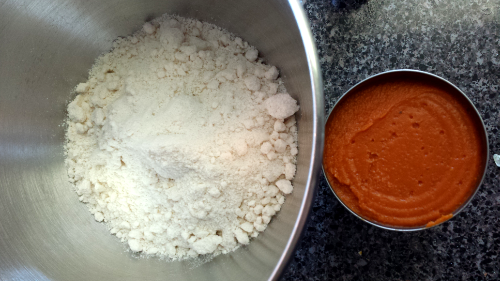
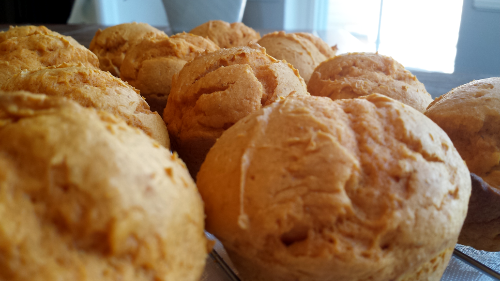
Your can of pumpkin is one of only TWO ingredients that you’ll need to make these Pumpkin Muffins!

I also wanted to mention, for you healthy folks like myself, there are only about 140 calories per muffin! Because you’re not adding a lot of extra calories with oil and eggs, these are actually pretty healthy!

The other ingredient is cake mix. Can you say cheap? I think I paid a total of $2.25 for these muffins. My kinda treat, cheap and sweet.

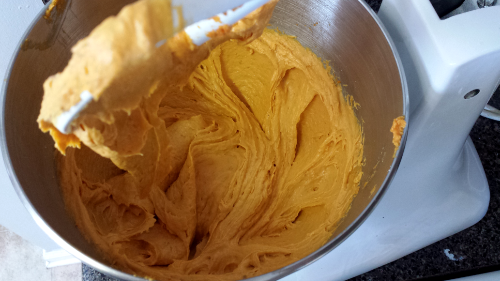
It takes a whirl in the mixer or about 50 strokes by hand to whip the muffin batter up.

Put your muffins in the oven!

These are probably some of the fluffiest most light and airy muffins that I make.

And heavens, if you crack one open when it’s still warm and slather it with butter, you will be in heaven y’all.

Pumpkin heaven…

Pumpkin or cinnamon cream cheese would be so incredible with these I’m sure. I enjoyed warming them up with butter and sprinkling a little cinnamon on them!

Though you don’t exactly need much instruction because these are so dang easy, here’s the recipe.

2-Ingredient Pumpkin Muffins
Recipe Type: Breakfast, Snack
2 simple ingredients come together to make the ultimate fall snack- Pumpkin Muffins.
Ingredients
  • 1 Box Yellow Cake Mix
  • 1 (standard) Can Pumpkin Puree
Instructions
  1. Preheat oven to 350°.
  2. Grease a couple muffin pans.
  3. Mix cake mix and pumpkin puree together.
  4. Fill muffin cup about 2/3 the way full. (Should make about 15 regular size muffins)
  5. Bake for 15-18 minutes.
  6. Allow to cool and eat!
Serving size: 1 Calories: 140
Notes

These would be super tasty with the addition of 1/2 cup chocolate chips!

Recipe courtesy of Melissa at This Girl’s Life Blog.


Like this post? SHARE it!

Related Posts Plugin for WordPress, Blogger...

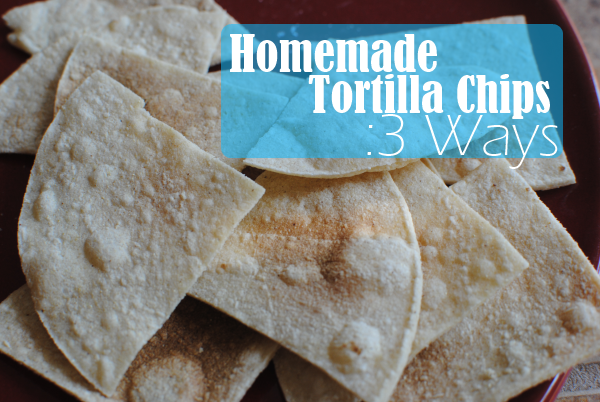
Homemade Tortilla Chips: 3 Ways

First of all, just let me say HELLO THERE! I’ve been just a little preoccupied lately with some personal things and have neglected you. I know…bad blogger, bad. But I’m going to work real hard to make it up to you…I promise.

I thought I’d start this back-to-school season with a simple recipe for something that everyone likes, tortilla chips! The reason that I ever made these in the first place can be credited to my husband. Bless his heart, he almost never gets an urge to cook anything. So when he came to me and said he wanted to “cook up” some homemade tortilla chips, I was ON IT!

There could not be a simpler thing to make that tastes so very close to what you buy in the store. And they are so much cheaper this way as well. One big bag of corn tortillas will run you between $1- $2, but will make the equivalent to probably 2-3 bags of tortilla chips from the store.

Plus, YOU get to take the credit for calling them homemade!

Here are 3 different ways to make your crunchy corn tortilla beauties. I’ll tell you my favorite when we’re done…

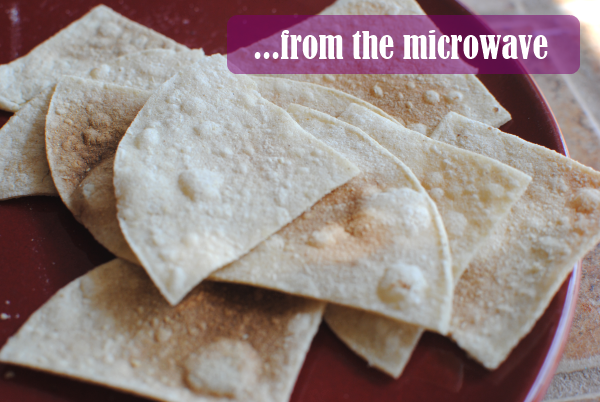
As you can probably imagine, this is the quickest and easiest method for making your chips. No preheating, no baking sheet, no chips, and no oil. Are you paying attention? Of course you need chips, you silly head. Get it together!

Just making sure you’re paying attention…

You’re going to need to make these in batches, a tortilla or two at a time.

1) Cut the tortillas into desired chip size.

2) Place tortilla pieces evenly (not overlapping) on a large microwave-safe plate.

3) Heat 45 seconds. Remove and flip. Heat another 45 seconds.

4) Remove from microwave, salt (if desired) and let sit for a minute or two. They will crisp even more!

Voila! It’s simple. Each microwave is different, so your microwave may need less or perhaps more cooking time to get them just right. You want the chips to brown, but not burn so be sure to keep your eye on the batches as you make them.

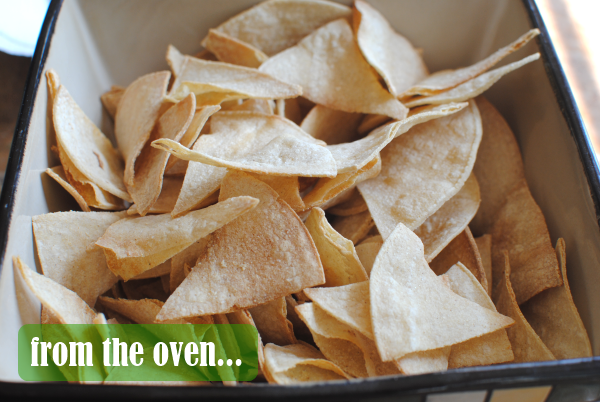
Ok, I said I was going to wait until the end to tell you my favorite method, but I’m sure by now that you realize I have no patience. And if you didn’t know that, you do now! This was my favorite method. The perfect crispness with a light and airy feel. These taste most like what you buy at the store. To me anyways..

Let’s do this:

1) Preheat oven to 350°.

2) Cut your tortillas into desired size.

3) Place pieces evenly over baking sheet. No need to grease it.

4) Bake for 6-8 minutes. Flip chips over and bake for another 6-8 minutes until golden and crispy.

5) Remove from oven. Season and serve! They will crisp a little more as they cool.

Once again, you’ll want to be sure to keep an eye on them. If they are turning dark brown, they are close to burning. You want them golden, not brown.


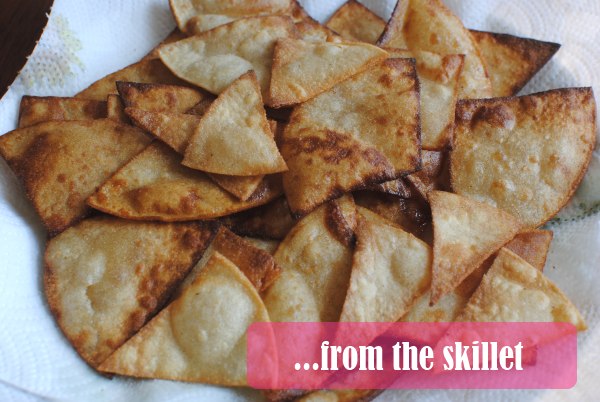
The last method is from your skillet or fryer! This is still a really simple way to make them. It’s also fairly quick. It’s just not as healthy as the other methods. My husband liked these the best!

1) Cut tortillas into desired size pieces. Place a few paper towels on a large plate to dry the chips when they finish frying.

2) Pour enough oil of choice (I used vegetable oil) into skillet that it goes 2/3 the way to the top. You need enough for the chips to swim in. Heat to medium-high. I didn’t check the temperature of my oil, I just made sure that the oil bubbled when I placed my wooden spoon in it.

3) Place 4-5 chips at a time into the oil. You don’t want to overcrowd, so make sure they aren’t overlapping. Fry them for approximately 2 minutes flipping them over to brown both sides if desired. I did this at first, but got lazy and quit flipping eventually. The chips lived.

4) Place on paper towels and continue frying in batches.

Voila!

All of these methods can be adjusted based on your microwave, oven, and oil temperature. You may even come up with tricks and techniques to make them better. This is just a good starting point for making your own homemade tortilla chips.

Let me know what you think about these in the comments below! 🙂


Like this post? SHARE it!

Related Posts Plugin for WordPress, Blogger...

Summer Cucumber Salad

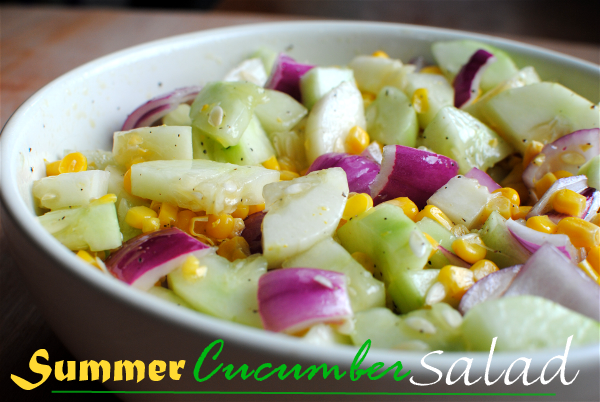
There are only about a thousand reasons to like summer. Sun, fun, vacation, strawberries, and the list could go on and on. But one of my favorite things are the cool and crisp summer salads. Cole slaw is always a great addition to any summer cookout, but is there anything cooler than a cucumber? Well sure, but they don’t have a saying about those things so we’ll stick with the chillin’ cucumber.

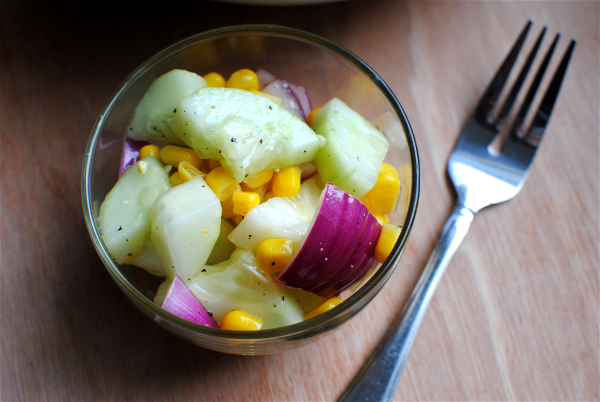
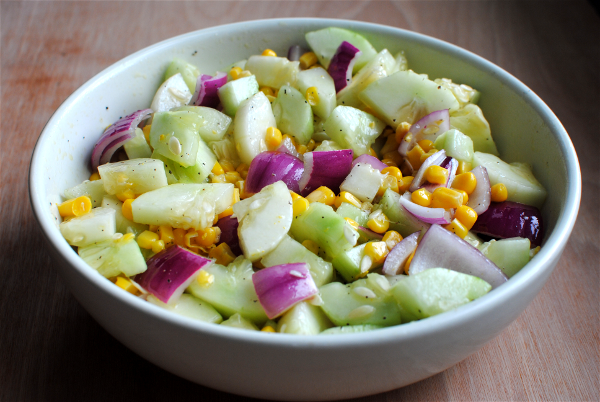
I was delighted to find a cucumber in my garden the other day. I have been waiting for them to grow so I could start adding them to my salads. If your garden is brimming with cucumbers, you might like this Summer Cucumber Salad recipe. There are many variations of this type of salad, so don’t feel like you have to follow it to the T. But this is my favorite combination of flavors.

I was at a family get-together a little while back when my stepsister brought a salad like this. I asked her what she put in hers and I remember thinking how simple it was. It was so tasty! Within a few days I had made my own and within a couple of days it was gone. I ate the entire thing myself.

I have no shame in admitting that.

After all, we’re talking about healthy foods here, right? Not chocolate cake.

It took me a few times making this to perfect the combination of flavors. And you may want to give or take some of the ingredients to get it to your liking. Also, might I suggest making this up the day or night before an event. The longer the cucumbers and onions get to marinate in the vinegar mixture, the better they taste. And oh do they taste lovely!

My family isn’t really the cucumber-eating type. They don’t eat onions that aren’t cooked and you can also bet they won’t munch on anything marinate in vinegar. But hey, more for me! I’ve probably eaten 4 or 5 whole Summer Cucumber Salads by myself this summer…

Wow, it sounds a lot more when typed out…

Summer Cucumber Salad
Recipe Type: Side Dish, Salad
Author: Pennywise Cook
Super easy summer ingredients come together to make a tasty, cool, and crisp summer salad!
Ingredients
  • 2-3 Cucumbers, peeled & cut into halves or quarters
  • 1 Medium Red Onion, cut into chunks and then peeled
  • 1 can Whole Kernel Corn, Drained
  • 1/4 c. + 3 tbsp Apple Cider Vinegar
  • 3 tbsp Olive Oil
  • 1/4 tsp Salt
  • 1/8 tsp Pepper
Instructions
  1. Place all ingredients into a medium bowl and cover with plastic wrap. Allow to marinate overnight or for at least 2 hours. Serve!
Notes

Some people like to also add tomatoes cut into chunks to this dish as well!

Feel free to use any onion for this. I just like to use red onion because it adds pretty color!

I would eat this within a few days of making. The vinegar breaks down the veggies.


Like this post? SHARE it!

Related Posts Plugin for WordPress, Blogger...

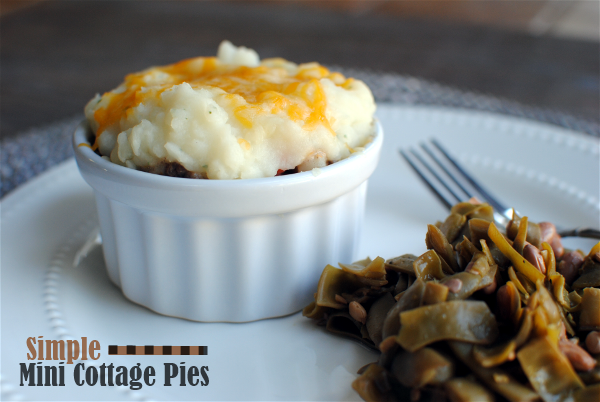
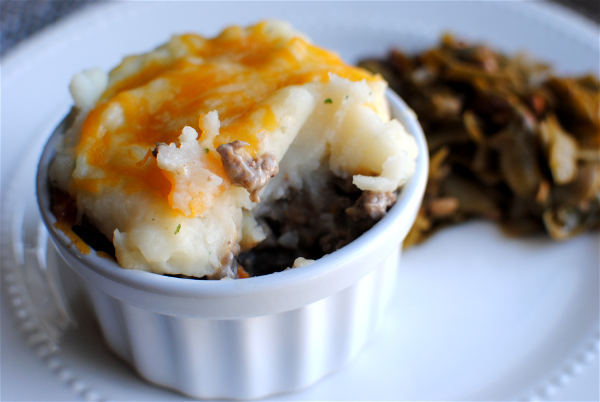
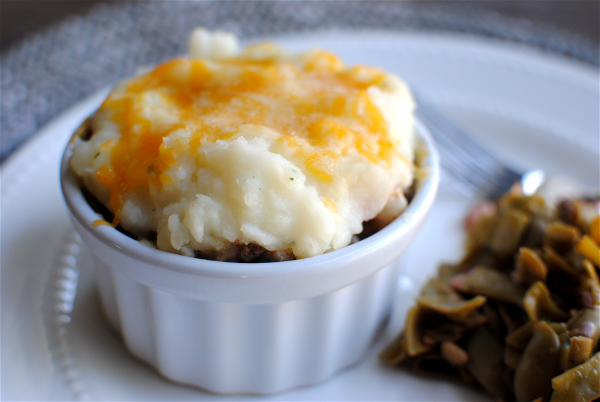
Simple Mini Cottage Pies

My husband and I went to England a few years ago. We indulged in all of the meals that you might associate with England like Fish ‘N Chips, Bangers and Mash, and of course Shepherd’s Pie. I think I was more excited to eat their food than I was to see the sites!

You may have heard of Shepherd’s Pie here in the US and have most likely eaten it before. It’s such an easy dish that almost anyone likes. But did you know that the term started out as Cottage Pie? Cottage Pie dates all the way back to 1791 when the potato was found to be an affordable option for poor folks to eat. They’d use whatever meat they had leftover and line the dish with mashed potatoes and then top it with them as well. Sound familiar? It wasn’t until 1877 that folks started calling it Shepherd’s Pie. (via Wikipedia) There are tons of variations on making this dish, but I wanted to share this easy one with you!

I’ve been making this for years. Probably not as often as I should, but when I do it’s a hit!

You guys know me and my healthification (technical word there) of my meals. In this one, I of course use ground turkey or extra lean ground beef, but I also wanted to work on portion control. When something is really good like Cottage Pie, you need a stopping point! Or at least I do…

I busted out my little souffle dishes to make these and it was the perfect individual amount. As a side note, I just realized that I’ve never made a souffle before. Challenge ACCEPTED!

Anywho, if you need a really easy dinner idea this week you should definitely consider this meal. Here’s how to make them!

Simple Mini Cottage Pies
Recipe Type: Main Dish
Cuisine: Brittish
Author: Pennywise Cook
A simple way to change up your every day Shepherd’s Pie. Try these super simple Cottage Pies!
Ingredients
  • 1 lb Lean Ground Beef (or turkey)
  • 1 Medium Onion, Chopped
  • 1 can Mixed Vegetables (drained)
  • 1 can Cream of Mushroom Soup
  • 2 tsp Minced Garlic
  • 1/2 tsp Dried Oregano
  • 1 (4 serving) pkg Instant Mashed Potatoes cooked according to package
  • Salt and Pepper to Taste
  • 1/2 c. Shredded Cheddar Cheese
Instructions
  1. Preheat oven to 350°.
  2. In a skillet over medium-high heat, brown the ground beef with onion until onions are translucent. Drain. Add minced garlic and cook until it becomes fragrant.
  3. Add can of mixed veggies and can of cream of mushroom soup. Mix and cook until all is warmed through.
  4. Place equal amounts of meat mixture into 4 or 5 ramekins. Top with equal amounts of mashed potatoes.
  5. Sprinkle with cheese. Put ramekins on a baking sheet and place in the oven for 5-10 minutes or until cheese is melted. Serve!
Notes

You can add whatever kind of “cream of” soup that you’d like to these, but the mushroom version tastes wonderful. I think cream of celery would also make a good choice.
Depending on the size of your ramekins, you may need 5 of them.
And don’t feel obligated to use instant mashed potatoes. It’s a shortcut on busy nights for me, but when I have the time homemade tastes the best hands down!


Like this post? SHARE it!

Related Posts Plugin for WordPress, Blogger...