DIY Christmas Countdown

My oldest daughter is getting big enough to really start counting down the days until Christmas. And to be honest with you, I’m so excited about her excitement that I’m counting them down myself.

It’s such a simple thing to get excited about, but it makes the waiting for Christmas to come a little more exciting. ‘

I’ve seen the little blocks that count down the days. I’ve seen the little advent calendars and all the other little ideas, but none really scream exciting to me. Sure, some have little candies and treats every time you open a door, but I remember caring more about that when I was a kid than really knowing how many days there were until Christmas.

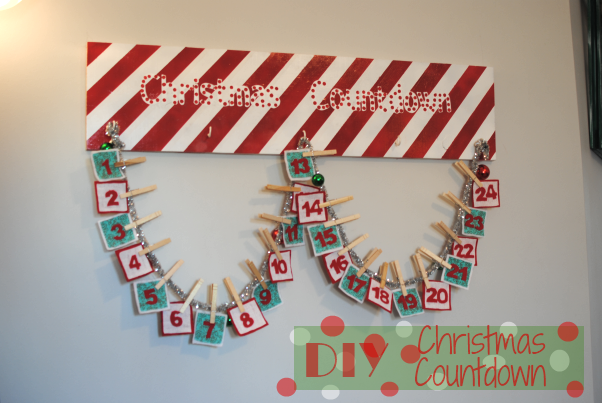
So I set out on a DIY mission to make a countdown for my girls. One that hopefully would last for years to come. We don’t have a mantle or fireplace. Which I’d say that a lot of people can relate to this, which makes hanging stockings and garland a little difficult. So I made my own way of hanging this thing and here’s how I made it.

I started with an extra piece of wood that I had in the garage. I don’t know it’s exact measurements, but it was about 3 feet long.

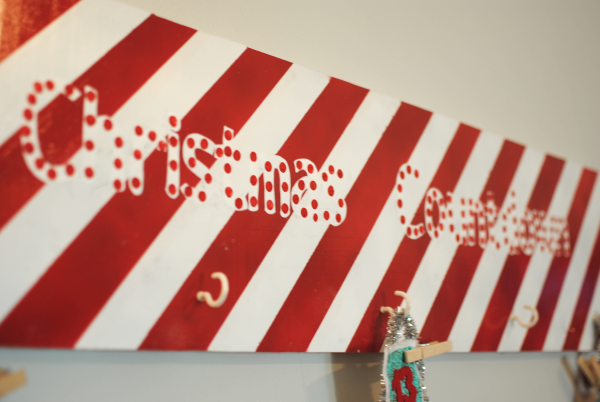
I spray painted the entire board white, then used painter’s tape to create stripes. I then spray painted it red which left red and white stripes like a candy cane.

Then, using the same method as my DIY Mug Holder for transfering text to wood, I added the Christmas Countdown words to the board. The white words really got lost, so I added little red polka dots to help it stand out a little.

Next came the numbers.

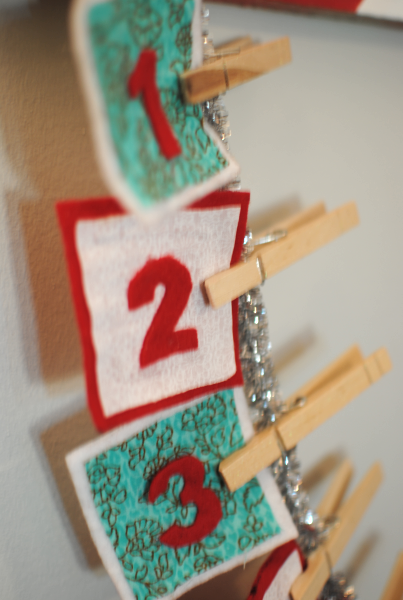
I am NOT a sewer (yet). Though I may someday learn, right now I’m sticking like glue to my hot glue gun. The numbers were way simpler than they look. Plus they only cost me about $3.

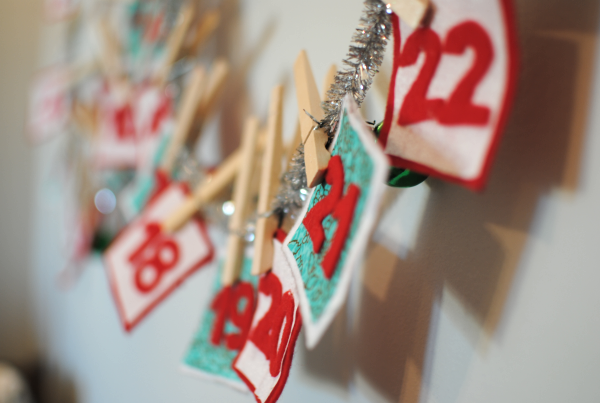
I purchased about 4 pieces of red and white felt at Walmart for $.23 each. I also purchased a couple of fat quarters of fabric for $.97 each. I cut out the squares and hot glued the fabric squares to the felt squares to make sure the numbers had good support.

For the actual numbers, I simply printed off the numbers in the font and size that I liked and then tape them to the felt. I then just cut them out using the paper numbers as a template. Voila! I had numbers.

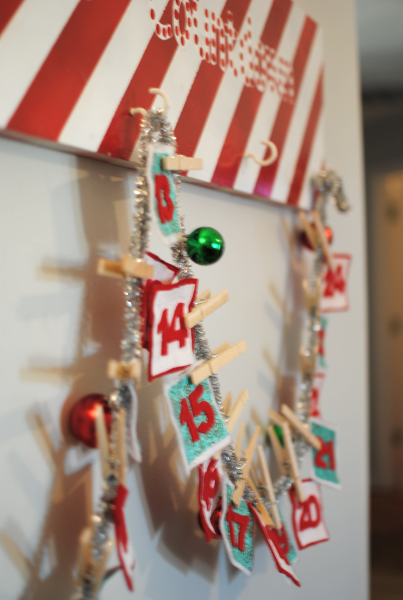
I then hot glued them to the fabric and boom they were done. The clothes pins were $1 at Dollar Tree! Even the cute garland was a buck.

I debated over and over about how many hooks I would want for hanging the garland. I didn’t want it to look too tight, but I didn’t want it to be too lose either. So I ended up with 5 hooks (leftover from another project that just screw right into the board), but only used 3 total. I like the looser look.

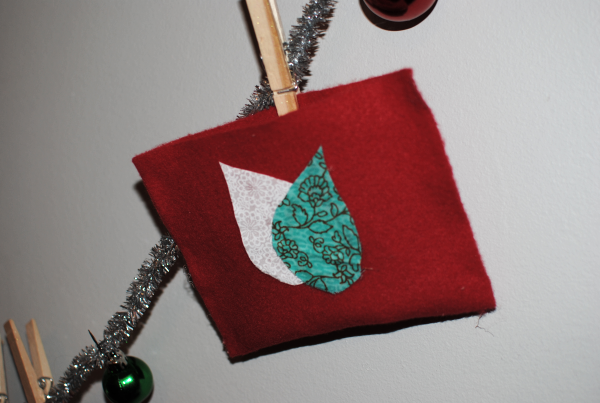
Then as we began to take off numbers in our countdown, I realized we had nowhere to store the numbers that were coming off. I glued to ends of some leftover felt together to make this little pouch. I added some little pieces of fabric cut out into droplets to embellish it a little.

Voila! A numbers pouch to keep up with them once they come off.

Each morning, Addie is absolutely ecstatic about taking off a number. This morning she said “Momma, there are only EIGHT days until Christmas!”

It’s awesome to have something that we can use over and over again and know that I created it! Anybody can make this and I hope that this gives you ideas if you’ve considered making something like this for your home!

Does your family have a countdown that you use each year?


Like this post? SHARE it!

Related Posts Plugin for WordPress, Blogger...

YumEarth Organic Candy Review and Giveaway

We’re at the grocery store picking up our weekly groceries. There’s but one thing that I can guarantee that my daughter is going to ask for….

Gummy snacks.

We’re talking fruit snacks, fruit roll-ups, gummy bears, and you name it. She’s going to request that we throw it in the buggy. Yes buggy. That’s what we call them here in the south y’all. I don’t usually mind grabbing some for her snack box at school or perhaps something to snack on in the afternoons. But sometimes, I have to draw the line. She would eat them every second of every day if I let her.

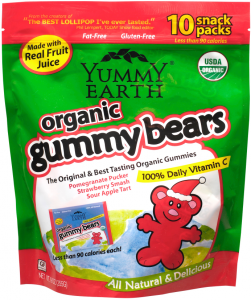
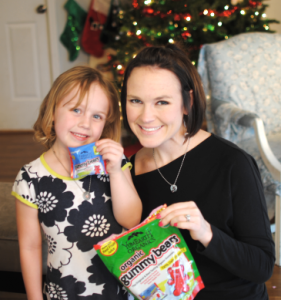
I often find awesome deals on YumEarth Organic Gummy Bears on Amazon so I was thrilled to get a chance to try these out for myself. And to let my little gummy connoisseur try them for herself.

I didn’t actually tell her that these were organic before she tried them. I didn’t think it would matter and I was right! She loved them and so did I.

I will say that I was a little thrown off by their color. They seemed a little drab in color and not as bright as most gummy bears, but that didn’t mean they tasted bad. They were still really yummy. They reminded me of a cross between gummy bears and fruit snacks. Gummy bears tend to be tougher and fruit snacks are usually soft. This was a blend of the two. Either way, it only took us a couple of days to go through our tasty bag of 10 packs.

Come to find out, YumEarth was founded by two DADS who were on a mission to share wholesome treats with their kids. YumEarth is dedicated to making delicious treats and sweets with all-natural ingredients, no artificial colors, no artificial flavors, and no major allergens, such as gluten, nuts and dairy. Pretty sure that most anyone can eat these and not have to worry about any funky ingredients.

There are tons of everyday stores that carry these. So be on the lookout at your store or find out where you can locate them here.

In the meantime, you wanna win a FREE bag of these for yourself? It’s a GIVEAWAY!

____________________________________________________________________

YumEarth Organic Gummy Bear Bag Giveaway

Mandatory Entry: Leave a comment on this post telling me who you think would eat these if you won!

Optional Additional Entries:

This giveaway will end on December 20th at 11:59pm CT. I will contact the winner on December 21st and they will have 24 hours to respond. If I have not heard from them in 24 hours, I will name a new winner. This giveaway is open to those in the US only.

This review was made possible by Mom Spark Media. Thoughts are 100% my own. All prizing for MSM giveaways is handled by a third party unless otherwise noted. For this reason prize fulfillment can take up to 90 days after the winners information is received.


Like this post? SHARE it!

Related Posts Plugin for WordPress, Blogger...

Chocolate Chip Banana Bread Gift Jars

I’ve recently gotten the nickname “Becky Homecky” from my mom. Had you asked me 5 years ago if I would be creating recipes, crafts, and projects then I probably would have said absolutely not. Not just because I was working at the time, but also because I never really had the urge to do anything so Betty Crocker-ish. These days I find these things to be completely stress-relieving and better yet, fun.

Whodathunkit?

Every Christmas for the past 5 years, I’ve said I’m going to make homemade Christmas gifts to save money and to put a little thought into my gifts. And almost every year, I get down to the wire and never get around to it. This year, I’m determined to make it happen.

I’m starting with these gift jars. There are about a million combinations for gift jars these days. You name it, you can gift it in a jar. My daughter suggested that we try Banana Bread Gift Jars the other night. I told her that I wasn’t sure that you could do that because bananas can’t rightly be put in a jar and keep.

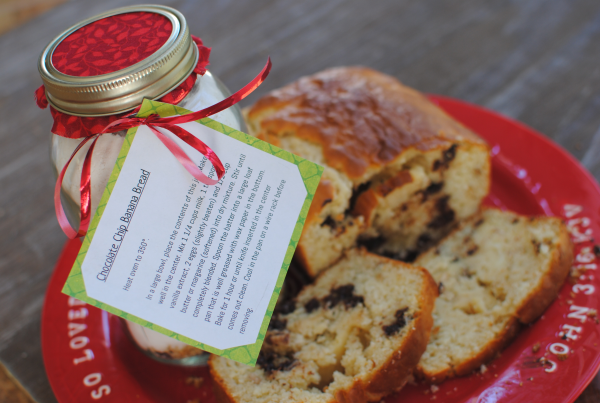
Then I came across this recipe at Recipe Goldmine for Chocolate Chip Banana Bread in a Jar. Never having made mixes in a jar like this, I wanted to go with a tried and true recipe before branching out into experimentation. I found it interesting that using dried banana chips for the banana part actually ended up tasting like regular bananas.

And the chocolate, come on. YUM is the only word to describe chocolate and bananas.

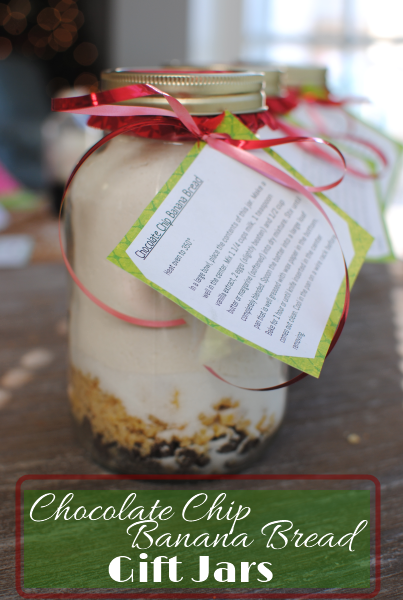
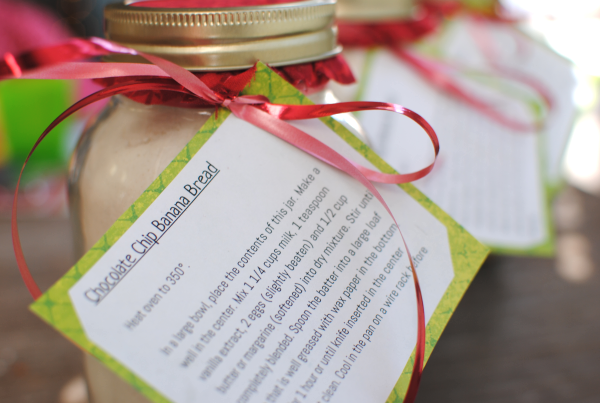
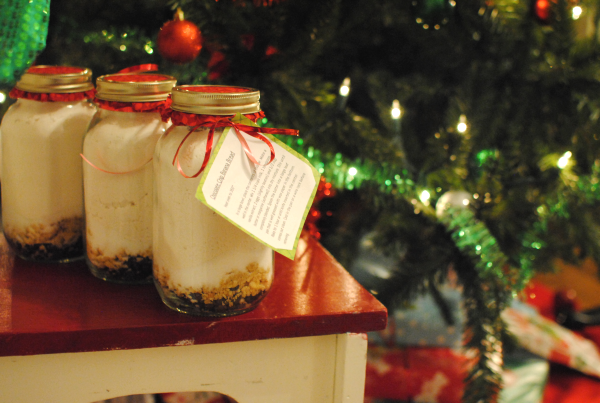
I got my jars at Walmart for around $8 for 12 of them including tops. I used some fabrics pieces that I already had along with some red string to dress the jars up a bit. I printed out the instructions for making the bread and glued it to a piece of scrapbook paper. Then punched a hole and tied it to the jar.

Aren’t they adorable?

These make such great gifts for teachers and coworkers. And they are inexpensive too. My favorite part!

Recipe courtesy of Recipe Goldmine.

Chocolate Chip Banana Bread Gift Jars
Recipe Type: Gift, Bread, Snack
Author: Reipe Goldmine
Easily create homemade gift jars for yummy Chocolate Chip Banana Bread!
Ingredients
  • 1/2 cup chocolate chips
  • 1/2 cup dried bananas, finely chopped
  • 1/2 cup granulated sugar
  • 2 1/2 cups Bisquick
  • 1 teaspoon baking powder
  • 1/4 teaspoon salt
Instructions
  1. Layer all ingredients in a quart-size jar in order they are given. Press the layers down firmly before adding next layer.
  2. Attach gift tag with these instructions:
  3. In a large bowl, place the contents of this jar. Make a well in the center. Mix 1 1/4 cups milk, 1 teaspoon vanilla extract, 2 eggs (slightly beaten) and 1/2 cup butter or margarine (softened) into dry mixture. Stir until completely blended. Spoon the batter into a large loaf pan that is well greased with wax paper in the bottom. Bake for 1 hour or until knife inserted in the center comes out clean. Cool in the pan on a wire rack before removing.

Like this post? SHARE it!

Related Posts Plugin for WordPress, Blogger...

Baby Shower On A Budget

I have been dying to share this stuff with you for weeks, but just haven’t had a moment to sit down and get it all together. Is it just me or is time beginning to move faster and faster? I barely have time to finish a thought before I move on to my next one. And with the holidays quickly approaching , things are sure to get even faster.

One of my dear friends is expecting a little bundle of joy next month and when it came to her baby shower, I knew that I wanted to be the one to throw it. This, ahem, was my very first shower to throw. I’ve helped out with others and attended plenty, but I’ve never had one here at my home. So naturally, I wanted it to be perfect.

Well….as perfect as one can be with an 18 month-old and 5 year-old running around while preparing. I can’t complain. They were both angels the entire time that I put this together. And thankfully, another friend of mine helped out with food and planning so it wasn’t ALL me. Sheesh, I think I’d go nuts if it was!

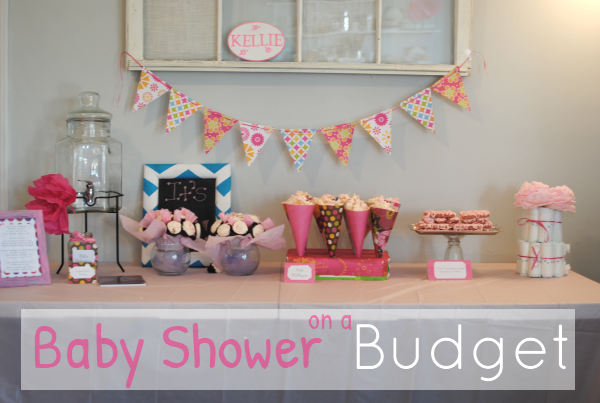
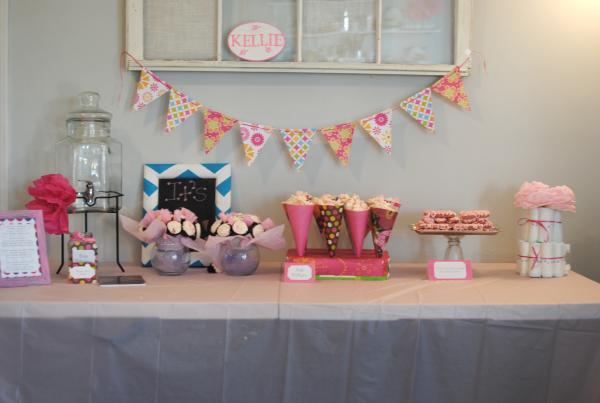
So I thought I’d share with you a few of the frugal touches that I used to make this shower special for my friend. At this point, I’ve only included pictures, but I do have some pictures for a tutorial if anyone is interested. Just let me know!

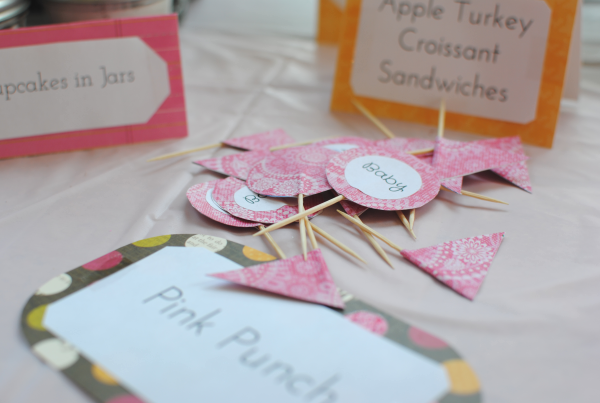
The first thing that I did was to make up these adorable little food tags and cupcake flags. SUPER cheap to make. Don’t you DARE go and buy them! Especially if you’re a scrapper, chances are that you have some extra scrapbook paper. And that, my friends, is a party planner’s best friend.

I did buy a new set of scrapbook paper with assorted colors for $5. It covered the entire party. I was able to make markers for all of the dishes and snacks along with the super cute cupcake flags.

I simply printed out the words with cute font on my printer, cut them out, and attached them with tape to the scrapbook paper. The food markers were folded in half so they stood up.

All in all this only cost me the $5 for the paper.

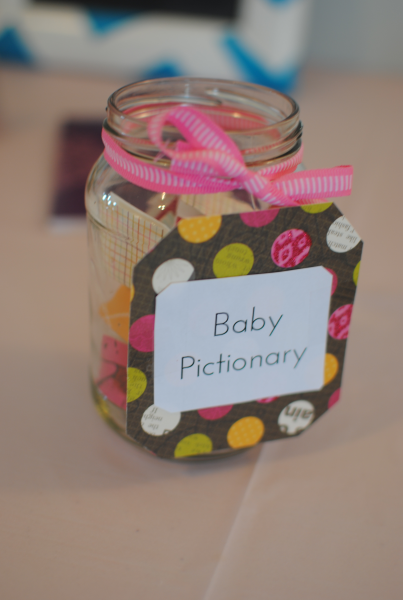
I even made a cute little tag for the party games that we played. I used an old pickle jar to hold the words and just tied a cute little bow around it to dress it up.

This didn’t cost me anything!

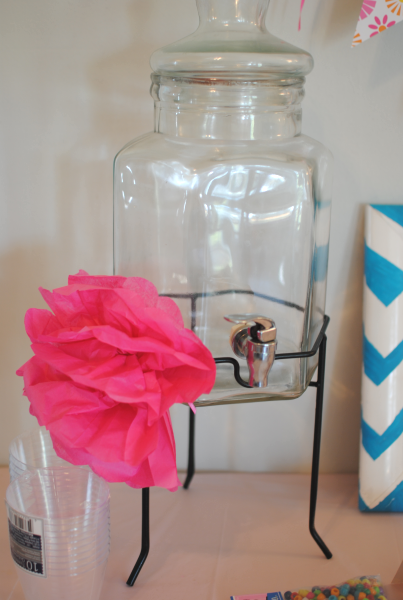
I picked up some hot pink tissue paper at Walmart for $.97 and made up a few of these tissue flowers to make a few decorations. It looked really cute attached to the punch.

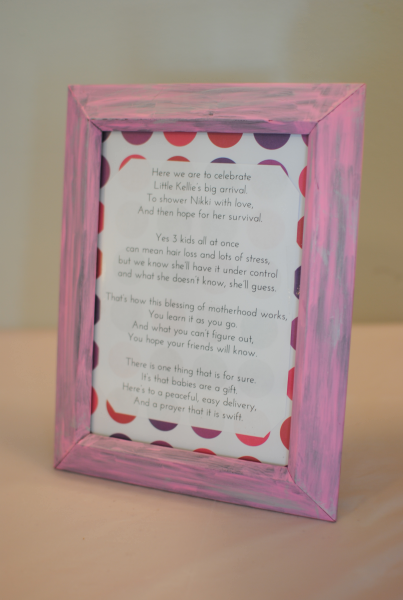
Ok, don’t judge me but I had a lot of time on my hands. My husband went out of town and I ended up writing a poem.

Yeah, yeah, I’m a little overachiever.

It was SO cute though. I dropped into Dollar Tree and got a frame that I painted with pink paint that I already had. Printed the poem out and attached to scrapbook paper to make a nice addition to the shower table.

$1 added to the cost.

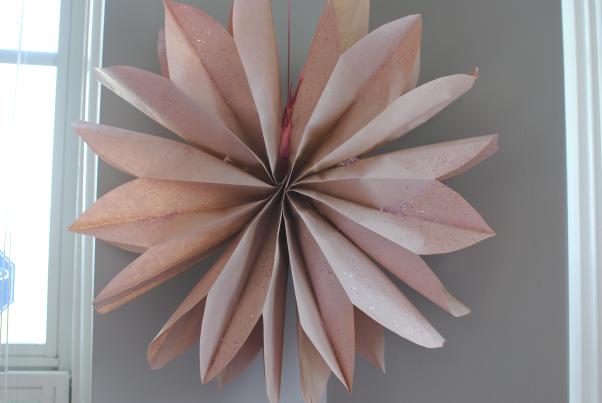
I found a tutorial on how to make a brown bag flower decoration on Pinterest and I HAD to try it. I always have brown bags on-hand.

In like 5 minutes flat, I had this darling flower that I simply spray painted and added a little glitter to. I tied it the ceiling and voila!

At some point in time, I have become obsessed with food in jars. I know I’m a little late on that, but I’m only human and my brain takes a little longer to process than most. 😉

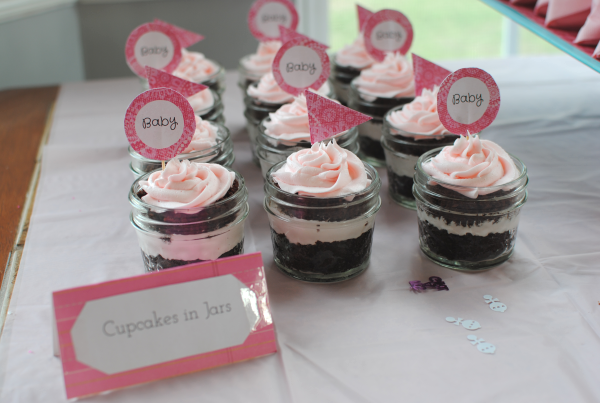
I made cupcakes regularly in a muffin pan. Then I cut them in half placing the bottom layer in the bottom of a 4 oz jar. Added frosting, then added the 2nd layer. I then topped them once again with more frosting. These were homemade devil’s food and vanilla buttercream cupcakes and they were AMAZING.

Don’t the flags add a nice touch?

I did buy the jars just for this event, but they will be around for use later on so I’m considering them to pay for themselves. But since I did buy them, we’ll add $7.97 to our total.

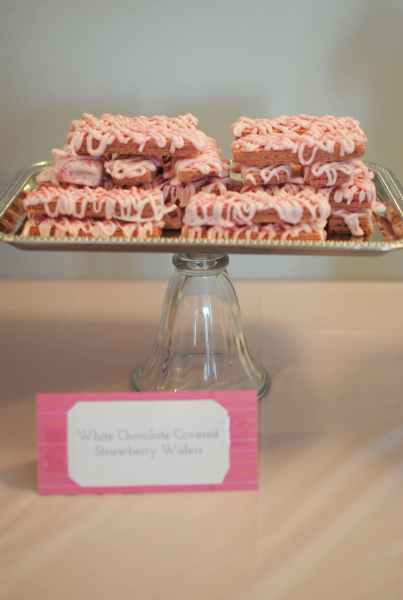
These White Chocolate Covered Strawberry Wafers were so easy, but looked like a million bucks. I bought them at Dollar Tree. I tinted some white chocolate chips pink and drizzled it along with some sprinkles all over. Snazzy huh?

$2.29 was all that they cost me.

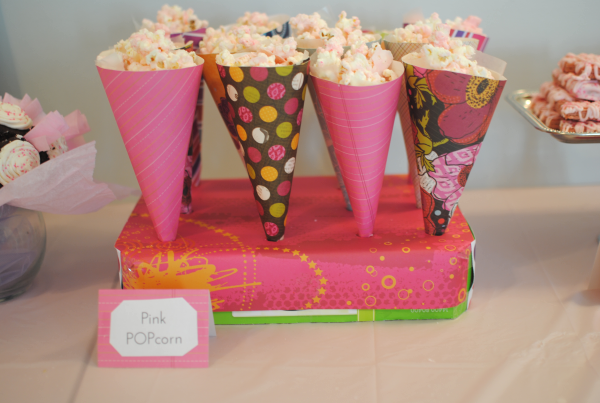
With all the scrapbook paper that I had, I knew I wanted to serve some things in cones. I simply rolled up the scrapbook paper cut to size and then taped them in place. The box they are standing up in? Oh, it’s the box from the 4 oz mason jars! I used a knife to poke holes in it so the cones could stand up.

I made up some popcorn that I already had and drizzled in pink tinted white chocolate to it all. It came out to be super tasty Pink Popcorn! I even added pink sprinkles too.

Total cost for this was $1.29 for the white chocolate chips. Aldi has the BEST price y’all!

I made these mini cupcake bouquets with the help from Dollar Tree. I got 2 vases and used 2 foam flower arrangement thingies (that’s a technical term) to place toothpicks in. The bottom is a couple of small pieces of tulle that I had on-hand to dress them up. I then made my cupcakes and stuck them all over onto the toothpicks.

I also added a few pieces of tissue here and there to fill it out.

Total cost for these was $4.

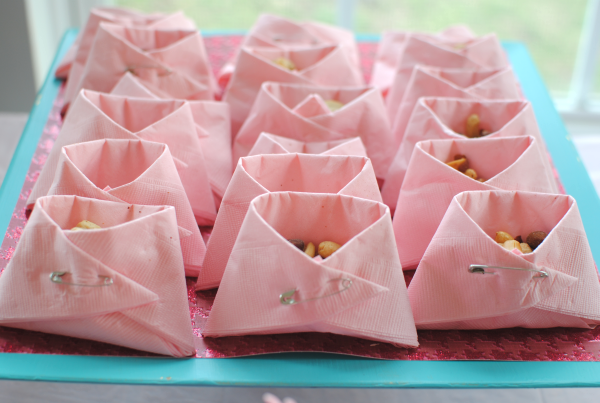
Of all the elements to this shower, THESE were my favorite. I saw a picture of these somewhere out in cyberspace recently and decided to give them a go. Without even glancing at the directions, I was able to whip up 25 of these in no time at all.

All you need is a package of napkins (your choice of color) and the appopriate amount of safety pins. SO easy and they make any treat that you’re serving look completely adorable. Obviously the smaller your napkins, the smaller your little diapers so buy the size according to what you are going to serve in them.

These also make awesome party favor bags!

Total cost for these? $2.

I also made a small diaper cake as you see in the upper right that was about $6 for the diapers. I made a coffee filter flower for the top. And the little name plaque with baby’s name on it was just $.97 at Walmart! I had the paint already.

Many of the little cupcake and serving stands that you see I made out of saucers and dessert cups that I hot-glued to each other. I get a lot of those materials at thrift stores and then paint to make them cute. So affordable and look so fancy.

All in all, what you see here cost me only around $30. And every bit of it was special because it was made with love and thought. That’s always the best gift!

What about you? Are you throwing a baby shower soon? Have any frugal baby shower tips to share?!


Like this post? SHARE it!

Related Posts Plugin for WordPress, Blogger...

$50 California Wine Club Giveaway!

You may have read my last post and review about the California Wine Club. Do you know someone who has a plaque or perhaps a magnet that says “Life is Too Short to Drink Bad Wine”?

Yeah, this just might be the perfect Christmas gift for them. Or hey, if it’s YOU with that magnet, we’re not going to judge. Go on ahead and grab yourself a membership. 😉

Basically, you get 2 bottles of homegrown, not-sold-in-stores, even award-winning wine each month delivered to your door. What a concept!

This is Bruce and Pam Boring. Their last name may sound less than enthusiastic, but their desire for wine certainly is not! They are the ones behind this specialty club and the tasters that bring you the unique wine each month. Isn’t it nice to have a face to go with a company?

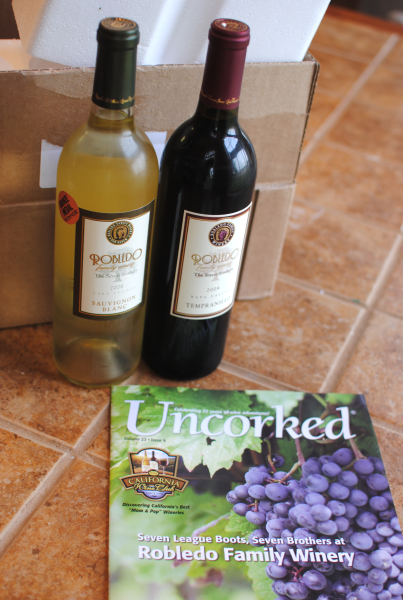
I was recently sent another shipment from the California Wine Company with a Merlot and a Chenin Blanc from David Grehrs. Both of which I never would have had the opportunity to try if it wasn’t for this club! I’m not much a Merlot drinker, but I really enjoyed the Chenin Blanc. Nice and sweet, but not overly.

If you’re thinking about getting someone a unique and fun gift this year, be sure to check out the California Wine Company. Here’s how:

Wanna check it out for yourself? Here’s how to find them:

www.cawineclub.com
California Wine Club Facebook
California Wine Club Twitter

Now, how about a FANTASTIC giveway?! The winner will receive a $50 credit to try it all out for themselves!

__________________________________________________________________________

California Wine Club $50 Credit Giveaway

Mandatory Entry: Leave a comment on this post telling me your favorite kind of wine. Or one you’d like to try!

Optional Additional Entries:

This giveaway will end on December 12th at 11:59pm CT. I will contact the winner on December 13th and they will have 24 hours to respond. If I have not heard from them in 24 hours, I will name a new winner. This giveaway is open to those in the US only. 

This review was made possible by Mom Spark Media. Thoughts are my own. I received a 2 month Membership to the California Wine Club for the purpose of this review.


Like this post? SHARE it!

Related Posts Plugin for WordPress, Blogger...

Stuffed Pizza Cupcakes

I’ve finally started Christmas shopping. Last year I had most of it done by the very first week in December. Yeah, I was a little nuts wasn’t I? Nuts or extremely genius I’d say. This year, I’m probably going to do a lot of my shopping online. Since I’ve stopped blogging at Saving with Amy, I’m very much less in-tune with the current deals and steals across the web.

It’s a weird feeling not being on top of the latest deals.

But my sanity is currently intact so I’m not going to complain. It took a long time to make my decision to quit blogging deals and in the end, it was best for me and my family. And now I get to spend my time making yummy food and fun DIY projects to share with you!

These, my friends, might just be your family’s new favorite snack. When I made these, I had no idea how excited that my family would get about them. They have been requested over and over again. Hubby even wants me to make some for him to take for lunches.

There is nothing better than making something that is requested a second time. Well at least in my book anyways.

I made these earlier in the day and just reheated them for dinner and they were perfect. You could just make them on demand, but I needed the daylight for my pictures. But it goes to show that these are great for making ahead of time for a party or lunches.

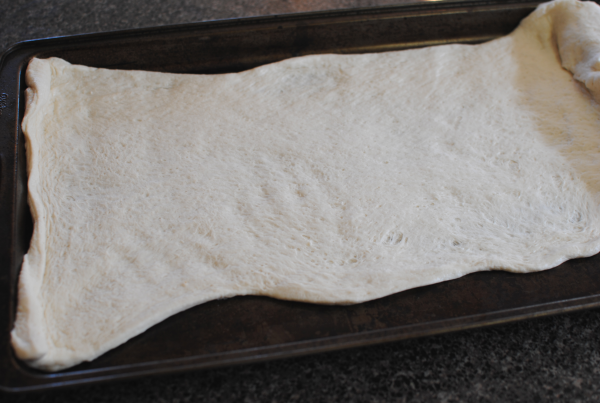
You start by rolling out a store-bought pizza dough. Get it as long and flat as you can. It doesn’t have to be perfect.

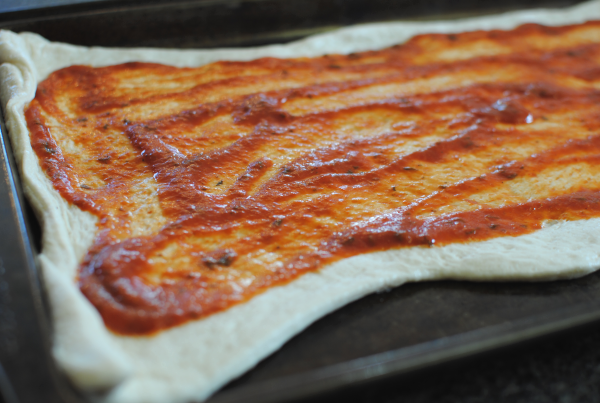
Next, spread about 1/2 a jar of pizza sauce over the entire pizza dough, leaving about an inch around the edges.

Then sprinkle the entire thing with mini pepperonis. I was going to use the regular size, but when I came across these, I thought they might work better for this. And I was right! So glad that I used the smaller. It made it possible to get a bite of pepperoni in each bite without them trying to separate.

Then cut the dough in half.

Place about 4-5 pieces of cut up string cheese across the dough like this.

Then proceed to roll the dough up. Once rolled, cut it into 1 inch pieces doing your best to keep all the fillings inside.

Place the rolled up pieces into a greased muffin pan with the swirled part facing up.

You’ll top with a little more mini pepperonis and some shredded cheese before baking. Then bake them up and you’re done!

SO amazingly yummy! Everyone will be bound to love these. Come on, pizza dough filled with sauce, pepperoni, and cheese? I think so!

Stuffed Pizza Cupcakes
Recipe Type: Main Dish, Snack
Author: Pennywise Cook
5 simple ingredients lead to the tastiest of all cupcakes. STUFFED Pizza Cupcakes!
Ingredients
  • 1 pkg Store-Bought Pizza Dough
  • 1/2 Jar Pizza Sauce
  • 1 c. Mini Pepperonis, Divided
  • 1/2 c. Shredded Mozzarella Cheese
  • 6 Mozzarella String Cheese, cut into 1 inch pieces
Instructions
  1. Preheat oven according to pizza dough’s directions.
  2. Begin by rolling out the pizza dough flat. Spread the pizza sauce over the dough, leaving 1 inch around the edges. Sprinkle with 1/2 c. mini pepperonis. Cut the dough in half.
  3. Lay 4-5 pieces of string cheese across the dough, adding more as you roll. Do this with both of the pizza doughs.
  4. Cut into 1 inch pieces and place in a greased muffin pan with the swirled side up.
  5. Bake according to your pizza dough’s directions checking after about 12 minutes. When tops begin to brown, remove from oven.
  6. Use a knife to separate from the pan and cool.

Like this post? SHARE it!

Related Posts Plugin for WordPress, Blogger...

Easy Vegetable Beef Soup

I sincerely apologize for not getting on here last week and wishing you guys a very Happy Thanksgiving! I’m normally a lot better about that, but this year I decided to truly disconnect from the outside world. Well, everything except for Words with Friends. I’m not sure that I could live without that.

So even though this is very late and you’re probably tired of hearing it, HAPPY THANKSGIVING! And now I can officially move on into the Christmas season. I’m just not the type to feel Christmas-y until I’ve digested my turkey and dressing. Anyone else feel that way?

We had a very fun-filled Thanksgiving with family and friends. I got to see my best friend from high school and even ran a 5k on Thanksgiving morning. It really was a great Thanksgiving. I hope that you enjoyed yours as much as I did!

I’ve got another recipe for you today that comes from my momma. It’s funny how our cooking skills and what we learn in the kitchen usually comes from those we are closest to. When I was little, watching my mom cook was nothing but dinner for my belly. But these days I look back on those days as valuable knowledge. And it’s especially fun to cook with her now.

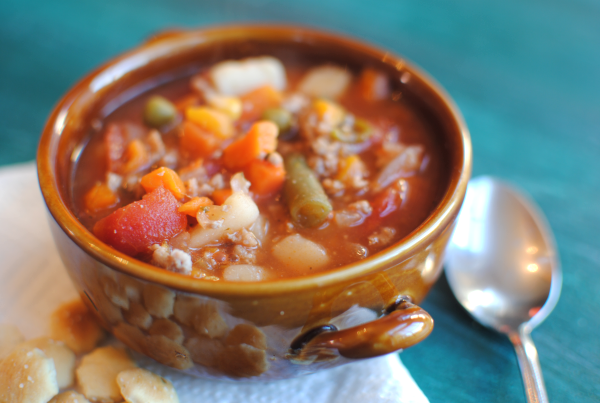
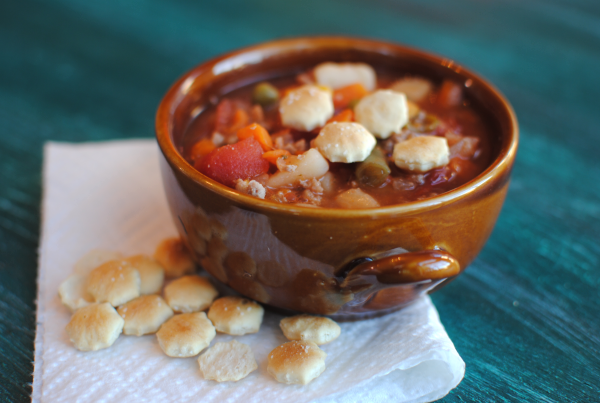
This Vegetable Beef soup is a regular when I visit my mom and also here in our home. It’s simple, it’s fast, and it’s incredibly tasty.

The absolutely perfect soup to warm your soul on a chilly night.

This soup can be whipped up in no time. Even on those last minute weeknights when you have no idea what to make for supper. In fact, most of the ingredients are things you’ll probably already have on-hand.

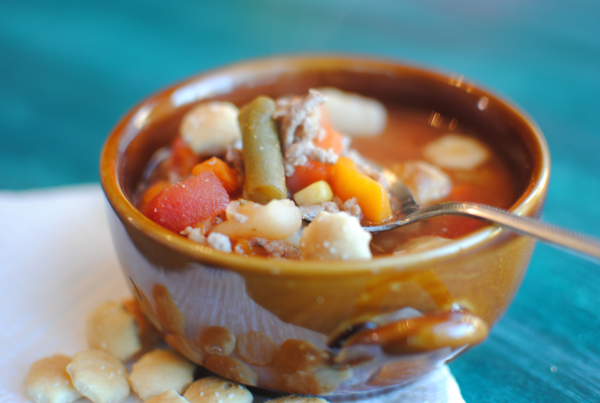
The bulk of this recipe is the beef and plain old canned veggies. It really doesn’t get much easier than cracking open a can or two and making a soup that tastes like you’ve been working hard on it all day long.

I can’t wait for you to try this recipe out! Let me know what you think if you do…

Easy Vegetable Beef Soup
Recipe Type: Main Dish, Soup
Author: Pennywise Cook’s Momma
Warm up on chilly nights with this super easy, yet tasty vegetable beef soup!
Ingredients
  • 1 lb Lean Ground Beef
  • 1 Medium Onion, Chopped
  • 4 Cans Veg-All
  • 1 (28 oz) Can Diced Tomatoes, Undrained
  • 1 (15 oz) Can Tomato Sauce
  • 6 Beef Bouillon Cubes
  • 6 Cups Water
  • 1 and 1/2 tsp Garlic Powder
  • 1/2 tsp Salt
  • 1/4 tsp Pepper
  • 1 tsp Italian Seasoning
Instructions
  1. In a large dutch oven or soup pot, brown ground beef along with onion. Drain.
  2. Stir in the remaining ingredients and heat over medium heat until boiling. Reduce heat and simmer for 10-15 minutes.
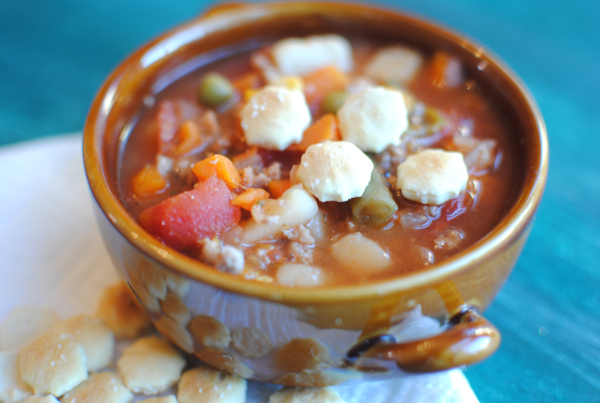
  3. Serve with crackers and enjoy!

Like this post? SHARE it!

Related Posts Plugin for WordPress, Blogger...

Butterscotch Pretzel Treats

Thanksgiving is in TWO days! This year has just flown by. Have you finished all your big feast shopping? I sure hope so, because the stores are nuts about now. I was in a few stores the other day and just gave up. You know those trips to the store when you have only a couple of items. Then you get in line only to realize that for those 2 items you’ll have to wait in line for 20 minutes. That’s about the time that I start to justify whether or not it’s absolutely necessary that I get those items.

I usually just give up.

I wanted to share with you guys these awesomely yummy treats that I made the other day. When I’m feeling experimental, I pick up things I think might go well together and then kinda throw it together. As you know, sometimes it works well and other times, well, it completely bombs.

I’m human and a novice cook, so what can I say?

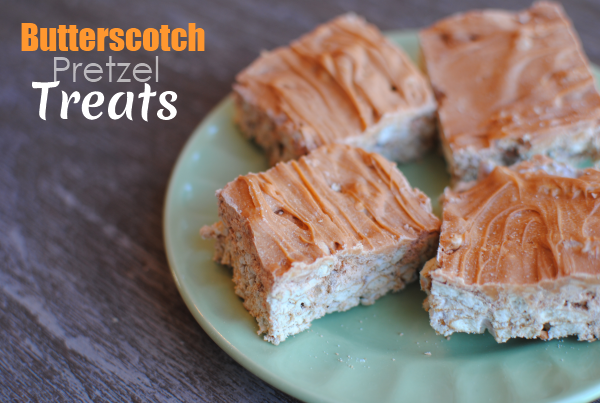
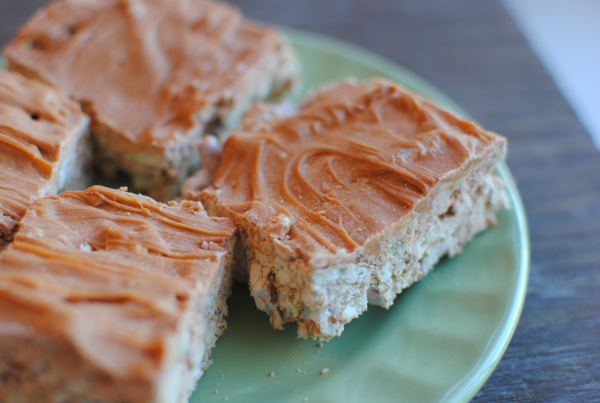
So this is why I was so very happy when these tasty Butterscotch Pretzel Treats turned out so yummy! So easy with just 4 simple ingredients and they take literally minutes to make.

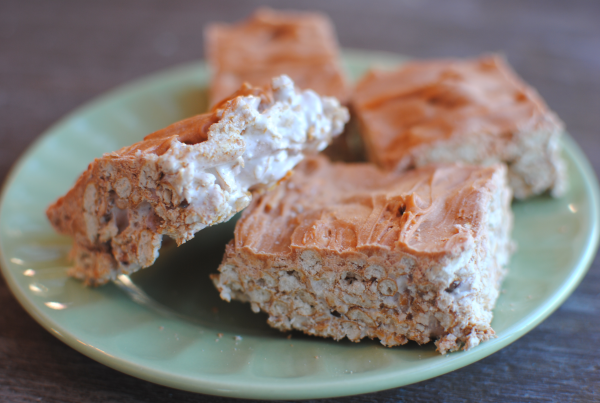
They resemble that of rice krispie treats, but I used pretzels instead of the rice krispies. And oh did that make them yummy. I just love the hint of salty that  you get with these sweet treats.

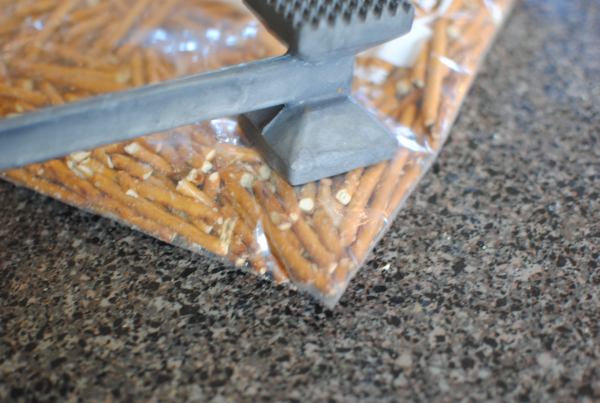
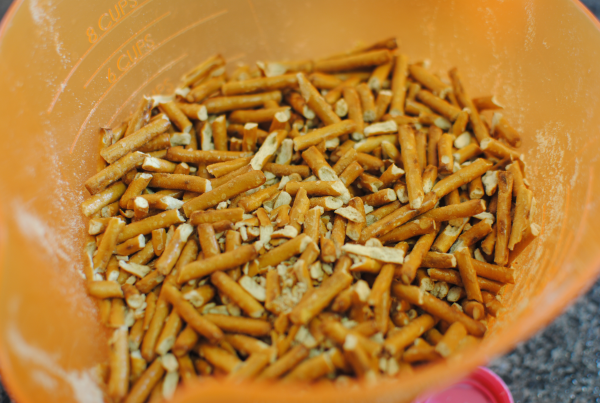
The first thing you want to do is get all of the pretzels out of the bag. The reason that I want to unscore pretzels is because the bag tends to have a ton of salt at the bottom, so don’t just pour the entire bag of pretzels into your ziploc. Use your hand to get them out leaving all the salt at the bottom of the bag.

Use meat mallet or something heavy to break up the pretzels a bit.

It’s really not essential that you make them super small. Just get them fairly broken and be done. Put them in a bowl.

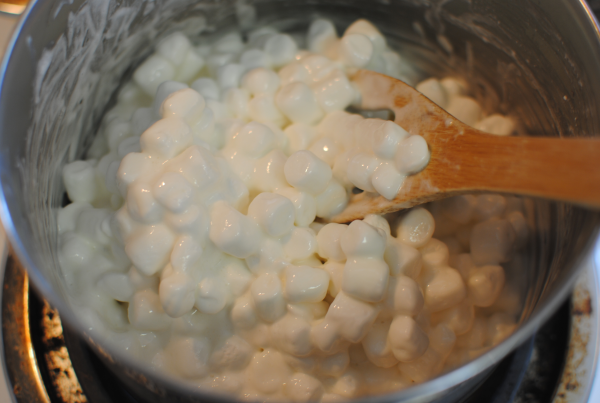
Then it’s time to melt up your marshmallows with a little bit of milk. This may be the longest step in the whole process.

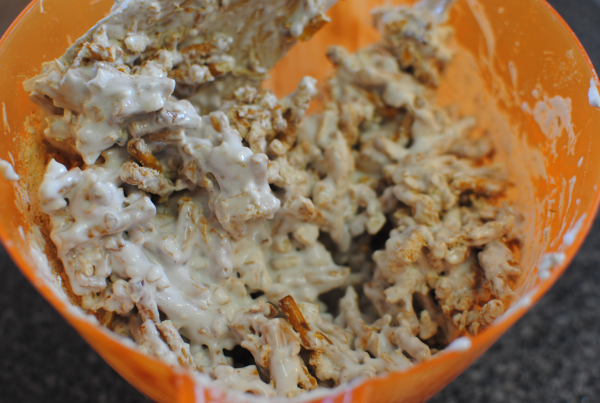
Pour the melted marshmallows in with the pretzels and use your spoon to mix it all up really well. There tends to be pretzel crumbs at the bottom, so make sure to incorporate those too.

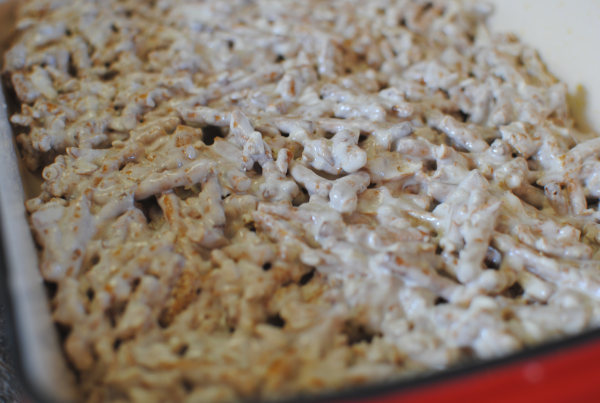
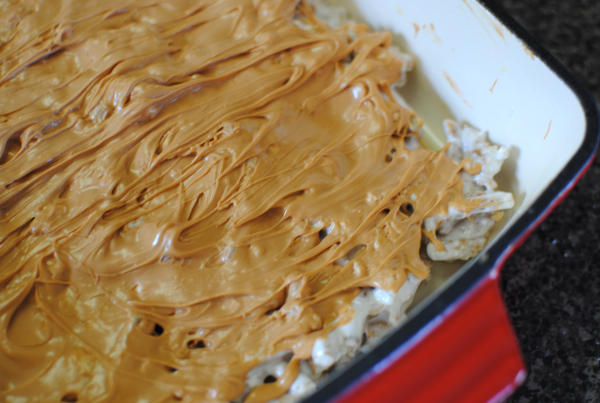
Pour it all into a greased 9×13 dish and flatten out. Set that aside while you get the butterscotch going.

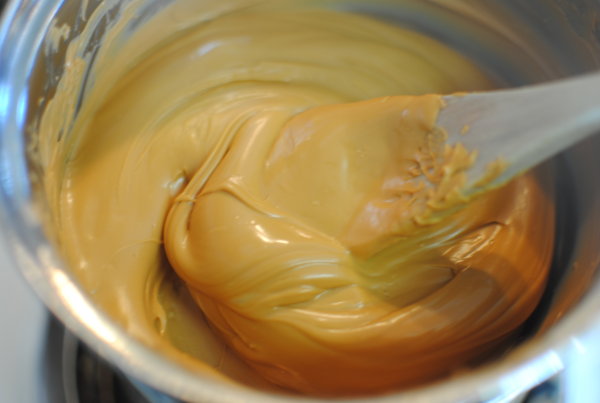
Using your preferred method, melt the butterscotch chips until smooth. Some people feel comfortable using the microwave, but I’m not good at that so I always use a make-shift double boiler for this.

Pour the melted chips over the marshmallowey pretzels and place in the refrigerator to set.

Cut into bars and serve! It’s so easy to make these and they are SO good. A nice little change from your everyday rice krispie treats, don’t ya think?

Butterscotch Pretzel Treats
Recipe Type: Dessert, Snack
Author: Pennywise Cook
With only 4 ingredients, these Butterscotch Pretzel Bars and easy AND incredibly yummy!
Ingredients
  • 1 12 oz Package Butterscotch Chips
  • 1 12 oz Package Pretzel Sticks
  • 1 10 oz Package Mini Marshmallows
  • 2 Tbsp Milk
Instructions
  1. Remove the pretzels from their bag and transfer to a large ziploc bag. Make sure to use your hands to remove them and not pour the entire bag in. This will avoid getting all of the salt into your treats.
  2. Using something heavy, break the pretzels inside the ziploc until fairly small. Pour into a mixing bowl.
  3. Place the milk into a large saucepan. Pour in marshmallows and melt over medium heat until smooth.
  4. Pour the marshmallows into the pretzels and combine well. Making sure to get the pretzel crumbs incorporated well. Pour into a greased 9×13 dish and flatten with the back of a wooden spoon.
  5. Meanwhile, melt bag of butterscotch chips in microwave or over a double boiler until smooth. Pour over pretzel mixture and spread completely over top.
  6. Place in refrigerator to set. Cut into bars and serve!


Like this post? SHARE it!

Related Posts Plugin for WordPress, Blogger...

California Wine Club is Nothing to Wine About

Could there be anything better than enjoying a cozy evening with a glass of wine and great conversation? Maybe a really tasty meal as well, but the wine really helps doesn’t it? I’m not a big drinker, but I do enjoy really good wine to take the edge off every now and then. I’m a MOM, what do you expect?

I can’t tell you how many times I’ve randomly picked a bottle out at the liquor store just hoping that it would taste decent. I’m no expert, but I know what I like and also enjoy trying new wines. Especially those recommended by friends. You know those friends, the ones that know everything about every wine out there.

We all have one of those friends don’t we?

Enter the California Wine Club. They are kinda like that friend. Bruce and Pam Boring started this club over 20 years ago. Each month, they travel California’s fertile wine country to local wineries. They meet the families that run them and taste their wine. Then they share them with the club! It’s like a “cookie of the month club”, but with wine.

My favorite part is that they all come from family-run mom & pop wineries. Usually, that’s where the hidden gems are and it’s awesome to be able to try wine that you might never have been able to experience before.

I received a membership this month and was thrilled to receive my first shipment! Each month, your membership comes with 2 bottles of wine. One red and one white. But they will work with you if you prefer all white or all red. You’ll also receive a copy of their magazine Uncorked. It’s full of info about the wine you’ll be drinking along with tips, recipes and more. Plus, discounts and special offers for reordering your favorites.

The coolest thing is that they share with you the story behind the winery where your wine came from. There is even a picture of the people/family that run it in the magazine. Plus, ahem, you get wine set to your front door. How incredibly awesome is THAT?

It really is cool idea. And with Christmas around the corner, this would make a stellar gift idea for the wine lovers that you know. Or you know, just a treat for yourself. Once you join, there’s no obligation. You can cancel anytime which means you can give it a try. They have a few different options of shipments to choose from as well.

Wanna check it out for yourself? Here’s how to find them:

www.cawineclub.com
California Wine Club Facebook
California Wine Club Twitter

And you do NOT want to miss out on my next post about these folks y’all. There might just be a giveaway in the works and I can’t WAIT to share! Stay tuned.

This review was made possible by Mom Spark Media. Thoughts are my own. I received a 2 month Membership to the California Wine Club for the purpose of this review.


Like this post? SHARE it!

Related Posts Plugin for WordPress, Blogger...

Ridiculously Easy Brown Bag Popcorn

I wish I had a dime for all of the “duh” moments that I’ve had in my life. I will not go into any specifics with you, but just know that sometimes I’m not the brightest crayon in the box. 🙂

Now that I’ve thoroughly dissed myself, we’ll move on to this awesome new revelation that I’ve made! It’s been a long time, but a friend of mine guest posted on Saving with Amy about how to make your own popcorn. I remember reading it and thinking oh that’s neat and looks really easy. And then I just moved on with my life to never try it out for myself.

Not sure why I didn’t because I am HOOKED on this stuff now!

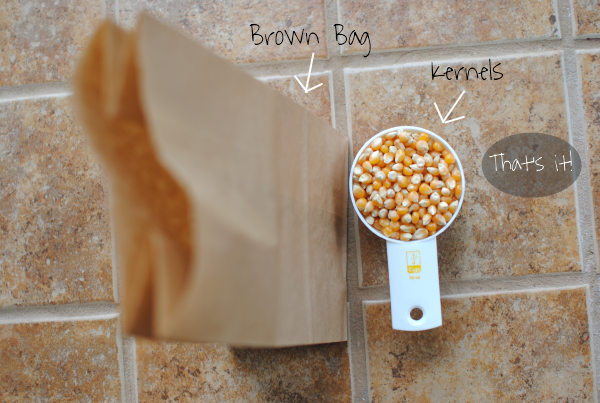
You see, to make about 8 or 9 cups of your very own popcorn, all you need is a brown bag like this one. You can get 50 of them at Dollar Tree for a buck! And you need 1/3 cup of unpopped kernels. You can also get these at Dollar Tree for a buck!

For $2, you’ll have popcorn coming out of your ears…

Have you ever looked inside one of those prepackaged bags of popcorn? There are all sorts of things in there that are pretty much unnecessary. Sure it’s nice to have salt or butter flavor, but with all the added fat too? This easy brown bag method makes it easy to make pure popped corn without adding any extra nonsense. In fact, I actually like it plain just like this. No butter or salt needed!

Just try it once and you’ll be hooked like me. It’s too incredibly simple not to.

Ridiculously Easy Brown Bag Popcorn
Recipe Type: Snack
Author: Pennywise Cook
A brown paper sack and popcorn kernels are all you need to make your very own popcorn!
Ingredients
  • 1 Brown Paper Bag
  • 1/3 c. Unpopped Kernels
Instructions
  1. Pour to kernels into the brown bag. Fold the top down about 2 times.
  2. Place in microwave and heat on full power for 1:45- 2 minutes. This will depend on your microwave, but 2 minutes is about right for mine. Just stop it once there is about 2-3 seconds between kernel pops.

Like this post? SHARE it!

Related Posts Plugin for WordPress, Blogger...