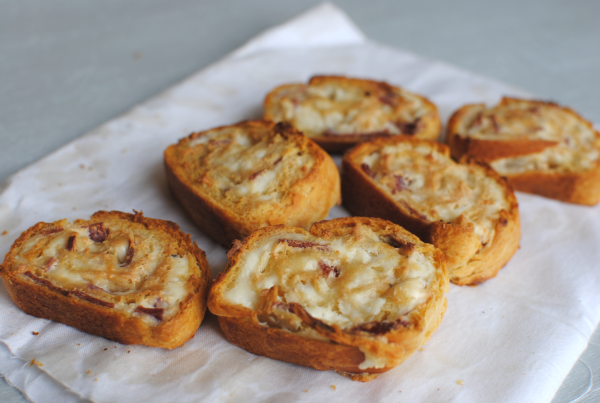
Bacon Cream Cheese Pinwheels

How was your weekend? Our goal since our yard sale a few weeks ago has been to clean out the garage. Has it happened yet? Nope. I will get my van back in the garage before it’s all said and done! I have to!

Do you park in your garage or am I the only one with junk taking over?

I came across this recipe in a company cookbook that I’ve had for years. If I could link to this book so you could get a copy, I would. It’s a great cookbook. I just love ones like that from folks that you know have amazing recipes.

This week I gave Addie a little break from eating peanut butter and jelly sandwiches by making her up some of these Bacon Cream Cheese Pinwheels! She was less than enthusiastic about eating them when she saw me preparing them.

“Moooooooom, I don’t want onions in mine.” She said. Somehow I knew that was coming the moment that I began to chop. Even still, I had confidence that she was going to like these with onions and all.

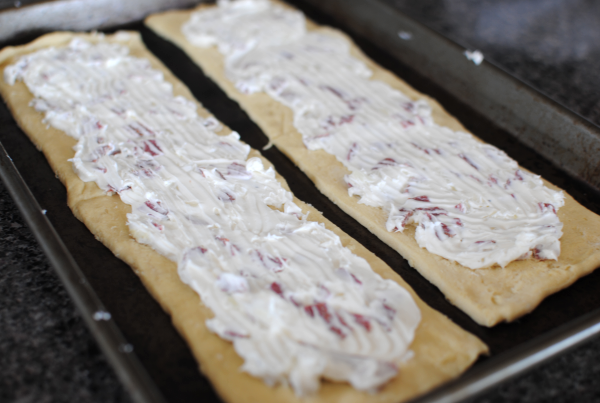
These snacks are so easy to make and have awesome flavor. Bacon, onions, and cream cheese all melt together inside a crescent roll. Hello! You simply mix up a block of cream cheese along with some crumbled bacon (or even bacon bits) and chopped onions and slather it onto some pinched together crescent rolls.

You can almost always find a coupon for Pillsbury Crescent Rolls here. Combine it with a sale and you have a deal!

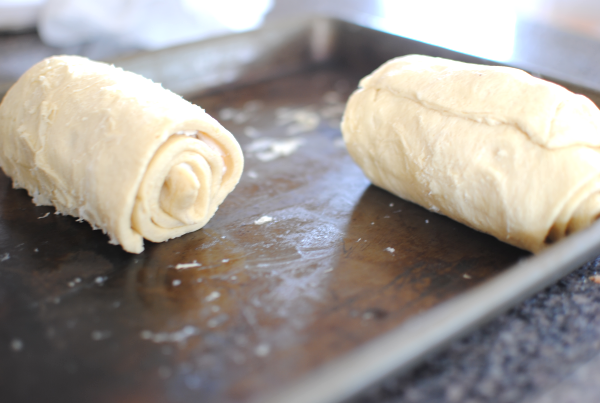
After the slathering process, roooooooooooooll the gooeyness up into 2 little bundles of goodness. Then slice them into separate pinwheels.

Note: I tried baking these before slicing them and trust me, you will want to slice them BEFORE you bake them. They cook much faster and get a better crust.

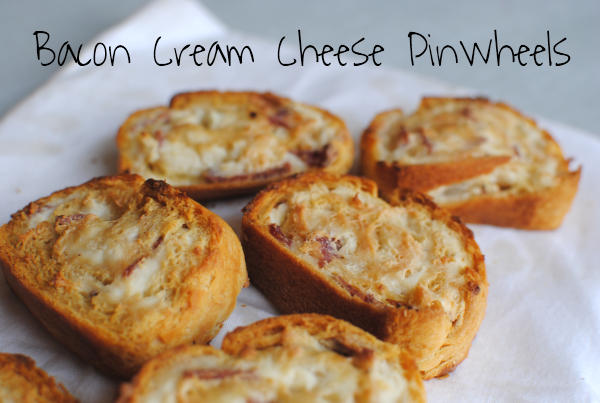
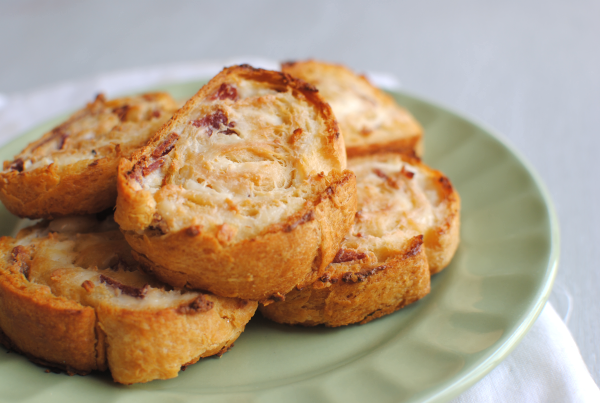
In a matter of minutes you have crusty, cream cheesey pinwheels. These are perfect for a snack, lunch, and even appetizers for a party!

And for the record, Addie LOVED them. Daddy did too. The onions add flavor without being very onion-y.

Bacon Cream Cheese Pinwheels
Recipe Type: Appetizer, Snack
Author: MTEMC Gifts of Christmas Cookbook- Kathie Davies
Spice up your everyday crescent rolls by rolling up bacon and cream cheese inside!
Ingredients
  • 1 Pkge (8 oz) Cream Cheese, Softened
  • 1/4 c. Crumbled Bacon
  • 2 Tbsp Chopped Onions
  • 1/2 Tsp. Black Pepper
  • 1 Can Crescent Rolls
Instructions
  1. Preheat oven to 350 degrees.
  2. Combine cream cheese, bacon, onions and pepper together. Set aside.
  3. Separate crescent rolls into 2 rectangles by pinching the seams together.
  4. Spread mixture onto each rectangle and roll up from the long end.
  5. Bake for 15 minutes or until golden brown.

Like this post? SHARE it!

Related Posts Plugin for WordPress, Blogger...

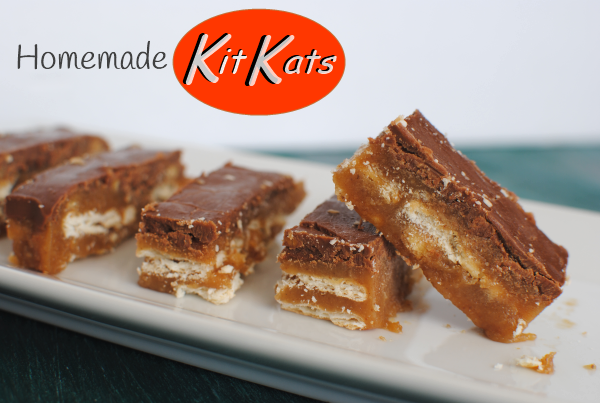
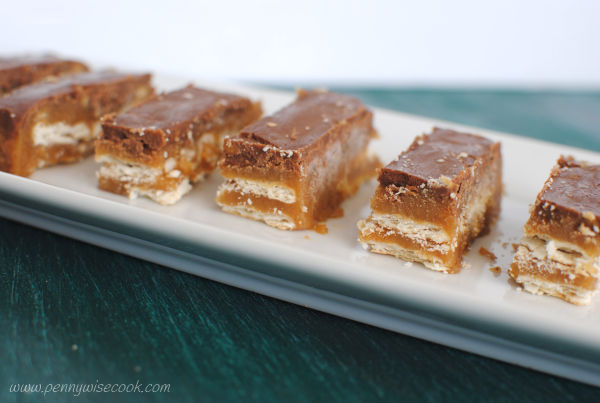
Homemade Kit Kat Bars

Warning: the following recipe could be detrimental to your diet.

Visiting with my husband’s parents every now and then, there’s a certain sweet treat that often pops up. His aunt Millie makes these treats and I can remember sneaking into the refrigerator multiple times to grab a bite of these ooey gooey and addicting morsels.

Here’s a FAQ to prepare you for what is to come if you make these:

Q- Are these good for a diet?
A- Absolutely not.

Q- Can you eat just one of them at a time?
A- Absolutely not.

Q- Will these last long in my house?
A- Absolutely not.

Q- What’s the best occasion to make them?
A- When you will be taking them far, far away from your house.

I hope that this information will be of some help when it comes time to make these Homemade Kit Kat bars. You are going to need to be armed with willpower and a big glass of milk when you do.

I’m not really sure why I was thinking of these the other day, but I asked Millie for the recipe so that I could make some up. I decided to make them for the 4th of July get together in hopes of getting other people to eat them instead of me. No luck, I couldn’t keep my hands off of them. They are SO good.

And I had no idea how yummy the filling was when it was warm until I had it bubbling on my stove. I kept taking the crackers and dipping them directly into the filling. Hubby wasn’t too excited when he went to do the same and I had basically licked the pot clean.

What can I say? It’s the least I deserve when slaving over a warm stove making Kit Kats, right?

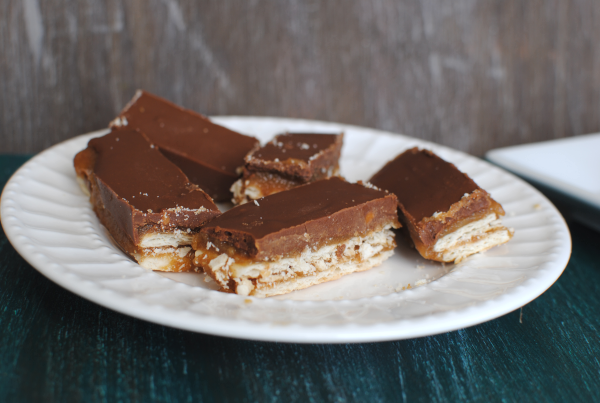
You have free reign to create these bars as little or as BIG as you please. Be cautious and enjoy!

Homemade Kit Kat Bars
Recipe Type: Dessert, Snack
Author: Hubby’s Aunt Millie
Create yummy and addicting Kit Kat bars at home!
Ingredients
  • Club Crackers (Less than a box, About 75 Crackers)
  • 1 C. Butter
  • 2 C. Graham Cracker Crumbs
  • 1 C. Firmly Packed Brown Sugar
  • 1/2 C. Whole Milk
  • 1/3 C. Sugar
  • 2/3 C. Creamy Peanut Butter
  • 1/2 C. Semisweet Chocolate Chips
  • 1/2 C. Butterscotch Chips
Instructions
  1. Line an ungreased 9×13 pan with wax paper. Lay a flat layer of Club Crackers along the bottom cutting them to fit if necessary. Set aside.
  2. In a large saucepan, melt butter. Add in the cracker crumbs, brown sugar, milk & sugar. Bring to boil and cook for 5 minutes stirring constantly. Remove from heat.
  3. Pour half butter mixture evenly over crackers. Place another single layer of crackers flat over butter mixture, cutting to fit if necessary. Pour the remaining butter mixture evenly over crackers.
  4. In a small saucepan, combine peanut butter, chocolate chips and butterscotch chips. Melt over medium-low heat, stirring constantly. Spread evenly over top of crackers.
  5. Cover and chill for at least an hour. Cut into bars.
Notes

To make these a bit healthier, I used reduced-fat club crackers, light butter, and part splenda in place of the sugar.

To speed up the chill time, you can also place them in the freezer instead. I prefer to keep them there so they stay nice and hard.


Like this post? SHARE it!

Related Posts Plugin for WordPress, Blogger...

Peanut Butter and Jelly Rolls

As I sit here and listen to the sirens heading all over the city, I can’t help but be thankful that the 4th is over. No rain for what seems like forever and fires popping up everywhere. Fireworks are the last thing that we need right now for sure. Our city did a big display which was really great this year. I’m fortunate to have a front row seat from our driveway. It was a great show! I hope that you’ve had a fantastic 4th.

There are times when I balance a diaper bag, a 13 month old, a 5 year old, and a buggy all at the same time. I can cook dinner and make a sippie cup while tying a shoe, simultaneously. You may know exactly what I’m talking about if you’re a supermom like I am. Go ahead, accept that title and wear it proud.

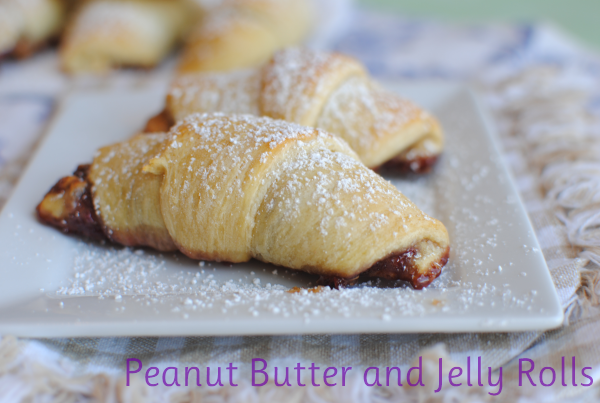
Another way to confirm your supermom status is to make some of these Peanut Butter and Jelly Rolls. I know the name is kinda lame. I couldn’t think of much more creative to be honest. It’s a crescent roll filled with peanut butter and jelly. How creative can you really get with that?

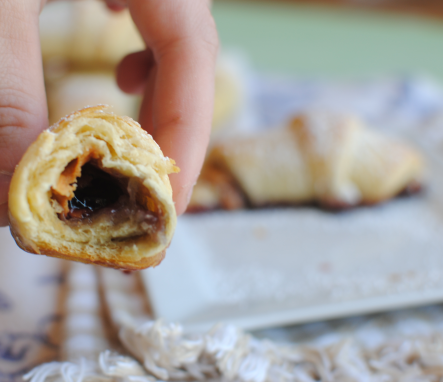
While these may seem extremely simple, which they are, they are also extremely incredible to kids. It’s like 2 of the best things on earth coming together to make the perfect snack. Warm and toasty crescent rolls filled with ooey gooey peanut butter and jelly. I like to call this one of those “duh” things. Like duh, why didn’t I think of that!

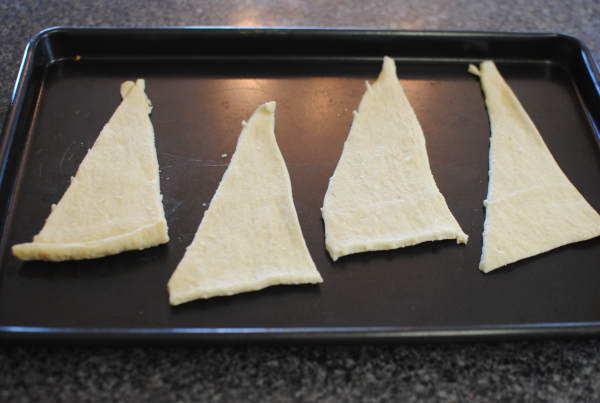
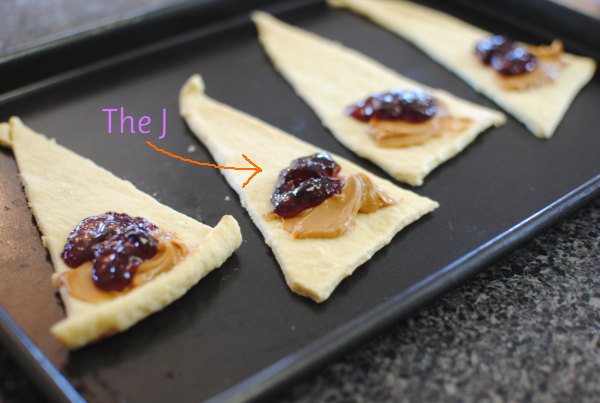
Start off with your cute little crescent roll triangles like so.

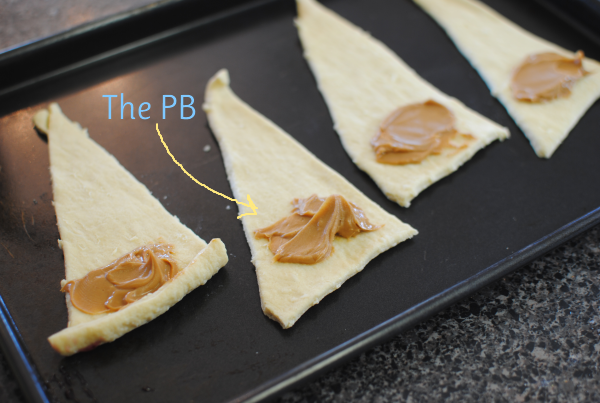
Drop a teaspoon full of peanut butter onto each triangle.

Then drop a teaspoonful of jelly (your favorite kind!) onto the peanut butter.

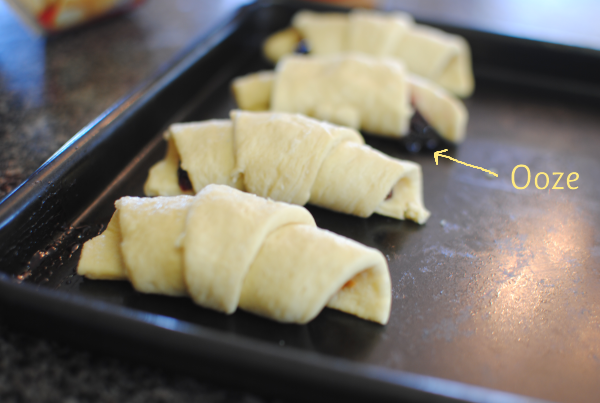
Then you just roooooooooll the suckers up going from the large end to the small end. Place the point side down. You might end up with some ooze, but that’s alright. A little mess never hurt anyone.

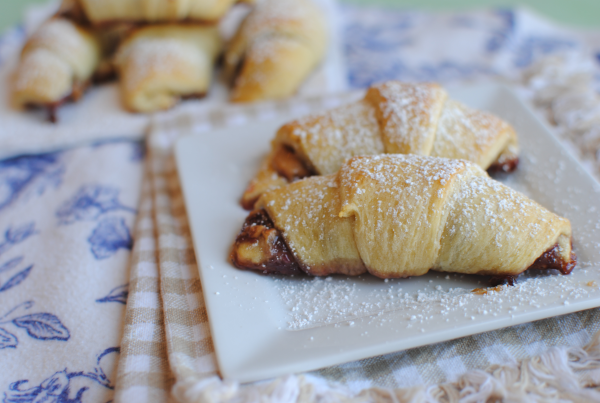
Dust your rolls with a little powdered sugar and serve! These also freeze well too.

I love when they have a sale on Pillsbury Crescent Rolls so I can stock up for snacks like these. You can usually find some good coupons for Pillsbury Crescent Rolls here.

Peanut Butter and Jelly Rolls
Recipe Type: Snack
Author: Pennywise Cook
A simple yet tasty treat with peanut butter and jelly. Your child will love it!
Ingredients
  • 1 Package Crescent Rolls (8 ct)
  • 8 Tsp Peanut Butter
  • 8 Tsp Jelly (Your favorite Flavor)
  • Powdered Sugar for Dusting
Instructions
  1. Preheat oven to degree listed on crescent roll package.
  2. Roll out dough into 8 triangles. Place teaspoon each of peanut butter and jelly on the big part of each triangle.
  3. Roll starting with the bigger end towards the smaller.
  4. Bake 5-8 minutes or until the tops begin to brown. Let cool.
  5. Dust with powdered sugar if preferred.

Like this post? SHARE it!

Related Posts Plugin for WordPress, Blogger...

Banana Nut Bread Cookies

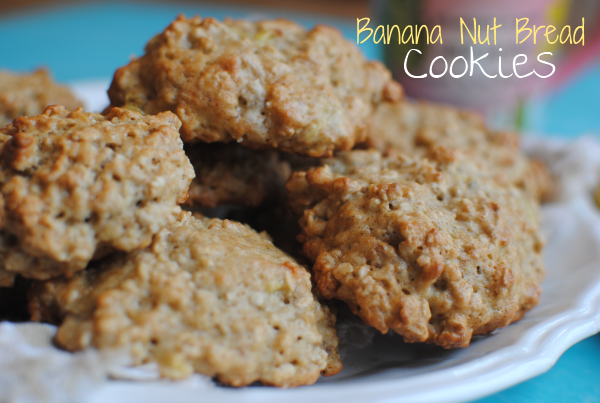
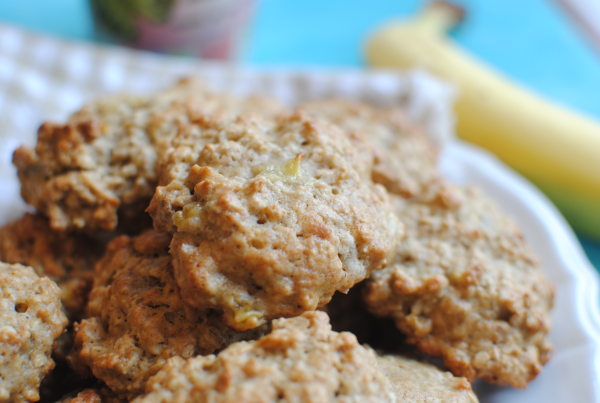
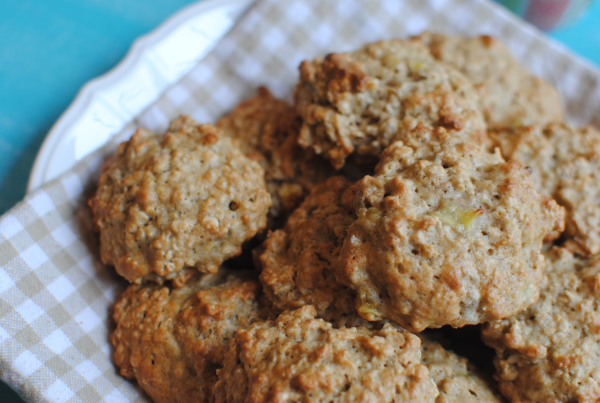
So I completely understand if you look at the title of this recipe and think, what in the world? How can a recipe be both bread and cookies at the same time? Well it’s simple really. You take the best flavors and tastes from a popular bread and bake it into a cookie leaving the cookie every so slightly bread-ish, but in bite-size form. It’s a tremendous feat. Creating the impossible.

You can be a kitchen super-hero just by making these cookies!

No really, your kids will love them. And hubby too. Mine won’t get out of the kitchen eating them. But I’m not going to scold him for it because I can’t get away from them either. I think I’ve already eaten about 6 myself.

I got this recipe from this eCookbook at Amazon called Keep the Cookie Jar Full, but I made some changes to it to accommodate what I had on hand. These turned out fantastic!

Just the right mixture of bananas, oats, and walnuts make these ultra soft and mimic the flavors of banana nut bread perfectly. Great idea for bringing along to a get together!

I can’t believe that tomorrow is July 4th already. I feel like I’m still waiting on Easter or something. Sheesh I’m behind! I’m just praying that all of these fireworks don’t set off fires all over town. Scary stuff with how dry it’s been.

I digress….

Try these cookies! You won’t be sorry.

Banana Nut Bread Cookies
Recipe Type: Dessert, Cookies
Author: Homemade Cookie Recipes eCookbook on Amazon
As tasty as a fresh loaf of banana nut bread, these cookies are the perfect alternative.
Ingredients
  • 1 and 1/2 c. All-Purpose Flour
  • 1/2 Tsp Baking Soda
  • 1 c. Sugar
  • 1/8 Tsp Nutmeg
  • 1/2 Tsp Cinnamon
  • 3/4 c. Butter
  • 1 Egg, Beaten
  • 1 Tsp Salt
  • 2 Very Ripe Bananas, Mashed
  • 1 and 3/4 c. Oats
  • 1/2 c. Chopped Walnuts
Instructions
  1. Preheat the oven to 400 degrees.
  2. In a large bowl, sift together the flour, baking soda, sugar, nutmeg, salt, and cinnamon. Add in the butter and combine until most of the lumps are gone.
  3. Add the egg and bananas and combine well. Fold in the oats and walnuts and mix well.
  4. Drop dough by the teaspoonful on an ungreased cookie sheet. About 2 inches apart.
  5. Bake for 10-12 minutes or until the edges start to brown.
  6. When done, immediately remove from pan and place on wire rack to cool.

Like this post? SHARE it!

Related Posts Plugin for WordPress, Blogger...

Easy Slow Cooker Salsa

You know those times when you go to a mexican restaurant and you get the chips and salsa before your meal? Why do they do that? I’m about to eat a taco salad swimming in yummy cheesy goodness and you start me off with a food trap that I will most likely fall into. Who can resist those warm and salty chips dipped in that cool, spicy salsa? And they are free to boot! Who wouldn’t scarf down as many as they can.

On the bright side, you’ll be so full that you can take half your taco salad for lunch tomorrow.

I’m a sucker for chips and salsa. Always have been, always will be. It’s a very good snack that isn’t too bad on calories. The key is to just eat a few and not ask for a refill of your chip basket. That is asking for a lot though, so I understand if you do. I probably will too.

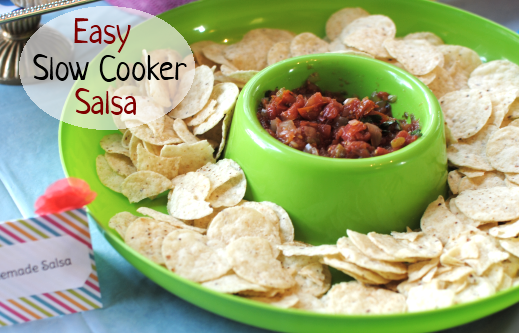
But check this out. Before you head to the Mexican restaurant, consider making up some of this homemade slow cooker salsa. It’s quite the invention and makes having fresh salsa a snap. It’s also great for parties. I made this for my Beach Party about a month ago.

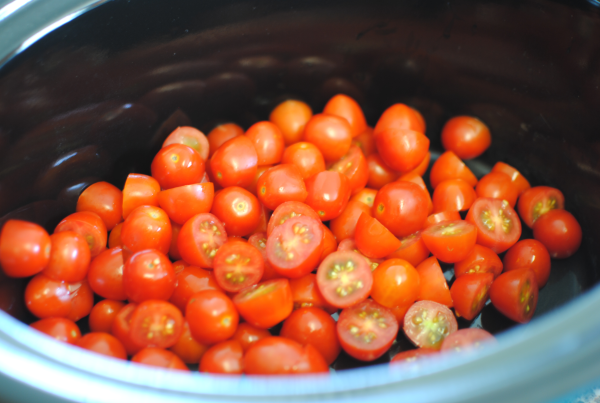
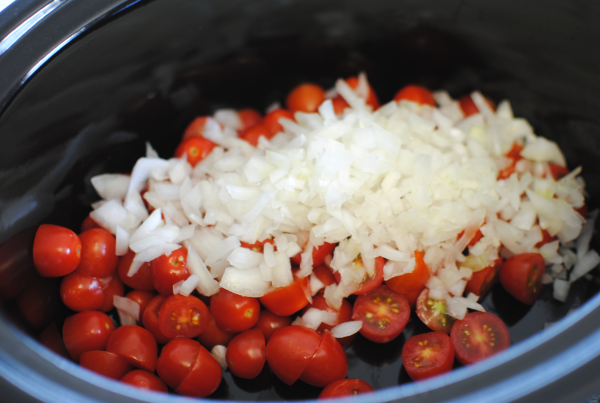
It starts with grapes tomatoes that are halved. Plop them all right in.

You’re practically done…

Add in a chopped small onion. What’s salsa without onion? Chopped liver?

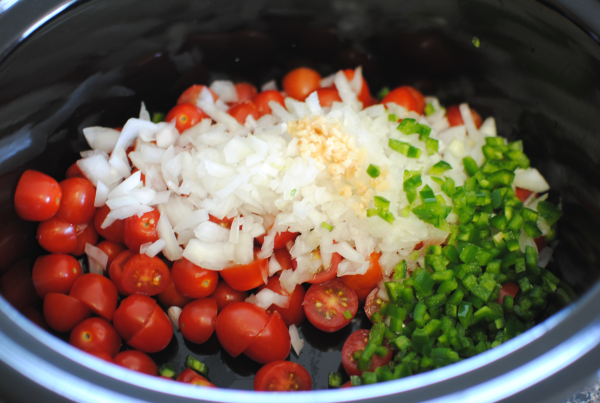
Then add the spicy part, jalapenos! I also added some minced garlic for more flavor. Throw in a pinch of salt too.

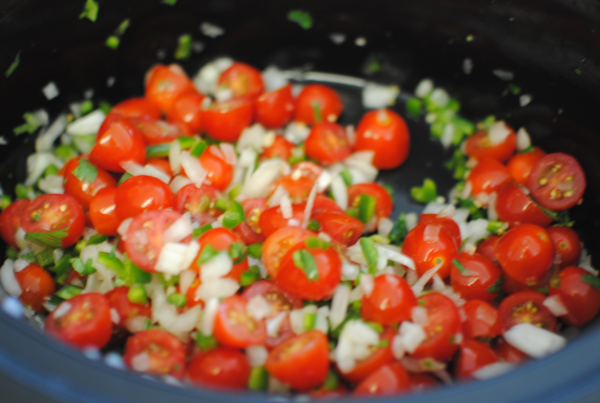
(Sorry for the blurry picture folks) Stir it all up and forget it for a while. When you’re done, you’ll have super easy yet fantastic salsa for your party or get together. Or heck, have it for lunch.

Recipe adapted from The Everything Healthy Slow Cooker Cookbook.

Easy Slow Cooker Salsa
Recipe Type: Appetizer, Dip
Author: The Everything Healthy Slow Cooker Cookbook
Make perfect salsa with little effort in your slow cooker.
Ingredients
  • 4 cups Grape Tomatoes, Halved
  • 1 Small Onion, Chopped
  • 2 Jalapenos, (Chopped)
  • 1 Tsp Garlic, Minced
  • Pinch of Salt
Instructions
  1. Place all ingredients into slow cooker and smash slightly.
  2. Cook on low for 5 hours. Chill before serving.

Like this post? SHARE it!

Related Posts Plugin for WordPress, Blogger...

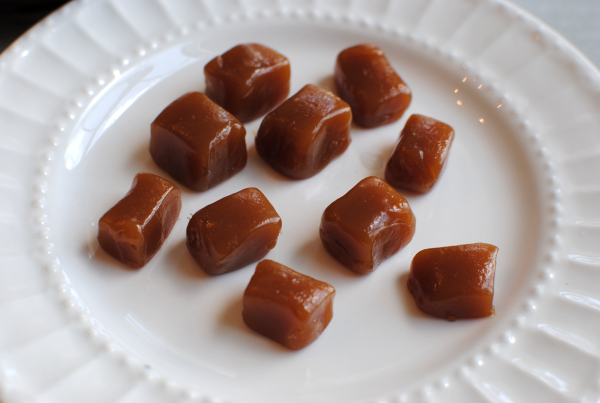
How to Make Old-Fashioned Caramels

Let’s go back to a simpler time shall we? How about way back 80 years ago when things were cheaper. For instance, a new house would cost you only around $7000.  Gas was about a dime per gallon and 1 lb steak was only about $.20.

If we only had a time machine…

Luckily there are some things that can “transport” us back to that time with music, food, and relic furniture. One of which is my personal favorite, food. Popular in the 1930’s and a treat still on store shelves today are old-fashioned caramels. I think that it’s almost impossible to dislike smooth and rich caramel isn’t it? I guess I should never say never because I have some pretty picky eaters in my family, but I can assure you they really loved these caramels.

I’ve never really been one to make candy that often. A little peanut brittle or chocolate bark here and there, but nothing extremely involved.

And I have a confession- I have never used a candy thermometer in my life. Most recipes will say this is extremely important but I’ve always been able to get by without one.

So I found this really simple Old-fashioned Caramels recipe in my Pillsbury Cookbook and it looked so simple and tasty that I had to make some up.

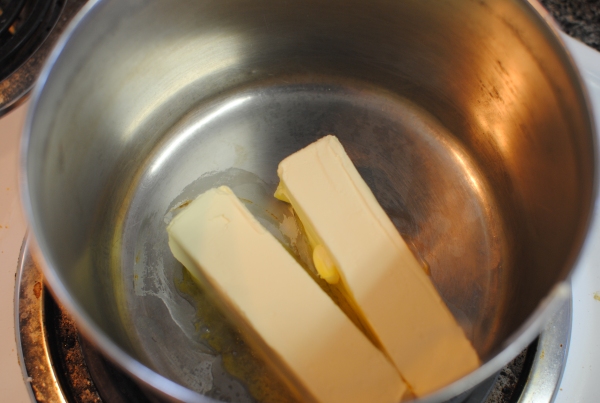
It starts with melted butter.  You know this is going somewhere good when it involves that much butter. But just for the record, I use light butter.

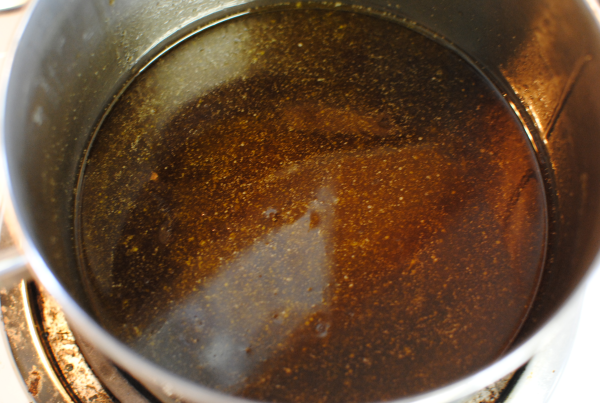
Then you stir in the brown sugar and corn syrup until completely dissolved.

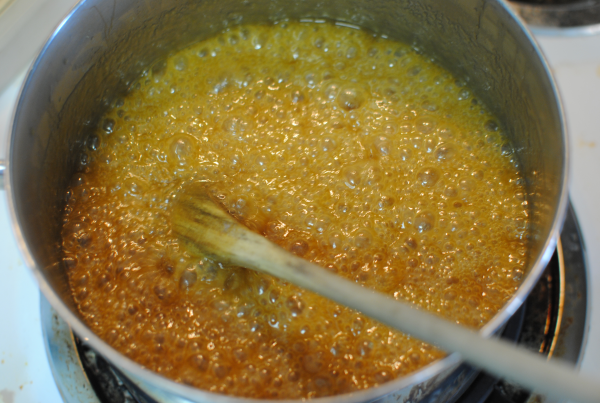
Lookie there, it’s already looking like caramel! The next step is to remove it from heat and add in sweetened condensed milk. Then we get it nice and bubbly for about 25 minutes stirring constantly so it doesn’t burn.  Now is the time when a candy thermometer should be used, so if you’re prepared and have one, use it.

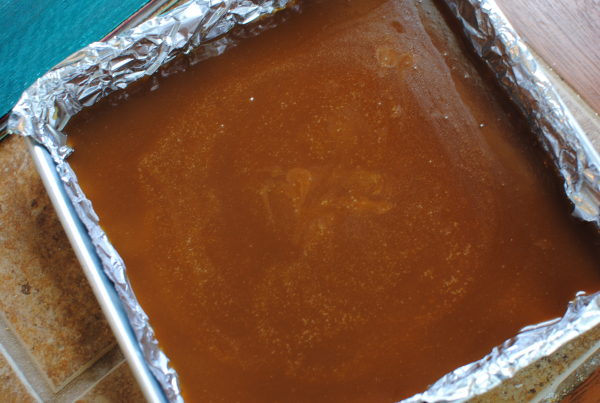
Then it’s all a matter of pouring it into a 8×8 pan and letting it harden.

Note- I do NOT recommend using foil to line your pan unless you have very hefty foil. It was a nightmare getting it off the caramel once set. Also be sure to keep your caramel in the refrigerator until ready to eat so that it stays nice and firm.

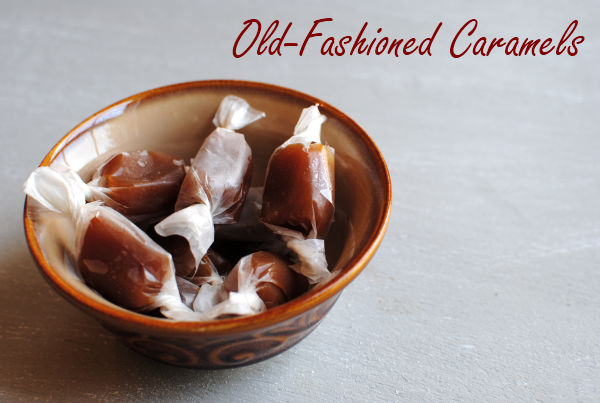
Once set, you can cut it into small squares and wrap it in squares of wax paper for easy eating and sharing. It’s oh so yummy! Even my hubby who is a strict chocolate lover loved this caramel.

How to Make Old-Fashioned Caramels
Recipe Type: Dessert, Treat, Candy
Author: Pillsbury
With just 5 ingredients you can create a time machine back to a simpler yet sweet time.
Ingredients
  • 1 cup butter
  • 2 1/4 cups firmly packed brown sugar
  • 1cup light corn syrup
  • 1(14-oz.) can sweetened condensed milk (not evaporated)
  • 1 1/2 teaspoons vanilla
Instructions
  1. Lightly grease a square baking dish.
  2. In a medium saucepan, melt 2 sticks butter. Add in brown sugar and mix well. Then add in corn syrup. Stir until sugar is dissolved.
  3. Remove from heat and add sweetened condensed milk.
  4. Heat over medium heat for 20- 30 minutes until it reaches 244 degrees.
  5. Remove from heat and add vanilla.
  6. Pour mixture into greased pan and let sit until firm.
  7. Wrap in wax paper and store in refrigerator.
Notes

This is not a diet dish by any means. Eat at your own risk!

Happy Pennywise Cooking!


Like this post? SHARE it!

Related Posts Plugin for WordPress, Blogger...

Glitter Grapes {Healthy Snack}

I have an addiction. Yes, let me just bust that confession out to you now. While if you’ve read this blog or Saving with Amy for any length of time, you know that I love sweets. Unfortunately, most of my cravings for them hit at night. No it’s not a good thing and yes I work my tail off at the gym! But this simply means that I try and make every attempt possible to make my sweets healthy.

Ahem, healthy-ER anyways.

Although sometimes you just need a dadgum hot fudge sundae….

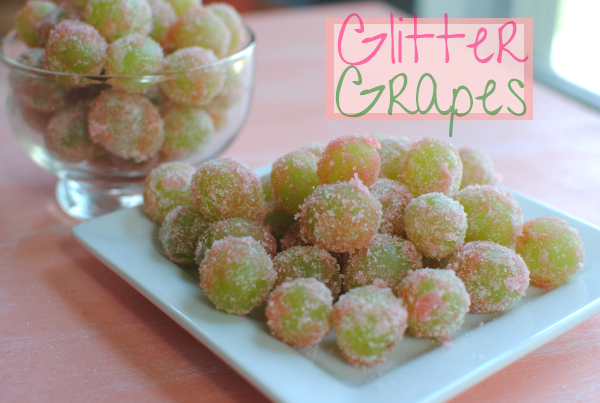
TODAY is not that day. No, we are going to talk GRAPES today! And not just any grapes…….glitter grapes!

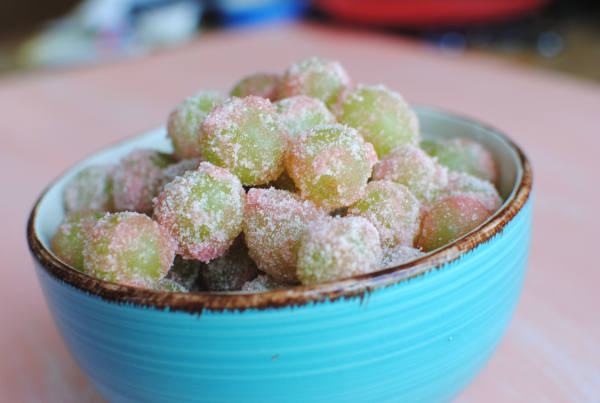
I already love them in their everyday form. Plump, sweet, and tasty without a thing done to them. However, after coming across this amazing idea at Pure Sugar, I love grapes about 100 times more. They only way to make grapes even better is to give them a bath and then roooooooooll their little grape bodies in a pile of sour jell-o mix!

Jell-o. Yep. So simple, yet so incredibly delightful. They have now been dubbed “Glitter Grapes” for their shinyness in the light. Also known as “sour patch grapes” because of the tang the jell-o mix gives them. Trust me, the kids will love them and unfortunately they might become your very next sweet addiction like mine. It really is just like eating candy.

But it’s A-OK because they are grapes and you cannot possibly feel bad about eating those can you? Naaaaaaah….

Glitter Grapes {Healthy Snack}

Glitter Grapes {Healthy Snack}

Enjoy a healthy snack of sour grapes that taste like candy!

Ingredients

  • 1 Pound Green Grapes
  • {Water}
  • Jell-O Mix

Method

  1. Rinse grapes in colander leaving some water on grapes.
  2. Place jell-o mix on a plate and roll grapes in batches through the mix.
  3. Refrigerate grapes for at least an hour for the jell-o to set.
  4. Serve and try not to eat the whole batch!

Notes

I used watermelon jell-o because the melon fusion that original recipe wasn't available at my store. However, I think the flavors that can be used is completely up to you! Whatever you fancy!

These would also be amazing FROZEN!

http://www.pennywisecook.com/glitter-grapes-healthy-snack/


Like this post? SHARE it!

Related Posts Plugin for WordPress, Blogger...

Strawberry Salsa Chicken

Take me or leave me, but I like weird things to eat. Well, what some might call weird anyways. I was making a hot dog the other night and was so excited while I prepared my ingredients. My husband watched as I drug out the relish, mustard, and ketchup. Then I decided that it wasn’t complete without chopped onions. Almost in awe of my condiment concoction, he asked “Did you chop that entire onion just for a little for your hot dog?”. Why yes, I in fact had chopped a very small amount of onion just for my hot dog. That’s how me and my dogs roll you know. He thinks I’m a bit odd, but I know there are others out there like me.

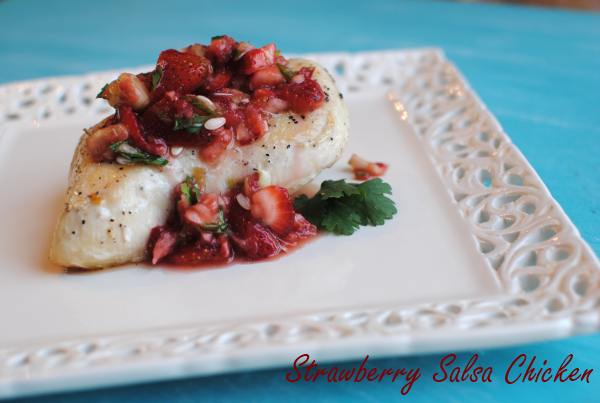
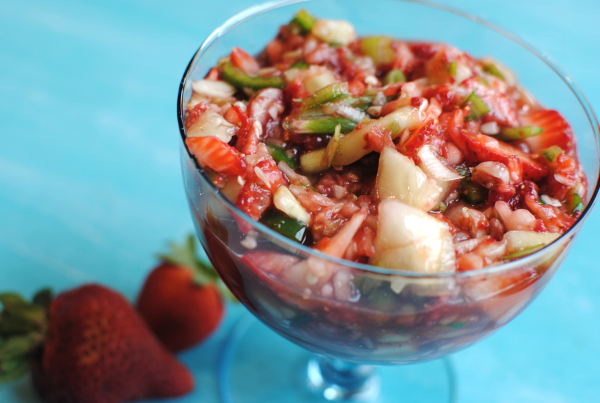
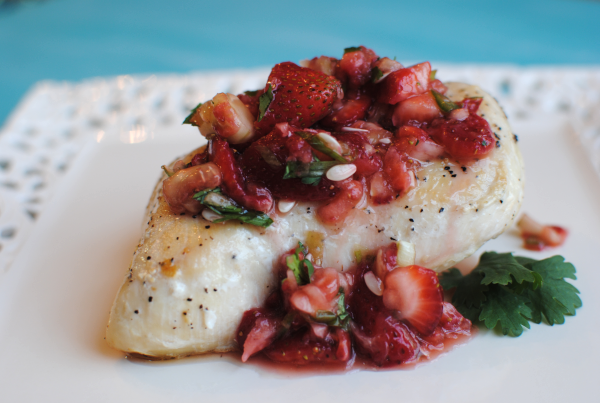
Like someone else who might like strawberry salsa? That’s another weird thing that might be perplexing to some. We’re talking replacing your tomatoes with juicy and summery strawberries instead. It’s absolutely divine I tell you. I had no idea that it would be so incredible.

And then I ate it with chicken.

Just imagine me kissing my fingers like the Italians do. It’s that marvelous.

Complete with cool and crisp cucumbers, lime juice, brown sugar and even jalapeno, I can almost guarantee that you will like this. Oh and if you don’t like hot salsa, don’t worry. The one jalapeno that is in this will not be hot. It’s really the one thing that makes this a “salsa”.

I’ve also learned a fancy smancy teqnique for making oven baked chicken PERFECT. The key is to brown it in a skillet a few minutes on each side. Not enough to cook it through, but just enough to get it browned a bit. Then finish it off in the oven. Works everytime to get the most perfectly cooked chicken ever.

AND I also highly recommend pounding your meat first. Yes, it seems like a lot of work but trust me. You will not only enjoy the task, but you’ll also enjoy the chicken a lot more than going without. I told my mom about this recently and she always beats her chicken first now! Just do it next time and you’ll see.

Ready for the most perfect summer chicken recipe ever? See below!

Strawberry Salsa Chicken

Strawberry Salsa Chicken

Celebrate summer with this baked chicken with strawberry salsa!

Ingredients

  • Boneless, Skinless Chicken Breasts
  • 1 Tbsp Olive Oil
  • 1 and 1/2 c. Strawberries, Chopped
  • 1/2 c. Cucumber, Chopped
  • 2 Green Onions, Chopped
  • 1 Jalapeno, Chopped
  • 1 Tbsp Cilantro, Chopped
  • The Juice of 1 Lime
  • 2 Tbsp Brown Sugar

Method

  1. Preheat oven to 350 degrees. Season chicken with salt and pepper. Brown chicken over medium high heat in oil for a few moments on each side. Just until browned, no need to cook through. Bake 20 minutes.
  2. Meanwhile, mix all salsa ingredients and combine well. Place in refrigerator until chicken is done.
  3. Remove chicken from oven. Serve salsa over chicken!

Notes

There's no much to it! Simple as pie.

The salsa would be divine with tortilla chips too!

Enjoy!

http://www.pennywisecook.com/strawberry-salsa-chicken/

Question of the day: What do you like on your hot dogs?


Like this post? SHARE it!

Related Posts Plugin for WordPress, Blogger...

Kitchen Tip: Shaping Sliders

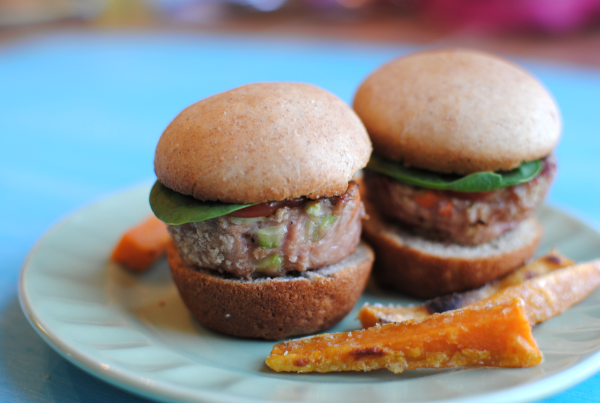
Sliders have become more and more popular over the years haven’t they? It seems a lot of the mainstream restaurants have some type on slider on the menu. I am in absolute love with the Ruby Tuesday Turkey Rubies. They are amazing. When I’m craving them, it’s not always possible to go out to eat with a very busy 1 and 4 year old. I could order them to go, but what’s the point in eating out if you’re going to eat at home? We rarely get food to go.

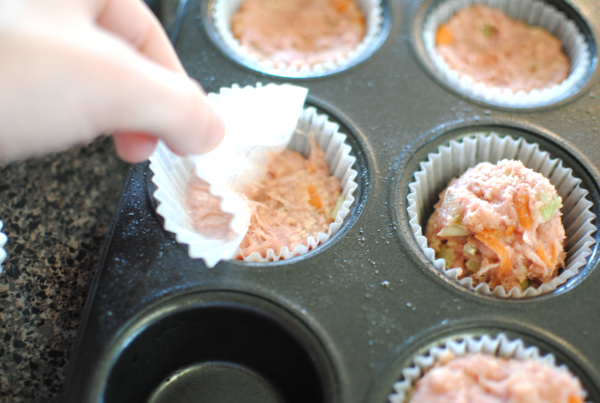
To make sliders at home, you may think that you have to have one of those fancy slider grills or shapers. But in reality, it’s as easy as a little kitchen trick involving of all things, muffin tins and cupcake liners. I saw this idea and new I had to try it when I made up these Asian Turkey Sliders one night.

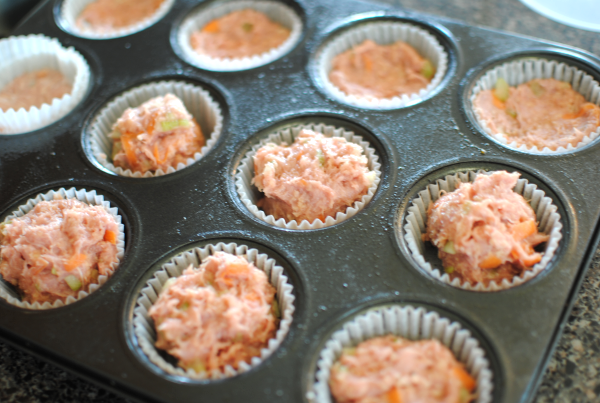
Start by placing cupcake liners into your muffin tins like so. No need to use fancy ones, just ones that you might have leftover. (Try not to get jealous of my ugly white Dollar Tree cupcake liners) If you want to make sliders a lot, you might even consider having a set of liners just for making sliders!

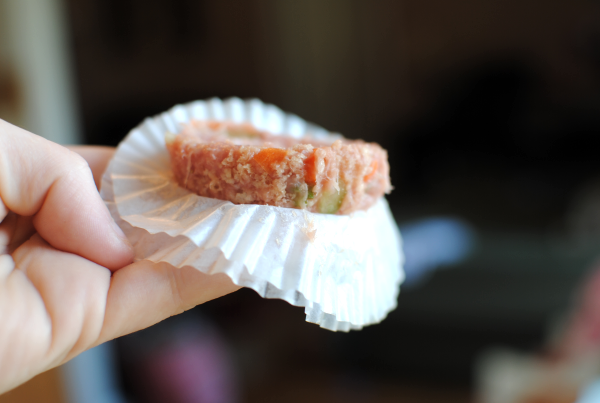
Then using a new cupcake liner for each slider, simply press them into that patty shape in the tin. I know my meat may look a little weird, remember it’s Asian turkey! 🙂

After that fairly simple process you’ll have all uniform and tidy slider patties ready for the grill or skillet! Love finding shortcuts in the kitchen like this that make life easier. And with sliders, the possibilites are endless. I mean come on, they are just tiny hamburgers and there are TONS of variations of hamburgers.

I will say that using these Perfect Wheat Dinner Rolls as a slider bun would be a great idea. 🙂

Question of the Day: Have you ever made sliders before?


Like this post? SHARE it!

Related Posts Plugin for WordPress, Blogger...

Healthy Granola Bars

Its incredible to me the amount of sugar that are in things these days. It’s almost like we humans have adapted to ginormous amounts of sugar and we just keep adding more and more to our foods. At the pediatricians office the other day, she told me that juice boxes are some of the worst things for children to drink. They are on up there with sodas! Come on, JUICE BOXES? Of all things that you expect to be ok for your kids. I was looking for juice boxes to take on an upcoming road trip and decided to take a gander at the nutrition label. 1 juice box had 24 grams of sugar! Insanity isn’t it?

Don’t get me wrong, I like my sugar. In fact, I’d much rather eat something sweet than savory any day. But I love when I can use natural sugars instead of globbing on cups of the granulated stuff.

Granola bars have long been one of my favorite snacks. Simple to grab and go and packed with nutrition. Well most of them at least. Plus, if there’s a chance that I get in a little energy and fiber then I’m all for it. This momma can really use all the help that she can get.

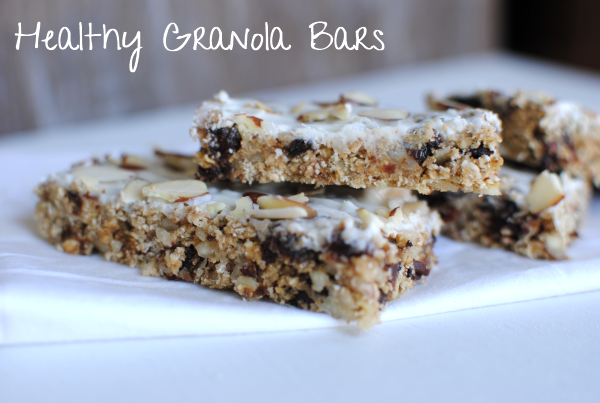
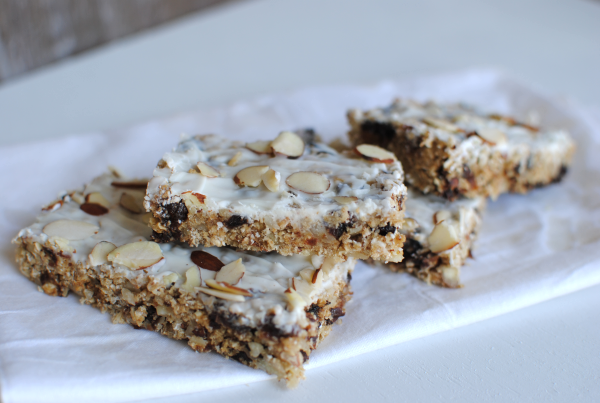
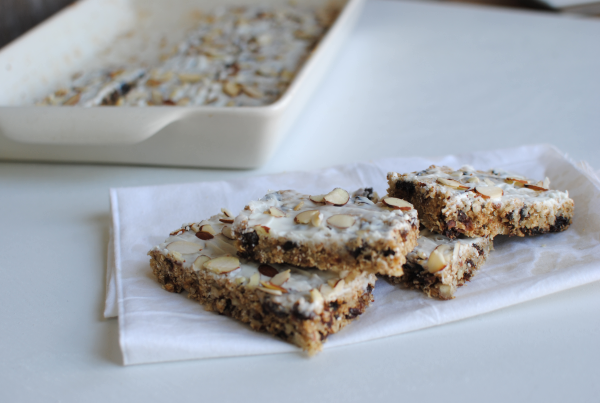
I found this High Fiber Granola Bar recipe and adapted it a bit. While the original didn’t call for any added sugar, I did top mine with a little white chocolate. And I do mean a little. I practiced a little self control and only added a very thin layer. These are packed full of grains and dried fruit along with some natural sweeteners like honey. They do require baking, which I’m sure might not sound pleasant to some of you. But if you have the time to bake these, I’m sure that you’ll like them too. And come on, you have 18 minutes right?

Minus the thin layer of chocolate on top, these are actually low in calories! Score! And my favorite part is that they are heartier than most granola bars. They don’t use rice krispies as filler, but instead use shredded wheat cereal to give you slow-burning carbs.

Recipe adapted from Fitho.

Healthy Granola Bars

Healthy Granola Bars

These granola bars are not only healthy and packed full of fiber, they are also quite tasty too!

Ingredients

  • 1 cup quick cooking oats
  • 1 cup shredded wheat cereal
  • 1 cup almonds + 1/4 c. almonds for topping
  • 1.5 cups raisins
  • 1/2 teaspoon ground cinnamon
  • 1/2 teaspoon salt
  • 3 eggs
  • 2 tbsp honey
  • 1 teaspoon vanilla essence
  • 1/3 c. white chocolate chips or almond bark, melted

Method

  1. Preheat the oven to 350°F. Grease a large baking pan and set aside.
  2. Place the oats, shredded wheat, 1 cup almonds, dried fruit, cinnamon, and salt in a food mixer until the mixture is finely chopped.
  3. In a large bowl, whisk the eggs, honey, and vanilla. Add the oatmeal mixture and stir, till its mixed evenly.
  4. Transfer to the baking pan and flatten down gently with the back of a spoon or spatula to spread evenly.
  5. Bake about 18 minutes until the edges turn golden brown and the bars are done.
  6. Remove granola bars from the oven and let cool completely. Meanwhile, melt your white chocolate chips (or almond bark) in the microwave or double boiler.
  7. Pour melted chocolate chips over the top. Sprinkle with remaining 1/4 c. almonds. Stick in the fridge to set until chocolate is firm.
  8. Cut into bars and serve!

Notes

You don't have to use raisins, you can use just about any dried fruit that you wish. Dates would be good or perhaps cherries.

When flattening the mixture into your baking pan, spray the back of your spoon with cooking spray to prevent sticking.

If you want thicker granola bars, use an 8x8 pan. I prefer thinner and longer bars so I used a 9x13 dish.

These are not that expensive to make since most are ingredients that you might have on hand. I got the shredded wheat at Dollar Tree and the Almonds at Aldi. Everything else I found in my own pantry.

http://www.pennywisecook.com/healthy-granola-bars/


Like this post? SHARE it!

Related Posts Plugin for WordPress, Blogger...