How to Make Homemade Marshmallows

Any which way that you present a marshmallow to me, I will eat it. I love them big, small, melted, torched, as a cream, in a frosting- you name it! I’ve been that way since I was a kid.

My grandmother used to buy bags of the mini marshmallows and stick them in the freezer. I would always sneak in there and get a handful or two at a time and munch on them. I can’t tell you how many times I’ve ate an entire half bag of them. Probably enough times to be ashamed if I told you. 😉

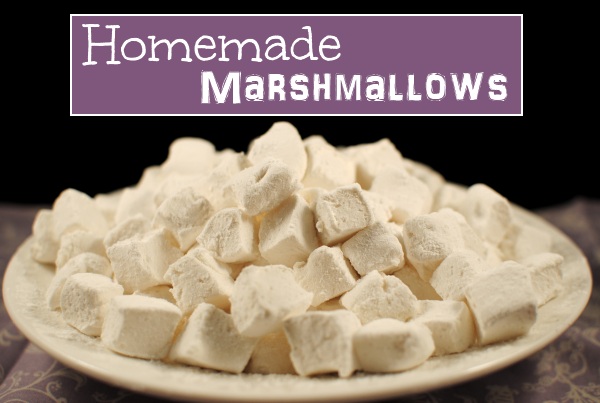
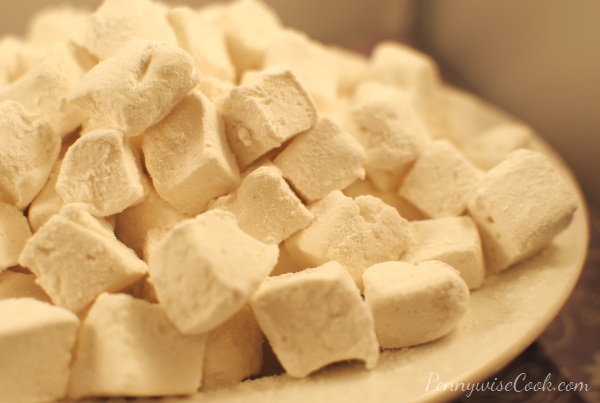
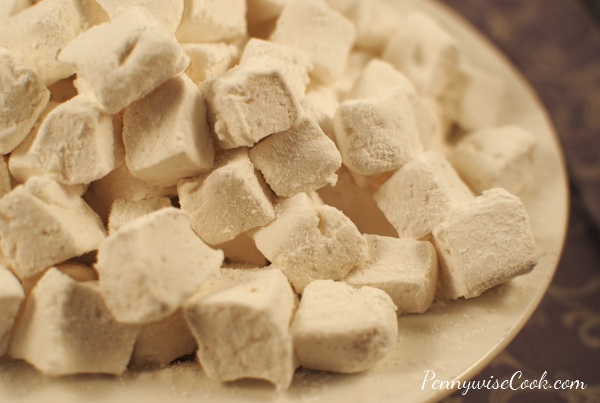
Even after my love for marshmallows as a child, you’d be surprised that I never have once tried to make them as an adult……until now. I had absolutely no idea how easy they were. And the taste? Wow! Store bought has nothing on the homemade taste. Soft and creamy, there is just nothing like them. I first got the inspiration after watching an episode of Barefoot Contessa. Anyone else watch that? I’m a fan.

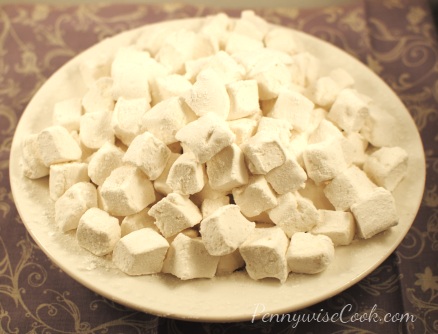
You’ll have to excuse my pictures. Still learning the lighting tricks. Anywho, most of the recipes that I’ve seen call for you to cut them into big cubes, but I cut mine into smaller cubes to mimic the mini marshmallows. It was a good and bad thing. Even though they were small, I ate more to make it for it!

I actually had everything that I needed to make these in my pantry already, minus the light corn syrup. The only other ingredient that some might not have is the unflavored gelatin. It’s fairly inexpensive and usually comes in packs of 4 and you just need 3 and 1/2 envelopes for this recipe.

My first impression of this process? Very sticky and messy! But not so much that I would never make them again. After boiling the sugar and corn syrup (etc) you have to transfer the mixture to your pan and that’s when it gets sticky. These fluffy sweet clouds are worth the trouble. You’ll be glad to know that it’s very easy to clean though! I was surprised how easily the sugary mess dissolved and cleaned up. Besides that, I can’t see why I haven’t made them before. What a great present these would make around the holidays. You could make up a big batch and wrap them in pretty cellophane. Cheap and easy!

Recipe from Smitten Kitchen.
Easy Homemade Marshmallows

Easy Homemade Marshmallows

Marshmallows are readily available at the grocery store, but the ones you create at home are more tasty and surprisingly easier than you think.

Ingredients

  • 1 cup confectioners’ sugar
  • 3 1/2 envelopes (2 tablespoons plus 2 1/2 teaspoons) unflavored gelatin
  • 1 cup cold water, divided
  • 2 cups granulated sugar
  • 1/2 cup light corn syrup
  • 1/4 teaspoon salt
  • 2 large egg whites
  • 1 tablespoon vanilla

Method

  1. Oil the bottom and sides of a 9x13 dish and then dust with powdered sugar.
  2. In the bowl of a standing mixer or a large bowl, sprinkle the gelatin over 1/2 c. cold water and let stand to soften.
  3. Meanwhile, in a large saucepan cook sugar, corn syrup, 1/2 c. cold water, and salt over low heat stirring with a wooden spoon until the sugar dissolves. Then increase the heat to moderate and boil without stirring until a candy thermometer reaches 240 degrees. This will take about 12 minutes.
  4. Remove the pan from heat and pour of the gelatin mixture, stirring until the gelatin is dissolved.
  5. With standing or hand mixer, beat on high until white and thick and nearly tripled in volume. 6 minutes if using a stand mixer, 10 minutes if using a hand mixer.
  6. In a separate bowl with clean beats, beat the egg whites until stiff peaks form. Mix the egg whites and vanilla to the sugar/gelatin mixture until just combined.
  7. Pour mixture into baking pan. Sift 1/4 c. powdered sugar over the top.
  8. Chill for at least 3 hours, until firm.
  9. Run a knife along the edges and cut into desired size. Roll each cube into powdered sugar to keep them from being sticky.
  10. Store in an airtight container for up to 1 week.

Notes

I didn't have a candy thermometer so I just boiled the mixture for exactly 12 minutes and it worked like a charm. If you have one it will be more precise, but don't fret if not.

I used a pair of scissors to cut my cubes at the end. I sprayed them with non-stick spray first. Depending on how small you want them, it takes some time cutting them up so this really helped since they are so sticky.

Once you roll them into the powdered sugar, you'll want to kinda shake the excess off. We found that leaving too much on them made them taste like a big bunch of powdered sugar.

http://www.pennywisecook.com/making-homemade-marshmallows/


Like this post? SHARE it!

Related Posts Plugin for WordPress, Blogger...

5 Simple Easter Treat Ideas

Easter is on Sunday! Can you believe it? Addie had her school’s Easter egg hunt today and she was so proud of all the eggs that she collected. I had to stop her from eating so much candy though. I don’t remember having that much candy when I was hunting eggs.

If you’re still looking for cute ideas for treats to create with the kids, here is a recap of my goodies that Addie and I put together the last few weeks. I’m ashamed that not one ounce of any of these treats are left. They were all too yummy to stick around for too long.

Peeps in Sprinkle TuTus

Rice Krispie Treat Speckled Eggs

Bunny Brownie Pops

White Chocolate Pretzel Ducks

Tootsie Roll Easter Nests

I also plan to make Resurrection Rolls this year.

Do you have any traditions with Easter treats are your house?


Like this post? SHARE it!

Related Posts Plugin for WordPress, Blogger...

3-Ingredient Strawberry Ice Cream

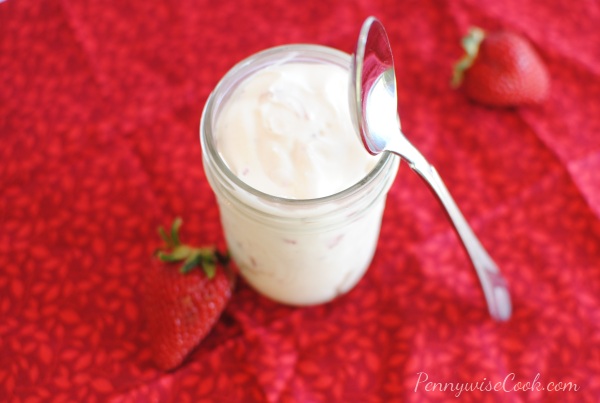
Do you remember making homemade ice cream as a kid? I remember we had one of those crank machines that took FOREVER to produce about 2 bowls of ice cream. By the time you were done doing hard labor cranking the machine, you were almost too tired to eat it! Almost…. Though I do specifically remember the taste of how amazing it was compared to the stuff that you buy at the grocery store.

It’s incredible to me how expensive that ice cream has gotten. It’s worse than GAS at $6 or $7 bucks per gallon. And just like we have to get around in our cars, we have to feed our ice cream cravings. Especially in the summer.

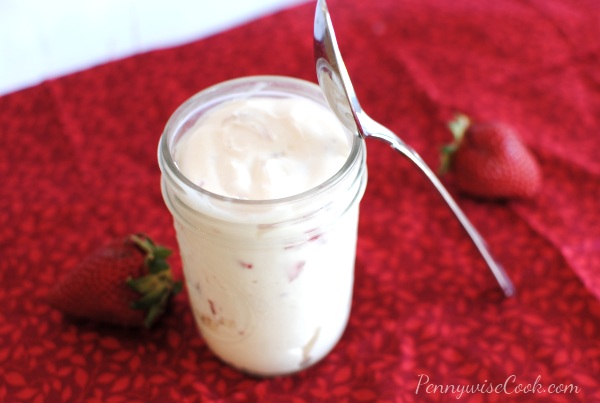
I’m going to go ahead and tell you that you’ll probably want to go out and buy some mason jars if you don’t already have some. It’s not good (I’m so ashamed), but sometimes I inhale eat ice cream straight from the carton with a fork. Yeah the fork thing came from my dad. It’s how he always eats it and I’ve just picked it up too. The mason jars are a great way to prevent overeating and make great portion control. It’s always great to have your own personal container. Less feels like more that way.

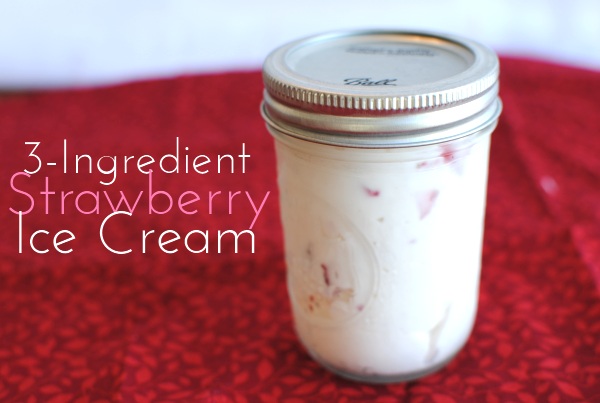
This recipe only involves 3 ingredients and is so perfect every time. I cannot believe that I didn’t figure this out earlier. And by the way, you won’t need one of those horrible hand-crank ice cream machines for this recipe. Just an appetite for smooth and creamy strawberry ice cream. You can always use another fruit of your choice.

I will never go without homemade ice cream again!

Recipe courtesy of Fat Girl Trapped in a Skinny Body.

3-Ingredient Homemade Strawberry Ice Cream

3-Ingredient Homemade Strawberry Ice Cream

With very few ingredients you can make the most amazing (and easy) strawberry ice cream!

Ingredients

  • 1 (14 oz) Can Sweetened Condensed Milk- I used Fat Free and it works!
  • 2 Cups Heavy Cream
  • 2 Cups Strawberries, Chopped- Measure them out and them chop or puree them

Method

  1. In a large bowl using a hand mixer, whip the heavy cream until soft peaks form. Just about to where it gets stiff.
  2. Add in the sweetened condensed milk and whip for another minute or so.
  3. Fold in the strawberries and pour into freezer containers or mason jars.

Notes

I used my KitchenAid stand mixer to make this and it worked very well!

I chopped my strawberries this time, but next time I plan to puree them. I liked the large bits of strawberries, but I think it would taste more strawberry-y if they were more pureed.

If it's really hard when you take it out of the freezer, just set it out on the counter for a few minutes and it will soften up a bit.

I'm going to try this with oreos soon for Cookies and Cream ice cream!

It tastes almost like soft serve and it's fabulous!

http://www.pennywisecook.com/3-ingredient-strawberry-ice-cream/


Like this post? SHARE it!

Related Posts Plugin for WordPress, Blogger...

Ranch Oyster Crackers

How was your weekend? We had a really great weekend full of physical activity and fun. My husband’s parents came for a visit and we enjoyed being with them. I also ran a 5k and came in 238th. Woo hoo! No really, I am proud of that considering there were around 2,000 people in this race. As long as I wasn’t last, I’m happy.

I’m always snacking on something. I don’t like feeling really full during the day so I usually end up “grazing” (that’s what my husband and I call it) throughout the day. I’ve got a simple favorite that’s easy to make and is a great snack idea for a party or get together. People easily grab a handful at a time, but usually come back for seconds. You may have heard of these yummy ranch crackers before, but in case you hadn’t I thought I’d share.

One of my favorite parts of this recipe is that it’s inexpensive. (My favorite kind) Most everything in it is something you might have a hand. Spices, a little bit of oil, and some oyster crackers. If you don’t usually have oyster crackers, you can find them at Dollar Tree or most grocery stores for around $1.

When I was refreshing my memory for how to make these Ranch Oyster Crackers, I came across this version at Peas and Thank You. I liked the idea of not using store bought ranch mix, so I tried this one out.

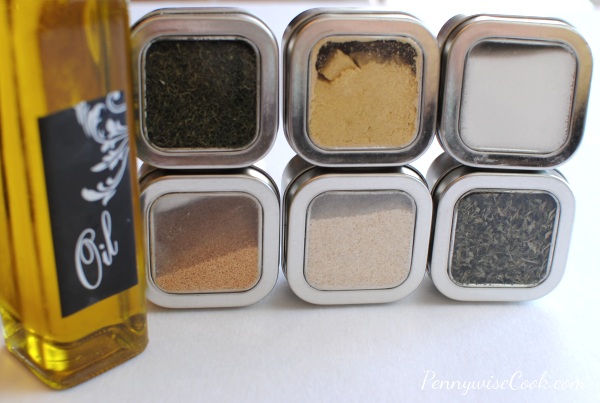
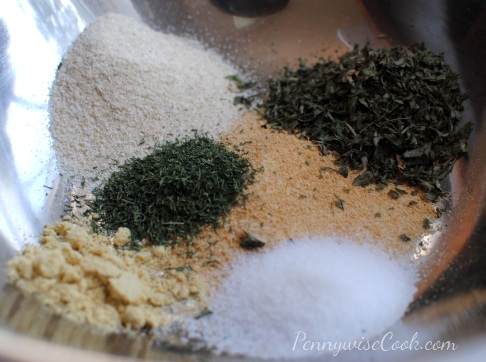
It starts out with 6 different spices: garlic powder, onion powder, dried mustard, dill, dried parsley, and salt. You don’t have to use these. You are more than welcome to use whichever spices you have on hand or think might be tasty. These are a great starting point.

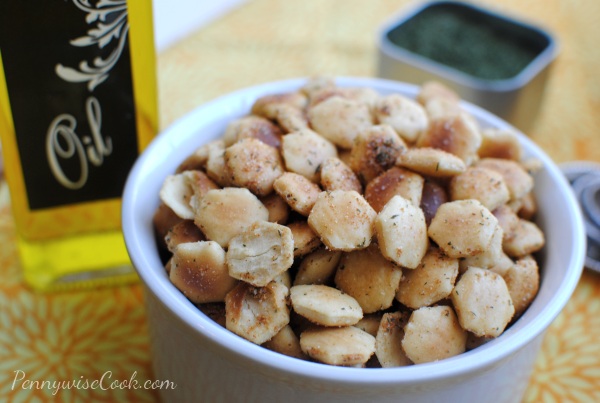
Pop them into a bowl and they will look pretty and earthy like this.

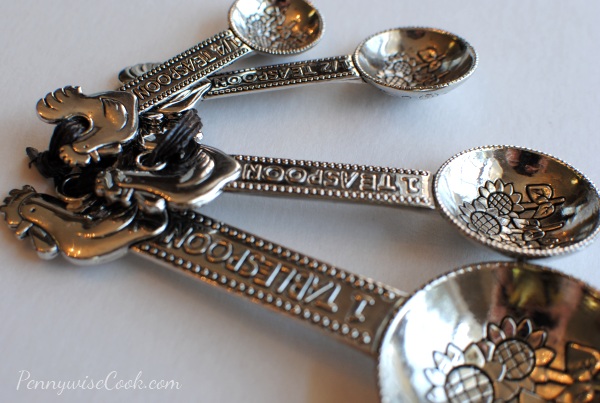
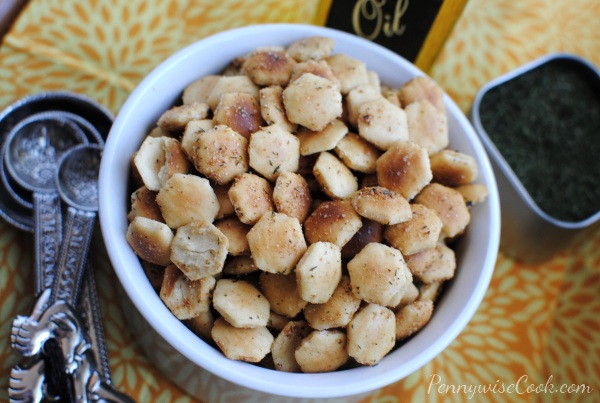
Do you have a favorite kitchen gadget? Maybe one spoon or pan that you love and use more than another? These are my favorite measuring spoons. Since I was using them to measure out all of those spices, I had to stop and take a picture of them. I just love ’em.

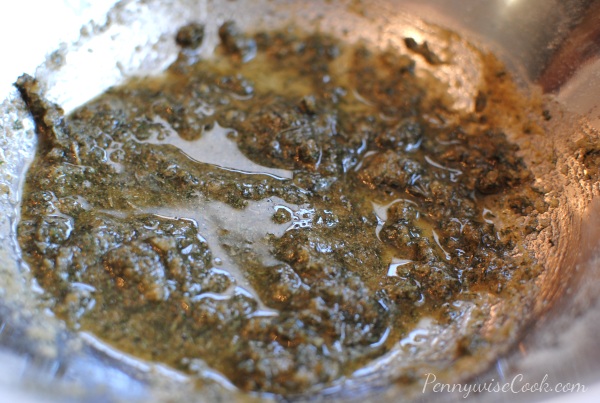
Back to the recipe. So you add some olive oil to the spices and mix them up. This is a part of the recipe that I might change the next time that I make it. See the notes for why.

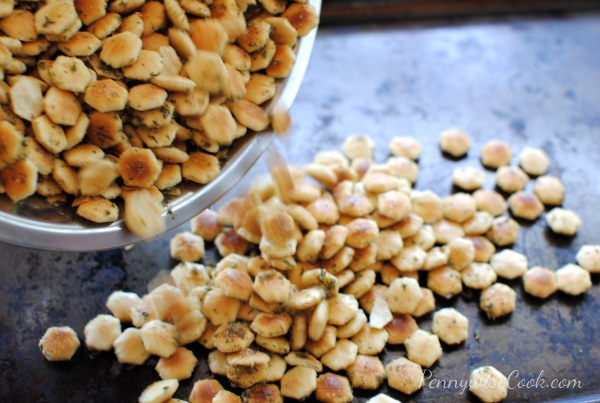
Then you mix the oyster crackers into the spices and oil mixture. Pour them evenly onto a baking sheet. Don’t stare at my baking sheet! It’s really old. Bake them to toast them up and help the spices bake in.

What are the magic words? Tah-dah!

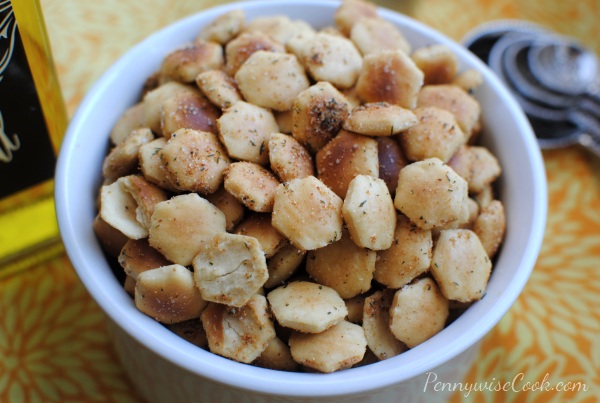
Your spices and oil have transformed oyster crackers into a flavorful and tasty snack.

Ranch Oyster Crackers

Ranch Oyster Crackers

Spice up those cute little oyster crackers with the flavor of ranch! So easy and cheap and makes the best snack.

Ingredients

  • 2 Tsp. Garlic Powder
  • 2 Tsp. Onion Powder
  • 1/2 Tsp. Dry Mustard
  • 1/2 Tsp. Dry Dill
  • 2 Tsp. Dry Parsley
  • 1 Tsp. Salt
  • 3 Tbsp Oil (Canola, Olive, Grapeseed etc.)
  • 8 oz Package Oyster Crackers

Method

  1. Preheat oven to 250 degrees.
  2. In a large bowl, combine dried spices. Stir in oil and mix well.
  3. Stir in oyster crackers and toss to coat.
  4. Transfer the crackers to a baking sheet.
  5. Bake for 10 minutes, then turn and bake another 10 minutes for a total of 20 minutes.

Notes

I liked these, however the powerful garlic taste was a bit much. I think I will be using only 1 tsp of both onion and garlic powder next time. I think I'll also only use 1 tsp of parsley next time as well.

I would recommend tossing the crackers in the oil FIRST and then tossing the crackers in each of the spices separately. Mixing spices in the oil makes for a pasty-like texture which can cake onto the crackers. The oil coating would help the spices stick better to the crackers. Just FYI and something that I noted.

http://www.pennywisecook.com/ranch-oyster-crackers/


Like this post? SHARE it!

Related Posts Plugin for WordPress, Blogger...

Rice Krispie Treat Speckled Eggs

I do apologize for having the same exact little image at the top of all the posts this week. But I made it and it’s cute. So there. But really, isn’t it festive? Kinda like all of these sweets this week, aren’t they just yummy!

I was just telling someone the other day that one of the best parts of having a food blog is that you get to eat all of the goodies. On the other hand, the worst part of having a food blog is that you eat all of the goodies. I saw something recently that said, “I like running. I like running because I like dessert.” That’s me! And just as much as I’m running to work the dessert off, I’m running back home to eat more.

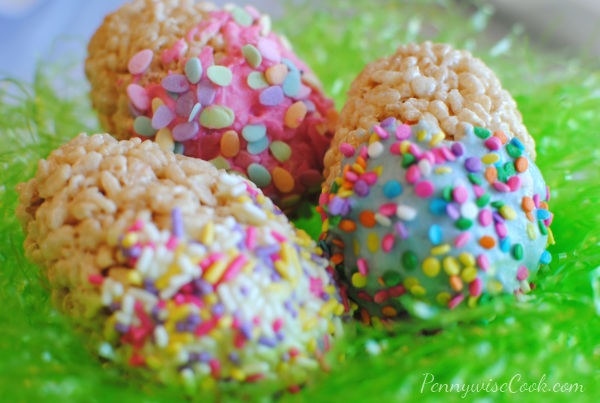
To continue Easter Treats Week I’ve got a pretty familiar treat for you. Rice krispie treats. They aren’t usually an Easter treat, but with a little imagination (and sprinkles) you can turn them into morsels that are fit to sit next to your Easter ham.

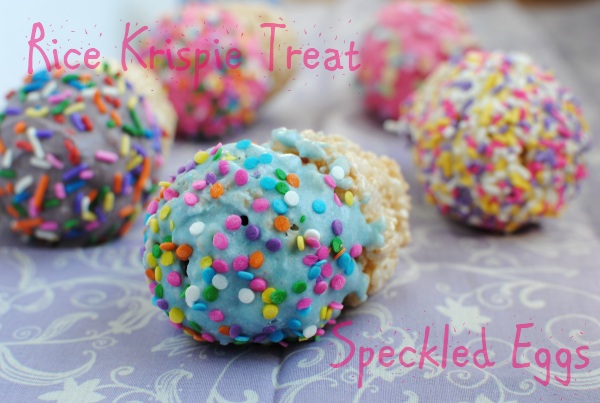
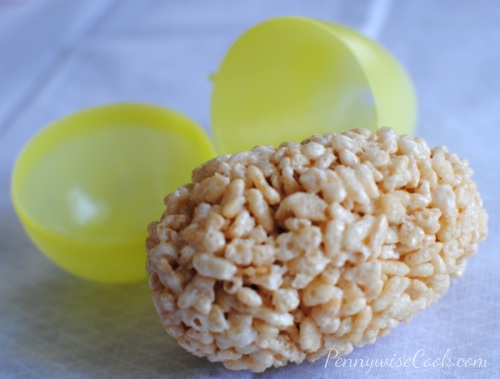
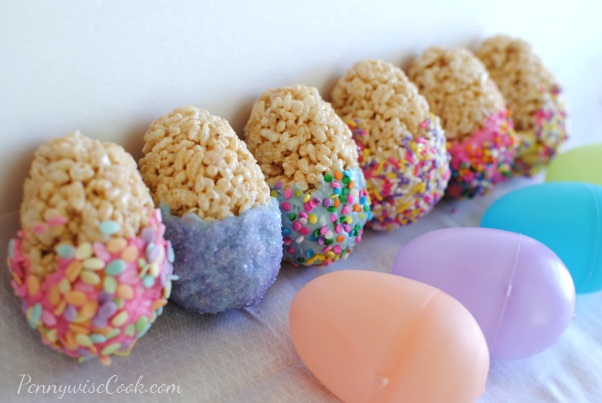
It really is a simple as making your favorite rice krispie treat recipe (I’ve got one for you below) and then before it sets, shoving them into the middle of a large plastic egg to mold. Pop it out and VOILA! You have a treat in the shape of an egg. And at this point, you could just eat it like that or you can doll them up and go sprinkle crazy like we did.

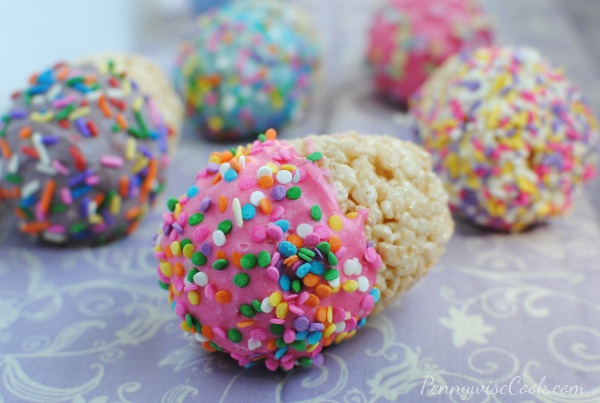
We tried out a few different varieties and combinations of colors and sprinkles on our eggs. I think the favorite turned out to be the pink chocolate coating with colorful decoration. Although it was hard to tell.

Just about every egg that we made, Addie wanted to eat right then and there. But you know, I couldn’t let her eat them yet because I had to take pictures for you. That’s how the cookie crumbles around here. Nobody eats until mommy gets her pictures! Kinda sad really, but you wouldn’t want pictures of an empty plate would you? Nah.

We used the white candy coating bark to make these and used food coloring to make our colors. You can feel free to use white chocolate chips or candy melts if you prefer. It would all taste just as yummy. As for decoration, the sky is the limit! Sprinkles, colored sugars, cookie crumbs, whatever you’d like. We didn’t completely cover ours in the candy bark because I was trying to cut down on mess. If you’re using sprinkles, you can’t exactly avoid a mess, but be prepared to sweep!

Rice Krispie Treat Speckled Eggs

Rice Krispie Treat Speckled Eggs

Make your favorite every day treat into your favorite Easter time snack with these Rice Krispie Treat Speckled Eggs.

Ingredients

  • 3 Tbsp Butter
  • 4 Cups Mini Marshmallows
  • 6 Cups Krispy Rice Cereal
  • Candy Coating Bark or Candy Melts/White Chocolate Chips
  • Sprinkles
  • Large Plastic Egg (for molding)
  • Cooking Spray

Method

  1. In a large saucepan, melt butter over low heat. Stir in marshmallows and until melted. Remove from heat.
  2. Add the Rice Krispies and stir until well coated.
  3. Spray inside of plastic egg and yours hands with cooking spray. Mold even amounts of the egg into the egg. Let sit for a little bit to help them set a bit.
  4. Melt candy bark according to package or in microwave.
  5. Dip the eggs in the candy coating and then sprinkle them with sprinkles. Let cool and serve.
http://www.pennywisecook.com/rice-krispie-treat-speckled-eggs/


Like this post? SHARE it!

Related Posts Plugin for WordPress, Blogger...

Peeps in Sprinkle Tutus

I must say that Easter is usually my weakness when it comes to candy. Yes I do love Halloween candy, but jelly beans aren’t around when it spooky time. I love jelly beans, it doesn’t really matter what kind they are. I especially love the Starburst and Lifesaver jelly beans. I take that back. I do not like the ones that taste like licorice. I usually leave those at the bottom of the bag.

The other day Addie and I were at one of our favorite places, Dollar Tree. We picked up another one of my favorite Easter candy, Peeps! Where are my Peeps fans? Those cute little fluffy marshmallow bunnies and chicks contribute to my sugar highs every Easter. I can’t ever pass them up in the store. It almost doesn’t feel like Easter until I’ve consumed twenty one. A lot of people hate them because they are basically complete sugar, but I have a major sweet tooth.

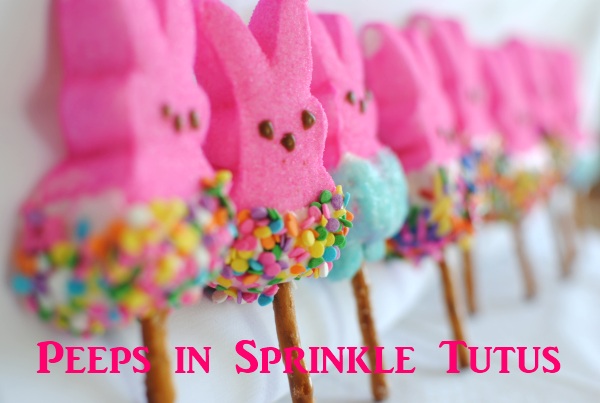
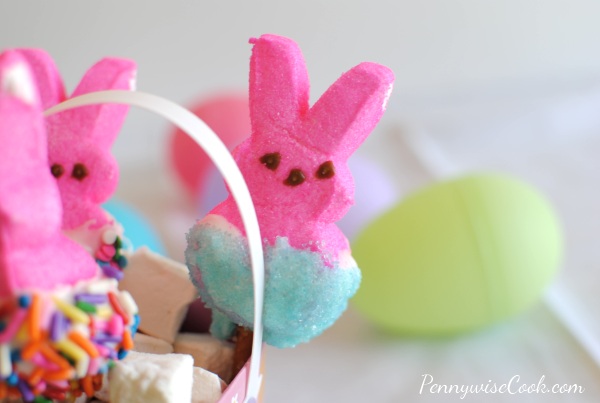
I picked up some of the cutest spring time sprinkles at Aldi the other day for only $2.99. They came with 6 different colors of sprinkles and sugar so we decided to embellish our Peeps Bunnies a little. Yep, that one in focus is totally looking at you. I didn’t even plan that. It’s saying, “I know I look so adorable and delicious, but don’t eat me!

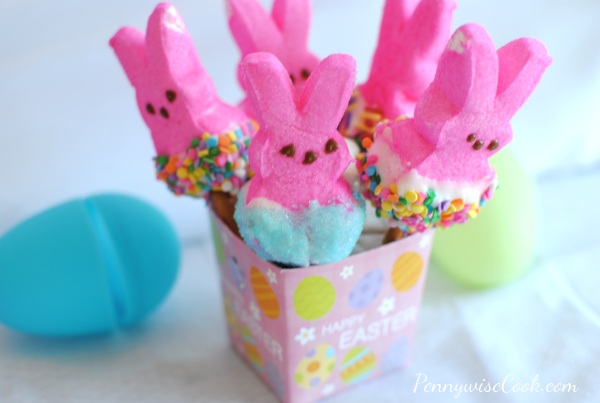
We dipped their little bottoms in a bit of melted white candy bark and then dipped them in sprinkles! Addie exclaimed, “Momma, they are wearing tutus!”. Alas the name- Peeps in Sprinkle Tutus.

We added a pretzel stick for them to stand up on. I put these in a little treat box filled with mini marshmallows that says Happy Easter. It made a nice way to display them. They ended up being the most adorable and colorful Easter treats. And they surely satisfied my insanely ridiculous sweet tooth.

I really love how colorful these are. Sprinkles always add a nice and cheery touch to any food, especially Easter treats!


Like this post? SHARE it!

Related Posts Plugin for WordPress, Blogger...

White Chocolate Pretzel Ducks

Easter Treats Week


What is cuter for Easter than little ducks? Well, besides bunnies of course. While they aren’t always typical Easter animals, they sure do fit in well with the yellow and pastel colors of this holiday.

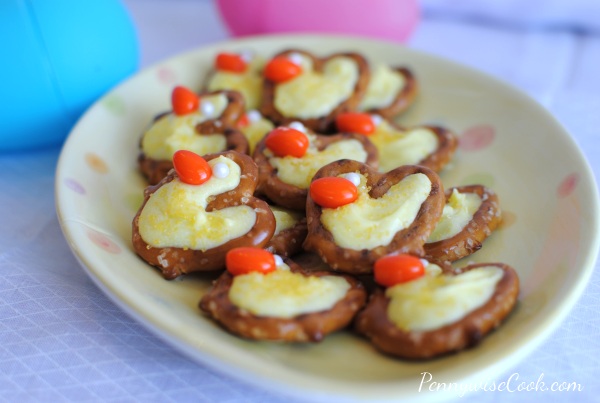
Today’s Easter treat is White Chocolate Pretzel Ducks! Made of simple things like pretzel twists, white chocolate and a couple of sugary embellishments you can create these in little time.

I found this idea over at The Sugar Buzz Pantry and knew that I had to try them out. Boy were they easy! She used a sunflower seed for the beak, but I used an orange mint kinda like a tic tac for mine. I used a sugar pearl for the eyes.

1) Lay out your pretzel twists on a piece of wax paper.

2) Melt white chocolate chips or white candy coating bark in the microwave. If using the white candy bark, I only needed 2 blocks for mine. Tint it yellow (or whatever color you want your ducks).

3) Using a Ziploc bag with the tip snipped off, pipe some chocolate into the holes of the pretzel covering the middle of the pretzel.

4) While still soft, place your eye and beak.

5) Let set until firm.

Or if you’d prefer to just write on your ducks, Amazon carries Wilton Food Writing Markers that have edible colors. Or just get creative with what you have. That’s what I did!


Like this post? SHARE it!

Related Posts Plugin for WordPress, Blogger...

Easter Treats Week: Tootsie Roll Easter Nests

I can’t believe that next Sunday is already Easter. And how about this weather folks? Did we totally skip winter this year? Last year it was so late, so this year it feels quite early. I guess that’s alright, because we get to do Easter crafts! I love the colors of Easter. Spring-y and fun, they just lift spirits and make you smile. So I thought I would do a mini-series this week on cute little treats that you can make at home for Easter! While I do believe in the real meaning of Easter, I do love to indulge in some fun with eggs and bunnies for the kiddos.

These little treats were so easy and turned out so cute. I picked up most of the ingredients for about $3 at Dollar Tree.

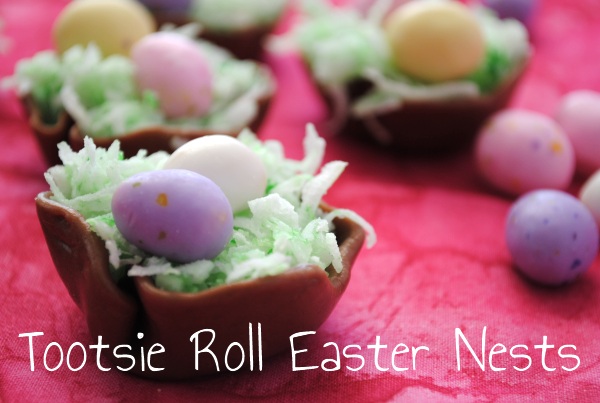
I started out by placing the Tootsie Rolls between two sheets of wax paper. I microwaved them until just soft. You don’t want them to melt otherwise they will be too sticky and you won’t be able to get them off the wax paper.

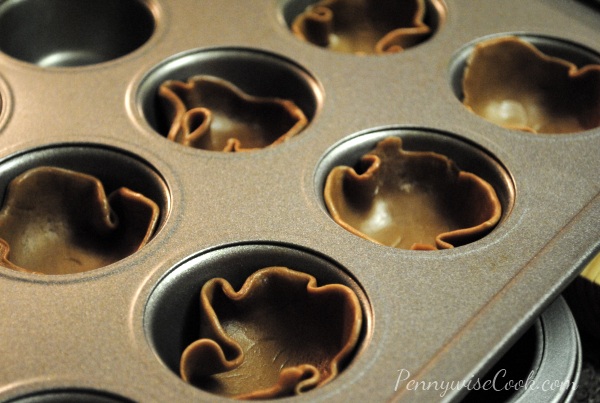
Once they are softened, squish them until fairly thin. Line a mini muffin pan with them and let them ruffle around the edges. I then placed them in the refrigerator for a bit to harden a little.

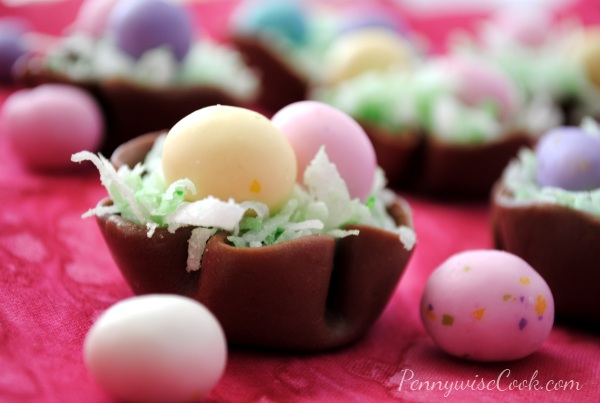
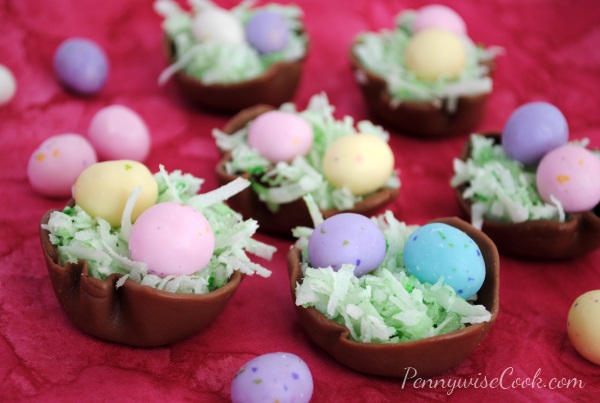
I added a couple of drops of green food coloring to some shredded coconut (bought at Dollar Tree) and plopped a couple of malted milk eggs to the top and tah dah!

After very little effort, you have these little Easter nests that are as tasty as they are cute. I think they would make a nice addition to our Easter egg hunt this year!

Do let me know if you make these!

What are your Easter plans this year?


Like this post? SHARE it!

Related Posts Plugin for WordPress, Blogger...

4 Ingredient Artisan Bread

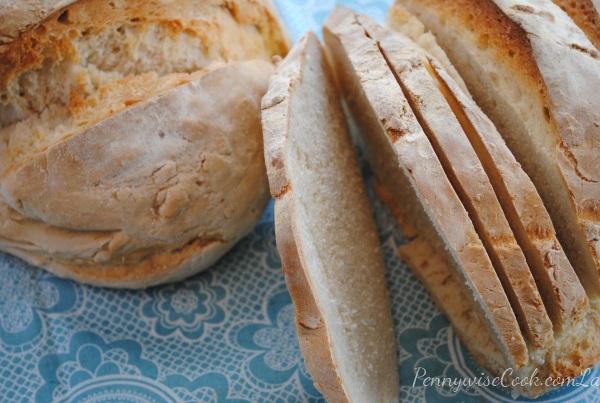
My mom used to have a bread business that she ran out of our home. I remember the smell of fresh bread baking in the oven. It’s the most glorious smell. Not to mention that it tastes amazing too.

I’m not a bread baker, but every now and then I get the itch to make up a loaf. Instead of entertaining the idea of laboring to make it myself, I usually just buy a fresh made loaf at my local grocery store’s bakery counter. Not this time. I became a bread warrior on a random Tuesday afternoon and decided it was time.

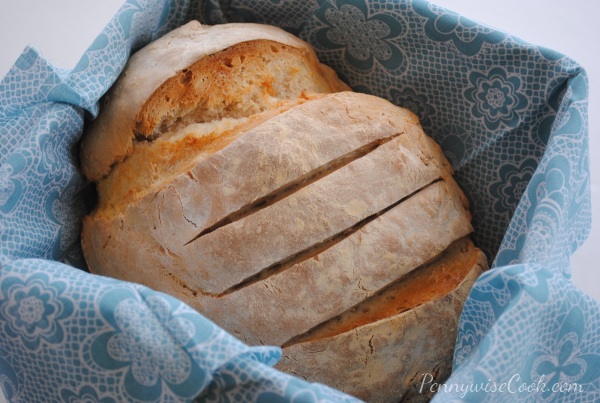
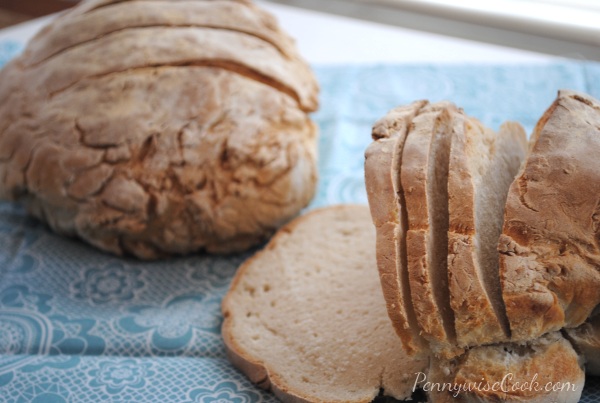
This 4 Ingredient Artisan Bread recipe was super easy, especially with my KitchenAid mixer and dough hook. Love that thing! The “labor” wasn’t near as bad as I would have expected with homemade bread. The waiting for the rising was the worst part, but I have kiddos that keep me occupied so I survived the waiting.

This bread made the perfect complement to our warm meal that night. It made two loaves and I shared the other with our neighbor.

Recipe thanks to JoCooks!

4 Ingredient Artisan Bread

4 Ingredient Artisan Bread

This easy recipe is great for making a nice crusty bread for soup!

Ingredients

  • 3 cups of lukewarm water
  • 1 1/2 tbsp active dry yeast
  • 1 1/2 tbsp salt
  • 6 1/2 cups all purpose flour

Method

  1. In a medium bowl add the warm water, salt and yeast and stir together.
  2. In the bowl of your mixer add all the flour, then pour the yeast mixture over the flour and mix using the dough hook of your mixer, until it’s all well incorporated.
  3. Place the dough in a large plastic container, it needs room to rise, and put the lid on it, but do not close completely, there needs to be one corner left open to let the gases escape. You could also use a large bowl, covered well with plastic wrap and poke a couple small holes in the top using toothpicks.
  4. Let the dough rise for 2 hours.
  5. The dough will be very sticky and elastic. It is recommended to bake this on a stone, however a regular baking sheet will work just fine. Cover the baking sheet, or stone with parchment paper.
  6. Add some flour to your hands, and divide the dough in two pieces. Add more flour to your hands as necessary. Shape the dough into the desired shape for your bread and place it seam down on the baking sheet. Sprinkle some more flour on top of the loaves. Let the loaves rest for another 30 minutes so that they can rise a bit.
  7. Preheat oven to 450 F degrees. Before placing the bread in the oven, add a pan with a cup of water and place it in the bottom rack. Slash the top of your bread, to allow gases to escape.
  8. Bake for 30 to 35 minutes. The water will allow for the bread to form a nice crusty top.
  9. Cool before serving.
http://www.pennywisecook.com/4-ingredient-artisan-bread/

Save on the ingredients in this recipe:

  • $0.40/1 Fleischmann’s Yeast, exp. 4/8/12 (SS 12/04/11)
  • $0.40/1 Fleischmann’s Yeast, exp. 4/15/12 (SS 11/06/11)
  • $1/1 Ultragrain All-Purpose Flour with Whole Grain, exp. 4/30/12 (SS 11/06/11 R)

Like this post? SHARE it!

Related Posts Plugin for WordPress, Blogger...

Fun with Stuff that Jiggles

You know what I’m talking about!

One of my favorite snacks of all time is Jell-O. It brings me back to childhood and always reminds me of Jigglers no matter what shape it’s in. Though we don’t make it nearly as much as we should, it’s one of those snacks that takes time therefore we often pass it up. It’s silly since there is a speedy method, but we’re impatient.

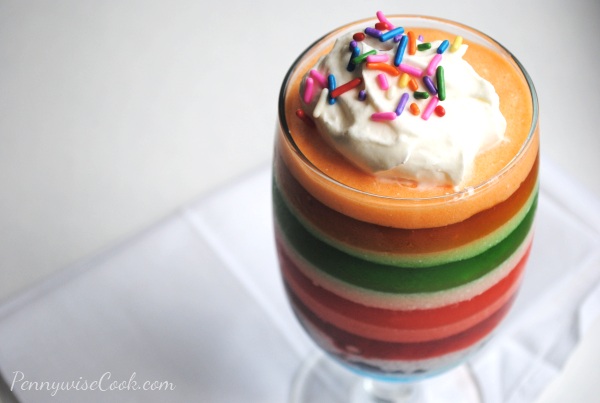
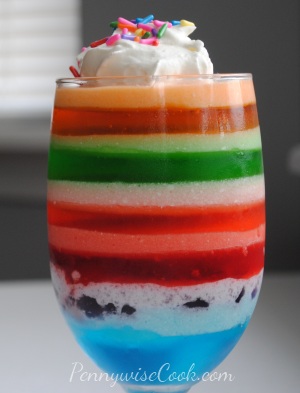
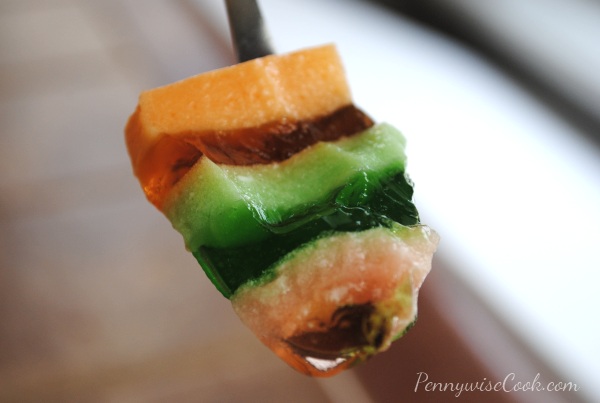
As you may know, I’ve been on Pinterest. I can’t get away from that place. Someone really needs to put some type of timer on there for how long you can be on it per day. Or maybe I just need to have self control….. Nah, that’s an awful idea. 🙂 I came across this rainbow Jell-O over at Glorious Treats and immediately thought of my Addie. She is all about rainbows and bright colors so this was perfect for a mother-daughter project. We are still novices at these treats so ours didn’t turn out as perfect as Glorious Treats did. But we’ll get better. Addie will make sure of it!

I’m not going to lie, it took some time. Each layer has to set before the next can be applied. Even with the speedy method it seemed to take a while. You see the bottom layer there? Where the purple kinda stepped into the blue’s kool-aid? Yep. That’s where we got a little impatient. As we went on you can see that we learned out lesson and to make sure they set properly before moving on.

When picking out your Jell-O, there aren’t as many flavor options in sugar-free. So you’ll have to get a little crazy and get the kind full of sugar in order to have pretty colors. Unless your store is just a lot cooler than mine and they have a lot of sugar-free flavors.

I will tell you, the regular Jell-O didn’t set as fast or as well as the sugar-free. The blue and purple in that picture were regular and needed a lot more time that the others. Just FYI.

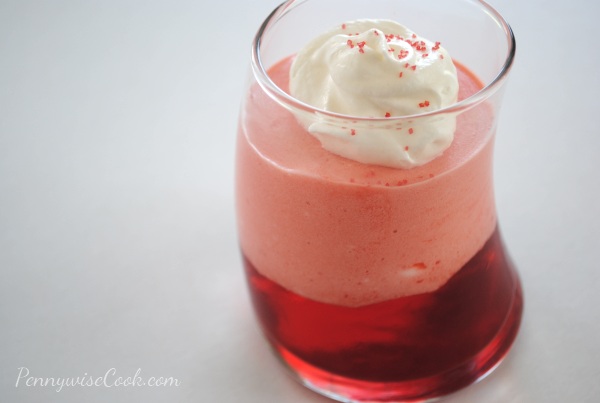
With some of the leftover red that we had, I made up this little parfait. The lighter color is simply already made Jell-O with a little cool whip stirred in. This was such a refreshing treat! I think my most favorite part of these snacks is that they are sweet and satisfy my craving for something sweet. Yet all the while they are low calorie and healthy! But don’t tell the kiddos.

How about making some JellO Treats of your own?

Fun with Stuff that Jiggles

Fun with Stuff that Jiggles

Springtime is here! Celebrate the beautiful colors blooming with this colorful way to make Jell-O!

Ingredients

  • 1 (small) Box of Jell-O for how many colors you'd like to make
  • 1 Tub of Cool Whip
  • Glasses to pour Jell-O into (I'd say at least 3)

Method

  1. Prepare your first flavor according to the speedy method on the package. Pour a little into the bottom of each glass. Divide it among however many glasses you have. Leave about 1/3 of it to combine with cool whip.
  2. Place those glasses in the refrigerator to set. Meanwhile mix 1/4- 1/3 cup cool whip with the leftover Jell-O. When glasses in the refrigerator have set most of the way, pour a little of the cool whip Jell-O into each of those glasses.
  3. Continue this method until you have used all of your colors.
  4. You can add a dollop of cool whip to the top and sprinkles if you'd like!

Notes

Like I said before, I'd recommend only using sugar-free Jell-O. Just make sure that you don't rush it. They each need time to set to look pretty 🙂

If you are extremely impatient you can place it in the freezer to get it to set a little faster. We did this with a couple of the flavors. Just note that it sets really fast.

http://www.pennywisecook.com/fun-with-stuff-that-jiggles/


Like this post? SHARE it!

Related Posts Plugin for WordPress, Blogger...