Marshmallow Glazed Oatmeal Muffins

It’s Friday the 13th! Who is up for a Jason marathon? Not me, but the thought sounded fun anyways. πŸ™‚

I always have good intentions, don’t you? It’s funny how things can sometimes work out completely different than you really intend them to. For instance, some days I plan my entire day around cleaning the house. The perfect example of a good intention. And then some unforeseen, crazy, busyness takes over and the dishes pile up while the laundry remains unfolded. But I take comfort in knowing that I really did plan on making my house spotless…. That is, until I can’t see my floor because it’s covered in toys.

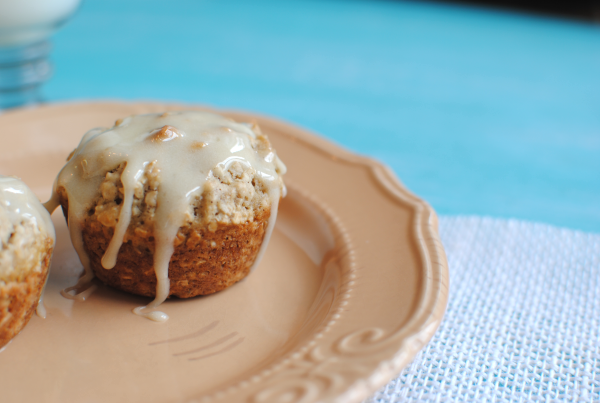
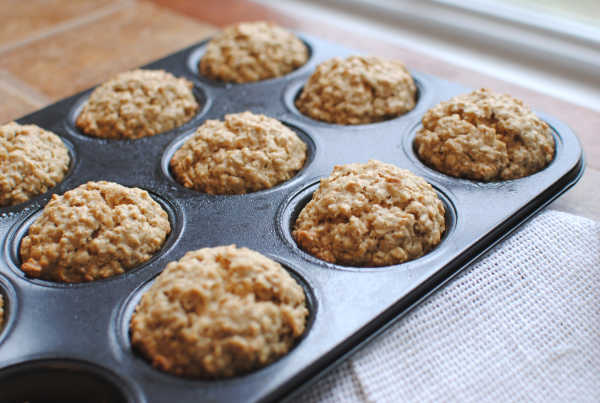
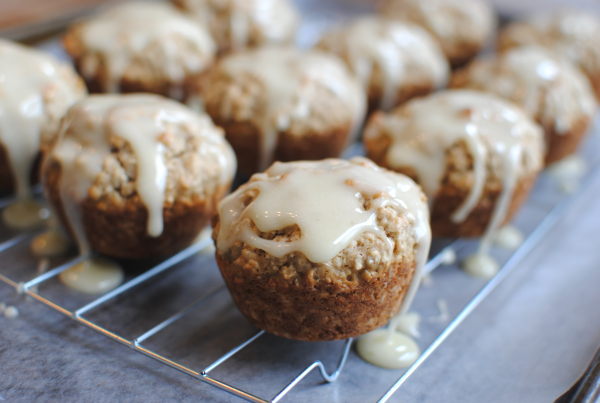
My first intention for this recipe today was to make homemade oatmeal cream pies. And then my second intention was to make oatmeal cream pie cupcakes. They eventually turned into more of a muffin and instead of the everyday marshmallow cream filling, I decided to glaze them. Though they ended up completely different than what I had intended, I must say that they are fabulous just the same!

It might just be impossible to dislike oatmeal muffins. Even those who don’t like oatmeal usually like oatmeal muffins. And if they don’t then they are really missing out my friends. They are dense (the muffins, not the people who dislike them) and yet still so cakey and muffiny. You like those words there don’t you?

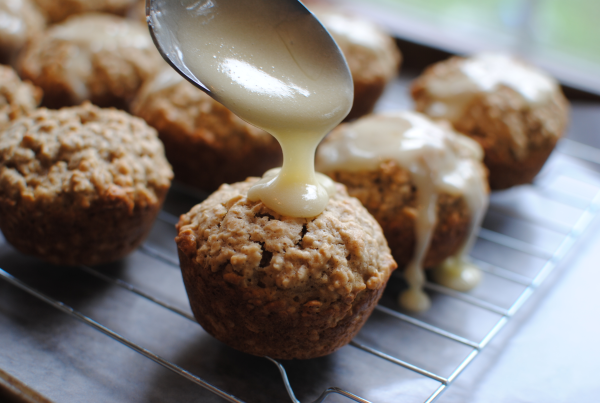
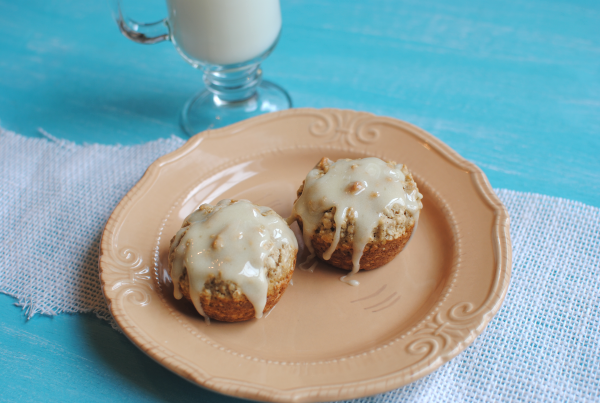
Believe it or not, these are actually not that bad calorie-wise. I did what I could to create them with low calorie ingredients, including the glaze. So you won’t have to feel too bad for inhaling a few. The glaze firms up a bit and starts to get back to it’s marshmallow form after they have sat for a bit. My Addie kept laughing because she would get a marshmallow mustache after taking bites.

Just perfect for breakfast or perhaps a brunch, they do have a certain oatmeal cream pie-esqe taste to them. They definitely satisfy my sweet tooth and yet are so filling that I don’t need anything else for breakfast. Except for MILK. You will need milk for sure.

So how do you think my intentions turned out?

Question of the day: Can you count how many times I used any variation of the word intention in this post?

Marshmallow Glazed Oatmeal Muffins
Recipe Type: Breakfast
Author: Pennywise Cook
Prep time: 10 mins
Cook time: 13 mins
Total time: 23 mins
Serves: 11
This muffin recipe intended to mimic oatmeal cream pies takes the famous snack to a whole new level.
Ingredients
  • For the Oatmeal Muffins
  • 6 tbsp butter (I use Blue Bonnet Light)
  • 1/4 c. Unsweetened Applesauce
  • 1/2 c. Brown Sugar
  • 1/2 c. Granulated Sugar
  • 3 Egg Whites
  • 1 Tsp Vanilla
  • 1 and 1/2 c. all-purpose flour
  • 1 Tsp Baking Soda
  • 1/2 Tsp Cinnamon
  • 1/2 Tsp Salt
  • 2 Cups Oats (Quick Cooking)
  • For the Marshmallow Glaze
  • 2 c. Marshmallows (big or little)
  • 2 Tbsp Skim Milk
  • 2 Tbsp butter
  • 1/4 c. Powdered Sugar
Instructions
  1. Preheat oven to 350 degrees. Cream together butter, sugars, and applesauce. Add in egg whites and vanilla.
  2. Sift flour, baking soda, cinnamon and salt together. Slowly add to sugar mixture and beat until combined.
  3. Stir in the oats. Using an ice cream scoop, scoop equal amounts into greased muffin tin.
  4. Bake 13 minutes or until golden brown.
  5. Meanwhile, in a saucepan place the butter, skim milk and marshmallows and cook over medium heat stirring constantly. Once the marshmallows are completely melted and smooth, stir in the powdered sugar.
  6. Remove muffins from oven and place on cooling rack with wax paper underneath. Carefully glaze each muffin and allow to cool.
Notes

This recipe will make about 11 muffins, maybe 12 if you make your batter go further.


Like this post? SHARE it!

Related Posts Plugin for WordPress, Blogger...

Peanut Butter and Jelly Rolls

As I sit here and listen to the sirens heading all over the city, I can’t help but be thankful that the 4th is over. No rain for what seems like forever and fires popping up everywhere. Fireworks are the last thing that we need right now for sure. Our city did a big display which was really great this year. I’m fortunate to have a front row seat from our driveway. It was a great show! I hope that you’ve had a fantastic 4th.

There are times when I balance a diaper bag, a 13 month old, a 5 year old, and a buggy all at the same time. I can cook dinner and make a sippie cup while tying a shoe, simultaneously. You may know exactly what I’m talking about if you’re a supermom like I am. Go ahead, accept that title and wear it proud.

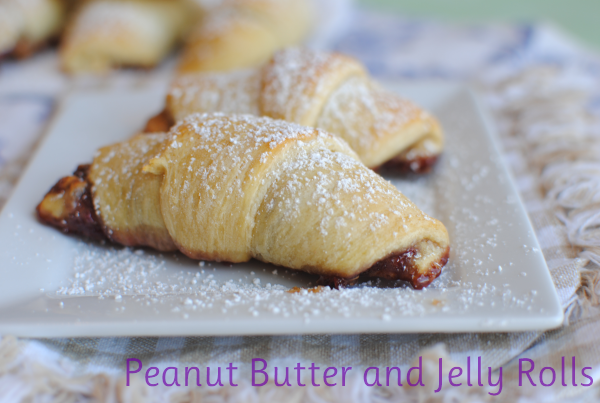
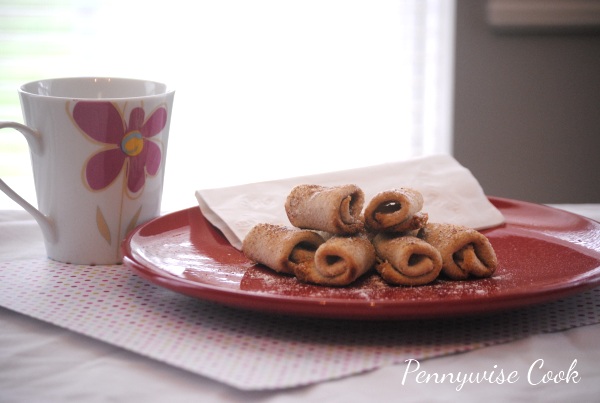
Another way to confirm your supermom status is to make some of these Peanut Butter and Jelly Rolls. I know the name is kinda lame. I couldn’t think of much more creative to be honest. It’s a crescent roll filled with peanut butter and jelly. How creative can you really get with that?

While these may seem extremely simple, which they are, they are also extremely incredible to kids. It’s like 2 of the best things on earth coming together to make the perfect snack. Warm and toasty crescent rolls filled with ooey gooey peanut butter and jelly. I like to call this one of those “duh” things. Like duh, why didn’t I think of that!

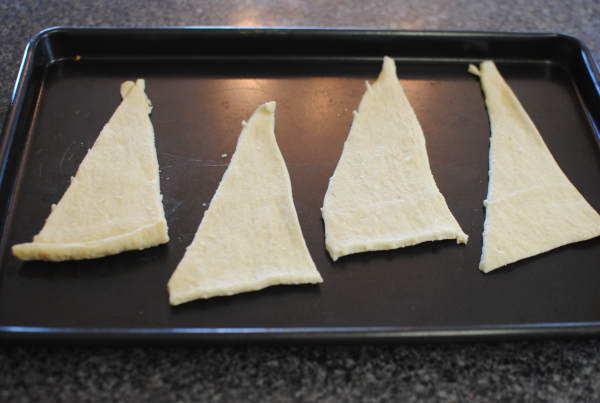
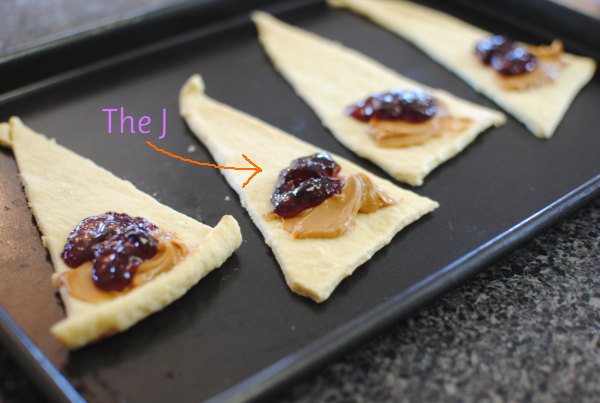
Start off with your cute little crescent roll triangles like so.

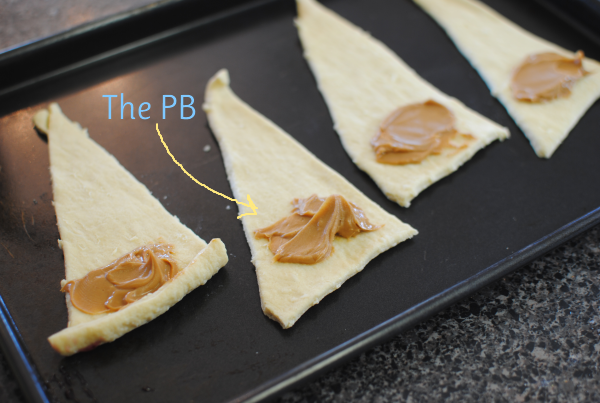
Drop a teaspoon full of peanut butter onto each triangle.

Then drop a teaspoonful of jelly (your favorite kind!) onto the peanut butter.

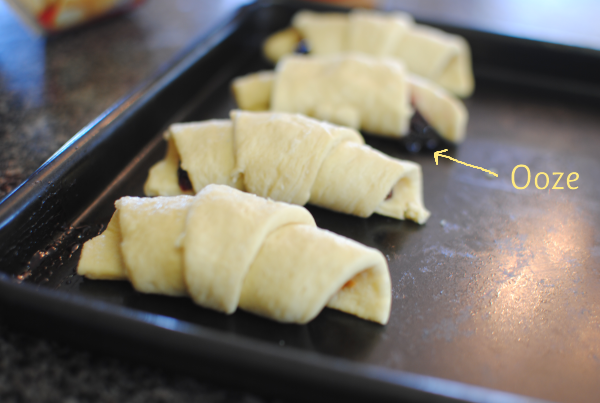
Then you just roooooooooll the suckers up going from the large end to the small end. Place the point side down. You might end up with some ooze, but that’s alright. A little mess never hurt anyone.

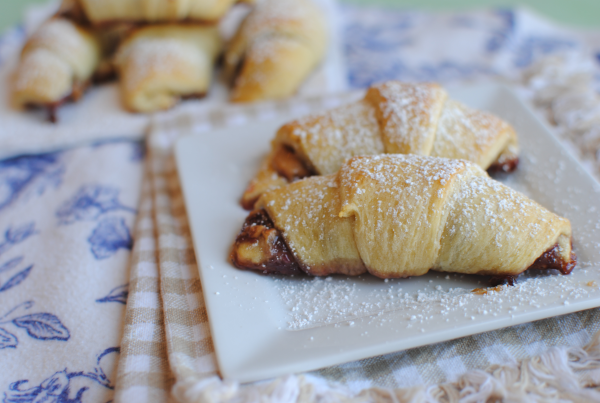
Dust your rolls with a little powdered sugar and serve! These also freeze well too.

I love when they have a sale on Pillsbury Crescent Rolls so I can stock up for snacks like these. You can usually find some good coupons for Pillsbury Crescent Rolls here.

Peanut Butter and Jelly Rolls
Recipe Type: Snack
Author: Pennywise Cook
A simple yet tasty treat with peanut butter and jelly. Your child will love it!
Ingredients
  • 1 Package Crescent Rolls (8 ct)
  • 8 Tsp Peanut Butter
  • 8 Tsp Jelly (Your favorite Flavor)
  • Powdered Sugar for Dusting
Instructions
  1. Preheat oven to degree listed on crescent roll package.
  2. Roll out dough into 8 triangles. Place teaspoon each of peanut butter and jelly on the big part of each triangle.
  3. Roll starting with the bigger end towards the smaller.
  4. Bake 5-8 minutes or until the tops begin to brown. Let cool.
  5. Dust with powdered sugar if preferred.

Like this post? SHARE it!

Related Posts Plugin for WordPress, Blogger...

Chocolate Gravy

Some recipes come from the back of a can. Others are found in a favorite cookbook. You can even find some pretty amazing recipes just by Googling it. But some of the very best recipes in life are found passed down from relative to relative. You know the ones that are tried and true and your great grandma spent her time perfecting. These are some of the best recipes known to man.
My mom recently whipped up a very tasty concoction that apparently has been made by our family for years. And yet, I had never even tried it!
This isn’t just any concoction either.

We’re talking….

Chocolate. Gravy.

Yes it does exist and I was never told about this until just recently. My sweet grandma just published a book about her life (very interesting read!) and she even talks about this chocolate gravy on her book. So needless to say, I had to make some of this famous chocolate gravy.


Turns out that this recipe was created by my great aunt Janice! It has been a hit for years and she’s the lady behind the chocolate. She also created a chocolate pie that I’ll be trying out real soon.
I’m not going to lie to you. I screwed up this recipe the first time I tried it. Thinking that I would get all smart, I started with milk and butter and added in the flour mixture. Why did I do that? I have no idea. Everyone knows that any rue starts with butter, you add in flour and THEN the milk. After coming to my senses, it turned out perfect. Being me, I also reduced the amount of sugar from 2 cups to 1/2 cup and it still turned out plenty sweet.

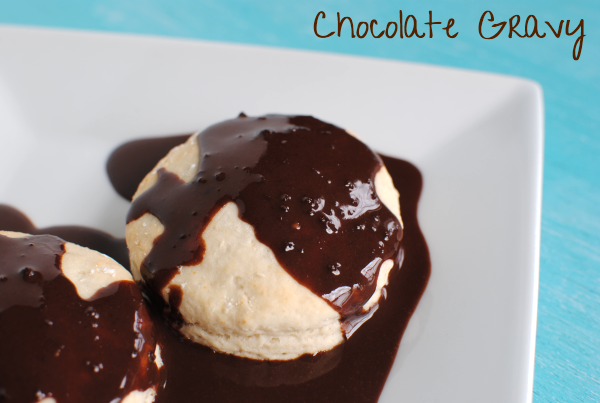
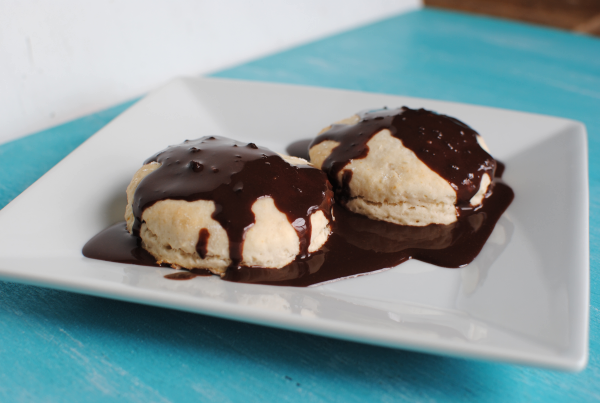
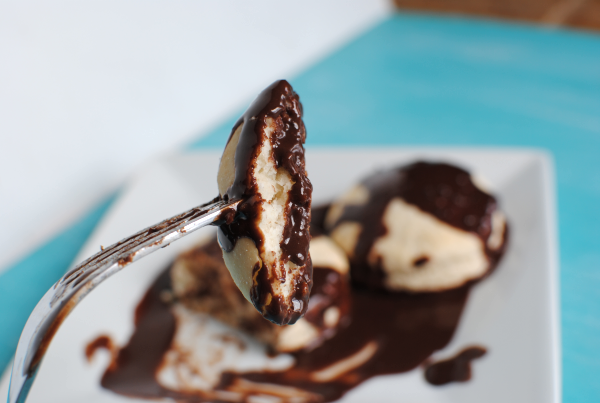
My hat is off to great aunt Janice! This gravy is the perfect chocolatey complement to a couple of morning biscuits. Or perhaps to a bowl of ice cream. Anything that you want to chocolatize really. I loves it on biscuits and I think it would make an awesome topping for cinnamon rolls instead of glaze.
Interested in trying out this spectacular chocolate gravy? Find the recipe below!

Chocolate Gravy

Chocolate Gravy

Biscuits and CHOCOLATE gravy for breakfast!

Ingredients

  • 1/2 c. Sugar
  • 6 Tbsp Cocoa
  • Dash of Salt
  • 1/4 c. Flour
  • 1/2 c. Milk
  • 2 Tbsp Butter

Method

  1. Mix all dry ingredients together in a medium size bowl.
  2. Melt butter in a small saucepan over medium heat. Slowly stir in cocoa/flour mixture.
  3. Slowly stir in milk and simmer over medium heat for 2-3 until combined.
  4. Remove from heat and gravy will thicken as it stands.

Notes

This makes a great topping for cupcakes, fruit, biscuits, and even ice cream.

http://www.pennywisecook.com/chocolate-gravy/


Like this post? SHARE it!

Related Posts Plugin for WordPress, Blogger...

Easy Sausage and Cheese Biscuits

It was a busy weekend here. Hence the lack of the DIY and kitchen tip for you. I had the most amazing craft to share with you, but I have been so exhausted that every free moment has been used just plain sitting. You know how those weekends go. Today’s recipe is one that can practically save breakfast on days just as I described.

While it’s fairly simple to prepare a bowl of Froot Loops in the morning, it’s not always filling. The sugary cereal usually makes my oldest hungry within about 20 minutes. Looking for some freezer breakfast ideas the other night I ended up settling on a biscuit idea that I was sure would satisfy and kick start the mornings will something yummy.

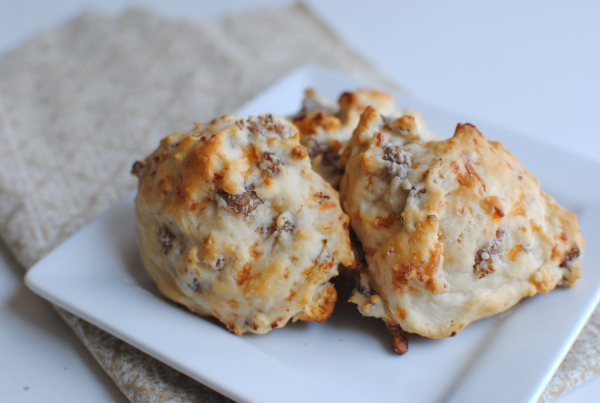
Biscuits packed with meaty sausage and cheese.

I could’ve gone to my mom and gotten a family recipe for special biscuits. I could’ve gone to Google for a tasty biscuit recipe that was effortless. But to be honest with you, I ended up using the recipe for drop biscuits on the back of my off-brand Bisquik box and just adding what I wanted to it!

They turned out absolutely perfect. So simple, yet so tasty. My favorite kind of recipes!

These make the perfect freezer breakfast on the go! Or just on a lazy morning when you don’t feel like making anything. That just so happens to be most mornings around here. Especially lately because Britton has decided that she is an early bird. I’m not yet used to such early mornings just yet, but it’s good to know that I have something like these biscuits to just pop in the microwave for a quick bite for breakfast.

Easy Sausage and Cheese Biscuits

Easy Sausage and Cheese Biscuits

Adding hearty ingredients like sausage and cheese to an everyday biscuit make a great kick start to your morning!

Ingredients

  • 2 1/4 c. Bisquik Baking Mix
  • 2/3 c. Milk
  • 1 lb Turkey Breakfast Sausage
  • 3/4 c. Shredded Cheddar Cheese
  • 1 1/2 tsp garlic, minced

Method

  1. Preheat oven to 450 degrees.
  2. Mix all ingredients in a medium bowl until combined.
  3. Drop dough by the teaspoonful onto a lightly-greased baking sheet.
  4. Bake for 8-10 minutes or until golden brown.

Notes

To freeze, let cool completely then place in a ziploc or freezer bag. To thaw, pop in the microwave for around 5 seconds.

http://www.pennywisecook.com/easy-sausage-and-cheese-biscuits/


Like this post? SHARE it!

Related Posts Plugin for WordPress, Blogger...

Simple Omelet Muffins

Even on the weekends, we’re not big breakfast people around here. Yes I know it’s the most important meal of the day, but the morning is also the most important time of day (especially on the weekends) to be lazy! I’d rather cook a big breakfast for dinner than get up and slave in the morning. Yes I would consider pouring a bowl of Cap ‘N Crunch slaving too! πŸ™‚

However, I saw something on Pinterest a while back that really sparked my interest. It was for “Eggs Baked in Ham Cups“. We just kinda adapted it to our liking. I like my omelets scrambled with lots of yummy sausage and bacon and cheese!

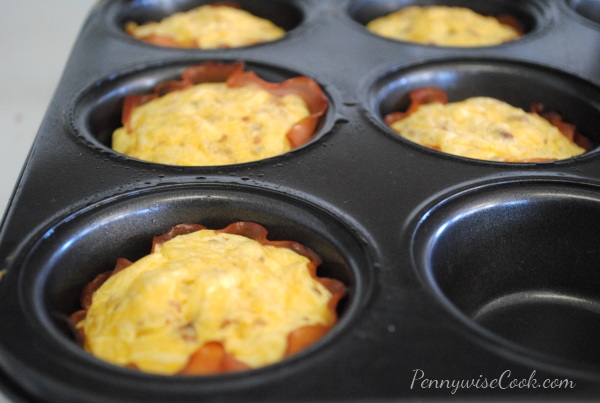
Place your slices of lunchmeat into the muffin tin along with your favorite egg fixin’s and you’ve got an omelet muffin. Super yummy and my favorite part- cheap! I found the smaller packages of smoked turkey breast (and other types) at Kroger for around $.97. These would make such great little additions to a fancy brunch.

You can add or take away whatever you’d like when putting together your omelet muffins, but I’ll share how I made mine in case you need the inspiration.

Simple Omelet Muffins

Simple Omelet Muffins

A simple way to change up your morning omelet by making it a muffin.

Ingredients

  • 12 Slices Lunch meat (Ham or Turkey are great)
  • 4 Eggs (beaten)
  • Chopped Bacon or Bacon Bits
  • 3-4 Links Sausage, Cooked and Crumbled
  • 1/4 c. Shredded Cheddar Cheese

Method

  1. Preheat the oven to 375 degrees. Spray your muffin pan with nonstick cooking spray.
  2. Place a piece of lunch meat into the muffin cups. Let them ruffle up around the edges.
  3. Fill each cup with equal amounts of beaten egg, followed by equal amounts of bacon bits, sausage, and cheese.
  4. Bake for around 15 minutes until your eggs are firm.
http://www.pennywisecook.com/simple-omelet-muffins/


Like this post? SHARE it!

Related Posts Plugin for WordPress, Blogger...

Mini White Bread Cinnamon Rolls

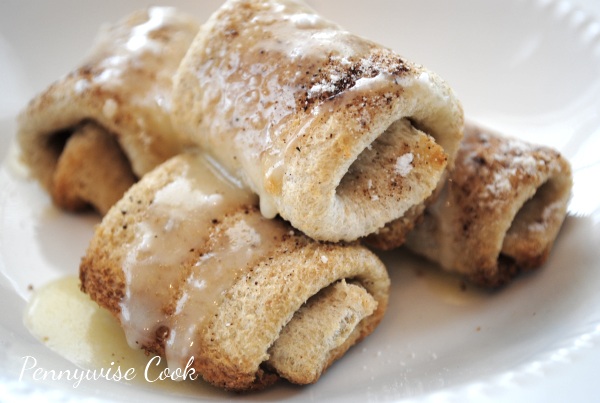
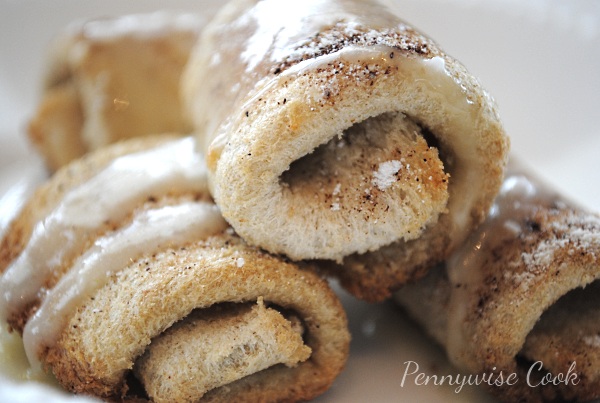
So who knew that the best thing since sliced bread would be itself? I really love finding ways to use things that I already have around my house to make easy and awesome snacks. I would totally put these into the awesome category. I mean they are cinnamon rolls made from regular old plain jane white bread. Before you get too excited, just note that these aren’t as magnificent as Grands!, they are small and dainty. But they will definitely suffice in a pinch and make the kiddos just as happy for sure.

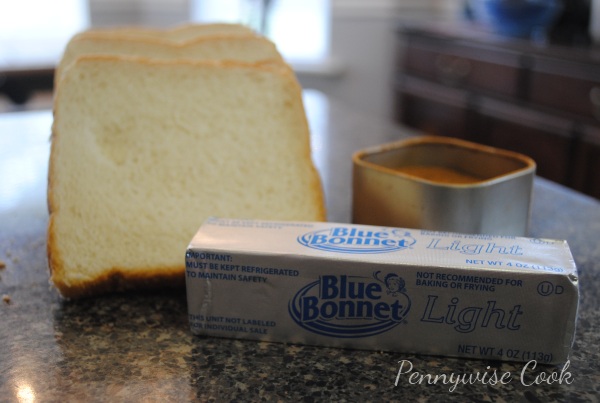
Ya got your butter, your cinnamon sugar, and your loaf of bread. And if you want that yummy glaze for them you’ll also need powdered sugar that’s not pictured here. Use your magic wand (I have one, don’t you?) and voila! Cinnamon rolls!

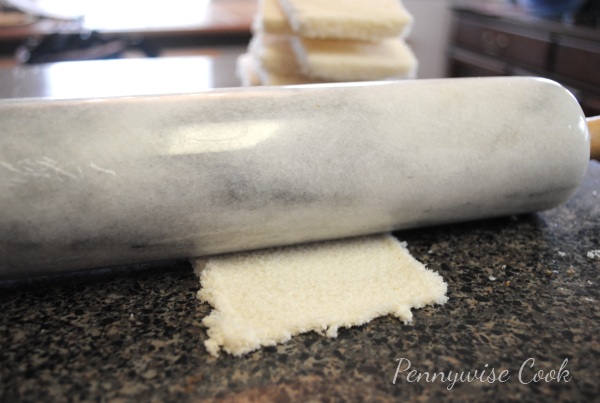
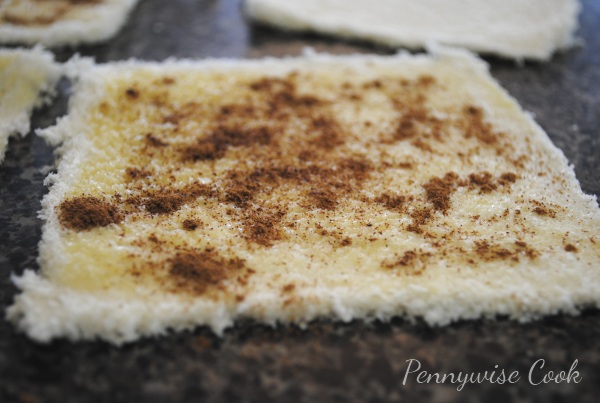
Cut the crust off of each slice of bread and use a rolling pin or heavy can to flatten them out. The better you are at cutting the crusts off, the more roll you’ll have. I’m not amazing at it, but I’m working on it. Get them nice and flat, then use a brush or something like that to brush on some melted butter. You don’t want them to be swimming in it, but just enough to coat. Something for the cinnamon sugar to stick to.

Then sprinkle the cinnamon sugar to your liking on the buttered and flattened bread. It is already looking fabulous. Fold each edge into the center and then roll them up. Place on a greased cookie sheet or in a muffin pan. I used a muffin pan to make sure they didn’t try to roll on me.

After baking them at 375 degrees for a little while, they come out crusty on the outside and little soft on the inside. Mix some of the melted butter with powdered sugar and you have a yummy butter glaze to drizzle over the top.

Recipe courtesy of Circle B Kitchen

White Bread Cinnamon Rolls

White Bread Cinnamon Rolls

Out of Pillsbury sweet rolls? Have a loaf of bread? Make your own mini cinnamon rolls in no time with this easy fix. Only 4 ingredients!

Ingredients

  • A dozen or so slices of soft white bread
  • Melted Butter (1/2 c. should be plenty)
  • Cinnamon Sugar
  • Powdered Sugar (optional for glaze)

Method

  1. Preheat oven to 375 degrees.
  2. Cut the crusts off the pieces of bread. Roll very thin with rolling pin or can.
  3. Brush both sides of the bread with melted butter. Then sprinkle one side with cinnamon sugar.
  4. Fold each side of the bread into the center, then roll up.
  5. Place onto greased cookie sheet or muffin tin. Bake for 15-20 minutes until they start to turn golden.
  6. Add powdered sugar to the leftover melted butter for glaze and drizzle over the top.

Notes

You can freeze these too! Although, they don’t stick around long enough to get frozen here.

http://www.pennywisecook.com/mini-white-bread-cinnamon-rolls/


Like this post? SHARE it!

Related Posts Plugin for WordPress, Blogger...

Whole Wheat Peanut Butter and Banana Pancakes

Most mornings I have to start with my cup of coffee. While I think it’s mostly a mind thing, somehow my body thinks that I really need that caffeine to get my day started. Days that I skip it, I feel as though my days are off. We’ve been out of k-cups lately so I’ve been using my little refillable k-cup to make it. The funny part is that we had these grounds in a container for so long, I can’t remember if they are regular or decaf (from when I was pregnant). So at this moment, I could be fueling my day with decaf. Heck, I’d never even know it!

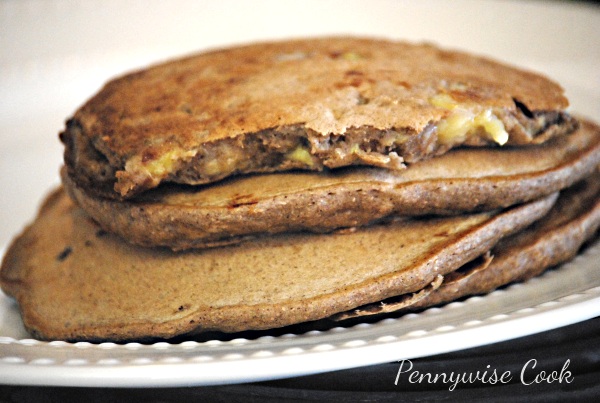
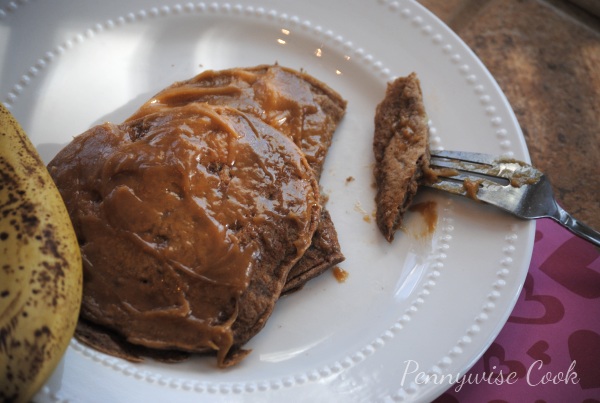
There have been some fabulous prices on bananas lately. Not sure if it’s a bumper crop or what the case is but most stores (even Walmart) have come down significantly on bananas. Aldi holds steady around $.44 per pound most weeks. Kroger and Walmart have both had them for $.38 per pound recently around here and I can’t help but find something to make with bananas when they are that cheap. They are so good for you and can be used in so many recipes. Like these pancakes for instance. Whole Wheat Peanut Butter and BANANA Pancakes to be exact! They are oh so incredibly yummy. I can’t find the blog where I originally got this recipe, but I did find an exact replica over at Food.com.

These are very good at hiding their nutritiousness. I don’t think that hubby or my 4 year old even blinked an eye at the fact that they were mainly whole wheat. I think the mixture of spices and creamy banana worked very well together and created a pancake that I think even Elvis himself would have approved of. It’s amazing how much these taste just like a peanut butter and banana sandwich!

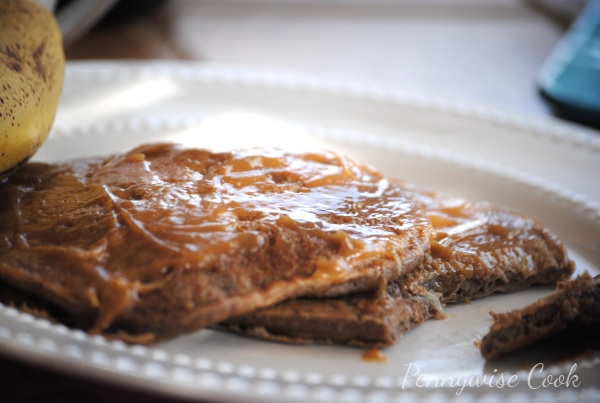
When it came the syrup, I wasn’t really into cooking anything else. Around here, most mornings my breakfast consists of a cup of yogurt on the go. So I just mixed up some creamy peanut butter with my sugar free syrup to spread over top and it worked beautifully (thankfully). I will admit that the ingredients do seem like a lot of work. But for the occasional Saturday morning, I can totally see whipping up these scrumptious babies.

Recipe courtesy of Food.com

Whole Wheat Peanut Butter and Banana Pancakes

Whole Wheat Peanut Butter and Banana Pancakes

Pancakes similar to a peanut butter and banana sandwich with a healthy twist. Even the king would approve!

Ingredients

  • 3/4 c. Whole Wheat Flour
  • 1/4 c. All-Purpose Flour
  • 2 Tbsp Splenda
  • 1/8 Tsp Salt
  • 1.5 Tsp Cinnamon
  • 1 Tsp Cocoa Powder
  • 1.5 Tsp Baking Powder
  • 1.5 Tsp Vanilla Extract
  • 1/2 c. Water
  • 12 c. Skim Milk
  • 2 Ripe Bananas
  • 1/4 c. Egg Substitute

Method

  1. Add the whole wheat flour, all-purpose flour, splenda, salt, cinnamon, cocoa powder, and baking powder to a bowl and mix well. Be sure to sift the whole wheat flour, it can get clumpy.
  2. Mash up the bananas.
  3. Add the rest of the ingredients to the dry ingredients.
  4. Spray your griddle or skillet with non-stick cooking spray and heat to medium.
  5. Cook the pancakes until they start to bubble and then flip. Cook for another 1-2 minutes and continue in batches until done.
http://www.pennywisecook.com/whole-wheat-peanut-butter-and-banana-pancakes-oh-yes/


Like this post? SHARE it!

Related Posts Plugin for WordPress, Blogger...