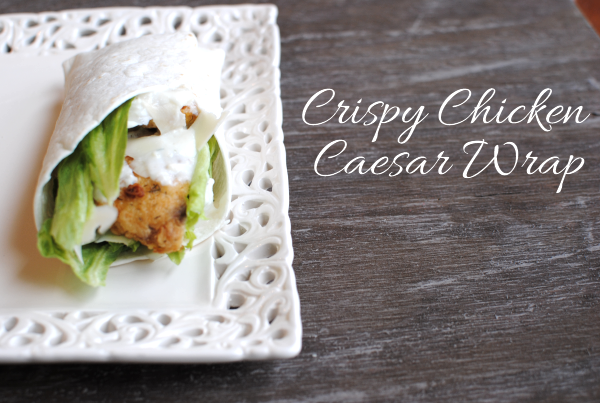
Crispy Caesar Chicken Wraps

Do you ever have those days when you start thinking about dinner and your mind just goes completely blank? This happens to me a lot so I do my best to prepare a meal plan for the week. Though we rarely actually stick to it. Most weeks I come up with my menu on my own, but some weeks I go to the family to see what they would like. I recently asked my husband if he had any suggestions for dinners and of all things that he could come up with, he asked for crispy chicken caesar wraps.

Yes, like the ones at Wendy’s. Very original right?

Honestly, he had a great idea. I love those things! He often gets those on his lunch breaks. He thinks they are “healthy”. You know, because they are wraps. And not burgers. I love man-thinking don’t you? I’ll just let him keep thinking that. But I did want to try and create them at home so that I could know exactly what was going into them and to make them healthier.

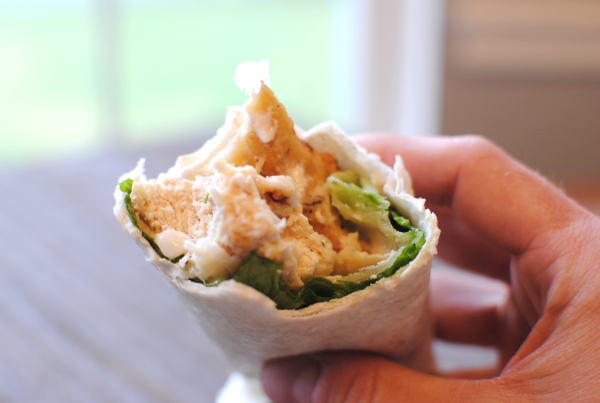
All I can say is YUM. Being a frugal person, I can’t tell you that these are going to be cheaper than spending the $.99 on ones at Wendy’s. But I can tell you that the ones you make at home will be bigger, homemade, and a bit healthier.

These wraps are made with a cheese that I’ve never really worked with before- Asiago. I’m not too fond of it by itself. You really don’t want to take a big bite out of that block of cheese. But in these wraps with the caesar dressing and lettuce and crispy chicken, it’s wonderful!

The caesar dressing that I made was a healthier version that I adapted a bit from Cooking Light. It uses nonfat yogurt, dijon mustard, and other yummy lowfat ingredients to create this familiar dressing. I suggest using this recipe on your salads too! It’s fabulous.

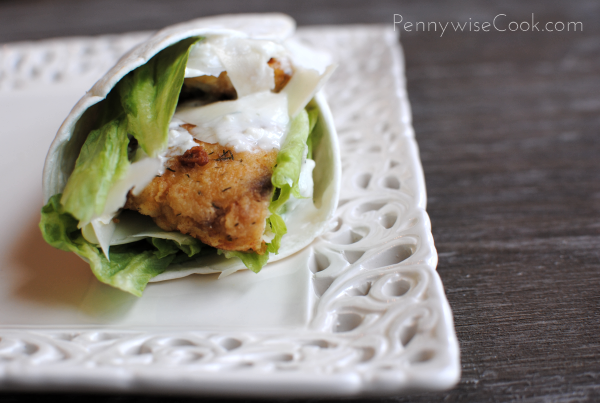
The chicken breasts that I used were quite large so they ended up only being crispy on the outside. Hubby commented that it was almost like they weren’t crispy because there was so much meat inside them making them seem grilled. So I do suggest using smaller chicken breasts in order to get a crispier crunch.

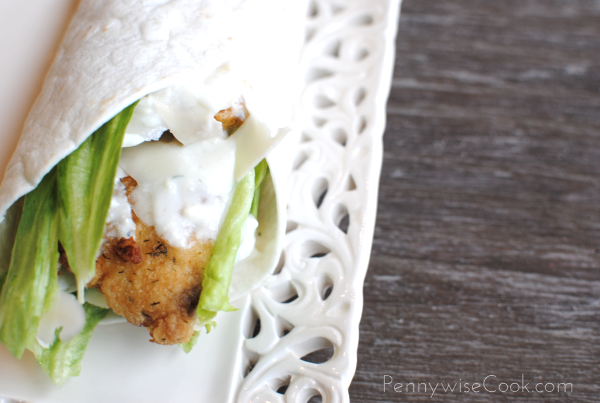
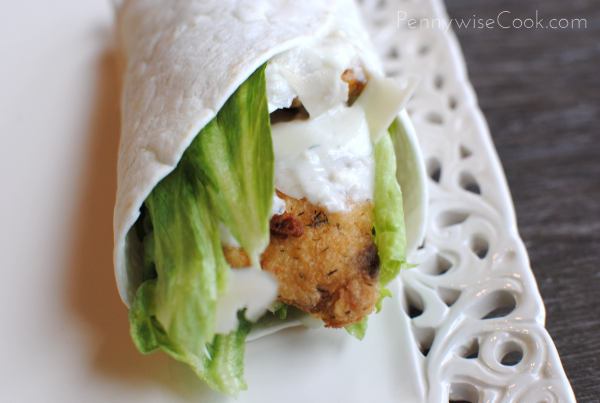
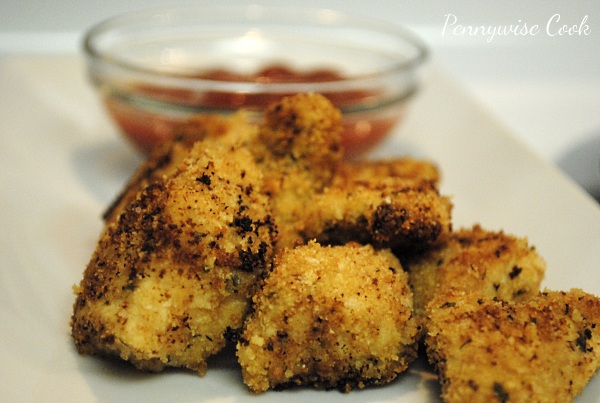
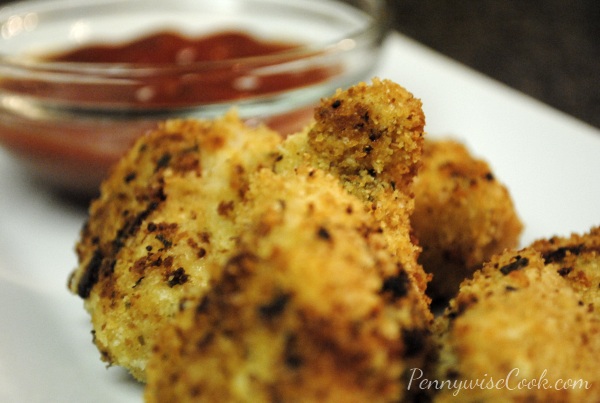
I used the shallow fried chicken recipe from my Chicken and Waffles post but added some dill to the breading to give it a green and caesar flavor. It was a great addition. See those flecks of dill on the chicken?

Skip the drive-thru and try these next time!
Crispy Caesar Chicken Wraps

Crispy Caesar Chicken Wraps

A healthy alternative to Wendy's Crispy Chicken Caesar Wrap.

Ingredients

    For the Chicken
  • 4 Boneless, Skinless Chicken Breasts- Pounded Flat
  • 1/3 c. Egg Substitute or 1 Egg
  • 1/2 c. Flour
  • 1 Tsp. Kosher Salt
  • 1 Tsp Paprika
  • 1/4 Tsp. Pepper
  • 1/4 c. Olive Oil
  • For the Caesar Dressing
  • 1 cup plain nonfat yogurt $
  • 1/2 cup grated Parmesan cheese
  • 1/2 cup low-fat buttermilk
  • 2 tablespoons 1% low-fat milk $
  • 1 tablespoon reduced-calorie mayonnaise $
  • 1 tablespoon Dijon mustard $
  • 1/4 teaspoon salt
  • 1/4 teaspoon pepper
  • 2 garlic cloves, minced
  • For the Assembly
  • Flour Tortillas
  • Lettuce
  • Asiago Cheese, Shaved

Method

  1. Combine all of the ceasar dressing ingredients in a small bowl and whisk well. Set aside.
  2. Mix the flour, kosher salt, paprika, and pepper together and place on a plate.
  3. Heat the olive oil in a skillet over medium high heat.
  4. Dredge chicken breast in the egg then in the flour and seasonings. Place in skillet and brown until crispy. About 4-5 minutes on each side. Cut chicken breasts in half.
  5. Assemble wraps by laying tortillas flat. Next, tear a few pieces of lettuce and place on tortillas. Next place a few pieces of shaved Asiago cheese, then chicken breast. Top with more Asiago cheese and then drizzle desired amount of caesar dressing over chicken.
  6. Roll each tortilla up starting with the bottom and folding upwards, then rolling the sides in.

Notes

You won't need a ton of Asiago cheese, so feel free to buy the smallest amount that you can find.

http://www.pennywisecook.com/crispy-ceasar-chicken-wraps/


Like this post? SHARE it!

Related Posts Plugin for WordPress, Blogger...

Chicken and Waffle Sandwiches

We had an awesome weekend. Got some yard work done, ran some errands, went to church, and had some friends over. Oh and I ran 5 miles! It felt really great too. I love runs like that.

How was your weekend?

I eat healthy most of the time. Even on the weekends when I “splurge” I find that I can’t help by choose the healthiest options. It’s a blessing and a curse I guess. Sometimes I try to substitute things for other things that just don’t turn out right. For instance, you just can’t use I Can’t Believe It’s Not Butter Fat Free in place of regular butter. It will burn and ruin whatever you’re using it for. But there are tons of other ways to make shortcuts that I use on an everyday basis. Did you catch my post about swapping mushrooms for meat? That’s a great example!

Sometimes I crave ridiculous stuff like those little chocolate covered Hostess donuts. You know the ones. OH MY are they delicious. I have no doubt that I could sit and eat an entire bag in one sitting. Or how about those cheese fries at Outback? They are so incredibly amazing. I remember when I used to go eat there and order those as an appetizer AND a meal on top of that.

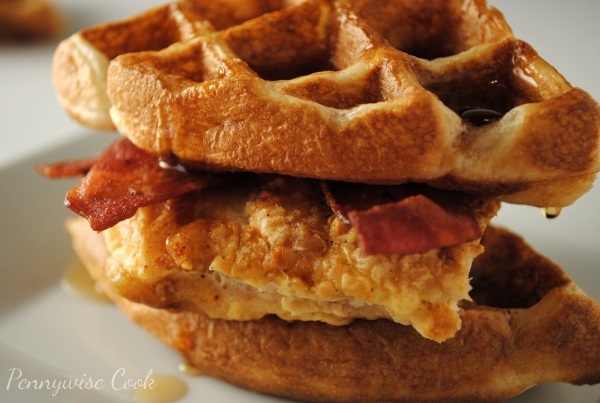
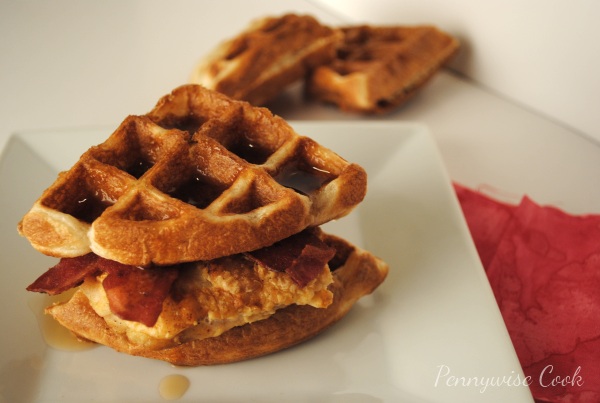
The other night I was craving a southern sandwich that is maybe a little foreign to some. A chicken and waffle sandwich. A normal sandwich like this consists of crispy fried chicken sandwiches between two waffles and slathered with maple syrup. So insanely delicious.

I decided to whip these up for the fam that night and they satisfied my craving and were really tasty! If you’ve never tried one of these and want a lighter version you might try this out for yourself. They are so yummy. These are more like mini sandwiches since I used 1/2 a Belgian waffle for each. However, each sandwich does have half a chicken breast and along with the waffle they are actually quite filling!

Chicken and Waffle Sandwiches

4 Sandwiches

Chicken and Waffle Sandwiches

A lightened up version of the Chicken and Waffle Sandwich.

Ingredients

  • 2 Belgian Waffles
  • 2 Chicken Breasts
  • 1/3 c. Egg Substitute or 1 Egg
  • 1/2 c. Flour
  • 1 Tsp. Kosher Salt
  • 1 Tsp Paprika
  • 1/4 Tsp. Pepper
  • 1/4 c. Olive Oil
  • 4 Pieces Turkey Bacon
  • Sugar Free Syrup

Method

  1. Mix the flour, kosher salt, paprika, and pepper together and place on a plate.
  2. Heat the olive oil in a skillet over medium high heat.
  3. Dredge chicken breast in the egg then in the flour and seasonings. Place in skillet and brown until crispy. About 4-5 minutes on each side.
  4. Cut each chicken breast in half and place on 1/4 of Belgian waffle. Tear 1 piece of bacon in half and place on chicken then top with another 1/4 of Belgian waffle.
  5. Pour syrup over the top and eat!

Notes

I used Batter Blaster to make my Beligan waffles, but feel free to use your favorite batter recipe or premade mix.

To cook your bacon quickly, place the 4 pieces on a paper towel and microwave for 1-2 minutes until you reach desired crispiness.

http://www.pennywisecook.com/chicken-and-waffle-sandwiches/


Like this post? SHARE it!

Related Posts Plugin for WordPress, Blogger...

Sticky Sesame Chicken

I have always been a huge fan of Chinese food. I absolutely love garlic, onions, soy sauce, you name it. The combination that is used in that ethnicity is just my kind of flavor. And what most people don’t realize is that a lot Chinese dishes are simple to make. There are two things in recipes that I look at to decide if I want to make it.

1) Does it contain ingredients that I would have on-hand or that I would actually buy and use later?
This is what makes it frugal. You don’t want to have to make a special trip to a crazy store 30 minutes away to use that ingredient just once.

2) Is the recipe simple with steps that are easy to follow?
I’m all about simple. If a recipe contains a bunch of steps that are difficult, I usually move on. I’m ok with maybe one challenging step in a recipe, but the more challenging the more time it takes and the less simple that it becomes. And we all know that time is very important too. With two kiddos and a hungry husband, there’s not a moment to spare when getting dinner on the table.

If you’ve been following this blog for a while, then you know I’m a big fan of Hungry Girl. I love her use of resources and out of the box thinking when it comes to making meals healthier. I found this recipe for Sesame Chicken over there and I was a bit turned off by the ingredients to be honest. There are a total of 15- 16 ingredients in this recipe. Yeah, exactly. It doesn’t sound like one of those easy recipes, but after actually seeing what the ingredients were I quickly changed my tune.

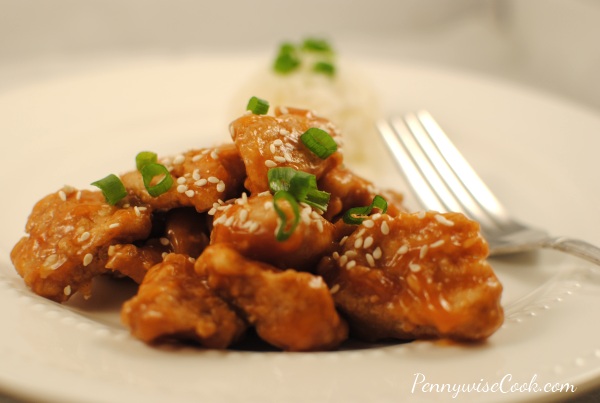
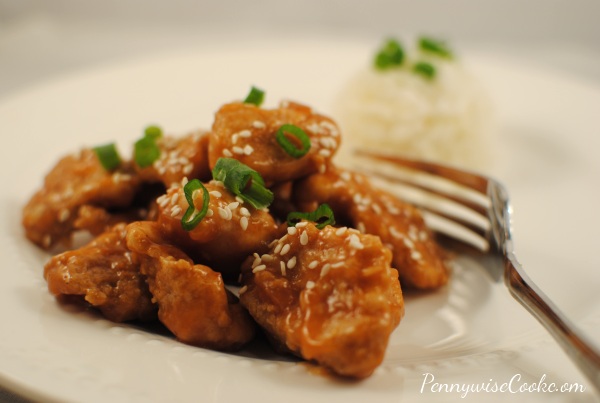
With the combination of regular everyday ingredients that you might have on hand, you can whip up this super yummy Sticky Sesame Chicken! I’m serious too, it’s healthy but it’s also amazing! The only drawback to this recipe is the time it takes to coat each piece of chicken. Just make sure that you give yourself plenty of time to do that when preparing this recipe.

Recipe adapted from Hungry Girl.

Sticky Sesame Chicken

2 Servings

Serving Size: 1 Cup

288

Sticky Sesame Chicken

Make your own yummy Sesame Chicken just like your favorite Chinese restaurant without all the extra fat!

Ingredients

  • 10 oz Boneless Skinless Chicken Tenders, chopped into bite-sized pieces
  • 1/8 tsp. salt
  • 1/8 tsp. black pepper
  • 1/4 cup fat-free liquid egg substitute
  • 1/4 cup whole-wheat flour, divided
  • 1/4 cup fat-free chicken broth
  • 1 tbsp. cornstarch
  • 2 tbsp. sugar-free pancake syrup
  • 2 tbsp. seasoned rice vinegar
  • 1 tbsp. ketchup
  • 1/2 tbsp. lite/low-sodium soy sauce
  • 1/2 tsp. sesame oil (I used olive oil)
  • 1/2 tsp. crushed garlic
  • 1 tsp. sesame seeds
  • 2 tbsp. thinly sliced scallions (optional)

Method

  1. Preheat oven to 375 degrees. Spray a baking sheet with cooking spray and set aside.
  2. Place chicken in a bowl, season with salt and pepper, and cover with egg substitute. Toss to coat and set aside.
  3. Place 2 tbsp. flour in another bowl. Use a fork to transfer half of the chicken to the flour bowl, allowing excess egg substitute to drain back into the egg bowl. Thoroughly coat chicken with flour, and then transfer to the baking sheet. Wipe the bowl clean, and then do it again with remaining flour and chicken.
  4. Bake chicken in the oven until cooked, about 10 minutes.
  5. Meanwhile, combine broth with cornstarch in a small nonstick pot and stir to dissolve. Add the syrup, vinegar, ketchup, soy sauce, oil, and garlic. Mix well and bring to medium heat on the stove. Stirring often, cook until thick, 2 - 3 minutes. Set aside.
  6. Place cooked chicken in a bowl, top with sauce, and toss to coat. Sprinkle with sesame seeds.
  7. Top with scallions or crushed red pepper if desired and serve!

Notes

This recipe is made for 2 people, but I had more than 10 oz of chicken so I added a little of each ingredient to make it go further for our family. I used vegetable oil instead of sesame oil and it turned out just fine. So don't fret if you don't have that. Make sure that your chicken is nice and warm when you serve it with the sauce. I found that it gets cold pretty quickly.

http://www.pennywisecook.com/sticky-sesame-chicken/


Like this post? SHARE it!

Related Posts Plugin for WordPress, Blogger...

Crispy Oven Baked Chicken Nuggets

Happy Friday! This weekend is my husband and I’s 6th anniversary so we are headed out on a special little trip together. No kids allowed! We are so excited to have some time together as life gets so hectic these days. It’s going to be so nice to have an entire couple of days to reconnect. I’m actually quite giddy about it!

I’ve told you before about my fear of frying things. Whenever humanly possible I will bake something in place of frying to make it healthier. I mean if you have achieve the same general flavor and composition, what’s the use in all that unnecessary oil? One thing that I’ve always loved even since I was a kid was chicken nuggets. Who doesn’t like chicken nuggets?

The chicken…in the form of a nugget…you just can’t beat that. I’ve made some pretty darn amazing chicken tenders in the past, but never tried the smaller bite-size nuggets before.  Why you ask? I have no earthly idea. In fact when I came across this recipe, it really made me wonder to myself why I hadn’t tried chicken nuggets before. It was well worth the wait though. These baked chicken nuggets came out crispy  and yummy. It’s so nice to eat a chicken nugget and know exactly what is inside of it. 😉

If you have never tried to make your own nuggets before, I encourage you to try this one. The one suggestion that I do have with this recipe is not to fiddle with the chicken too much until they are done. You do have to turn them over during the baking process, but I wouldn’t give them too much of a jolt as the breading tries to come off when they aren’t done yet.

Very simple recipe with things you might already have laying around the house. And since they aren’t fried and aren’t coated in thick batter, they are actually very healthy too! These would go really awesome along side some Crispy Homemade Oven Fries!

Recipe from SkinnyTaste.com

Crispy Oven Baked Chicken Nuggets

Prep Time: 15 minutes

Cook Time: 10 minutes

Crispy Oven Baked Chicken Nuggets

Don't fight the chicken nugget cravings! Just make them better for you. Try these Crispy Oven Baked Chicken Nuggets!

Ingredients

  • 1 lb Boneless, Skinless Chicken Breasts (About 2 Large), Cut into Bite-size Pieces
  • Salt and Pepper to Taste
  • 2 Tbsp Olive Oil
  • 6 Tbsp Whole Wheat Bread Crumbs (I used Regular Italian)
  • 2 Tbsp Panko Bread Crumbs
  • 2 Tbsp Grated Parmesan Cheese
  • Cooking Spray

Method

  1. Preheat oven to 425 degrees.
  2. Place olive oil in one bowl and the breadcrumbs, panko, and parmesan cheese in another.
  3. Season the chicken with salt and pepper then place in the bowl with olive oil and coat each piece well.
  4. Put a few pieces of the chicken in the breadcrumb mixture a time and toss. Place on baking sheet.
  5. Lightly spray the tops of the nuggets with cooking or olive oil spray. Bake for 8- 10 minutes then turn and cook for another 4-5 minutes.

Notes

When you're flipping them, just be sure to be extra careful. The breading will easily come off before they start to crisp.

http://www.pennywisecook.com/crispy-oven-baked-chicken-nuggets/

Kids just love these so much. My Addie is a chicken nugget connoisseur (she likes to think) and she thoroughly approves!

Let me know if you make these and how they turn out!


Like this post? SHARE it!

Related Posts Plugin for WordPress, Blogger...