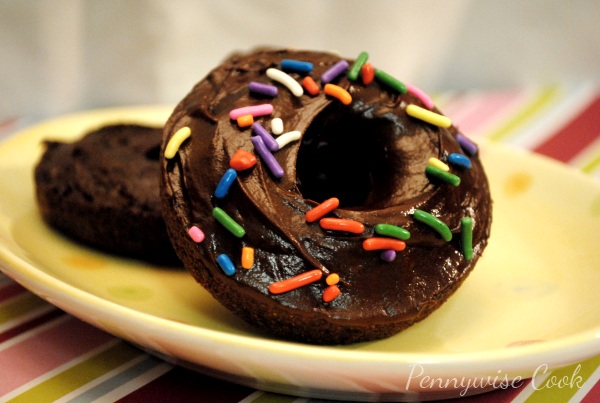
Chocolate Glazed Baked Chocolate Donuts

So you may have caught on to the fact that I’m a sweets person by now. I could eat sweets for every meal. Yes, even dinner. As long as I could have a cracker afterwards to balance the sweet with salty. I do know my limits though. Like I told you on the Fried Ravioli post, I’m not too much into frying things. Pan-searing, lightly frying in a bit of olive oil are ok. But completely submerging something in oil just makes me feel dirty. 😉

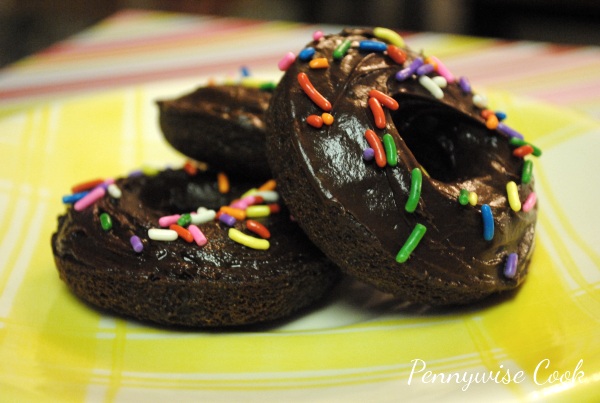
That’s why I was absolutely thrilled to come across this amazing Chocolate Glazed Chocolate Baked Donuts recipe at Prevention RD. She has got some fabulous recipes that I cannot wait to try. I really wanted to make these donuts, so I went in search of a donut pan. It’s close to impossible to find one really. Don’t expect Walmart to have them. I was delighted to find this mini donut pan on Amazon for only $9.99 shipped. When I found this recipe I was really antsy to try it out. At 93 per donut, I was floored. That is for the full-size donuts and my pan is mini so mine will only have 46 calories per. When my donut pan came in the mail, I was really giddy. You can just imagine my excitement can’t you? My mail lady thinks I’m nuts.

My pictures aren’t quite as good as her’s, but you get the picture. This recipe was surprisingly easy, however I will say this- it’s fairly difficult getting the batter into those little donut wells. Because it’s round you don’t want to get the batter on the little thing in the middle. I managed to get it done with a spatula in one hand and a spoon in the other. I’d say this is little sacrifice for chocolate donuts.

Recipe from Prevention RD
Chocolate Glazed Baked Chocolate Donuts

14 Full-Size Donuts

Serving Size: 1 Full-Size Donut

93

Chocolate Glazed Baked Chocolate Donuts

93 calories for a chocolate donut? Sign me up! These chocolate glazed BAKED donuts will satisfy without packing on the calories.

Ingredients

    Donut Ingredients
  • 1 cup whole wheat pastry flour (or I used 1/2 c white and 1/2 c whole wheat)
  • 1/4 cup unsweetened cocoa powder
  • 1/4 cup sugar
  • 1 Tbsp baking powder
  • 1/4 tsp salt
  • 1 egg
  • 1/2 cup almond milk (I used soy milk)
  • 1 tsp vanilla
  • 1 Tbsp canola oil
  • 3 Tbsp unsweetened applesauce
  • Choclate Glaze Ingredients
  • 1/2 cup semisweet chocolate chips
  • 1 tsp canola oil
  • 1 Tbsp corn syrup
  • 1/4 tsp vanilla extract

Method

  1. Preheat the oven to 450 degrees. Spray donut pan with cooking spray.
  2. Stir together flour, cocoa powder, sugar, baking powder, and salt in a large bowl. Add the egg, milk, vanilla, oil, and applesauce for 1 minute.
  3. Fill each donut cavity in the pan 1/2 way full.
  4. Bake for 7-8 minutes until donuts spring back slightly when touched. Cool.
  5. Meanwhile, melt the chocolate chips in a microwave safe bowl. Stir in the corn syrup and oil. Microwave at 20 second increments until completely smooth. Stir in the vanilla.
  6. Dunk each donut and allow to set.

Notes

And like my husband says, these wouldn’t be what they are without the glaze so you’ll definitely want to make that along with these. They are a fantastic treat for after school for the kiddos and you don’t have to worry that they are high in calories and sugar.

P.S.- if you don't have a donut pan, no worries. Use a mini or regular muffin pan and glaze just the tops. They will still taste as yummy. Since I made these the first time, I've found donut pans at Target for around $12.99- FYI.

http://www.pennywisecook.com/chocolate-glazed-baked-chocolate-donuts/

Let me know if you make them and how they turn out!

Your turn! Have you ever made donuts before?


Like this post? SHARE it!

Related Posts Plugin for WordPress, Blogger...

Chocolate Cherry Coke Cupcakes

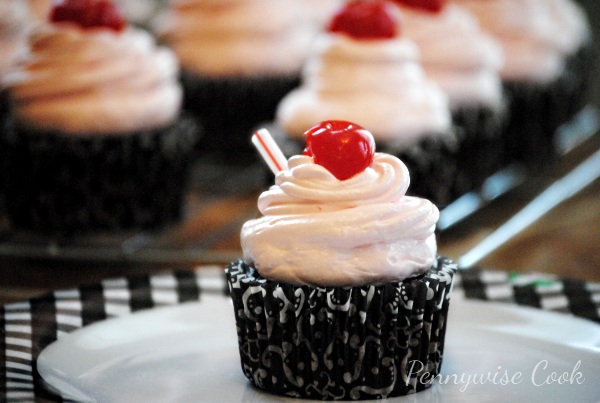
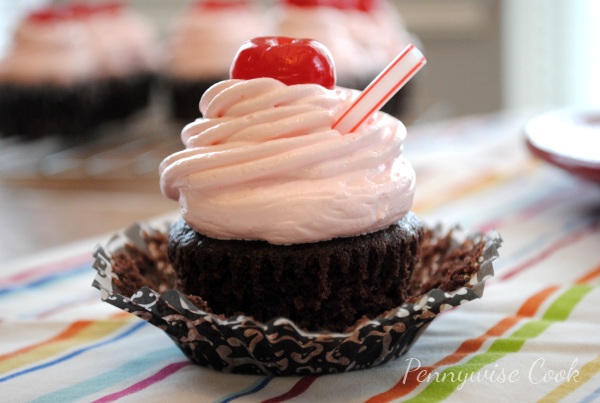
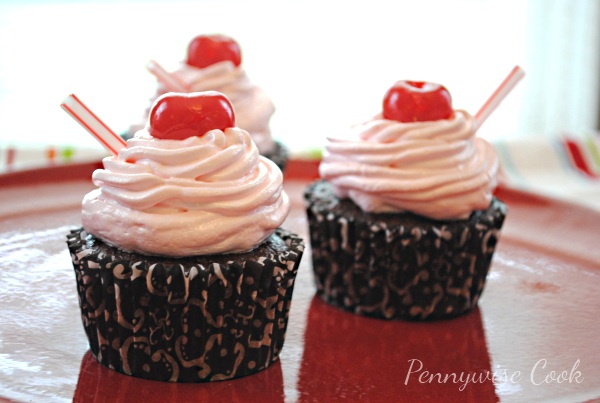
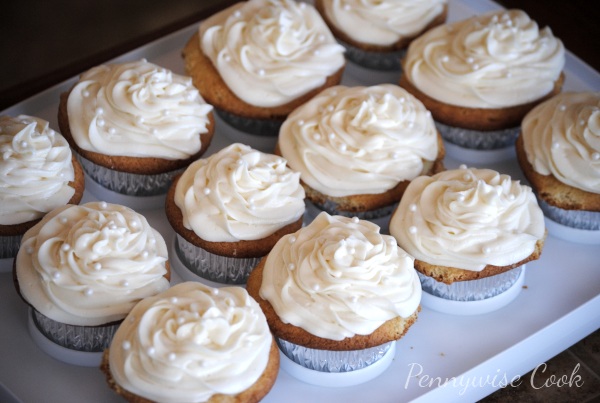
Cupcakes will always be one of my most favorite things to make, ever. Individual cakes? Come on. How can you not love your own little cake with icing and all? What about a Cherry Coke Cupcake? And how about let’s make it chocolate too! I think that sounds like a fantastic combination. This cupcake ended up quite cherry-y. A lot more than I had planned, but it was quite tasty. One I will definitely make again.

It wasn’t until I set out to make these cupcakes that I realized how hard it was to find Cherry Coke these days. I used to drink it a lot in high school and it was pretty easy to find. I had to settle on Wild Cherry Pepsi to make these, so they may come out a bit different for those who are actually able to find Cherry Coke. Oh and just a little secret, I also used DIET Pepsi Wild Cherry. This made these a little better on the calorie side. You know me, always making things a bit healthier. I also used egg white substitute instead of plain old egg whites, but feel free to use real egg whites.

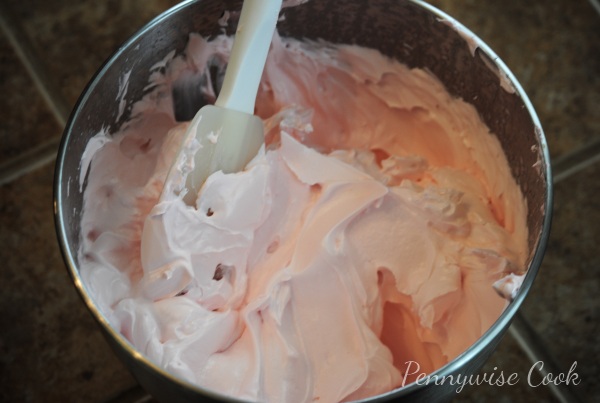
The frosting on these babies is a very fluffy cherry frosting with BIG taste. I really enjoyed using something other than your everyday buttercream. Sometimes that can be so heavy.

Made with mainly egg whites, boiled and then whipped, this frosting was very easy to pipe onto the cupcakes and made for a very pretty color! It was fantastic. I’ll be using it again.

You most definitely don’t have to make yours as diet as I did. After all, you’re already making cupcakes. It’s just in my nature to get my food as low in calories as possible. Any little shortcuts that I can make without sacrificing taste makes me happy!

Chocolate Cherry Coke Cupcakes

Chocolate Cherry Coke Cupcakes

Cherry coke lover? These cupcakes are the perfect combination of chocolate and cherry coke with a healthy twist!

Ingredients

  • Box Devils Food Cake Mix (Your preference)
  • 2 Egg Whites (Or substitute)
  • 12 oz Cherry Coke (Or Diet)
  • Maraschino Cherries (for topping)
  • 1-1/2 cups sugar
  • 4 egg whites
  • 1/4 cup water
  • 1/4 cup maraschino cherry juice
  • 1/2 teaspoon cream of tartar
  • 1 teaspoon vanilla extract
  • 1/2 teaspoon cherry extract or 1/4 teaspoon almond extract

Method

    For The Cupcakes
  1. Mix cake mix, egg whites, and cherry coke in a bowl. Pour into cupcake liners and bake according to cake mix directions. Simple!
  2. For The Cherry Frosting
  3. In a heavy saucepan, mix the sugar, egg whites, water, cherry juice and cream of tartar. Mix on a low speed with hand mixer for 1 minute. Continue to beat on low over low heat until mix reach 160 degrees on a candy thermometer. This will take about 10 minutes.
  4. Transfer to heavy-duty stand mixer bowl. Add the extracts. Beat on high until stiff peaks form. This will take about 7 minutes.
  5. Frost the cupcakes.
  6. Add your cherries and you’re done!
http://www.pennywisecook.com/chocolate-cherry-coke-cupcakes/


Like this post? SHARE it!

Related Posts Plugin for WordPress, Blogger...

Chocolate and Peanut Butter Pretzel Bars

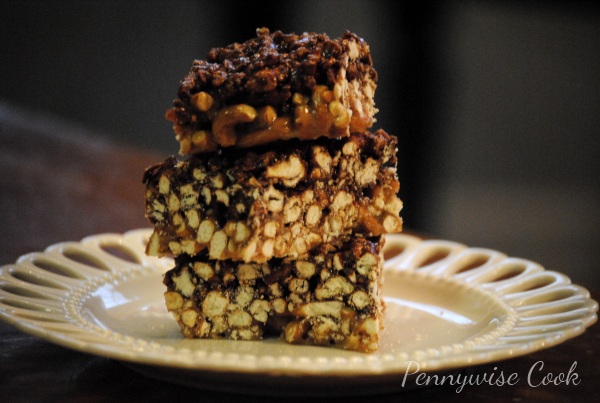
I’m one of those sweet and salty folks. I’d like to say that I’m more sweet than anything, but I have a salty side too. Who doesn’t? I’m the kinda gal who might enjoy a really indulgent piece of cheesecake and then have to go eat a cracker to offset the sweet. I think I got this from my momma. She always does this.

I threw this recipe together one day when I was craving something rice krispie treats. I had some pretzels in the cabinet and thought how fitting for a sweet and salty kinda bar to combine marshmallows and pretzels? And of course, peanut butter and chocolate are the only other two ingredients that could make this that much more incredible. Within about 10 minutes, I created these bars and they were fantastic. With only 5 ingredients, you can’t go wrong. I love the crunch that you get in every bite. Some may not like that about these, but if you’re a crunchy kinda person, I think you’ll enjoy them.

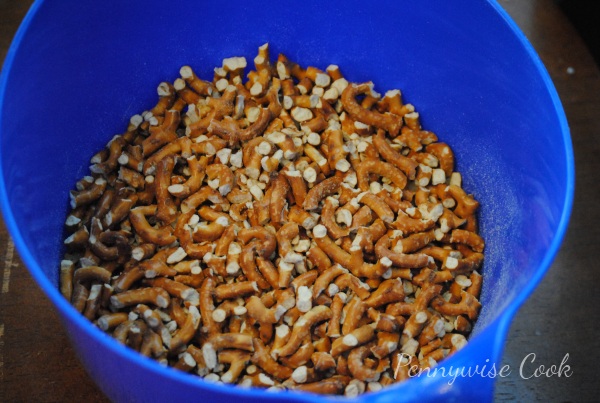
Not really knowing what I was going to do with these ingredients, I threw a bag of pretzels in a bowl and broke them up. You can get them super finely crushed if you prefer. To keep it light and avoid any extra buttery calories, I refrained from adding anything to them.

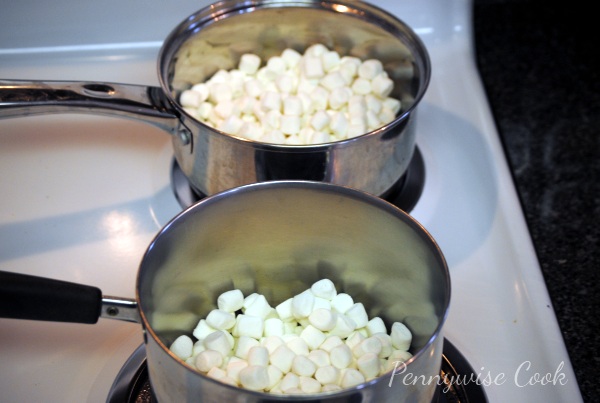
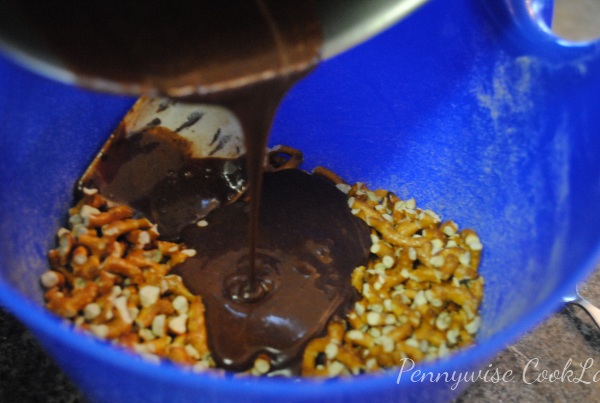
Next, I got two pots heating up each with half a bag of mini marshmallows inside to melt. Peanut butter in one and chocolate chips in the other. I must warn you though, it will take every bit of willpower that you have inside to not eat the entire batch of peanut butter marshmallow mixture.

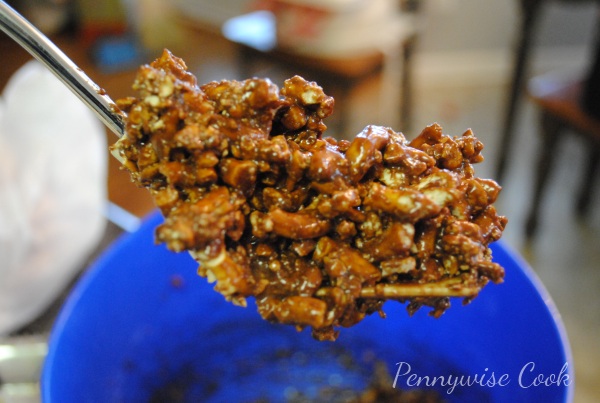
After putting half the crushed pretzels into a second bowl, pour the chocolate/marshmallow mixture into one pretzels bowl and the peanut butter mixture into the other.

At this point, there is no chance of fighting the willpower. Just take a bite of the chocolatey pretzels. I’ll forgive you.

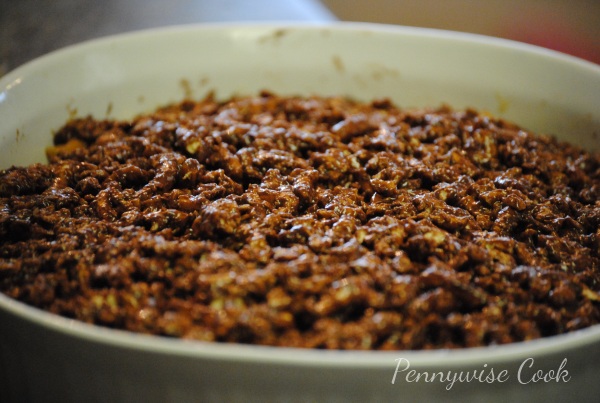
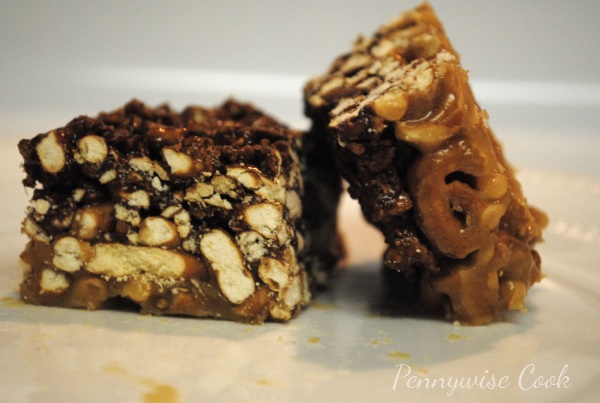
Flatten both mixtures into a pan starting with the peanut butter on bottom and then following with the chocolate. I used a shallow oval dish. Let sit in the refrigerator for a bit to set and you’re done!

Chocolate and Peanut Butter Pretzel Bars

Chocolate and Peanut Butter Pretzel Bars

Get that sweet and salty yumminess in one bite with these chocolate and peanut butter pretzel bars!

Ingredients

  • 1/2 c. Milk, divided
  • 1 Bag Mini Marshmallows
  • 1/3 c. Peanut Butter
  • 1/3 c. Semi-sweet Chocolate Chips
  • 1 12 oz Bag Pretzels, You can use any kind- sticks or twists

Method

  1. Crush the pretzels up either in a bowl or in a ziploc bag. Place into two medium-size bowls.
  2. In two sauce pans, place half the bag of marshmallows in each along with 1/4 cup milk. Melt them until almost smooth.
  3. Add in the peanut butter to one sauce pan and the chocolate chips to the other.
  4. Once mixed well, add peanut butter mixture to one bowl of pretzels and chocolate to the other. Mix well.
  5. Flatten the peanut butter pretzels to the bottom of a greased square dish. Then flatten the chocolate pretzels on top of that.
  6. Place in the refrigerator to set. Cut into squares and serve!
http://www.pennywisecook.com/chocolate-and-peanut-butter-pretzel-bars/


Like this post? SHARE it!

Related Posts Plugin for WordPress, Blogger...

Instant Cakeification: Chocolate Cake In A Mug

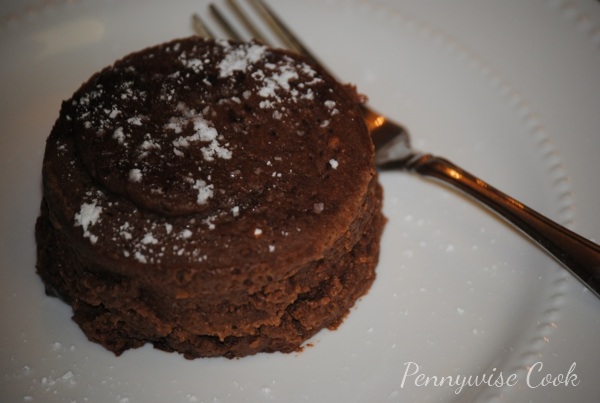
Has it been one of those weeks? It’s Friday, so I hereby declare that it will get better. And to celebrate Friday in all it’s glory, I think that you need a nice and chocolately piece of cake. How about it? It’s almost impossible to refrain from eating chocolate cake if it’s in my house. This is the exact reason that I just don’t make it often! You start with a really small piece trying to be good. Next thing you know, you’ve eaten the entire cake in a matter of two days and you feel horrible. At least that’s how it goes around here. Either that or I’m having to fight my husband away from the cake every 5 minutes.

But sometimes you just need a good, gooey, yummy piece of chocolate cake to satisfy that sweet tooth or to make your day (or late night) a little better. What if I told you that you could have your cake, and eat it too? Eat it and really enjoy it without guilt and without having to look at an entire cake sitting around afterwards. Yeah, that’s my kinda cake. Enter Chocolate Cake in a Mug! This clever little invention has been around for years, but somehow I missed the boat and am just now hearing about it. Two servings of chocolatey, gooey, delicious, indulgent chocolate cake in a matter of minutes without guilt and without a cake staring at you the next day. Sign me up!

After trying out a variety of recipes (it’s research you know, so I tried a LOT of them), I found one that I think is the best! There are a bunch of different recipes for cake in a mug, many of which just didn’t do it for me. With this one, from beginning to end you know the best way to get this cake to come out perfect each time. I made it as healthy as possible and you can’t even tell. Top it with a little powdered sugar or whipped topping and you have yourself a SWEET treat at any hour. No really, you can even eat this as a midnight snack. I give you permission. This has become a favorite snack of mine and my husband’s.

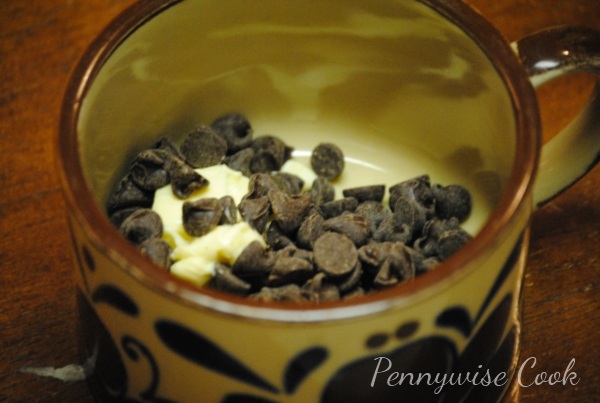
Using your widest and biggest mug, start out by melting 3 tbsp of chocolate chips into a tbsp of butter. I used Fat Free I Can’t Believe It’s Not Butter and it worked well! Mix that together well and add in 2 tbsp light or reduced fat sour cream (or substitute applesauce) and then 3 tbsp of skim milk. Then mix in 1 egg or egg substitute and 1/2 tsp vanilla extract. It’s recommended that you use a fork and I agree that this makes it easier!

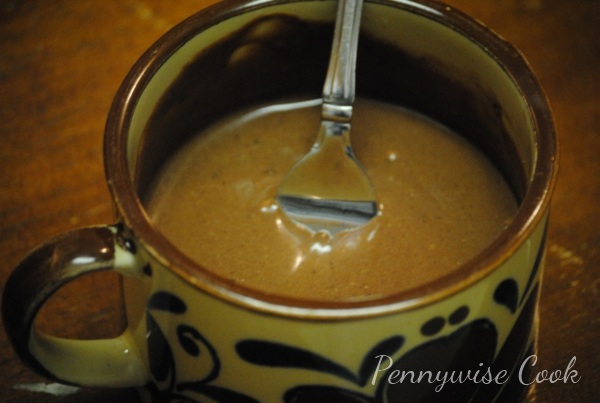
It’s going to look kinda like this once you’ve gotten all of that mixed together. Kinda runny because it’s missing the sugar and flour!

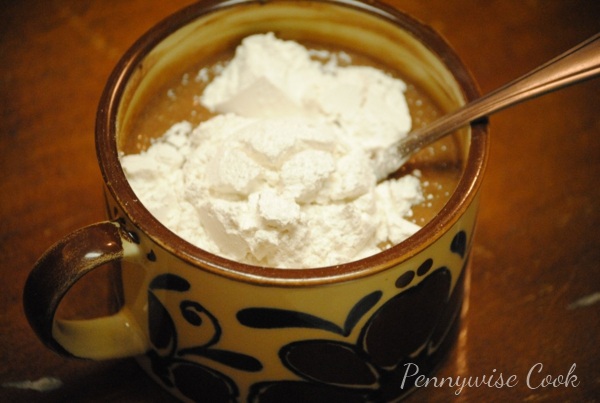
And finally, mix in 3 tbsp splenda and 4 tbsp flour. I used cake flour for a fluffier texture, but of course you can use what you have on hand.

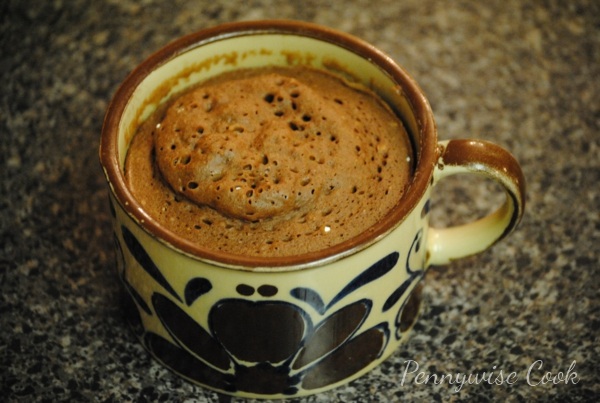
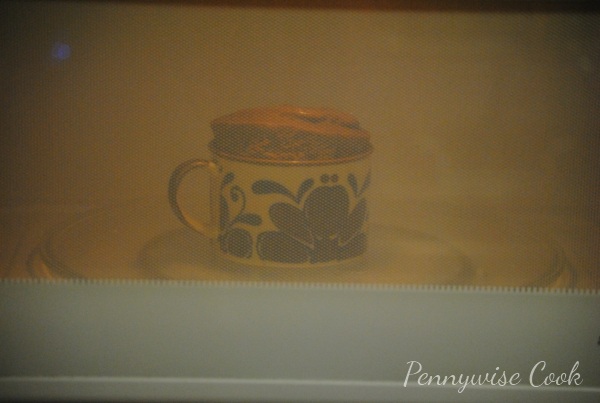
In the microwave, it tends to rise up like this. Don’t worry, I haven’t had one escape from my mug yet.

How easy was that?

Recipe courtesy of Urban Domestic Diva

Chocolate Cake In A Mug

Chocolate Cake In A Mug

Chocolate cake on-demand from your microwave!

Ingredients

  • 1 Tbsp. butter
  • 3 Tbsp. semi-sweet chocolate chips
  • 2 Tbsp. light sour cream
  • 3 Tbsp. Skim Milk
  • 1 egg substitute
  • 1/2 tsp. vanilla extract
  • 3 Tbsp. Splenda
  • 4 Tbsp. Flour

Method

  1. Melt chocolate chips into butter for 30 seconds in microwave. Mix well with a fork.
  2. Add in the sour cream and milk. Mix well.
  3. Next, add the egg and vanilla extract. Whip for a fluffy texture.
  4. Now add the Splenda and combine well.
  5. Lastly, add in the flour and make sure that all ingredients are incorporated well.
  6. Microwave for 2:30- 3 minutes. Times depend on your microwave. (Mine is perfect at 3 minutes)
  7. Top with powdered sugar or whipped topping and enjoy!

Notes

You can eat this right out of the mug or invert onto a plate like we do. Makes it easier for sharing.

http://www.pennywisecook.com/instant-cakeification-chocolate-cake-in-a-mug/

Now, take your cake and go watch Hot in Cleveland!

Do any of you watch that show? It’s my favorite!


Like this post? SHARE it!

Related Posts Plugin for WordPress, Blogger...

Chocolate Chip Cookie Dough Dip

How did your Valentine’s Day go? Oh really? Uh-huh. Interesting… Well if you had a less than satisfactory day (or even if you had a great one), you might just want to dig into this little sumthin’ sumthin’ here…

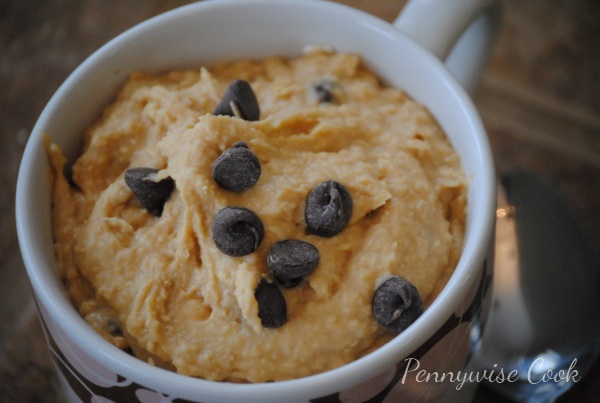
You are about to be amazed. How incredible does THAT look? Couldn’t you just dive right in? Well you really can, because it’s actually healthy. How many times have you been making cookies and stolen a bite or two of the dough? It’s almost humanly impossible for me not to. That’s probably why I don’t make cookies that often. I’d be as big as a house. I digress…

This cookie dough “dip” has a secret and it’s not going to tell anyone. I am- Chickpeas! Yes, that’s right. Those little garbanzos that no one knows what to do with half the time actually add something nutritional and special to this dip. It’s also been called “dessert hummus”, but I’m not too keen on that title. There are a ton of different versions of this dip everywhere right now. They are all very similar either being very smooth or very chunky. With or without sweeteners. With or without oats. It’s all a matter of taste. This recipe is the one that I enjoy the most, but you can feel free to adjust it to your liking.

Everyone always want to know what to dip these in. I’ve used vanilla wafers and graham crackers. And don’t tell anyone (I’m totally going to look like a pig now), but you can also pile some into an ice cream cone and eat it like ice cream. I don’t have ice cream in there with it, but that might be delicious too. I prefer the sugar cones over the others.

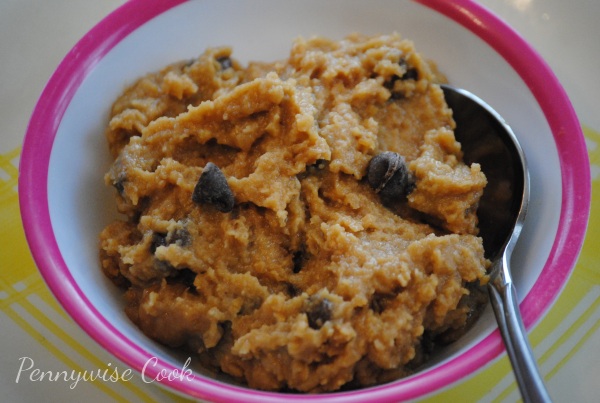
It’s fantastic and I can say that on my scouts honor. My husband and I devoured an entire bowl of this the other night. Not needing crackers or cookies to dip in it, it’s lovely right out of the bowl. You will want to make this tonight, I can almost guarantee it. Here’s the recipe, exactly as I made it.

You can find similar recipes for “dessert hummus” at Nourishing Flourising, Chocolate Covered Katie and Food Doodles. All fabulous! This one is kind of a mixture of those.

Chocolate Chip Cookie Dough Dip

Chocolate Chip Cookie Dough Dip

A dessert hummus recipe that no one will ever guess what's in it! Healthy but equally as delicious.

Ingredients

  • 1 Can Chickpeas, Drained and Rinsed
  • Pinch of Salt
  • 1 Tsp Vanilla Extract
  • 1/4 c. Peanut Butter (Natural if preferred although I’ve used Peter Pan Honey Roasted before and Reduced Fat even works!)
  • 1 Tbsp Milk (skim is healthiest!)
  • 2/3 c. Brown Sugar (Even Splenda Brown Sugar works!)
  • 2 Tbsp Oats (optional)
  • 1/3 c. Chocolate Chips

Method

  1. Place all ingredients, except chocolate chips, in food processor and mix until very smooth.
  2. Add in chocolate chips and stir. Serve with graham crackers or devour right out of the bowl.

Notes

I tried using less chocolate chips to be “good” and it’s just not the same. I usually end up adding more than the recipe calls for. 😉 If you don’t prefer the grit of the brown sugar, you can try using 1/4 + 2 Tbsp of maple syrup like Food Doodles does. This makes it very fluffy!

P.S.- you can also use White Northern Beans or Cannelini Beans in place of the Chickpeas if you’re seeking a smoother texture. I just prefer a thicker dip. 🙂 Also, I recommend refrigerating it a bit before eating. It thickens up a bit and tastes better chilled to me.

http://www.pennywisecook.com/to-die-for-cookie-dough-dip-its-healthy-too/


Like this post? SHARE it!

Related Posts Plugin for WordPress, Blogger...

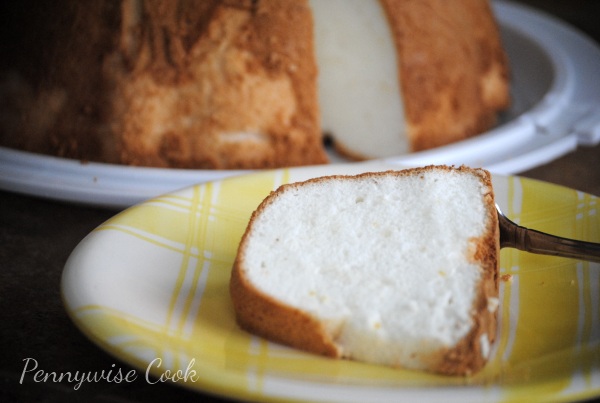
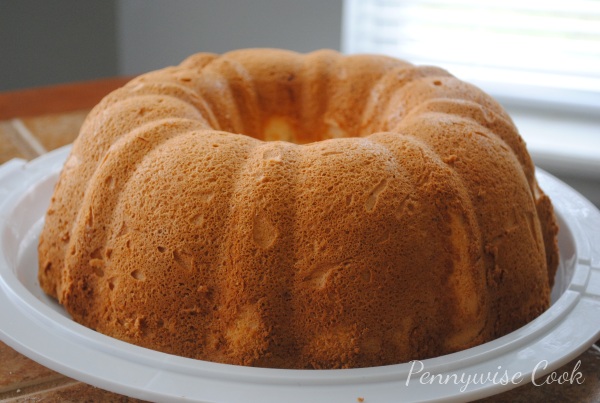
Heavenly Orange Angel Food Cake

We had a fantastic weekend. Max and I went on our first date in about 10 months. Wow. I had forgotten how much I really enjoy adult conversation. Although, I also had forgotten how hard it is to not talk about our girls too. Hooray for uninterrupted conversations! My mother and step dad came for visit and I got to cook for them. My mom always cooks for me, so it’s nice to return the favor sometimes.

Here’s a recipe that I like making almost as much as I love eating.

Named for the fact that it’s light and airy, angel food cake was definitely named well.  I’ve always had a thing for it because  it just seems healthier than most other cakes. It in fact is! And there are only about a million different ways to make an angel food cake. Of course, you could start with a box mix and whip one up in no time. But who wants to do that when you can make your very own from scratch that taste waaaaay better? For years I’ve been purchasing angel food cakes at the store only to find out that the labor I was avoiding wasn’t so bad after all.

I do believe that an angel must have invented this cake, because it truly is heavenly! Budum chhh. 🙂

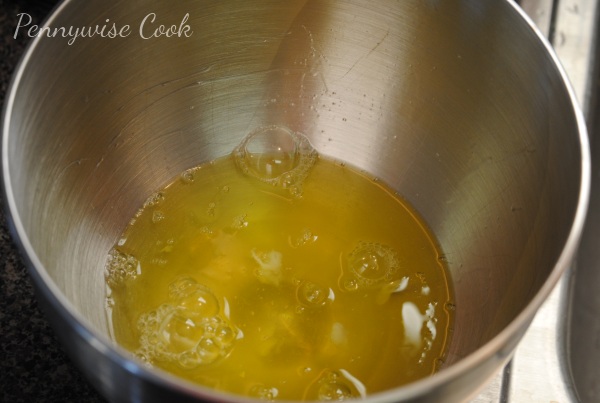
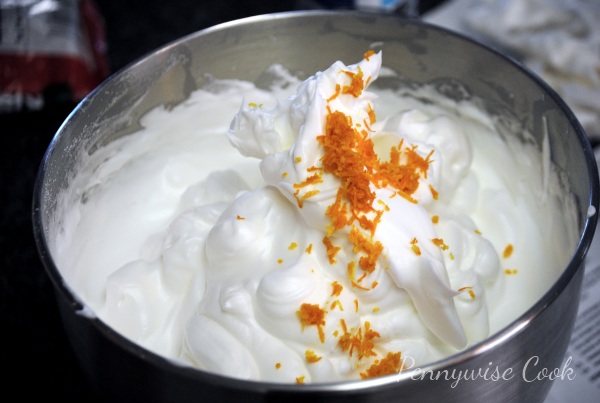
The main ingredient that creates its fluffy and white texture is the egg whites. Just be sure to have them at room temperature when you begin to whip them. Along with some cream of tartar, these babies will form peaks like the Grand Tetons. Next comes the shug-ah slowly added in by tablespoons.

My recipe is for Orange Angel Food Cake and the orange-y taste comes straight from the zested orange. No artificial extracts or flavors. Slowly fold in the flour and that’s it!

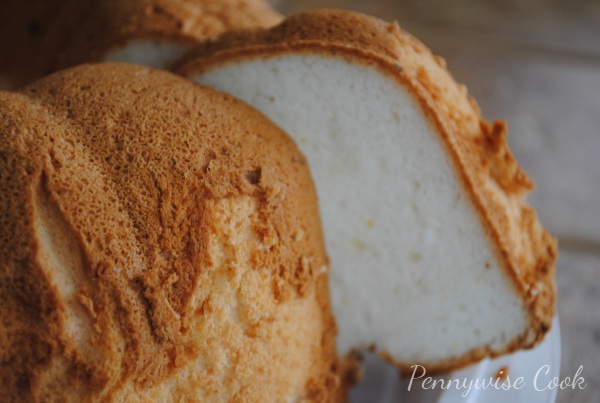
The result is a very incredible ever-so-slighty orange angel food cake that everyone will love. But believe me, they won’t need convincing. It’s just that good. And YOU will feel special for creating something so yummy that not even a store can beat. If you don’t like the taste of orange, you can always leave out the orange zest.

There is also a recipe there for a fruit compote to serve with this. I’ve made that along with this cake before and it’s yummy.

Recipe courtesy of Fitness Magazine.

Orange Angel Food Cake

Serving Size: 1 Piece

210

Orange Angel Food Cake

Simple homemade angel food cake with a hint of orange!

Ingredients

  • 1 1/2 cups egg whites (10 to 12 large)
  • 1 teaspoon cream of tartar
  • 1 1/3 cups extra-fine granulated sugar
  • 1 tablespoon finely shredded orange peel
  • 1 cup sifted cake flour

Method

  1. Preheat oven to 350 degrees.
  2. Place egg whites in extra-large bowl and allow to sit at room temperature for 30 minutes.
  3. Place your oven racks to the lowest point possible. Preheat oven to 350 degrees.
  4. Add cream of tartar to egg whites and beat with an electric mixer until soft peaks form. Slowly add in the 1 and 1/3 c sugar tablespoons at a time.
  5. Sprinkle orange peel into egg whites. Slowly fold in sifted flour a fourth at a time.
  6. Pour batter into an ungreaded bundt pan.
  7. Bake for 40 minutes or until top of cake springs back.
  8. Once cooked, immediately invert the cake on a stand or plate until cool. Using a knife around the edges, remove cake and serve!

Notes

The toppings are endless. My suggestions would be strawberries, blueberries, whipped cream or even ice cream!

http://www.pennywisecook.com/heavenly-orange-angel-food-cake/


Like this post? SHARE it!

Related Posts Plugin for WordPress, Blogger...

Subscribe to Pennywise Cook via Email

Many of you have asked how to subscribe to Pennywise Cook via email. You can subscribe here or you can click on the social button at the top right that says Subscribe. It will ask for your email address and once you sign up you’ll receive an email with a confirmation link to verify your subscription. Please do sign up and THANK YOU to everyone for all the kind words!


Like this post? SHARE it!

Related Posts Plugin for WordPress, Blogger...

Welcome to Pennywise Cook!

I’m so glad that you stumbled upon (or got dragged over here from Saving with Amy, I hear she’s pushy) this totally cool and delicious new blog, Pennywise Cook! This is a completely new venture for myself as I’ve spent the last 2.6 years sharing deals and coupons with folks. I still plan on doing so, but I also have another love and it’s time that I come clean with you. I’m a closet foodie. Yes it’s true and I’m not ashamed. I certainly don’t claim to be a professional or culinary genius. But I am a true southern girl that loves good food and telling others about it!

I’ve had my ups and downs with food. There were times when all I did was make hamburger helper and macaroni and cheese when my husband and I first got married. While my hubby would be just fine with that, we now have kiddos and it’s time to be healthy and teach our children to try new things. Whether that is actually accomplished is another story, but this is my journey to try! When I met my husband, he wouldn’t even eat mexican *gasp!* food. I know, what a weirdo huh? 🙂 I begged him one year for my birthday to go eat mexican and all it took was ONE bite for him to like it. Then I realized, one reason that most people (including the hubby) don’t like some foods is because they have never tried it! Textures and smells can be off putting, but with the proper presentation (and sneakiness), you can get people to try new things and actually like them!

You may know me from my other blog, Saving with Amy. Yep, I’m a frugal girl too! Actually, I’m probably one of the cheapest people you’ll meet. However, I love to save where I can so that I can spend in others! I love to shop and it wears my husband out. What girl doesn’t? Aside from sharing frugal and delicious meals, I also try to make them as healthy as possible. I splurge sometimes, but you’ll catch me making my meals as healthy as possible at all times.

My goal for this blog is to share with you recipes that I love, that I come across, and that I’ve tried. I’ll take my own pictures so you can see how the recipes “really” come out when made by an amateur like myself. My husband thinks I’m nuts because I love taking pictures of my food. I don’t think he knows that it’s only going to get worse. Shhh, we won’t tell him though.

So WELCOME and please give me your feedback, recipe ideas, or just say hi! I’m excited for what might come of this blog and getting to know you as we share our love of food.

Learn more about Amy on the About Me page.


Like this post? SHARE it!

Related Posts Plugin for WordPress, Blogger...