2-Ingredient Pumpkin Muffins

Alright, fess up all you pumpkin junkies. I see you everywhere drinking your Starbucks Pumpkin Spice Lattes and  swirling your Pumpkin Spice coffee creamer and eating your Pumpkin Pie ice cream. We are only 9 days into the month of September and you’re  already in full swing.

If only seeing a pumpkin meant that the weather automatically got cooler!

Now, I think one of the smartest inventions was pumpkin in a can. Gone are the days of needing to cut open a pumpkin and scrape all of the insides to create a puree for recipes.

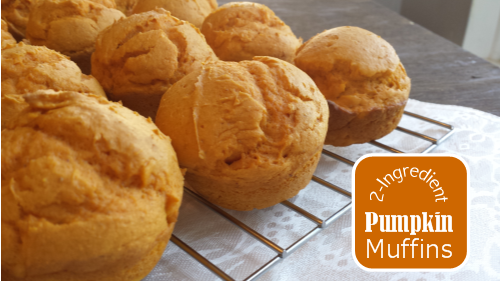
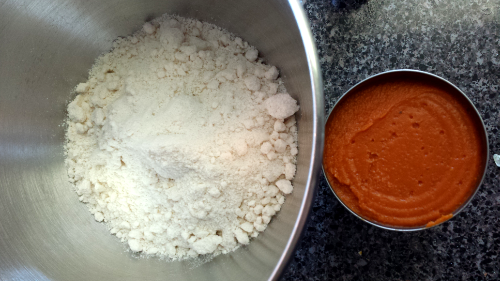
Your can of pumpkin is one of only TWO ingredients that you’ll need to make these Pumpkin Muffins!

I also wanted to mention, for you healthy folks like myself, there are only about 140 calories per muffin! Because you’re not adding a lot of extra calories with oil and eggs, these are actually pretty healthy!

The other ingredient is cake mix. Can you say cheap? I think I paid a total of $2.25 for these muffins. My kinda treat, cheap and sweet.

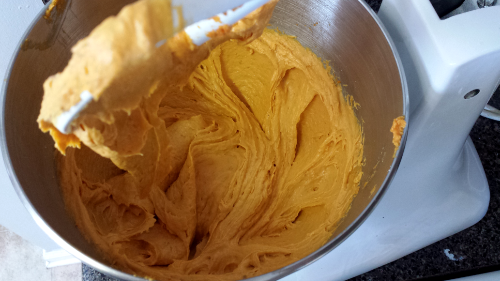
It takes a whirl in the mixer or about 50 strokes by hand to whip the muffin batter up.

Put your muffins in the oven!

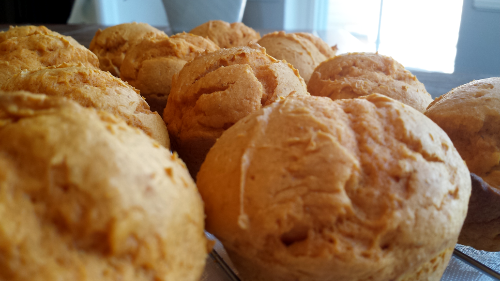
These are probably some of the fluffiest most light and airy muffins that I make.

And heavens, if you crack one open when it’s still warm and slather it with butter, you will be in heaven y’all.

Pumpkin heaven…

Pumpkin or cinnamon cream cheese would be so incredible with these I’m sure. I enjoyed warming them up with butter and sprinkling a little cinnamon on them!

Though you don’t exactly need much instruction because these are so dang easy, here’s the recipe.

2-Ingredient Pumpkin Muffins
Recipe Type: Breakfast, Snack
2 simple ingredients come together to make the ultimate fall snack- Pumpkin Muffins.
Ingredients
  • 1 Box Yellow Cake Mix
  • 1 (standard) Can Pumpkin Puree
Instructions
  1. Preheat oven to 350°.
  2. Grease a couple muffin pans.
  3. Mix cake mix and pumpkin puree together.
  4. Fill muffin cup about 2/3 the way full. (Should make about 15 regular size muffins)
  5. Bake for 15-18 minutes.
  6. Allow to cool and eat!
Serving size: 1 Calories: 140
Notes

These would be super tasty with the addition of 1/2 cup chocolate chips!

Recipe courtesy of Melissa at This Girl’s Life Blog.


Like this post? SHARE it!

Related Posts Plugin for WordPress, Blogger...

Strawberry Rice Krispie Treats

It’s only the first week out of school and I’m finding my snack stash to be a little on the low side. Sure I’ve bought the same as usual like I’ve always done throughout the year, but then it dawned on me….she’s home now.

When Addie would have been learning to spell small words, she is now asking for a Pop-Tart. When she would have been learning to add simple addition problems, she is now asking for a peanut butter and jelly sandwich. And when Addie would have been out burning off energy on the playground, she is now asking for a piece of candy or popsicle. It’s a never-ending viscous cycle.

She comes to me and asks for something to eat.

I say no.

She comes back 3 minutes later.

I say no.

And the process continues. Am I the only one experiencing this? I feel bad sometimes, like I’m depriving her of her basic needs! But I have to remind myself that she just ate lunch 15 minutes ago and that her main reason for snacking is boredom. I, myself, have that same issue so I can relate. But do as I say, not as I do!

So as I’m telling you all of this, I’m realizing that it’s not exactly a great way to relate my life to these super tasty treats. But I digress and will now tell you about this awesome new discovery that I made!

So I told you earlier this week that I put together a super cool Mickey Mouse party for my now 2 year old. I had so much fun planning this party, it’s ridiculous. This idea came to me when I was figuring out the color scheme.

I wanted RED Rice Krispie Treats. I was thinking what can make things red? Food coloring? Yes, but it’s weird sometimes when things are an unexpected color, but don’t taste any different. (Anybody remember the green ketchup years ago?) Kool-Aid? Maybe. J-ELLO! That’s it!

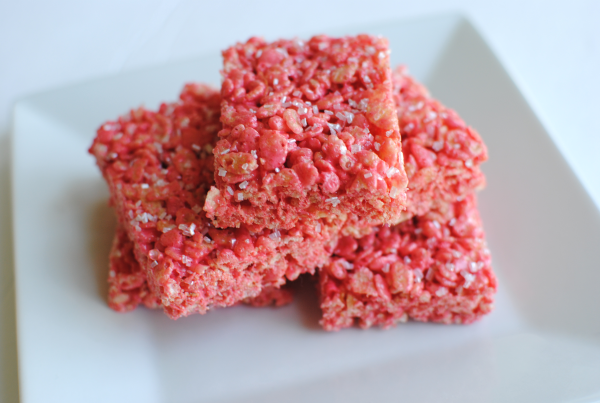
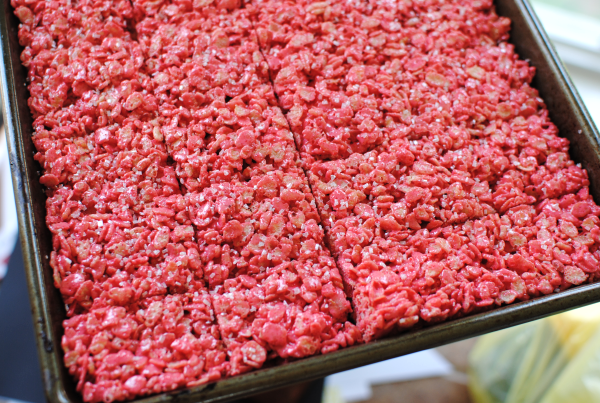
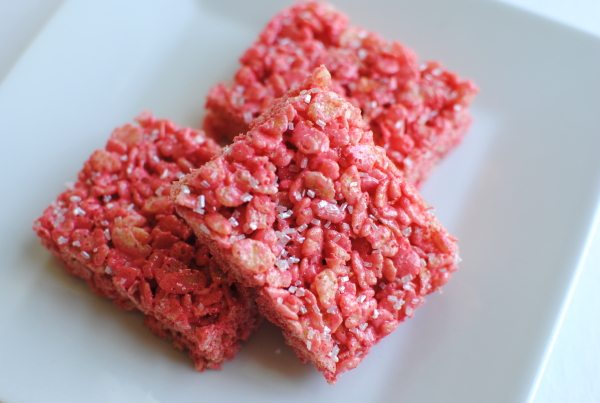
The rest is history y’all. I whipped up a batch of the original Rice Krispie Treats, but added a box of sugar-free Strawberry J-ELLO to the melted marshmallows before adding them to the Rice Krispies! They turned out delish. They remind me of the Crunch Berries in Cap ‘N Crunch cereal!

You should have seen me when I realized the possibilities. You can make them any flavor that you’d like! Simply add the box of J-ELLO to your melted marshmallows before mixing them with the Rice Krispies. Done deal.

And for the record, I was a teensy bit saddened that they didn’t end up red. I should’ve known that red and white make pink, DUH. Either way, I was very happy with the way they turned out.

Strawberry Rice Krispie Treats
Recipe Type: Snack, Dessert
Author: Pennywise Cook
This simple trick can get you several different tasty flavors of marshmallow treats!
Ingredients
  • 3 Tbsp Butter
  • 4 Cups Mini Marshmallows
  • 6 Cups Krispy Rice Cereal
  • 1 Pkg Sugar-Free Strawberry J-ELLO Mix (or any flavor you like)
Instructions
  1. In a large saucepan, melt butter over low heat. Stir in marshmallows and until melted.
  2. Add package of J-ELLO and mix until disolved. Remove from heat.
  3. Add the Rice Krispies and stir until well coated.
  4. Place into a well-greased jellyroll pan or casserole dish and let set.
  5. Cut into squares and enjoy!


Like this post? SHARE it!

Related Posts Plugin for WordPress, Blogger...

Summer is a Piece of Cake!

Welp, Memorial Day has come and gone which means WELCOME SUMMER! Wahoo! I got to sleep in this morning until about, oh, 7:15. That’s good right? The kids slept in, but me? No. I’m still stuck in let’s get going, get your shoes on, eat your breakfast mode. I’m hoping that nonsense will wear off soon. I’ve got to at least work up to sleeping to 8:00, don’t ya think?

My youngest turned 2 this weekend! It’s hard to believe that she is already 2. Her favorite show is Mickey Mouse Clubhouse, so naturally that became the theme of her party. I had a TON of fun putting it together. Don’t worry, I have a post all about it coming up.

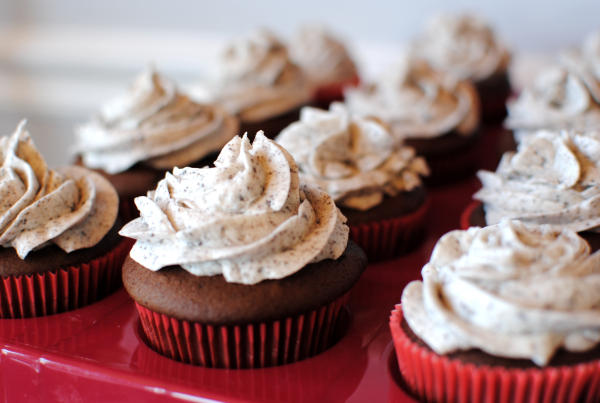
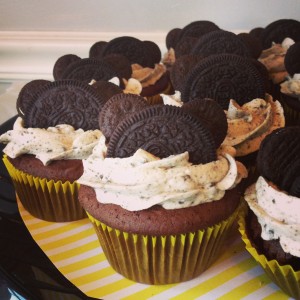
I wanted to share with you my Cookies N Cream Cupcakes. While I didn’t put together a step by step with these, they were really simple. I used Devil’s Food Cake Mix for the cupcakes. Only, I added a sweet surprise. Before baking, I placed a chocolate sandwich cookie in the bottom of each liner and then a dollop of marshmallow cream on top. THEN I plopped cake batter in. So they baked up with a cookie and filling inside!

For the frosting, I made a simple buttercream (no shortening in this one) and added about 1/2 cup of crushed chocolate sandwich cookies to the mix. Then piped it on and voila! These were so incredibly tasty. The cookie inside became soft after a while which I thought I wouldn’t like, but I found them to be even tastier that way.


Of course, I had to Mickeytize them for the party. Here’s a sneak peek of the Mickey fun! More on that later…

I think summer is one of the best times to create cool cakes. Not just because most of us have a little more time on our hands, but because the kids can help out! That is, if they can tear themselves away from the TV and video games…

Betty Crocker has got some really cute ideas for summer cakes. And you know that Betty Crocker likes to make things easy for us moms. There are some really cute cake ideas on the Betty Crocker website. I LOVE the Watermelon Cake. I think I’ll be trying that one out this summer. Considering that most of my family doesn’t like really watermelon, maybe they’d like it in cake form? I also find the butterfly cake to be adorable. It looks a little complicated, but Betty Crocker even provides a template for making it. How helpful!

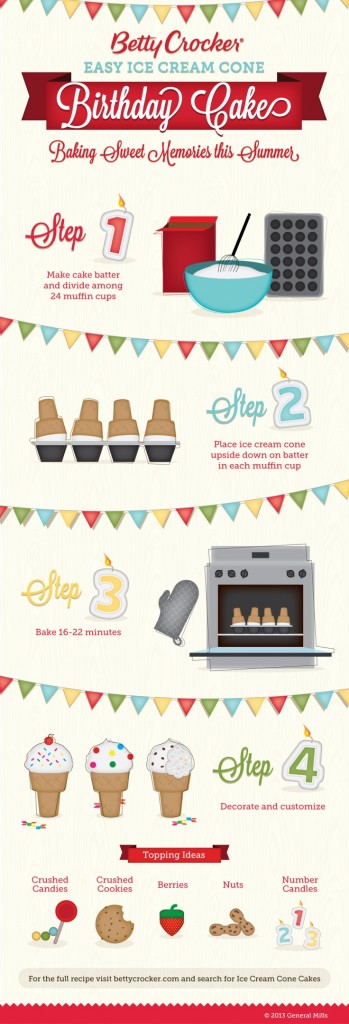
Have you seen the cupcakes made in ice cream cones yet? It’s a popular pin on Pinterest right now. Check out the infographic that Betty Crocker put together about how to easily put those cuties together.


Have you made the ice cream cone cupcakes before? I haven’t yet braved them so I’d love to hear your thoughts!

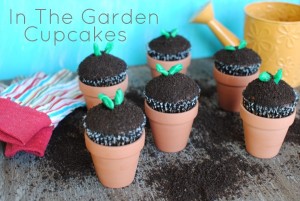
I made these In The Garden Cupcakes last year. They were a blast to make. You can find out how to make them here.

I’m full of inspiration for making cakes this summer now! You can find more summer cake inspiration from Betty Crocker!

This is a sponsored post written by me on behalf of Betty Crocker. All opinions expressed are 100% my own.


Like this post? SHARE it!

Related Posts Plugin for WordPress, Blogger...

Homemade Strawberry Belgian Waffles

It is MAY! Where in the wide world of sports did March and April get off to? I remember thinking wow, it’s already March and then BOOM it’s  May. I’m mostly caught off-guard because both of my girl’s birthdays are in May which means that mommy has a lot of work to do. My oldest’s birthday is next week and I decided not to procrastinate this year by asking her cake preference a week before instead of, oh, the night before.

These are Mom Of The Year qualities, you know.

She chose My Little Pony with a Rainbow Dash emphasis. For those of you who don’t know about these girly things, just know that I have a lot on my plate next week.

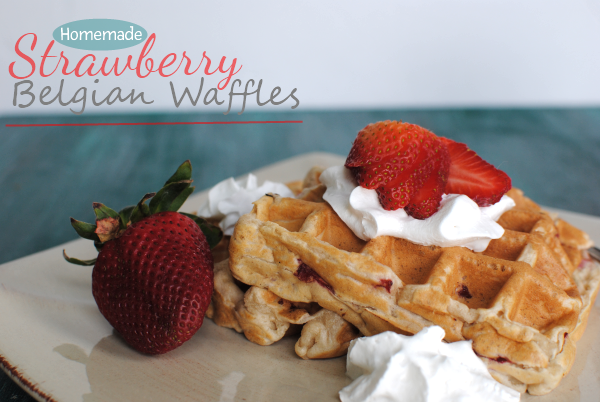
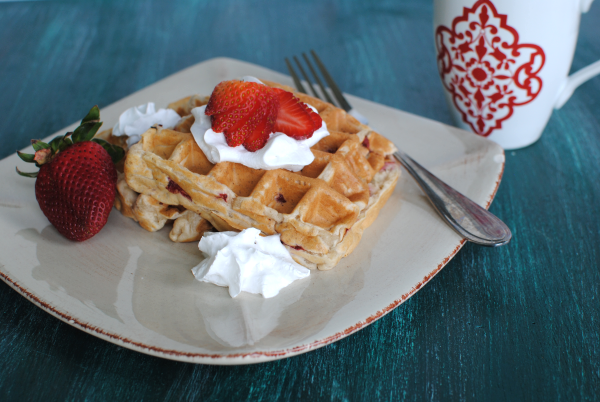
There’s probably a chance that you’d like to know about those big, fluffy waffles up there. I could tell you many stories about when my mom used to make these for me. Without exaggerating, I probably ate 4 of these in one sitting when I was younger.

I could do the same now, but I try to practice self-control.

My mom always made them from a box. Do not get me wrong, that is normally the very method that I would use. However, since I do have a tendency to eat a redonkulous amount of them, I wanted to make sure and healthify them up just a bit.

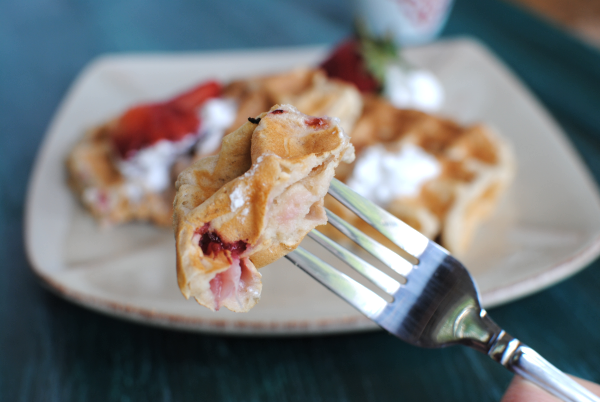
These Homemade Strawberry Belgian Waffles contain no butter, oil, or eggs. You could use soy milk or almond milk in place of the milk and you’d have them dairy free! They aren’t artificially made to taste like strawberries like some boxed mixes might work. They are literally made with fresh strawberries which give them a more natural flavor.

I almost called these Strawberry-Banana Belgian Waffles because I used bananas instead of the oil/butter/egg, but the banana taste didn’t come through as much as I was expecting. Even the strawberry taste didn’t become as potent as I would have liked. But if you’re brave and don’t mind a little sugar, you can add a tsp of sugar to the strawberries before adding them to the batter and I’m sure that it will bring out the strawberry flavor a little more.

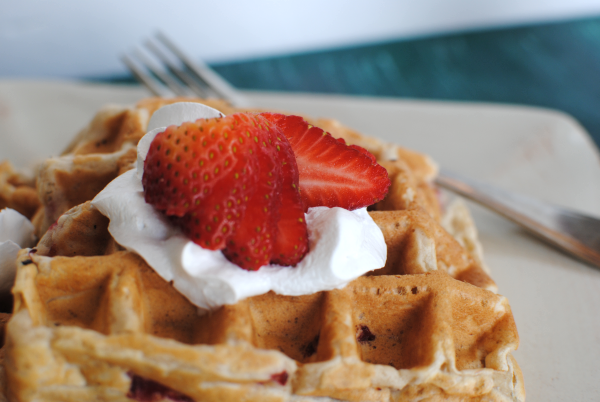
I think my favorite part about Belgian waffles as opposed to regular waffles is the fact that they are super fluffy.

I love fluffy food.

Does that sound weird? I’m sure it does, but I don’t care. I like whipped cream, cotton candy, mousse of all kinds, lighter-than-air angel food cakes. You name it, if it’s an ounce away from losing it’s gravity and joining the angels, then I probably enjoy eating it. The key to eating them, at least in my opinion, is to top them with fresh (or sliced and sweetened) strawberries and then give them a few squirts of Reddi Whip. I’m not sure that I could be in the presence of a Belgian waffle that didn’t contain whipped cream. That’s just the way that I was taught to eat them. I wonder what the Belgians think of me…

My waffle iron makes 2 of these at a time. With the amount of batter that I mixed up, I got 4 total. To help you know how many of these you’ll get out of 1 batch. I’d recommend doubling the recipe if you have a hungry bunch.

Believe me, they won’t eat just one.

Recipe adapted from Vegan Heartland.

Homemade Strawberry Belgian Waffles
 
Recipe Type: Breakfast
Author: <span class=”mceItemHidden”><span class=”mceItemHiddenSpellWord”>Pennywise</span> Cook- Adapted from Vegan Heartland</span>

Serves: 4
Strawberries add a summery flavor to sweet and tasty belgian waffles! You’d never know these were healthy. There are only about 150 calories per waffle!
Ingredients
  • 1 c flour (I used about 1/4 c whole wheat)
  • 1/4 tsp salt
  • 2 tsp baking powder
  • 1 tbsp maple syrup (I used sugar free)
  • 1/4 c mashed banana (about 1 banana)
  • 3/4 c skim milk
  • 1 tsp vanilla extract
  • 1/2 c fresh strawberries, finely chopped
Instructions
  1. In a small bowl, stir together flour, salt, and baking powder until combined. Set aside.
  2. In a separate mixing bowl, combine maple syrup, banana, milk, and vanilla. Mix on low until fluffy.
  3. Slowly add the dry ingredients to the wet and mix well.
  4. Then gently fold in the strawberries.
  5. Cook according to your waffle iron’s directions.
  6. Optional) Top with fresh strawberries and Reddi Whip!
 
Notes

– If you wanted to bump up the nutrition, you could also add some flax to these. I used about a 1/4 c whole wheat flour in mine.

– You can use pretty much any type of milk in place of the dairy milk if you’d like. Even coconut milk. It’s just a matter of your preference!

– These don’t have a strong strawberry taste (what’s in a name anyways?), so if you want to bump that up, add about a tsp of sugar to the strawberries. OR you could add the strawberries in the at the beginning and let them mix in well with the wet ingredients. The flavor would disperse a little more there. (I will be trying this myself)

– Or if you have any other suggestions for these, I’d love to hear! They are a work in progress. 🙂


Facts (per waffle not including toppings): 147 calories, 40 carbs, 0 grams fat, 5 grams protein, 417 gram sodium, 3 grams sugar.


Like this post? SHARE it!

Related Posts Plugin for WordPress, Blogger...

2-Ingredient Homemade Magic Shell

Ever since I can remember, I have been in love with the dipped cones from Sonic. I remember as a kid, we’d be coming home from church or school and I’d close my eyes and imagine that my parents’ blinker would come on once we got to Sonic. Oh the joy that would come when I’d hear that click click click. And if we did stop, sometimes that joy would be crushed by my dad eating the tip off my dipped cone. I still have a complex about that to this day…

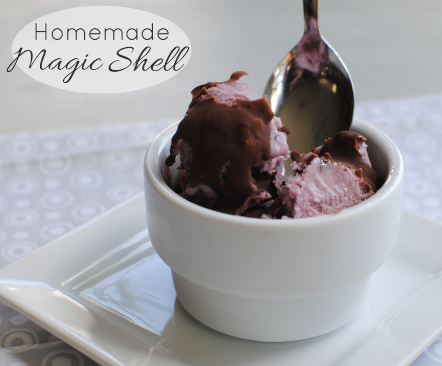
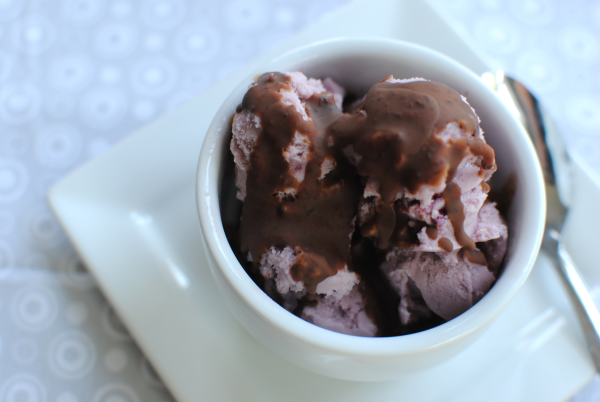
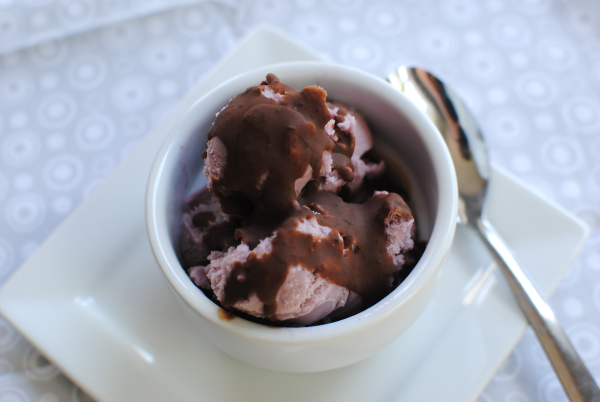
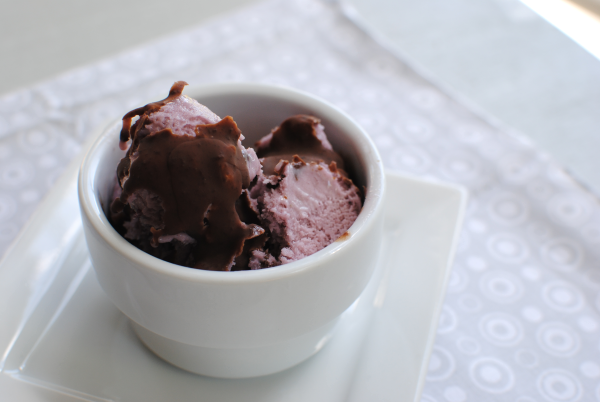
I also adore that Magic Shell liquid that you pour over your ice cream. You know the stuff. It starts as a liquid, but the minute that it hits your ice cream it starts to harden and forms a shell. It’s basically the same thing as the dipped cones from Sonic. No wonder I love the stuff.

It was only recently that I found out how extremely SIMPLE it is to make magic shell. You can pay around $3 bucks for a bottle of it at the store. After you read this recipe, you may never purchase it ever again. I know I won’t.

There’s something about the fun of starting off with a liquid and watching it turn to a solid. Brings me back to high school when we would do science lab. I was usually pretty bored until we did the hands-on experiments.

You see the TWO ingredients that are used to make this lovely, tasty, and sweet ice cream topping combine together to make your own little science experiment each time that you eat a bowl of ice cream. Coconut oil is the ingredient that essentially causes the hardening with contact to the cold. And then of course, you have your chocolate chips that mix with the coconut oil to create the “shell”.

Therefore, you end up with a liquid that becomes a chocolatey, yummy, shell on top of your creamy ice cream. And to think that this recipe only contains two ingredients that takes only seconds to make. You’ll never go back to store-bought, I promise…

 You can use your favorite flavor of chips to make this. Use butterscotch chips, white chocolate, dark chocolate, milk, or semi-sweet. I store mine in an old chocolate syrup bottle. With the coconut oil as an ingredient, it tends to harden in the bottle after a while at room temp. Simply pop it in the microwave for about 30 seconds and it’ll be back to liquid and ready to create a chocolate shell over your ice cream.

Recipe courtesy of I Wash, You Dry.

2-Ingredient Homemade Magic Shell
 
Recipe Type: Dessert
Author: I Wash, You Dry

With just 2 ingredients, you can create your own magic shell without a trip to the store!
Ingredients
  • 1/2 c. Coconut Oil
  • 12 oz. Semi-sweet Chocolate Chips (or your choice)
Instructions
  1. In a large microwavable bowl, combine the coconut oil and chocolate chips.
  2. Microwave at intervals of 30 seconds at 50% power, stirring between intervals.
  3. Pour over ice cream and allow to dry and harden.
  4. Store in an airtight container at ROOM TEMPERATURE.
 
Notes

If your magic shell hardens in the bottle, microwave it for about 30 seconds to get it back to a liquid again.


Like this post? SHARE it!

Related Posts Plugin for WordPress, Blogger...

No Time To Make Dessert? {Giveaway}

This is a Sponsored post written by me on behalf of Edwards. All opinions are 100% mine.

Edwards Pie

The words you are about to hear may come as a shock to you….

I don't always have time to make a homemade dessert. Yes, it is true. Sometimes, just sometimes I don't even feel like making dessert. And perhaps the reasoning behind it is that I spend so much time on dinner that I justdon't care to spend anymore time in the kitchen. It's understandable right?

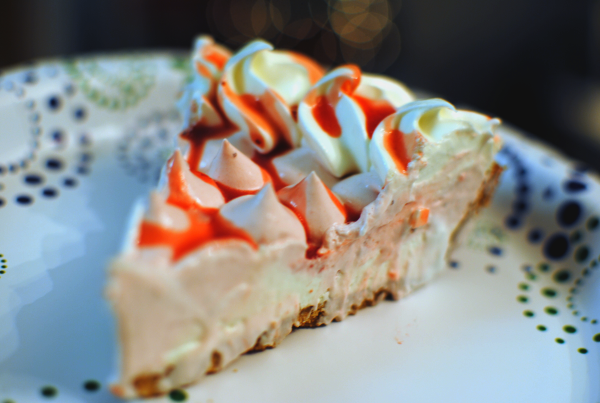
The only times that I really feel it's necessary to have dessert as a requirement is when it's a formal meal. You know, friends over or perhaps a holiday dinner. We had a dinner like this recently and of course, dessert was a forgotten project. Edwards Crème pies to the rescue! We stopped by the store and I let my daughter pick out her favorite. Strawberry Cream Pie was her dessert of choice and it was a good one. I'd probably recommend it for a get-together. I love when there's no baking involved. 🙂

For the holidays, Edwards is still offering a holiday e-card that you can send to family and friends! I know it's January, but the link still works so try it out! It's pretty cute. I sent my e-card in no time flat and received a coupon via email. 

My favorite part of the e-card offer? You AND your recipient get a $1 off coupon. Throughout the month of November and December, Edwards Desserts donated $1 for each and every Edwards product purchased. How super cool is that?

Now, let's get to the good stuff! One of YOU are going to win a FREE Edwards Creme Pie! The winner of this giveaway will receive a coupon for a FREE Edwards Creme Pie AND Edward's Desserts will be making a $20 donation to Toys for Toys in the winner's name! This will be a quicker than normal giveaway ending on Tuesday, January 15th at midnight CT.

Edward's Desserts Giveaway

Mandatory Entry: Leave a comment on this post with your favorite Edward's pie or perhaps one you'd like to try.

Optional Additional Entries:

This giveaway will end on Tuesday, January 15th at midnight CT. I will contact the winner on Wednesday, January 16th and they will have 24 hours to respond. If I have not heard from them, I will name a new winner. Please allow up to 6 weeks for delivery of your coupon. US residents only.

Edwards.jpg

Tots.jpg

Visit Sponsor's Site


Like this post? SHARE it!

Related Posts Plugin for WordPress, Blogger...

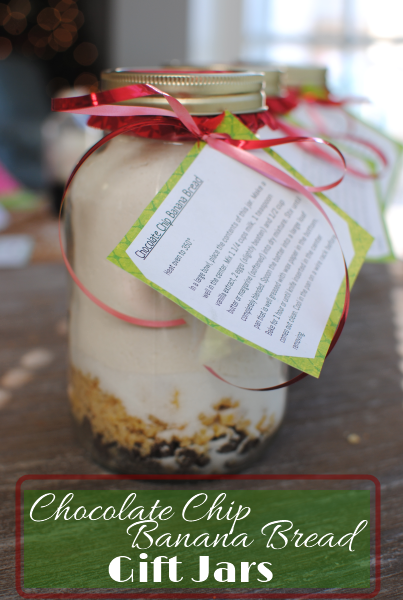
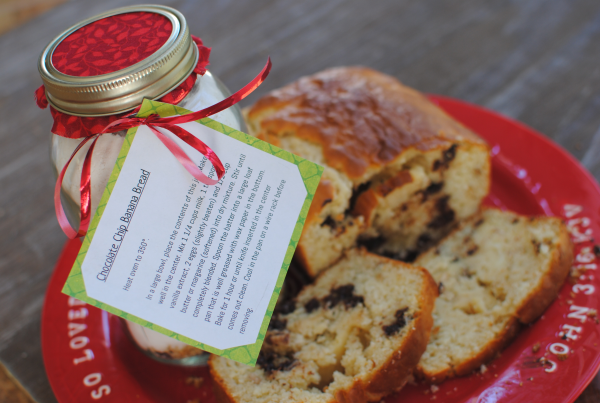
Chocolate Chip Banana Bread Gift Jars

I’ve recently gotten the nickname “Becky Homecky” from my mom. Had you asked me 5 years ago if I would be creating recipes, crafts, and projects then I probably would have said absolutely not. Not just because I was working at the time, but also because I never really had the urge to do anything so Betty Crocker-ish. These days I find these things to be completely stress-relieving and better yet, fun.

Whodathunkit?

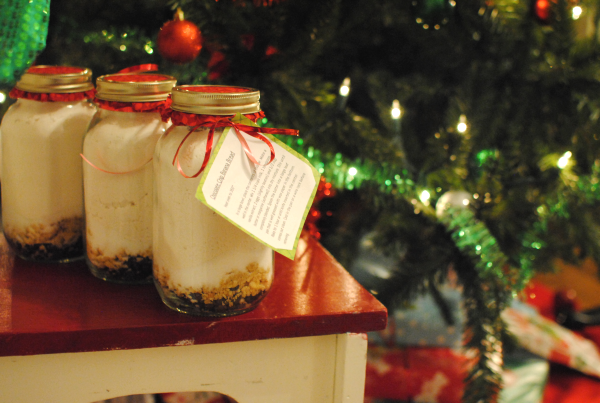
Every Christmas for the past 5 years, I’ve said I’m going to make homemade Christmas gifts to save money and to put a little thought into my gifts. And almost every year, I get down to the wire and never get around to it. This year, I’m determined to make it happen.

I’m starting with these gift jars. There are about a million combinations for gift jars these days. You name it, you can gift it in a jar. My daughter suggested that we try Banana Bread Gift Jars the other night. I told her that I wasn’t sure that you could do that because bananas can’t rightly be put in a jar and keep.

Then I came across this recipe at Recipe Goldmine for Chocolate Chip Banana Bread in a Jar. Never having made mixes in a jar like this, I wanted to go with a tried and true recipe before branching out into experimentation. I found it interesting that using dried banana chips for the banana part actually ended up tasting like regular bananas.

And the chocolate, come on. YUM is the only word to describe chocolate and bananas.

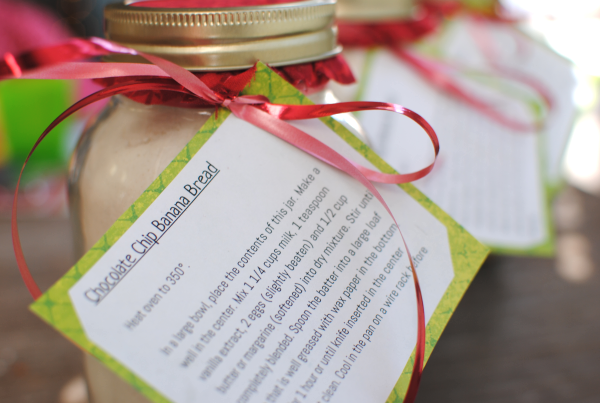
I got my jars at Walmart for around $8 for 12 of them including tops. I used some fabrics pieces that I already had along with some red string to dress the jars up a bit. I printed out the instructions for making the bread and glued it to a piece of scrapbook paper. Then punched a hole and tied it to the jar.

Aren’t they adorable?

These make such great gifts for teachers and coworkers. And they are inexpensive too. My favorite part!

Recipe courtesy of Recipe Goldmine.

Chocolate Chip Banana Bread Gift Jars
Recipe Type: Gift, Bread, Snack
Author: Reipe Goldmine
Easily create homemade gift jars for yummy Chocolate Chip Banana Bread!
Ingredients
  • 1/2 cup chocolate chips
  • 1/2 cup dried bananas, finely chopped
  • 1/2 cup granulated sugar
  • 2 1/2 cups Bisquick
  • 1 teaspoon baking powder
  • 1/4 teaspoon salt
Instructions
  1. Layer all ingredients in a quart-size jar in order they are given. Press the layers down firmly before adding next layer.
  2. Attach gift tag with these instructions:
  3. In a large bowl, place the contents of this jar. Make a well in the center. Mix 1 1/4 cups milk, 1 teaspoon vanilla extract, 2 eggs (slightly beaten) and 1/2 cup butter or margarine (softened) into dry mixture. Stir until completely blended. Spoon the batter into a large loaf pan that is well greased with wax paper in the bottom. Bake for 1 hour or until knife inserted in the center comes out clean. Cool in the pan on a wire rack before removing.

Like this post? SHARE it!

Related Posts Plugin for WordPress, Blogger...

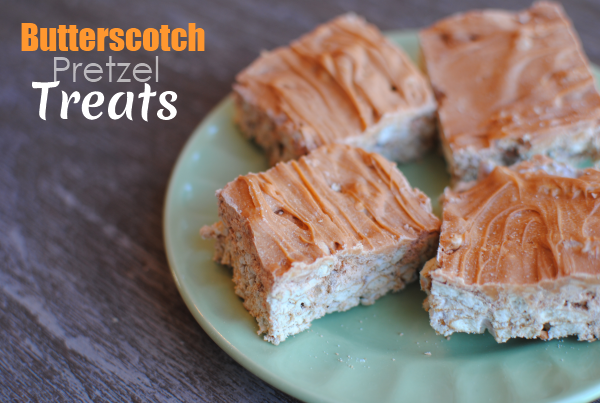
Butterscotch Pretzel Treats

Thanksgiving is in TWO days! This year has just flown by. Have you finished all your big feast shopping? I sure hope so, because the stores are nuts about now. I was in a few stores the other day and just gave up. You know those trips to the store when you have only a couple of items. Then you get in line only to realize that for those 2 items you’ll have to wait in line for 20 minutes. That’s about the time that I start to justify whether or not it’s absolutely necessary that I get those items.

I usually just give up.

I wanted to share with you guys these awesomely yummy treats that I made the other day. When I’m feeling experimental, I pick up things I think might go well together and then kinda throw it together. As you know, sometimes it works well and other times, well, it completely bombs.

I’m human and a novice cook, so what can I say?

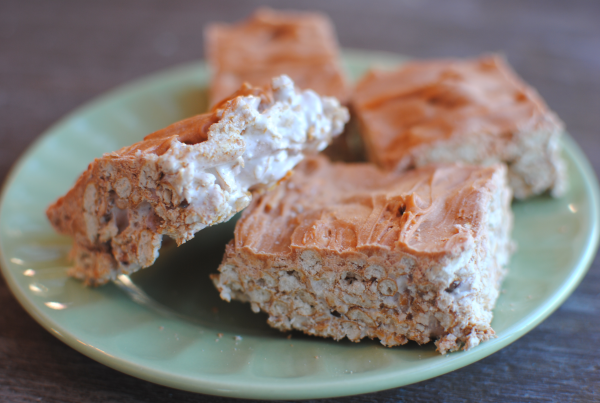
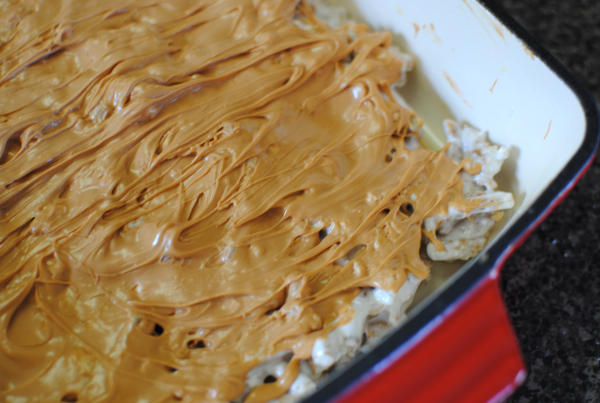
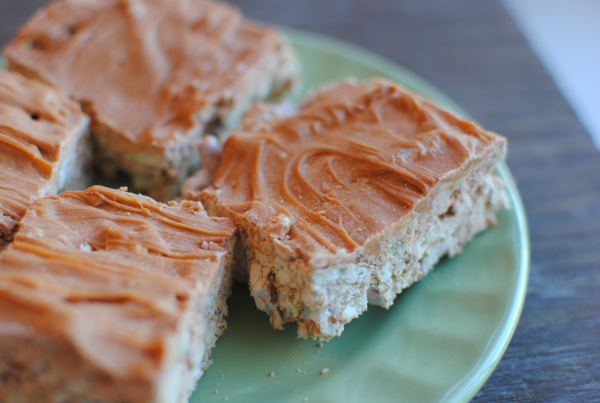
So this is why I was so very happy when these tasty Butterscotch Pretzel Treats turned out so yummy! So easy with just 4 simple ingredients and they take literally minutes to make.

They resemble that of rice krispie treats, but I used pretzels instead of the rice krispies. And oh did that make them yummy. I just love the hint of salty that  you get with these sweet treats.

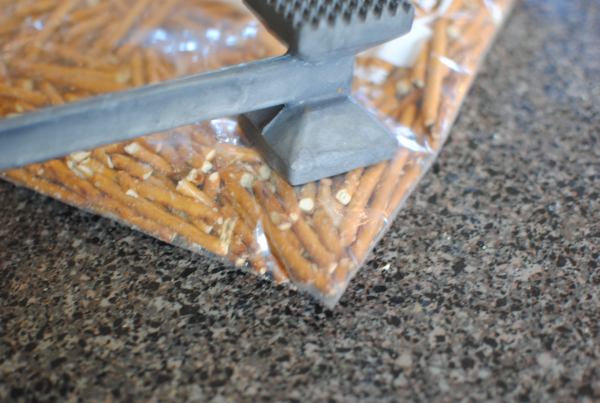
The first thing you want to do is get all of the pretzels out of the bag. The reason that I want to unscore pretzels is because the bag tends to have a ton of salt at the bottom, so don’t just pour the entire bag of pretzels into your ziploc. Use your hand to get them out leaving all the salt at the bottom of the bag.

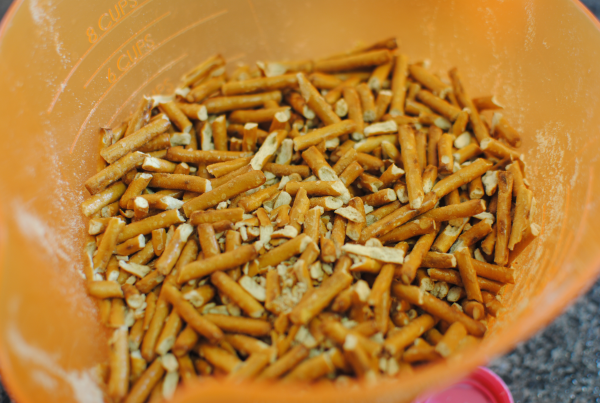
Use meat mallet or something heavy to break up the pretzels a bit.

It’s really not essential that you make them super small. Just get them fairly broken and be done. Put them in a bowl.

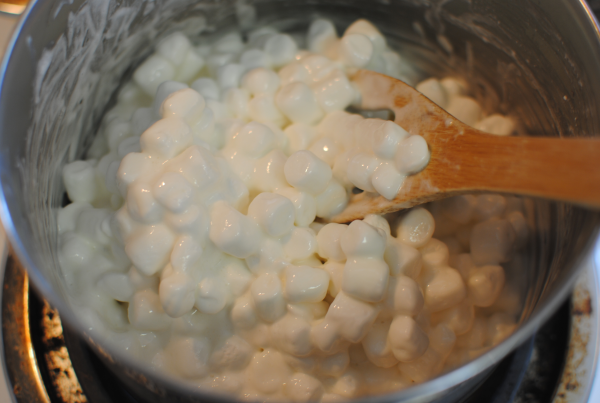
Then it’s time to melt up your marshmallows with a little bit of milk. This may be the longest step in the whole process.

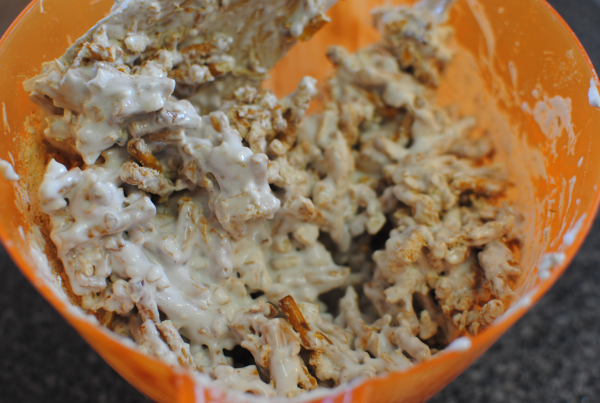
Pour the melted marshmallows in with the pretzels and use your spoon to mix it all up really well. There tends to be pretzel crumbs at the bottom, so make sure to incorporate those too.

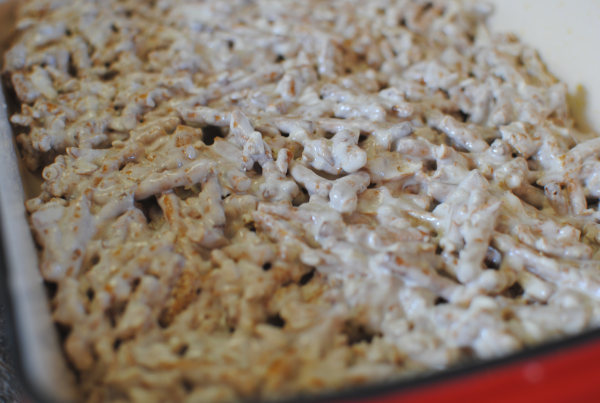
Pour it all into a greased 9×13 dish and flatten out. Set that aside while you get the butterscotch going.

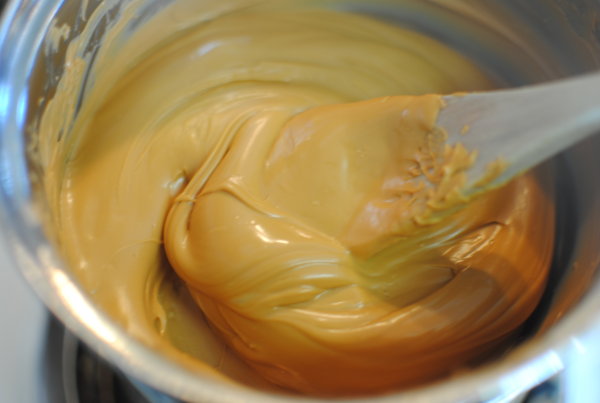
Using your preferred method, melt the butterscotch chips until smooth. Some people feel comfortable using the microwave, but I’m not good at that so I always use a make-shift double boiler for this.

Pour the melted chips over the marshmallowey pretzels and place in the refrigerator to set.

Cut into bars and serve! It’s so easy to make these and they are SO good. A nice little change from your everyday rice krispie treats, don’t ya think?

Butterscotch Pretzel Treats
Recipe Type: Dessert, Snack
Author: Pennywise Cook
With only 4 ingredients, these Butterscotch Pretzel Bars and easy AND incredibly yummy!
Ingredients
  • 1 12 oz Package Butterscotch Chips
  • 1 12 oz Package Pretzel Sticks
  • 1 10 oz Package Mini Marshmallows
  • 2 Tbsp Milk
Instructions
  1. Remove the pretzels from their bag and transfer to a large ziploc bag. Make sure to use your hands to remove them and not pour the entire bag in. This will avoid getting all of the salt into your treats.
  2. Using something heavy, break the pretzels inside the ziploc until fairly small. Pour into a mixing bowl.
  3. Place the milk into a large saucepan. Pour in marshmallows and melt over medium heat until smooth.
  4. Pour the marshmallows into the pretzels and combine well. Making sure to get the pretzel crumbs incorporated well. Pour into a greased 9×13 dish and flatten with the back of a wooden spoon.
  5. Meanwhile, melt bag of butterscotch chips in microwave or over a double boiler until smooth. Pour over pretzel mixture and spread completely over top.
  6. Place in refrigerator to set. Cut into bars and serve!


Like this post? SHARE it!

Related Posts Plugin for WordPress, Blogger...

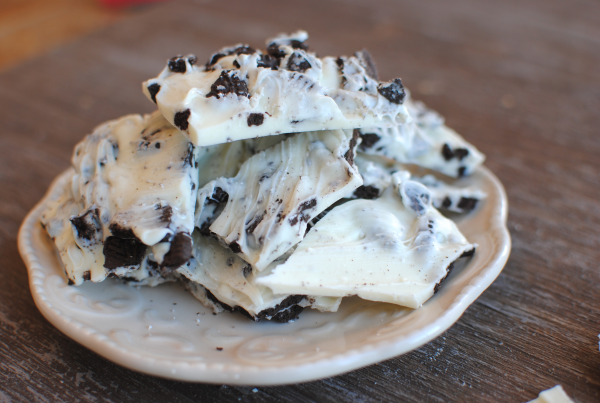
2-Ingredient Oreo Bark

How did your family do with the time change? Everyone enjoy their extra hour of sleep at your place? With 2 girls under 5, there was no extra hour of sleep here. They just don’t cherish that hour like we do. I even had a conversation with my 5 year old the other night about how mommy and daddy like sleep. She just couldn’t grasp why we would enjoy wasting so much time with our eyes closed. That whole conversation was a lost cause. It never really went anywhere and contained no resolution for her.

Sometimes it’s better to just not try and explain things to a 5 year old, huh?

Last week, I had a hankering for something Oreo. I can’t ever bring myself to actually indulge in eating oreos, but I do like to make things containing them. Go figure. I had a package of white chocolate chips in the pantry and some individual packages of Oreos.

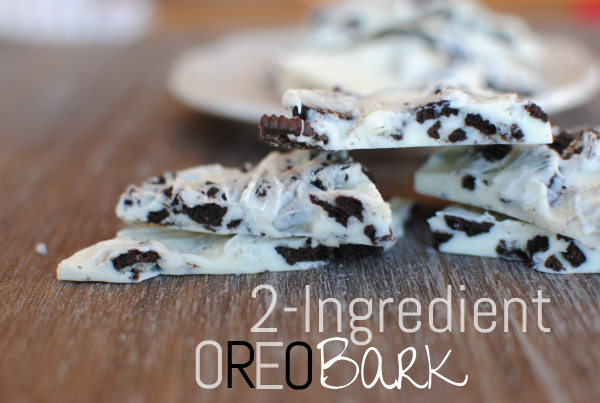
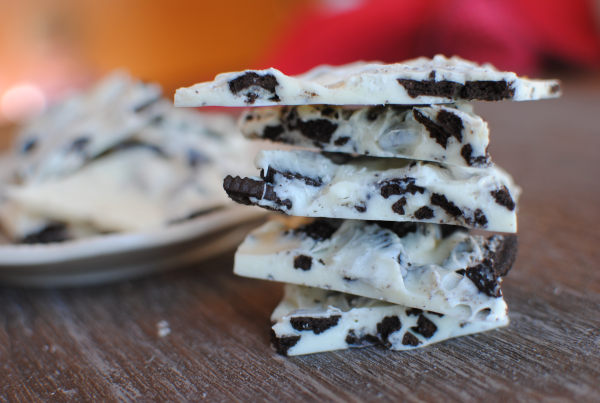
Can you say simple? That’s all that I needed to make this incredibly tasty candy bark. It took literally minutes to make and satisfied my Oreo hankering times 2.

I found myself eating so much of it that I sent it to work with the hubby. That’s my secret weapon, y’all. You notice sometimes I don’t always make “healthy” things. Those are usually the ones that I try to send away to a friend or to work with hubby.

It all starts with a cookie sheet covered in wax paper. Crumble up about 12 or so Oreos and lay them around the cookie sheet. Melt up your white chocolate chips and pour them over the Oreos. Smooth out and place in the freezer for about 10 minutes or so and YOU’RE DONE.

Does it get any easier?

This, my friends, would make a fantastic food gift for Christmas! Simple wrap it up in a fancy tin or treat bag and tie with a Christmas bow and you have one cheap and cheerful gift!

Who wouldn’t enjoy Oreo Bark?

2-Ingredient Oreo Bark
Recipe Type: Dessert, Snack
Author: Pennywise Cook
With only 2 simple ingredients, you can make a Christmas gift or tasty snack within minutes!
Ingredients
  • 12 or so Oreos (Crumbled)
  • 1 (12 oz) Package White Chocolate Chips
Instructions
  1. Line a cookie sheet with wax paper. Spread the crumbled Oreos around the sheet.
  2. Melt entire bag of white chocolate chips according to the package or in a double boiler.
  3. Once melted pour over the Oreo pieces and smooth out. Place cookie sheet in freezer for about 10 minutes and then break into pieces.
Notes

If you don’t have a double boiler to melt your chocolate chips, just use two sauce pans. Place hot water in the bottom one and the chocolate chips in the top. Bring the water to a rolling boil and melt the chips.


Like this post? SHARE it!

Related Posts Plugin for WordPress, Blogger...

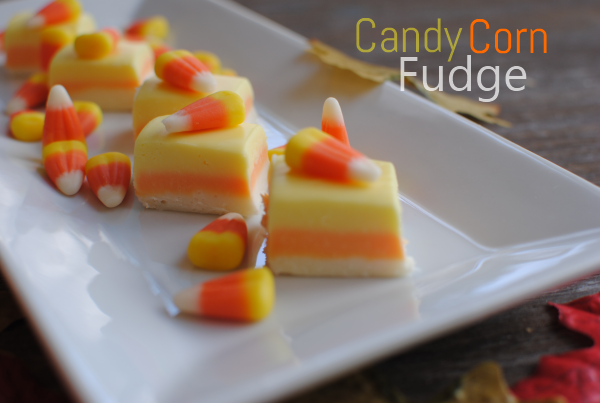
Candy Corn Fudge

I realize that those of you out there who don’t like candy corn are probably cringing right now. But luckily for you, this fudge doesn’t actually taste like candy corn. And for those of us who do like candy corn, you can make some of this for your candy corn-hater friends and keep all of the actual candy corn for yourself. With Halloween just around the corner now, it’s everywhere!

For Christmas last year, my husband got me 6 bags of candy corn. He got a stellar deal on them after Halloween and put them up until Christmas. He knows the way to my heart. 😉

True story.

And no, that’s not all that he got me. 🙂

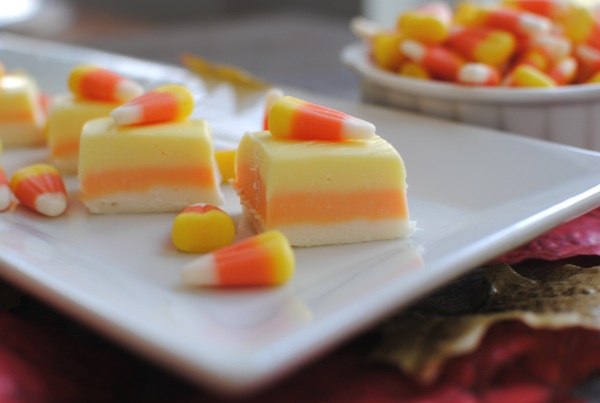
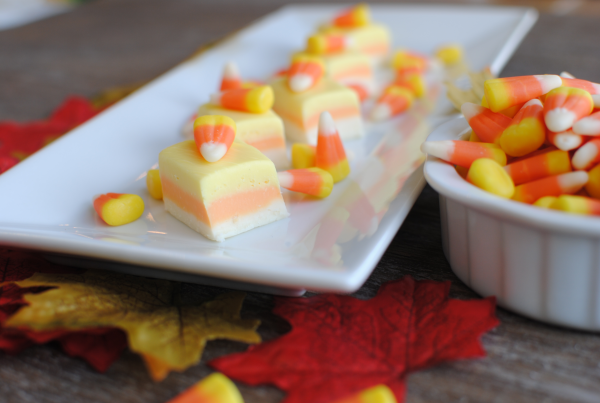
This fudge isn’t for those watching their sugar. Or calories, or carbs at that. It’s high in everything I’m sure, but is a worthy splurge for the candy holiday. It also looks quite festive and makes a great party snack!

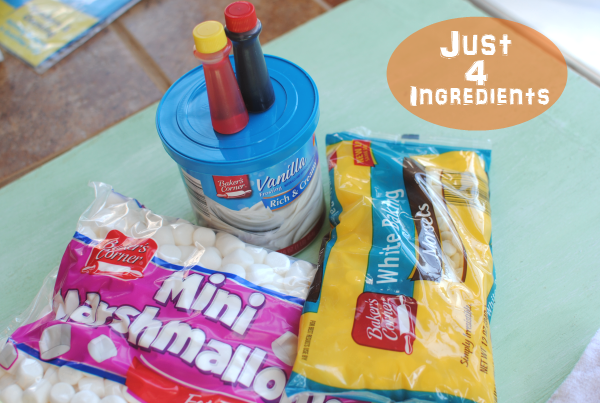
I can’t help but love this recipe because it only contains 4 simple ingredients. Needless to say that the steps are simple too! In total, it took me about 30 minutes, 1 dirtied mixing bowl, a dirtied measuring cup, and a major sugar high to make this.  When I say major sugar high, I mean I ate waaaaay too much of the ingredients while making it.

Learn from my mistakes and don’t do it if you want to eat any of the actual fudge. 😉

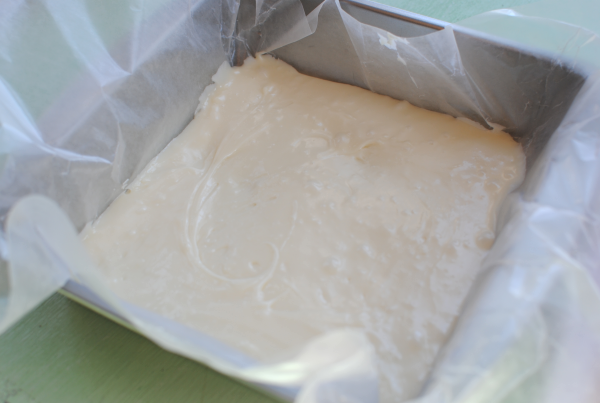
That’s a mix of white chocolate chips, marshmallows, and vanilla frosting. Who wouldn’t want to dive right into that?! This picture begins the layering process which is much easier than it sounds.

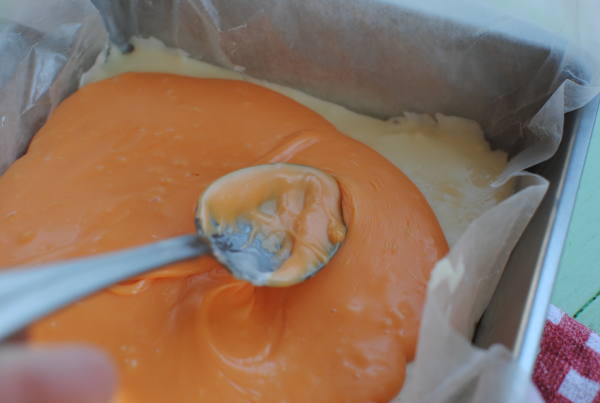
We’ve given the white a little time to cool and set and here comes the orange layer! It happens pretty fast.

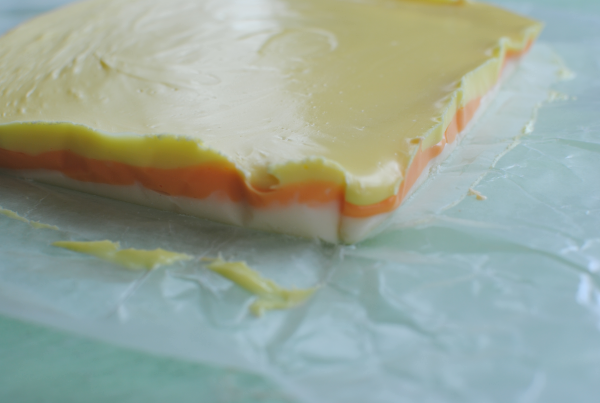
And after finishing up the layering, you’ll be proud that you decided to use wax paper because it makes it super easy to remove from the pan and cut into perfect little fudge pieces!

This would be a great fun fall snack to make with the kiddos. Stirring in the coloring is the best part, aside from licking the spoon. I’ve always got an eager spoon-licker around here.

Here’s how to make it!

Candy Corn Fudge
Recipe Type: Dessert, Snack
Author: Pennywise Cook
With just 4 ingredients, you can create fun and festive fudge that mimics the look of candy corn!
Ingredients
  • 1 Package Mini Marshmallows
  • 1 Tub Vanilla Frosting
  • 1 12 oz Bag White Chocolate Chips
  • Orange and Yellow Food Coloring
Instructions
  1. Line a square baking dish with wax paper.
  2. st Layer:
  3. In a large mixing bowl, place 3/4 c. white chocolate chips, 3/4 c. mini marshmallows, and 1/4 c. + 2 tbsp vanilla frosting. Microwave on 50% power for 30 seconds. Remove and stir. Return to microwave and heat for another 30 seconds. Stir and pour into bottom of baking dish. Smooth out to all of the edges. Place in refrigerator to set for 10-15 minutes.
  4. nd Layer:
  5. Place the same ingredients in bowl and microwave as you did the other layer. Add orange food coloring to melted mix until you reach desired color. Pour onto cooled and set white layer. Smooth out to all edges and return to refrigerator for another 10-15 minutes.
  6. rd Layer:
  7. Place the same ingredients in bowl (use up the rest of the white chocolate chips, but you may have some leftover marshmallows and frosting) and microwave as you did the other layer. Add yellow food coloring to melted mix until you reach desired color. Pour onto cooled and set orange layer. Smooth out to all edges. At this point, I place mine in the freezer for 10-15 minutes for it to set really well.
  8. Using wax paper, pull out from dish and cut into squares. Store in refrigerator to keep firm.

Like this post? SHARE it!

Related Posts Plugin for WordPress, Blogger...