Peanut Butter Banana Cupcakes

I can almost say without a doubt that Elvis and I would have got along great. Besides the fact that he was easy on the eyes (younger years), he also had great taste. I’ve toured Graceland before and Elvis’s style was definitely unique and modern for his time. My favorite room, of course, was the Jungle Room.
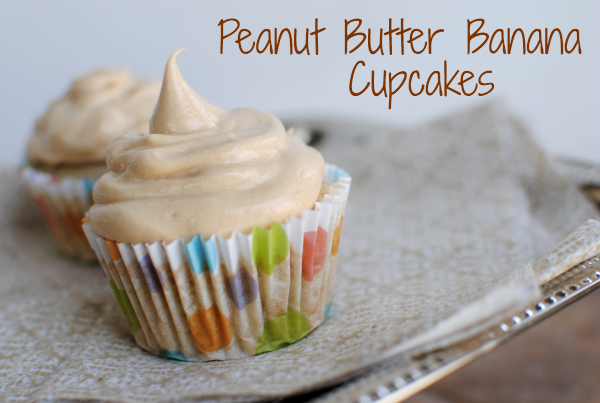

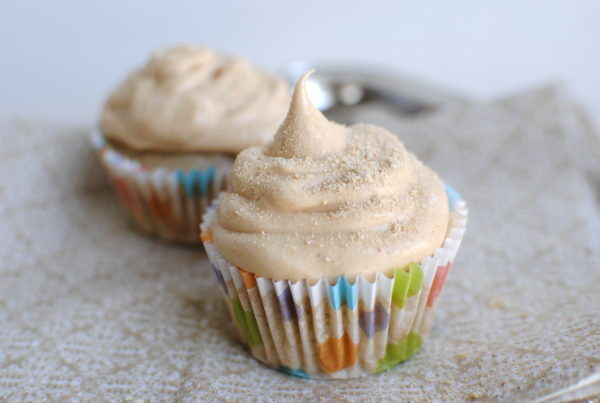
Though the King of Rock and Roll is gone, his influence on taste has stuck around. Take these incredible Peanut Butter Banana Cupcakes for instance. Fit for a king and rockin’ and rollin’ with flavor, you just can’t go wrong with the creamy combination of peanut butter and banana.
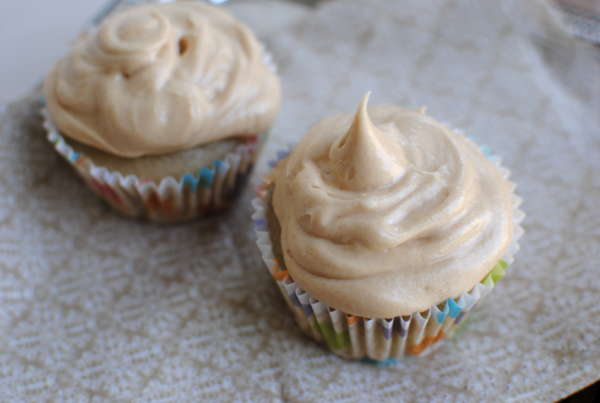

These cupcakes are almost like a poundcake. I didn’t expect to have such dense cupcakes, but the more that I ate them, they grew on me. The banana taste in these comes directly from real bananas with no artificial flavoring. I think that’s what makes these so good.

Oh yeah….

And that peanut butter frosting.

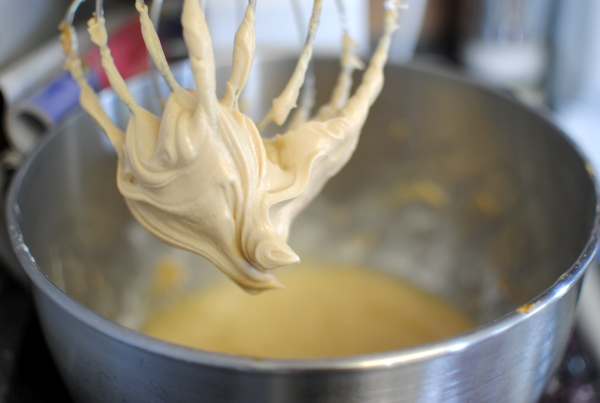
This frosting by far is one of my favorite frostings that I’ve made. Not because others have made are not as good, but this is one that I could just sit and eat out of the bowl all day.

And I did. I have no shame.

This peanut butter frosting is the key to completing such a royally-inspired cupcake. And though you’d expect to spend a long time baking up a completely from scratch cupcake, it’s also very easy. And frugal at the same time.

Most ingredients in this cupcake are things you might have on-hand. You may have to grab some bananas at the store if you don’t usually keep those around. And those will put you out like what….$1?

Banana Cupcake recipe inspired by gourmetgeema at grouprecipes.com. Peanut butter frosting recipe inspired by hutchison at recipes.sparkpeople.com.

Peanut Butter Banana Cupcakes

Peanut Butter Banana Cupcakes

Creamy banana cupcakes topped with a smooth and decadent peanut butter frosting are fit for a king! Of rock and roll that is!

Ingredients

    For the Cupcakes
  • 1/2 c. Butter
  • 1/2 c. Domino Light or Splenda
  • 1/2 c. Sugar
  • 1 egg, slightly beaten
  • 1 and 1/2 c. flour
  • 1/4 tsp Salt
  • 1 c. Bananas (very ripe), mashed
  • 1 tsp Vanilla
  • For the Peanut Butter Frosting
  • 2 c. Powdered Sugar
  • 1/4 c. Skim Milk
  • 1/4 c. Butter
  • 1/2 c. Peanut Butter
  • 1 tsp Vanilla
  • Graham Cracker Crumbs for sprinkling (optional)

Method

    For the Cupcakes
  1. Preheat the oven to 350 degrees. Add all ingredients to a large bowl and mix until well combined.
  2. Fill cupcake tins 1/2 full and bake for 15-20 minutes.
  3. Let cool.
  4. For the Frosting
  5. In a large bowl, cream butter, milk, and peanut butter together. Slowly add in the powdered sugar. Add vanilla and whip until combined well. Frost cooled cupcakes.
  6. Sprinkle with graham cracker crumbs (optional).

Notes

The cupcakes don't get really brown on top like most cupcakes do. The banana in them tend to keep them light. Don't let this fool you when you are timing them in the oven. Be sure to use a toothpick to tell if they are cooked through and remove them right away. They can become extremely hard if overcooked.
http://www.pennywisecook.com/peanut-butter-banana-cupcakes/


Like this post? SHARE it!

Related Posts Plugin for WordPress, Blogger...

Pineapple Toasted Coconut Pretzel Salad

I’ve been blessed to have been to Jamaica twice in my life. It’s a fantastic place to visit with it’s beautiful crystal clear water and “No problems, mon” atmosphere. It’s one of the very few places that I’ve visited that I feel carefree. Two flavors that always bring me back to the Caribbean are pineapple and coconut. I’m a huge fan of both and together they make the most amazing combination.

There’s of course the ever-popular pina colada made of rum, coconut cream, and pineapples. But I have something new for you to try that might just curb your craving for the tropical duo.

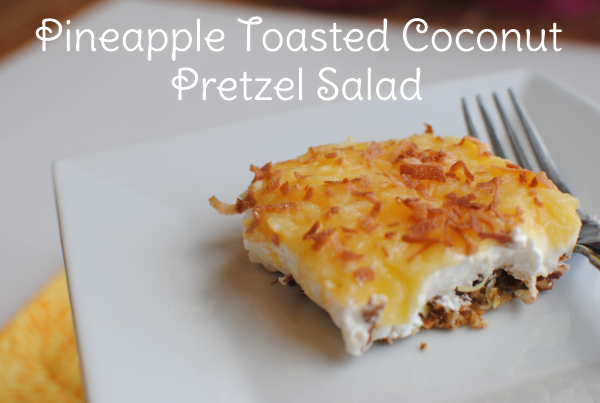
I found this Pineapple Pretzel Salad recipe and made some changes to give it a tropical and healthier twist. Although, the fact that I sat and ate half the pan the night that I made this kinda counteracted the fact that it was healthy, but you’ll be smarted than me won’t you?

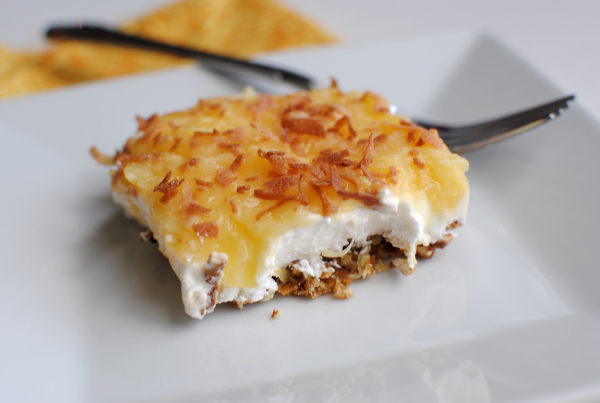
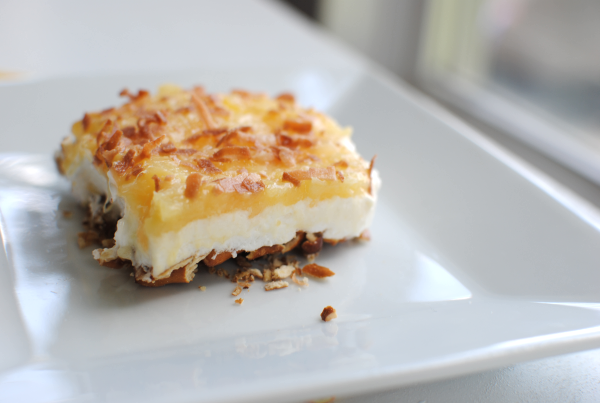
I think that one of my favorite things about this dessert is that it’s got that sweet and salty thing going on. The pineapple and cream cheese provide that tasty sweet that you expect from a dessert, but the salty pretzels along with the toasted coconut give it a salty taste. This is the perfect summer dessert.

Pineapple Toasted Coconut Pretzel Salad

Pineapple Toasted Coconut Pretzel Salad

Pineapple and toasted coconut come together with a mixture of sweet and salty for a refreshing summer treat!

Ingredients

  • 2 c. Crushed Pretzels
  • 1/2 c. Shredded Coconut + 1/4 c. Shredded Coconut
  • 1/2 c. butter, melted
  • Several Sprays of I Can't Believe It's Not Butter
  • 1 8 oz Package of Reduced Fat Cream Cheese
  • 1/4 c. Domino Light or 1/2 c. Splenda
  • 1 8 oz Whipped Topping, thawed
  • 1 20 oz Can Crushed Pineapple
  • 4 Tsp Instant Sugar Free Vanilla Pudding Mix

Method

  1. Preheat oven to 350 degrees.
  2. Toasted coconut in oven for 2 minutes and remove.
  3. Mix toasted coconut with crushed pretzels and place in the bottom of a 9x13 pan. Pour melted butter over the top. Spray several times with I Can't Believe It's Not Butter Spray to coat the pretzels. Bake for 10 minutes. Let cool.
  4. Cream the cream cheese and sweetener together. Fold in whipped topping and spread over crust.
  5. Combine the pineapple and pudding mix and spread over cream cheese layer. Chill until ready to serve.

Notes

An easy way to crush your pretzels is to throw them in a ziploc bag and use a heavy spoon or meat mallet to crush them on a kitchen towels. Or if you want a finer crushed crust, use a food processor.

http://www.pennywisecook.com/pineapple-toasted-coconut-pretzel-salad/


Like this post? SHARE it!

Related Posts Plugin for WordPress, Blogger...

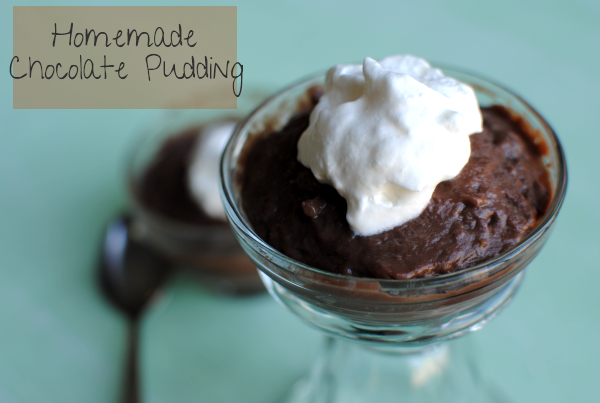
Homemade Chocolate Pudding

Marshmallows, pie crusts, ice cream, loaves of bread, even cookies. All of these things are foods that we tend to buy from the store for convenience. Isn’t it funny how we can get so used to that processed, store-bought taste that we aren’t even familiar with the homemade version anymore?

I’m not complaining about store-bought food. I buy those things just as much as the next person, but with my love of creating and cooking, I can’t help but want to make those things myself from time to time. And usually, the difference in the processed and the homemade are similar yet very different.

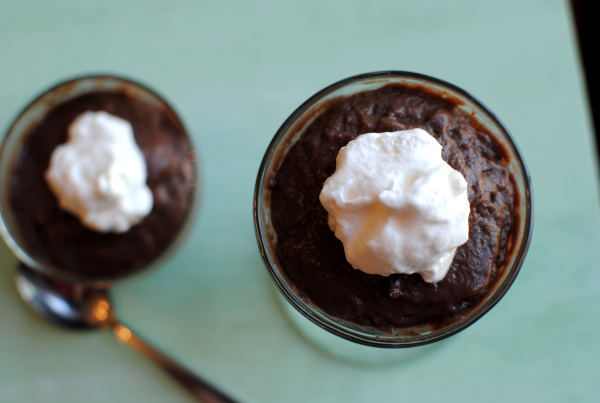
Let’s take this homemade chocolate pudding for instance. Until last week, I had NEVER made homemade chocolate pudding before. Why? Because the purchasing of the Snak Packs are just easier.

Or so I thought.

I’m beginning to question every Snak Pack purchase that I’ve ever made. Why chocolate pudding is made of things that I have in my very kitchen every day! And there are no extra preservatives or triglceridontknows in it.

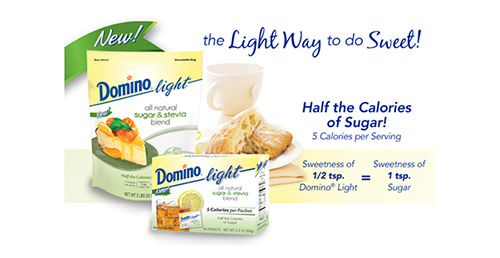
You know me and my healthy makeovers on food. Have you heard of Domino Light? I’ve seen tons of coupons for it, so I was excited to try it out with this pudding. Basically, Domino Light is made from pure cane sugar and the tropical stevia plant. Which means that it’s ALL NATURAL with no added artificial ingredients.

What could possibly make this sweetener better? Oh nothing big, but that it contains HALF the calories of sugar. Plus, you only need a 1/2 teaspoon of Domino Light to be equivalent to 1 teaspoon of sugar which means that your dollar will go further. That means saving money and saving money makes momma happy! It comes in 2lb bags (which is equivalent to a 4lb bag of sugar!) and individual packets too.

You can like Domino Sugar on facebook to get a $1 off Domino Light Coupon! This is a great way to try it out for yourself. There is a Twitter party coming up with C&H/Domino Sugar that you won’t want to miss. You can RSVP to the party HERE as it takes place on August 8th from 5-7pm PST. There will be $500 worth of prizes and gift cards given away.

With every intention of making this chocolate pudding for Addie and Britton, I found myself eating most of it. I shared a teensie tiny bit with my husband too. He had to try it out too you know.

I’m new to stevia so I wasn’t sure what to expect, but the Domino Light was wonderful in this recipe. I’ve used it in every sweet dish over the last 2 weeks and I love it. One thing that I really want to point out about it, is that it’s very similar to sugar. The consistency I mean. You know how some sweeteners are very light and fluffy and don’t really take on the same feel as sugar? This is almost exactly the same texture as sugar itself.

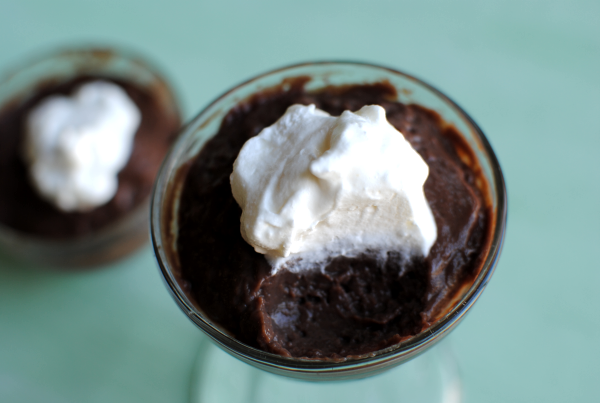
If you’ve never made homemade chocolate pudding before, I urge you to try it out. Place it in small containers and treat it just like a Snak Pack.

Recipe courtesy of Domino Light.

Homemade Chocolate Pudding

Homemade Chocolate Pudding

Only 5 ingredients that you probably have in your kitchen right now can make you homemade chocolate pudding!

Ingredients

  • 1/4 c. + 1 Tbsp Domino Light
  • 1/4 c. unsweetened cocoa powder
  • 1/4 c. cornstarch
  • 2 c. milk
  • 1 tsp vanilla extract

Method

  1. In a small saucepan, whisk together all dry ingredients.
  2. Whisk in the milk 1/2 c. at a time until combined. Place over medium heat and continue to whisk until the pudding thickens and begins to bubble.
  3. Remove from heat and whisk in the vanilla. Pour into a medium bowl or individual serving bowls.
  4. Place plastic wrap on the surface to prevent a skin from forming. Chill for at least 2 hours.

Notes

My pudding didn't thicken at all until it started to boil. So don't fret if it takes a minute for it to begin thickening. Just be sure to keep whisking to avoid having lumps.

This is fantastic with a little whipped cream on top!

http://www.pennywisecook.com/homemade-chocolate-pudding/

This is a sponsored post written by me on behalf of Domino Sugar. All opinions expressed are 100% my own.


Like this post? SHARE it!

Related Posts Plugin for WordPress, Blogger...

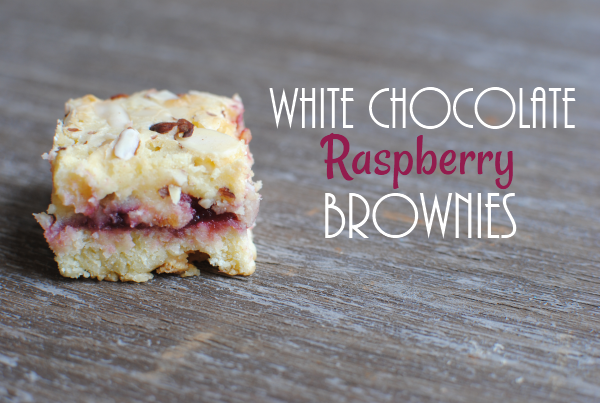
White Chocolate Raspberry Brownies

I’m going to have to apologize for once again tempting you with a very bad recipe. I promise that I really do eat healthy. I’m not pulling your leg. But I have a very big weak spot for sweets.

Especially white chocolate.

I could eat white chocolate all day long and never get enough. It’s THAT good to me. I’m sure that you have your guilty pleasures. Over the last few weeks, I’ve been attempting to create a recipe that involves white chocolate. I have created several recipes that all failed in some way or another. Don’t get me wrong, they tasted amazing. Though you’d never know it by looking at them.

So after eventually giving up, I came across this recipe on Pillsbury’s website for Raspberry-Filled White Chocolate Bars and I HAD to try it. It was a redemption kinda determination situation. I said to myself, I’m not letting white chocolate take me down like this! And boy oh boy did I conquer the white chocolate with this recipe.

Oh.

My.

Word.

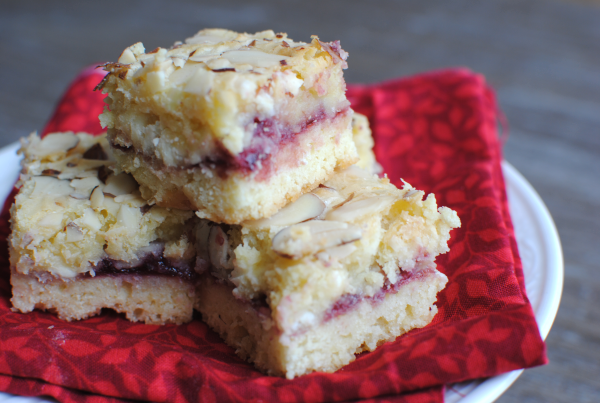
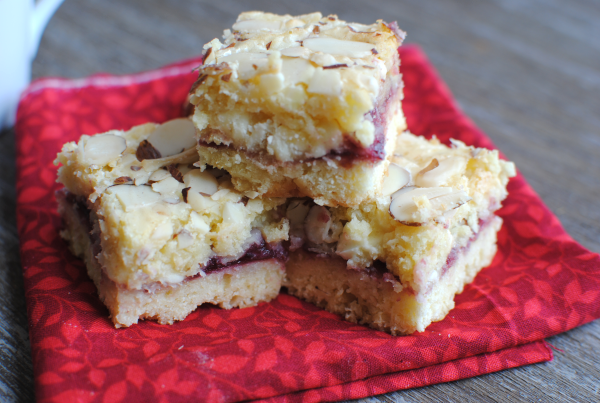
If you are a white chocolate lover, then you absolutely HAVE to make these. Incredibly rich, smooth and creamy, with a raspberry filling to boot.

Once into this recipe I couldn’t believe how easy it was to make. I made some little healthy changes like substituting sweeteners and using a sugar-free jam. You’d never even know that I made those changes with the richness of the white chocolate. These are simply incredible and worthy of a special occasion or just for the heck of it.

Yep, I’ll be doing a little more at the gym to work these babies off. Totally worth it though!

I’m using a different name for this recipe than Pillsbury did. These taste just like brownies to me and they are well worthy of that title.

White Chocolate Raspberry Brownies

White Chocolate Raspberry Brownies

These indulgent white chocolate brownies will have you smiling with a special surprise of raspberry filling in the center!

Ingredients

  • 1/2 cup butter
  • 1 (12-oz.) pkg. (2 cups) white chocolate chips
  • 2 eggs
  • 1/4 cup sugar
  • 1/4 cup artificial sweetener such as Domino Light!
  • 1 cup all-purpose flour
  • 1/2 teaspoon salt
  • 1 teaspoon almond extract
  • 1/2 cup sugar-free raspberry spreadable fruit or jam
  • 1/4 cup sliced almonds, toasted

Method

  1. Heat oven to 325°F. Grease and flour an 8-inch square baking dish.
  2. Melt margarine in small saucepan over low heat. Remove from heat. Add 1 cup of the white vanilla chips. LET STAND; DO NOT STIR.
  3. Beat eggs in large bowl until foamy. Gradually add sugar, beating at high speed until lemon-colored. Stir in white vanilla chip mixture. Add flour, salt and almond extract; mix at low speed just until combined.
  4. Spread half of batter (about 1 cup) in greased and floured pan. Set remaining batter aside.
  5. Bake at 325°F. for 15 to 20 minutes or until light golden brown.
  6. Meanwhile, stir remaining 1 cup white vanilla chips into remaining half of batter; set aside. Melt jam in small saucepan over low heat.
  7. Remove pan from oven. Spread melted jam evenly over warm base. Gently spoon teaspoonfuls of remaining batter over fruit. (Some fruit may show through batter, that's ok!) Sprinkle with almonds.
  8. Return to oven; bake an additional 25 to 35 minutes or until toothpick inserted in center comes out clean. Cool 1 hour or until completely cooled. Cut into bars.
http://www.pennywisecook.com/white-chocolate-raspberry-brownies/


Like this post? SHARE it!

Related Posts Plugin for WordPress, Blogger...

Crockpot Hot Fudge Cake

We got bikes this weekend. I haven’t been on a bike since I was in high school. I had forgotten how much fun they are! But I also had forgotten how they can make your legs burn. As a runner I guess I figured they would be easier than running, but I may be wrong on that. Hills were killing me on my first 10 minutes on my new bike. It could be due to make lack of cycling experience or perhaps the fact that I was pulling a trailer filled with almost 70 pounds of child inside! Either way I’m looking forward to getting better at it and enjoying family time with them.

I like to run and I love going to the gym so any other exercise is just bonus. Bonus for working off extra desserts like this one here. Oh yeah, this most amazing CROCKPOT hot fudge cake! Cake is already good, but let’s talk about how EASY making it in the crockpot is.

Mix the ingredients.

Add them to your crockpot.

And cook it for a few hours.

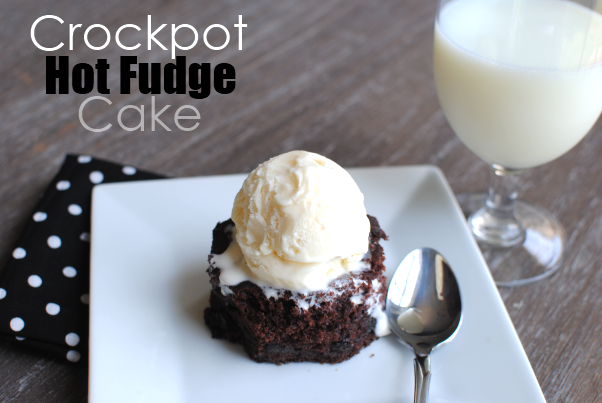
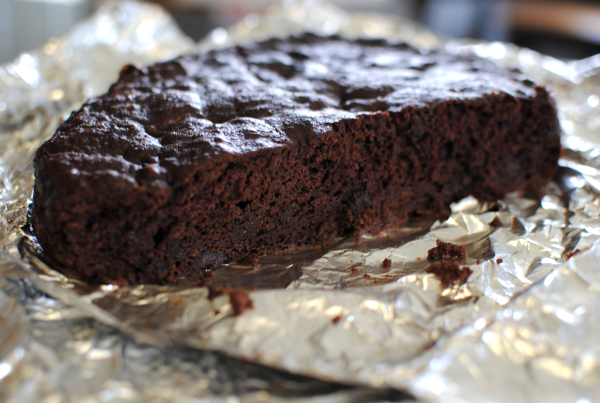
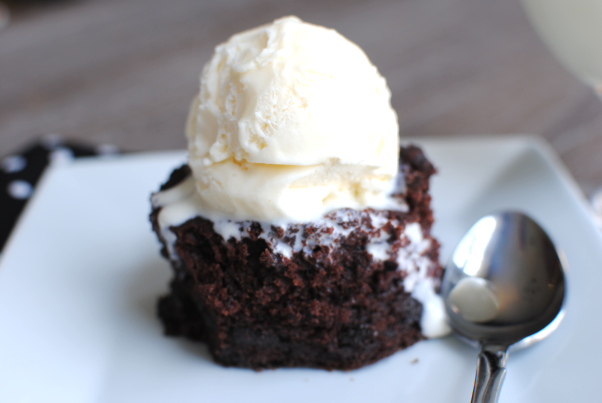
When you’re done, you’ll have a thick, yet fluffy and chocolate-y and ridiculously divine cake worthy of a massive scoop of vanilla ice cream.

Lining your crockpot with foil is a great idea for this recipe. Not only does it make it easy to remove the cake, but it also reduces the need for cleaning.

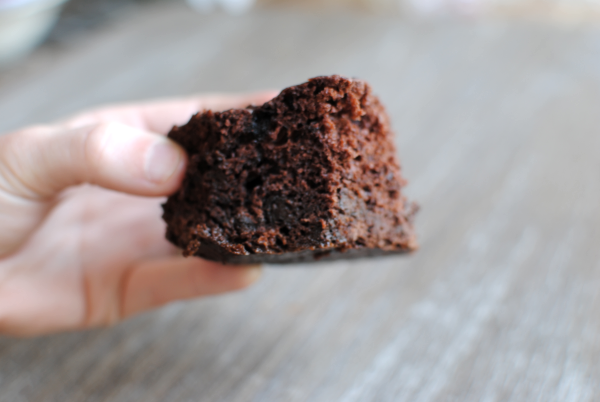
Do you see how thick that cake is? I’m not sure if this picture really captures how thick it is.

There, that’s better. THIS picture really gives a good view of the incredible mountain of cake that your crockpot will produce!

And oh wow is it yummy. Way too yummy actually. And it only gets better the longer that it hangs out in the foil.

I have a little secret to share about this cake. It’s actually healthy too. Made without any oil or butter and using ingredients that are low in sugar and calories, you can eat this without feeling too much guilt. My husband ate this for a few days before I told him it was a “healthy” cake. He was very surprised to hear that it was.

Recipe found at MyFitnessPal.

Crockpot Hot Fudge Cake

Crockpot Hot Fudge Cake

Warm, gooey, hot fudge cake that you create in your crockpot!

Ingredients

  • 1 box Devil's food cake mix
  • 8 oz plain Greek yogurt
  • 1 box sugar free chocolate pudding
  • 4 egg whites
  • 3/4 cup unsweetened applesauce
  • 3/4 cup semi-sweet chocolate chips
  • 1 cup water

Method

  1. Mix all ingredients in a large bowl until combined. Do NOT overmix.
  2. Grease crock pot (all the way up - it rises a lot!) OR make a sling out of foil for easy cleanup and removal.
  3. Cook on high for 3-4 hours. 4 hours worked well for me.
  4. Scoop into bowl while warm and add ice cream or frozen yogurt!

Notes

To make warm the next day, cut a piece and place in the microwave for about 30 seconds.

http://www.pennywisecook.com/crockpot-hot-fudge-cake/


Like this post? SHARE it!

Related Posts Plugin for WordPress, Blogger...

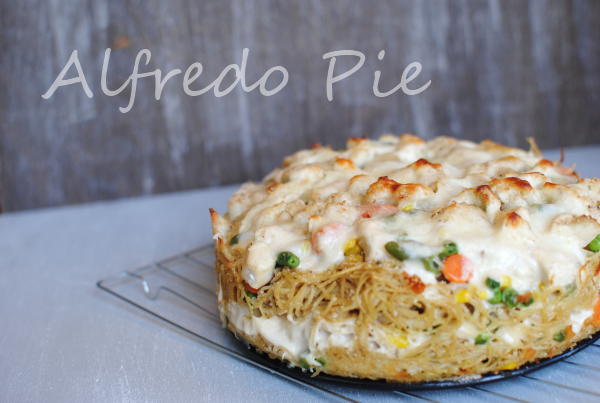
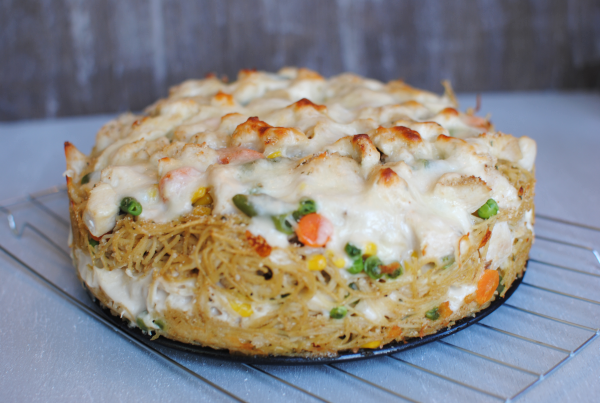
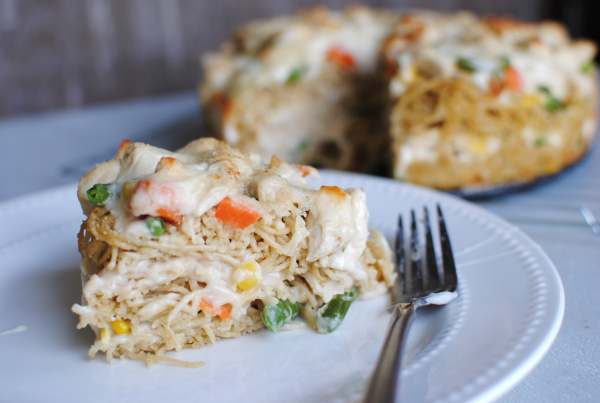
Alfredo Pie

You’ll have to excuse the simplicity of this recipe’s name. I just couldn’t really come up with much more. Some days I can spout off big glamorous recipe names and others I am left bumbling like an idiot.

I’ve grown quite fond of my springform pan as of lately. Most people only break theirs out when they are making a cake or cheesecake or something sweet, but I have recently discovered that it has so many other uses in the savory realm too. I got the idea back in the winter while making Cappelini Al Forno from Giada’s recipe. We absolutely adore that yummy baked spaghetti so why not go the alfredo route and get creamy on it?

I tried to make this recipe as simple as possible with things that I’ve gotten cheap with coupons or that I had stockpiled. For instance, I didn’t bother making homemade alfredo, I used up jars that I had in the pantry. I also used Bird’s Eye Steamfresh Veggies and they were steamed and ready for the recipe in minutes! And of course, the pasta was next to nothing and I have oodles of that. Most everything else are things that you are bound to have in your pantry or refrigerator.

Don’t fret if you don’t have a springform pan. Using a round casserole dish or even a rectangular dish will work just fine too. It may not as pretty, but it will work! Just be sure to grease it really well.

I honestly just kinda made this up as I went along. You can definitely feel free to experiment with your own tastes and ideas. This turned out really fabulous this way. I couldn’t breathe when we got done with dinner. I ate way too much of this!

Go ahead, have a go at this one and you might even have your kiddos eating their vegetables.

Alfredo Pie

Alfredo Pie

Alfredo gets a makeover in this creamy pasta pie!

Ingredients

  • 1 lb Thin Spaghetti
  • 1 Jar Alfredo Sauce
  • 2 Boneless, Skinless Chicken Breasts, cut into bite-size pieces
  • 2 Tsp Garlic, Minced
  • 1 Bag Frozen Mixed Vegetables
  • Bread Crumbs
  • 1/4 Cup Parmesan Cheese
  • Mozzarella Cheese
  • 1 Egg, lightly beaten
  • 1 Tsp Parsley, Dried
  • 2 Tbsp Butter

Method

  1. Preheat oven to 350 degrees.
  2. In a skillet, cook chicken breast with garlic over medium heat until no longer pink.
  3. Meanwhile cook spaghetti just under 1 minute from what the package suggests.
  4. Cook frozen mixed veggies according to their packaging.
  5. When noodles are done, place them in a large bowl along with 1/3 c. breadcrumbs, egg, and 1/4 c. Parmesan cheese. Using tongs mix well.
  6. Add a sprinkle of breadcrumbs to the bottom of a greased springform pan.
  7. Place 1/3 of noodle mixture into the bottom. Pour 1/3 of the alfredo sauce over noodles.
  8. Next add a layer of veggies, then 2 tbsp of breadcrumbs, then 1/3 of the chicken, then sprinkle with layer of mozzarella cheese.
  9. Repeat this until you have 3 layers ending with mozzarella cheese.
  10. Bake 25-30 minutes or until top begins to brown.
  11. Let cool before removing sides of pan.
http://www.pennywisecook.com/alfredo-pie/

P.S.- Have a recipe name suggestion? I’d love to hear it! Leave a comment below.


Like this post? SHARE it!

Related Posts Plugin for WordPress, Blogger...

Sugar Cookie Ice Cream Bowls

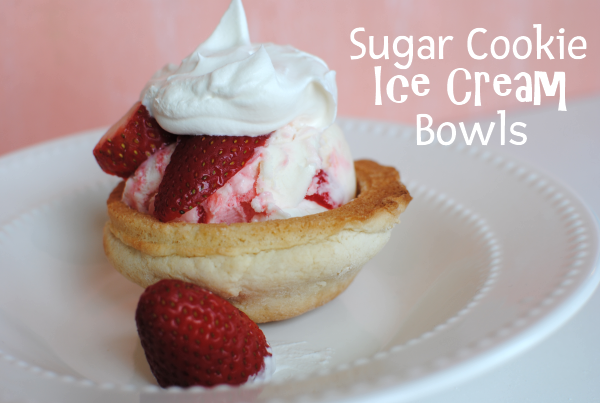
I was busy making up cookies for Addie’s 5th birthday last week. Which by the way, I am still in shock that I have a 5 year-old. Doesn’t seem possible that she is already that big. I’m going to try to get over it and not have a mini meltdown. Instead, I’ll just eat a SUGAR COOKIE BOWL full of ice cream! I got the idea from this picture. Pretty self explanatory.

Yeah, it’s quite an epiphany. Eating ice cream out of a cookie? I’m totally down with that. I think the only thing better than that would be eating ice cream out of a brownie. Hmmm, I’m getting ideas….

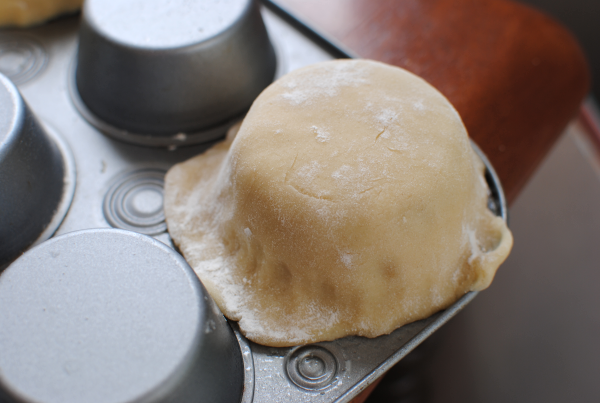
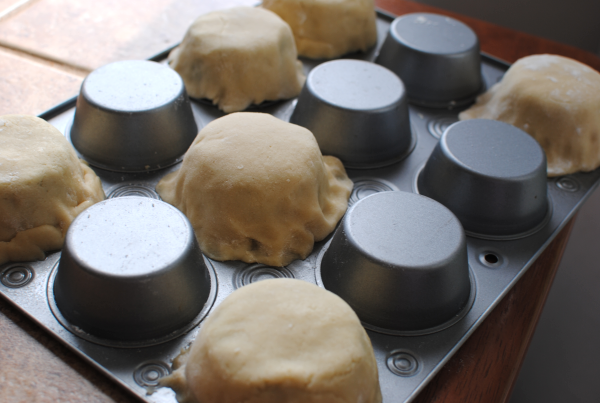
It’s best to have a good batch of sugar cookie dough to use. I found the BEST recipe last week and it worked like a charm. You simply lay the dough over the muffin tin cups and bake as usual.

You can also cut the dough using the top of a glass to get a perfect circle. Or you can just wing it like I did. I even had to patch a few up. It didn’t matter though because they still baked up fine.

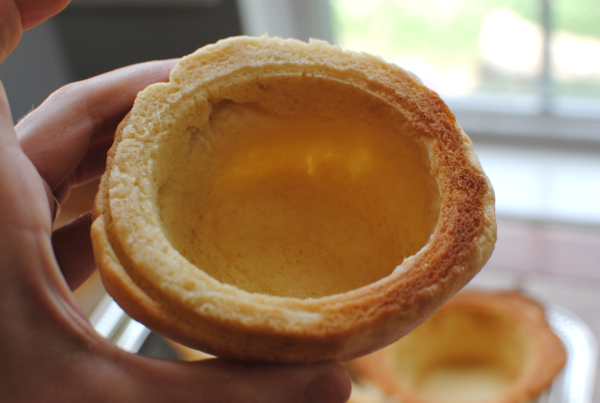
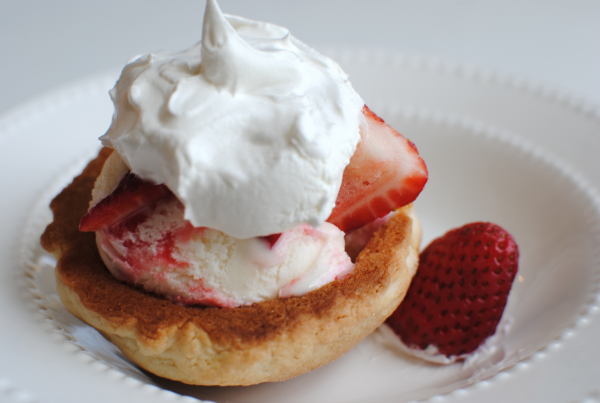
Tah dah! Oh yeah, it’s a bowl that’s a sugar cookie. Incredible isn’t it? This is where you place your ice cream…

Or even fruit if you’re being good….

Sugar Cookie recipe courtesy of Spark People.

Sugar Cookie Ice Cream Bowls

Sugar Cookie Ice Cream Bowls

Eat your ice cream out of a sugar cookie!

Ingredients

  • 1 1/2 cups - granulated sugar
  • 2/3 cup - butter (or shortening - half of each is recommended)
  • 2 whole eggs
  • 2 Tbsp - 2% milk
  • 1 tsp. - vanilla extract
  • 3 1/4 cups - white flour
  • 2 1/2 tsp - baking powder
  • 1/2 tsp - salt

Method

  1. Cream butter and sugar together in a large bowl. Add eggs, extract, and milk and mix well.
  2. Mix dry ingredients with a wire wisk in a medium bowl. Add dry ingredients to wet ingredients in large bowl. Mix until combined well.
  3. With hands, shape dough into a ball. Wrap with plastic wrap and refrigerate for 2-3 hours.
  4. Meanwhile, preheat oven to 400 degrees F.
  5. Lightly grease muffin tins. Roll half or 1/3 of the dough at a time on a floured surface. Keep the rest in the fridge.
  6. Roll dough to 1/8-1/4 inch thick.
  7. Flour a glass or cup and cut shapes. Re-roll trimmings and reshape. Place over muffin tin wells making sure to cover the whole thing with no holes.
  8. Bake for 8 min or until light brown.

Notes

You are free to use whatever sugar cookies your prefer, even store bought. I just found this recipe to be really great to molding and rolling.

It's not a bad idea to make your dough the night before and roll it out in the morning. The colder it is, the easier it is to work with.

This works with chocolate chip cookie dough too!

This recipe makes a LOT of dough (like 72 cookies depending on your size) so if you only plan on making a few, half this recipe.

http://www.pennywisecook.com/sugar-cookie-ice-cream-bowls/


Like this post? SHARE it!

Related Posts Plugin for WordPress, Blogger...

Strawberry Banana Smoothie Pops

Sometimes I wish that I had a dime for every time that my daughter came to me during the day saying “I’m huuuuuuuungry”. You don’t even have to have kids to know exactly what that statement sounds like. I can remember saying that to my mom when I was young. Even after my daughter has just eaten a complete meal, not 10 minutes later I hear those words come out of her mouth. So around here it’s imperative that we have healthy snacks available for these moments of huuuuuunger.

Some of the snacks of choice that I like to have on-hand are string cheese, peanut butter crackers, and fruit snacks. But we’re almost to summer and it’s time to cool off with some refreshing snacks on a hot day. My favorite store for produce, Aldi of course, had a great price on strawberries the other day and I stocked up! They also almost always have the best price on bananas in town. To me, nothing brings those two fruits together better than a smoothie! But if you don’t want to have to create a smoothie every time you would like one, the pops might just satisfy your strawberry banana smoothie craving!

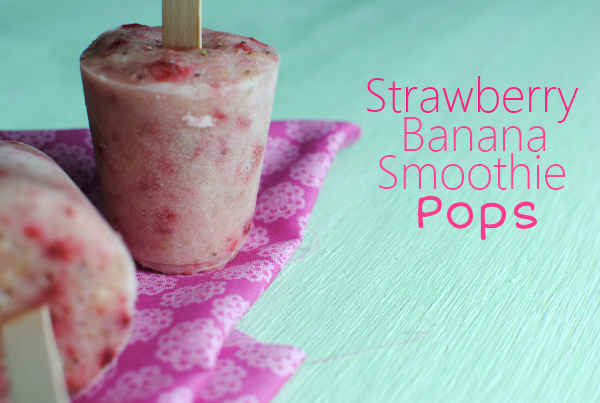
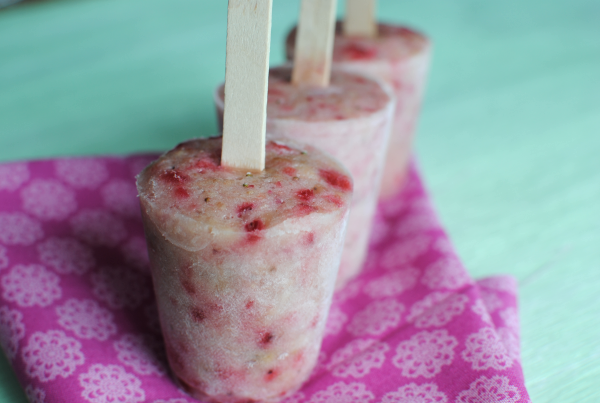
I mixed a couple of bananas and several strawberries together with a little plain yogurt and a pinch of splenda and threw it all in several dixie cups. I popped popsicle sticks into each one and froze them to create these yummy smoothie pops.

It’s a snack that’s not only healthy but really satisfying and refreshing at the same time. And I love that making them in these cups make them fairly big. Maybe more than you would get from a store bought pop and way cheaper for sure!

Strawberry Banana Smoothie Pops

Strawberry Banana Smoothie Pops

A natural and refreshing popsicle made from fresh strawberries and bananas.

Ingredients

  • 2 Large Bananas
  • 10 Medium-Large Strawberries, Cored
  • 1/4 Cup Plain Nonfat Yogurt
  • 1 Tsp Sugar Substitute (optional)
  • 8 Small Dixie Cups

Method

  1. Place all ingredients in a food processor or blender and mix until smooth.
  2. Pour into cups and freeze until solid (around 2-3 hours).

Notes

You don't have to use "Dixie" cups. Use whatever cups you might have. We used plastic bathroom cups. Depending on the size, you may have more or less popsicles.

The sugar substitute addition is not completely necessary. The strawberries and bananas give it plenty of natural sweetness, I just like mine extra sweet!

http://www.pennywisecook.com/strawberry-banana-smoothie-pops/


Like this post? SHARE it!

Related Posts Plugin for WordPress, Blogger...

The Simplest Fruit Dip Ever

Happy Thursday! Almost to the weekend, hang in there.

We all have our ideas of the word simple, don’t we? I have a tendency to always make things difficult no matter how easy they could really be. It’s just part of my nature and if you ask my husband, he’ll be the first to tell you so.

Don’t you just hate when someone says “Oh, it’s simple. You just do this and this and this and this”. And before you know it, it’s difficult. Reminds me of high school geometry. What might be “simple” to one student is like pulling teeth to another.

With spring here and summer just around the corner now, fruits are fresh and abundant. Something we all see at gatherings and parties are those gigantic fruit trays with juicy melons and ruby strawberries galore. There’s nothing more tasty to accompany those fruits than with a creamy, sweet fruit dip.

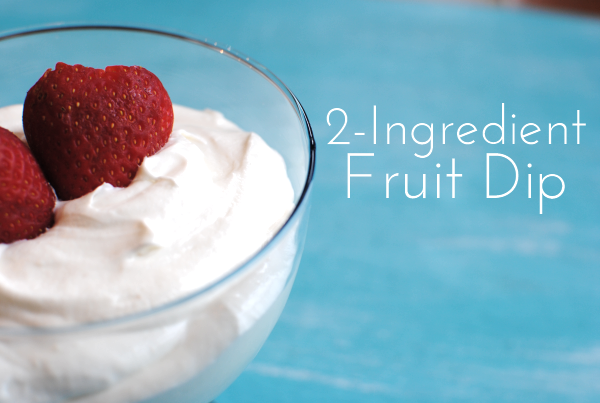
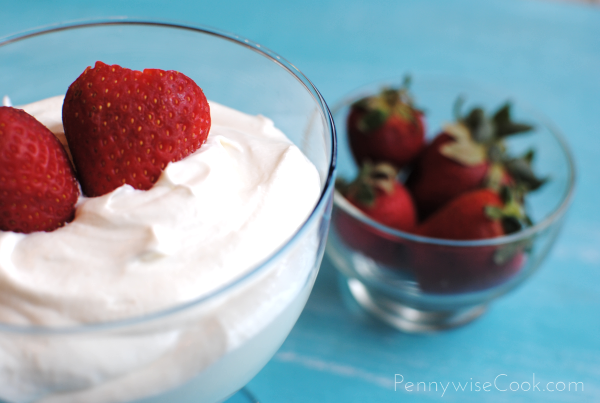
For years my family has been making this incredible, yet simple fruit dip for just that. Only 2 ingredients make the smoothest, fluffiest, and creamy fruit dip perfect for any occasion.

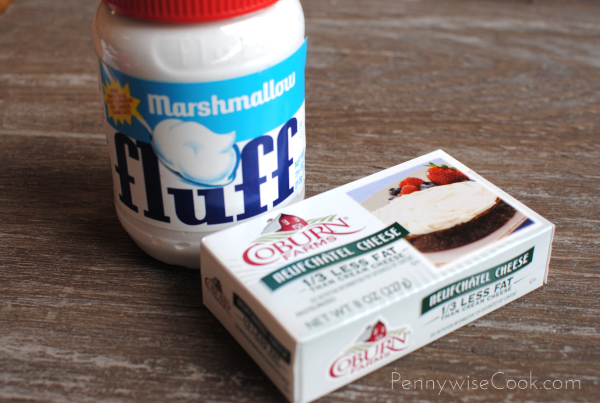
The combination of fluffy marshmallow cream mixed with the thick and creamy cream cheese are so yummy together it’s ridiculous. If you have never made this stuff, I think it’s about time. I love to make this up to take along with fruit for a party.

You can usually find marshmallow cream for a buck and if you shop right, you can usually get cream cheese for around a buck too. Of course I prefer the neufchatel cheese for the less fattening version. Whip those too together and they are a match made in heaven.

I’m not just pulling your leg or yanking your chain. My 4 year old daughter made this completely by herself last weekend. It’s that simple.

The Simplest Fruit Dip Ever

The Simplest Fruit Dip Ever

This may be the easiest recipe you ever make. Fruit Dip with only 2 ingredients.

Ingredients

  • 1 Package Marshmallow Cream
  • 1 Block Cream Cheese 8 oz, Softened

Method

  1. Whip the marshmallow cream and cream cheese together.
  2. You're done!

Notes

Could that BE anymore simple?

http://www.pennywisecook.com/the-simplest-fruit-dip-ever/


Like this post? SHARE it!

Related Posts Plugin for WordPress, Blogger...

Cream Cheese Filled Chocolate Ganache Cakes

Have you ever eaten something that you know is so incredibly yummy that you could almost gain 10 pounds just by looking at it? Maybe it’s a dessert at your restaurant or maybe it’s something covered in ooey gooey melted cheese. It’s pretty incredible how food can be that way.

I’m going to lie, sometimes I feel that way about Big Macs. We all have our cryptonite foods. But I am here to tell you that you can have those things every now and then. There is absolutely nothing wrong with giving in once in a blue moon. After all, life is too short to be healthy all the time.

This is one of those moments. Be bad.

Be real bad.

Forgive me and my dark picture here. I started these at night and there was not good lighting.

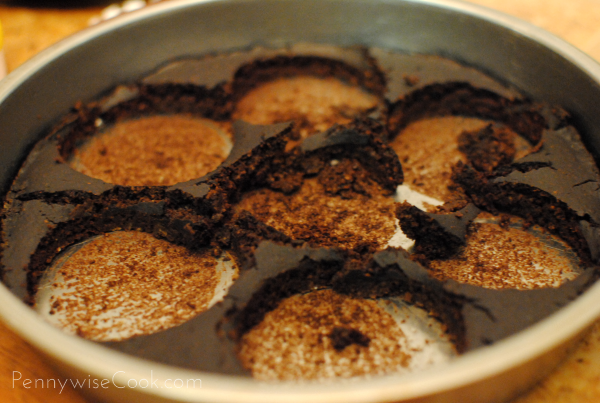
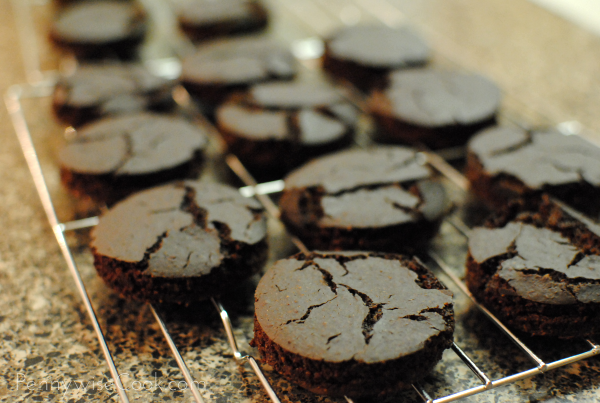
It starts with some surprisingly healthy thin chocolate cakes. 2 8-inch rounds to be exact. Then you cut little circles out like so to create the top and bottom of your cakes.

You should end up with 14 of these little round cakes. Kind of an odd number, but that just means that you absolutely have to eat the odd one to even them out….

The easiest way to make these is to then freeze the little rounds so that they don’t get all crumby when you’re working with them.

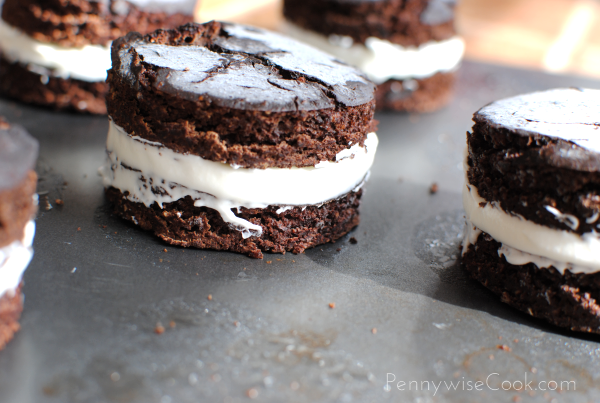
Then you take them out and whip up the cream cheese filling that is ah-maz-ing. Slap some on one round then top it with another round cake. They are beginning to take shape! These alone would make incredible dessert sandwiches, but believe me….you don’t want to pass on the chocolate ganache.

I found it easiest to freeze them again before covering them in the chocolate ganache.

After freezing them another little while, it’s time to create the ganache and then cover each of those incredible chocolate-y cakes in even more chocolate-y goodness.

Oh.

My.

Word.

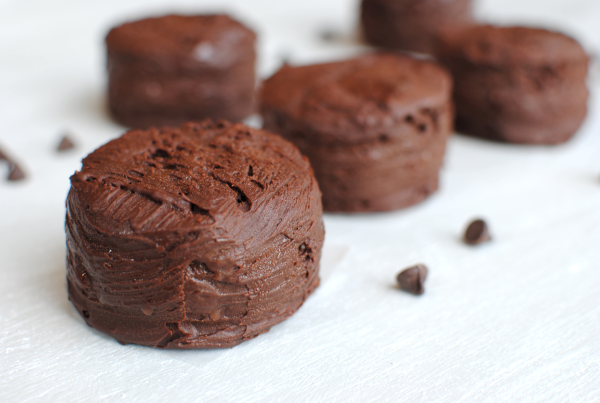
The ganache gives it such an insanely delicious coating and the inside is creamy and cream-cheesey. You will be glad that this recipe only makes 7 of them. I topped mine with leftover filling which added a really creamy touch. And extra chocolate chips can’t hurt either. Why not?

Cream Cheese Filled Chocolate Ganache Cakes

Cream Cheese Filled Chocolate Ganache Cakes

Chocolate cakes filled with a whipped cream cheese mixture and coated in an incredible chocolate ganache make for a wonderful splurge dessert.

Ingredients

    For the Cakes
  • 1 3/4 cup Oats
  • 3 Egg whites
  • 3/4 cup Unsweetened cocoa
  • 1/2 cup Unsweetened applesauce
  • 1 tsp Vanilla extract
  • 1/2 cup Plain nonfat yogurt
  • 1/2 tsp Cream of tartar
  • 1 1/2 tsp Baking powder
  • 1 1/2 tsp Baking soda
  • 1/4 tsp Salt
  • 1 cup Hot water
  • 1 cup Splenda (or sugar if you're being bad)
  • For the Cream Cheese Filling
  • 1 Cup Heavy Whipping Cream
  • 1/2 C. Powdered Sugar
  • 1/2 Block Low-fat Cream Cheese, softened
  • For the Ganache
  • 1/2 C. Heavy Whipping Cream
  • 6 oz (half bag) Semi-Sweet Chocolate Chips

Method

    For the Cakes
  1. Preheat oven to 350 degrees.
  2. Place all ingredients in a food processor or blender and process until smooth.
  3. Pour into two greased 8 in cake pans and bake for 12 minutes.
  4. Cool completely.
  5. Using a 2 and 1/2 inch biscuit or cookie cutter, cut into rounds and freeze.
  6. For the Filling
  7. Meanwhile whip the heavy whipping cream until stiff peaks form. Add the powdered sugar and cream cheese and whip well.
  8. Remove cake rounds from freezer.
  9. Place a generous spoonful of cream cheese filling on 7 of the rounds and top with second cake. Make sure to even the edges. Place back in the freezer for 30 minute to an hour.
  10. For the Ganache
  11. In a small sauce pan, place heavy whipping cream and bring to a boil.
  12. Pour the cream over the chocolate chips in a bowl and stir until smooth.
  13. Remove cakes from freezer.
  14. Using a pastry brush or basting brush, evenly brush ganache all over the cakes.
  15. Set aside to harden and store cakes in the refrigerator.

Notes

Size of your cakes may depend on what size cookie or biscuit cutters that you have. 2 and 1/2 is just the size that I had.

Brownie mix might also make a nice cake mixture to use for these if you don't have the ingredients for the healthier cake version. My husband said that the chocolate cake was just alright by itself but with everything else that it was amazing!

If you don't have a pastry or basting brush, use whatever you have that might create an even ganache coat.

http://www.pennywisecook.com/cream-cheese-filled-chocolate-ganache-cakes/

Chocolate cake recipe adapted from Dashing Dish.


Like this post? SHARE it!

Related Posts Plugin for WordPress, Blogger...