2-Ingredient Ice Cream Bread

One of my fondest memories as a kid was sitting on the couch with my dad eating ice cream.

Right from the container.

With a fork.

Don’t ask me why, but he always ate his ice cream with a fork. To this day when I open the silverware drawer to remove a utensil for eating ice cream, I cannot help but look at a fork and remember those times with my dad.

The other fond ice cream memory would be when our family would stop at Sonic for dipped cones. I can remember hearing the blinker click on when the Sonic sign came into sight and getting extremely excited about those cones. It wasn’t until recently that my dad found out I had a complex as a kid because he used to bite the very tip off of my cone before he handed it back to me. I can’t blame him though. Those cute little chocolate peaks are very enticing. Even my husband has done this to me a few times.

Brace yourself. Today’s recipe might just be life-changing. I absolutely cannot take the credit for this simple, yet incredible recipe that I’m sharing with you today. I found this over at The Hungry Housewife who originally found it in 1001 Ways to Cook Southern which looks like an amazing cookbook.

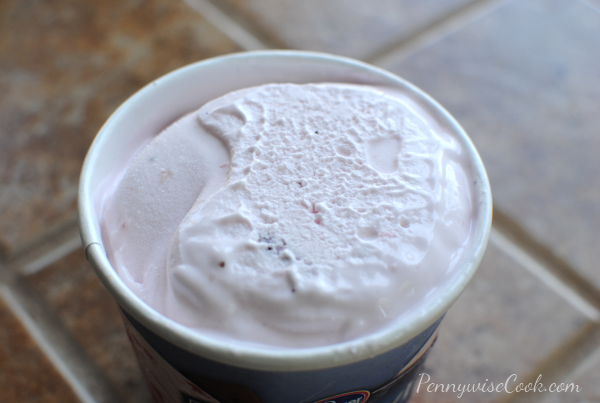
I’d hardly call this a recipe though. It’s 2 ingredients and even a child could make this. Get you one of those 16 oz tubs of ice cream at Kroger when they are on sale for $1 and you’re set. That’s what I did. I got a few different flavors to try out. I’m going to share two of them with you today. Let your ice cream sit out and soften real good. It can still be thick, just not with big lumps.

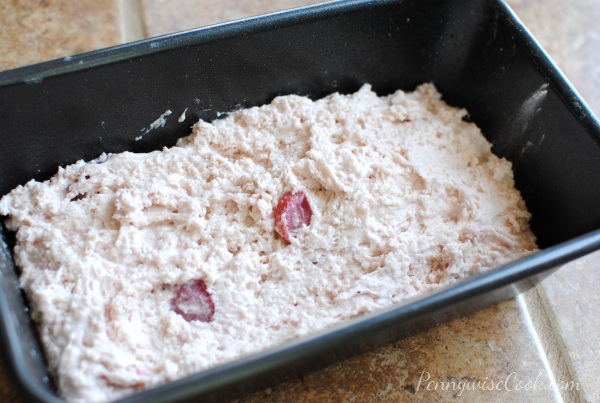
Mix the softened ice cream with 1 and 1/2 cups of (very key here) self-rising flour. Pop into a greased loaf pan and it might look a scraggily mess like mine did.

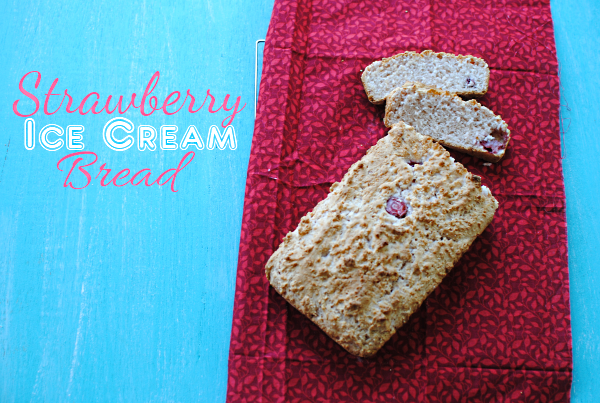
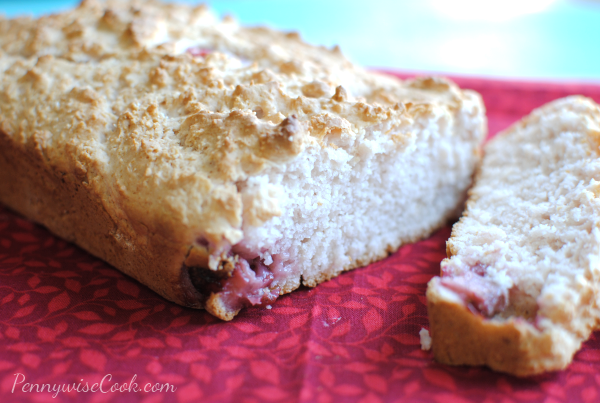
It doesn’t matter though. Because that scraggily mess makes the most delicious bread. Strawberry was my favorite so far. The ice cream had pieces of strawberry that flecked themselves all throughout the bread. It’s a very subtle strawberry taste. Don’t expect it to taste like a mouthful of ice cream or anything. This was absolutely fantastic when warm with butter slathered on it.

Well, I Can’t Believe It’s Not Butter anyways. 😉

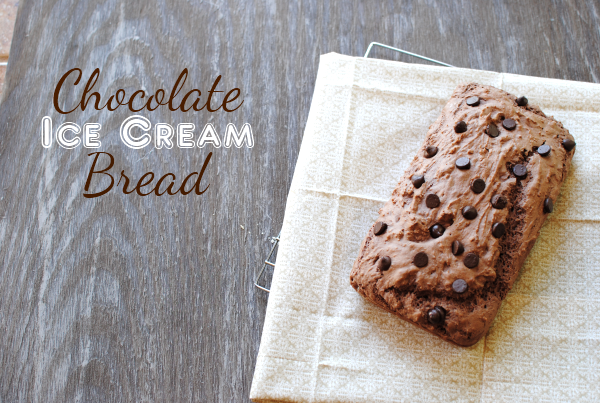
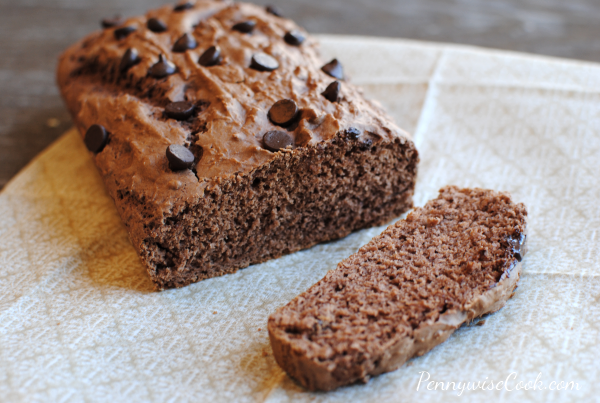
I also made this chocolate version. Oh my goodness was it good. I embellished a little with chocolate chips on top. I think this was hubby’s favorite.

Once again when it’s warm, you might try a little butter on it. It’s soooo good.

If you try any other flavors do let me know how it turns out!
Ice Cream Bread

Ice Cream Bread

Your favorite flavors of ice cream can easily be turned into bread!

Ingredients

  • 2 Cups Ice Cream of Choice
  • 1 and 1/2 Cups Self-Rising Flour

Method

  1. Preheat oven to 350 degrees.
  2. Allow ice cream to soften with no big lumps.
  3. Mix ice cream with flour and place into greased loaf pan.
  4. Bake for 35- 45 minutes or until you get a clean toothpick.
  5. Remove from pan and let cool. Or slap some butter on it and eat it right away!

Notes

My bread did not take the full 45 minutes to cook. I was using a dark coated pan so that could be why. But I suggest checking yours at around 35 minutes.

My bread batter was a bit lumpy which made for a nice crusty top. If you want smoother texture, you might let your ice cream come completely to room temperature before mixing. The flour tends to ball up when mixed with the colder ice cream.

Be sure to use full-fat ice cream.

http://www.pennywisecook.com/2-ingredient-ice-cream-bread/


Like this post? SHARE it!

Related Posts Plugin for WordPress, Blogger...

3-Ingredient White Chocolate Peanut Butter Fudge

It was an extremely lazy weekend around here. We did manage to get out of the house a bit, but for the most part we were like slowly moving sloths. The house was still in shambles from creating a baby shower cake last week. (Which I will be posting soon!) While I was at the shower my incredible husband actually cleaned up after me. Don’t you just love little surprises like that? These nights are extremely rare so I take what I can get.

I absolutely hate cleaning up after I cook. I don’t really think about it when I’m making the mess. It’s once I’m done that I look around and realize how many dishes I’ve used or how much flour is all over the counter and floor. I’m not the type of person who cleans as I go. Funny, because we teach Addie to play with one toy at a time and clean up as she goes.

This is where the “do as I say, not as I do” quotation comes in handy.

You may have noticed that I have a slight fixation with recipes having few ingredients. Not only is a recipe with only a few ingredients frugal, but it’s so much easier too. Easier usually means less time consuming as well which means a happy me! And you know what they say….A happy momma means a happy family.

I ran across this recipe recently at Cookies & Cups and I have no idea how. I wasn’t on Pinterest *gasp* when I found it.

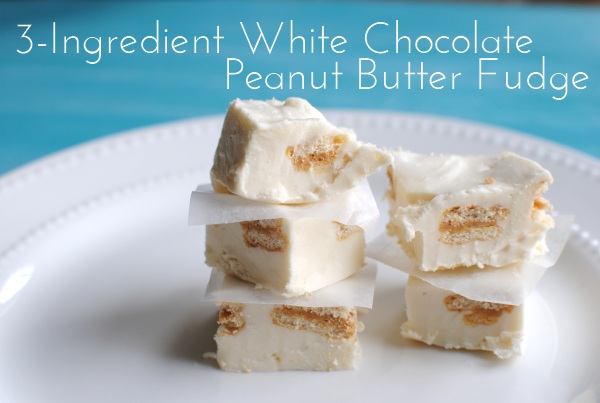
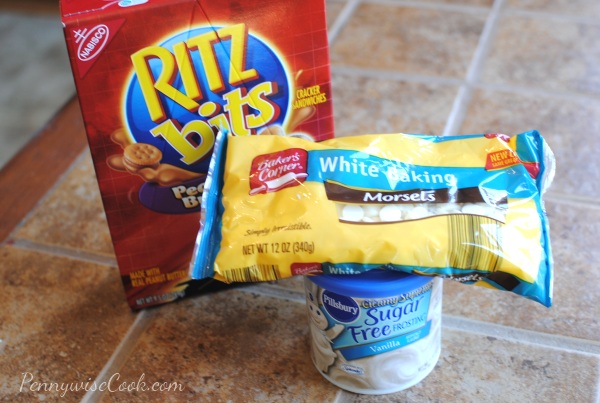
This White Chocolate Peanut Butter Fudge only contain 3 simple ingredients! Ritz Bits, White Chocolate Chips, and Vanilla Frosting! Does it get any simpler than that? I even used Sugar Free frosting. Hey I gotta make it as healthy as I can!

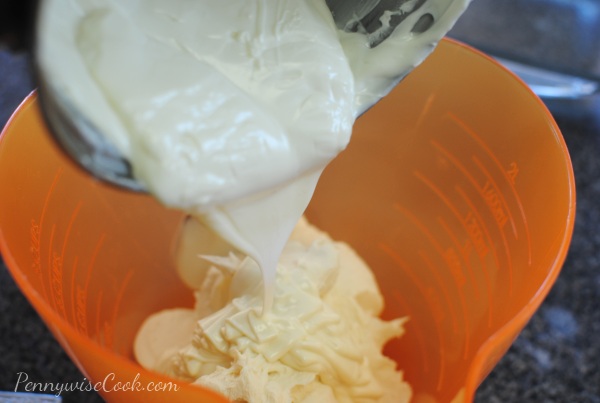
Melt the chocolate chips over a double boiler (or your rigged up pot in a pot). Once completely melted pour it into your frosting and stir until it’s all smooth.

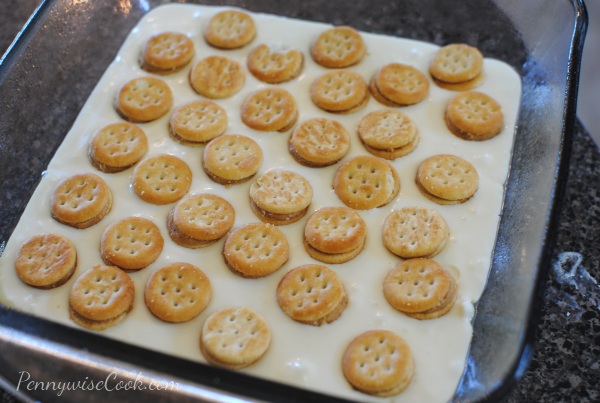
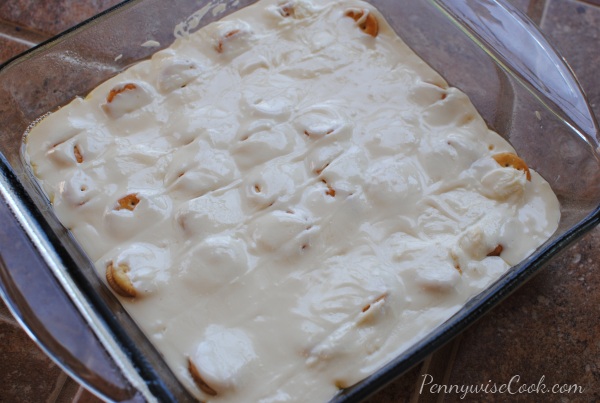
Pour half of the mixture into a square baking dish and then place the Ritz Bits all over the top. Pour the rest over the top.

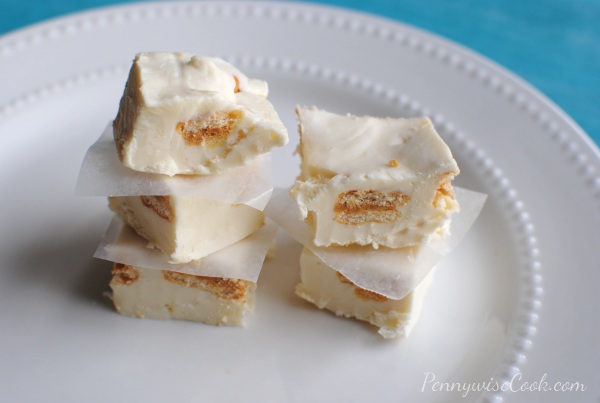
Lookie there! It will look something like this. Refrigerate it until it sets well. Then cut into pieces.

The salty. The sweet. They work together in some yummy frosting and chocolate harmony. I also LOVE the crunch that you get from the Ritz Bits.

And technically this isn’t “peanut butter” fudge because you don’t add peanut butter to it. But you do have that peanut butter flavor because of the crackers.

See? ridiculously easy. So easy that you could even make it tonight. Although, I’ve made a new rule at our house. We only make this when company comes, otherwise I’ll eat it all myself when no one is looking!

3-Ingredient White Chocolate Peanut Butter Fudge

3-Ingredient White Chocolate Peanut Butter Fudge

3 simple ingredients come together to make one tasty and amazing fudge!

Ingredients

  • 1 Tub Vanilla Frosting
  • 1 Bag White Chocolate Chips 12 oz
  • 2 Cups Peanut Butter Ritz

Method

  1. Melt the chocolate chips over a double boiler until smooth.
  2. Place the frosting in a bowl and pour the melted chocolate chips over it. Stir until smooth.
  3. Pour half the mixture into a greased square baking dish.
  4. Lay the Ritz Crackers flat on the mixture.
  5. Pour the rest over the top of the crackers.
  6. Chill until firm.

Notes

I prefer to keep this fudge in the refrigerator as it can soften up a bit when at room temperature.

http://www.pennywisecook.com/3-ingredient-white-chocolate-peanut-butter-fudge/


Like this post? SHARE it!

Related Posts Plugin for WordPress, Blogger...

In The Garden Cupcakes

I’m not much of a gardener. Most every spring I get an artificial green thumb. I like to waltz around thinking I’m going to make my flower beds and yard look amazing. It usually leads to removing about a third of the weeds and then throwing mulch on top of the rest. At least they look pretty for a little while!

Although I will say that this spring I’ve decided to stop pretending and actually attempt to grow something that I might use that way I’m accountable. I’ve started an herb garden in pots. Which Addie insists it’s not a garden because it’s not in the ground, but I beg to differ. Aside from that, what you see above is probably about as close to a green thumb as I’m going to get.

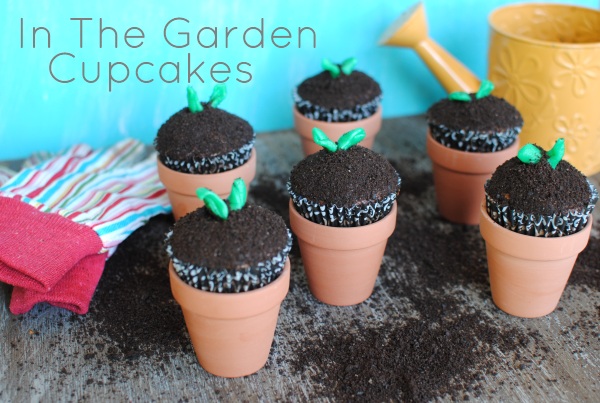
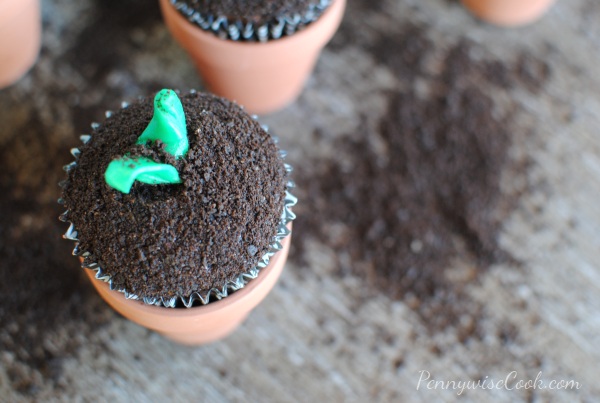
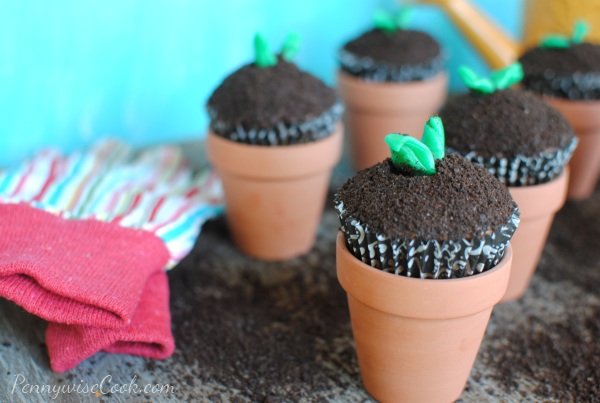
How about In The Garden Cupcakes? Aren’t they adorable? I found these little planter pots at Dollar Tree and they where 3 for $1!

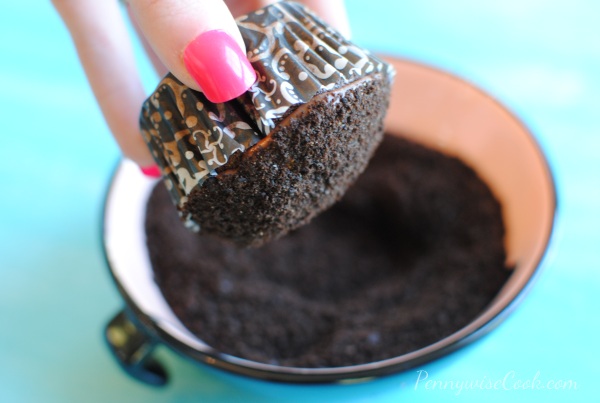
I simply made up some chocolate cupcakes (see recipe below) and frosted them. Then I dipped their tops in crushed oreo cookies like so. Before you go thinking wow are her nails so pretty, they are fake. I love those boxed nails! Cheaper than going to a salon and great in a pinch.

After getting them good and “dirty”, I made these little sprouts out of all things….Airheads! Remember those? I just cut them into small pieces and rolled them until they look semi-close to a sprout. Simple!

And then of course, I placed them into these adorable little planters. So fun and the neighborhood kids just loved them. Make these for a party and hand out the planters with them so they can each decorate one with their name. Or hoard them and keep them for another batch of these beauties.

I found this cupcake recipe over at Spark People. It’s actually healthy and only has about 110 calories per cupcake. That’s not including your frosting so keep that in mind. The frosting that I used on this cupcake was AMAZING and is my new favorite. But you’ll have to wait to get that recipe. I’ve got to have something to keep you coming back! 😉

And of course you can use whatever cupcake recipe you’d like. I’m just sharing with you the one that I used this go round.

In The Garden Cupcakes

In The Garden Cupcakes

Perfect for a party or outside gathering, these In The Garden Cupcakes make the perfect addition. Crushed up Oreos create the look of dirt and small planters complete the look.

Ingredients

  • 1 3/4 cups flour
  • 1 1/2 tsp baking soda
  • 1 tsp salt
  • 3/4 cup applesauce
  • 1/4 cup margarine (softened)
  • 1 cup splenda
  • 1/4 cup sugar
  • 1/4 cup brown sugar
  • 3 eggwhites
  • 1/2 cup skim milk
  • 1 tsp Vanilla ext
  • 2 TBSP coffee
  • 1 cup semisweet chocolate chips
  • Chocolate Frosting of Your Choice (even Betty Crocker will work!)
  • Small planters (clean)
  • 1 Cup Crushed Oreos
  • Green Airheads cut into around sixths

Method

  1. Preheat oven 350 degrees.
  2. Sift flour, baking soda, and salt. Set aside.
  3. Melt semisweet chocolate chips and coffee in double boiler. Let cool slightly.
  4. Cream butter, applesauce, splenda, sugar, brown sugar, and eggwhites. Add melted
  5. Add flour mixture. Mix well. Add vanilla ext. Add milk slowly until well blended.
  6. Pour in cupcake liners and bake for 25-35 minutes or until toothpick comes out clean.
  7. Let cool then frosting with your choice of chocolate frosting.
  8. Dip each cupcake in crushed oreos then place in planters.
  9. Roll each Airhead up and then bend at a 90 degree angle and then stick into the bottom of your cupcake.

Notes

This cupcake recipe makes 24 cupcakes, but you can half the recipe if you don't have that many planters.

Even though this is a "healthy" recipe, I've gotten very good reviews from it!

http://www.pennywisecook.com/in-the-garden-cupcakes/


Like this post? SHARE it!

Related Posts Plugin for WordPress, Blogger...

1-Minute Emergency Cake

I feel I should say Happy Tax Day or something, but for some reason it doesn’t feel right. There is most definitely no happy when it comes to taxes for me. We always owe because I’m “self-employed”. But I hope that many of you got a large refund and do have a Happy Tax Day.

I have done you a grave disservice, I have to admit. I have not yet shared with you one of my most favorite nighttime snacks. I’ve told a handful of my friends and every single one wondered where this unknown marvel was all of their life. As was I the first time I learned of this simple yet incredible treat that I have now named “Emergency Cake”.

We all have our emergencies don’t we? Tax Day maybe? The idiot who cut us off in traffic this morning. The rude cashier who didn’t accept our coupon at the store. Or perhaps your emergency is that it’s Tuesday. Whatever it is, I have the cure.

It’s called Emergency Cake. And it will come to your rescue.

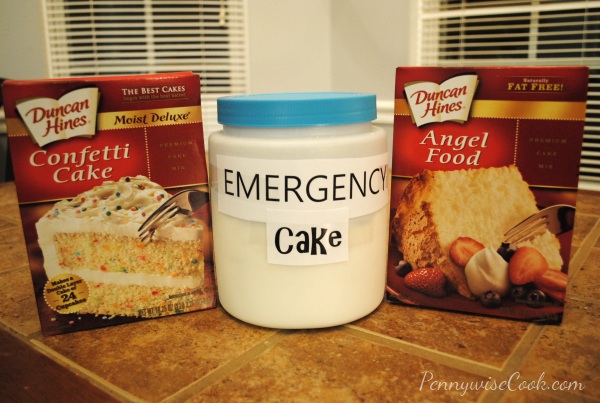
You see, you only need two ingredients to make up weeks worth of this Emergency Cake. A box of Angel Food Cake and a box of your desired flavor cake. Mix them together and keep them in a container. I bought this storage container at Dollar Tree to keep my cake mix in. I actually have two of these, one for confetti cake and one for devil’s food cake.

As if only needing two ingredients wasn’t enough, it gets better. I’m a little impatient sometimes, especially during my cake emergencies. It only takes 1 minute to have a piece of cake ready for your face.

You might have heard of this being called 3-2-1 cake. That’s another way that you can remember how to make it. Although every single time we make it (which is a lot!), my husband proceeds to ask me how.

  • 3 tablespoons of your cake mix
  • 2 tablespoons of water
  • 1 minute in the microwave

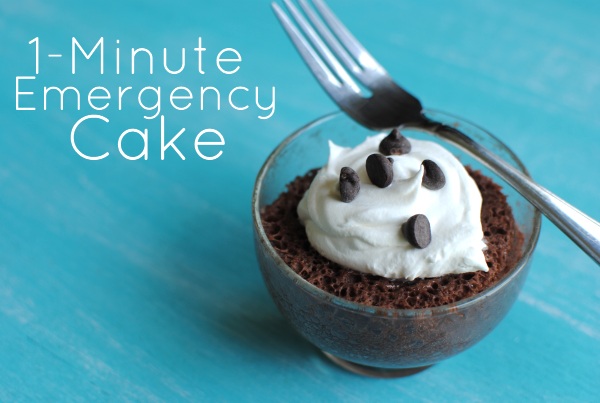
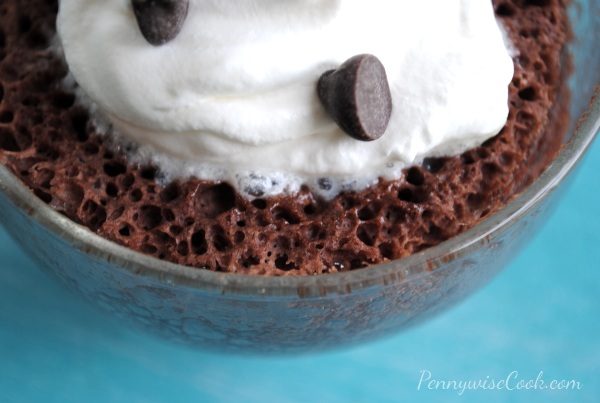
You can make this in a mug or a little dessert cup like I have here.

You have cake in a pinch and yet you won’t have to worry about a cake staring you in the face the next day. These aren’t the largest pieces of cake that you’ve ever had. But with a little whipped cream on top with sprinkles or chocolate chips, they are plenty. Although my husband would argue otherwise. He doubles the recipe most days.

Unfortunately, I’ve come to the conclusion that I have emergencies every night and therefore have to eat emergency cake. 🙂 You might just have the same issue!

You will be happy to know that it’s not bad in calories. One piece has around 50 calories depending on your cake mixes. And of course whatever you add to the top.

Let me know if you have an emergency tonight and how your cake turned out!

The Hidden Pantry shared this awesome recipe and I did some research to find out it was originally a Weight Watchers recipe which means it definitely can’t be all that bad on your diet!


Like this post? SHARE it!

Related Posts Plugin for WordPress, Blogger...

Blissful Oatmeal Raisin Cookies

Back at the end of February I attended my 3rd Blissdom Conference. It’s a conference for us blogging geeks. Not only is it a bunch of fun, but I always learn a thing or two as well. And I especially love hanging out with my blogger friends and meeting the sponsors. They are always so fantastic to us.

I made my way around to all of the booths and spoke with many of them. I told you about meeting Cynthia Sass. She is such a sweetheart and inspiration. And then I could hardly contain myself, I got to meet a real California Raisin.

It was all smiles and very friendly, but it didn’t say a whole lot. I was thankful to have gotten a hug from such a huge celebrity. It took time out of it’s very busy raisin schedule to pose for a picture with me. I also really appreciated how natural and genuine it was. Because you know, those raisins are simply grapes dried in the run, right?

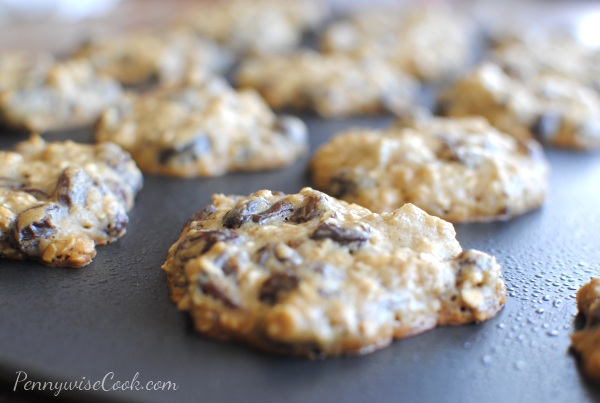
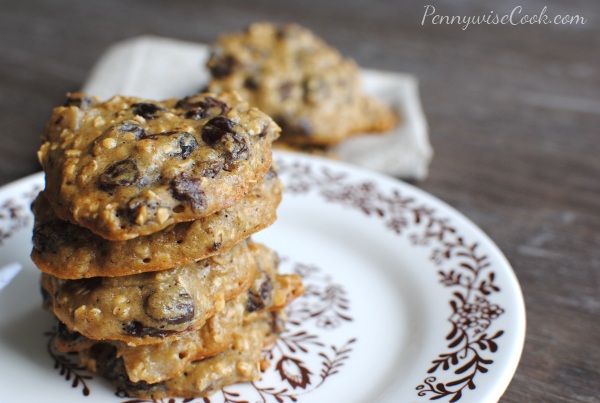
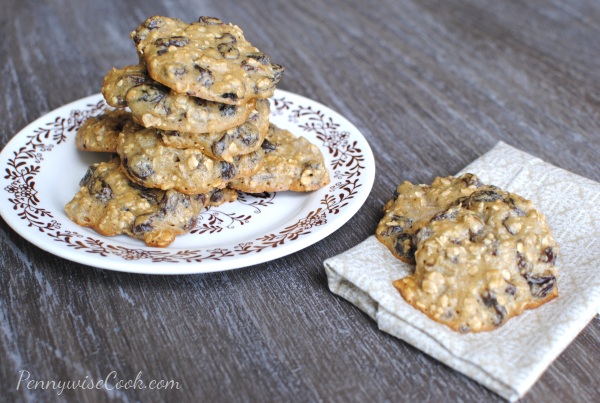
The California Raisins were a sponsor there at Blissdom this year. They had the most amazing booth with the coolest kitchen. And they also had these incredible oatmeal raisin cookies. When I think of oatmeal raisin cookies, I expect to see 5 maybe 6 raisins in the cookie. But these cookies had a TON of them. Come to find out, they also had NO added sugar. They were all natural, soft, delicious, and I completely fell in love.

Of course you know I had to make them….

I had to make them really soon.

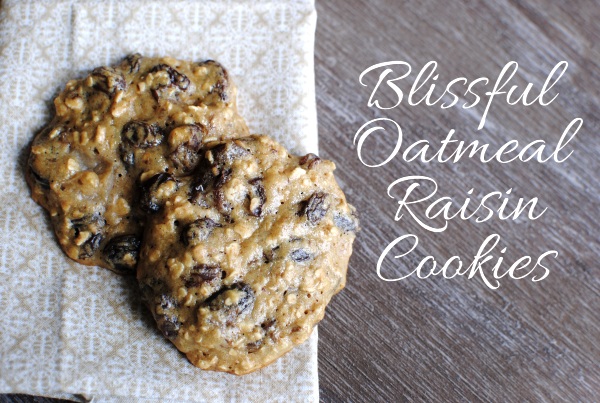
So I did. And I call them Blissful Oatmeal Raisin Cookies. One other little secret about these cookies…..they also contain an apple. It’s just another unique and natural way to add a little sweetness without having to add sugar. It also keeps them extremely moist which makes these nice and soft. They also don’t take long to cook which makes it all the easier to enjoy them quickly.

These are really yummy when they are just out of the oven and warm.

Since they are natural, they have a very nice flavor. Not overly sweet like some cookies can be. If you were naughty, you might add a handful of chocolate chips into this batter. But I’m not gonna force you. 😉

This recipe comes from the California Raisins Let’s Keep It Real Campaign. You can learn more there about how raisins are a good choice for eating healthy and nutrients.

Blissful Oatmeal Raisin Cookies

Blissful Oatmeal Raisin Cookies

Try these amazing oatmeal raisin cookies and feel good about it because they contain no added sugar!

Ingredients

  • 2 cups California raisins
  • ½ cup peeled, cored and chopped apples (we used granny smith)
  • 1 cup water
  • ½ cup butter
  • 1 cup flour
  • 1 teaspoon baking soda
  • 1 teaspoon vanilla extract
  • 1 cup cooking oats
  • 2 eggs (beaten)
  • 5 tablespoons honey

Method

  1. In a medium saucepan, combine the raisins, apples and water. Bring to a boil and cook for 3 minutes. Remove from the heat and stir in the butter. Set aside to cool.
  2. In a medium bowl, stir together the flour and baking soda. Stir in the vanilla, eggs, and the apple mixture until well blended. Fold in the oats and honey.
  3. Scoop the dough into a greased cookie sheet. Press the cookies down and bake at 325 degrees for approx. 8-10 minutes.

Notes

This recipe makes 3 dozen cookies!

http://www.pennywisecook.com/blissful-oatmeal-raisin-cookies/


Like this post? SHARE it!

Related Posts Plugin for WordPress, Blogger...

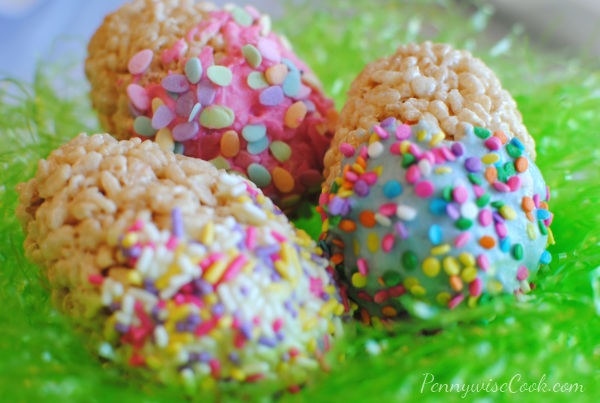
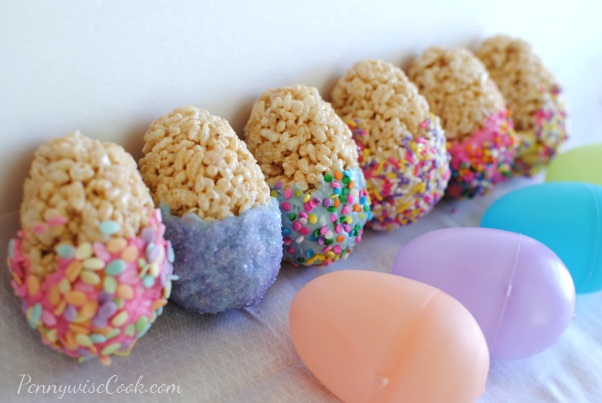
5 Simple Easter Treat Ideas

Easter is on Sunday! Can you believe it? Addie had her school’s Easter egg hunt today and she was so proud of all the eggs that she collected. I had to stop her from eating so much candy though. I don’t remember having that much candy when I was hunting eggs.

If you’re still looking for cute ideas for treats to create with the kids, here is a recap of my goodies that Addie and I put together the last few weeks. I’m ashamed that not one ounce of any of these treats are left. They were all too yummy to stick around for too long.

Peeps in Sprinkle TuTus

Rice Krispie Treat Speckled Eggs

Bunny Brownie Pops

White Chocolate Pretzel Ducks

Tootsie Roll Easter Nests

I also plan to make Resurrection Rolls this year.

Do you have any traditions with Easter treats are your house?


Like this post? SHARE it!

Related Posts Plugin for WordPress, Blogger...

Strawberry Cake Mix Cookies

Not only do I enjoy using coupons (when I have the time), but I also really love when I can use them for things that I can actually use! For instance, every once in a while Publix will put cake mix on sale. I usually order extra coupons and stockpile it. Cake mix is such a universal baking ingredient. It’s nice to make a homemade cake, but sometimes you don’t have the time or patience to start from scratch. I love finding new ways to use it and spice it up.

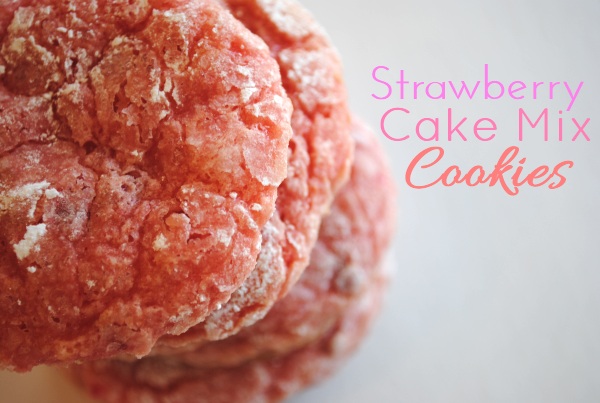
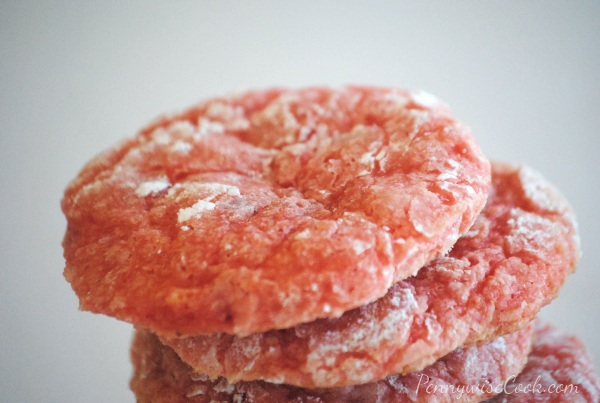
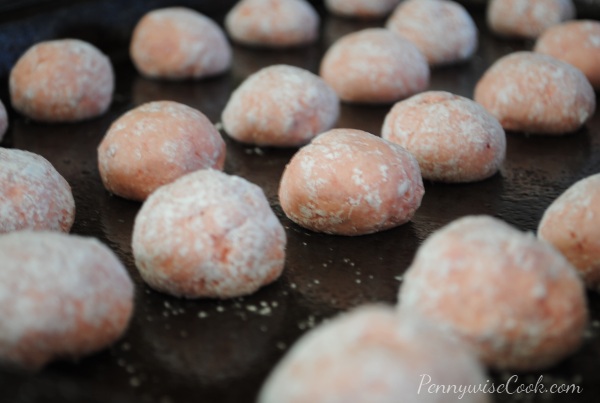
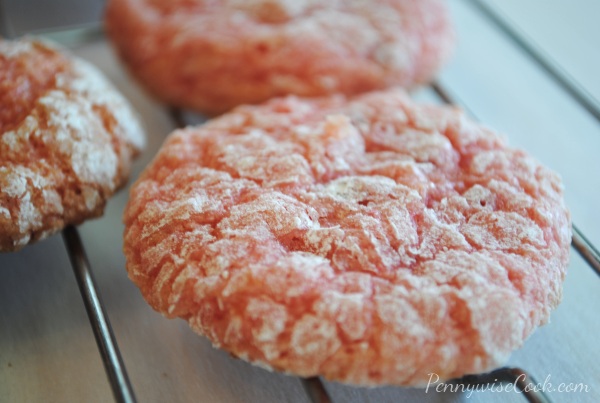
If you get tired of making cakes with your cake mix, try something new and make cookies! I have a thing for pink so I naturally gravitate towards the strawberry mix. They come out in such a spring-y color. However, that doesn’t really matter because they will most likely be gone before you have time to enjoy their color. I kid you not, my family ate the entire batch in one day. They were THAT good.

These remind me a lot of sugar cookies because they are so soft. It’s the cake mix doin’ it’s thang. I love soft cookies and I hate them. They are so incredibly yummy and easy to eat, but this also makes them easy to inhale. And before you know it, you’ve eaten 10 of them. Don’t judge me. I don’t have much will power when it comes to soft, gooey, and strawberry cookies.

I also love these because they are incredibly cheap.

  • A box of cake mix ($1- $1.50)
  • 1 egg ($.10)
  • tub of cool whip ($1- $1.25)
  • 1 cup powdered sugar ($.50)

Total= $3.35

Not too shabby for feeding your sweet tooth. And these are also incredibly easy. We’re talking mixing egg and cool whip and then folding in the cake mix. You do have to chill it in the refrigerator for a little bit to help it firm up and set so that you can roll them into balls.

After they have firmed up a bit, you roll them into balls and then roll them in the powdered sugar. This gives a nice and sweet crusty coating when they bake. This is the most time consuming part. I did find it to be very tedious. But I’ve heard of folks not even going through this step so if you are in a crunch you can just leave it out. You won’t be banished to the corner and your cookies will probably be just as yummy.

These cookies can be made with any flavor cake mix. I’ve tried confetti cake mix and made birthday cake cookies. They were yummy too!

Let me know if you try other flavors and how it turns out!

Strawberry Cake Mix Cookies

Strawberry Cake Mix Cookies

These cookies are made out of cake mix and cool whip!

Ingredients

  • 1 Box Strawberry Cake Mix
  • 1 8 oz Tub Cool Whip
  • 1 Egg
  • 1 C. Powdered Sugar

Method

  1. Preheat oven to 350 degrees.
  2. In a bowl, mix the cool whip and egg together until smooth.
  3. Fold in the cake mix until well combined. Chill in the refrigerator for 20- 30 minutes.
  4. Place powdered sugar in a bowl and drop spoonfuls of the dough into the sugar and roll it around to coat.
  5. Place sugar-covered dough balls onto a cookie sheet and bake for 12-15 minutes.
  6. Let cool on a wire rack.

Notes

The longer that you let the dough firm up in the refrigerator, the easier it will be to roll them.

I had to cook my cookies a bit longer because they were a bit too soft. Be sure to watch the time because you definitely don't want to overcook them.

http://www.pennywisecook.com/strawberry-cake-mix-cookies/


Like this post? SHARE it!

Related Posts Plugin for WordPress, Blogger...

3-Ingredient Strawberry Ice Cream

Do you remember making homemade ice cream as a kid? I remember we had one of those crank machines that took FOREVER to produce about 2 bowls of ice cream. By the time you were done doing hard labor cranking the machine, you were almost too tired to eat it! Almost…. Though I do specifically remember the taste of how amazing it was compared to the stuff that you buy at the grocery store.

It’s incredible to me how expensive that ice cream has gotten. It’s worse than GAS at $6 or $7 bucks per gallon. And just like we have to get around in our cars, we have to feed our ice cream cravings. Especially in the summer.

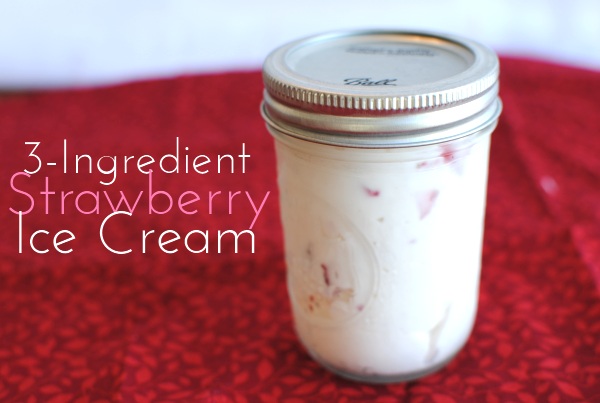
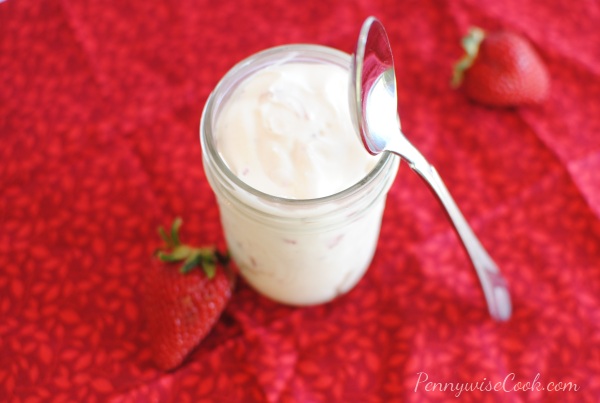
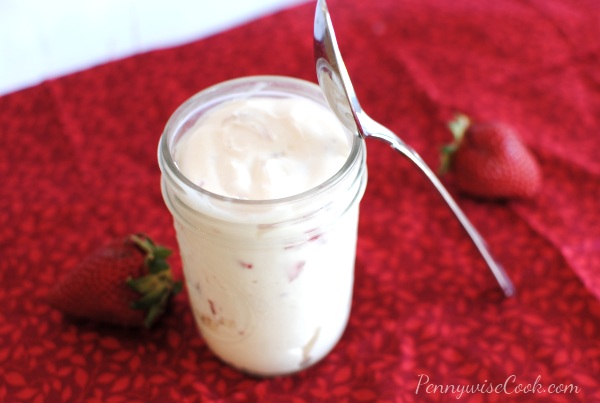
I’m going to go ahead and tell you that you’ll probably want to go out and buy some mason jars if you don’t already have some. It’s not good (I’m so ashamed), but sometimes I inhale eat ice cream straight from the carton with a fork. Yeah the fork thing came from my dad. It’s how he always eats it and I’ve just picked it up too. The mason jars are a great way to prevent overeating and make great portion control. It’s always great to have your own personal container. Less feels like more that way.

This recipe only involves 3 ingredients and is so perfect every time. I cannot believe that I didn’t figure this out earlier. And by the way, you won’t need one of those horrible hand-crank ice cream machines for this recipe. Just an appetite for smooth and creamy strawberry ice cream. You can always use another fruit of your choice.

I will never go without homemade ice cream again!

Recipe courtesy of Fat Girl Trapped in a Skinny Body.

3-Ingredient Homemade Strawberry Ice Cream

3-Ingredient Homemade Strawberry Ice Cream

With very few ingredients you can make the most amazing (and easy) strawberry ice cream!

Ingredients

  • 1 (14 oz) Can Sweetened Condensed Milk- I used Fat Free and it works!
  • 2 Cups Heavy Cream
  • 2 Cups Strawberries, Chopped- Measure them out and them chop or puree them

Method

  1. In a large bowl using a hand mixer, whip the heavy cream until soft peaks form. Just about to where it gets stiff.
  2. Add in the sweetened condensed milk and whip for another minute or so.
  3. Fold in the strawberries and pour into freezer containers or mason jars.

Notes

I used my KitchenAid stand mixer to make this and it worked very well!

I chopped my strawberries this time, but next time I plan to puree them. I liked the large bits of strawberries, but I think it would taste more strawberry-y if they were more pureed.

If it's really hard when you take it out of the freezer, just set it out on the counter for a few minutes and it will soften up a bit.

I'm going to try this with oreos soon for Cookies and Cream ice cream!

It tastes almost like soft serve and it's fabulous!

http://www.pennywisecook.com/3-ingredient-strawberry-ice-cream/


Like this post? SHARE it!

Related Posts Plugin for WordPress, Blogger...

Bunny Brownie Pops

TGIF! Are you as glad that it’s Friday as I am? I can’t wait to get out and about and enjoy the warm weather this weekend. After this week’s Easter treats you better believe I’m going to get out and try to work some of this off.


I hope that you’ve enjoyed Easter Week! I absolutely love making themed cupcakes and special characters so this has been a blast. I’m already looking forward to getting some super cute treats together for my Addie and Britton’s birthdays in May. (Yes, BOTH are in May- lucky me!) But before we say goodbye to our less than healthy sweetfest this week, let me share just one more with you.

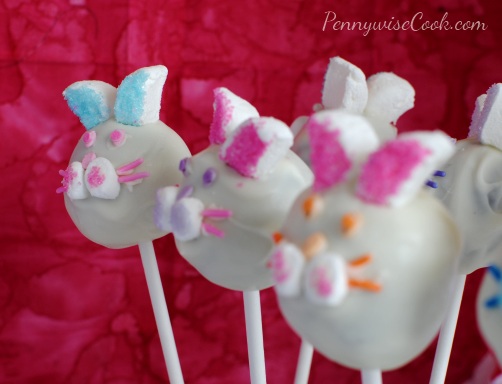
How about a little chocolate brownie underneath a cute little bunny head? That kinda sounds funny, but I assure you that it’s more than tasty! These brownie pops are a lot like cake pops only chocolate-ier. If you were wondering, no that’s not a word. But yes, I will use it anyways.

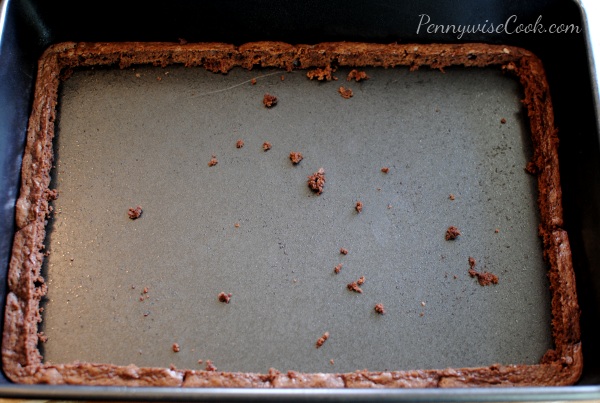
I made up a batch of your everyday brownies. Nothing special, in fact these were Pillsbury. I got them free a while back, so I thought why not. When you’re making yours you’ll want to cook them just undercooked so they are fudgey and easy to squish. I ended up cutting the edges off since they were a bit hard.

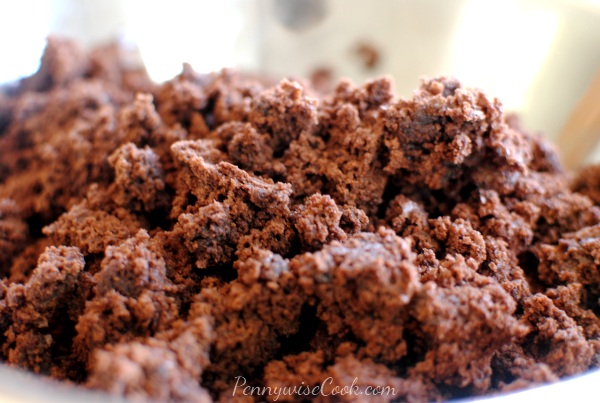
I crumbled up the brownies into a bowl and got them ready for squishing!

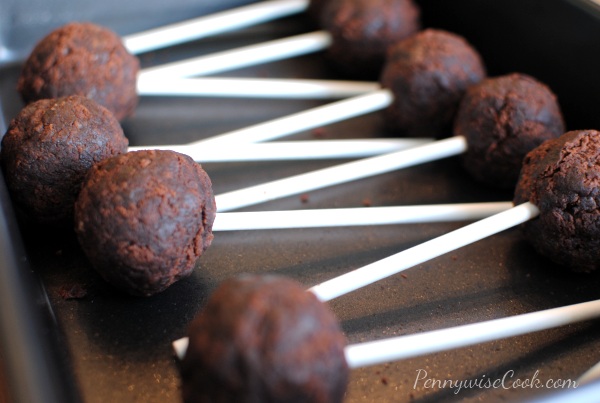
Then I commenced with the squishing. I rolled them into semi-circular balls. As close to a circle as I could get them. Then I popped them in the freezer for a while to get them nice and hard for dipping!

Using large marshmallows, I cut them in half and dipped them in colored sugar to make the middle of their ears. Each bunny got different color eyes and whiskers with sprinkles. I had to get creative really because I didn’t have anything fancy or “made for bunnies” supplies. All of my decorations besides the marshmallows were some type of sprinkle. I’m pretty sure at one point they were looking like little kitties to me.

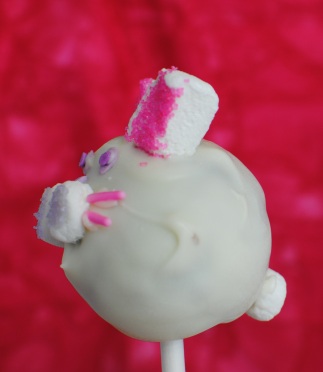
It was at that point that I added little cotton tails so they would no doubt look like bunnies and not kitties. 🙂

This little bunny is looking at you saying Happy Easter! 🙂 In the end these may not have looked amazing, but they were Easter-y and above all, delicious! Your family will definitely love them.

I got this idea over at Karis Cooking, but used what I had to make mine work. Here’s what I did in case you want to make some Easter lovelies!

Bunny Brownie Pops

Bunny Brownie Pops

Ingredients

  • 1 Package Brownie Mix (Or your favorite recipe)
  • 1 Package White Candy Melts (or color of choice)
  • Lollipop Sticks
  • Large Marshmallows
  • Small Marshmallows (for bunny tails if desired)
  • Colored Sugar
  • Sprinkles or other Decorations

Method

  1. Make up the brownies according to the directions baking until just undercooked. While baking take large marshmallows and cut in half. Dip the sticky parts into colored sugar and set aside for assembly later.
  2. Let cool completely and then crumble.
  3. Form brownies into desired size balls then place lollipop stick into each one. Put in the freezer for around an hour or so.
  4. Melt candy melts according to package directions. Remove brownie balls from the freezer.
  5. Dip brownies completely into candy melts. While candy melts are still soft, apply all decorations, marshmallows ears and tails, and eyes.
  6. Let cool and they are ready to serve!

Notes

For the ears- I do suggest cutting the bottoms of the ears off to make them easier to apply to the rounded top of the bunny's head.

When dipping the balls, try using a very deep cup or mug. This makes it easy for the entire ball to get coated at one resulting in a prettier appearance.

If you have some type of foam or support to set these in while working with them, that would really help! I used a foam piece for making flower arrangements to hold them.

http://www.pennywisecook.com/bunny-brownie-pops/


Like this post? SHARE it!

Related Posts Plugin for WordPress, Blogger...

Rice Krispie Treat Speckled Eggs

I do apologize for having the same exact little image at the top of all the posts this week. But I made it and it’s cute. So there. But really, isn’t it festive? Kinda like all of these sweets this week, aren’t they just yummy!

I was just telling someone the other day that one of the best parts of having a food blog is that you get to eat all of the goodies. On the other hand, the worst part of having a food blog is that you eat all of the goodies. I saw something recently that said, “I like running. I like running because I like dessert.” That’s me! And just as much as I’m running to work the dessert off, I’m running back home to eat more.

To continue Easter Treats Week I’ve got a pretty familiar treat for you. Rice krispie treats. They aren’t usually an Easter treat, but with a little imagination (and sprinkles) you can turn them into morsels that are fit to sit next to your Easter ham.

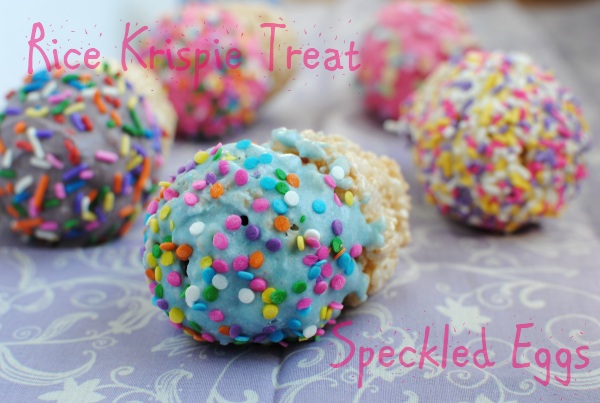
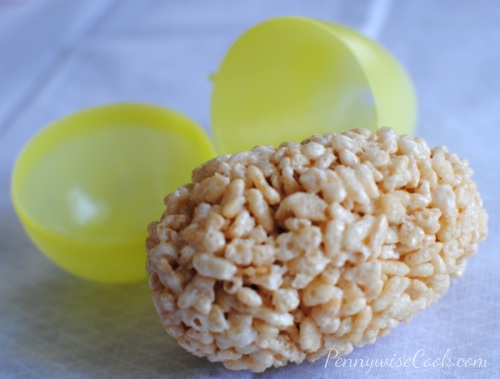
It really is a simple as making your favorite rice krispie treat recipe (I’ve got one for you below) and then before it sets, shoving them into the middle of a large plastic egg to mold. Pop it out and VOILA! You have a treat in the shape of an egg. And at this point, you could just eat it like that or you can doll them up and go sprinkle crazy like we did.

We tried out a few different varieties and combinations of colors and sprinkles on our eggs. I think the favorite turned out to be the pink chocolate coating with colorful decoration. Although it was hard to tell.

Just about every egg that we made, Addie wanted to eat right then and there. But you know, I couldn’t let her eat them yet because I had to take pictures for you. That’s how the cookie crumbles around here. Nobody eats until mommy gets her pictures! Kinda sad really, but you wouldn’t want pictures of an empty plate would you? Nah.

We used the white candy coating bark to make these and used food coloring to make our colors. You can feel free to use white chocolate chips or candy melts if you prefer. It would all taste just as yummy. As for decoration, the sky is the limit! Sprinkles, colored sugars, cookie crumbs, whatever you’d like. We didn’t completely cover ours in the candy bark because I was trying to cut down on mess. If you’re using sprinkles, you can’t exactly avoid a mess, but be prepared to sweep!

Rice Krispie Treat Speckled Eggs

Rice Krispie Treat Speckled Eggs

Make your favorite every day treat into your favorite Easter time snack with these Rice Krispie Treat Speckled Eggs.

Ingredients

  • 3 Tbsp Butter
  • 4 Cups Mini Marshmallows
  • 6 Cups Krispy Rice Cereal
  • Candy Coating Bark or Candy Melts/White Chocolate Chips
  • Sprinkles
  • Large Plastic Egg (for molding)
  • Cooking Spray

Method

  1. In a large saucepan, melt butter over low heat. Stir in marshmallows and until melted. Remove from heat.
  2. Add the Rice Krispies and stir until well coated.
  3. Spray inside of plastic egg and yours hands with cooking spray. Mold even amounts of the egg into the egg. Let sit for a little bit to help them set a bit.
  4. Melt candy bark according to package or in microwave.
  5. Dip the eggs in the candy coating and then sprinkle them with sprinkles. Let cool and serve.
http://www.pennywisecook.com/rice-krispie-treat-speckled-eggs/


Like this post? SHARE it!

Related Posts Plugin for WordPress, Blogger...