Filing Cabinet Makeover

Filing

I think it’s safe to say that most filing cabinets are pretty boring. They just don’t offer them in a plethora of prints or colors. The office supply store isn’t really concerned whether our filing cabinet matches our aqua theme or not. Well, all I can say is how dare they!

It gave me a little DIY project to sink to teeth into. 

I purchased a massive tanker desk at a thrift store recently. I knew it needed a friend.

A filing cabinet friend. 

I thought what better way to practice my metal object furniture redoing, than with a filing cabinet.

Before

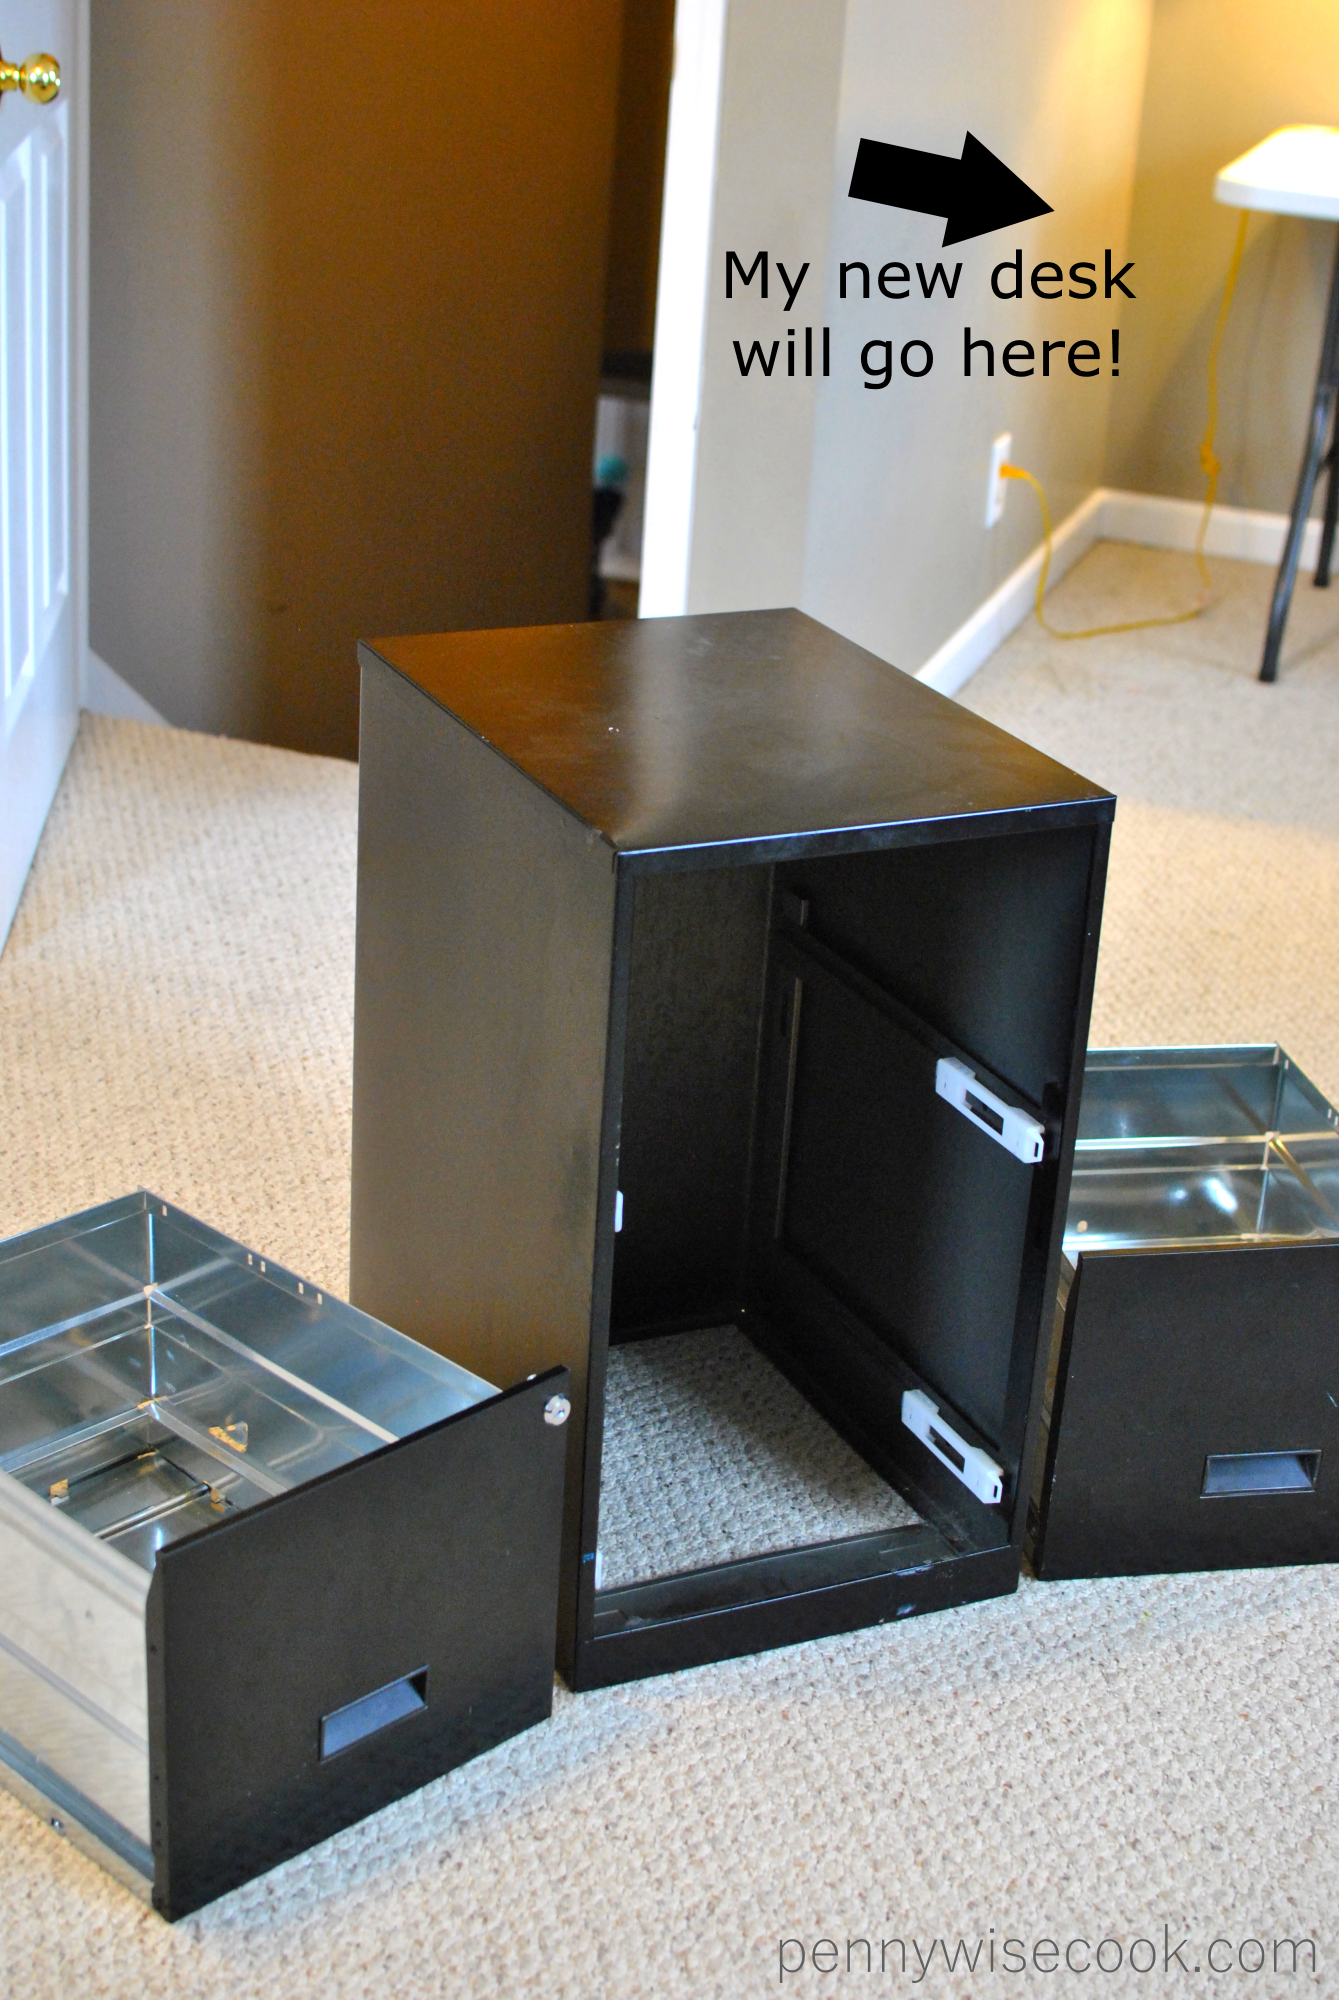
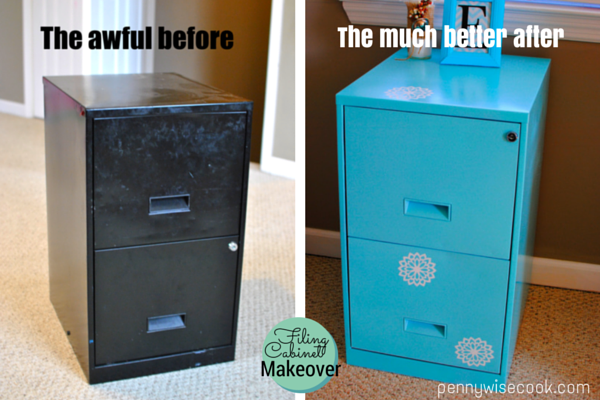
I guess it’s a good thing that I had this old black/ugly filing cabinet hanging around.

Confession: I had to YouTube how to remove the drawers. Leave it to me to have a filing cabinet with drawers that didn’t remove the same as most.

Spray Paint

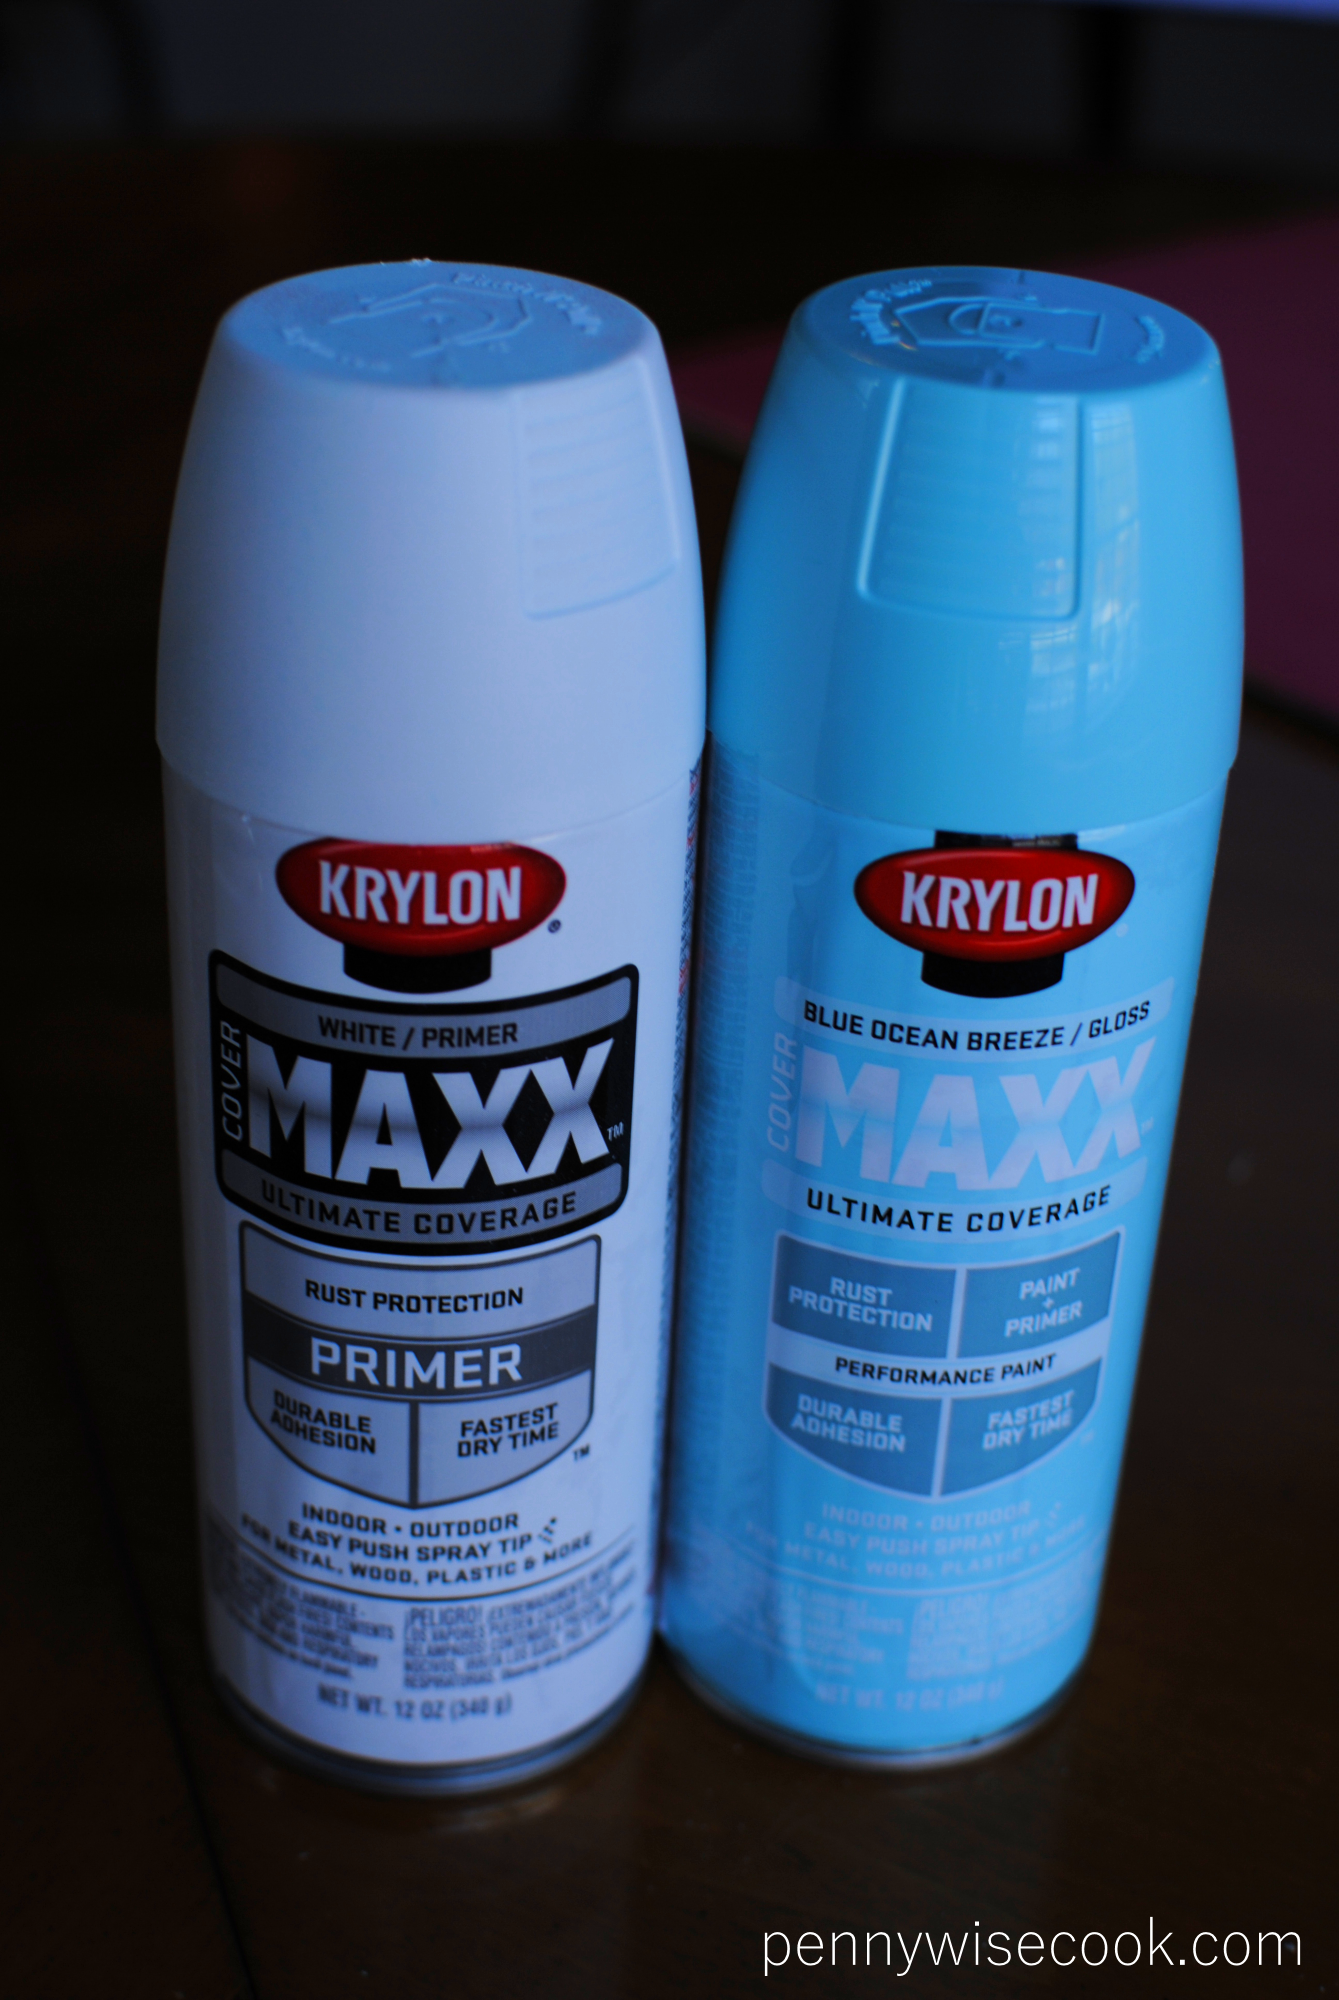
My weapons of choice for this Filing Cabinet Makeover.

I knew I needed to prime this sucker so the paint would stick to the metal. Walmart’s Krylon has always been good to me in the past. It’s cheap too, so Krylon it is!

Gift Bags as drop cloths

I started by wiping the filing cabinet down with a damp cloth. You know, to get the cooties off. 

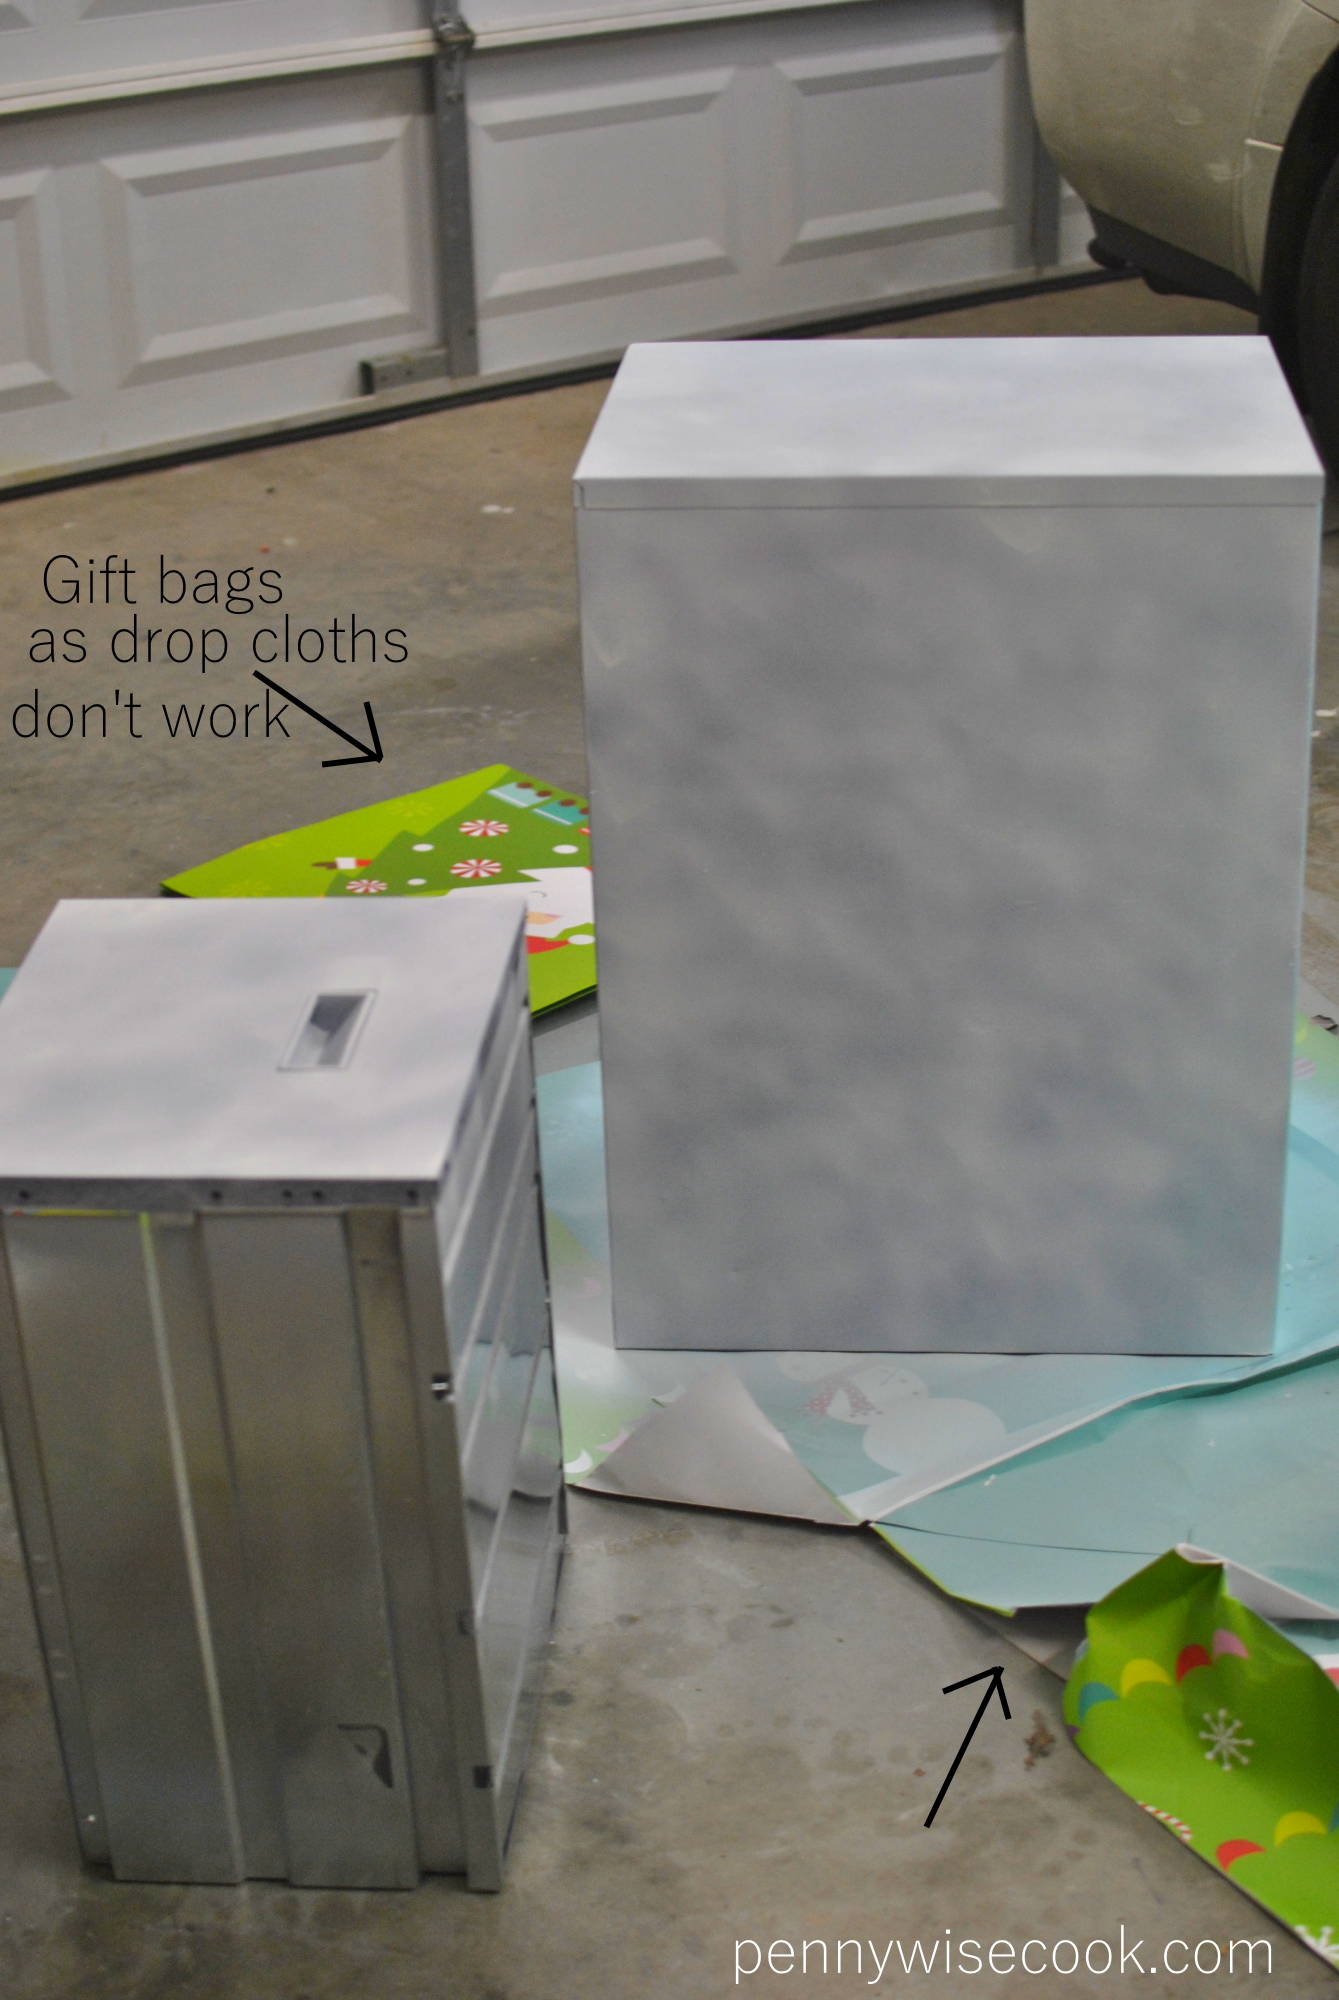
Then I went into my garage where the temperature was twelve below zero. Not really, but it felt that way. Because my DIY projects can’t wait until the summer. Noooo. I have to do them when it’s frigid and I can barely hold a can of spray paint because my fingers are trying to fall off because of frost bite.

Next, I perused my garage for something to use as a drop cloth.

Of course! The Christmas gift bags that we received that were larger than life! I’ll cut them and place them underneath. 

Bad idea. Don’t recommend it.

I primed the whole thing and then let it dry for an hour and a half. Then went back and sprayed on the aqua-ness.

Filing Cabinet Makeover 1

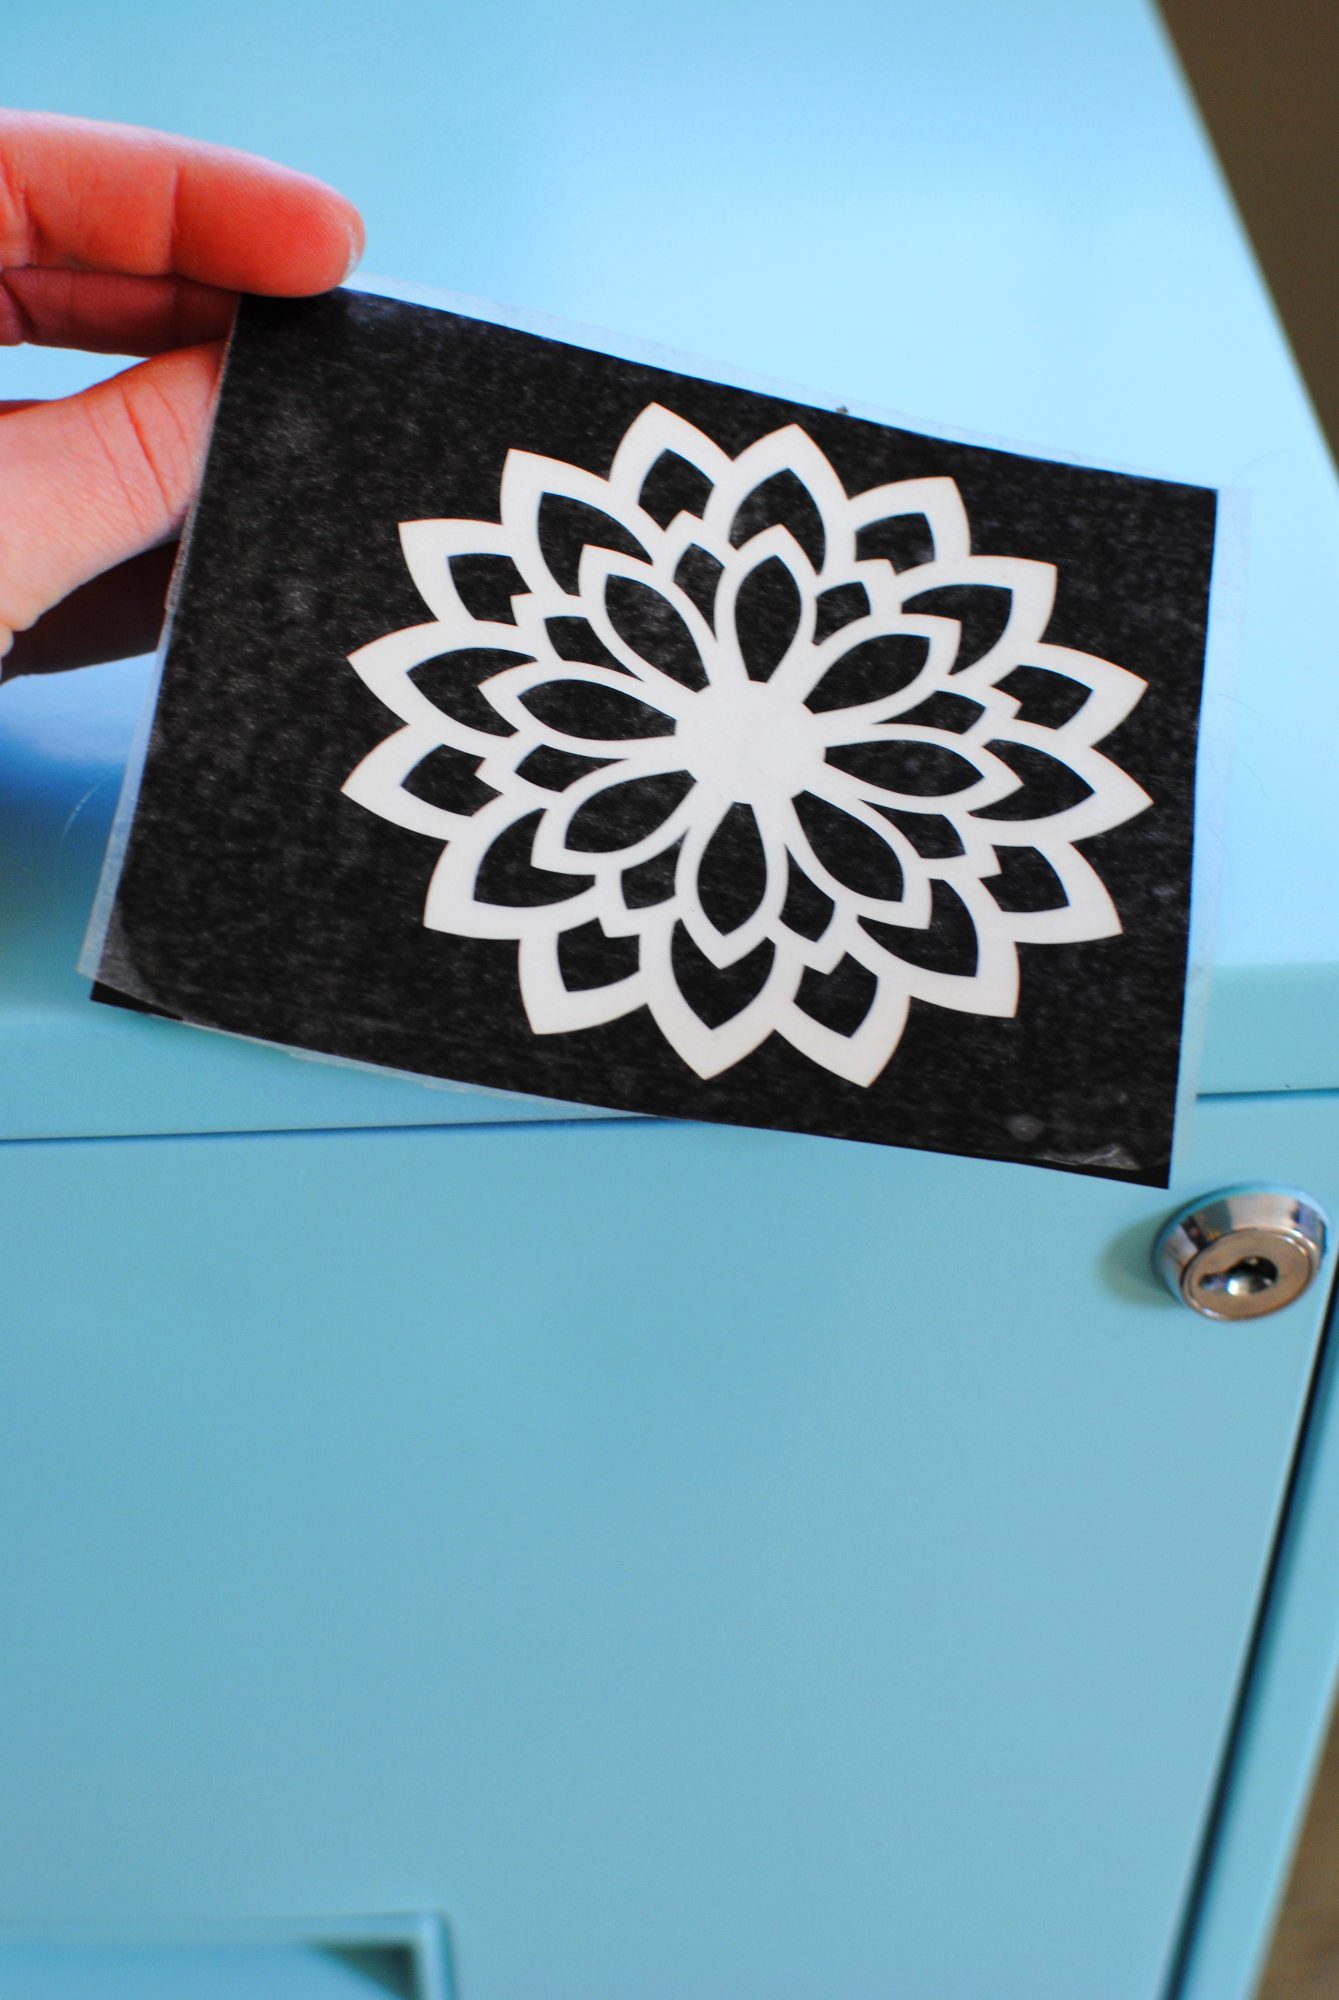
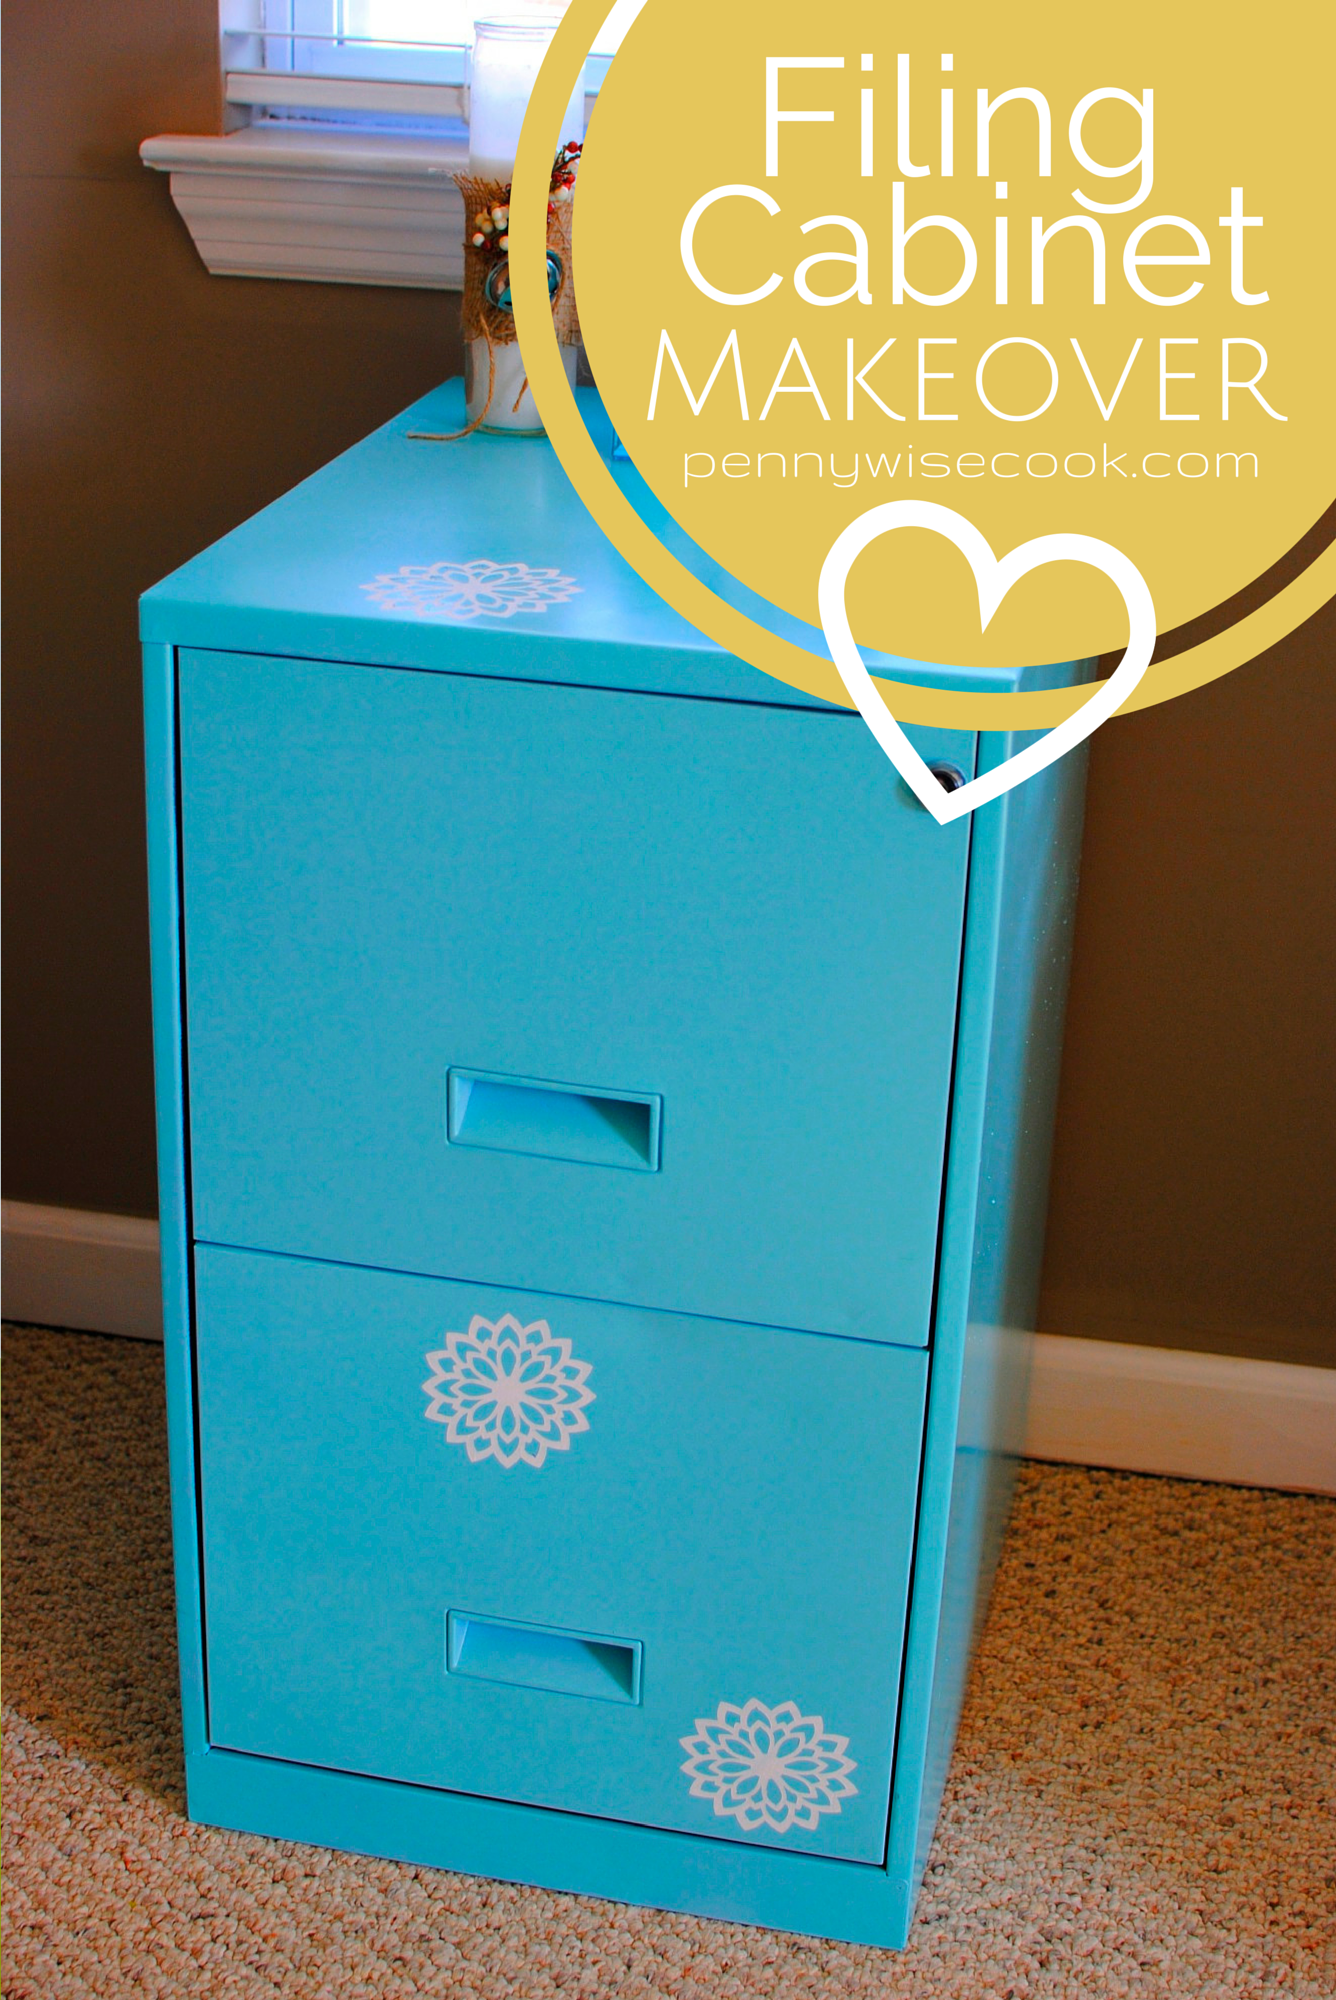
I used my Silhouette Portrait machine (which I’m obsessed with) to cut out these cute little flowers. Then I painted them onto the filing cabinet in a few random places.

Filing Cabinet Makeover 2

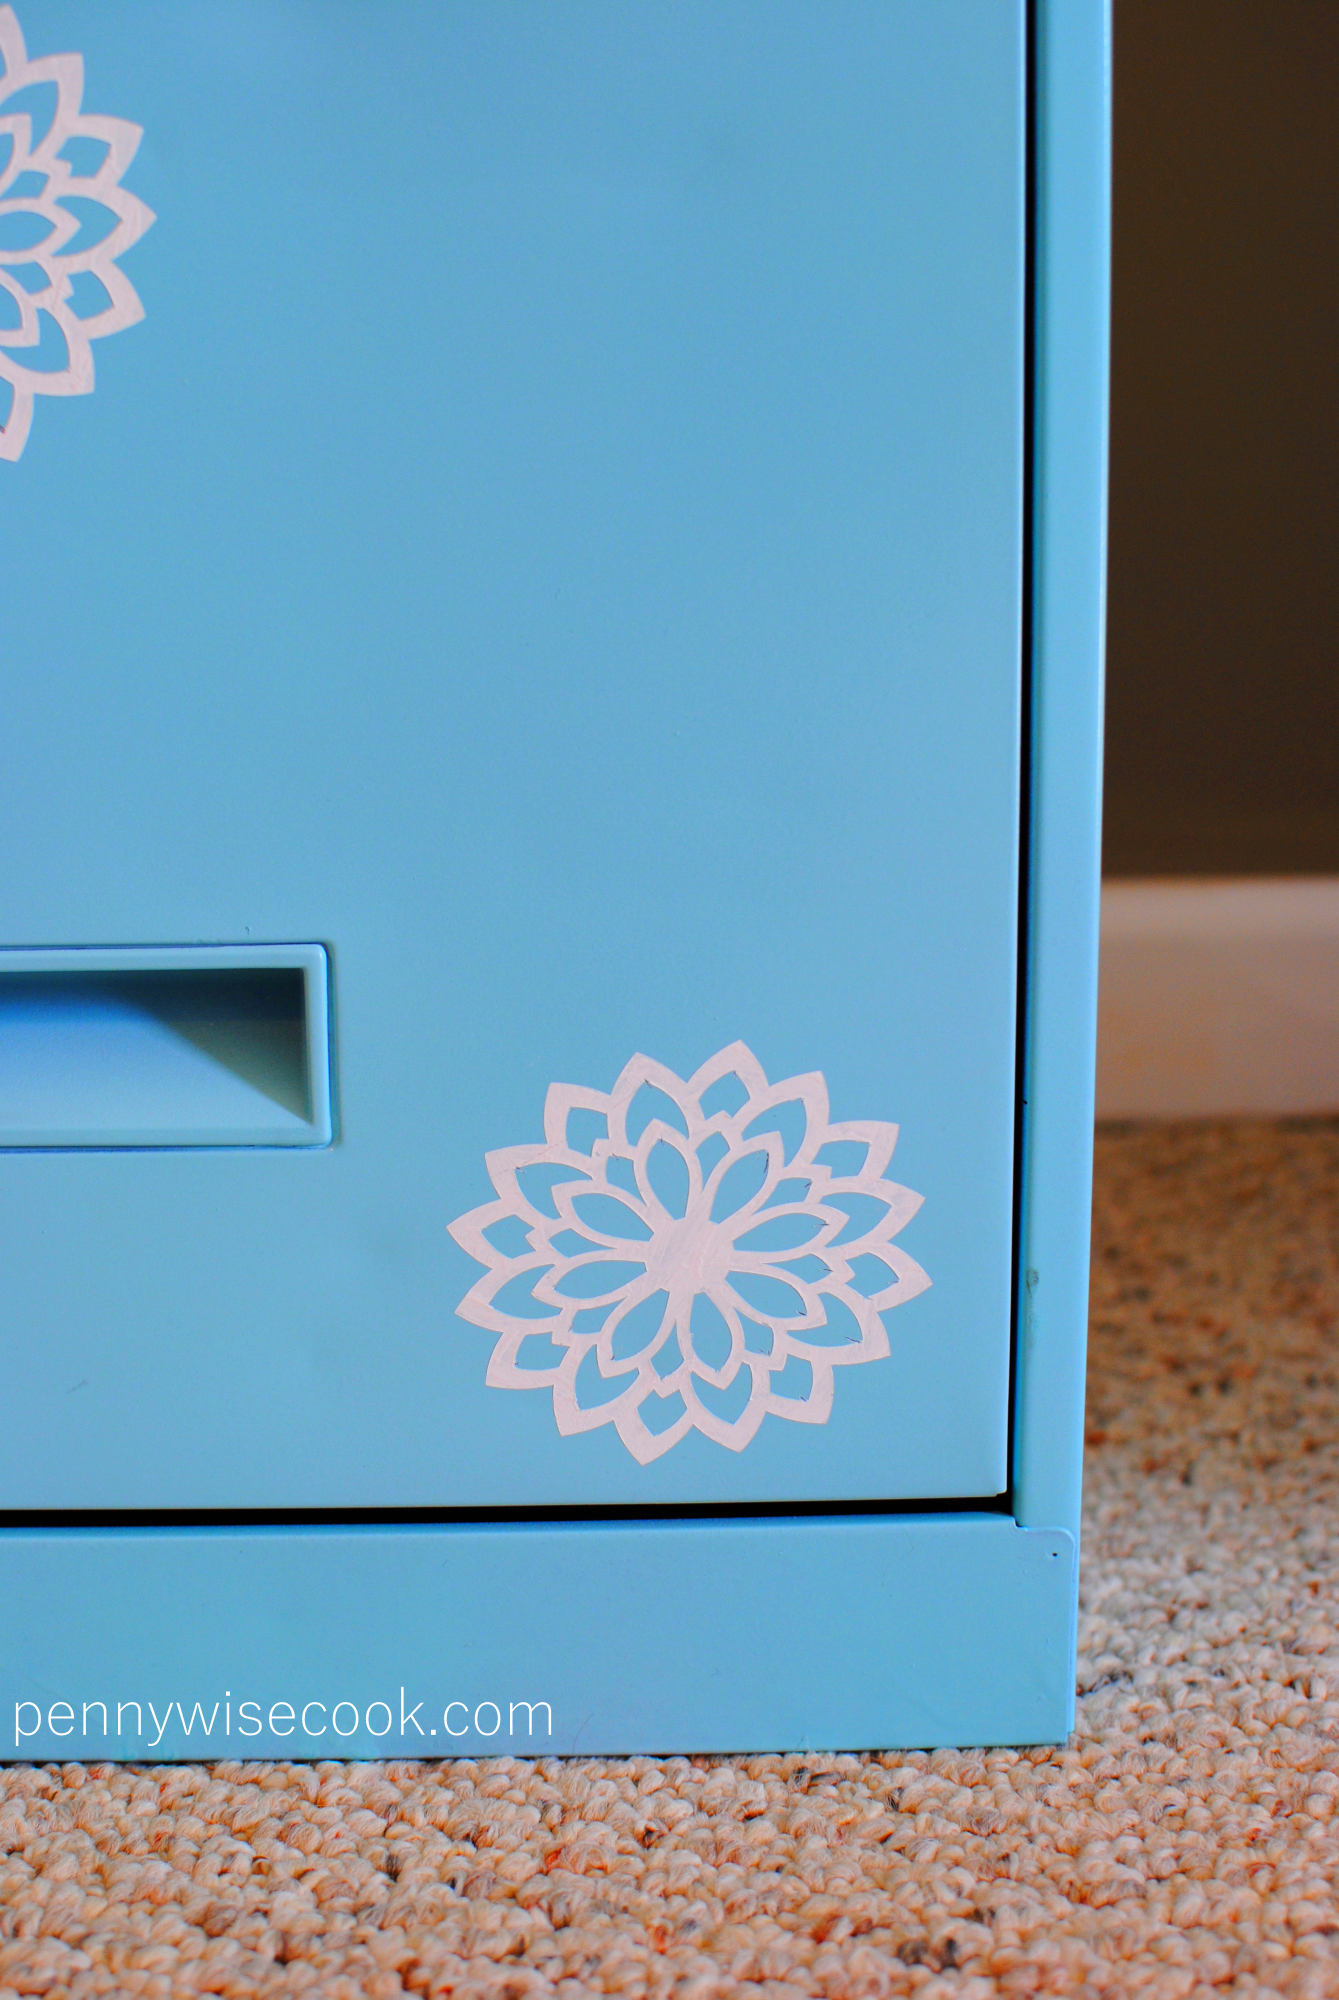
I think they added a nice little touch!

Filing Cabinet Makeover 3

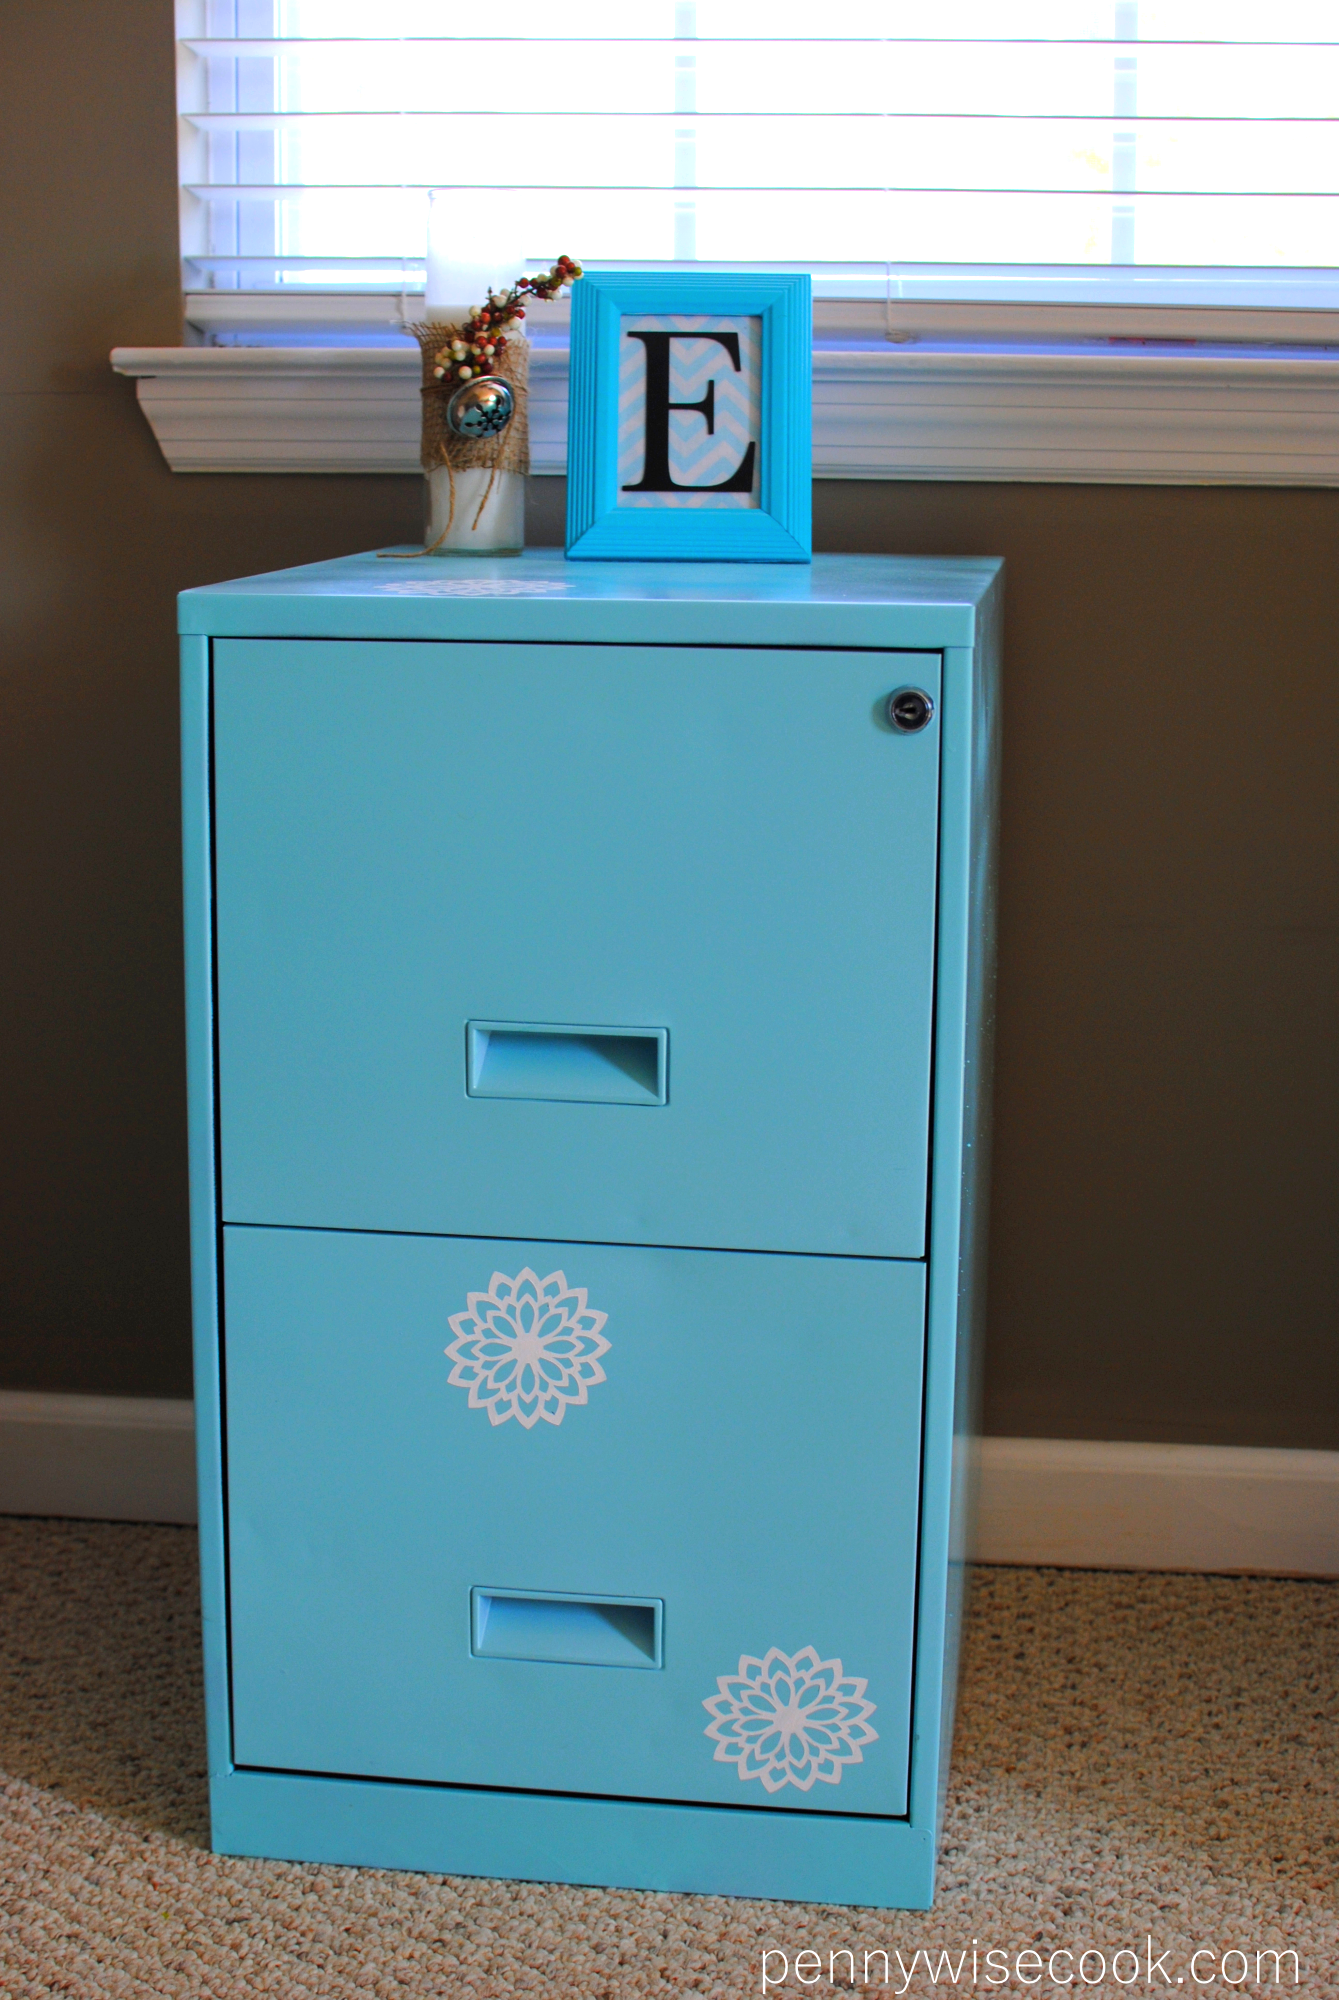
And then BAM! Mr. Filing Cabinet became Mr. Awesome Filing Cabinet!

Filing

It goes really well with my DIY Tanker Desk Makeover. I can’t wait to show that to you!

Stay cool Mr. Awesome Filing Cabinet.

You are way too cool for school.


Like this post? SHARE it!

Related Posts Plugin for WordPress, Blogger...

DIY Roadside Dresser Transformation

photo1

Driving down the road you pass a dirty old dresser with missing drawers by the curb, and the remains of someone’s stinky trash. You might look at it and think that is one ugly dresser. You might look at its missing drawers and consider it rendered useless. You might think how in the world would I ever get this in my van even if I could get past the fact that its butt ugly?

You MIGHT even slow down long enough to get a good gander at its bones…

Not this girl. I stopped in my tracks and got out of my van to look it over. My suspicions of its stankiness were confirmed. There was a good reason someone was getting rid of this stinker. I made room in the back and gave hubby a call for help to load ‘er up.

I didn’t have a clue what the plan was for this piece of roadside furniture, but you know Pinterest came into play. I had a plan by that evening. Time was most definitely not wasted.

Then we made a huge move into our new and amazing home and this little guy with all its potential was locked up in our shed for a couple of months before I could get my hands on him. The anticipation was killing me and then finally one day, I got him out and began his road to transformation. Why I’m dubbing this dresser a he? I’m not sure. I’ve never called it a he before now, but it feels right so let’s go with it.

photo2

The first thing that I had to do with this thing was to wipe it down really good. It was absolutely disgusting inside and out. It was as though someone had used it for housing small stinky animals and then, to cover up the smells, had sprayed it heavily with a chemical solution. Y’all. Y’aaaaaaall. It was bad.

After that, I removed all the hardware from the drawers. Then I sanded every inch of the dresser that I could. Some parts were solid wood and other parts were particle board type stuff so I did the best I could. Not my favorite part of the transformation I must say. It’s for real getting down to the nitty gritty. And then getting it all up in your eyeball. Should I have worn goggles? Maybe.

I decided to only use the bottom two drawers since they were really the only ones functioning anymore. I removed the drawer tracks for the other three. Then I measured the space on top of each drawer and tacked in very thin plywood as a new base. Nothing fancy here. I could’ve made this part look better. This part literally was a little rough around the edges. And as you can see, I painted the plywood before placing as to access them easier.

photo3

 Then I began the process of painting the whole thing. I didn’t use any special paint. Just some simple Rustoleum Ultra White latex paint. It may have been trim paint? I also bought new hardware for the drawers to match the hardware in my living room. Dark and bold to contrast the stark white.

photo4

 Here she is with added hardware. (Why is this dresser changing sex all of the sudden?)

And here’s a bonus- you get to see my screwdriver!

photo5

 I do have a teenie tiny little obsession with chevron, so I added that to the drawers. I think it gave it some serious style. Don’t you?

photo6

 Finished product! I searched for days for baskets and bins to use in place of the drawers for this thing. I’m horrible at making decisions. Absolutely. Horrible. I wanted to make sure they were not too dark and went ok with the chevron and color of the room, etc. I gave into these cute chevron baskets at Old Time Pottery after days of looking and complete discouragement at the price of these boogers. Not cheap!

photo7

 It is by no means perfect, but it makes for lots of storage space for my crafts! I had it in our living room for a bit. Now it’s in the bonus providing ample and stylish storage for our craft stuff. HE turned out so good!

What do YOU think?!


Like this post? SHARE it!

Related Posts Plugin for WordPress, Blogger...

DIY Personalized Gift Mugs

DIY Gift Mugs

Have you finished all your Christmas shopping yet? No? Shame on you! HA!

Totally just kidding you. I haven’t gotten anywhere close. This year has been a whirlwind and I’ve felt about a month behind each holiday as they come. So if you’re like me, then you’ll really enjoy this last-minute gift idea that takes no time at all and comes straight from your heart.

I can’t take the credit for this one, I came across it the other day at Happy Go Lucky and thought I have got to do this! I had seen the idea of it on Pinterest before, but wasn’t sure that it worked. So I was glad to have found proof that it does.

DIY Mugs Before


To try this out for myself, I didn’t want to spend a bundle on mugs. Even Dollar Tree is a bit expensive per mug for me. So I ran into Goodwill where there were a ton of white mugs. Whodathunkit? It was meant to be! $.49 per mug and you just can’t beat that, even with a stick.

It’s as simple as using a permanent marker to write, draw, or color on your mugs and then pop them into a preheated oven for 30 minutes. That’s 350° in the oven to be exact. When they come out, the marker has been baked, sealing it to the mug!

UPDATE PLEASE READ: I mentioned this in the comments, but DO NOT PUT THESE IN THE DISHWASHER. Using regular sharpies, it will come off. Hand washing is fine. When I gave these out, I wrote a little poem to go with that said please hand wash. I know many of you have had issues with this.

DIY Mugs After


So easy and yet so thoughtful. Even the kiddos can make their own. Get creative and have fun! You can make these for any occasion as well. Add a heart for Valentine’s Day or an egg for Easter. Whatever suits your fancy.

In the meantime, Merry Christmas!

Once again: do not put these through the dishwasher unless you use a more permanent type of marker made for ceramic. The Sharpie works fine if hand washed.


Like this post? SHARE it!

Related Posts Plugin for WordPress, Blogger...

Affordable Mickey Mouse Party

My youngest turned 2 not too long ago and we decided on a Mickey theme for her party. It took me some time to figure out what theme to go with because she’s not at the age where she drools over certain characters and has a fit because she wants the latest and greatest of a certain toy collection. I’m thankful for that, but it created some difficulty when deciding on a party theme.

Then it hit me one morning…

She brought me the remote and said “turn on Mickey Mouse Howhouse” (That’s what she calls it). She does this almost every morning. How could I have not thought of this before? That’s all it took and I began to run with the theme idea. It’s the most fun I’ve  had planning a party in a while.

Sure, she may not remember any of it, but I’ll have pictures to remind her. 😉 I put the entire thing together on a budget. I’m almost always on a budget so most store-bought party items aren’t really an option. Plus, isn’t it always better to have one-of-a-kind things? I think so anyways.

I’ll share my ideas and give you a general idea of what I did. If there are more questions, I may end up doing separate posts for those items. Here we go!

These super simple tissue pom poms cost me a whopping $3! I bought each color separately at different stores in packs of 8 or 10 sheets. The 10-sheet packages make better poms poms, but they are harder to find. For a buck, you can create a nice hanging decoration for above your table!

This could be the decor that I was most proud of. I found much inspiration for ideas on Pinterest and ended up going with this design. I bought the straw wreath at Goodwill and the red ribbon at Walmart for around $1. The black is actually an old t-shirt that I cut up and wrapped around. The buttons were $1.

The ears are circles that I cut out of a cardboard box and covered with more t-shirt. I then pinned them to the wreath.

And of course the little signs are just printed up and taped to scrapbook paper to spiff it all up!

Scrapbook paper and fancy Disney font make a cute little sign as guests exit.

A cardboard box I had on-hand made a great goodie bag container. I just printed up a cute note and attached some Mickeys that I cut out of construction paper!

The flags are simply pieces of cut out scrapbook paper. I punched holes in each of them to run some ribbon through and hung them on top of a table cloth. The big 2 you see is (believe it or not) a 2 that I cut out of cardboard and then glued CUPCAKE WRAPPERS to! Hung with a cute little ribbon over the Mickey treats and it made for a cute party backdrop.

With scrapbook paper, I cut out little Mickey heads and punched holes in them to make Mickey Garland! I hung this all over the house including the chandelier. It doesn’t get any easier (or cheaper!) than that!

No party would be complete without snacks! If you know a lot about Mickey Mouse Clubhouse, than you’ve probably seen them fishing for Gooey Fish. Swedish Fish make great substitutes for those. Using scrapbook paper, I was able to create cute little name signs for all the food.

As a side note- if you haven’t heard of Gooey Fish from Mickey Mouse Clubhouse, don’t feel bad. Apparently I know WAY too much about the show! lol

Pigs in a blanket make the perfect Hot Diggity Dogs and snack for hungry kiddos at your Mickey party! Once again, this is a cheap snack that everyone will loves. Especially kids!

I threw some Bugles in a bowl and called them Oh Toodles! Bugles.

Getting a little more creative with the names of the foods, these are Meeska Mouska Marshmallow Treats. AKA Strawberry Rice Krispie Treats. Tasty!

The name of this snack wasn’t as creative, but the popcorn was DE-lish! Birthday Cake popcorn made with actual cake mix. It’s divine and costs pennies to make!

I had only just learned of the PB&J Sushi when I was gathering my menu for this party. I just had to include these. They were a HUGE hit. I found the recipe here. They were so easy, but seemed like they took a lot of work. I love those type of snacks!

These “Minnie” Pizzas were also a big hit. I started making each of them with a big pepperoni and 2 small ones on the top, but it became a little tedious and my time was running thin. I’m glad I opted out of making them all that way. They weren’t around long enough to admire!

I had these super cool milk jugs from a local dairy to put chocolate milk in. We called it Clarabelle’s Moooooooo Milk!

Whowouldathunk (yes, this is totally a word y’all) that grapes could make such a pretty presentation? Skewers did the trick to make these just right for individual servings. Must I say it? They were a hit!

The cupcakes were Cookies ‘N Cream Cupcakes and they were really tasty. Different size Oreos made for cute little Mickey heads as toppers. I hid a Oreo and a dollop of marshmallow cream inside each cupcake, too!

I printed off the little sign and attached it to one of my construction paper Mickey heads. The cupcake holder was $1 at Michael’s. Love that store.

Pluto’s Pineapple Punch was nothing more than Ginger Ale and Pineapple Juice and ice. So easy and tasty at the same time.

Mickey party success! What do you think?

Are you planning a Mickey party soon? I’d love to hear your ideas or suggestions!


Like this post? SHARE it!

Related Posts Plugin for WordPress, Blogger...

DIY Christmas Countdown

My oldest daughter is getting big enough to really start counting down the days until Christmas. And to be honest with you, I’m so excited about her excitement that I’m counting them down myself.

It’s such a simple thing to get excited about, but it makes the waiting for Christmas to come a little more exciting. ‘

I’ve seen the little blocks that count down the days. I’ve seen the little advent calendars and all the other little ideas, but none really scream exciting to me. Sure, some have little candies and treats every time you open a door, but I remember caring more about that when I was a kid than really knowing how many days there were until Christmas.

So I set out on a DIY mission to make a countdown for my girls. One that hopefully would last for years to come. We don’t have a mantle or fireplace. Which I’d say that a lot of people can relate to this, which makes hanging stockings and garland a little difficult. So I made my own way of hanging this thing and here’s how I made it.

I started with an extra piece of wood that I had in the garage. I don’t know it’s exact measurements, but it was about 3 feet long.

I spray painted the entire board white, then used painter’s tape to create stripes. I then spray painted it red which left red and white stripes like a candy cane.

Then, using the same method as my DIY Mug Holder for transfering text to wood, I added the Christmas Countdown words to the board. The white words really got lost, so I added little red polka dots to help it stand out a little.

Next came the numbers.

I am NOT a sewer (yet). Though I may someday learn, right now I’m sticking like glue to my hot glue gun. The numbers were way simpler than they look. Plus they only cost me about $3.

I purchased about 4 pieces of red and white felt at Walmart for $.23 each. I also purchased a couple of fat quarters of fabric for $.97 each. I cut out the squares and hot glued the fabric squares to the felt squares to make sure the numbers had good support.

For the actual numbers, I simply printed off the numbers in the font and size that I liked and then tape them to the felt. I then just cut them out using the paper numbers as a template. Voila! I had numbers.

I then hot glued them to the fabric and boom they were done. The clothes pins were $1 at Dollar Tree! Even the cute garland was a buck.

I debated over and over about how many hooks I would want for hanging the garland. I didn’t want it to look too tight, but I didn’t want it to be too lose either. So I ended up with 5 hooks (leftover from another project that just screw right into the board), but only used 3 total. I like the looser look.

Then as we began to take off numbers in our countdown, I realized we had nowhere to store the numbers that were coming off. I glued to ends of some leftover felt together to make this little pouch. I added some little pieces of fabric cut out into droplets to embellish it a little.

Voila! A numbers pouch to keep up with them once they come off.

Each morning, Addie is absolutely ecstatic about taking off a number. This morning she said “Momma, there are only EIGHT days until Christmas!”

It’s awesome to have something that we can use over and over again and know that I created it! Anybody can make this and I hope that this gives you ideas if you’ve considered making something like this for your home!

Does your family have a countdown that you use each year?


Like this post? SHARE it!

Related Posts Plugin for WordPress, Blogger...

Chocolate Chip Banana Bread Gift Jars

I’ve recently gotten the nickname “Becky Homecky” from my mom. Had you asked me 5 years ago if I would be creating recipes, crafts, and projects then I probably would have said absolutely not. Not just because I was working at the time, but also because I never really had the urge to do anything so Betty Crocker-ish. These days I find these things to be completely stress-relieving and better yet, fun.

Whodathunkit?

Every Christmas for the past 5 years, I’ve said I’m going to make homemade Christmas gifts to save money and to put a little thought into my gifts. And almost every year, I get down to the wire and never get around to it. This year, I’m determined to make it happen.

I’m starting with these gift jars. There are about a million combinations for gift jars these days. You name it, you can gift it in a jar. My daughter suggested that we try Banana Bread Gift Jars the other night. I told her that I wasn’t sure that you could do that because bananas can’t rightly be put in a jar and keep.

Then I came across this recipe at Recipe Goldmine for Chocolate Chip Banana Bread in a Jar. Never having made mixes in a jar like this, I wanted to go with a tried and true recipe before branching out into experimentation. I found it interesting that using dried banana chips for the banana part actually ended up tasting like regular bananas.

And the chocolate, come on. YUM is the only word to describe chocolate and bananas.

I got my jars at Walmart for around $8 for 12 of them including tops. I used some fabrics pieces that I already had along with some red string to dress the jars up a bit. I printed out the instructions for making the bread and glued it to a piece of scrapbook paper. Then punched a hole and tied it to the jar.

Aren’t they adorable?

These make such great gifts for teachers and coworkers. And they are inexpensive too. My favorite part!

Recipe courtesy of Recipe Goldmine.

Chocolate Chip Banana Bread Gift Jars
Recipe Type: Gift, Bread, Snack
Author: Reipe Goldmine
Easily create homemade gift jars for yummy Chocolate Chip Banana Bread!
Ingredients
  • 1/2 cup chocolate chips
  • 1/2 cup dried bananas, finely chopped
  • 1/2 cup granulated sugar
  • 2 1/2 cups Bisquick
  • 1 teaspoon baking powder
  • 1/4 teaspoon salt
Instructions
  1. Layer all ingredients in a quart-size jar in order they are given. Press the layers down firmly before adding next layer.
  2. Attach gift tag with these instructions:
  3. In a large bowl, place the contents of this jar. Make a well in the center. Mix 1 1/4 cups milk, 1 teaspoon vanilla extract, 2 eggs (slightly beaten) and 1/2 cup butter or margarine (softened) into dry mixture. Stir until completely blended. Spoon the batter into a large loaf pan that is well greased with wax paper in the bottom. Bake for 1 hour or until knife inserted in the center comes out clean. Cool in the pan on a wire rack before removing.

Like this post? SHARE it!

Related Posts Plugin for WordPress, Blogger...

Baby Shower On A Budget

I have been dying to share this stuff with you for weeks, but just haven’t had a moment to sit down and get it all together. Is it just me or is time beginning to move faster and faster? I barely have time to finish a thought before I move on to my next one. And with the holidays quickly approaching , things are sure to get even faster.

One of my dear friends is expecting a little bundle of joy next month and when it came to her baby shower, I knew that I wanted to be the one to throw it. This, ahem, was my very first shower to throw. I’ve helped out with others and attended plenty, but I’ve never had one here at my home. So naturally, I wanted it to be perfect.

Well….as perfect as one can be with an 18 month-old and 5 year-old running around while preparing. I can’t complain. They were both angels the entire time that I put this together. And thankfully, another friend of mine helped out with food and planning so it wasn’t ALL me. Sheesh, I think I’d go nuts if it was!

So I thought I’d share with you a few of the frugal touches that I used to make this shower special for my friend. At this point, I’ve only included pictures, but I do have some pictures for a tutorial if anyone is interested. Just let me know!

The first thing that I did was to make up these adorable little food tags and cupcake flags. SUPER cheap to make. Don’t you DARE go and buy them! Especially if you’re a scrapper, chances are that you have some extra scrapbook paper. And that, my friends, is a party planner’s best friend.

I did buy a new set of scrapbook paper with assorted colors for $5. It covered the entire party. I was able to make markers for all of the dishes and snacks along with the super cute cupcake flags.

I simply printed out the words with cute font on my printer, cut them out, and attached them with tape to the scrapbook paper. The food markers were folded in half so they stood up.

All in all this only cost me the $5 for the paper.

I even made a cute little tag for the party games that we played. I used an old pickle jar to hold the words and just tied a cute little bow around it to dress it up.

This didn’t cost me anything!

I picked up some hot pink tissue paper at Walmart for $.97 and made up a few of these tissue flowers to make a few decorations. It looked really cute attached to the punch.

Ok, don’t judge me but I had a lot of time on my hands. My husband went out of town and I ended up writing a poem.

Yeah, yeah, I’m a little overachiever.

It was SO cute though. I dropped into Dollar Tree and got a frame that I painted with pink paint that I already had. Printed the poem out and attached to scrapbook paper to make a nice addition to the shower table.

$1 added to the cost.

I found a tutorial on how to make a brown bag flower decoration on Pinterest and I HAD to try it. I always have brown bags on-hand.

In like 5 minutes flat, I had this darling flower that I simply spray painted and added a little glitter to. I tied it the ceiling and voila!

At some point in time, I have become obsessed with food in jars. I know I’m a little late on that, but I’m only human and my brain takes a little longer to process than most. 😉

I made cupcakes regularly in a muffin pan. Then I cut them in half placing the bottom layer in the bottom of a 4 oz jar. Added frosting, then added the 2nd layer. I then topped them once again with more frosting. These were homemade devil’s food and vanilla buttercream cupcakes and they were AMAZING.

Don’t the flags add a nice touch?

I did buy the jars just for this event, but they will be around for use later on so I’m considering them to pay for themselves. But since I did buy them, we’ll add $7.97 to our total.

These White Chocolate Covered Strawberry Wafers were so easy, but looked like a million bucks. I bought them at Dollar Tree. I tinted some white chocolate chips pink and drizzled it along with some sprinkles all over. Snazzy huh?

$2.29 was all that they cost me.

With all the scrapbook paper that I had, I knew I wanted to serve some things in cones. I simply rolled up the scrapbook paper cut to size and then taped them in place. The box they are standing up in? Oh, it’s the box from the 4 oz mason jars! I used a knife to poke holes in it so the cones could stand up.

I made up some popcorn that I already had and drizzled in pink tinted white chocolate to it all. It came out to be super tasty Pink Popcorn! I even added pink sprinkles too.

Total cost for this was $1.29 for the white chocolate chips. Aldi has the BEST price y’all!

I made these mini cupcake bouquets with the help from Dollar Tree. I got 2 vases and used 2 foam flower arrangement thingies (that’s a technical term) to place toothpicks in. The bottom is a couple of small pieces of tulle that I had on-hand to dress them up. I then made my cupcakes and stuck them all over onto the toothpicks.

I also added a few pieces of tissue here and there to fill it out.

Total cost for these was $4.

Of all the elements to this shower, THESE were my favorite. I saw a picture of these somewhere out in cyberspace recently and decided to give them a go. Without even glancing at the directions, I was able to whip up 25 of these in no time at all.

All you need is a package of napkins (your choice of color) and the appopriate amount of safety pins. SO easy and they make any treat that you’re serving look completely adorable. Obviously the smaller your napkins, the smaller your little diapers so buy the size according to what you are going to serve in them.

These also make awesome party favor bags!

Total cost for these? $2.

I also made a small diaper cake as you see in the upper right that was about $6 for the diapers. I made a coffee filter flower for the top. And the little name plaque with baby’s name on it was just $.97 at Walmart! I had the paint already.

Many of the little cupcake and serving stands that you see I made out of saucers and dessert cups that I hot-glued to each other. I get a lot of those materials at thrift stores and then paint to make them cute. So affordable and look so fancy.

All in all, what you see here cost me only around $30. And every bit of it was special because it was made with love and thought. That’s always the best gift!

What about you? Are you throwing a baby shower soon? Have any frugal baby shower tips to share?!


Like this post? SHARE it!

Related Posts Plugin for WordPress, Blogger...

A”Door”able Hall Tree

Do you have a spot in the house where everyone leaves their stuff? Perhaps the entryway or foyer area. In my house, the living room and kitchen are the drop zone. We come into out house through the garage and on the way to the living room, we tend to expel our belongings as we go. And by we, I mainly mean the children. One of our biggest problems is finding shoes. Yes, I know this may sound silly to some, but for some reason my Addie likes them off the very moment that she arrives at home. This isn’t one of those “Take your shoes off at the door” kinda situations.

We have hard floors.

This leads to shoes that go missing. Under the couch. IN the couch. Around the couch. Under random toys. IN random toys. You name it, we’ve probably found a shoe there. So I wanted an easier solution for keeping the family’s shoes in one place.

I originally wanted one of those storage benches with matching shelf and hook above. I spent countless hours on Pinterest looking for ideas. I even found a few that I liked, but I cannot justify paying the price for those sets. Many are upwards of $300-$500. Then I came across numerous ideas for hall trees made from old doors on there. What a genius idea, huh? Plus this gave me a reason to visit one of my favorite stores on earth, Habitat Restore! That place is brimming with old building materials, paint, light fixtures and all for awesomely affordable prices.

This is my creation! When I started, I really had no idea what it was that I wanted to do with this door. I knew that I wanted to have a bench, a place for bins, and hooks. I didn’t even have plans for HOW this was going to occur. I kinda just winged it to be honest.

It all started with this door. I liked this one because it was really wide and in great shape. No big scratches or gauges. It only set me back $25 bucks.

Knowing that the bench wouldn’t need a back (the door is the backing), I knew building the box for it would be fairly simple. I measured the door and the estimated height that I would want the bench and created this box that is 36 inches long and 13.25 inches high. We used a drilled to screw the boards directly into each other.

The wood for this cost about $14 at Lowes.

I also knew that I wanted to have sweet little spindle feet on the bottom of the hall tree to dress it up. I found these 3.25 inch feet at Lowes for $1.47 each for a total of $5.88. I had really only planned to have the 4, but hubby brought up that it might be more sturdy to do ahead and put on 4. It didn’t look as silly as I was expecting it to look once we got them on. Though next time, I’d probably go for thicker legs.

Then it was time to dress the bench up a bit. I got these exterior house accessories at Lowes as well. Not exactly what I was hoping for, but they made nice and delicate arm pieces for the bench. They were a whopping $8.50 each for a total of $17 bucks.

Then we attached the bench to the door using long wood screws through the backside of the door. This included one each directly into the pretty little arms.

This picture is absolutely horrific, but you can see that we added the shelf on top. We didn’t make this as wide as the door, leaving a couple inches on each side. I used wooden shelf pieces to give it some pizazz. The shelf was around $11 total including the support pieces. They were surprising inexpensive!

I knew that it had to get difficult at some point and this is where it did. Getting the shelf to line up perfectly with the screws in the back was the hardest part. In the end, we didn’t do it perfectly and the shelf is not flush on both sides, but it holds and we aren’t very concerned about it. You’d have to be looking to really notice it.

We also added framing around the bench’s opening to finish off the edges a bit. I simply got a thin framing piece and we cut with a handsaw to fit, then tacked it on. It gives the box a sort of “lip” around the edges. I also primed and painted at this point. I used paint that I found at the Habitat Restore. I got a gallon of this beautiful aqua/greenish color for just $4!

Then came the finishing touches. I splurged on these hooks at Lowes for $4.50 each for a total of $13.50. I really didn’t want to spend that much on simple hooks, but I liked the color and knew that I wanted the bins to be dark like this too.

Now for the biggest function of this hall tree—bins! I got these smaller bins at Lowes for $7 each or $21 total. They look wicker but are an eco substance that mimics it. Nice and durable for the ravaging that our family might put them through.

I am in love with this hall tree for many reasons. It was so easy to make, even for the wood-working challenged. We didn’t even have to break out a big saw. I love the color that we painted it. So cheery and such a beautiful accent to the entryway. And I love that it was completely custom and not out of a box.

Did I mention that I love its functionality? I have been working on making sure that backpacks get hung along with coats and purses. I also have a rule to make sure all shoes go in the shoe bins. Once the deep winter hits, we’ll also keep scarves and gloves here too.

And my fancy shelf? I can use it for more storage with smaller bins or maybe even just place a seasonal item up there like a pumpkin to be festive!

Yay for DIY! What do you think?


Like this post? SHARE it!

Related Posts Plugin for WordPress, Blogger...

Making Space in a Crowded Kitchen

When we purchased our home years ago, we planned for our little family to grow. It did indeed grow. We went from 1 to 2 sweet children and there were space sacrifices made. For instance my stockpile closet in the guest bedroom/office became my sweet baby’s closet. Which also meant that my guest bedroom/office became the nursery.

Needless to say, we’ve become quite the masters at utilizing the space that we have fairly efficiently. And then one day after moving my stockpile into my kitchen cabinets, I realized that there just was not enough space. To be honest, I don’t think that I would EVER have enough space for all the cool gadgets, cookware, and ingredients I’d like to store in my kitchen. But we do the best that we can to make room.

One our kitchen wall, we had a very lovely large black mirror hung over the buffet. This buffet used to contain a huge hutch for our china cabinet, but in the process of de-cluttering and minimizing it got the boot. Back to the mirror.

It was huge and made the wall basically unusable. With cans and pots (and my obsessive mug collection) popping out of the cabinets (almost literally), I decided it was time for a change.

Here’s what I did! 3 simple shelves in place of the mirror gave me space and a place to show off some of my favorite kitchen treasures. I’m fairly sure that when I first brought this idea to my husband that he thought I was silly. But after it came together, he came around.

I love how the shelves made some of the most mundane things like these glass jars look sparkly and special. These would otherwise just be locked away in a dark cabinet and only seen when in use.

Or this trifle bowl. It’s a beautiful vision now with it’s showcase position on the shelves.

Even the canisters holding my tri-color pasta seem to demand more attention.

I enjoy looking at the things that once caused me much grief when I opened and closed my cabinets. And now my matching plate and bowl set are living in harmony in their cozy cabinet without the clutter of mix-n-match thrift store finds cramping their style. But little do they know they were Dollar Tree finds themselves! Shhh, we won’t tell them…

For now we’ll enjoy our extra space. For now that is, until my mugs take over and that is a very big possibility.

I hope that this might inspire you if you are becoming crowded in your own kitchen. Get creative, inventive, and don’t give up!


Like this post? SHARE it!

Related Posts Plugin for WordPress, Blogger...

DIY Coffee Mug Holder

One thing that you may not know about me is that I have an obsession with mugs. No, not with faces, but with the ceramic formations that hold the most incredible substance that keeps me going every day, coffee. I only started to drink coffee about a year and a 1/2 ago and yet it sucked me in so fast that I didn’t even know what was happening!

I now enjoy scouring flea markets, thrift stores, and any other places finding the most unique and eclectic mugs that I can. I’d call it a “hobby”, but that would be giving in and I’m afraid that my obsession would deepen so I’m just going to pretend that it’s just something that I do. 🙂

When I noticed that there wasn’t any place to put regular glasses in my cabinet, I decided that something need to be done.

I needed a place just for mugs. After all, they are worthy.

So I thought up this mug holder idea and got to work. I knew that I wanted it to be inexpensive and semi-simple to make since I’m no carpenter. Brace yourself, I took a lot of photos for this one…

I started with cheap board from Lowes. I had them cut it to 2 feet so that it would fit on the side of my cabinet. I didn’t want anything too thick, but I wanted it thick enough to hold screw hooks well. I believe this board is 1 inch thick which turned out just right. I painted the board with a light blue before lightly painting over it with an off-white. Then I sanded it a bit to distress it.

And in the process I got paint on the garage floor. It needed some color anyways.

I found this fantastic technique for transferring text onto wood at Elm Street Life. It doesn’t get any simpler than your printer, a pencil, and a pen.

Print off the text of your choice from your printer. No need for reversing the text or anything. Cut out most of the white surrounding the text. Then using a lead pencil, color the back of each letter like the picture above. The need for a cheetah print pencil is not necessary, but it helps to make you feel awesome.

I may have gone a bit overkill, but here’s what it will look like on the back.

Tape your words lightly to your wood so it won’t try coming up on you. Using a pen, trace around each letter firmly. The lead will transfer to the wood and you’ll be left with an outline of your words.

Like this! Then you can use a brush (if you’re brave) or a paint pen to fill in the outline. They actually make an assortment of paint pens these days which is nice.  Just remember that it doesn’t have to be perfect. You can always sand it a little and if you’re going for a vintage feel anyways, it wouldn’t look perfect either.

Use your paint pen to go around the letters and then fill them in. When buying your paint pens, be sure to look at what kind of tip you are getting. Some are made for calligraphy and others for painting. I don’t suggest the calligraphy tips for this.

Tah dah! We have a board. We have text on the board. now we just need hooks and mugs for our mug holder!

You may have seen my post on Toilet Paper Roll Art. It’s quite genius and is so simple and fun. I used a paper towel roll to create this flower and then dipped it into some of my favorite aqua paint.

I gave the board a little detail with my flowers and I even added an orange one on top to give it some more color.

I let it dry and then screwed in the hooks in an unexpected way. Or at least it was unexpected to my husband. He thought I would have made it a little more uniform, but as I started hooking them in, it seemed to make more room with them being offset this way.

UPDATE: We hung this by screwing screws directly through the backside of the cabinet into the board itself. We used 4 screws total and it holds just fine.

And there you have it! A simple yet cute way to display your coffee mug obsession (if you have one) and to give your cabinets a little more room.

It’s not just functional, but it looks really cool too. We’re going to make one for my husband’s mugs for the other side too.

Happy DIYing!


Like this post? SHARE it!

Related Posts Plugin for WordPress, Blogger...