DIY Large Graphic Wall Sign

Since my hubby was out of town for a few days, I must admit that I’ve been quite lax on cooking. It’s nice to take a break from it every now and then. In fact, our meals for the last few days have been mainly out of the most clever invention ever…..the microwave. I’m really not sure where I would be without it.

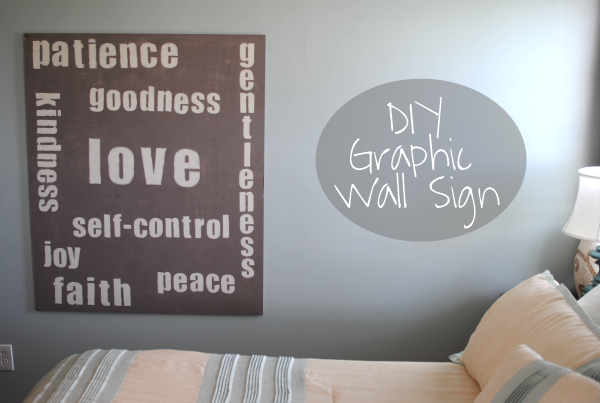
I’m back up and cooking now so you know I’ve got some good recipes on the way. But for now, I have a really cool DIY project for you that my husband and I did one weekend. I LOVE our sign! I look at it every morning when I wake up and every night when I go to bed. Shoot, I look at it when I walk in the room and when I’m walking out.

It demands attention. I love statement pieces like that.

I wanted to make one of these as cheap as I possibly could because 1) I’m just a cheapo and 2) because I like a challenge. I priced a lot of the materials at a few different stores. My main concern was the lettering. I wanted letters that weren’t too boring and I knew that I needed a lot of each. To my surprise, a pack with just 4 E’s was $8 bucks! And that wasn’t even a cute font either. There was no way that I was going to pay $40 for just the letters.

So I opened up Microsoft Word and went to work. 🙂

You may remember me mentioning one of my favorite Bible verses when I shared my Random Acts of Kindness. If not, here it is again.

But the fruit of the Spirit is love, joy, peace, patience, kindness, goodness, faith,gentleness, self-control. Against such things there is no law.

– Galatians 5:22-23

Those words pack a wallop don’t they? Can you imagine practicing each one every single day? Seems to me that I need a reminder because it’s just not easy. So I decided that those words would make a great sign for our bedroom wall. Here’s how we did it…

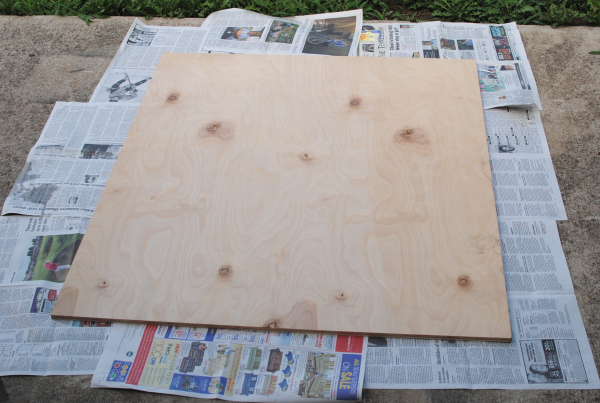
It all began with a very large piece of untreated white wood from Lowes. This one cost me approximately $13. It was a HUGE board and I even had 8 inches cut off of it to make it more rectangular.

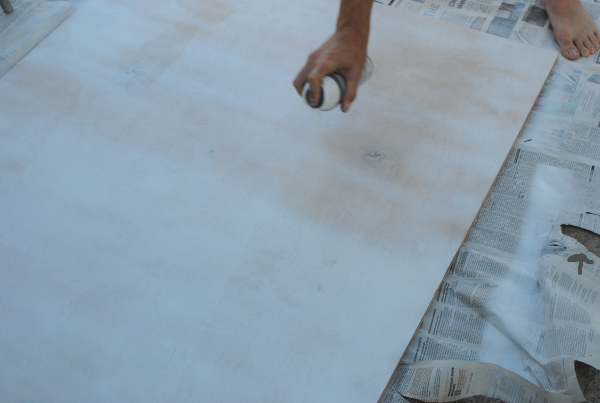
Then we used a $3 can of white spray paint to be the base of the sign. It’s essentially what the color of the letters will be when we’re done. I considered using latex paint to do this project, but in the end I figured that spray paint would be quicker with more coverage.

See that arrow there on the right of the picture? That is where the newspaper became attached to hubby’s foot because he stepped in wet spray paint. Moral of the story? Don’t spray in bare feet. 🙂

I didn’t take any pictures of the next step because it wasn’t a happy time. Cutting out a billion paper letters including many with holes is not fun. I’ll spare you the sweet talk and be honest with you. It’s work, but it’s cheaper and highly worth saving $40. At least to me and my cheap brain.

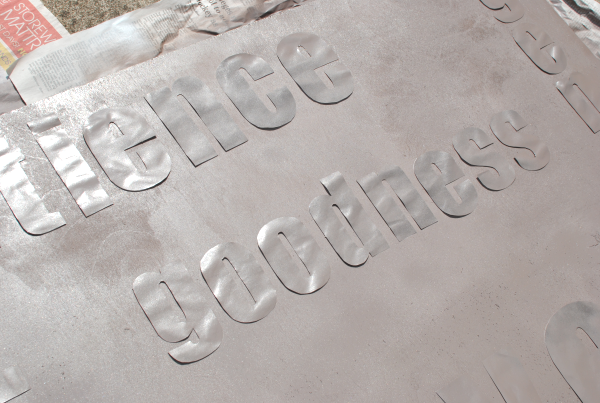
So we cut out the letters and taped each one down using only tape on the backside of the letters. Sorry that this picture is so dark. By the time that we got the letters done it was dark. I knew this wasn’t exactly the best way to do it, but I also knew that I could try to make it work. Where there’s a will, there’s a way you know. 😉

The next morning, I got out my 2nd can of $4 spray paint from Lowes and went to town going over the letters. I loved this color. It Valspar Satin Interior called Thorny Brush. Perfect color for my bedroom. As I was spraying, I could tell that the spray paint was going under my tape a bit. There was definitely more work to be done…

Here’s a close-up of what the letters turned out like once the paint was dry. See the spots where the tape was? It really bothered me so I went over all of the letters with a small brush and some leftover white paint that I had.

That wasn’t a very fun process either. I totally forgot to take a picture of it. But I did remember to take a finished product shot! Here’s what it looks like all pretty and on the wall. We used plain jane screws to attach it straight to the wall. We’ve been having things with chain from the ceilings around here lately so that crossed our mind. But I didn’t want the sign just hanging and knocking against the wall, so we went with the easy route.

We aren’t professionals by any means so I’m sure that most could probably make theirs look a lot better. But for only about $20 and a little hard work, it’s a beautiful reminder on our bedroom wall! We LOVE it!

What do YOU think of it? I’d love to hear!


Like this post? SHARE it!

Related Posts Plugin for WordPress, Blogger...

DIY Wooden Eat Sign

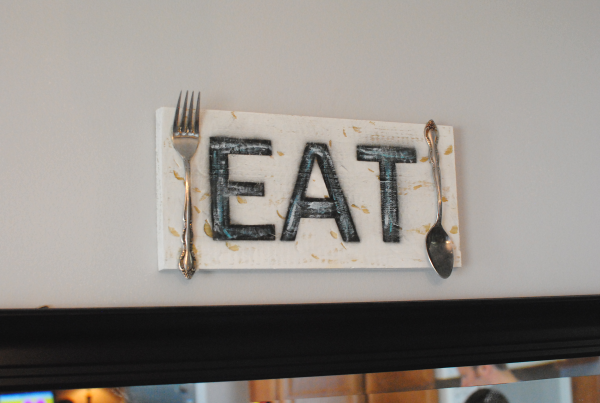
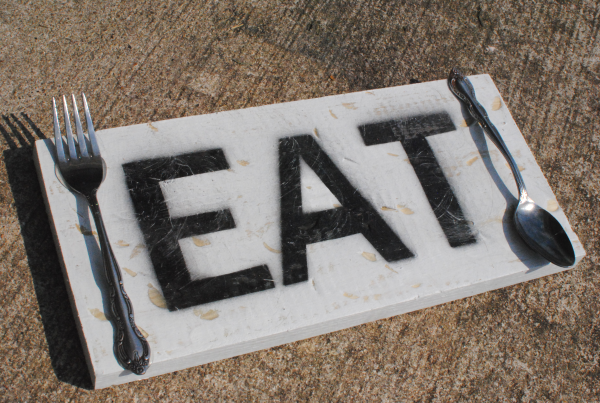
You may have seen the cute little Eat signs that have been popping up all over the net. They make the perfect wall decoration for a kitchen. I’ve never once attempted to make a wall sign before, but we had some leftover wood from another project so I decided I’d give it a shot. I first came across the idea over at Crafts by Amanda. And apparently I’m late on the Eat sign bandwagon because she originally posted that back in November of 2012!

If you’re considering something like this cute sign for your kitchen, here’s how I made mine. Super easy and only cost me the price of the fork and spoon (which was literally a few cents). I picked them up at Goodwill where they were 10 for $.99.

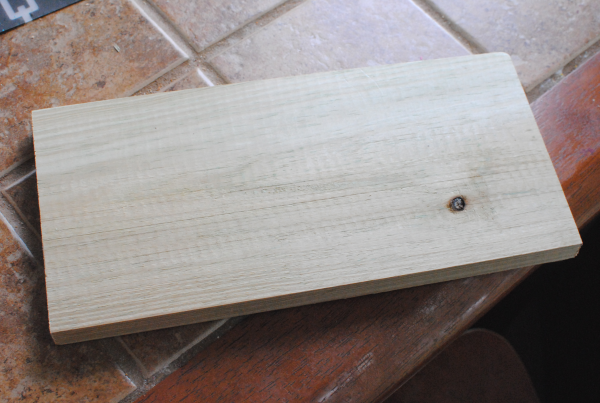
I started with this plain jane, foot-long piece of wood. It doesn’t really matter what size, it’s whatever you have on-hand or find cheap.

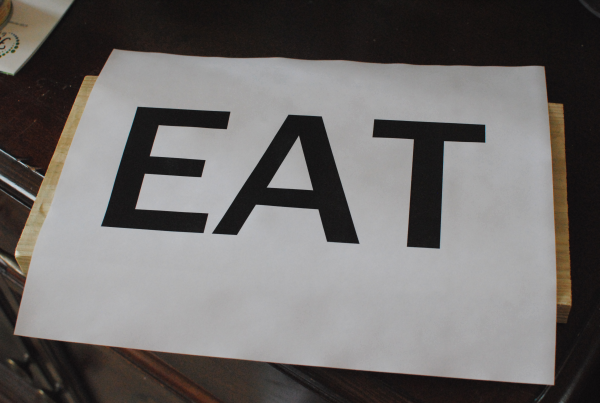
Using my computer and printer, I made the word eat with a pretty standard font. You’ll have to forgive me, I forgot exactly which one this is. I fit it to my board making sure it would fit just right.

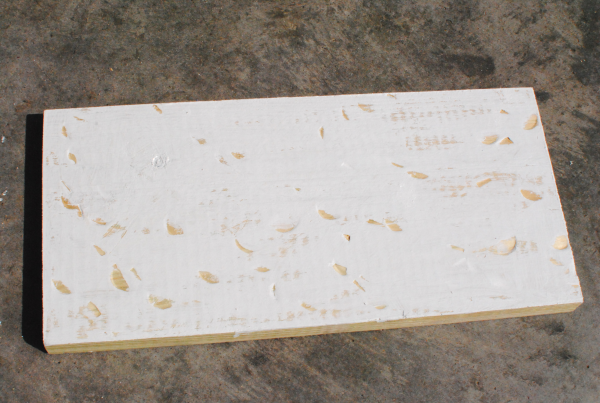
I then painted it with some white-ish paint that I had already. I let it dry and then came the fun part…

I took a hammer and sander to it. Just to give it a little distressing. I wasn’t too worried about making it perfect.

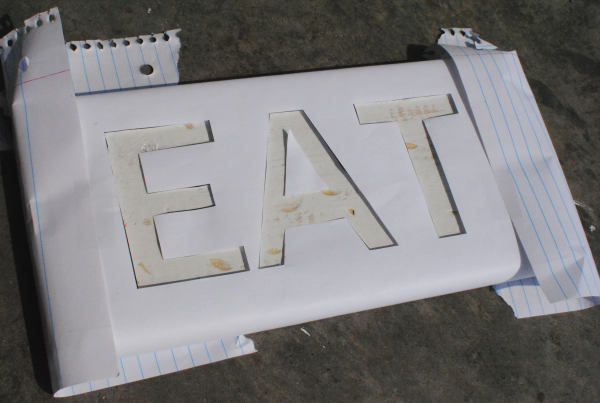
I cut out my letters and then taped them to the board on the back. Once again, I wasn’t too worried about it looking perfect. Do you like my notebook paper job? It’s a hot mess!

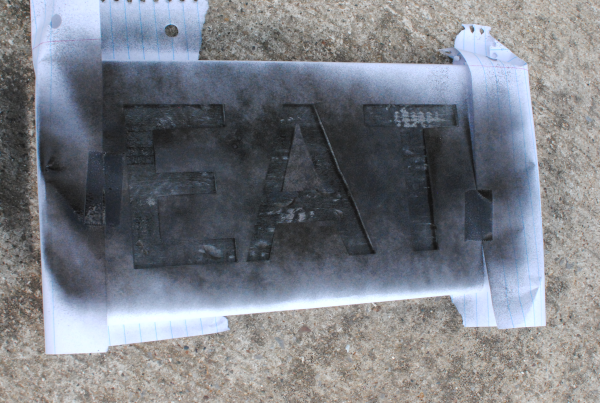
I spray painted the cut out letters and once again, perfection was not the object. It can look darker in some areas and lighter in others.

I used a very small brush to paint in a few more colors onto the word eat. I also sanded the letters just a bit.

I then used some general glue (I can’t remember what it’s called) to glue the silverware to the sign. I really loved the idea of Amanda’s to put silverware on there. It really gives the sign some demention I think.

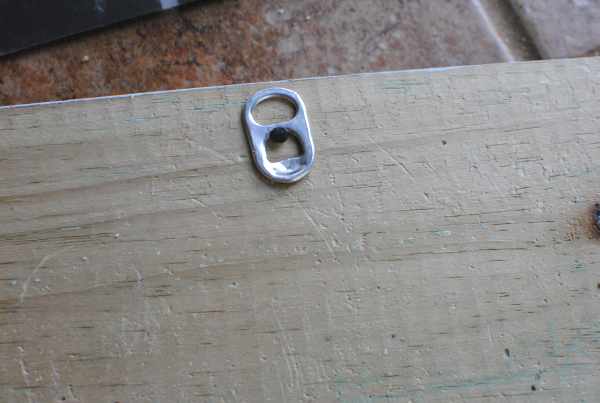
And check this out, I used a soda tab to hang it! It was light enough that I didn’t really need anything too involved to hang it.


Like this post? SHARE it!

Related Posts Plugin for WordPress, Blogger...

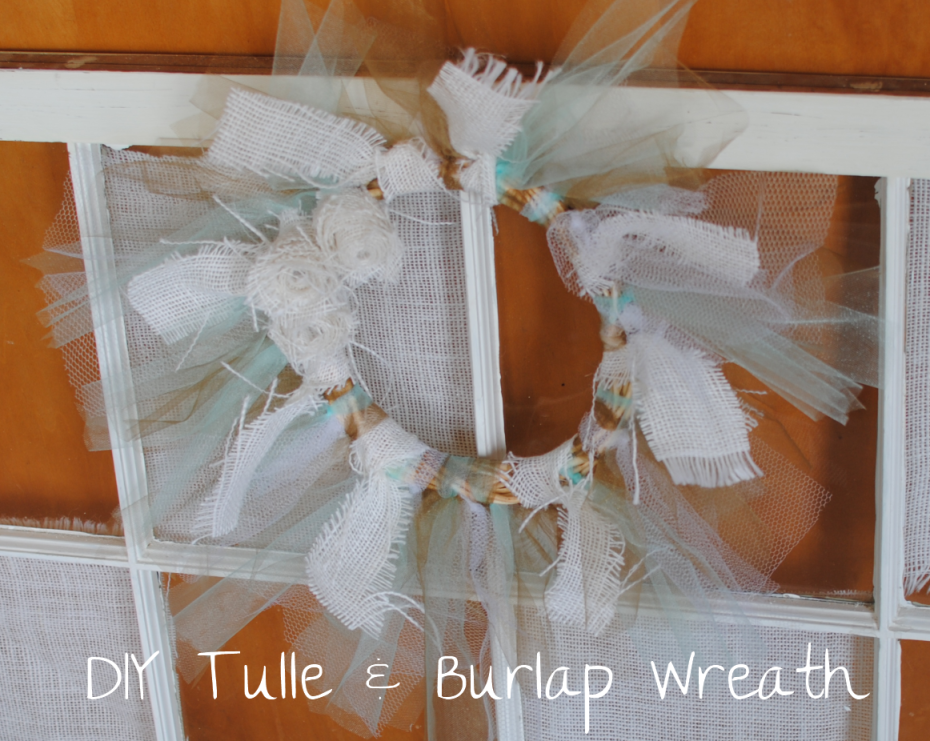
DIY Tulle and Burlap Wreath

I’m at the Dollar Tree a LOT y’all. There is one really close to my house and that’s part of the reason why. The other reason is because they have things for $1 that would most likely cost you more going anywhere else. I could be their spokesperson. I would totally do it for free dollar merchandise too. Maybe a Dollar Tree head honcho is reading this right now and wants to put me in a commercial. I would be ok with that.

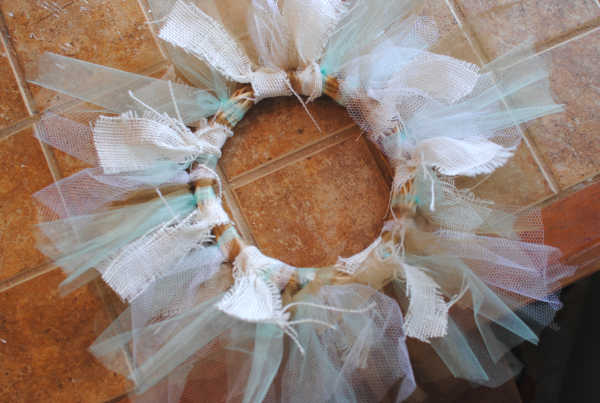
I made this wreath a couple of weeks ago using one of those wicker beginning wreaths that you can find at Dollar Tree. I see them there all the time and keep thinking that I could use them in some way and I finally figured out how. I’ve been on a window kick here lately since we’ve been redoing our living room. Hanging random windows from the ceiling is so much fun and a change from plain old pictures hanging on the wall.

Tulle is a very affordable way to make arrangements, wreaths, and other crafts for home decor. It’s usually around $1 per yard at Walmart.  And my new favorite fabric is burlap. It’s so rustic and imperfect. Even with it’s strings hanging down, it’s still nice to look at.

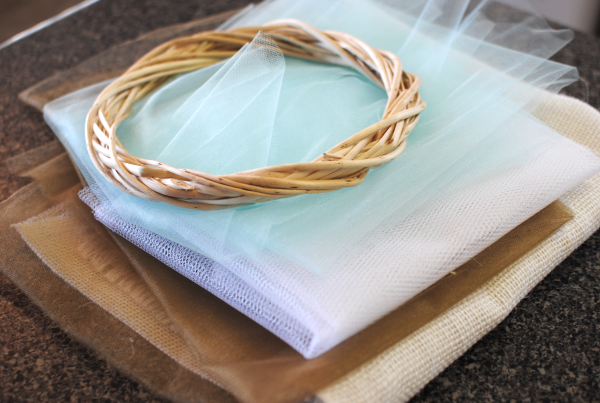
What you’ll need:

1 Wicker beginning wreath
3 Yards Tulle in the color of your choice
1/2 yard Burlap in color of your choice

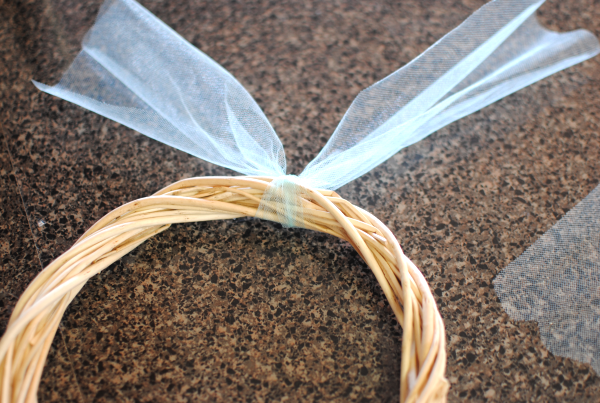
It’s SO simple. Cut your tulle into strips that are the same size. About 2-3 inches wide. You just tie bows and then make a second knot.

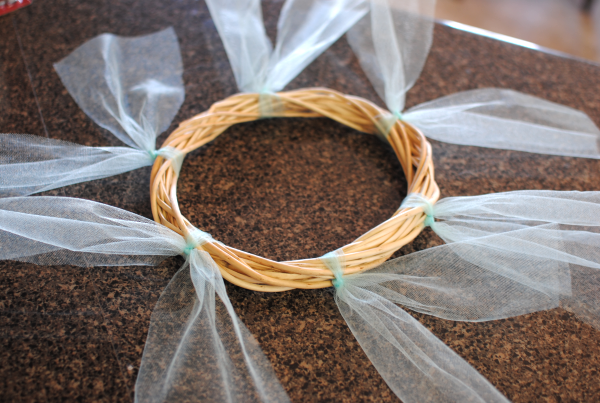
Tie them evenly dispersed around the wreath. Then you can come back with a second color to go in between to add more depth.

Keep going adding in colors where you think they might fit best. It will really start to fill out and then you can add in your burlap ties to make it a little more rustic. I didn’t go too crazy with the burlap strips because a little goes a long way.

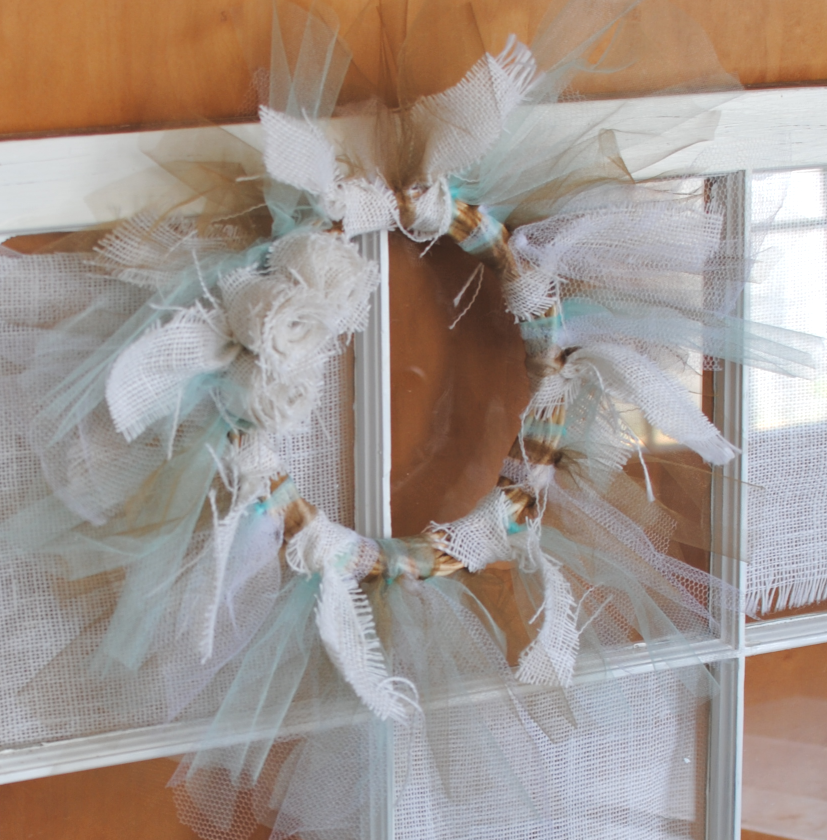
But when I was finished I thought it needed a little more burlap so I made up a few burlap roses by simply rolling it up unevenly. They aren’t perfect but they do resemble roses so they will work.

The wreath looks wonderful on my window that I painted and distressed a little. I also added a little burlap behind a few of the panes to tie it all together.

I hope you enjoyed this DIY project. It’s SO easy and it looks just fabulous wherever you put it.

Enjoy!


Like this post? SHARE it!

Related Posts Plugin for WordPress, Blogger...

This Makeover Has Hit the Fan {Before & After}

Let’s talk dust bunnies for a moment, shall we? Most people have them. You could clean out from under your bed, dust your blinds, and wipe down your ceiling fan blades daily and they would always come back. However, I must say that for some reason my house is haunted with dust monsters.

Or perhaps abominable dust bunnies would be a better description. I found this out when we decided to do a little makeover on our ceiling fans. We only have 2 of them in the entire house so I knew it wouldn’t be too difficult to update them a bit. I think the thing I looked forward to the most was finally getting rid of the dust. We’ve been in our house for almost 5 years and have never dusted our fan blades once. While I am ashamed of that statement, I can at least say that we have finally done it!

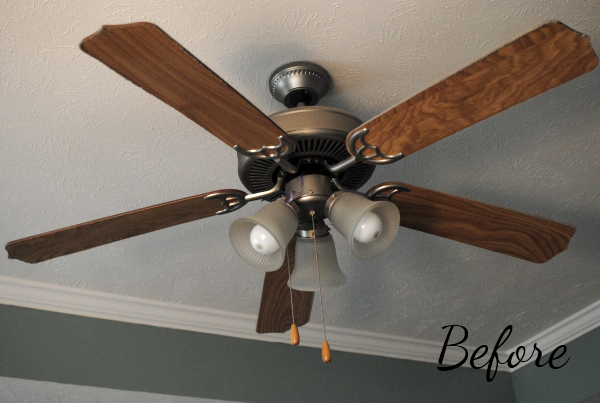
I knew I didn’t want to spend very much to update these fans. They aren’t in bad shape and don’t really look half bad, but I didn’t like their colors. We have a darker furniture thing going so that was our main objective. That and updating the globes. We updated both the bedroom and living room fans. Both looked exactly the same so consider this both before pictures.

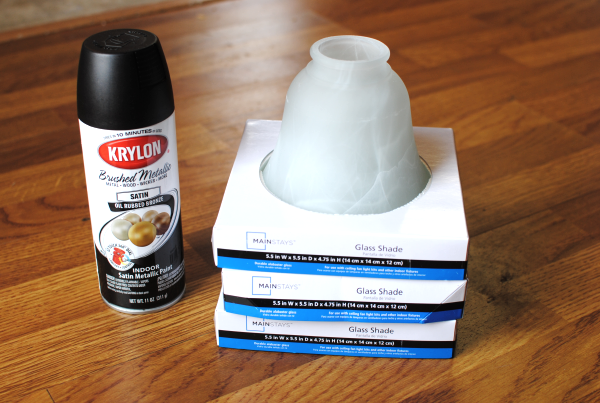
Surprisingly enough, these were the only materials that we needed to give them an update. I had originally planned to cover the blades in fabric to cover up the light colored wood blades, but when we got the blades down we found out they were reversable! And the other side was a darker color so there was no need to change them. Unfortunately they were a little red, but I’m going to try to deal with it for now.  Also, the fan pulls that we got to replace the old ones aren’t shown here, but we did get new ones.

Materials breakdown:

Krylon Oil Rubbed Bronze Spray Paint $4
Glass Globe Shades $5 x 3= $15
Fan Pulls $3 x 2= $6
Total Fan Makeover Cost: $25 

Not bad considering you’d pay at least double that for a new fan that looks like what we were going for.

Ceiling Fan Disassembly

Here’s Mr. Pennywise taking down the old fan. It was fairly easy to get down. We just had to make sure to remember what wires went where. Funny story, keep reading.

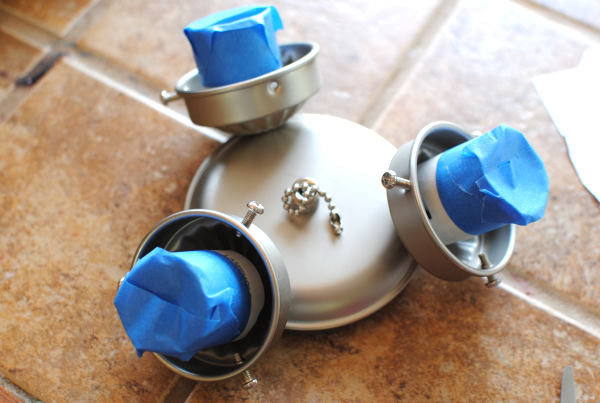
For most of the parts it was ok to just spray without a care in the world, but some places I covered so that the paint wouldn’t get inside the wiring or sockets.

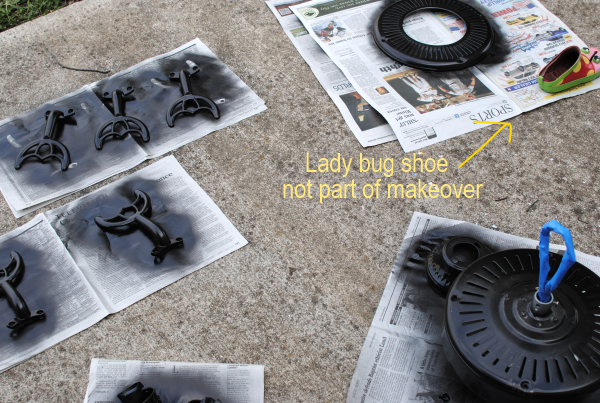
And the transformation was taking shape. I LOVE the oil rubbed bronze paint. It’s almost black but has a really great bronze tone to it that kinda shimmers in the sun. Just fabulous.

It was a super windy day and the lady bug shoe was very helpful to hold down the newspaper. 😉

And here is Mr. Pennywise reassembiling the fan. You can already tell it’s going to look a lot better! Just changing the color made a big difference.

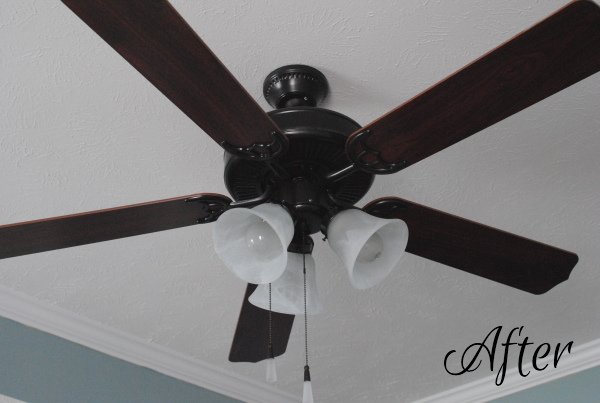
And here is the finished product….

MUCH better huh? The glass globes together with the new color and fan blade color really does a lot. Looks like a whole new fan!

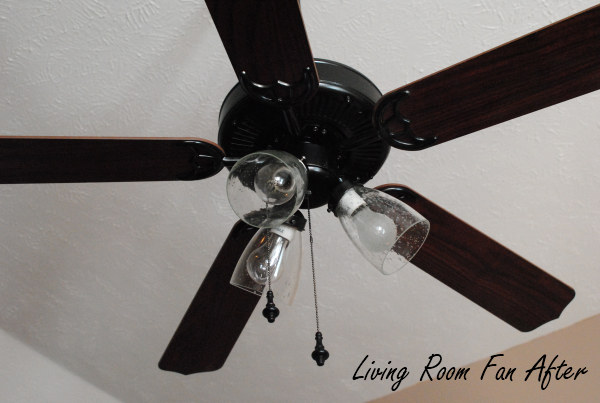
We did the exact same makeover on the Living Room fan only with different glass globes. When I saw these in the store I didn’t like them. I thought they looked wet and weird. However, they were out of the ones that I used in the bedroom so I had to get these or ones that were amber colored. I chose these and I’m glad I did! I really actually like this clear look with the bubbles. It reminds me of an Allen Roth ceiling fan that’s high end and would cost about $100 more!

If you are considering a ceiling fan makeoever be sure to check the other side of your fan blades. Who knows, maybe you’ll get lucky like me and save some cost in your makeover too!


Like this post? SHARE it!

Related Posts Plugin for WordPress, Blogger...

From Spice Rack to K-Cup Holder {Before & After}

If you have a Keurig, then you are probably aware of the ungodly prices for accessories and extras that go along with it. Honestly, I’m just glad that the machines themselves have come down in price. If you don’t have a Keurig yet and have considered getting one, you might check out Amazon. They have decent prices on the machines and they also have a huge K-Cup sale on Fridays!

Chances are that you’ve seen the K-Cup carousels and the fancy little drawers for the Keurigs. Both range in price from around $25- $35 at most stores. Sure they are handy, but after the cost of all the K-cups you have to buy and the cost of the machine itself, who wants to shell out yet another $25 for that? Somebody who really needs a place to store their K-cups I guess.

I am just too cheap to pay for one of those, so I’ve made do with the box they come in.

Until now…

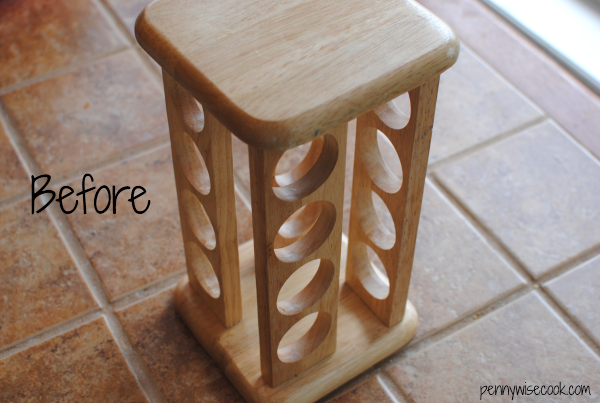
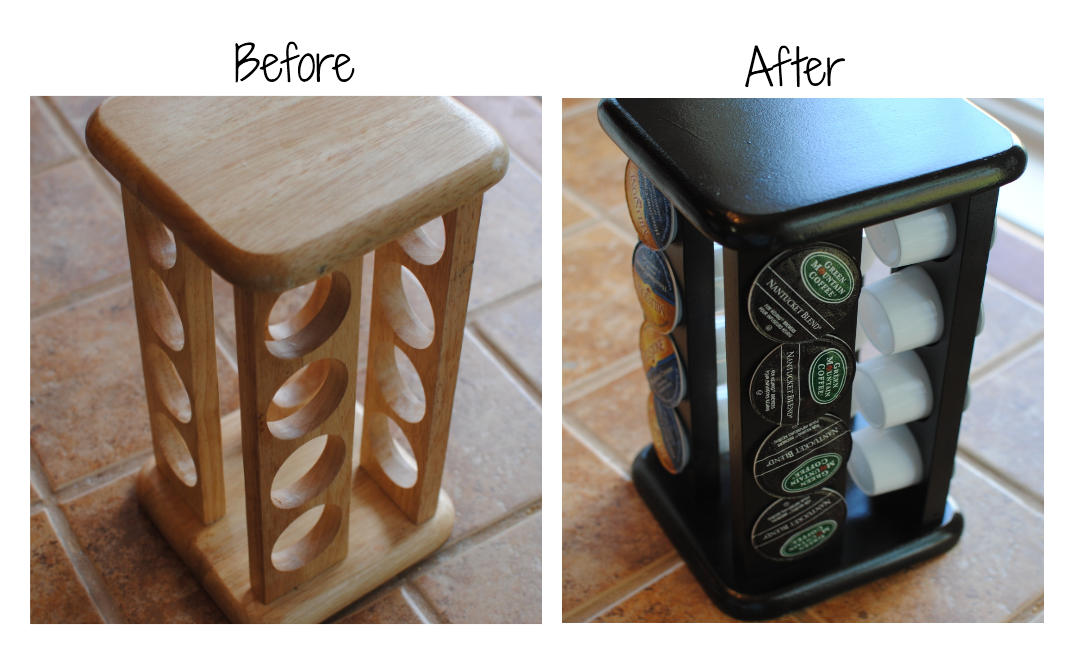
Goodwill is my hero. They have given me inspiration for a lot of things and now they have swooped in to save the day for my K-cup dilema! I found this empty spice rack at my local store for just $.99. To most, this would look like junk. One might think their spices wouldn’t fit its holes or think the color was all wrong. Or some might just have no idea what it is.

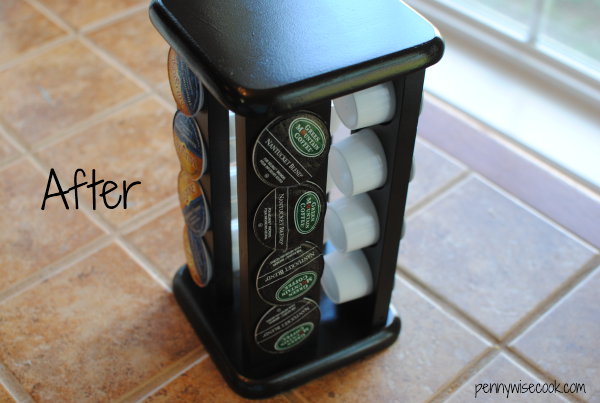
But I saw my new K-cup holder in this thrift store treasure. So I went home, cleaned it up a bit and then gave it a shiny new coat of spray paint to bring it into modern-day. Wow, what a difference!

The K-cups fit just perfectly and it’s not too big nor too small for my kitchen. Just goes to show that someone’s trash (or Goodwill donation) is someone else’ treasure!

Who needs a $25 K-cup carousel when you can repurpose a Goodwill spice rack for $.99?

Question of the Day: Do you have a K-cup holder? If so, what kind?


Like this post? SHARE it!

Related Posts Plugin for WordPress, Blogger...