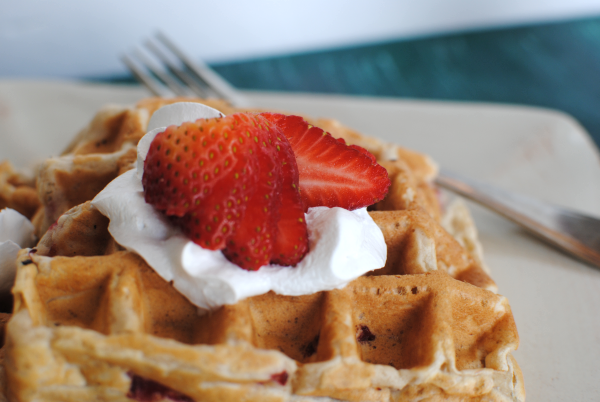
Triple Thick Banana Cranberry Smoothie

This is a Sponsored post written by me on behalf of Carton Smart for SocialSpark. All opinions are 100% mine.
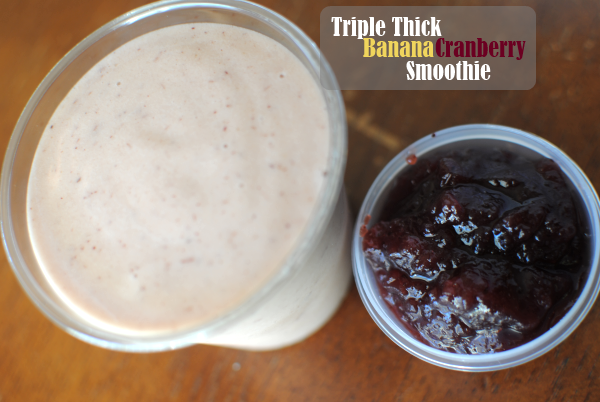
One of the forgotten ingredients around the holidays that can tend to get a bad rep is of course, the cranberry sauce. Typically at the family gatherings that I attend, someone always buys it "just in case" and then it never makes it to the table. However, this all changed last year when my oldest realized that she is in love with such cranberry sauce.

Now it is simply a requirement. 

Don't get me wrong, I like cranberry sauce. I'll even eat the kind out of the can. Although sometimes it can have a tinny taste to it depending on the brand. I got to try out some pretty cool products from Tetra Pak that are packaged in cartons, not cans! How perfect is that? No tinny taste and not only that, but they use 1/3 less packaging compared to cans.

 photo 62adf36b-e1dc-4d93-98c1-aa80d97a468d_zps600d562e.jpg

Tetra Pak doesn't just package cranberry sauce either. You can find a variety of products for making your upcoming holiday meals!

 photo 1898ca76-3272-4baf-a8df-07abf60e15e3_zps1bf425e9.jpg

The products that I got to try out seemed so much more compact in their little cartons. I love the fact that they make less waste than your regular everyday food packaging.
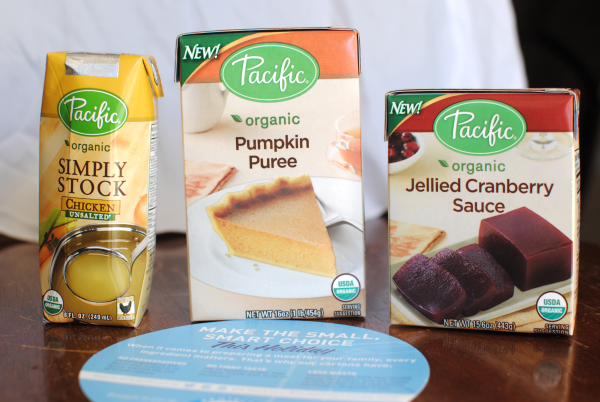
 photo d1d52bb8-c150-4f19-9a7c-b8c9ab3c8df3_zpsac6b75dd.jpg

 photo 795e421d-1ec8-414e-b1b8-dde8f5f23ded_zps62983f0a.jpg

Here are the beauties I got to try out. Look at that cranberry sauce. You can even enjoy a different shape than the famous can circle when you get it from a carton.
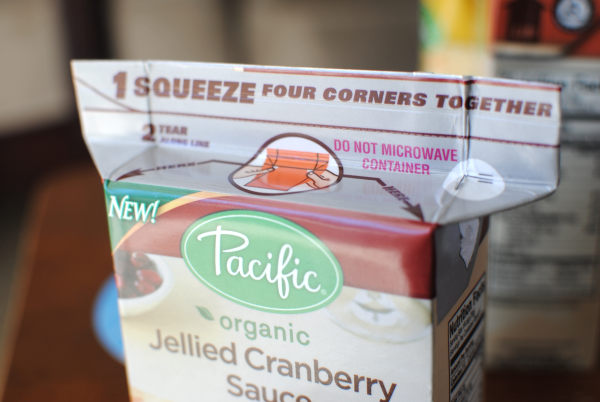
I think what I loved most about the carton was how easy it was to open

I used some of my cranberry sauce to surprise my daughter with as an afterschool snack. We found out that my youngest is also a very big fan of cranberry sauce now too. Had to break up a sibling fight over it!

How can you be Carton Smart this holiday season? Well, you could make something up like I did! I some of the cranberry sauce to whip up a quick smoothie for my hubby while he was working. You know me and my experimentations. I threw this together in about 5 minutes and it was really good! A great way to use up leftoever cranberry sauce if you ever need to. 

Triple Thick Banana Cranberry Smoothie

Ingredients

1 whole banana, frozen
1/4 c. cranberry sauce
1/4 c. water

Directions

Blend all ingredients in a blender until smooth. Viola! 

In the meantime, you should Become Carton Smart and check out the other products that you can get in a carton. It makes a difference, it really does!

You can also follow them here:

Tweet @CartonSmart and Follow #CartonSmart on Pinterest

Visit Sponsor's Site


Like this post? SHARE it!

Related Posts Plugin for WordPress, Blogger...

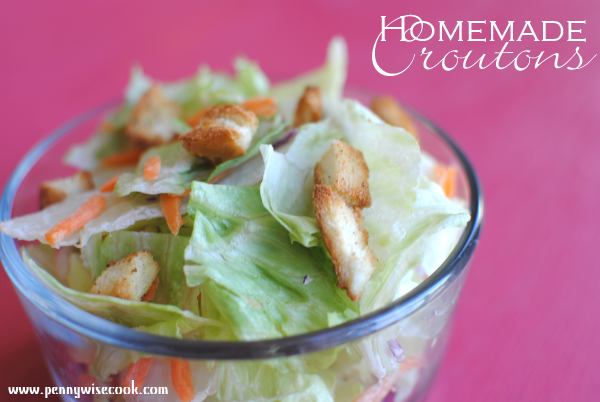
Easy Homemade Croutons

Happy Veteran’s Day! I am so very thankful for the men and women who served our country to give us our freedom. I don’t think that we show this enough all year. It’s a huge sacrifice to put your life on the line for people all around the country that you don’t even know and I am eternally grateful for those who have done so!

I’m a bit of a crazy salad person. I have been ever since high school. I love the crunch of crisp lettuce mixed with creamy dressing and other tasty components that go along with a salad. When we’re picking out a place to eat, my daughter will judge if I will like a restaurant by if they serve salad or not. And then she’ll say “Mom, you’ll love this place. They have salad!”. Thanks darling…

While I do like my salad, I also really like croutons. Like, really really like croutons. They are kinda like potato chips to me. Once I start, I can’t stop.

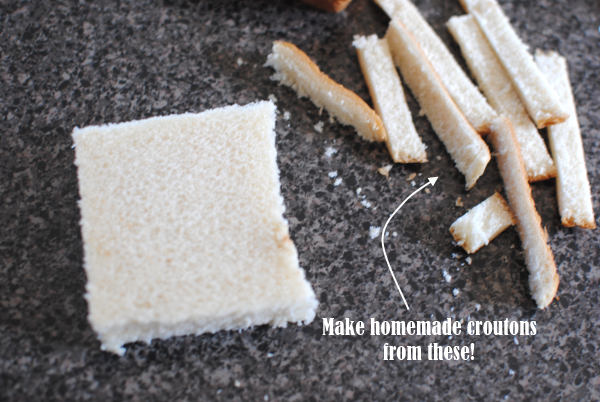
Do you have kiddos who don’t like the crust on their sandwiches? Or perhaps you make things that require you to cut off the crusts.

For instance:
Grilled Cheese Rollups
3-Ingredient Lady Fingers
White Bread Cinnamon Rolls

It’s recycling in a way. You can even freeze the crusts and make croutons later if you don’t have time right away. Just thaw them out before preparing to make croutons. How awesome is that?

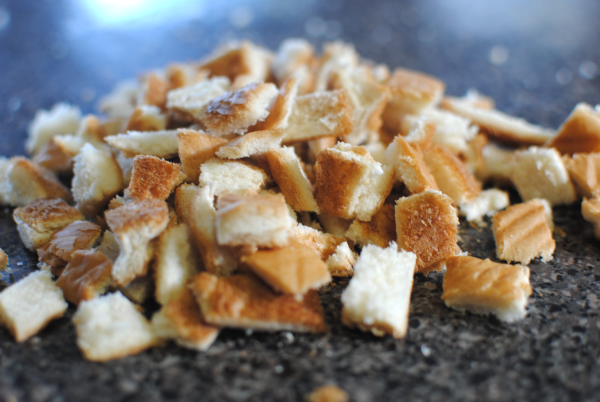
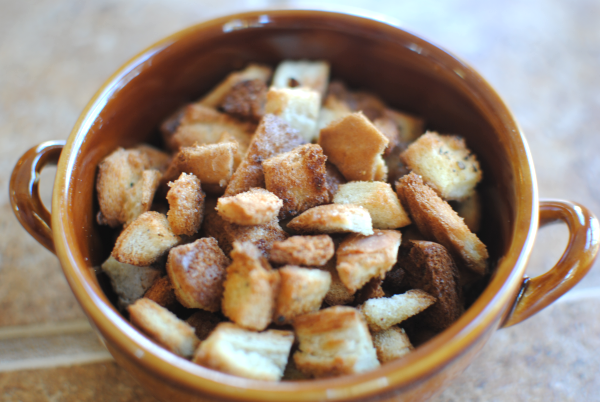
Try to line them up and then just cut them into smaller pieces like above. They already look just like croutons don’t they? And in minutes they will be! Preheat the oven to 400°.

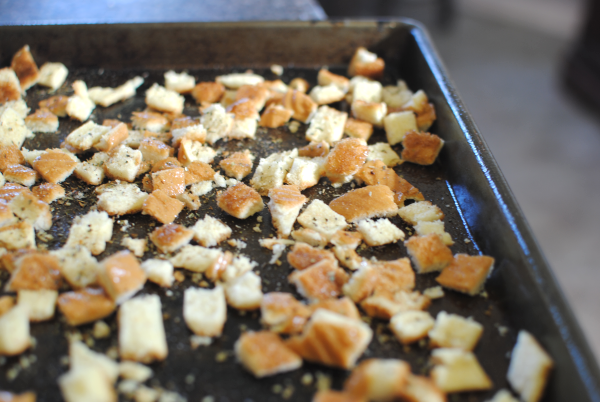
Spread them quite evenly onto a cookie sheet. Spray them well with olive oil cooking spray or butter cooking spray like me. Sprinkle with seasonings of your choice. I used italian seasoning and garlic powder.

Bake for about 4-8 minutes depending on your oven and you’re done. Store them in an airtight container and pop them out when you’re ready to eat a salad.

Or just eat handfuls of croutons…

….I don’t do that.

…Ok, maybe I do. Don’t judge.

Easy Homemade Croutons
Recipe Type: Salad Topping, Snack
Author: Pennywise Cook
Prep time:
Cook time:
Total time:
Here’s a double duty tip when you have leftover bread crusts. Make up a batch of healthy and homemade croutons!
Ingredients
  • Crusts cut off the bread of your choice
  • Seasonings of your choice (1 tsp italian seasoning and 1/2 tsp garlic powder are great!)
  • Cooking Spray
Instructions
  1. Preheat oven to 400°.
  2. Cut crusts into smaller square pieces or desired size.
  3. Spread evenly onto a cookie sheet.
  4. Sprinkle with seasonings.
  5. Bake for 4-8 minutes watching during baking to make sure they don’t burn. Mine took about 8 minutes.


Like this post? SHARE it!

Related Posts Plugin for WordPress, Blogger...

Eclair Cake- It’s So Stinkin’ Good

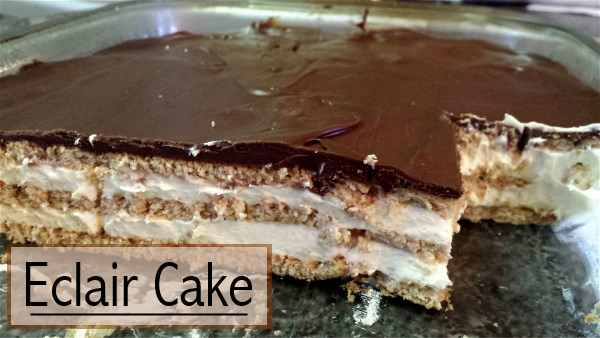
Let me begin by apologizing for the lower-than-normal quality pictures. You have to understand that I’ve made this cake a few times in the past few weeks and it was brought to my attention that I had to share it with you and therefore, I haven’t gotten a chance to take better pictures. Not to mention that each time I make it, the entire cake is gone before I can come close to taking pictures.

It’s that good y’all…

My mom had a recipe in her collection from years and years ago for Eclair Cake and she just raved about it. She used to have it all the time, but hadn’t made it in a long time. I recently came across a recipe that seemed similar and decided to make it for a family that we were taking a meal to. I knew my family wasn’t going to be happy with me if I left them out so I made one for us too.

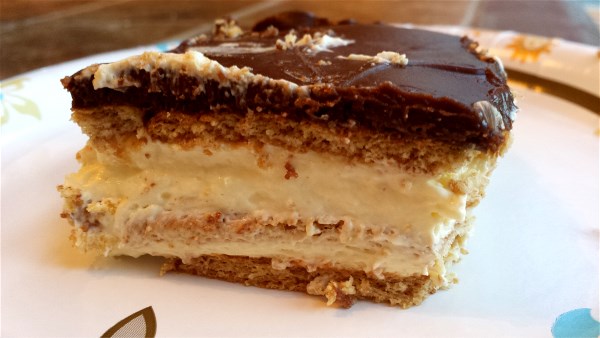
Man oh man was this cake a hit! But I should’ve known because this cake is awfully similar to the Strawberry Icebox Cake that I make. There is just something about graham crackers and pudding in the refrigerator.

I think that the best part about this cake (aside from how amazingly tasty it is) is how easy it is to make! 5 ingredients, 10 minutes, and BOOM I’m mom and wife of the year.

And to think, you didn’t even have to turn on the oven!

Make this cake. This is an order. You will not be upset. I promise.

The only difference in my mom’s recipe and this one is basically the frosting part. Her’s had a bunch of ingredients and required extra refrigeration. I’m sure it tasted amazing, but I really like the use of frosting and according to my husband and girls, it’s the very best part!

Eclair Cake- It’s So Stinkin’ Good

Recipe Type: Dessert

Author: Pennywise Cook

This no-bake Eclair cake will be gone in no time!

Ingredients

  • 1 Package Honey Graham Crackers
  • 2 Packages Instant French Vanilla Pudding
  • 3 c. Cold Milk
  • 1 (8 oz) Tub Whipped Cream
  • 1 tub Chocolate Frosting

Instructions

  1. In a mixing bowl, combine 2 packages french vanilla pudding and milk. Mix until completely dissolved, about 1-2 minutes. Fold in whipped cream until combined well.
  2. Meanwhile, line a 9×13 dish with graham crackers.
  3. Pour half of the pudding mixture over the graham crackers and spread evenly.
  4. Place another layer of graham crackers. Pour the rest of the pudding mixture over the top of the second layer and spread evenly.
  5. Place another layer of graham crackers on top.
  6. Take the top off the frosting and remove the foil cover. Place the tub in the microwave for 40 seconds or until melted.
  7. Pour over the last graham cracker layer and spread evenly.
  8. Place in the refrigerator for 1-2 hours and serve!

I could not find where I originally found this recipe (so sorry!), but the same one is found at All Recipes.


Like this post? SHARE it!

Related Posts Plugin for WordPress, Blogger...

2-Ingredient Pumpkin Muffins

Alright, fess up all you pumpkin junkies. I see you everywhere drinking your Starbucks Pumpkin Spice Lattes and  swirling your Pumpkin Spice coffee creamer and eating your Pumpkin Pie ice cream. We are only 9 days into the month of September and you’re  already in full swing.

If only seeing a pumpkin meant that the weather automatically got cooler!

Now, I think one of the smartest inventions was pumpkin in a can. Gone are the days of needing to cut open a pumpkin and scrape all of the insides to create a puree for recipes.

Your can of pumpkin is one of only TWO ingredients that you’ll need to make these Pumpkin Muffins!

I also wanted to mention, for you healthy folks like myself, there are only about 140 calories per muffin! Because you’re not adding a lot of extra calories with oil and eggs, these are actually pretty healthy!

The other ingredient is cake mix. Can you say cheap? I think I paid a total of $2.25 for these muffins. My kinda treat, cheap and sweet.

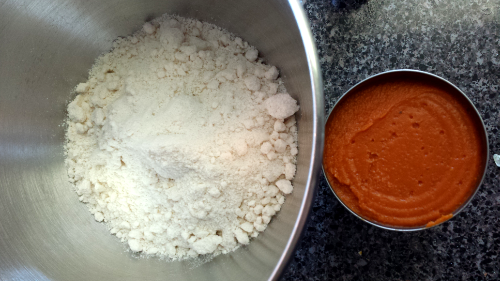
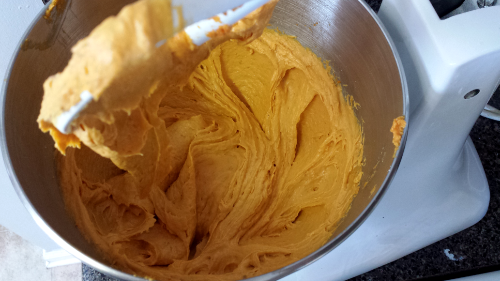
It takes a whirl in the mixer or about 50 strokes by hand to whip the muffin batter up.

Put your muffins in the oven!

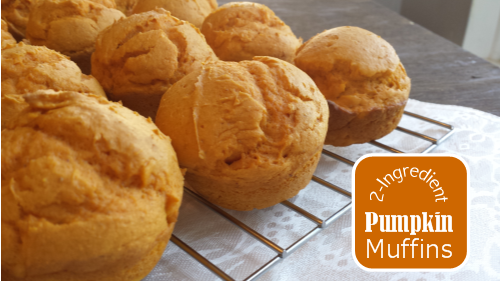
These are probably some of the fluffiest most light and airy muffins that I make.

And heavens, if you crack one open when it’s still warm and slather it with butter, you will be in heaven y’all.

Pumpkin heaven…

Pumpkin or cinnamon cream cheese would be so incredible with these I’m sure. I enjoyed warming them up with butter and sprinkling a little cinnamon on them!

Though you don’t exactly need much instruction because these are so dang easy, here’s the recipe.

2-Ingredient Pumpkin Muffins
Recipe Type: Breakfast, Snack
2 simple ingredients come together to make the ultimate fall snack- Pumpkin Muffins.
Ingredients
  • 1 Box Yellow Cake Mix
  • 1 (standard) Can Pumpkin Puree
Instructions
  1. Preheat oven to 350°.
  2. Grease a couple muffin pans.
  3. Mix cake mix and pumpkin puree together.
  4. Fill muffin cup about 2/3 the way full. (Should make about 15 regular size muffins)
  5. Bake for 15-18 minutes.
  6. Allow to cool and eat!
Serving size: 1 Calories: 140
Notes

These would be super tasty with the addition of 1/2 cup chocolate chips!

Recipe courtesy of Melissa at This Girl’s Life Blog.


Like this post? SHARE it!

Related Posts Plugin for WordPress, Blogger...

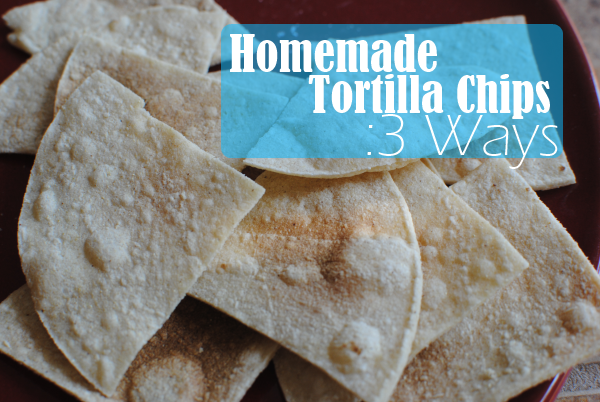
Homemade Tortilla Chips: 3 Ways

First of all, just let me say HELLO THERE! I’ve been just a little preoccupied lately with some personal things and have neglected you. I know…bad blogger, bad. But I’m going to work real hard to make it up to you…I promise.

I thought I’d start this back-to-school season with a simple recipe for something that everyone likes, tortilla chips! The reason that I ever made these in the first place can be credited to my husband. Bless his heart, he almost never gets an urge to cook anything. So when he came to me and said he wanted to “cook up” some homemade tortilla chips, I was ON IT!

There could not be a simpler thing to make that tastes so very close to what you buy in the store. And they are so much cheaper this way as well. One big bag of corn tortillas will run you between $1- $2, but will make the equivalent to probably 2-3 bags of tortilla chips from the store.

Plus, YOU get to take the credit for calling them homemade!

Here are 3 different ways to make your crunchy corn tortilla beauties. I’ll tell you my favorite when we’re done…

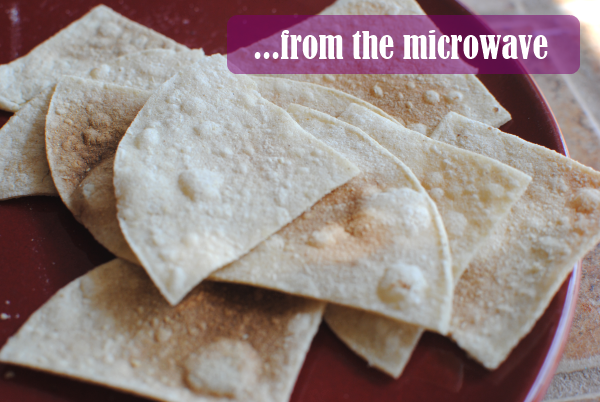
As you can probably imagine, this is the quickest and easiest method for making your chips. No preheating, no baking sheet, no chips, and no oil. Are you paying attention? Of course you need chips, you silly head. Get it together!

Just making sure you’re paying attention…

You’re going to need to make these in batches, a tortilla or two at a time.

1) Cut the tortillas into desired chip size.

2) Place tortilla pieces evenly (not overlapping) on a large microwave-safe plate.

3) Heat 45 seconds. Remove and flip. Heat another 45 seconds.

4) Remove from microwave, salt (if desired) and let sit for a minute or two. They will crisp even more!

Voila! It’s simple. Each microwave is different, so your microwave may need less or perhaps more cooking time to get them just right. You want the chips to brown, but not burn so be sure to keep your eye on the batches as you make them.

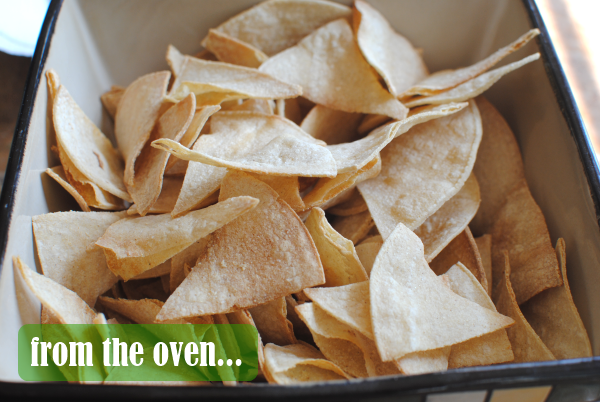
Ok, I said I was going to wait until the end to tell you my favorite method, but I’m sure by now that you realize I have no patience. And if you didn’t know that, you do now! This was my favorite method. The perfect crispness with a light and airy feel. These taste most like what you buy at the store. To me anyways..

Let’s do this:

1) Preheat oven to 350°.

2) Cut your tortillas into desired size.

3) Place pieces evenly over baking sheet. No need to grease it.

4) Bake for 6-8 minutes. Flip chips over and bake for another 6-8 minutes until golden and crispy.

5) Remove from oven. Season and serve! They will crisp a little more as they cool.

Once again, you’ll want to be sure to keep an eye on them. If they are turning dark brown, they are close to burning. You want them golden, not brown.


The last method is from your skillet or fryer! This is still a really simple way to make them. It’s also fairly quick. It’s just not as healthy as the other methods. My husband liked these the best!

1) Cut tortillas into desired size pieces. Place a few paper towels on a large plate to dry the chips when they finish frying.

2) Pour enough oil of choice (I used vegetable oil) into skillet that it goes 2/3 the way to the top. You need enough for the chips to swim in. Heat to medium-high. I didn’t check the temperature of my oil, I just made sure that the oil bubbled when I placed my wooden spoon in it.

3) Place 4-5 chips at a time into the oil. You don’t want to overcrowd, so make sure they aren’t overlapping. Fry them for approximately 2 minutes flipping them over to brown both sides if desired. I did this at first, but got lazy and quit flipping eventually. The chips lived.

4) Place on paper towels and continue frying in batches.

Voila!

All of these methods can be adjusted based on your microwave, oven, and oil temperature. You may even come up with tricks and techniques to make them better. This is just a good starting point for making your own homemade tortilla chips.

Let me know what you think about these in the comments below! 🙂


Like this post? SHARE it!

Related Posts Plugin for WordPress, Blogger...

Summer Cucumber Salad

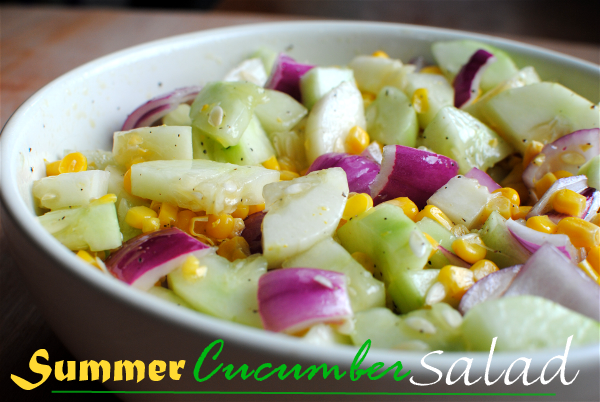
There are only about a thousand reasons to like summer. Sun, fun, vacation, strawberries, and the list could go on and on. But one of my favorite things are the cool and crisp summer salads. Cole slaw is always a great addition to any summer cookout, but is there anything cooler than a cucumber? Well sure, but they don’t have a saying about those things so we’ll stick with the chillin’ cucumber.

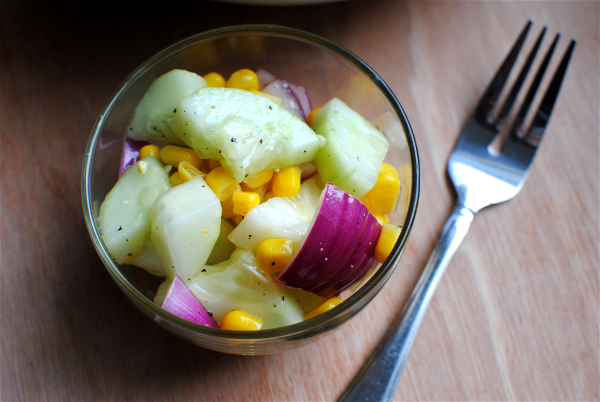
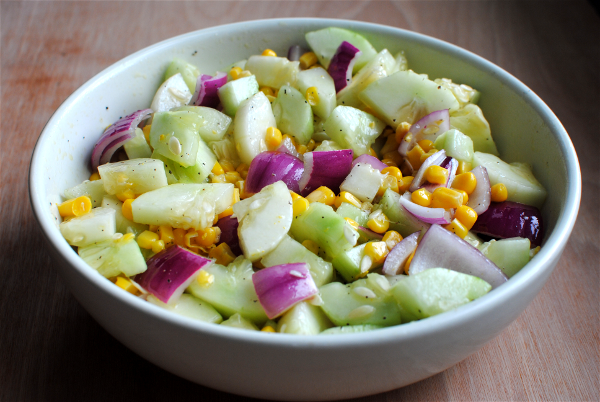
I was delighted to find a cucumber in my garden the other day. I have been waiting for them to grow so I could start adding them to my salads. If your garden is brimming with cucumbers, you might like this Summer Cucumber Salad recipe. There are many variations of this type of salad, so don’t feel like you have to follow it to the T. But this is my favorite combination of flavors.

I was at a family get-together a little while back when my stepsister brought a salad like this. I asked her what she put in hers and I remember thinking how simple it was. It was so tasty! Within a few days I had made my own and within a couple of days it was gone. I ate the entire thing myself.

I have no shame in admitting that.

After all, we’re talking about healthy foods here, right? Not chocolate cake.

It took me a few times making this to perfect the combination of flavors. And you may want to give or take some of the ingredients to get it to your liking. Also, might I suggest making this up the day or night before an event. The longer the cucumbers and onions get to marinate in the vinegar mixture, the better they taste. And oh do they taste lovely!

My family isn’t really the cucumber-eating type. They don’t eat onions that aren’t cooked and you can also bet they won’t munch on anything marinate in vinegar. But hey, more for me! I’ve probably eaten 4 or 5 whole Summer Cucumber Salads by myself this summer…

Wow, it sounds a lot more when typed out…

Summer Cucumber Salad
Recipe Type: Side Dish, Salad
Author: Pennywise Cook
Super easy summer ingredients come together to make a tasty, cool, and crisp summer salad!
Ingredients
  • 2-3 Cucumbers, peeled & cut into halves or quarters
  • 1 Medium Red Onion, cut into chunks and then peeled
  • 1 can Whole Kernel Corn, Drained
  • 1/4 c. + 3 tbsp Apple Cider Vinegar
  • 3 tbsp Olive Oil
  • 1/4 tsp Salt
  • 1/8 tsp Pepper
Instructions
  1. Place all ingredients into a medium bowl and cover with plastic wrap. Allow to marinate overnight or for at least 2 hours. Serve!
Notes

Some people like to also add tomatoes cut into chunks to this dish as well!

Feel free to use any onion for this. I just like to use red onion because it adds pretty color!

I would eat this within a few days of making. The vinegar breaks down the veggies.


Like this post? SHARE it!

Related Posts Plugin for WordPress, Blogger...

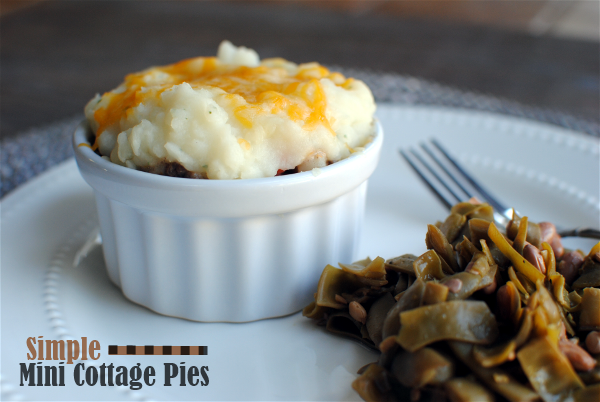
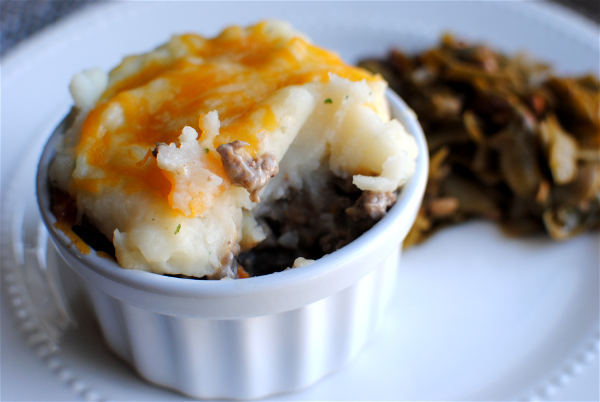
Simple Mini Cottage Pies

My husband and I went to England a few years ago. We indulged in all of the meals that you might associate with England like Fish ‘N Chips, Bangers and Mash, and of course Shepherd’s Pie. I think I was more excited to eat their food than I was to see the sites!

You may have heard of Shepherd’s Pie here in the US and have most likely eaten it before. It’s such an easy dish that almost anyone likes. But did you know that the term started out as Cottage Pie? Cottage Pie dates all the way back to 1791 when the potato was found to be an affordable option for poor folks to eat. They’d use whatever meat they had leftover and line the dish with mashed potatoes and then top it with them as well. Sound familiar? It wasn’t until 1877 that folks started calling it Shepherd’s Pie. (via Wikipedia) There are tons of variations on making this dish, but I wanted to share this easy one with you!

I’ve been making this for years. Probably not as often as I should, but when I do it’s a hit!

You guys know me and my healthification (technical word there) of my meals. In this one, I of course use ground turkey or extra lean ground beef, but I also wanted to work on portion control. When something is really good like Cottage Pie, you need a stopping point! Or at least I do…

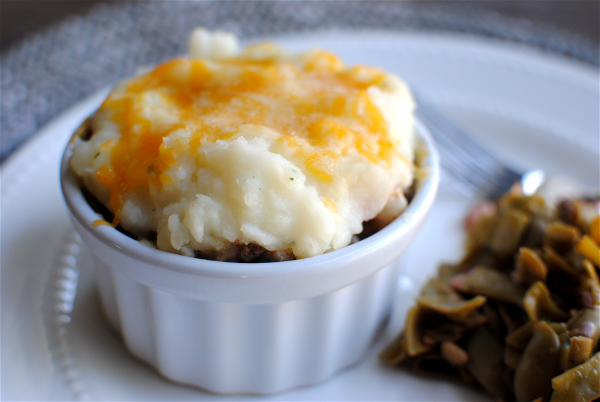
I busted out my little souffle dishes to make these and it was the perfect individual amount. As a side note, I just realized that I’ve never made a souffle before. Challenge ACCEPTED!

Anywho, if you need a really easy dinner idea this week you should definitely consider this meal. Here’s how to make them!

Simple Mini Cottage Pies
Recipe Type: Main Dish
Cuisine: Brittish
Author: Pennywise Cook
A simple way to change up your every day Shepherd’s Pie. Try these super simple Cottage Pies!
Ingredients
  • 1 lb Lean Ground Beef (or turkey)
  • 1 Medium Onion, Chopped
  • 1 can Mixed Vegetables (drained)
  • 1 can Cream of Mushroom Soup
  • 2 tsp Minced Garlic
  • 1/2 tsp Dried Oregano
  • 1 (4 serving) pkg Instant Mashed Potatoes cooked according to package
  • Salt and Pepper to Taste
  • 1/2 c. Shredded Cheddar Cheese
Instructions
  1. Preheat oven to 350°.
  2. In a skillet over medium-high heat, brown the ground beef with onion until onions are translucent. Drain. Add minced garlic and cook until it becomes fragrant.
  3. Add can of mixed veggies and can of cream of mushroom soup. Mix and cook until all is warmed through.
  4. Place equal amounts of meat mixture into 4 or 5 ramekins. Top with equal amounts of mashed potatoes.
  5. Sprinkle with cheese. Put ramekins on a baking sheet and place in the oven for 5-10 minutes or until cheese is melted. Serve!
Notes

You can add whatever kind of “cream of” soup that you’d like to these, but the mushroom version tastes wonderful. I think cream of celery would also make a good choice.
Depending on the size of your ramekins, you may need 5 of them.
And don’t feel obligated to use instant mashed potatoes. It’s a shortcut on busy nights for me, but when I have the time homemade tastes the best hands down!


Like this post? SHARE it!

Related Posts Plugin for WordPress, Blogger...

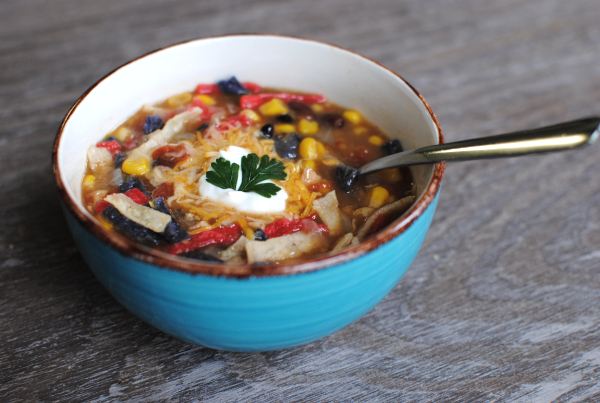
Crockpot Chicken Tortilla Soup

Today is my daughter’s last day of school. I can already hear the words “I’m booooooored mom”. You’d think that we live in a box without any toys, coloring books, or that all addicting boob tube contraption they call a TV. My goal is to do whatever I possibly can to try and keep those words from seaping out of my kiddo’s mouth.

So we’ll plan playdates, trips to the splash pad, fun at the Y, and anything and everything else that I can come up with to combat bordem.

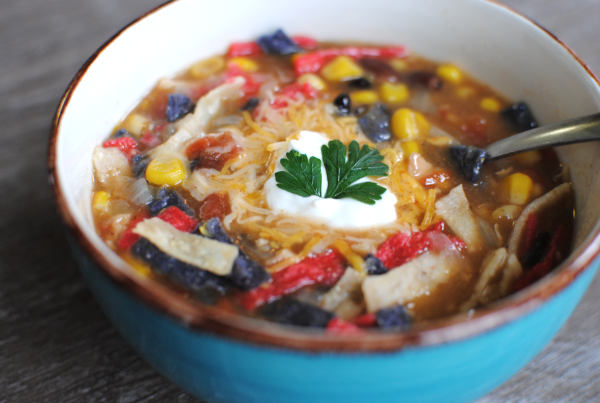
Dinner sometimes plays second fiddle in the summer around here. The sun is out later and we’re outside enjoying our days which means either mom has to miss out on the fun to cook or mom has to get creative. So creative I’ll get! This recipe is one that I put together in a pinch and is super simple to make.

Who doesn’t like making dinner in the crockpot? Most of the ingredients in this recipe are from cans which also makes for easy prep. This reminds me of a 7 can soup with a little twist. One ingredient that I’ve always kinda been leary of, is canned chicken. I don’t use it that often because, well, it’s called canned chicken. It smells a lot like tuna to me in the can which most of the time turns me off. But every now and then I’ll place it in a recipe that makes the chicken transform with the other flavors. And sometimes it actually tastes great. Hey, don’t knock it ’til ya tried it! If you’re not too keen on the canned chicken idea, use leftover rotisserie chicken or something along those lines if you’d like.

I love the crunch of the crispy tortilla strips on top at the very end. If you’re lucky enough, you’ll find some colorful ones like I did!

 It’s your turn: Do your kids get bored during the summer? Or do they enjoy the freedom?

Crockpot Chicken Tortilla Soup
 
Recipe Type: Soup, Main Dish, Crockpot
Author: Pennywise Cook

A few cans and seasonings and you’re on your way to a tasty Chicken Tortilla Soup!
Ingredients
  • 1 onion, chopped
  • 2 tsp garlic, minced
  • 1 (14 oz) can vegetable broth- could also use chicken
  • 1 (15.5 oz) can black beans, drained & rinsed
  • 1 (15.25 oz) can whole kernel corn, drained
  • 1 (12.5 oz) can chunk chicken breast, drained
  • 1 (10.5 oz) can cream of celery soup
  • 1 (10 oz) can rotel
  • 1 rotel can of water
  • 1 tsp coriander
  • 1/2 tsp cumin
  • 1 tsp chili powder
  • salt & pepper to taste
  • 1 c. tortilla strips for topping
Instructions
  1. Place all ingredients into crockpot and cook on high for 4-6 hours or low for 6-8 hours.
 
Notes

– The first time I made this, I sauted my onion and garlic before placing it in the crockpot. You can do this first if you are going to be cooking your soup for less time. If not, they should soften up enough while cooking.
– If you would rather, you can use chicken broth in place of the vegetable broth
– If you have leftover chicken, you can use that in place of the canned chicken
– Finally, if you prefer, you can use more broth in place of the water in the rotel can. I found it tastes just as good with the water.


Like this post? SHARE it!

Related Posts Plugin for WordPress, Blogger...

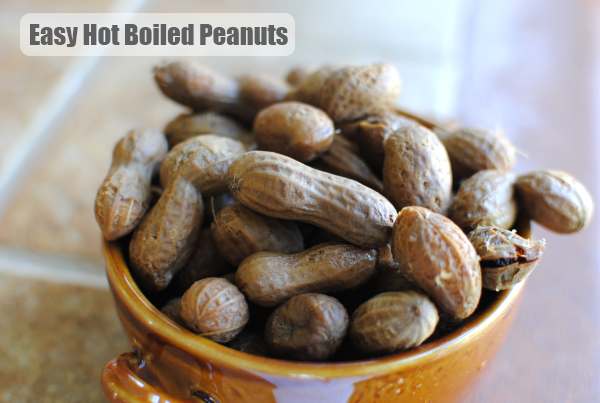
Hot Boiled Peanuts: It’s a Southern Thang

Sometimes you feel like a nut…

And sometimes you feel like a boiled nut.

My husband and I are doing the Daniel Fast right now. We’re on day 11 of 21 right now. If you’re not familiar with the Daniel Fast, I’ll sum it up by telling you some of the guidelines.

  • No meat, dairy, sugar or artificial sweeteners, leavened bread, or caffeine
  • You can have all vegetables, fruits, nuts, beans, and whole grains
  • No fried foods
  • Only water to drink
  • It’s based on the book of Daniel in the Bible and 2 of his fasting experiences
  • It’s not only physical, but meant to be a spiritual experience

The first time that Daniel did this fast was for 10 days. The second time was for 21 days. We’ve done the 10-day before without issue so we’ve challenged ourselves to try the 21-day. It’s gone really well so far. Considering that my husband is a cheeseburger and french fry kinda guy, it’s VERY surprising how he gets along with this type of fast. Praise God!

And me? What do I do about my sweets you say? Well let’s just say that bananas and raisins are my best friend these days. Remember my Peanut Butter Choco-Banana Ice Cream? I can actually eat that on this fast! But I have to eat it out of a bowl instead of a cone. Darn…

But I digress…

We’ve also been eating a lot of nuts lately. Almonds and peanuts mostly. You can get these HUGE, I mean HUGE bags of salted and roasted peanuts (in-shell) at Sam’s Club for around $5. It’s amazing how much peanuts will fill you up while providing you with energy.

If you’re from the south or have visited the south before, you’ve probably heard of folks offering Boiled Peanuts. There are signs just about everywhere once you get into Alabamer (yes, Alabamer) and Misippi (yes, Misippi). No need to pronounce words correctly around here, we’re too busy enjoying our boiled peanuts. I wish I could insert an audio clip of how I say boiled for y’all. Words like coil, boil, toilet all come out of my mouth a little on the Paula Deen side. Oh who am I kidding? It sounds a LOT like Paula Deen says boil. 🙂

So with all the nuts we’ve been eating, I wanted a little change in the nut department. So I though why not boil them?

Since the Hamptom Farms peanuts that I bought were already salted, I knew I didn’t need to salt them again. And I didn’t want them swimming in a bunch of oil (once again, just imagine a little Paula Deen accent). So I used water!

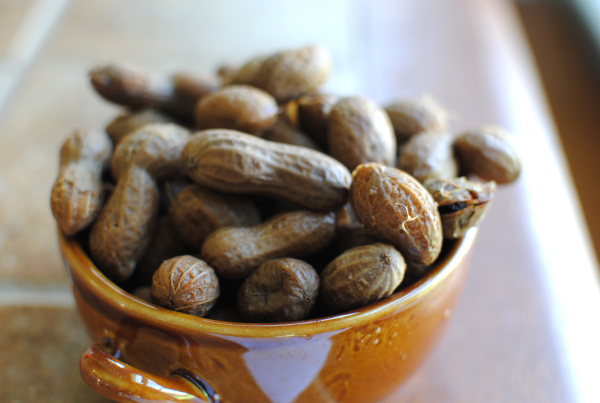
1 big pot full of water, a huge amount of salted and roasted peanuts, and 5 hours later you have hot boiled peanuts good enough to make you slap yo mama! It honestly didn’t get any easier than that.

And we didn’t even have to make a trip down to Alabamer!

Hot Boiled Peanuts: It’s a Southern Thang
 
Recipe Type: Snack, Appetizer
Author: Pennywise Cook

There is nothing to making hot boiled peanuts just like they make on those road-side stands in the south!
Ingredients
  • Any amount of in-shell roasted and salted peanuts
  • Water- to cover the entire amount of peanuts
Instructions
  1. Place the amount of desired peanuts into a large pot.
  2. Cover with water.
  3. Bring to a boil, then lower the temp to a simmer.
  4. Cover and let simmer for 4-5 hours or until the shells begin to give a little and the peanuts inside are soft.
 
Notes

You can of course get peanuts that aren’t salted already, just be sure to salt your water when boiling them.
Your water will evaporate throughout the boiling process, be sure to continue adding more hot water in order to keep the peanuts covered.


Like this post? SHARE it!

Related Posts Plugin for WordPress, Blogger...

Homemade Strawberry Belgian Waffles

It is MAY! Where in the wide world of sports did March and April get off to? I remember thinking wow, it’s already March and then BOOM it’s  May. I’m mostly caught off-guard because both of my girl’s birthdays are in May which means that mommy has a lot of work to do. My oldest’s birthday is next week and I decided not to procrastinate this year by asking her cake preference a week before instead of, oh, the night before.

These are Mom Of The Year qualities, you know.

She chose My Little Pony with a Rainbow Dash emphasis. For those of you who don’t know about these girly things, just know that I have a lot on my plate next week.

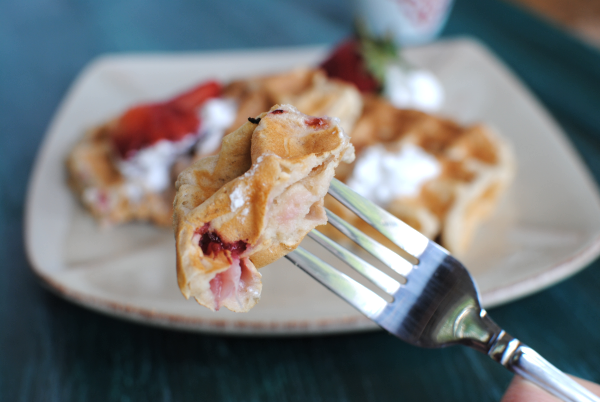
There’s probably a chance that you’d like to know about those big, fluffy waffles up there. I could tell you many stories about when my mom used to make these for me. Without exaggerating, I probably ate 4 of these in one sitting when I was younger.

I could do the same now, but I try to practice self-control.

My mom always made them from a box. Do not get me wrong, that is normally the very method that I would use. However, since I do have a tendency to eat a redonkulous amount of them, I wanted to make sure and healthify them up just a bit.

These Homemade Strawberry Belgian Waffles contain no butter, oil, or eggs. You could use soy milk or almond milk in place of the milk and you’d have them dairy free! They aren’t artificially made to taste like strawberries like some boxed mixes might work. They are literally made with fresh strawberries which give them a more natural flavor.

I almost called these Strawberry-Banana Belgian Waffles because I used bananas instead of the oil/butter/egg, but the banana taste didn’t come through as much as I was expecting. Even the strawberry taste didn’t become as potent as I would have liked. But if you’re brave and don’t mind a little sugar, you can add a tsp of sugar to the strawberries before adding them to the batter and I’m sure that it will bring out the strawberry flavor a little more.

I think my favorite part about Belgian waffles as opposed to regular waffles is the fact that they are super fluffy.

I love fluffy food.

Does that sound weird? I’m sure it does, but I don’t care. I like whipped cream, cotton candy, mousse of all kinds, lighter-than-air angel food cakes. You name it, if it’s an ounce away from losing it’s gravity and joining the angels, then I probably enjoy eating it. The key to eating them, at least in my opinion, is to top them with fresh (or sliced and sweetened) strawberries and then give them a few squirts of Reddi Whip. I’m not sure that I could be in the presence of a Belgian waffle that didn’t contain whipped cream. That’s just the way that I was taught to eat them. I wonder what the Belgians think of me…

My waffle iron makes 2 of these at a time. With the amount of batter that I mixed up, I got 4 total. To help you know how many of these you’ll get out of 1 batch. I’d recommend doubling the recipe if you have a hungry bunch.

Believe me, they won’t eat just one.

Recipe adapted from Vegan Heartland.

Homemade Strawberry Belgian Waffles
 
Recipe Type: Breakfast
Author: <span class=”mceItemHidden”><span class=”mceItemHiddenSpellWord”>Pennywise</span> Cook- Adapted from Vegan Heartland</span>

Serves: 4
Strawberries add a summery flavor to sweet and tasty belgian waffles! You’d never know these were healthy. There are only about 150 calories per waffle!
Ingredients
  • 1 c flour (I used about 1/4 c whole wheat)
  • 1/4 tsp salt
  • 2 tsp baking powder
  • 1 tbsp maple syrup (I used sugar free)
  • 1/4 c mashed banana (about 1 banana)
  • 3/4 c skim milk
  • 1 tsp vanilla extract
  • 1/2 c fresh strawberries, finely chopped
Instructions
  1. In a small bowl, stir together flour, salt, and baking powder until combined. Set aside.
  2. In a separate mixing bowl, combine maple syrup, banana, milk, and vanilla. Mix on low until fluffy.
  3. Slowly add the dry ingredients to the wet and mix well.
  4. Then gently fold in the strawberries.
  5. Cook according to your waffle iron’s directions.
  6. Optional) Top with fresh strawberries and Reddi Whip!
 
Notes

– If you wanted to bump up the nutrition, you could also add some flax to these. I used about a 1/4 c whole wheat flour in mine.

– You can use pretty much any type of milk in place of the dairy milk if you’d like. Even coconut milk. It’s just a matter of your preference!

– These don’t have a strong strawberry taste (what’s in a name anyways?), so if you want to bump that up, add about a tsp of sugar to the strawberries. OR you could add the strawberries in the at the beginning and let them mix in well with the wet ingredients. The flavor would disperse a little more there. (I will be trying this myself)

– Or if you have any other suggestions for these, I’d love to hear! They are a work in progress. 🙂


Facts (per waffle not including toppings): 147 calories, 40 carbs, 0 grams fat, 5 grams protein, 417 gram sodium, 3 grams sugar.


Like this post? SHARE it!

Related Posts Plugin for WordPress, Blogger...