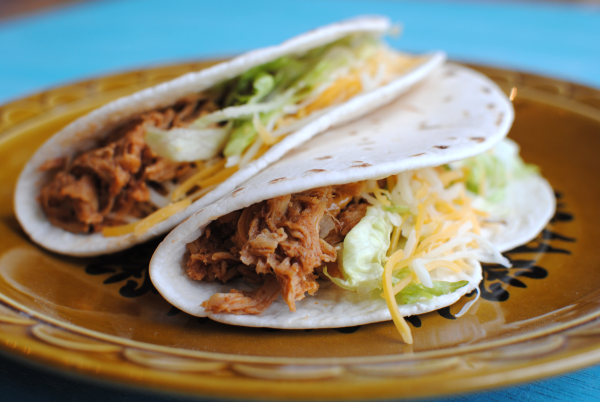
Crockpot Chicken Tacos

Well hello there! Long time no….er….blog?

As I was preparing the pictures for this post, even my husband made the comment about my lack of my snapping of photos of our dinners. Yes, I am usually known as the papparazi of food around here, but for the past couple of months there have been some awesome things happening around here and needless to say, I’ve been just a bit preoccupied.

But have no fear! I have a recipe today. One that even the least of cooks can throw together in minutes and makes for a family pleasing meal. Crockpot Chicken Tacos only take 3 ingredients and one of them is water. Your HUSBAND could make these.

He might get a big head afterwards. Just tell him that he did fabulous on dinner and that you adore his culinary skills. You didn’t realize that Crockpot Chicken Tacos could help you stroke your husband’s ego did you?

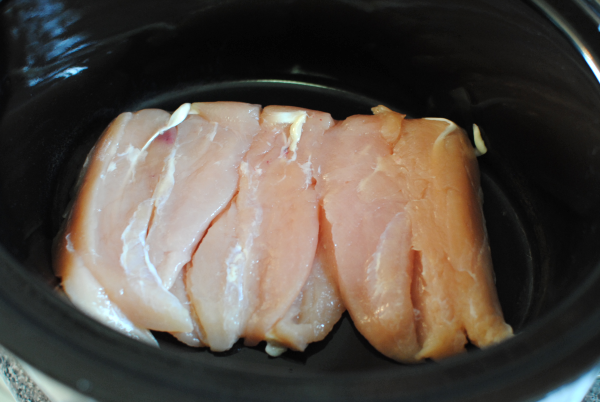
The most important ingredient in this one is, well, chicken! You need about a pound to a pound and 1/2. I used fresh because I got some on clearance, but frozen will also work. You’ll just need to adjust your crockpot setting depending on how fast you’d like it to cook.

Use tenderloins, breasts, thighs, whatever you’d like. It’s going to get tender and you’ll shred it anyways.

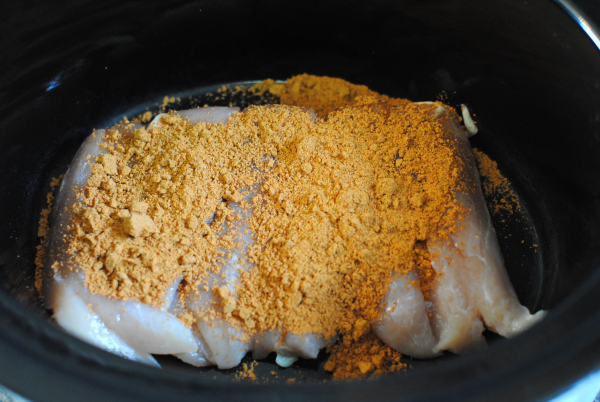
Brace yourself, this is where it gets a little tough. You must open a packet of taco seasoning and sprinkle over the chicken. I know, I know. How could I ask you to do such a laborious thing? Well suck it up. You’ll live.

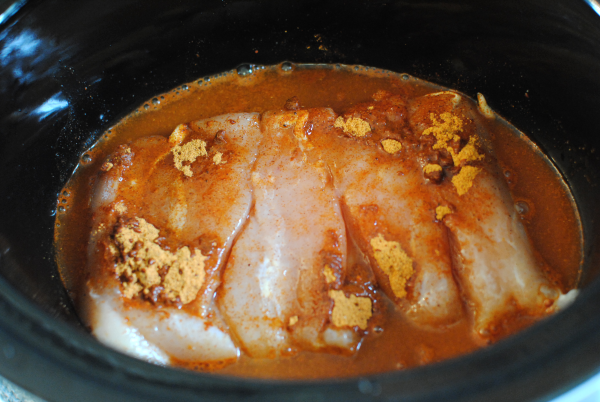
Here’s the last step. Add the amount of water listed on your taco seasoning packet to the crockpot.

Place the top on your crockpot and walk away. Go update your status. Take out the trash. Clip your toenails (you know who you are). Hey look, now you have time to make a dessert! Might I suggest Salted Caramel Brownies

I usually let it cook for about 6 hours on low when I’m using fresh chicken. Towards the end of the cooking, I usually add just a tad bit more water and then shred up the chicken. It’s so tender that just stirring it usually shreds it without hassle.

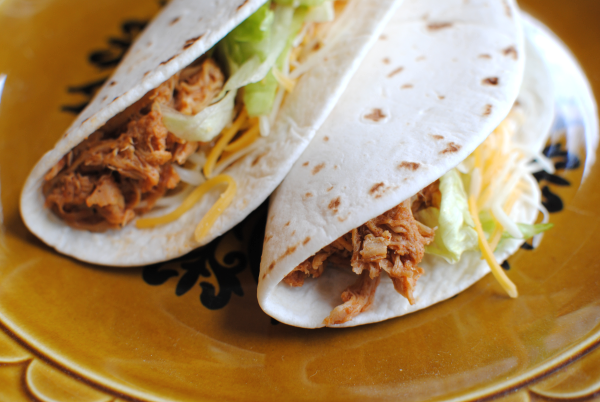
Add your favorite toppings and enjoy.

We’ve started having what we’re calling Taco Tuesday. Some form of taco will be made on Tuesdays. Whether casserole, soup, or plain tacos, that’s our theme. And beef is good, but sometimes chicken feels a bit healthier. Plus, it’s a nice change.

Crockpot Chicken Tacos
 
Recipe Type: Main, Crockpot
Author: Pennywise Cook

With only 3 ingredients (one of which is water) and a crockpot, you can have chicken tacos for dinner tonight!
Ingredients
  • 1- 1.5 pounds fresh or frozen chicken breasts, tenders, or thighs (your choice)
  • 1 package taco seasoning
  • Water listed on taco seasoning packet + a bit more
  • Toppings of your choice
Instructions
  1. Place fresh or frozen chicken into crockpot.
  2. Sprinkle with taco seasoning.
  3. Add the amount of water listed on the seasoning packet.
  4. Cook on low for about 6 hours (fresh chicken) or medium/high for 6 hours (frozen).
  5. Add a little water, about 1/4 cup towards the end. Let absorb then stir and shred.
  6. Serve with tortillas or shells and add your favorite toppings!


Like this post? SHARE it!

Related Posts Plugin for WordPress, Blogger...

Homemade Tomato Soup

The other day my daughter came home from school and declared that she liked tomato soup. Can you imagine that? She said that they serve it at the cafeteria and that she really liked it. Then she proceeded to ask me to make some at home.

Music to my ears!

My little one actually requested something other than pizza, macaroni, or a hot dog. I was speechless.

And like any good mother, I set out to find a recipe that I thought she’d enjoy and put it on our menu plan for this week. To make the hubs happy, I made grilled cheeses (tomato soup’s partner) to go with the soup.

I found this recipe at Spark People and it is surely a winner!

The entire recipe took me only about 15 minutes to make. It made a large pot so there will be leftovers. You can even freeze this for later on.

Dipping my grilled cheese into this soup was absolutely a match made in heaven. I cannot express the happiness that this soup brought me.

I didn’t even know I liked tomato soup!

If you’re looking for a quick meal on a weeknight or perhaps a last minute idea for the weekend, this should be on your list! What’s even better is that there’s only about 71 calories per serving.

Low cal? For reals? Yuuuup!

This ain’t nothing like that mess in a can y’all!

Homemade Tomato Soup
Recipe Type: Spark People via NARKMEISTER
With just a few ingredients you can create super tasty homemade soup that pairs great with a yummy grilled cheese!
Ingredients
  • 2 Medium Onions, Diced
  • 4 Garlic Gloves, Chopped
  • 4 Cans of Chopped Tomatoes
  • 1 Pint of Stock (Your preference)
  • 1 Tbs Dried Basil
  • Low Calorie Fat Spray/Olive Oil
Instructions
  1. Brown onion and garlic in a few sprays of cooking spray over medium heat.
  2. Add 4 cans tomatoes and bring to a boil. Simmer 5 minutes.
  3. Add broth or stock and bring to a boil. Simmer another 5 minutes.
  4. Add basil and salt and pepper to taste.
  5. Use an immersion blender to smooth to your liking.
  6. Serve with a grilled cheese and enjoy!


Like this post? SHARE it!

Related Posts Plugin for WordPress, Blogger...

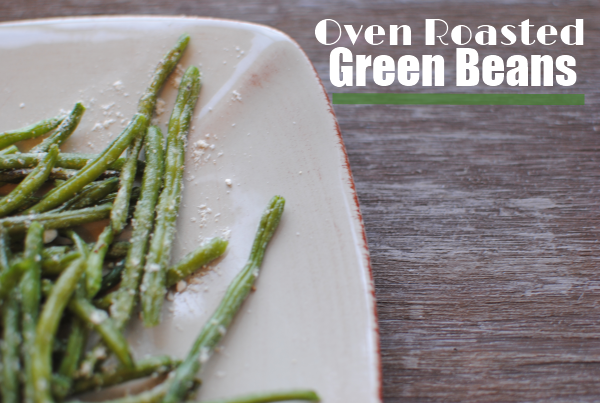
Oven Roasted Green Beans

On any given day here in our household, anything green won’t be eaten by the kiddos and sometimes even by the husband.

What is it about the color green that turns folks off?

It’s quite sad that it’s gotten such a bad rep when it’s one of the most nutritious colors to eat. This just makes the challenge for cooks like me to make those things that are green taste good enough to eat. Both of my girls wouldn’t touch green baby food. You know, those green peas and green beans all pureed and mushy. I can’t say that I blame them. I don’t think I’ll be indulging in a big ole jar of mushy green peas myself. When we went to England, that was a common side dish there. Of course I had to try it while I was there. But I was over it after my first taste.

With a bag of frozen green beans in my freezer, I decided it was time to use those babies up. I went for the roasting option hoping that they would taste good enough for the family to enjoy. After all, they always like my roasted broccoli and roasted cauliflower.

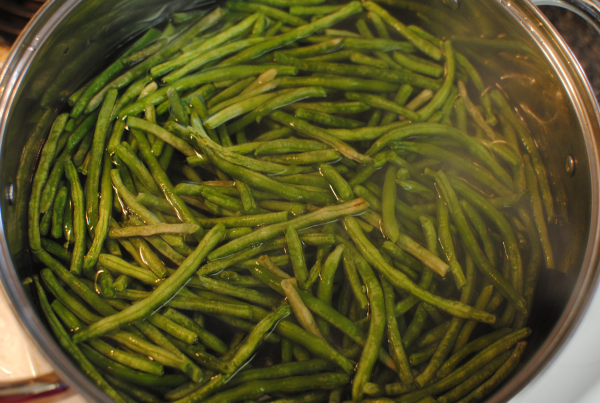
I started by parboiling the green beans straight from frozen. I wanted to get them thawed and mostly cooked and then finish them in the oven. I was surprised at how quick these cooked.

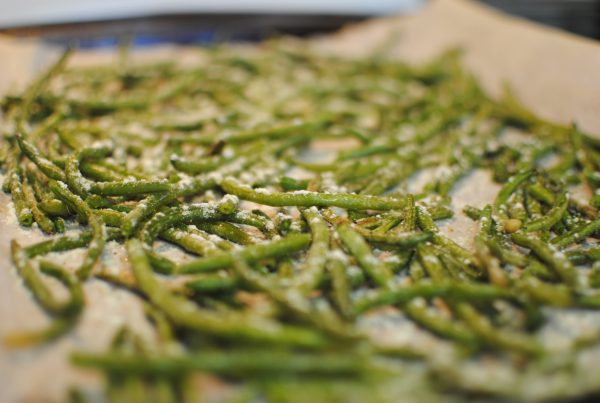
Then I drained them and spread them out onto a baking sheet lined with parchment paper. A little olive oil, salt, and pepper and into the oven they went.

After a nice stint in the green bean sauna (I know my analogies are ridiculous), they came out just perfect. Just roasted enough that some of them had a crunch, but still soft like you’d expect.

And what would make anything roasted taste better than parmesan cheese? Not a thing. A good sprinkling of that and you are set with the tastiest green beans this side of Mason Dixon Line.

When I was finished with these, I took one of them to my picky daughter for her approval. She gave me a look when she saw how green it was and I was fully expecting her to pass on the taste test.

Then it came….

She let out a “mmmmmm”. And I knew I was onto something. We had these with our dinner and they were a big hit.

Even though they were green. 🙂

Oven Roasted Green Beans
Recipe Type: Side Dish, Vegetable
Author: Pennywise Cook
Try a new take on everyday green beans by popping them into the oven to roast. Here’s how!
Ingredients
  • 16 oz Pkg Frozen Extra Fine Green Beans
  • 1 tsp Salt
  • 1/2 tsp Pepper
  • 2 Tbsp Olive Oil
  • 1/4 c. Parmesan Cheese
Instructions
  1. Preheat oven to 425°.
  2. Bring pot full of water to boil. Add green beans and boil for 5 minutes. Drain and dry.
  3. Lay green beans on baking sheet lined with parchment paper in a flat layer.
  4. Drizzle with olive oil and sprinkle with salt and pepper.
  5. Cook for 10 minutes. Remove from oven and toss. Return to oven for additional 5 minutes.
  6. Top with parmesan cheese and serve immediately!


Like this post? SHARE it!

Related Posts Plugin for WordPress, Blogger...

YumEarth Organic Candy Review and Giveaway

We’re at the grocery store picking up our weekly groceries. There’s but one thing that I can guarantee that my daughter is going to ask for….

Gummy snacks.

We’re talking fruit snacks, fruit roll-ups, gummy bears, and you name it. She’s going to request that we throw it in the buggy. Yes buggy. That’s what we call them here in the south y’all. I don’t usually mind grabbing some for her snack box at school or perhaps something to snack on in the afternoons. But sometimes, I have to draw the line. She would eat them every second of every day if I let her.

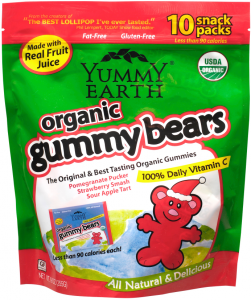
I often find awesome deals on YumEarth Organic Gummy Bears on Amazon so I was thrilled to get a chance to try these out for myself. And to let my little gummy connoisseur try them for herself.

I didn’t actually tell her that these were organic before she tried them. I didn’t think it would matter and I was right! She loved them and so did I.

I will say that I was a little thrown off by their color. They seemed a little drab in color and not as bright as most gummy bears, but that didn’t mean they tasted bad. They were still really yummy. They reminded me of a cross between gummy bears and fruit snacks. Gummy bears tend to be tougher and fruit snacks are usually soft. This was a blend of the two. Either way, it only took us a couple of days to go through our tasty bag of 10 packs.

Come to find out, YumEarth was founded by two DADS who were on a mission to share wholesome treats with their kids. YumEarth is dedicated to making delicious treats and sweets with all-natural ingredients, no artificial colors, no artificial flavors, and no major allergens, such as gluten, nuts and dairy. Pretty sure that most anyone can eat these and not have to worry about any funky ingredients.

There are tons of everyday stores that carry these. So be on the lookout at your store or find out where you can locate them here.

In the meantime, you wanna win a FREE bag of these for yourself? It’s a GIVEAWAY!

____________________________________________________________________

YumEarth Organic Gummy Bear Bag Giveaway

Mandatory Entry: Leave a comment on this post telling me who you think would eat these if you won!

Optional Additional Entries:

This giveaway will end on December 20th at 11:59pm CT. I will contact the winner on December 21st and they will have 24 hours to respond. If I have not heard from them in 24 hours, I will name a new winner. This giveaway is open to those in the US only.

This review was made possible by Mom Spark Media. Thoughts are 100% my own. All prizing for MSM giveaways is handled by a third party unless otherwise noted. For this reason prize fulfillment can take up to 90 days after the winners information is received.


Like this post? SHARE it!

Related Posts Plugin for WordPress, Blogger...

Easy Vegetable Beef Soup

I sincerely apologize for not getting on here last week and wishing you guys a very Happy Thanksgiving! I’m normally a lot better about that, but this year I decided to truly disconnect from the outside world. Well, everything except for Words with Friends. I’m not sure that I could live without that.

So even though this is very late and you’re probably tired of hearing it, HAPPY THANKSGIVING! And now I can officially move on into the Christmas season. I’m just not the type to feel Christmas-y until I’ve digested my turkey and dressing. Anyone else feel that way?

We had a very fun-filled Thanksgiving with family and friends. I got to see my best friend from high school and even ran a 5k on Thanksgiving morning. It really was a great Thanksgiving. I hope that you enjoyed yours as much as I did!

I’ve got another recipe for you today that comes from my momma. It’s funny how our cooking skills and what we learn in the kitchen usually comes from those we are closest to. When I was little, watching my mom cook was nothing but dinner for my belly. But these days I look back on those days as valuable knowledge. And it’s especially fun to cook with her now.

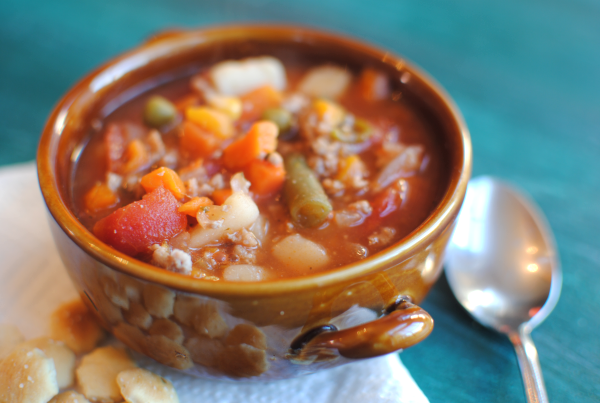
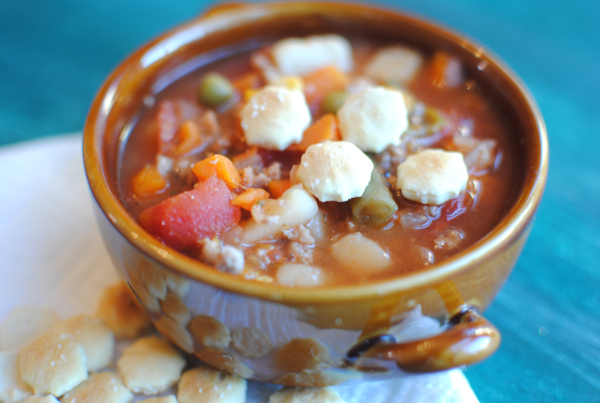
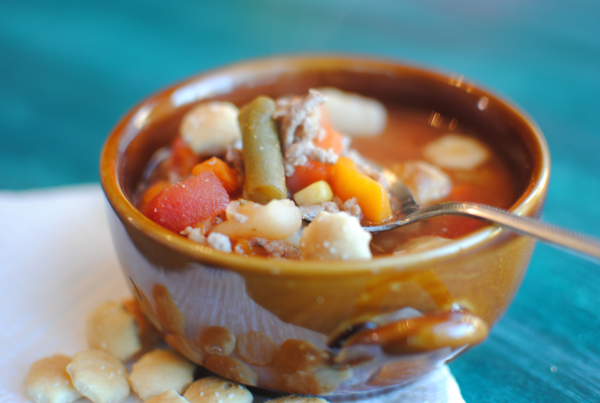
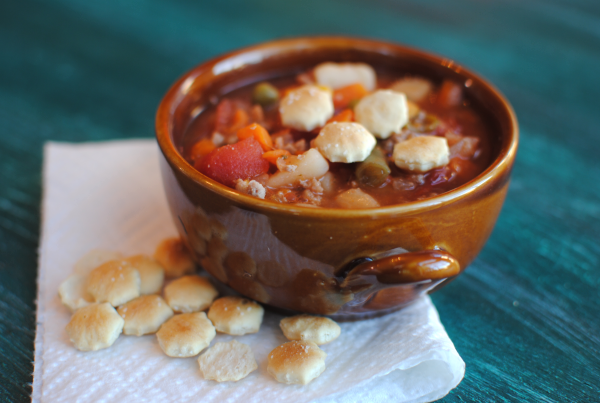
This Vegetable Beef soup is a regular when I visit my mom and also here in our home. It’s simple, it’s fast, and it’s incredibly tasty.

The absolutely perfect soup to warm your soul on a chilly night.

This soup can be whipped up in no time. Even on those last minute weeknights when you have no idea what to make for supper. In fact, most of the ingredients are things you’ll probably already have on-hand.

The bulk of this recipe is the beef and plain old canned veggies. It really doesn’t get much easier than cracking open a can or two and making a soup that tastes like you’ve been working hard on it all day long.

I can’t wait for you to try this recipe out! Let me know what you think if you do…

Easy Vegetable Beef Soup
Recipe Type: Main Dish, Soup
Author: Pennywise Cook’s Momma
Warm up on chilly nights with this super easy, yet tasty vegetable beef soup!
Ingredients
  • 1 lb Lean Ground Beef
  • 1 Medium Onion, Chopped
  • 4 Cans Veg-All
  • 1 (28 oz) Can Diced Tomatoes, Undrained
  • 1 (15 oz) Can Tomato Sauce
  • 6 Beef Bouillon Cubes
  • 6 Cups Water
  • 1 and 1/2 tsp Garlic Powder
  • 1/2 tsp Salt
  • 1/4 tsp Pepper
  • 1 tsp Italian Seasoning
Instructions
  1. In a large dutch oven or soup pot, brown ground beef along with onion. Drain.
  2. Stir in the remaining ingredients and heat over medium heat until boiling. Reduce heat and simmer for 10-15 minutes.
  3. Serve with crackers and enjoy!

Like this post? SHARE it!

Related Posts Plugin for WordPress, Blogger...

Ridiculously Easy Brown Bag Popcorn

I wish I had a dime for all of the “duh” moments that I’ve had in my life. I will not go into any specifics with you, but just know that sometimes I’m not the brightest crayon in the box. 🙂

Now that I’ve thoroughly dissed myself, we’ll move on to this awesome new revelation that I’ve made! It’s been a long time, but a friend of mine guest posted on Saving with Amy about how to make your own popcorn. I remember reading it and thinking oh that’s neat and looks really easy. And then I just moved on with my life to never try it out for myself.

Not sure why I didn’t because I am HOOKED on this stuff now!

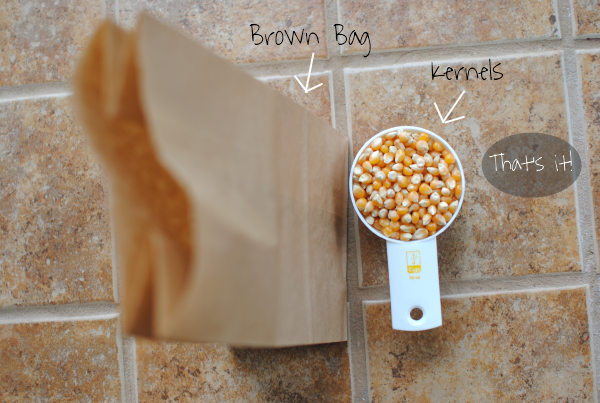
You see, to make about 8 or 9 cups of your very own popcorn, all you need is a brown bag like this one. You can get 50 of them at Dollar Tree for a buck! And you need 1/3 cup of unpopped kernels. You can also get these at Dollar Tree for a buck!

For $2, you’ll have popcorn coming out of your ears…

Have you ever looked inside one of those prepackaged bags of popcorn? There are all sorts of things in there that are pretty much unnecessary. Sure it’s nice to have salt or butter flavor, but with all the added fat too? This easy brown bag method makes it easy to make pure popped corn without adding any extra nonsense. In fact, I actually like it plain just like this. No butter or salt needed!

Just try it once and you’ll be hooked like me. It’s too incredibly simple not to.

Ridiculously Easy Brown Bag Popcorn
Recipe Type: Snack
Author: Pennywise Cook
A brown paper sack and popcorn kernels are all you need to make your very own popcorn!
Ingredients
  • 1 Brown Paper Bag
  • 1/3 c. Unpopped Kernels
Instructions
  1. Pour to kernels into the brown bag. Fold the top down about 2 times.
  2. Place in microwave and heat on full power for 1:45- 2 minutes. This will depend on your microwave, but 2 minutes is about right for mine. Just stop it once there is about 2-3 seconds between kernel pops.

Like this post? SHARE it!

Related Posts Plugin for WordPress, Blogger...

After School Snack: Frozen Peanut Butter Bananas

These days school is jam-packed full of learning, extra-curriculars, and even a taddy little bit of fun. They’ve even moved lunch time up for many kiddos to make room for other activities. Some children eat lunch at 10:00! What is this world coming to? But they are waking up at the crack of dawn so an early lunch isn’t so bad. But as parents we must be prepared to hear those impending words each afternoon….

I’m huuuuuungry. Can I have a snack?

Can you blame them? They have been busy for 7 HOURS. All of that icky math and science can really work up an appetite you know? The least that we can do is give them a snack. Here’s a simple snack idea for your busy student (or hungry parent!).

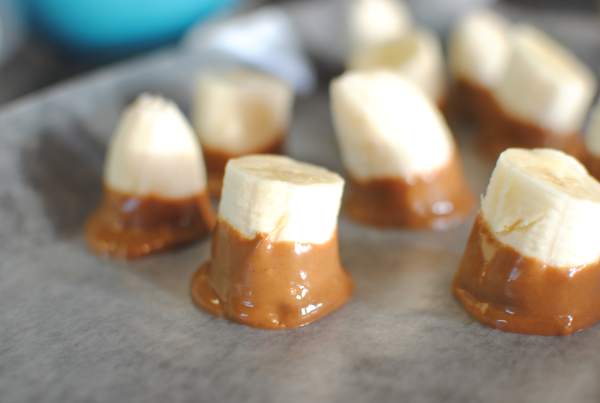
Start by cutting up a couple ripe bananas into bite-size pieces.

Microwave 1/4 cup creamy peanut butter and stir in 1/2 tbsp cocoa powder.

Dip each banana piece into the peanut butter and set on wax paper.

You can drizzle any leftovers on the tops if you’d like.

Freeze for at least an hour and you’re done!

Bing bang bong and you’ve got a very tasty (and healthy) snack! It’s a nice little change from chocolate-covered bananas. The peanut butter actually adds nutritional value with it’s healthy fats and boost of protein. Not to mention the potassium in the banana itself. But who cares about all that? The peanut buttery goodness with a hint of cocoa is super yummy!

Here they are after they are frozen. The peanut butter gets hard, but not as hard as chocolate would so you’ll want to eat them pretty quickly after removing them from the freezer. Ie- don’t leave them sitting around for long periods of time.

YUM!

After School Snack: Frozen Peanut Butter Bananas
Recipe Type: Snack, Dessert
Author: Pennywise Cook
Frozen peanut butter bananas create a healthy afternoon snack!
Ingredients
  • 2 Bananas, Cut into bite-size pieces
  • 1/4 c. Creamy Peanut Butter
  • 1/2 tbsp Cocoa Powder
Instructions
  1. Place peanut butter in a microwave-safe bowl. Heat for about 30 seconds to melt. Stir in cocoa powder until mixed well.
  2. Dip banana pieces into peanut butter and place on wax paper. Drizzle remaining peanut butter over top if desired.
  3. Freeze for at least an hour. Preferably 3-5 hours or longer.


Like this post? SHARE it!

Related Posts Plugin for WordPress, Blogger...

Easy Roasted Broccoli

When I was a kid, I never remember thinking I really want broccoli. In fact, I don’t really remember eating it ever as a kid. The word itself had some type of unappealing association with it so we just never spoke of it. Props to my mom for not shoving it down my throat! Luckily I grew up to love it and I’ve passed on that love to my daughter. Though she won’t touch most things that are green, broccoli is something that she will gladly gobble up in a moment’s notice.

Parental mission, accomplished.

We like to make broccoli many ways around here. Steamed, chopped, swimming in cheese sauce, and in a plethora of casseroles. But mostly, it’s easiest to just roast it to go along with a meal.

When you get a good price on a head of broccoli, stock up and make it for dinner. And if you need an idea for how to make it, consider this roasting method if you haven’t tried this before. It’s quite tasty.

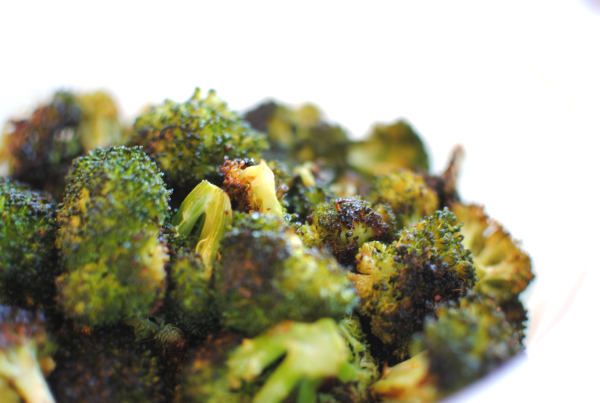
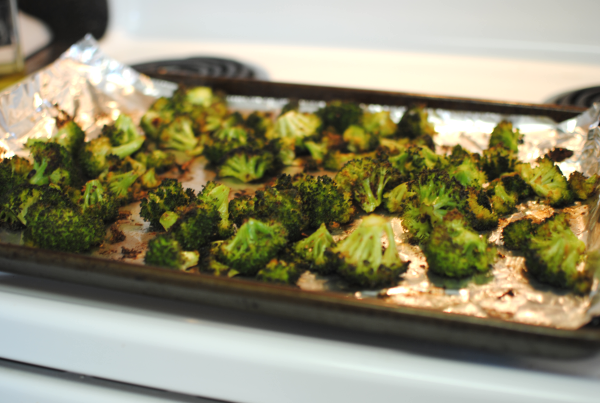
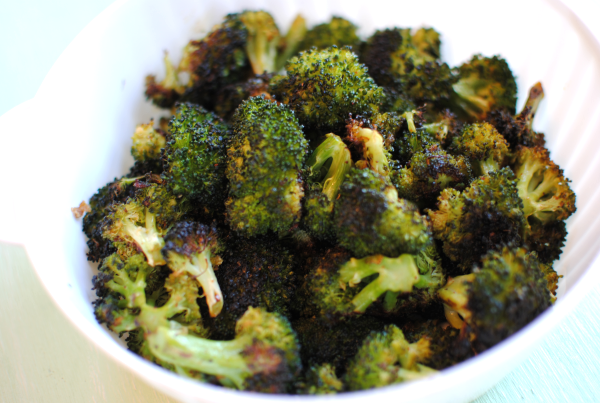
Cut up the head into bite-size pieces. Throw it in a bowl with some salt, garlic (oooooooh, aaaaaahhhhh), chili powder, and of course olive oil. Toss it up and pop it in the oven to get roasted and toasted.

What comes out of the oven is nothing short of amazing. Yummy, flavorful broccoli.

It’s that simple and frugal too!

Easy Roasted Broccoli
Recipe Type: Side Dish, Vegetable
Author: Pennywise Cook
This simple method for roasting broccoli makes for an easy side dish that’s full of flavor!
Ingredients
  • 4 c. Fresh Broccoli (Cut into bite-size pieces)
  • 1/4 Tsp Salt
  • 1 Tsp Chili Powder
  • 4 Cloves Garlic, Minced
  • 1/4 c. Olive Oil
Instructions
  1. Preheat oven to 425°.
  2. In a large bowl, combine all the ingredients and toss well.
  3. Place on a foil-lined cookie sheet. Bake for 20-22 minutes flipping once halfway through cooking.

Like this post? SHARE it!

Related Posts Plugin for WordPress, Blogger...

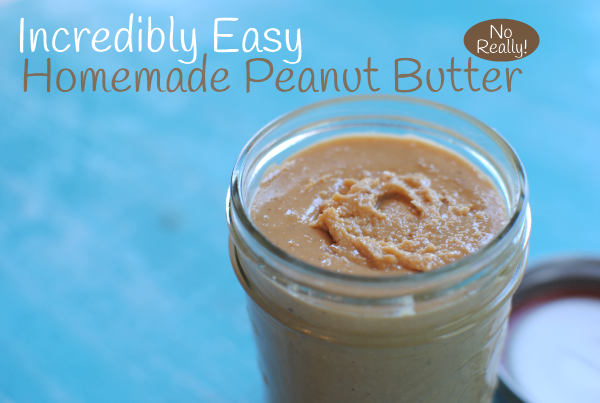
Incredibly Easy Homemade Peanut Butter

How was your weekend? Mine was FABULOUS! Yes, for once I have to say that every single moment was enjoyable. Friday was an impromptu family night which consisted of homemade tacos (mommy didn’t have to “cook”), settling in to watch The Lorax (highly recommended!), and finished off with sundaes complete with cherries on top. Saturday was pretty leisurely. We went to the pet shop to see the animals (cheap entertainment for sure) and ended at Chick-fil-A where we used coupons for FREE Icedreams and played in the playplace. Does a frugal family weekend get any better?

And of course, church on Sunday morning. Which I might have an update on our search coming up so be sure to look for that. Months of searching may have led us right back where we began. Funny how God works, isn’t it?

I was excited to find a deal on peanuts recently as part of the Publix BOGO sale recently. One thing on my list to try and make was peanut butter. It’s seriously been on my list for like months. Now that I’ve made it, I feel like an imbecile because of how simple it is. I would have been making my own peanut butter for months had I known how easy it really is.

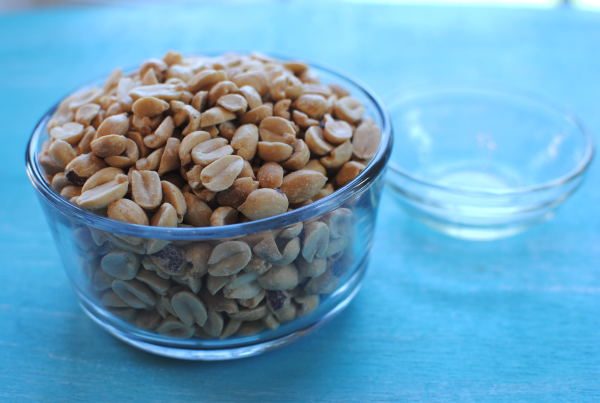
THIS is all you need to make it. Peanuts (DUH), a little bit of oil (whatever kind you have: peanut, canola, vegetable, it really doesn’t matter) and a dash of salt which didn’t make it in my picture. Other optional ingredients include cocoa powder, honey, sugar, brown sugar.

You’ll also want to have a food processor and something to store your homemade peanut butter in.

See what I’m saying? Simplicity at it’s finest here folks.

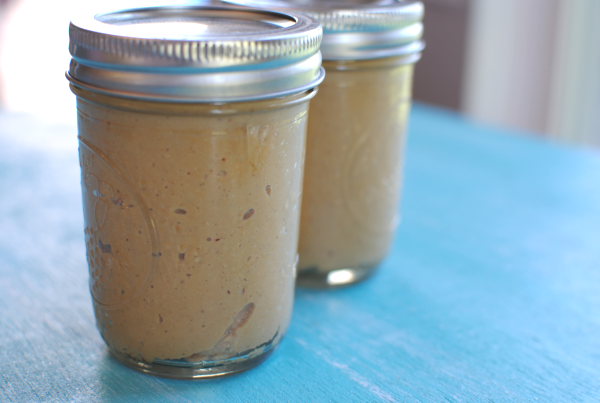
I stored mine in some pint-size mason jars that I had. It’s worked out well. 1 jar of peanuts made me 2 of these jars of peanut butter.

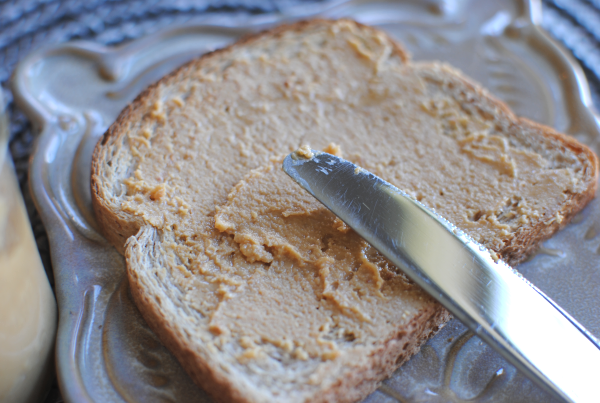
My girls are in absolute love with this peanut butter. I even overheard Addie saying to her daddy yesterday that “I really love momma’s peanut butter. It’s goooooooooood.” I was glowing from the other room y’all. I hardly ever get compliments like that. The only criticism that I received from the hubby was that it might need just a tad bit more salt. I was holding off on too much in case it became too salty. But I know to add just a tad more next time.

Storage: Your peanut butter isn’t equipped with shelf stabilizing ingredients so it will need to be refrigerated. It will last in the refrigerator for up to 4 weeks. (If your family lets it last that long!) You can also FREEZE it! Place it in an airtight container and freeze for up to 6 months. Just be sure to let it thaw before you use it again.

Are you ready to impress your family with your own homemade peanut butter?

Incredibly Easy Homemade Peanut Butter
Recipe Type: Sauce, Condiment
Author: Pennywise Cook
You’ll never believe how simple it really is to create your own peanut butter at home!
Ingredients
  • 2 Cups Unsalted, Dry-Roasted Peanuts
  • 1 Tsp Oil (peanut, canola, etc.)
  • Dash Salt
Instructions
  1. In a food processor, combine peanuts, oil, and salt. Process until desired consistency and smooth.
Notes

It may take a couple of minutes for the peanuts to come to a desirable consistency. They first get chopped, then they begin to really form a paste and then butter.

The oil is completely optional as well. If you’re going for a more natural peanut butter, the peanuts actually have their own oil so it’s not absolutely necessary to add the oil. Just makes for a smoother butter.


Like this post? SHARE it!

Related Posts Plugin for WordPress, Blogger...

Taco Stuffed Peppers

Preface- Sorry for so many red pepper recipes. It was not planned this way, but makes a nice theme anyways. 🙂

Have you ever noticed how when you place the word pizza in a recipe title, it’s usually a big hit. I find that tacos are a very close second. It’s hard not to like something with the flavor of pizza or tacos inside. And when it’s time to get the kids eating a little better, you have to get creative in what you fix.

I debuted stuffed peppers with my family only within the past year. Hubby has never been fond of sweet peppers before. It’s key that the filling be really great to get him to eat it. Popping the peppers in the oven for a little bit of time before filling them will get them started in the cooking process and soften them up just a bit.

The taco filling inside these babies is SO yummy. Onions, beef (or turkey), taco seasoning, and corn provide the perfect taco-y-ness. I just love the words that I make up. Don’t you? That one almost sounds like one my 5 year old would make up!

It’s really the cream cheese that makes them so tasty. I think, anyways.

You can top them with whatever taco fixin’s you’d normally like. The sky’s the limit! I had mine with lettuce and sour cream.

One tip that seemed to make it easier for me was to cut both ends off your peppers. Normally I’d leave the bottom but because there were seeds still hiding and since I don’t like to eat the tough ends, it only made sends to cut it flat on the bottom. Just be sure to use a spatula to carefully move it onto your plate without losing the yummy filling.

These peppers weren’t as soft as I would like them to be. Next time I’ll be making sure that I leave them to cook a bit longer. I used a knife to cut the pepper into strips to eat with my filling. But in a perfect world, the pepper would be much softer and easy to use a fork to gather bites along with the filling.

Enjoy the recipe!

Taco Stuffed Peppers
Recipe Type: Main Dish
Author: Pennywise Cook
Shake up your taco night with stuffed peppers instead!
Ingredients
  • 4 Red Bell Peppers
  • 1 lb Lean Ground Beef
  • 1 Medium Onion, Chopped
  • 1 Pkg Taco Seasoning
  • 1/4 Water
  • 1 Can Whole Kernel Corn
  • 4 oz Cream Cheese
  • 1/2 Cup Shredded Reduced-Fat Cheddar Cheese
Instructions
  1. Preheat oven to 350°.
  2. Cut ends off bell peppers and remove seeds. Place in baking dish and bake for 15 minutes.
  3. In a skillet over medium-high heat, brown ground beef with onion. Once browned, reduce heat. Stir in taco seasoning, water, corn, and cream cheese. Mix well and simmer until cream cheese is completely melted.
  4. Meanwhile, remove peppers from oven and fill each with equal amounts filling. Bake for 30 minutes.
  5. Remove from oven and top with equal amounts shredded cheese. Return to oven to bake for another 10 minutes.
  6. Cool.

Like this post? SHARE it!

Related Posts Plugin for WordPress, Blogger...