Healthy Granola Bars

Its incredible to me the amount of sugar that are in things these days. It’s almost like we humans have adapted to ginormous amounts of sugar and we just keep adding more and more to our foods. At the pediatricians office the other day, she told me that juice boxes are some of the worst things for children to drink. They are on up there with sodas! Come on, JUICE BOXES? Of all things that you expect to be ok for your kids. I was looking for juice boxes to take on an upcoming road trip and decided to take a gander at the nutrition label. 1 juice box had 24 grams of sugar! Insanity isn’t it?

Don’t get me wrong, I like my sugar. In fact, I’d much rather eat something sweet than savory any day. But I love when I can use natural sugars instead of globbing on cups of the granulated stuff.

Granola bars have long been one of my favorite snacks. Simple to grab and go and packed with nutrition. Well most of them at least. Plus, if there’s a chance that I get in a little energy and fiber then I’m all for it. This momma can really use all the help that she can get.

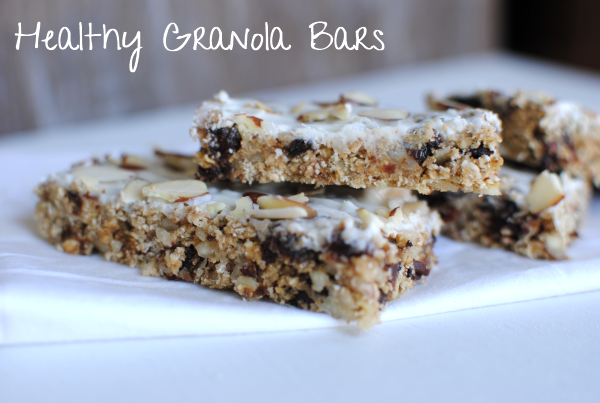
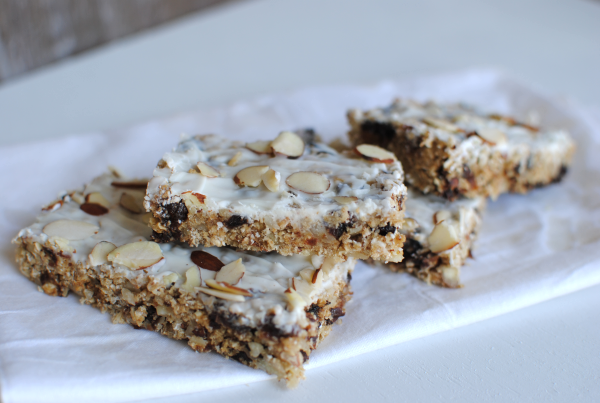
I found this High Fiber Granola Bar recipe and adapted it a bit. While the original didn’t call for any added sugar, I did top mine with a little white chocolate. And I do mean a little. I practiced a little self control and only added a very thin layer. These are packed full of grains and dried fruit along with some natural sweeteners like honey. They do require baking, which I’m sure might not sound pleasant to some of you. But if you have the time to bake these, I’m sure that you’ll like them too. And come on, you have 18 minutes right?

Minus the thin layer of chocolate on top, these are actually low in calories! Score! And my favorite part is that they are heartier than most granola bars. They don’t use rice krispies as filler, but instead use shredded wheat cereal to give you slow-burning carbs.

Recipe adapted from Fitho.
Healthy Granola Bars

Healthy Granola Bars

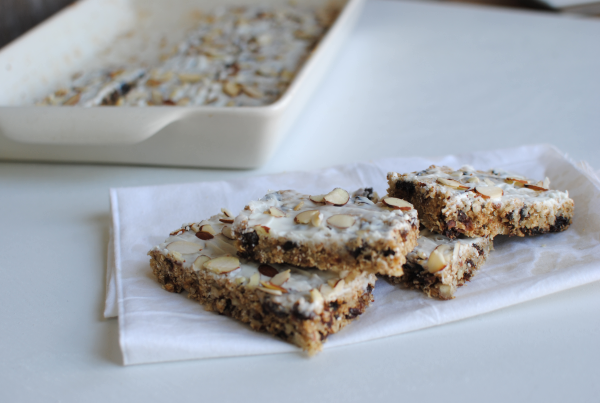
These granola bars are not only healthy and packed full of fiber, they are also quite tasty too!

Ingredients

  • 1 cup quick cooking oats
  • 1 cup shredded wheat cereal
  • 1 cup almonds + 1/4 c. almonds for topping
  • 1.5 cups raisins
  • 1/2 teaspoon ground cinnamon
  • 1/2 teaspoon salt
  • 3 eggs
  • 2 tbsp honey
  • 1 teaspoon vanilla essence
  • 1/3 c. white chocolate chips or almond bark, melted

Method

  1. Preheat the oven to 350°F. Grease a large baking pan and set aside.
  2. Place the oats, shredded wheat, 1 cup almonds, dried fruit, cinnamon, and salt in a food mixer until the mixture is finely chopped.
  3. In a large bowl, whisk the eggs, honey, and vanilla. Add the oatmeal mixture and stir, till its mixed evenly.
  4. Transfer to the baking pan and flatten down gently with the back of a spoon or spatula to spread evenly.
  5. Bake about 18 minutes until the edges turn golden brown and the bars are done.
  6. Remove granola bars from the oven and let cool completely. Meanwhile, melt your white chocolate chips (or almond bark) in the microwave or double boiler.
  7. Pour melted chocolate chips over the top. Sprinkle with remaining 1/4 c. almonds. Stick in the fridge to set until chocolate is firm.
  8. Cut into bars and serve!

Notes

You don't have to use raisins, you can use just about any dried fruit that you wish. Dates would be good or perhaps cherries.

When flattening the mixture into your baking pan, spray the back of your spoon with cooking spray to prevent sticking.

If you want thicker granola bars, use an 8x8 pan. I prefer thinner and longer bars so I used a 9x13 dish.

These are not that expensive to make since most are ingredients that you might have on hand. I got the shredded wheat at Dollar Tree and the Almonds at Aldi. Everything else I found in my own pantry.

http://www.pennywisecook.com/healthy-granola-bars/


Like this post? SHARE it!

Related Posts Plugin for WordPress, Blogger...

Chocolate Gravy

Some recipes come from the back of a can. Others are found in a favorite cookbook. You can even find some pretty amazing recipes just by Googling it. But some of the very best recipes in life are found passed down from relative to relative. You know the ones that are tried and true and your great grandma spent her time perfecting. These are some of the best recipes known to man.
My mom recently whipped up a very tasty concoction that apparently has been made by our family for years. And yet, I had never even tried it!
This isn’t just any concoction either.

We’re talking….

Chocolate. Gravy.

Yes it does exist and I was never told about this until just recently. My sweet grandma just published a book about her life (very interesting read!) and she even talks about this chocolate gravy on her book. So needless to say, I had to make some of this famous chocolate gravy.


Turns out that this recipe was created by my great aunt Janice! It has been a hit for years and she’s the lady behind the chocolate. She also created a chocolate pie that I’ll be trying out real soon.
I’m not going to lie to you. I screwed up this recipe the first time I tried it. Thinking that I would get all smart, I started with milk and butter and added in the flour mixture. Why did I do that? I have no idea. Everyone knows that any rue starts with butter, you add in flour and THEN the milk. After coming to my senses, it turned out perfect. Being me, I also reduced the amount of sugar from 2 cups to 1/2 cup and it still turned out plenty sweet.

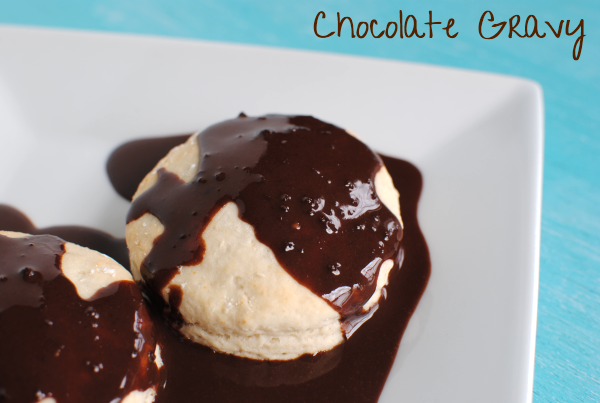
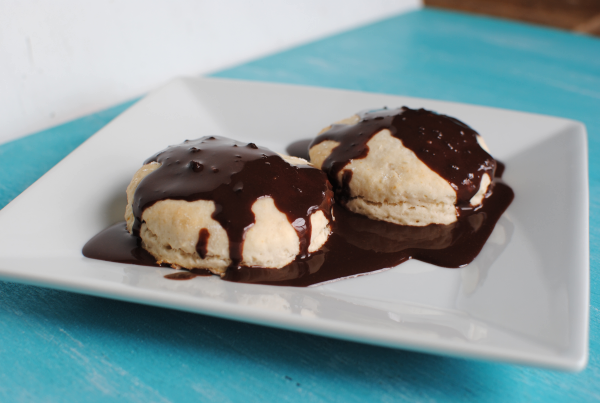
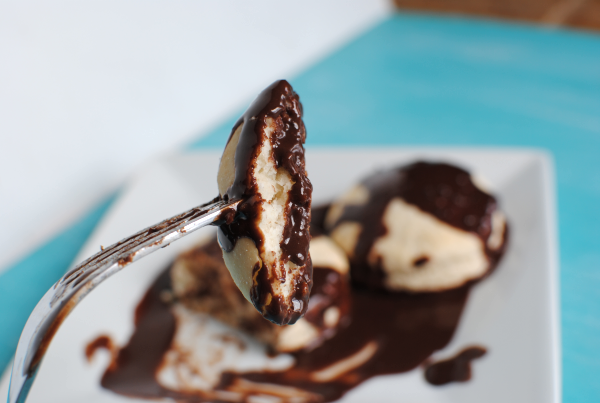
My hat is off to great aunt Janice! This gravy is the perfect chocolatey complement to a couple of morning biscuits. Or perhaps to a bowl of ice cream. Anything that you want to chocolatize really. I loves it on biscuits and I think it would make an awesome topping for cinnamon rolls instead of glaze.
Interested in trying out this spectacular chocolate gravy? Find the recipe below!

Chocolate Gravy

Chocolate Gravy

Biscuits and CHOCOLATE gravy for breakfast!

Ingredients

  • 1/2 c. Sugar
  • 6 Tbsp Cocoa
  • Dash of Salt
  • 1/4 c. Flour
  • 1/2 c. Milk
  • 2 Tbsp Butter

Method

  1. Mix all dry ingredients together in a medium size bowl.
  2. Melt butter in a small saucepan over medium heat. Slowly stir in cocoa/flour mixture.
  3. Slowly stir in milk and simmer over medium heat for 2-3 until combined.
  4. Remove from heat and gravy will thicken as it stands.

Notes

This makes a great topping for cupcakes, fruit, biscuits, and even ice cream.

http://www.pennywisecook.com/chocolate-gravy/


Like this post? SHARE it!

Related Posts Plugin for WordPress, Blogger...

Beach Party On the Cheap

I was making my way through a gigantic sea of knick knacks at Goodwill one day when I came across a set of umbrellas that were made from bamboo. These umbrellas were so unique and somehow I was inspired. I said to myself, I’m going to have a beach party. One might say that I’m silly because we don’t actually have a “beach” per say within 200 miles of us, but that wouldn’t stop me. Here in Tennessee we have plenty of “beaches” at the lakes and rivers. Heck and even at some ponds!

And at my house, all it takes is a kiddie pool made of plastic to create a beach atmosphere.

That and a little imagination and scrapbook paper!

Those $.99 cent umbrellas that I got at Goodwill were just the beginning. I didn’t even need a reason to have a party. I would eventually figure it out. Then a friend of mine (who was very preggo at the time) suggested that I have a Memorial Day cookout so that she could come but not have to have a cookout herself. What do ya know? It will be a Beach Memorial Day Party!

And then I realized that 2 days before that is my baby girl’s 1st birthday. So I combine them and call it a day. This won’t be a yearly thing as eventually Britton will not want her birthday combined, but for now it’s alright.

I don’t think I’ve ever had so much fun planning for a party in my life. Having pretty much full reign to do what I pleased made my OCD happy. (*I don’t really have OCD, trust me. If you saw my house on any given day, you’d agree) Feel free to try these ideas at your party if you’re planning a beach party. If you have a beach to have it at, even better! If not, you can still be just as cool with your plastic kiddie pool. My guests enjoyed it.

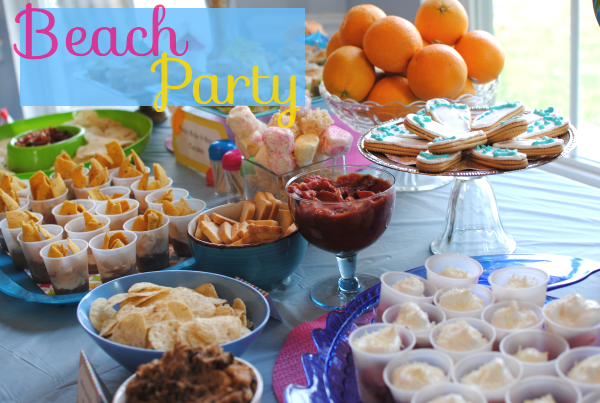
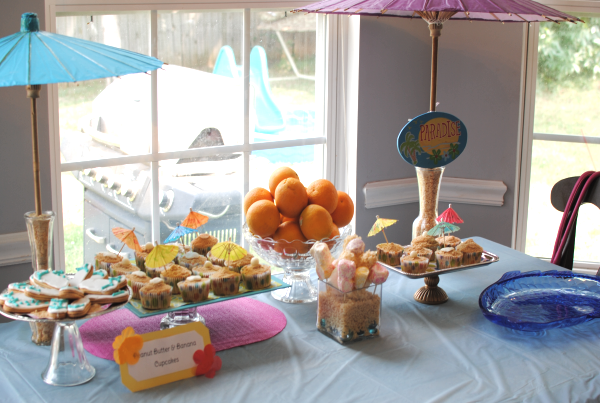
This is the beginning of my table when I first started setting out the goodies. SEE my umbrellas? Aren’t they cute? I also picked up some super cheap trays at Goodwill every now and then when I came across them. Most of my trays cost me about $.49 each. Got them on half price day at Goodwill. See my blue fishie? Love him. If you have never been to your Goodwill….GO! Now! Most have days that are 1/2 price and Wednesdays and Sundays are $.99 day. Certain colors apply and I’m sure the sales are different everywhere but you really can find some awesome deals.

The pink mat is just a placemat that I got at Dollar Tree. Came in a pack of 2.

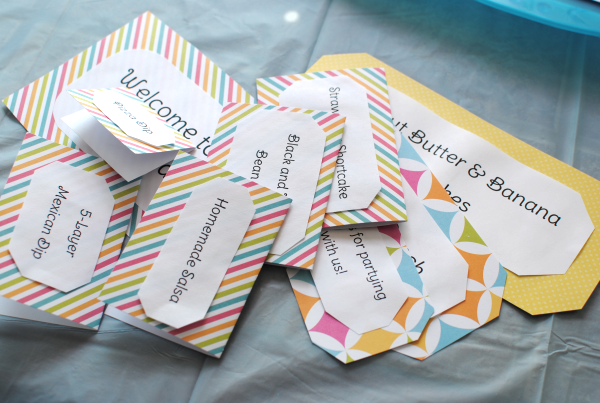
These are my little party signs! These may seem a little too detailed for some, but I think they were necessary. I made 4 different dips and I was pretty positive that I was going to hear “What kinda dip is this?” “What is this?” every time that someone walked up to the food table. I made these out of scrapbook paper and simple printed words on my printer! Cut them up and taped them together. The food signs are just folded in half to sit right next to each appetizer. Plus they add a splash of color and make the table fun.

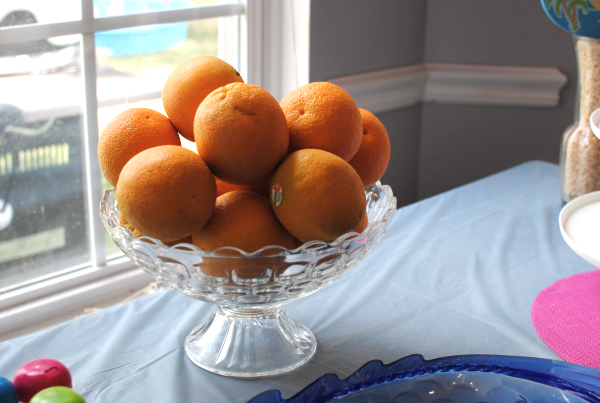
A very simple idea for sprucing up your table without spending a dime is displaying fruit. These Florida oranges really brought that citrus-y beach feel to the table. Plus, if a guest wanted to crack one open they could.

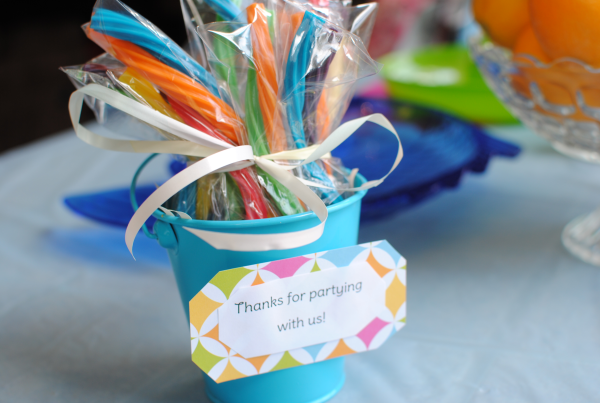
For party favors, I didn’t want to go too childish since there were some mainly there for the cookout so I grabbed a bag of the Rainbow Twizzlers and packaged them in Wilton pretzel wrappers (a couple bucks at most stores) and tied them with a ribbon that I already have on hand. I got the cute little bucket at Goodwill for a quarter and finished it off with one of my cute little scrapbook paper signs.

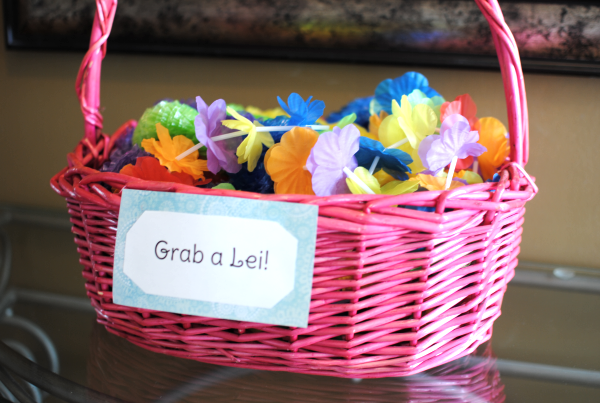
I had this very pink basket just hanging around one of my girl’s rooms so I enlisted it for lei duty. Placed a cute scrapbook paper sign on it and set it by the door so when guests came in they could get a lei and start feeling festive.

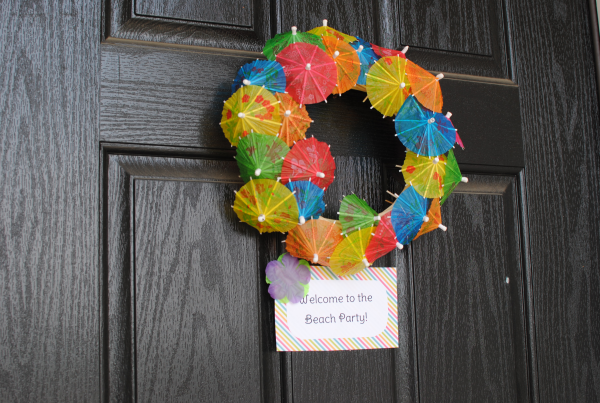
And you KNOW that I was on Pinterest while cooking up ideas for this shindig. I found this fantastic cocktail umbrella wreath idea over at cfabbridedesigns.com. Fit right in with my theme.

This wreath cost me about $2. NO JOKE. I got the pack of cocktail umbrells and the wreath shell at Dollar Tree. I bought 3 packages of the umbrellas but only really used about 1 package since my wreath shell wasn’t that large. You simply open each cocktail umbrella and place it in between the branches of the wreath shell. Most are so tight that you don’t need to glue them or anything. It made a great front door piece to go with my Welcome to the Beach Party sign!

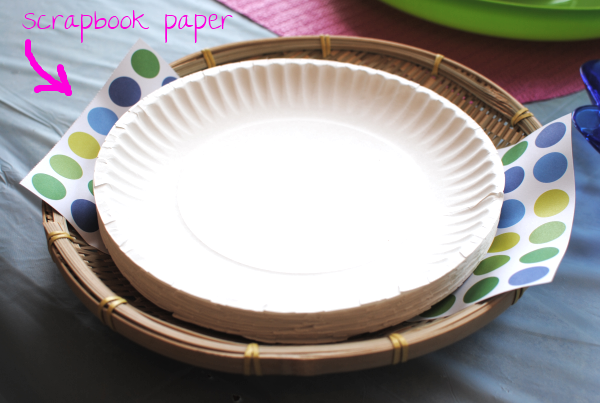
I know this may sound silly, but it’s all in the details. These paper plates would have looked boring if it wasn’t for my little piece of scrapbook paper spicing them up! Don’t you agree? Just nod your head for me. It love how something so simple can make the table look so much fun.

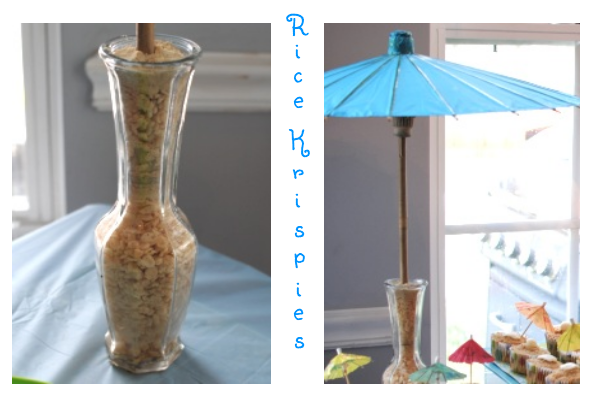
Here’s another little idea that I just kinda made up as I went. The fabulous Goodwill umbrellas were fairly top-heavy and needed good support. I was trying to stick with the neutral sand color theme for their base and then BOOM. It hit me. I saw a box of Rice Krispies sitting out and began pouring them into a vase. Put the umbrella base in and a support was created. I even topped each vase off with graham cracker crumbs to complete the sand look to the umbrellas. Believe it or not the rice krispies did a decent job of holding those umbrellas up! I did add some clear glass beads into the bottom of a couple to give it a little more weight. Those also added a little bit of color to the bottom.

These little darlings were the result of a late night brainstorming session. Finishing up my cupcakes I was staring blankly at a bag of marshmallows. Not sure if it was the sugar high from the cupcakes, the sleepy low from the Tylenol PM or the excitement for the party the next day but something got my mind thinking about those marshmallows.

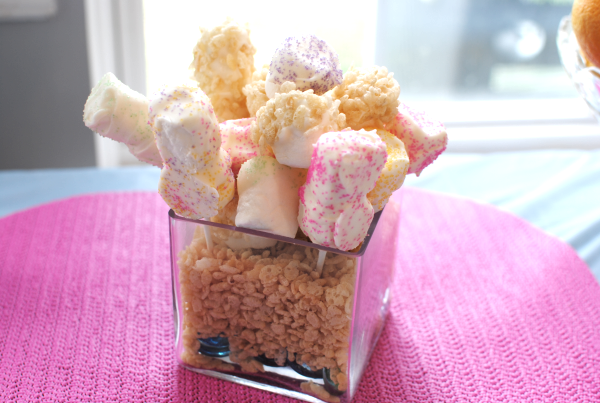
I began microwaving some white chocolate and busted out the sprinkles. I started dipping and putting them on sticks and made these random, but cute, white chocolate covered marshmallows. As you can see, I even dipped some in rice krispies. Not one of these were left when the party was over. And to think that they were almost not even created. I knew sugar highs were good for something!

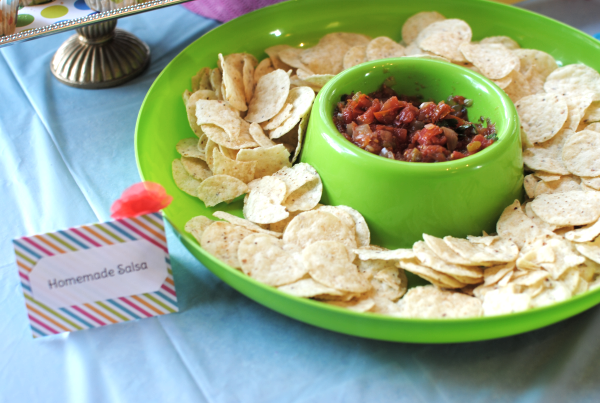
I made up some extremely easy slow cooker salsa (recipe to come!) and it was a great hit. I had to refill it twice. Got everything for it at Aldi for under $4 and the chips at Dollar Tree. I was pretty concerned about the quality of the tortilla chips at Dollar Tree, but not a single person noticed. They tasted just fine!

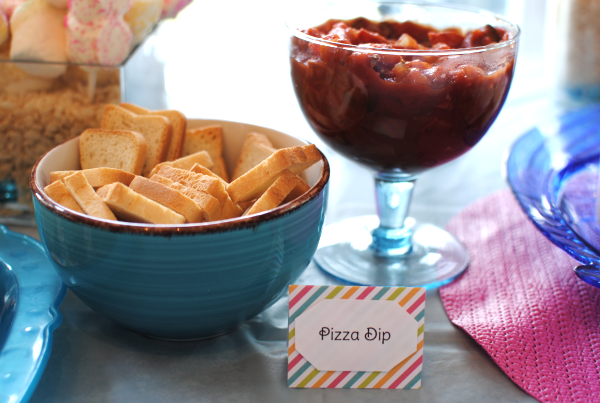
As you can see, I had a scrapbook paper sign by each appetizer. This Pizza Dip was my absolute favorite. I served it with the little melba toasts from Walmart ($.97) and that was a HUGE hit. I had planned to just serve it with tortilla chips, but at the last minute pulled these toasts out. Wish I had gotten more. They were so “fancy” and tasty at the same time! This Pizza Dip was really good. I’ll be sure to post that recipe soon too!

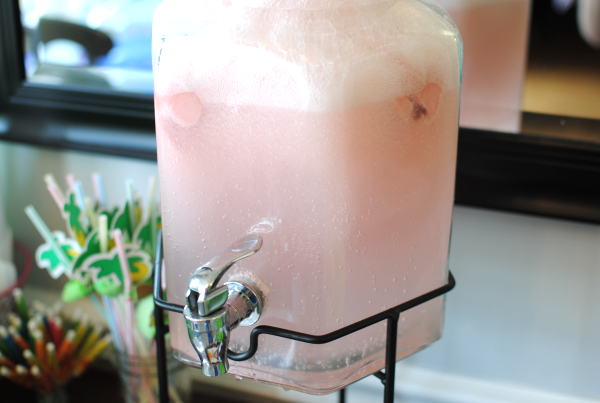
I kinda made up an idea for punch that I honestly didn’t think was that great. That was until the guests tried it and they loved it. I poured about 2 2 liters of Diet Sprite into my pitcher and added in half a tub of raspberry sherbet. Then I added some frozen ice cubes of raspberries to give it more red coloring. This picture was taken before it got really dark. It was a simple punch, but many liked it because it was not over the top sweet.

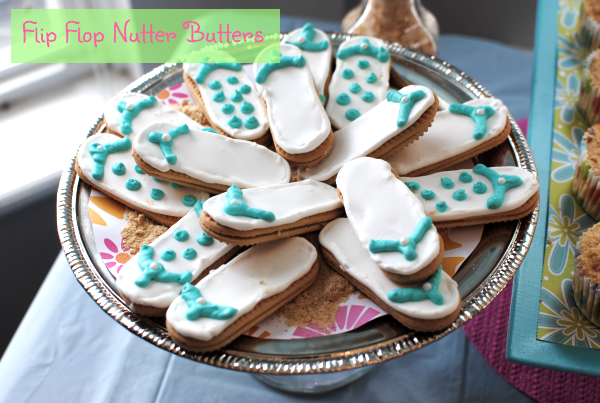
I picked up a package of off brand Nutter Butters at Dollar Tree as well. Found the idea on Pinterest! Added my own little flair with some royal icing and even though they aren’t perfect, they got the flip flop beach-y theme across. Not one of these were left at the end of the party. The kids especially liked them! Since the icing didn’t cost me anything (had all simple ingredients on hand), these only cost me $1! You’d pay way more than that for store-bought cookies like this.

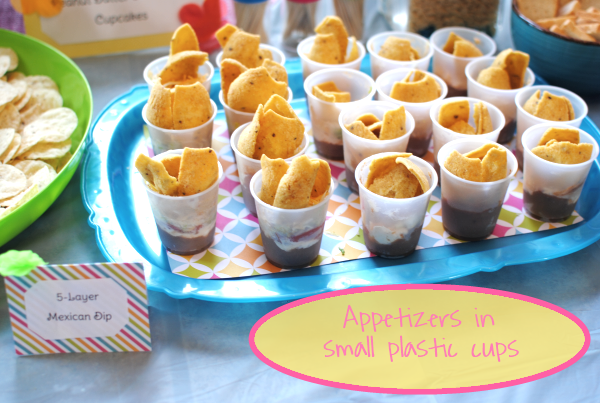
For another easy finger food, I used little bathroom plastic cups to layer 5-Layer Mexican Dip in and topped them with corn chips. I already had the refried beans, tomatoes, cream cheese, and the cups. All I had to buy was the lettuce ($.69), corn chips ($1), and the shredded cheese ($2.99). My tray was from Goodwill ($.49) and of course I couldn’t go without a piece of scrapbook paper to make it beach-y!

The appetizer in small plastic cups is a great idea no matter what appetizer you’re serving. They are a great way for guests to have everything they need in one place without a plate.

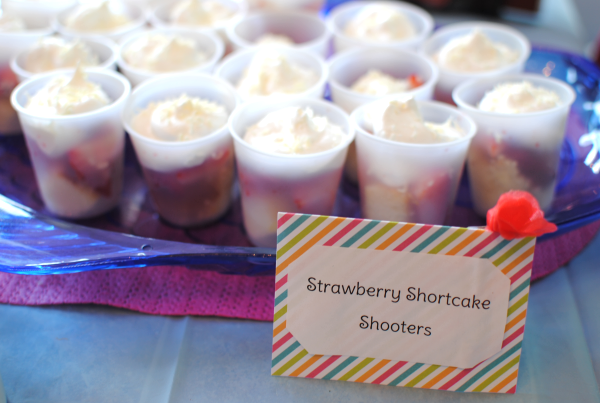
I used the same cup idea with these mini Strawberry Shortcakes. Aldi had their strawberries for $.79 and I grabbed a pound cake there as well for only $.79.  With some whipped cream I already had on hand, these Strawberry Shortcakes were an easy dessert. Each one had a couple of pieces of pound cake along with a few slices of strawberry and a dollop of whipped cream on top.

Easy peasy!

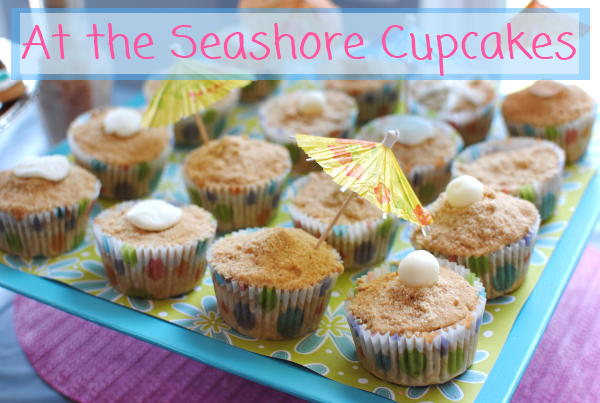
One of the highlights of the party were these At the Seashore Cupcakes. These were Peanut Butter Banana Cupcakes that ended up being a huge hit. I simply crushed a bunch of honey graham crackers and dipped the tops of the cupcakes in them to create the sand look. I topped some with sand dollars and oyster pearls made form candy melts and corn syrup, but quit making them because they didn’t turn out too well and honestly, I got tired. I stuck a few cocktail umbrellas in a few.

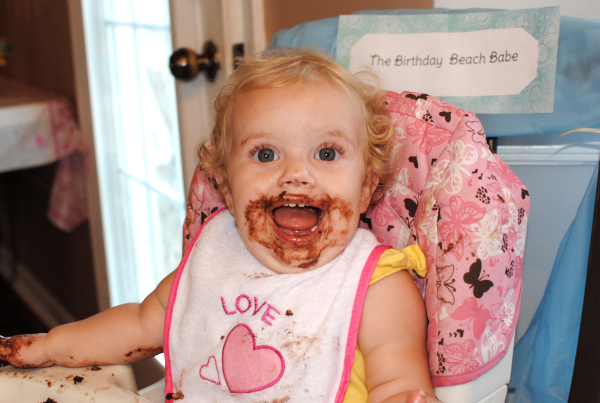
And any birthday party wouldn’t be complete without a special seat for the birthday girl! This one is adorned with a Birthday Beach Babe sign and ribbon. As you can see, she really enjoyed her birthday cake and her beach party! We had a pool setup in the backyard where the kiddos had fun in the sun. Daddy grilled up some hot dogs and everyone snacked on

And just as a general tip for planning any party be sure to plan ahead. The one thing that I made sure to do when preparing for this party was to do whatever I could possibly do, ahead of time. Almost everything was made the day before except for things like the strawberry shortcakes that needed to wait until just before. This was a major time and sanity saver when it came time to party. I wasn’t stuck in the kitchen the whole time and was able to enjoy Britton’s 1st birthday party and all our friends having fun.

I hope that this gave you a few ideas for your next beach party!


Like this post? SHARE it!

Related Posts Plugin for WordPress, Blogger...

Perfect Wheat Dinner Rolls

I can’t think of anything better than a soft, warm dinner roll with melted butter slathered onto it to eat with my dinner. I’m a big fan of Sister Schuberts yeast rolls, but they aren’t so great for my hips so I avoid them at all costs. I can remember there was a point at which we had those with almost every meal at our house. We love them that much. Now I like to make sure we don’t double dose on carbs so I watch how many I include in our meals.

But rolls simply call my name sometimes. They taunt me with their bready and golden pillows of perfection. I smell their sweet, comforting scent that’s fill up the kitchen and feel compelled to grab the butter.

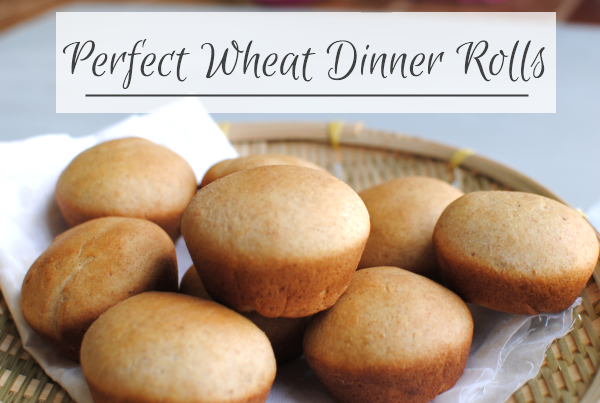
They remind me of potato chips in a way. There’s almost no way that I can eat just one. That’s why I at least try to make them a little more nutritious by making them wheat. I came across this Whole Wheat Rolls recipe at Salad in a Jar that looked easy enough and like it would make a great buns for some sliders that I was making. (Recipe to come!) So I decided to try it out and they turned out perfect!

And between you, me, and the fence post, I had a complete fail making wheat rolls just hours before I made this recipe so you can imagine my relief when these came out of my oven. It was funny too, because my husband came in to find these beauties while my disaster rolls were already at their fate in the trash can. I almost took a picture of them to show you. But I didn’t want you to be biased towards these, so I decided not to. 😉

If you’re looking for a wheat dinner roll recipe for sliders like I used them, or simply to complement your meal you should try this one!

Recipe courtesy of Salad in a Jar.

Perfect Wheat Dinner Rolls

Perfect Wheat Dinner Rolls

Warm and delicious whole wheat dinner rolls make a great addition to any meal!

Ingredients

  • 3/4 cup warm water
  • 1 egg
  • 1 teaspoon salt
  • 3 tablespoons honey
  • 3 tablespoons oil
  • 1 1/2 cup all purpose, unbleached flour
  • 1 1/2 cup whole wheat flour
  • 1 tablespoon vital wheat gluten (optional)
  • 2 1/4 teaspoons yeast

Method

  1. Preheat oven to 350 degrees.
  2. Add all ingredients (in order listed) to a stand mixer with a dough hook or to a bread machine.
  3. When dough cycle is complete or the dough is completely combined in your stand mixer, remove and shape into balls. For dinner rolls, place 2-3 dough balls into the wells of a muffin tin. For slider rolls, fill either 2 8-inch cake pans evenly OR place 1 dough ball into the well of a muffin tin.
  4. Cover pans with a damp towel and place in a warm place to rise for around 30 minutes.
  5. Bake for 10-12 minutes. Brush the tops with butter when you remove from the oven if desired.

Notes

Salad in a Jar describes using a bread machine to mix the dough for use. I don't have one so I opted for using my stand mixer and dough hook. It worked a lot better than I expected for mixing the dough. Just make sure that if you use your stand mixer to give it ample time to combine all the ingredients well.

Using a muffin tin will create the affect of a muffin roll so if you want your sliders to look less like muffins, the cake pan would be the way to go.

http://www.pennywisecook.com/perfect-wheat-dinner-rolls/


Like this post? SHARE it!

Related Posts Plugin for WordPress, Blogger...

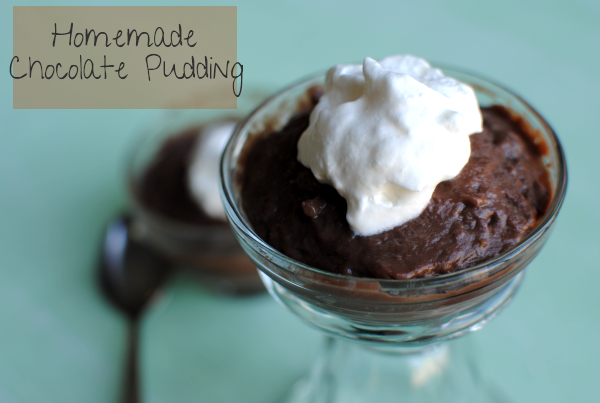
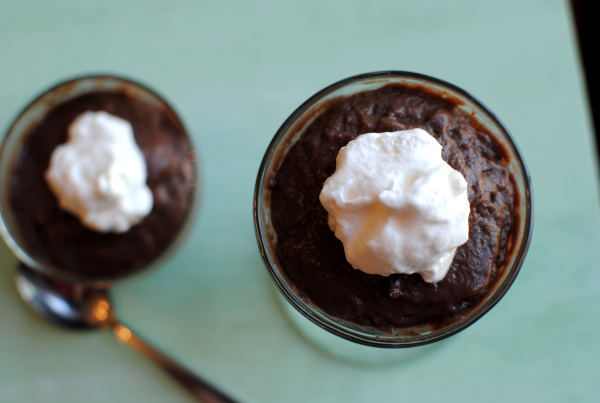
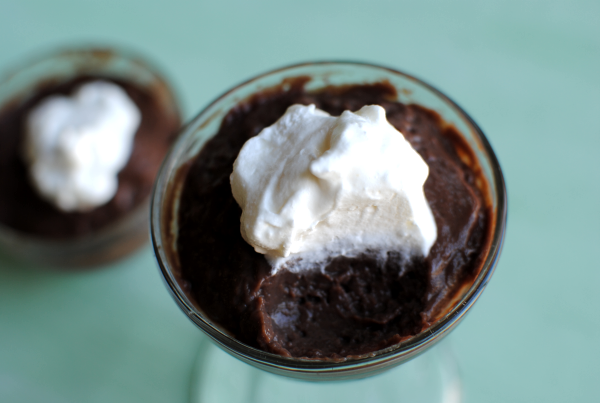
Homemade Chocolate Pudding

Marshmallows, pie crusts, ice cream, loaves of bread, even cookies. All of these things are foods that we tend to buy from the store for convenience. Isn’t it funny how we can get so used to that processed, store-bought taste that we aren’t even familiar with the homemade version anymore?

I’m not complaining about store-bought food. I buy those things just as much as the next person, but with my love of creating and cooking, I can’t help but want to make those things myself from time to time. And usually, the difference in the processed and the homemade are similar yet very different.

Let’s take this homemade chocolate pudding for instance. Until last week, I had NEVER made homemade chocolate pudding before. Why? Because the purchasing of the Snak Packs are just easier.

Or so I thought.

I’m beginning to question every Snak Pack purchase that I’ve ever made. Why chocolate pudding is made of things that I have in my very kitchen every day! And there are no extra preservatives or triglceridontknows in it.

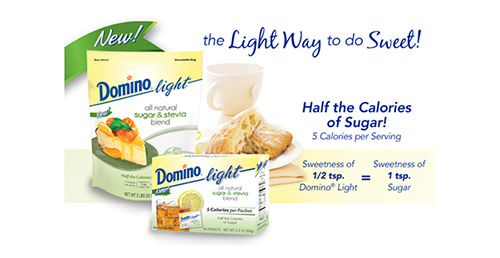
You know me and my healthy makeovers on food. Have you heard of Domino Light? I’ve seen tons of coupons for it, so I was excited to try it out with this pudding. Basically, Domino Light is made from pure cane sugar and the tropical stevia plant. Which means that it’s ALL NATURAL with no added artificial ingredients.

What could possibly make this sweetener better? Oh nothing big, but that it contains HALF the calories of sugar. Plus, you only need a 1/2 teaspoon of Domino Light to be equivalent to 1 teaspoon of sugar which means that your dollar will go further. That means saving money and saving money makes momma happy! It comes in 2lb bags (which is equivalent to a 4lb bag of sugar!) and individual packets too.

You can like Domino Sugar on facebook to get a $1 off Domino Light Coupon! This is a great way to try it out for yourself. There is a Twitter party coming up with C&H/Domino Sugar that you won’t want to miss. You can RSVP to the party HERE as it takes place on August 8th from 5-7pm PST. There will be $500 worth of prizes and gift cards given away.

With every intention of making this chocolate pudding for Addie and Britton, I found myself eating most of it. I shared a teensie tiny bit with my husband too. He had to try it out too you know.

I’m new to stevia so I wasn’t sure what to expect, but the Domino Light was wonderful in this recipe. I’ve used it in every sweet dish over the last 2 weeks and I love it. One thing that I really want to point out about it, is that it’s very similar to sugar. The consistency I mean. You know how some sweeteners are very light and fluffy and don’t really take on the same feel as sugar? This is almost exactly the same texture as sugar itself.

If you’ve never made homemade chocolate pudding before, I urge you to try it out. Place it in small containers and treat it just like a Snak Pack.

Recipe courtesy of Domino Light.

Homemade Chocolate Pudding

Homemade Chocolate Pudding

Only 5 ingredients that you probably have in your kitchen right now can make you homemade chocolate pudding!

Ingredients

  • 1/4 c. + 1 Tbsp Domino Light
  • 1/4 c. unsweetened cocoa powder
  • 1/4 c. cornstarch
  • 2 c. milk
  • 1 tsp vanilla extract

Method

  1. In a small saucepan, whisk together all dry ingredients.
  2. Whisk in the milk 1/2 c. at a time until combined. Place over medium heat and continue to whisk until the pudding thickens and begins to bubble.
  3. Remove from heat and whisk in the vanilla. Pour into a medium bowl or individual serving bowls.
  4. Place plastic wrap on the surface to prevent a skin from forming. Chill for at least 2 hours.

Notes

My pudding didn't thicken at all until it started to boil. So don't fret if it takes a minute for it to begin thickening. Just be sure to keep whisking to avoid having lumps.

This is fantastic with a little whipped cream on top!

http://www.pennywisecook.com/homemade-chocolate-pudding/

This is a sponsored post written by me on behalf of Domino Sugar. All opinions expressed are 100% my own.


Like this post? SHARE it!

Related Posts Plugin for WordPress, Blogger...

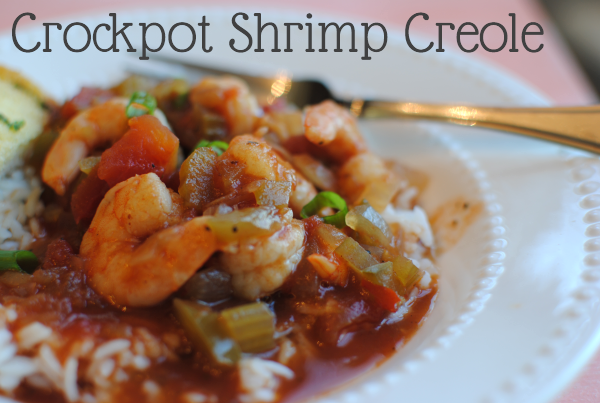
Crockpot Shrimp Creole

Ok, I’ll admit it. I’m lazy….sometimes. Some mornings I don’t want to get out of bed. I despise cleaning and sometimes let my dishes pile up. My husband shares my hate for dishwashing so there are days when we have a stand off to see who will clean them first. Those are usually the days when I don’t want to care about the dishes in the sink, but my secret cleaning OCD kicks in and I go on a very random rampage cleaning everything in sight.

My laziness comes in spurts.

When it comes to cooking, if there are too many ingredients or steps in a recipe then I pass. This busy moms gets distracted easily and a recipe with a gazillion ingredients simply won’t cut it. Hence the fact that many of my recipes are titled, 2-Ingredient This, 3-Ingredient That.

I also hate doing a lot of work for a recipe. If there 2 ingredients, but 1 involves seeding, peeling, poking, punching, baking, staking, grilling, patting, kneading, and THEN you can use it…I’m not interested. One of the ingredients that I’ve always considered high maintenance would be shrimp. I don’t really like to cook with cooked shrimp because I usually get it too rubbery. And raw shrimp has always seemed like too much work. Until recently that is.

I decided to pick up a bag of medium raw shrimp a few months ago because it’s low calorie and something that everyone in my family likes. Since then, I’ve made a variety of meals with shrimp. And you know what? The labor of peeling and shelling them hasn’t killed me! In fact, I love them now. They cook extremely quick no matter what method you use and they don’t need prior thawing. I’m notorious for forgetting to thaw out meat the night before.

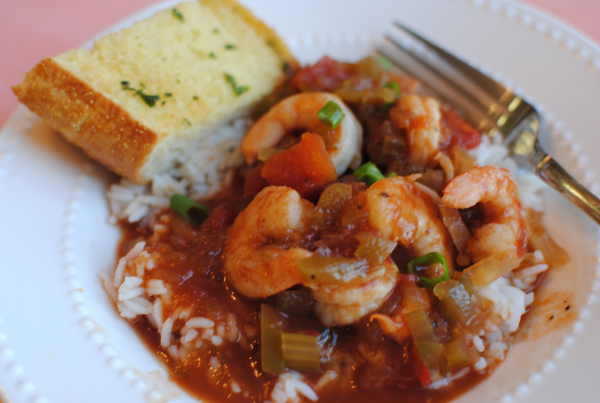
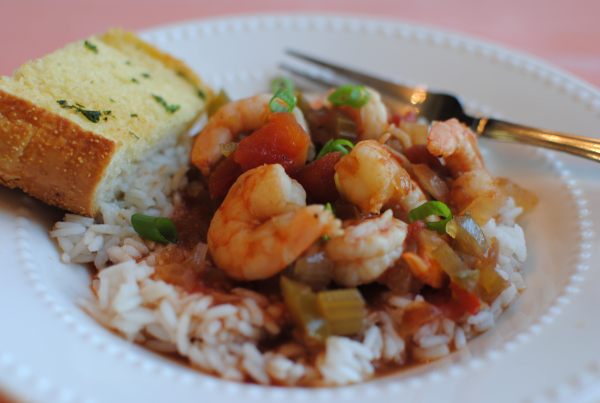
One of my recent and most favorite shrimp dishes was this Crockpot Shrimp Creole. I originally found this at Food.com, but it’s actually a Paula Deen recipe. It was amazing! Definitely makes the peeling and shelling worth it.

I made this while my husband’s parents were here and while we shopped all day. It’s so nice to come home and have dinner waiting, isn’t it? I hope you get a chance to make this and please tell me what you think!

I did adapt this recipe a bit. I added a little water to create more juice to pour over my rice. I also omitted hot sauce. We aren’t very spicy around here.

Crockpot Shrimp Creole

Crockpot Shrimp Creole

Nothing like a good shrimp creole for a comforting weeknight meal!

Ingredients

  • 2 tablespoon olive oil
  • 1/2 cup diced green bell peppers
  • 1/2 cup diced onions
  • 1/2 cup diced celery
  • 1 teaspoon chili powder
  • 1 (14-ounce) can tomatoes
  • 1 (8-ounce) can tomato sauce
  • 1 tomato can of water
  • 1 tablespoon Worcestershire sauce
  • 1 teaspoon white sugar
  • salt and pepper to taste
  • 1 1/2 lb peeled and deveined shrimp
  • green onions for garnish

Method

  1. Place all ingredients except the shrimp into the crockpot and set on LOW for 4-6 hours.
  2. In the last 15 minutes, add shrimp and let cook until orange.
  3. Serve!
http://www.pennywisecook.com/crockpot-shrimp-creole/


Like this post? SHARE it!

Related Posts Plugin for WordPress, Blogger...

Chili Cheese Fry Cupcakes

I think it’s about time that I shared a bad recipe with you. No, not bad as in it tastes like crap, but bad as in naughty. Oh yeah, you know what I’m talking about.

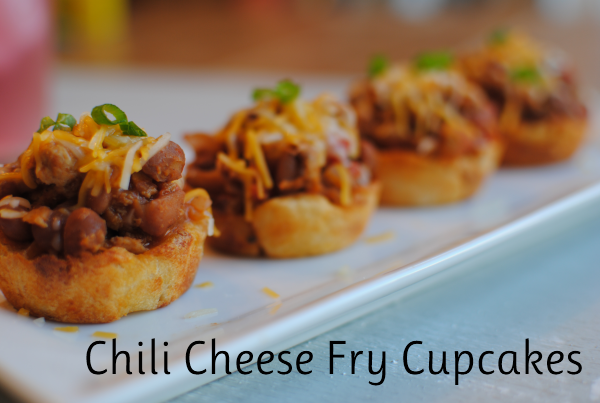
Try chili CHEESE fries. I’m feeling naughty just typing those words. Every now and then I like to take a break from my vegetable eating, low fat loving, and calorie watching to just make something so incredibly yummy that my toes curl. These Chili Cheese Fry Cupcakes come pretty darn close.

As you’d expect, I used ground turkey which makes me feel just a taddy bit better about them. I also used part skim low-moisture cheese which is also a little better. Besides that, all bets were off.

I started off by microwaving some store-bought steak fries until they were soft. Next time I will be making the fries from scratch in order for them to be softer. These ended up a bit crunchier than I would have preferred, but they were smothered in chili and cheese so I can’t complain too much.

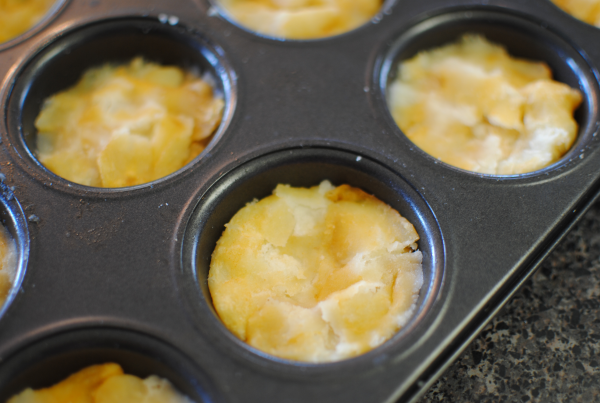
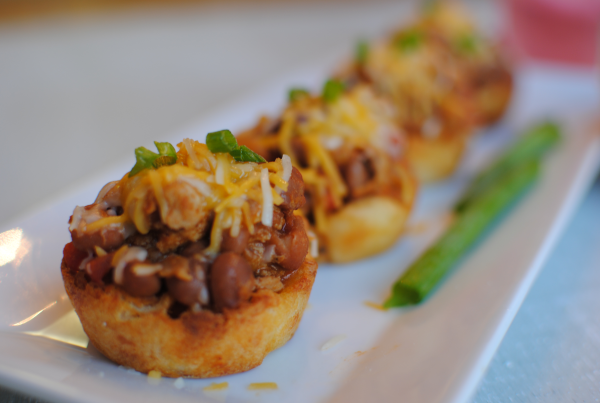
Once the fries are softened, you squish them into muffin tin wells to make the base of your “cupcake”. Believe it or not, but your muffin tin will take an entire bag of steak fries. Then it’s a matter of baking them a bit and letting them cool a minute before topping them with your fantastically easy homemade chili and melty cheese.

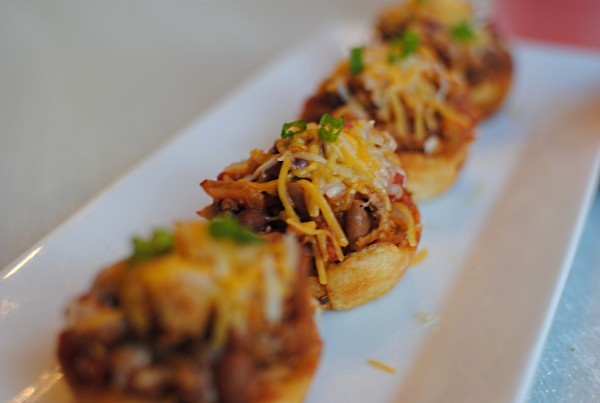
The result is nothing short of amazing. You have fries, chili, and cheese all in your hand. The only thing that could make this better would be….well,…….sour cream. (Which I unfortunately did not have otherwise I would have put a dollop on these)

I got the idea for these gems over at 1 Fine Cookie. I made the chili part up myself in an attempt to make it fast and wow did it come out well!

Chili Cheese Fry Cupcakes

Chili Cheese Fry Cupcakes

These cupcakes are anything but dainty. Chili, cheese, and fries come together to create the ultimate savory cupcake.

Ingredients

  • 1 Package Frozen Steak Fries (or create your own fries)
  • 1 Pound Ground Turkey
  • 1 Can Ranch Style Beans
  • 1 medium Onion, Chopped
  • 1 Can Rotel
  • 1 Tsp Chili Powder
  • 1 Tsp Garlic, Minced
  • Salt and Pepper to Taste
  • 2 Cups Shredded Cheddar Cheese

Method

  1. Preheat oven to 375 degrees.
  2. On a large microwavable plate, microwave steak fries for about 4 minutes or until soft. (You may have to do this in batches) Let cool.
  3. Squish and flatten equals amounts of fries into the muffin tin wells.
  4. Bake fries for about 25- 30 minutes. Do not overbake or else they will be hard as a rock.
  5. Meanwhile, brown ground beef with onion and garlic.
  6. Add in beans, rotel, chili powder, and salt and pepper to taste.
  7. Once potatoes are done, removed from muffin tin and allow to cool.
  8. Place a spoonful of chili on each of the fries. Next top with equal amounts shredded cheese.
  9. If desired, place cupcakes in the oven to allow the cheese to melt for a moment or two.
  10. Serve with sour cream and green onions if preferred!

Notes

If you do plan to make your own potato fries (I will do this next time!), parboil your fries a bit before placing them in the oven to crispy a little. Then squish them into the muffin tins before baking them one last time.

http://www.pennywisecook.com/chili-cheese-fry-cupcakes/


Like this post? SHARE it!

Related Posts Plugin for WordPress, Blogger...

Freezer Peanut Butter and Jelly Sandwiches

School is either out or almost out in most places. Just because school is out doesn’t mean that you can quit making lunches. The familiar I’m huuuuuuuuuuuungry will haunt you if you do! Well come to think of it, that will haunt you even if you do make lunches. Whether you work or you don’t, it’s always a good idea to make life easier by taking a few shortcuts.

I had my precious Britton about this time last year. 1 year on Friday to be exact. In preparation for my hands being tied up breastfeeding or changing diapers, I knew that I had to take a few shortcuts in order to keep myself sane. So I decided to make up a bunch of PB & J sandwiches and freeze them for a quick lunch for Addie. This shortcut basically was a Godsend during the first 2 months. I was struggling with breastfeeding and getting used to those sleepless nights again so every little bit helped.

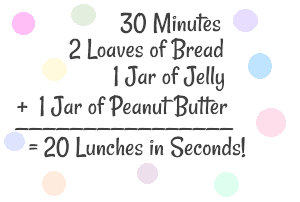
I’ve done some “mom math” for you to approximate the handiness of this shortcut.

It’s quite simple really. Everyone knows how to make a PB&J. Make a bunch at once and you’re set for practically a month! This math only calculates for using 2 loaves of bread, but technically I think you could get 3 out of it. I had quite a bit of peanut butter and jelly left over after using up the bread loaves.

This is really the only word to describe how freezing PB&Js can make your life. I couldn’t help myself from making a word with my sandwiches. Humor me please.

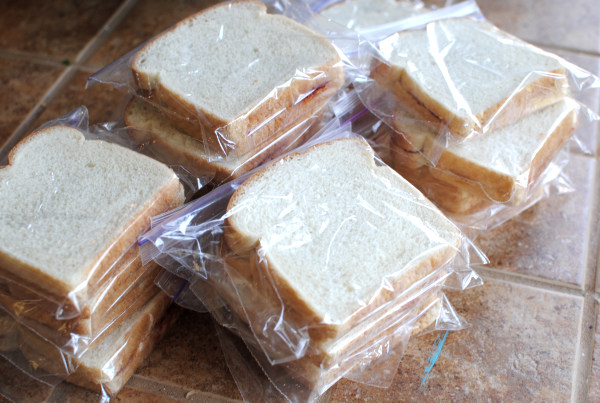
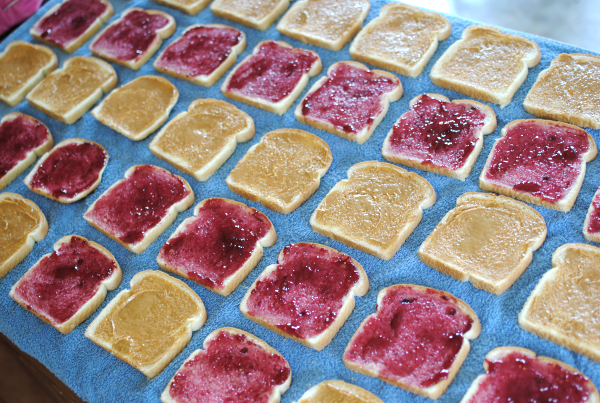
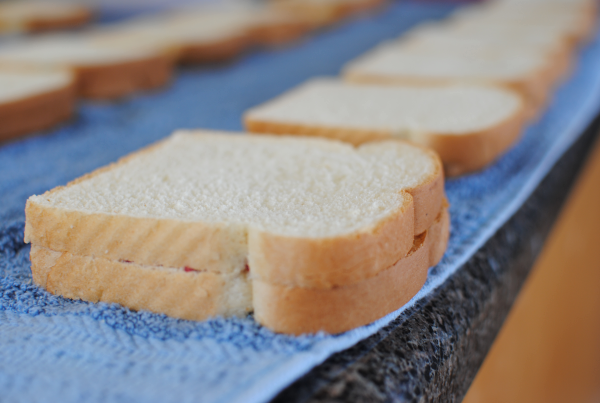
I don’t think that I’ve ever been so excited about a counter full of bread slices in my life. They represent time to me. Time that I can be washing dishes. Time that I can be eating my own lunch. Time that I could be sitting for a split second. You know, the important things.

Here are some questions that you might have about freezing PB&J Sandwiches:

Do you make them any special way for freezing?
Nope! Make them like you would regularly enjoy your PB&Js and pop them into a ziploc freezer bag.

Do they become soggy when you heat them up in the microwave?
This depends. If you overheat them, the jelly side does tend to become soggy so it’s imperative that you don’t overheat them.

How long do you reheat them in the microwave?
Depending on your microwave, this would be around 12 seconds. It’s better to have them a tad cold than overheated and soggy.

What if I am placing the frozen PB&J into a lunchbox for later that day?
The sandwich will simply thaw out on it’s own and most likely be just right at lunchtime!

I’m actually on a freezer cooking journey right now. Not necessarily for dinners, but for breakfasts and lunches. There is just not enough time in the day to create elaborate dishes for those meals so why waste your day doing so? Take shortcuts to make your life easier during the day and then create something amazing for dinner instead.

Can’t wait to share with you some other meals that I’ve stocked my freezer with! But this one just might change your life.


Like this post? SHARE it!

Related Posts Plugin for WordPress, Blogger...

Mini Cheeseburger Pies

When my husband and I were dating like a million years ago (or so it feels), we actually went on dates to McDonald’s. Not only were both incredibly cheap tightwads, but my husband had a crazy obsession with none other than…..dom dom dom, McDonald’s! Yes, he was (and still is) a cheeseburger fanatic. I even had a cheeseburger birthday cake made a couple years ago. Needless to say that he is all-American and loves his American food.

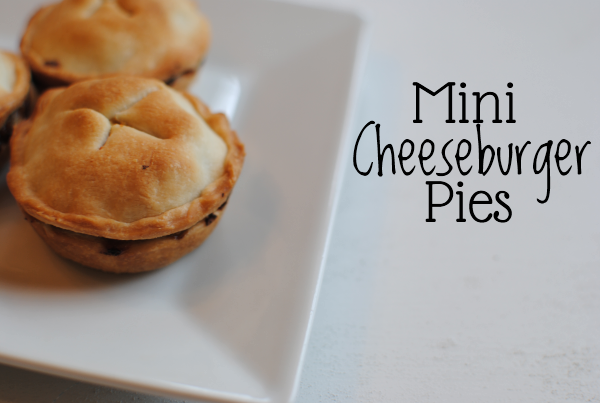
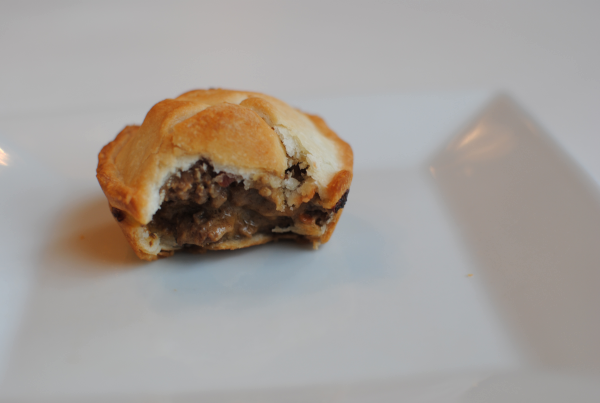
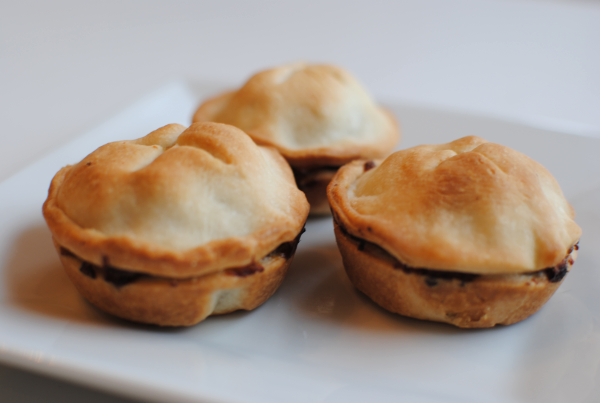
He’s not always easy to please, but as long as he gets his cheeseburger every now and then he’s good! In honor of him, I made up these amazing Mini Cheeseburger Pies that honestly was a little unplanned. It was one of those days when I was feeling experimental and I was on a path to one idea and ended up with another. I’m glad that this is where I ended up! These were sooooo good.

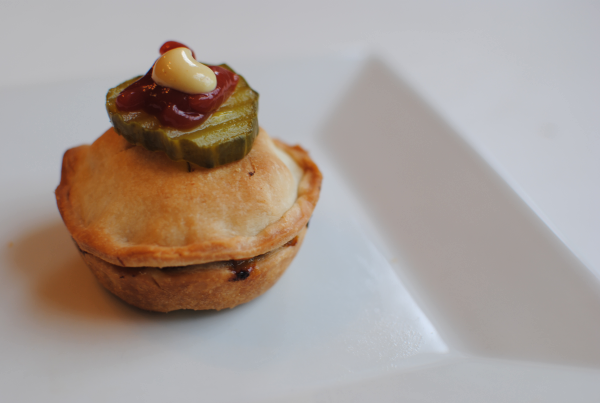
Using store bought pie crusts that I got 2 for $1.99 at Aldi, I filled them with a cheeseburger filling and topped them with whatever each family member wanted. My daughter Addie has just realized that she likes pickles. (I know right? Where has she been?! Pickles are yummy.) So she got those on her’s.

See? How adorable. What a great idea for a party. These aren’t too small but they also aren’t huge either so they could be used an appetizer also.

They are so simple too. I have a good feeling these would also freeze well.

Mini Cheeseburger Pies

Mini Cheeseburger Pies

This miniature version of cheeseburger pie is a perfect appetizer or party food!

Ingredients

  • 1 lb Ground Beef
  • 2 Premade Pie Crusts (or homemade if you prefer)
  • 1 Medium Onion, Chopped
  • 2 Tbsp Worcestershire Sauce
  • 1 Tbsp Ketchup
  • 1 Tbsp Djon or Yellow Mustard (whichever you prefer)
  • 2 Tsp Garlic, Minced
  • 4 oz Velveeta Cheese
  • Salt and Pepper
  • Bacon Pieces (Optional)

Method

  1. Preheat over to 450 degrees.
  2. In a large skillet over medium-high heat, brown mean with onion and garlic. Drain.
  3. Add worcestershire sauce, ketchup, mustard, and Velveeta. Stir until combined.
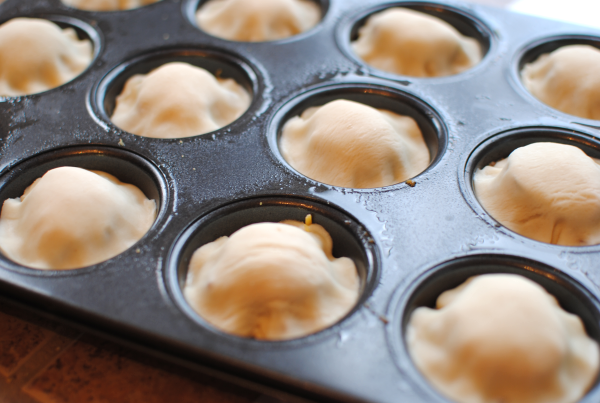
  4. Meanwhile, using a glass or biscuit cutter, cut 2 and 3/4 inch circles out of pie crusts. Place circles into a greased muffin tin using the leftover scraps to piece together more.
  5. Fill each crust with equal amounts of meat filling. Add bacon pieces last if desired.
  6. Place a second pie crust circle on top of each pie and press down around the edges to help it seal.
  7. Cut a T slit in the tops to prevent them from bubbling up.
  8. Bake for 12 minutes or until golden brown.
  9. Serve with your favorite cheeseburger condiments!
http://www.pennywisecook.com/mini-cheeseburger-pies/


Like this post? SHARE it!

Related Posts Plugin for WordPress, Blogger...

Sugar Cookie Ice Cream Bowls

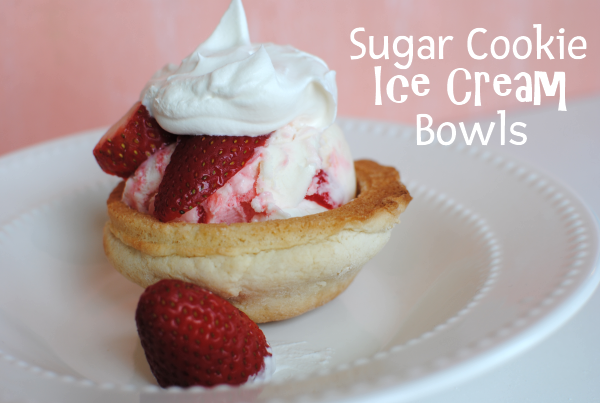
I was busy making up cookies for Addie’s 5th birthday last week. Which by the way, I am still in shock that I have a 5 year-old. Doesn’t seem possible that she is already that big. I’m going to try to get over it and not have a mini meltdown. Instead, I’ll just eat a SUGAR COOKIE BOWL full of ice cream! I got the idea from this picture. Pretty self explanatory.

Yeah, it’s quite an epiphany. Eating ice cream out of a cookie? I’m totally down with that. I think the only thing better than that would be eating ice cream out of a brownie. Hmmm, I’m getting ideas….

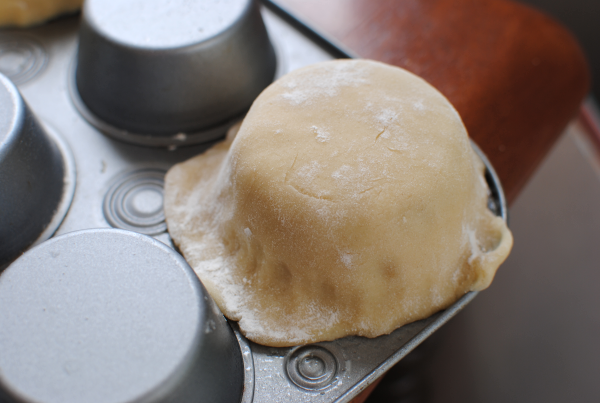
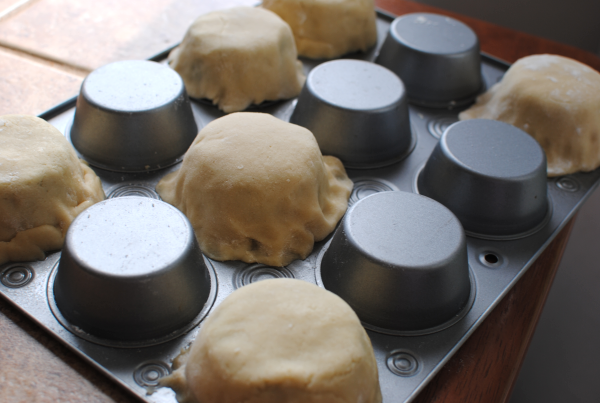
It’s best to have a good batch of sugar cookie dough to use. I found the BEST recipe last week and it worked like a charm. You simply lay the dough over the muffin tin cups and bake as usual.

You can also cut the dough using the top of a glass to get a perfect circle. Or you can just wing it like I did. I even had to patch a few up. It didn’t matter though because they still baked up fine.

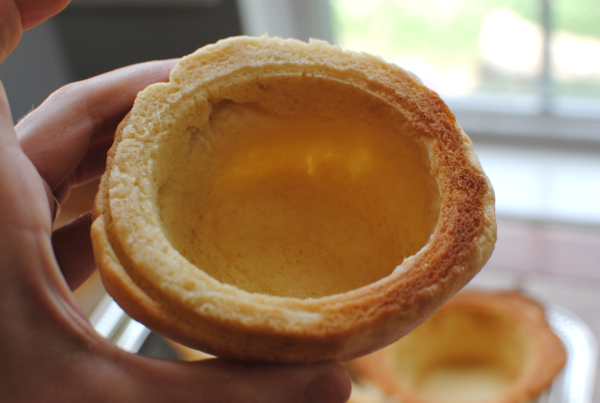
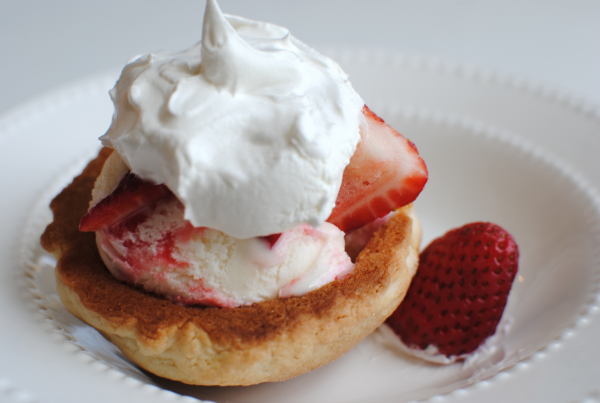
Tah dah! Oh yeah, it’s a bowl that’s a sugar cookie. Incredible isn’t it? This is where you place your ice cream…

Or even fruit if you’re being good….

Sugar Cookie recipe courtesy of Spark People.

Sugar Cookie Ice Cream Bowls

Sugar Cookie Ice Cream Bowls

Eat your ice cream out of a sugar cookie!

Ingredients

  • 1 1/2 cups - granulated sugar
  • 2/3 cup - butter (or shortening - half of each is recommended)
  • 2 whole eggs
  • 2 Tbsp - 2% milk
  • 1 tsp. - vanilla extract
  • 3 1/4 cups - white flour
  • 2 1/2 tsp - baking powder
  • 1/2 tsp - salt

Method

  1. Cream butter and sugar together in a large bowl. Add eggs, extract, and milk and mix well.
  2. Mix dry ingredients with a wire wisk in a medium bowl. Add dry ingredients to wet ingredients in large bowl. Mix until combined well.
  3. With hands, shape dough into a ball. Wrap with plastic wrap and refrigerate for 2-3 hours.
  4. Meanwhile, preheat oven to 400 degrees F.
  5. Lightly grease muffin tins. Roll half or 1/3 of the dough at a time on a floured surface. Keep the rest in the fridge.
  6. Roll dough to 1/8-1/4 inch thick.
  7. Flour a glass or cup and cut shapes. Re-roll trimmings and reshape. Place over muffin tin wells making sure to cover the whole thing with no holes.
  8. Bake for 8 min or until light brown.

Notes

You are free to use whatever sugar cookies your prefer, even store bought. I just found this recipe to be really great to molding and rolling.

It's not a bad idea to make your dough the night before and roll it out in the morning. The colder it is, the easier it is to work with.

This works with chocolate chip cookie dough too!

This recipe makes a LOT of dough (like 72 cookies depending on your size) so if you only plan on making a few, half this recipe.

http://www.pennywisecook.com/sugar-cookie-ice-cream-bowls/


Like this post? SHARE it!

Related Posts Plugin for WordPress, Blogger...