Crockpot Pinto Beans and Cornbread

There are a lot of meals that I remember my momma making when we were growing up. Some that I liked and some that I (as a kid with immature taste buds) I could have lived without. Of course, it’s the ones that I liked that I remember the most and now make for my family. This is one of those meals.

I want to start by pointing out that no, the cornbread is not cooked in the crockpot with the beans. Unfortunately, you’ll have to do some hard labor and bake your cornbread in the oven. When I made this the other night, I found a new cornbread recipe and it is absolutely divine. It’s so divine, that I plan on giving it it’s very own post. So stay tuned for that.

As I was saying, this meal takes me back to those comforting nights as a kid. Coming in from playing outside all day to have warm, hearty pinto beans served with crusty cornbread. They make the most amazing combination. This isn’t really even a “summer” dish, but I still make it in the summer anyways.

Start by soaking your bag of pinto beans in a big bowl overnight. This will soften them up and get them better prepared for cooking. This may sound like a difficult task, but really it’s not. Place your beans in a bowl covered in water and go to bed. Easy peasy!

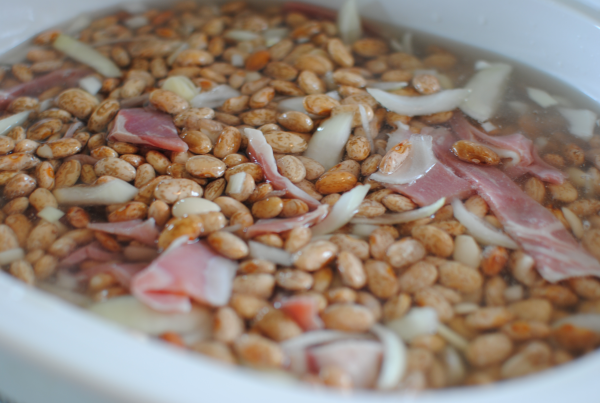
Then the next morning, drain that water and throw the beans in your crockpot with a chopped onion or two along with some nice and salty country ham pieces. DON’T season them yet. Since they are still quite hard, they won’t absorb any of that seasoning just yet so hold off on that salt and pepper.

Oh yeah, you can see where this is going.

In the meantime, between checking your email and watching Grey’s Anatomy (all that very important stuff that you do), bake up a batch of your favorite cornbread. Like I said, I have an amazing recipe that I will be sharing, but for now I have to leave you on the edge of your seat.

So bake that up and set it aside until your ready to eat up. You are now free to season the beans too!

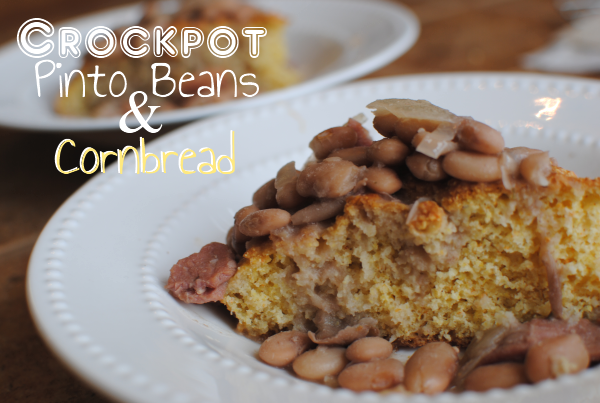
After a few hours you’ll have an incredible meal.
Crockpot Pinto Beans and Cornbread

Crockpot Pinto Beans and Cornbread

Hearty and comforting, pinto beans and cornbread make a match made in heaven.

Ingredients

  • 1 Bag Dry Pinto Beans
  • 1 Small Package Country Ham Pieces
  • 2 Medium Onions, Chopped
  • 1 Batch Cornbread (Your Choice)
  • Salt and Pepper to Taste

Method

  1. The night before you plan to eat your meal, place your pinto beans in a large bowl and cover with water. Let sit overnight.
  2. The next morning, drain beans and place in the crockpot along with chopped onions and country ham pieces. Fill crockpot with an inch or 2 of water above the beans. Let cook on low for 6-8 hours or high for 4-6 hours.
  3. Meanwhile prepare your cornbread of choice. Season beans with salt and pepper once they have been cooking and their lines have disappeared.
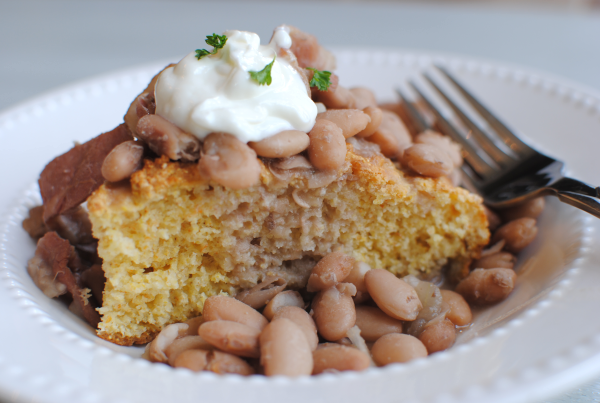
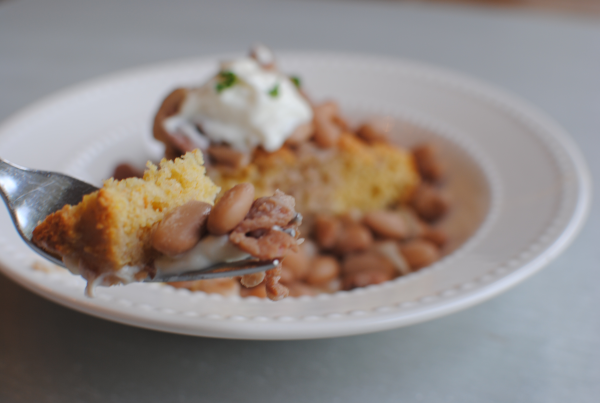
  4. To serve, pour beans over cornbread and let the juices soak in.

Notes

You'll notice that a couple of my pictures have sour cream on them. That was something new I was trying. Some people like sour cream on their pinto beans so I thought I'd try it out. It was eh to me. I could take it or leave it really.

Sometimes I even place my cornbread down in a mug and pour the beans over it in the mug. This is honestly one of the best ways to eat it!

http://www.pennywisecook.com/crockpot-pinto-beans-and-cornbread/


Like this post? SHARE it!

Related Posts Plugin for WordPress, Blogger...

Cinnamon Sugar Roasted Chickpeas

My sister has been making fun of me lately. This isn’t really anything new because she has always done this. We’re 4 years apart so it’s what you would expect. Back in the day she would make fun of me for the way I walked or the way I’d say something. You know, silly, ridiculous picking-on-your-sister kinda stuff. Now that we’re older, I’m used to it. It came with the territory of being the family baby.

Nowadays it’s things like her latest picking about my use of chickpeas in recipes. She thinks I’m silly for using them in so many dishes and in things that you wouldn’t normally expect to find them in. It’s alright, she can just pick away because I love my chickpeas! And for the record, I love my sister too.Very much so. It’s her birthday today so I want to wish her a happy one! I might just buy her a can of chickpeas! 😉


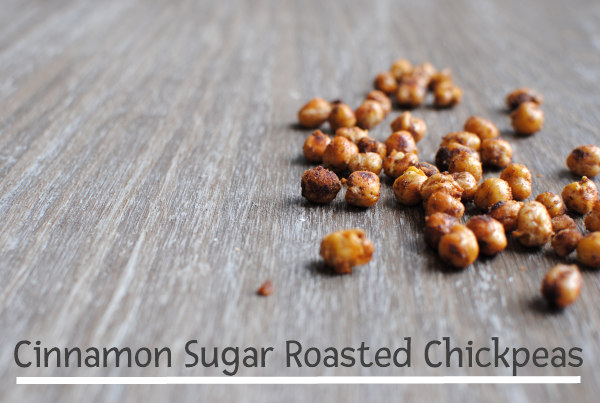
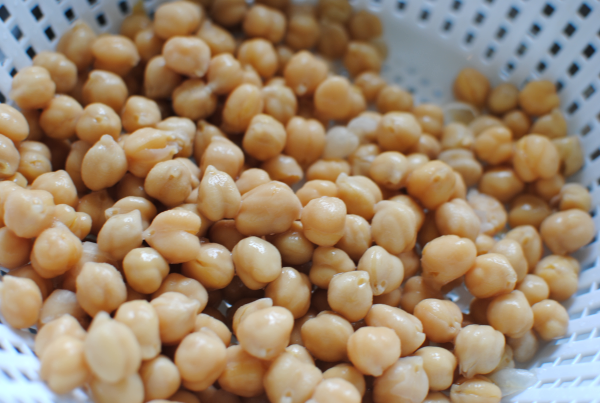
Yes, I admit it. I am a fan of chickpeas, otherwise known as garbanzo beans. I like them right out of the can on salads, mixed into cookies or cakes, and my newest favorite- roasted in the oven for a snack! The best part of roasting them is that they can go savory or sweet. I have a sweet tooth the size of Texas so I usually go that route.

I came across a recipe for Sweet and Salty Roasted Chickpeas over at The Cupcake Project and HAD to make them! I made a few slight changes and they were incredible. These are so incredibly cheap and easy to make and it’s awesome that these make for such a healthy snack too.

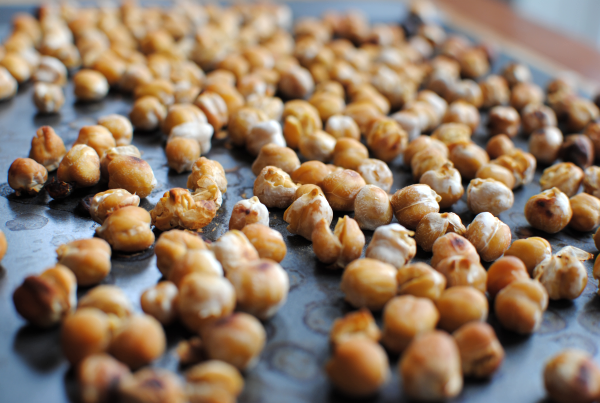
The first step is the easiest. Bake them for 30 minutes without doing a thing. Of course you’ll want to bake them on parchment paper or a nonstick baking mat. It’s only after they cook that you add the yumminess.

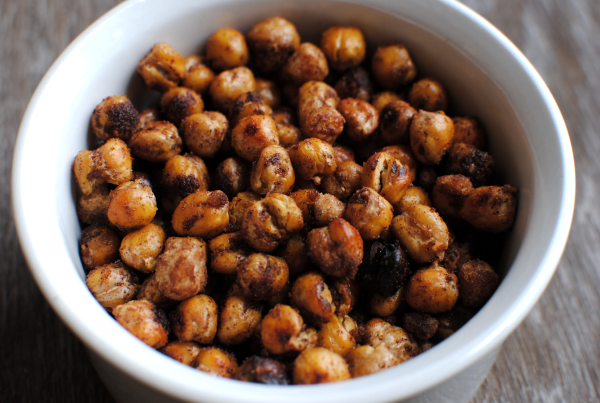
Then you transfer them to a bowl to mix in the olive oil, cinnamon and brown sugar. The next step isn’t as simple. Trying to not eat the entire batch is the hardest step of all.

I failed at this step.

I ate every single last chickpea.

Recipe adapted from The Cupcake Project.

Cinnamon Sugar Roasted Chickpeas

Cinnamon Sugar Roasted Chickpeas

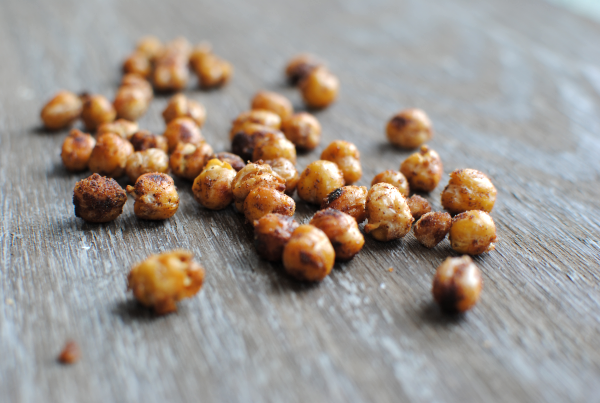
Cheap, easy and incredibly delicious, chickpeas make an awesome roasted snack!

Ingredients

  • 1 Can 14 or 15 oz Chickpeas (Garbanzo Beans), Drained and Rinsed
  • 2 Tsp Olive Oil
  • 1 Tsp Cinnamon
  • 2 Tsp Brown Sugar

Method

  1. Preheat oven to 450 degrees.
  2. Place chickpeas on parchment paper or nonstick baking mat and bake for 30 minutes.
  3. Transfer chickpeas to bowl and mix in the olive oil, cinnamon, and brown sugar until coated.
  4. Serve or store in an air-tight container.

Notes

IF (that is a big if) your chickpeas are still around the next day, they probably won't taste as good. They are best eaten right away or within a few hours, just FYI.

http://www.pennywisecook.com/cinnamon-sugar-roasted-chickpeas/

P.S.- A very BIG Happy Birthday to my sister! I love you!


Like this post? SHARE it!

Related Posts Plugin for WordPress, Blogger...

Picnic Ideas: Crockpot Sub Sandwiches

I’ve been leaning on my crockpot the last few weeks. Soccer games, school events, church events, life is busy. It’s so nice to have a little appliance that does the hard work for you, isn’t it?

We were planning a trip to the park for dinner last week and I knew it was going to be a busy day. On the menu for our picnic was either going to be peanut butter and jelly or lunch meat sandwiches which are necessarily a bad choice, but are quite possibly a little lame. And sure we could have stopped by Subway and gotten $5 subs, but to be honest I’m a cheapo and didn’t want to spend the money. So when picking up groceries that week I grabbed some hoagie rolls so that we could make up our own subs.

It wasn’t until the day of the park outing that I got the bright idea to put these in the crockpot. On my cooking journey, I’m learning that just about anything can be put in a crockpot. So why the heck not place some yummy subs in the crockpot to cook away all day and get toasty, warm, and gooey?

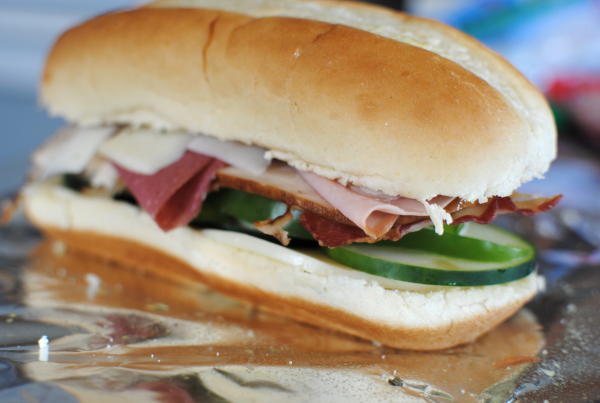
I started out by making up everybody’s sub their way. Mine consisted of a lot of good stuff like chicken breast, turkey, beef, cucumbers, onions, and more. And my daughter’s had just the meat and no cheese or anything else. This is one reason that I absolutely loved this idea. Each person can have whatever they want and yet they all cook at the same time.

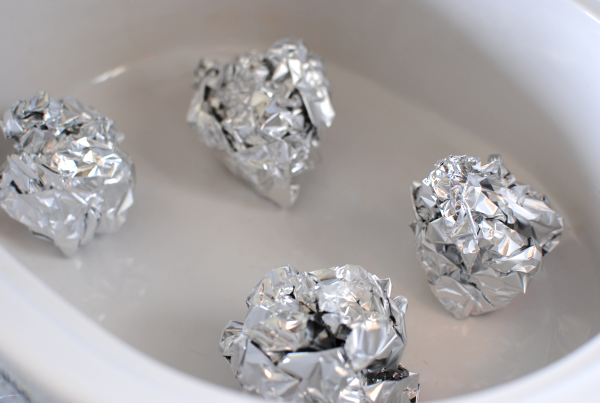
I placed some balls of aluminum foil in the bottom of the crockpot to avoid any burning. I think it’s best to keep them in the middle and away from the sides as well. They have a better chance at cooking evenly this way.


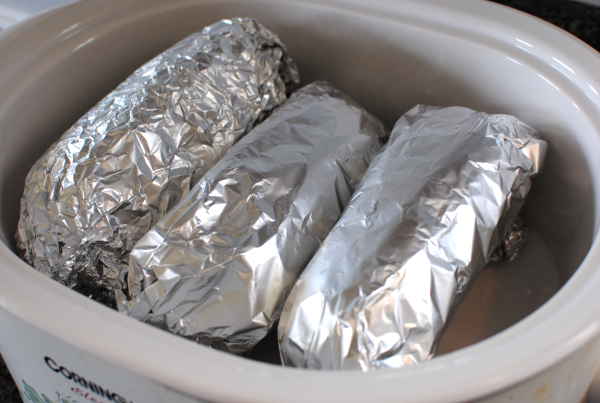
Here’s what they looked like in all of their foil splendor. At this point I was just crossing my fingers that when I went to remove them they wouldn’t be charred balls of mush. Hey, I’ve never done this before. I did my best not to look at them throughout the day and managed to only peek once. Only to find out that they were doing just fine.

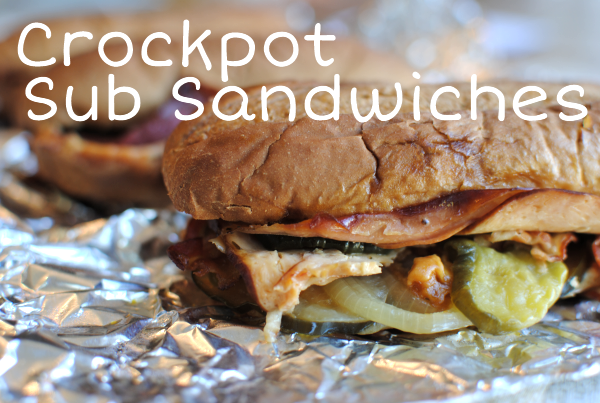
To my surprise, when it was time to leave for the picnic I popped them out and they were everything I’d imaged. Warm, gooey (cheese), browned, a little bit toasty, the onions were softened, and they looked fabulous. These will now always be favorite picnic food! I love that this is so versatile and you can change it up however you please.

Crockpot Sub Sandwiches

Crockpot Sub Sandwiches

Who needs Subway when you can make your own tasty subs at home in your crockpot?

Ingredients

  • Hoagie Buns
  • Lunchmeat of Choice (mine was smoked chicken breast, turkey, and sliced beef)
  • Cheeses of Choice (mine was provolone and a touch of mozzarella)
  • Veggies of Choice (mine was cucumbers, onions, green peppers, and pickles)

Method

  1. Create sub sandwiches according to your liking.
  2. Roll up balls of aluminum foil to place subs on in crockpot.
  3. Roll each sandwich in foil and place on the foil balls in crockpot making sure they aren't touching any of the sides.
  4. Cook on low for 4-6 hours.

Notes

If you put a lot of cheese, it will try to stick to the foil so be careful on how much you put on your sandwich.

I would wait until AFTER they have cooked to place any sauces or mayos on your sub. This can make them very soggy.

http://www.pennywisecook.com/picnic-ideas-crockpot-sub-sandwiches/


Like this post? SHARE it!

Related Posts Plugin for WordPress, Blogger...

Cream Cheese Filled Chocolate Ganache Cakes

Have you ever eaten something that you know is so incredibly yummy that you could almost gain 10 pounds just by looking at it? Maybe it’s a dessert at your restaurant or maybe it’s something covered in ooey gooey melted cheese. It’s pretty incredible how food can be that way.

I’m going to lie, sometimes I feel that way about Big Macs. We all have our cryptonite foods. But I am here to tell you that you can have those things every now and then. There is absolutely nothing wrong with giving in once in a blue moon. After all, life is too short to be healthy all the time.

This is one of those moments. Be bad.

Be real bad.

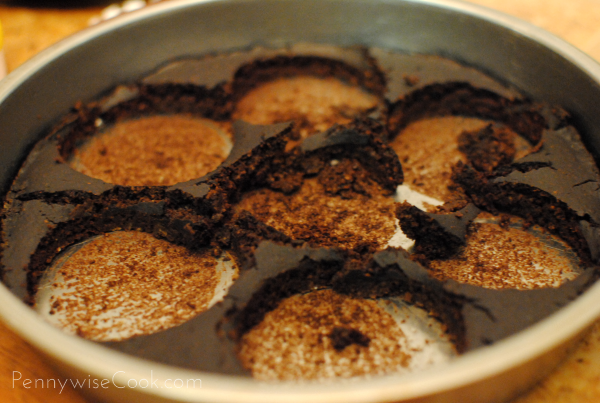
Forgive me and my dark picture here. I started these at night and there was not good lighting.

It starts with some surprisingly healthy thin chocolate cakes. 2 8-inch rounds to be exact. Then you cut little circles out like so to create the top and bottom of your cakes.

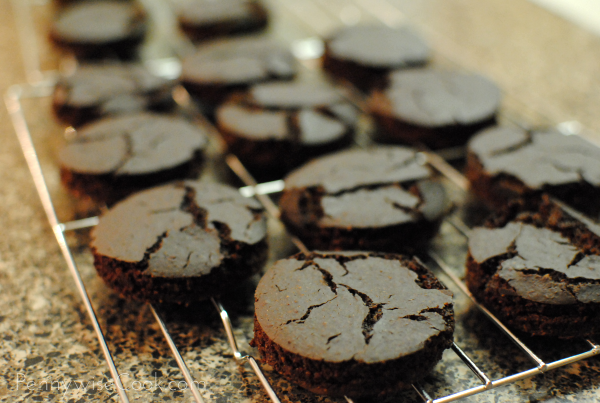
You should end up with 14 of these little round cakes. Kind of an odd number, but that just means that you absolutely have to eat the odd one to even them out….

The easiest way to make these is to then freeze the little rounds so that they don’t get all crumby when you’re working with them.

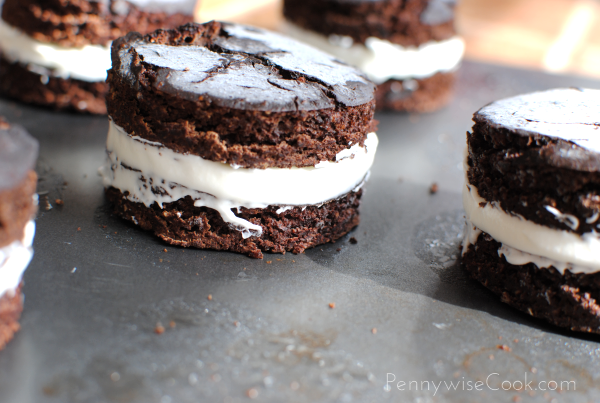
Then you take them out and whip up the cream cheese filling that is ah-maz-ing. Slap some on one round then top it with another round cake. They are beginning to take shape! These alone would make incredible dessert sandwiches, but believe me….you don’t want to pass on the chocolate ganache.

I found it easiest to freeze them again before covering them in the chocolate ganache.

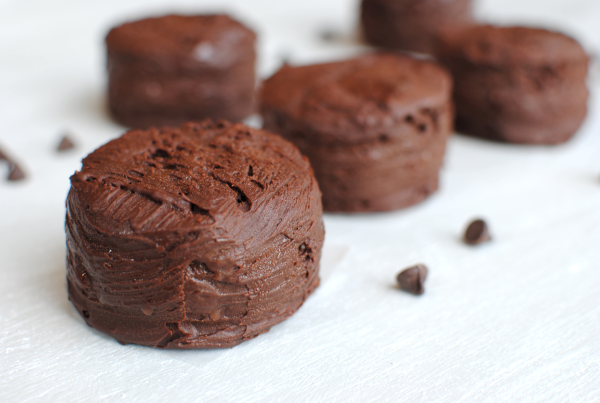
After freezing them another little while, it’s time to create the ganache and then cover each of those incredible chocolate-y cakes in even more chocolate-y goodness.

Oh.

My.

Word.

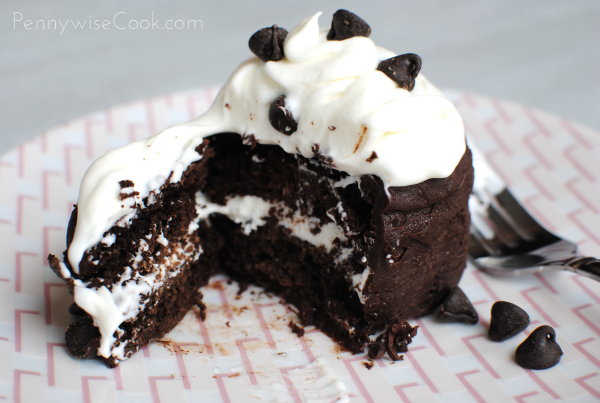
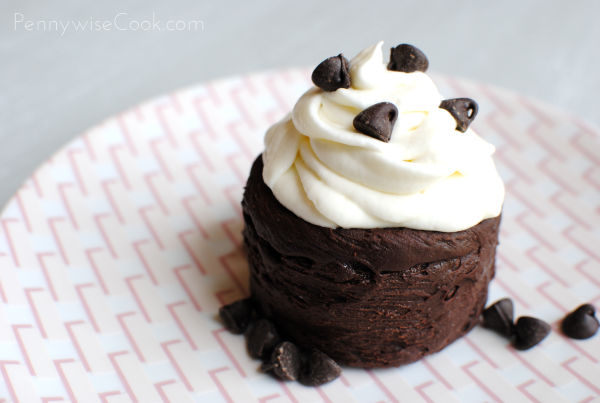
The ganache gives it such an insanely delicious coating and the inside is creamy and cream-cheesey. You will be glad that this recipe only makes 7 of them. I topped mine with leftover filling which added a really creamy touch. And extra chocolate chips can’t hurt either. Why not?

Cream Cheese Filled Chocolate Ganache Cakes

Cream Cheese Filled Chocolate Ganache Cakes

Chocolate cakes filled with a whipped cream cheese mixture and coated in an incredible chocolate ganache make for a wonderful splurge dessert.

Ingredients

    For the Cakes
  • 1 3/4 cup Oats
  • 3 Egg whites
  • 3/4 cup Unsweetened cocoa
  • 1/2 cup Unsweetened applesauce
  • 1 tsp Vanilla extract
  • 1/2 cup Plain nonfat yogurt
  • 1/2 tsp Cream of tartar
  • 1 1/2 tsp Baking powder
  • 1 1/2 tsp Baking soda
  • 1/4 tsp Salt
  • 1 cup Hot water
  • 1 cup Splenda (or sugar if you're being bad)
  • For the Cream Cheese Filling
  • 1 Cup Heavy Whipping Cream
  • 1/2 C. Powdered Sugar
  • 1/2 Block Low-fat Cream Cheese, softened
  • For the Ganache
  • 1/2 C. Heavy Whipping Cream
  • 6 oz (half bag) Semi-Sweet Chocolate Chips

Method

    For the Cakes
  1. Preheat oven to 350 degrees.
  2. Place all ingredients in a food processor or blender and process until smooth.
  3. Pour into two greased 8 in cake pans and bake for 12 minutes.
  4. Cool completely.
  5. Using a 2 and 1/2 inch biscuit or cookie cutter, cut into rounds and freeze.
  6. For the Filling
  7. Meanwhile whip the heavy whipping cream until stiff peaks form. Add the powdered sugar and cream cheese and whip well.
  8. Remove cake rounds from freezer.
  9. Place a generous spoonful of cream cheese filling on 7 of the rounds and top with second cake. Make sure to even the edges. Place back in the freezer for 30 minute to an hour.
  10. For the Ganache
  11. In a small sauce pan, place heavy whipping cream and bring to a boil.
  12. Pour the cream over the chocolate chips in a bowl and stir until smooth.
  13. Remove cakes from freezer.
  14. Using a pastry brush or basting brush, evenly brush ganache all over the cakes.
  15. Set aside to harden and store cakes in the refrigerator.

Notes

Size of your cakes may depend on what size cookie or biscuit cutters that you have. 2 and 1/2 is just the size that I had.

Brownie mix might also make a nice cake mixture to use for these if you don't have the ingredients for the healthier cake version. My husband said that the chocolate cake was just alright by itself but with everything else that it was amazing!

If you don't have a pastry or basting brush, use whatever you have that might create an even ganache coat.

http://www.pennywisecook.com/cream-cheese-filled-chocolate-ganache-cakes/

Chocolate cake recipe adapted from Dashing Dish.


Like this post? SHARE it!

Related Posts Plugin for WordPress, Blogger...

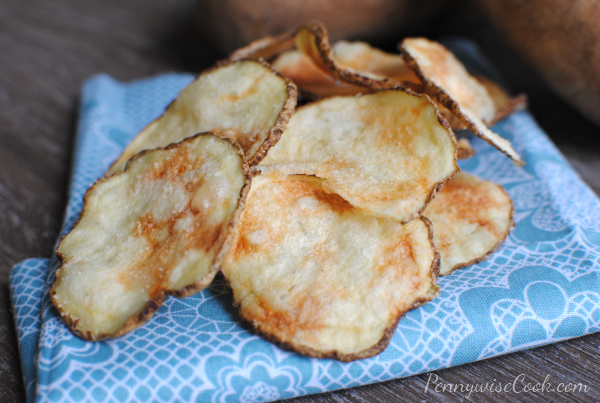
Easy Microwave Potato Chips

You are just going to have to excuse me and my love for potatoes these last couple of days. I’ve always had a thing for them. When I was pregnant with both my girls, I craved them. Give them to me in any shape form or fashion and I’m in heaven. I take that back…

I’ve never like Potatoes Au Gratin. Weird huh? I remember my mom making me eat them when I was little. To this day I can’t make myself eat them.

One of the ways that potatoes can be enjoyed is also possibly one of the worst health-wise. Potato chips. Once you pop, you can’t stop! Isn’t that the saying? It’s so true. The only way that I could eat just one chip is if it was the very last one in the bag. And if that was the case, I would have to yell at somebody for eating all the chips.

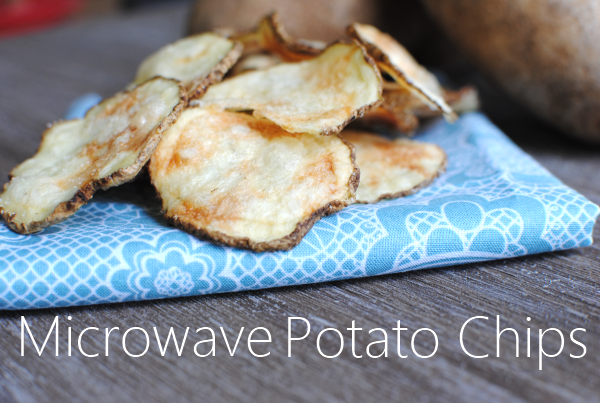
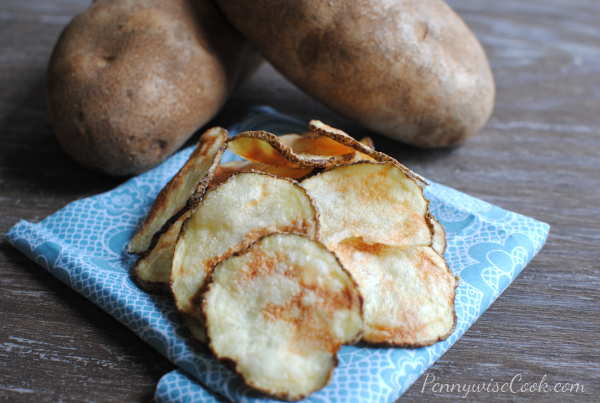
I recently discovered that you can use up potatoes by microwaving them into potato chips. How cool and incredibly simple is that?

You know how sometimes you buy potatoes to make mashed potatoes or something else and you have one or two random potatoes left. What do you do with those? Now that you’re hearing about these microwavable potato chips, this may just be your new way to use them up. It’s definitely mine.

In a matter of minutes and without frying and making them super unhealthy, you can create crispy potato chips in your own microwave. It’s a miracle I tell you.

Just the other day we were going on a picnic and I made a bunch of these up to throw in our lunches. They were so good!

Recipe adapted from Food Gal.

Easy Microwave Potato Chips

Easy Microwave Potato Chips

Create crispy, healthier potato chips in your microwave!

Ingredients

  • 2 Large Russet Potatoes (peeled if preferred)
  • Extra Virgin Olive OIl- Around 2 tbsp
  • Pinch Salt

Method

  1. Slice potatoes to about 1/8" thickness.
  2. Toss potato slices with extra virgin olive oil and salt.
  3. Spray a microwavable plate with cooking spray and place a single layer of potatoes on plate. (you may have to do more than one batch depending on the size of your plate)
  4. Microwave around 2 minutes until potatoes just start to brown. Remove, flip over and microwave another 2 minutes. (This time will really vary depending on your microwave and how thick your potatoes are)
  5. Remove slices and place on another plate to cool.
  6. Repeat with more batches if necessary.

Notes

You can use any type of potato that you prefer. Most will work just fine. Red and Yukon Gold might take a lot less time to cook however, because they are more tender. Keep that in mind.

You can also peel the potatoes if you don't like having the skin on your chips.

Once you do a batch or so, you'll get the hang of the timing for your microwave. Be sure to watch them for scorching, especially if your slices are very thin.

You can use a food processor with slicing attachment if you don't have a mandolin slicer.

http://www.pennywisecook.com/easy-microwave-potato-chips-2/


Like this post? SHARE it!

Related Posts Plugin for WordPress, Blogger...

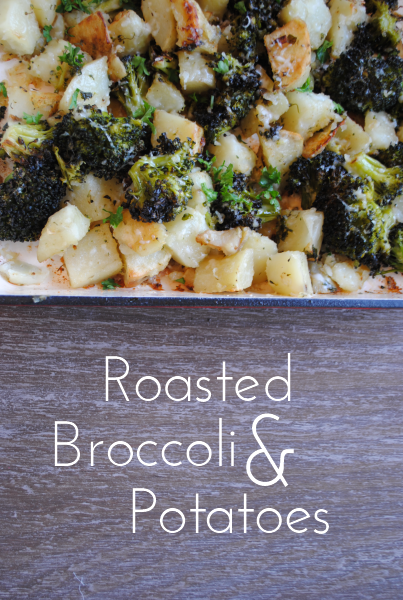
Roasted Broccoli and Potatoes

Some things are fantastic to buy in bulk. For instance, when there’s a stellar deal on paper towels with coupons I stock up like nobody’s business. Toilet paper also falls into this category. And then there are things like gigantic bags of salad that are on clearance. It’s really cheap but won’t last past tomorrow. You have to know when to stock up, when to freeze, and when to use.

Many times Aldi (my favorite go-to place for produce) has their broccoli, cauliflower, and potatoes on sale for cheap. You never know what to expect. You just check back during the week. The past couple weeks it’s been a 10 lb bag of russet potatoes on sale for $.99. Who in their right mind would pass those up? And since this is one of those things that could go bad in a matter of days, I was thinking of what and how I could use them up.

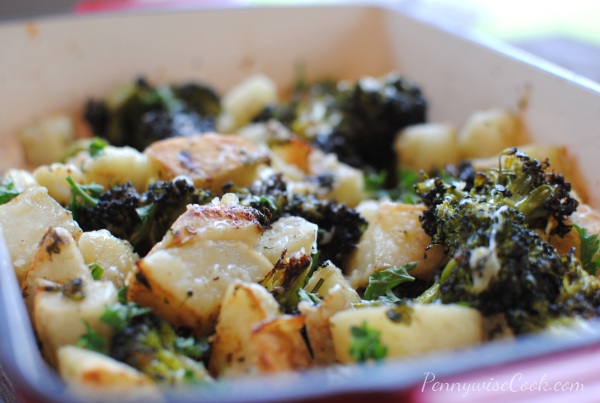
I ended up throwing together these Roasted Broccoli and Potatoes. They go really well together and play nicely with garlic.

This recipe is simple to make and is fairly cheap as well. Plus, it’s a great side dish for having company over.

Roasted Broccoli and Potatoes

Roasted Broccoli and Potatoes

This is a great way to use up russet potatoes and have your green veggies too.

Ingredients

  • 2 Large Russet Potatoes, Peeled and cut into small chunks
  • 2 Large Bunches of Broccoli, cut into bite size pieces
  • 2 Large Garlic Cloves, Chopped
  • 4-5 Tablespoons Fresh Parsley
  • 3-5 Tbsp Grated Parmesan Cheese
  • Generous Abundance of Extra Virgin Olive Oil
  • Garlic Salt

Method

  1. Preheat over to 450 degrees.
  2. Place all ingredients except for cheese and olive oil into casserole dish.
  3. Pour in generous amounts of olive oil and toss everything with it.
  4. Bake for 20 minutes. Remove and stir.
  5. Bake for 15 more minutes.
  6. Top with Parmesan cheese and serve!

Notes

Try cutting your potatoes small. They will cook and brown faster.

http://www.pennywisecook.com/roasted-broccoli-and-potatoes/


Like this post? SHARE it!

Related Posts Plugin for WordPress, Blogger...

2-Ingredient Ice Cream Bread

One of my fondest memories as a kid was sitting on the couch with my dad eating ice cream.

Right from the container.

With a fork.

Don’t ask me why, but he always ate his ice cream with a fork. To this day when I open the silverware drawer to remove a utensil for eating ice cream, I cannot help but look at a fork and remember those times with my dad.

The other fond ice cream memory would be when our family would stop at Sonic for dipped cones. I can remember hearing the blinker click on when the Sonic sign came into sight and getting extremely excited about those cones. It wasn’t until recently that my dad found out I had a complex as a kid because he used to bite the very tip off of my cone before he handed it back to me. I can’t blame him though. Those cute little chocolate peaks are very enticing. Even my husband has done this to me a few times.

Brace yourself. Today’s recipe might just be life-changing. I absolutely cannot take the credit for this simple, yet incredible recipe that I’m sharing with you today. I found this over at The Hungry Housewife who originally found it in 1001 Ways to Cook Southern which looks like an amazing cookbook.

I’d hardly call this a recipe though. It’s 2 ingredients and even a child could make this. Get you one of those 16 oz tubs of ice cream at Kroger when they are on sale for $1 and you’re set. That’s what I did. I got a few different flavors to try out. I’m going to share two of them with you today. Let your ice cream sit out and soften real good. It can still be thick, just not with big lumps.

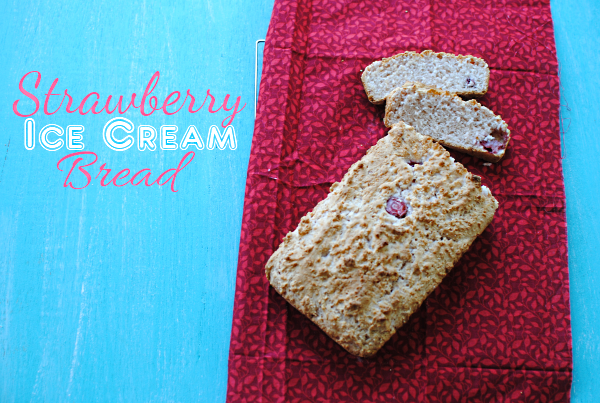
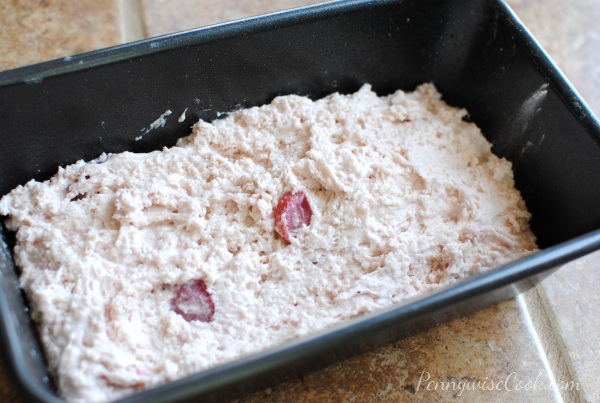
Mix the softened ice cream with 1 and 1/2 cups of (very key here) self-rising flour. Pop into a greased loaf pan and it might look a scraggily mess like mine did.

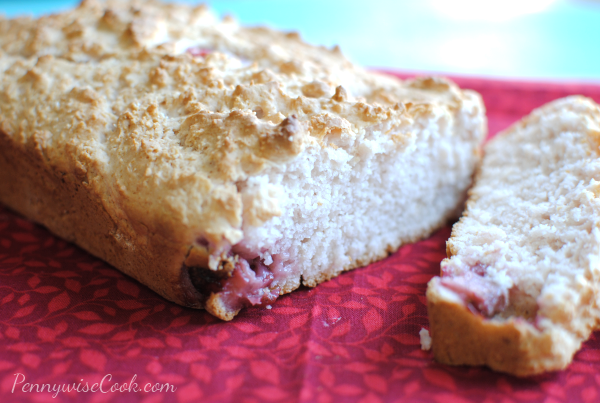
It doesn’t matter though. Because that scraggily mess makes the most delicious bread. Strawberry was my favorite so far. The ice cream had pieces of strawberry that flecked themselves all throughout the bread. It’s a very subtle strawberry taste. Don’t expect it to taste like a mouthful of ice cream or anything. This was absolutely fantastic when warm with butter slathered on it.

Well, I Can’t Believe It’s Not Butter anyways. 😉

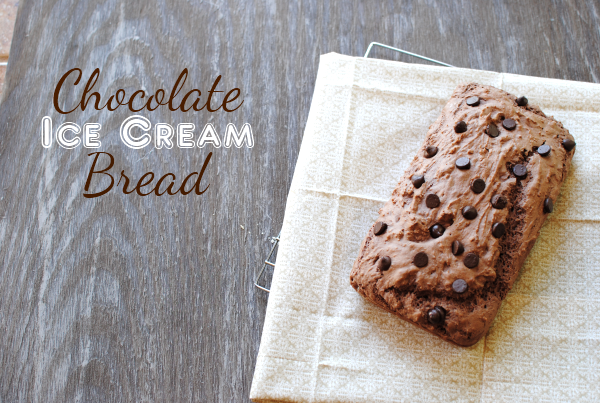
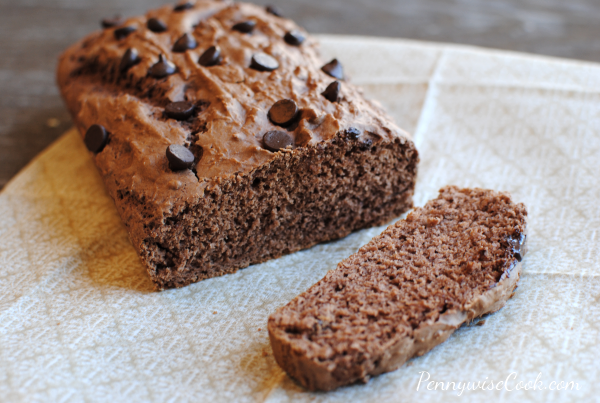
I also made this chocolate version. Oh my goodness was it good. I embellished a little with chocolate chips on top. I think this was hubby’s favorite.

Once again when it’s warm, you might try a little butter on it. It’s soooo good.

If you try any other flavors do let me know how it turns out!

Ice Cream Bread

Ice Cream Bread

Your favorite flavors of ice cream can easily be turned into bread!

Ingredients

  • 2 Cups Ice Cream of Choice
  • 1 and 1/2 Cups Self-Rising Flour

Method

  1. Preheat oven to 350 degrees.
  2. Allow ice cream to soften with no big lumps.
  3. Mix ice cream with flour and place into greased loaf pan.
  4. Bake for 35- 45 minutes or until you get a clean toothpick.
  5. Remove from pan and let cool. Or slap some butter on it and eat it right away!

Notes

My bread did not take the full 45 minutes to cook. I was using a dark coated pan so that could be why. But I suggest checking yours at around 35 minutes.

My bread batter was a bit lumpy which made for a nice crusty top. If you want smoother texture, you might let your ice cream come completely to room temperature before mixing. The flour tends to ball up when mixed with the colder ice cream.

Be sure to use full-fat ice cream.

http://www.pennywisecook.com/2-ingredient-ice-cream-bread/


Like this post? SHARE it!

Related Posts Plugin for WordPress, Blogger...

Corn Dog Waffles

When it comes to food, pleasing my husband is as simple as a bun with a plain hamburger slapped on it. No, there’s no need for anything fancy or green on it. Maybe a slice of cheese.

All American is the best way to describe his palate. Or child-like. Whichever you prefer call it. I do like to pick on him, but he has come a long way. When I met him, he didn’t like mexican food! I know, right? Who in their right mind doesn’t think they like mexican food. My point exactly. Turns out it’s because he thought it didn’t taste good, yet he had never tried it! Now he craves it and it’s one of his favorites.

When I’m not getting hubby to try new flavors and cuisines, I do let him have a shot at “creating” our meals. One of his latest….homemade baked corn dogs. What else would I have expected?

We spent a few tries working with difficult batters and trying to keep the batter on the dogs. A few different approaches yielded nothing but hot dogs falling out of batter and shattered corn dog dreams.

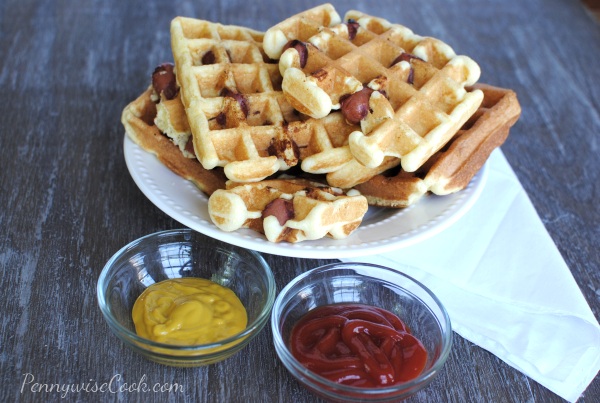
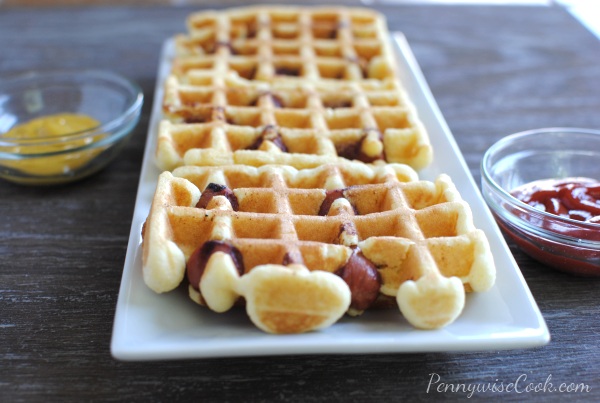
That is until, I was preparing breakfast one morning. I thought why not make corn dog waffles instead? Use the same batter as cornbread but lay the hot dogs inside the batter. A light bulb went off in our heads! After such determination with trial and error (mostly error), we had finally figured out a way to have baked homemade corn dogs instead of fried. After all, that was the whole point.

I have a bit of honesty for you. I didn’t make the batter from scratch. I used a store brand cornbread mix which really made my life easier. I’m not ashamed. You don’t have to be either. You are free to use whatever means of cornbread that you choose.

Addie tried to put syrup on these and was unpleasantly surprised at how it tasted with the waffle part. I then directed her to the ketchup and mustard which make a much better complement to the hot dogs.

My whole family (including myself) really loved these. They made a great meal for a busy weeknight.

Corn Dog Waffles

Corn Dog Waffles

Forget about corn dogs, try Corn Dog Waffles instead!

Ingredients

  • 1 Package Cornbread Mix (or homemade)
  • 1 Package Hotdogs, cut into 4ths

Method

  1. Mix cornbread according to package directions. Preheat waffle iron.
  2. Lay pieces of hot dogs directly on waffle maker to brown a little.
  3. Then pour cornbread batter over the hot dogs making sure not to let it run off the sides.
  4. Let cook until brown and remove.

Notes

The key is to make sure you don't overfill the waffle iron wells. I learned this the hard way when 2 of my first ones ran over the side.

You don't have to heat the hot dogs alone on the grill. I just found it necessary since the hot dogs are cold when you start.

http://www.pennywisecook.com/corn-dog-waffles/


Like this post? SHARE it!

Related Posts Plugin for WordPress, Blogger...

3-Ingredient Crockpot Ranch Porkchops

With busy nights, there are at least 3 nights per week that I plan on making a crockpot meal. I usually try to think of nights like soccer practice or small group when I know I’m not going to have time to cook up a big meal. My crockpot is like my best friend. It really does bring joy and happiness to my life. (Insert mushy crockpot love song here)

Take Easter for instance. We didn’t have a single plan (for once in our life). However, I was not about to spend the entire day cooking a meal. We really wanted to spend the day together enjoying each other’s company. Once again my crockpot stepped in to make life easy. I popped an entire chicken into it stuffed with rosemary and garlic and just let it go. 6 hours later after we were done playing outside, watching a little TV, and essentially getting a little tired of each other (what? doesn’t everybody?), the chicken was perfectly cooked and ready for our Easter dinner.

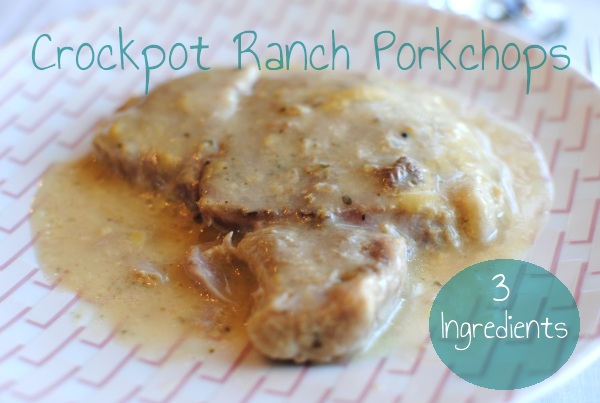
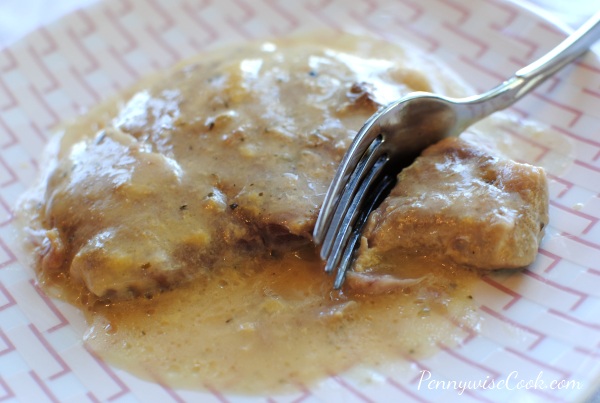
These porkchops are one of my new favorites for crockpot recipes! Only 3 ingredients and they are simply to most moist and tasty porkchops I might have ever had. No exaggeration.

I’m so thankful to have come across this recipe at Living Laughing and Loving!

You simply MUST try it!

3-Ingredient Crockpot Ranch Porkchops

3-Ingredient Crockpot Ranch Porkchops

With only 3 ingredients you can create the most moist and tasty porkchops ever!

Ingredients

  • Pork Chops
  • Ranch Seasoning Dry Mix Packet
  • 1 can Cream of Chicken plus 1 can water as needed (or 2 cans cream of chicken)

Method

  1. Combine all 3 ingredients in your crockpot and mix well.
  2. Cook on low for 4-6 hours.

Notes

I used only 1 can of cream of chicken with the 1 can water and it turned out perfect!

I cook 4 porkchops with this recipe.

This will also freeze well. Place all of the raw ingredients in a freezer bag together then run under warm water before placing in the crockpot when you're ready to cook!

http://www.pennywisecook.com/3-ingredient-crockpot-ranch-porkchops/


Like this post? SHARE it!

Related Posts Plugin for WordPress, Blogger...

Blissful Oatmeal Raisin Cookies

Back at the end of February I attended my 3rd Blissdom Conference. It’s a conference for us blogging geeks. Not only is it a bunch of fun, but I always learn a thing or two as well. And I especially love hanging out with my blogger friends and meeting the sponsors. They are always so fantastic to us.

I made my way around to all of the booths and spoke with many of them. I told you about meeting Cynthia Sass. She is such a sweetheart and inspiration. And then I could hardly contain myself, I got to meet a real California Raisin.

It was all smiles and very friendly, but it didn’t say a whole lot. I was thankful to have gotten a hug from such a huge celebrity. It took time out of it’s very busy raisin schedule to pose for a picture with me. I also really appreciated how natural and genuine it was. Because you know, those raisins are simply grapes dried in the run, right?

The California Raisins were a sponsor there at Blissdom this year. They had the most amazing booth with the coolest kitchen. And they also had these incredible oatmeal raisin cookies. When I think of oatmeal raisin cookies, I expect to see 5 maybe 6 raisins in the cookie. But these cookies had a TON of them. Come to find out, they also had NO added sugar. They were all natural, soft, delicious, and I completely fell in love.

Of course you know I had to make them….

I had to make them really soon.

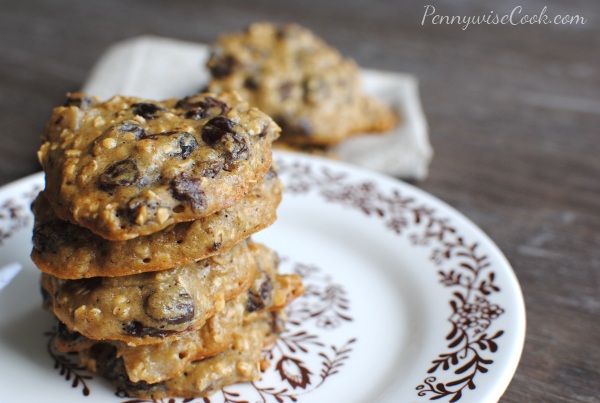
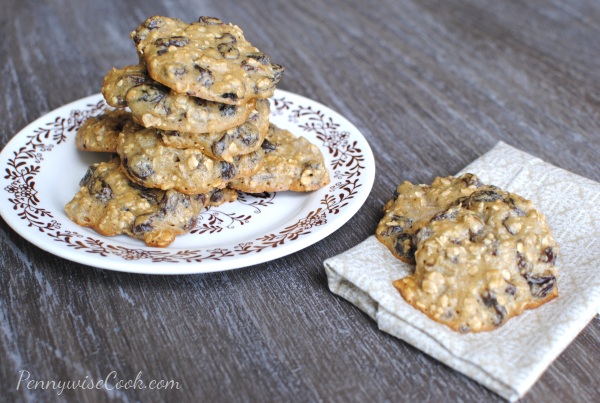
So I did. And I call them Blissful Oatmeal Raisin Cookies. One other little secret about these cookies…..they also contain an apple. It’s just another unique and natural way to add a little sweetness without having to add sugar. It also keeps them extremely moist which makes these nice and soft. They also don’t take long to cook which makes it all the easier to enjoy them quickly.

These are really yummy when they are just out of the oven and warm.

Since they are natural, they have a very nice flavor. Not overly sweet like some cookies can be. If you were naughty, you might add a handful of chocolate chips into this batter. But I’m not gonna force you. 😉

This recipe comes from the California Raisins Let’s Keep It Real Campaign. You can learn more there about how raisins are a good choice for eating healthy and nutrients.

Blissful Oatmeal Raisin Cookies

Blissful Oatmeal Raisin Cookies

Try these amazing oatmeal raisin cookies and feel good about it because they contain no added sugar!

Ingredients

  • 2 cups California raisins
  • ½ cup peeled, cored and chopped apples (we used granny smith)
  • 1 cup water
  • ½ cup butter
  • 1 cup flour
  • 1 teaspoon baking soda
  • 1 teaspoon vanilla extract
  • 1 cup cooking oats
  • 2 eggs (beaten)
  • 5 tablespoons honey

Method

  1. In a medium saucepan, combine the raisins, apples and water. Bring to a boil and cook for 3 minutes. Remove from the heat and stir in the butter. Set aside to cool.
  2. In a medium bowl, stir together the flour and baking soda. Stir in the vanilla, eggs, and the apple mixture until well blended. Fold in the oats and honey.
  3. Scoop the dough into a greased cookie sheet. Press the cookies down and bake at 325 degrees for approx. 8-10 minutes.

Notes

This recipe makes 3 dozen cookies!

http://www.pennywisecook.com/blissful-oatmeal-raisin-cookies/


Like this post? SHARE it!

Related Posts Plugin for WordPress, Blogger...