DIY Fall Treats: Tasty Acorns

Tasty Acorns 1

 I just about had a fit when I started to put this post together because my SD card decided that it wanted to be corrupted and not let me have access to my pictures. But you know what? I showed it who is boss and it eventually gave me my pictures. So you can see the beauty of these adorable little fall treats!

Today is the very last day of summer did you know that? Can you believe that? I sure can! And I’m completely ready for fires and everything cozy. I love fall wardrobes. Everything gets covered up, tucked in, and just more comfortable. Less intense and less need to be in shape.

So you can eat chocolate, right?! Aren’t these acorns just the cutest little fall treats? They are so easy to make and adorable to just set around for a treat. Not to mention that they taste amazing. Anything with a Hershey Kiss on it is going to make your mouth happy.

Tasty Acorns 3

 I made a bunch of these one night and it took me no time at all. Such a fun craft for the kids to enjoy with you. And because it’s so easy you can just let them take over! Just don’t let them eat too many before bed or they may never sleep. Again…

Tasty Acorns 2

 I didn’t put together step by step pictures for you because this one is easy enough. If you have questions please don’t hesitate to ask!

Tasty Acorns
With a few simple ingredients you can make tasty and edible acorns for the fall!
Write a review
Print
Ingredients
  1. Hershey Kisses
  2. Mini Vanilla Wafers
  3. Butterscotch Morsels
  4. Chocolate Frosting
Instructions
  1. Begin by placing a teensy bit of frosting in the middle on the bottom of the vanilla wafer. Press the flat side of the Hershey Kiss into the frosting and twist a little to attach it.
  2. On the top of the vanilla wafer, at a very teensy bit of frosting in the middle and press the flat side of a butterscotch morsel to the frosting, twisting a bit to attach.
  3. Set aside and allow the frosting to "crust" a bit which will help them to stay attached.
Notes
  1. I would serve these the same day or at least by the next day you plan to make them. The frosting can make the vanilla wafer begin to get a little soggy. I like when this happens but if you want them to be crisper you will want to serve them soon.
  2. Keep them in an air-tight container until ready to eat.
Pennywise Cook http://www.pennywisecook.com/

Like this post? SHARE it!

Related Posts Plugin for WordPress, Blogger...

Parmesan Peas

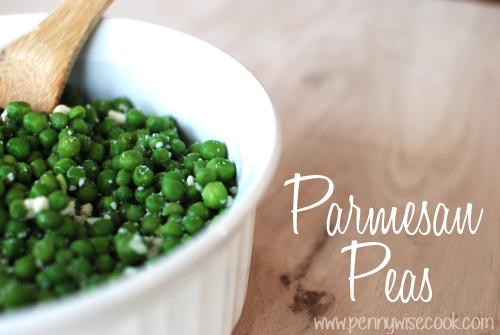
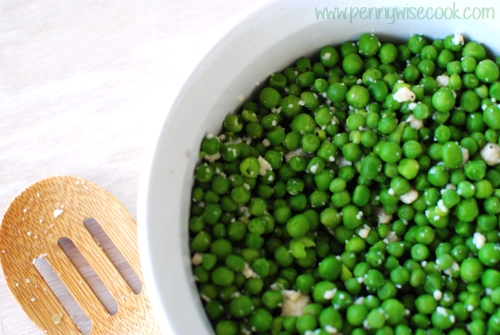
Parmesan Peas


I’m not exactly sure what it is about peas that makes them seem so unappealing. Did you see what I did there? For most kids I think it may be because they are green. Both of my girls have a strong aversion to green food no matter what it is. So when my oldest came home from school one day and told me that she liked peas, you can just imagine my confusion. 

1. She ate peas. Willingly. Without bribery or threatening. 

2. She ate peas at school of all places. This is also the place that she discovered she likes green beans. (Which I promise are the only two green foods that she likes.) I mean. What are the schools doing to their green foods to make them so enticing? They have new standards for how healthy things have to be so I know it’s not that they are slathering it all in butter. 

3. I gotta come close to making them at least half as good as the school. Woah. What is this world coming to with the statement that I just made?

I came across this recipe for Parmesan Peas and I figured it was worth a shot. If it doesn’t work then I may need to call my daughter’s cafeteria. Again. What weird statements I’m making.

PArmesan Peas1


I liked these peas, but I have a feeling that they weren’t as amazing as my daughter is used to. I will be tweaking these a little as I make them more. But for the most part, they are really tasty! The most important tip that I can give is to make sure that you serve them immediately after making. They do not taste the same after they get cold and sit there for a while. Just from my experience anyways. 

Also, be sure to use freshly grated parmesan and not the powered stuff. It works, but is not near as good.

Parmesan Peas
Write a review
Print
Ingredients
  1. 16 oz Bag of Frozen Peas or 4 cups Fresh Peas
  2. 1 tbsp Butter
  3. 1/2 cup Freshly grated parmesan cheese
  4. Little squeeze of lemon juice
  5. Dash of pepper
Instructions
  1. Fill a big saucepan 2/3 of the way full and bring to a boil.
  2. Add the peas and cook for 3 minutes if fresh and 1 minute if frozen. This will be your call as to if you think they are ready enough. I like mine to be really tender.
  3. Remove from heat and save a little amount of the cooking water. Drain.
  4. Put them back in the saucepan and add a little of the reserved water. Add the butter. Stir until melted.
  5. Stir in the parmesan cheese and make sure that all the peas get coated.
  6. Squeeze a tad of lemon juice and add a dash of pepper.
  7. Serve immediately!
Adapted from Ezra Pound Cake
Pennywise Cook http://www.pennywisecook.com/

Like this post? SHARE it!

Related Posts Plugin for WordPress, Blogger...

Fun and Easy Crafts With Olives!

Olive Art

 My oldest has only recently figured out that she likes black olives. It was by mistake that she realized that she did, but I’ll take what I can get. She grabbed a big handful of “grapes” only to come tell me “momma, those aren’t grapes”. Thanks honey for letting me know. I fully expected her to leave them on my plate while saying the everso common “I don’t liiiiiiiike it”. To my surprise, she ate every one of them. Small victories people. Small victories. 

I haven’t done just a lot to foster her new relationship with black olives, but somehow it’s blossomed. She now gets them on her sub sandwiches and even requires them on her pizza. I just grin ear to ear when I hear her telling anyone about her love for olives. My husband can hardly believe it. 

I got to pick up some California Ripe Olives in order to create to super duper cute little characters. I was just thrilled at how easy and adorbs they turned out. But I honestly think that the very best part was eating the creations. There is just something about cheese and olives man. A match made in hors d’oeuvres  heaven. The versatile California Ripe Olive is the ideal ingredient for home chefs and food artists. Not that I consider myself a chef or a food artist even, but they are pretty versatile and are something easy I can add to most meals. 

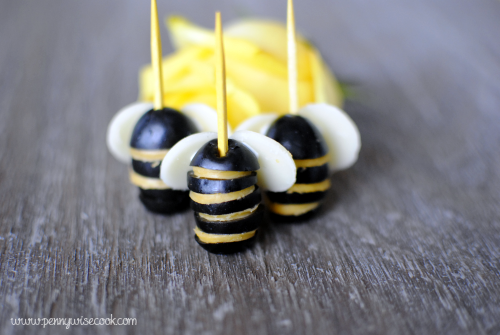
 Olive Bumble Bees 1

California Ripe Olives are kid-friendly and the perfect option for creating tasty and creative food art for the back to school season. Think about lunch boxes and after school snacks. How cute would it be to put one of these little bumble bees in your kiddos lunch box? Sweet surprise at the lunch table. These may have been my favorite olive creatures.

Olive Penguins

 California Ripe Olives provide a pop of color, texture, and flavor to a variety of dishes—including fun and delicious food art. Like these penguins for instance. Kids won’t even realize that they are eating healthy! These little guys were so easy to make and even tastier to eat! California Ripe Olives are the perfect pantry staple. They are good right out of the can, but mixing it up with little guys like this makes them even more fun.

Olive Spiders

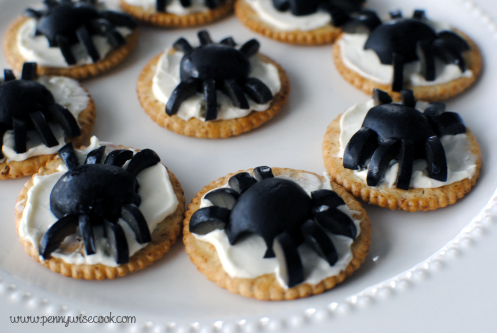
 California Ripe Olives are grown on over 1,000 multigenerational family farms that crisscross the warm inland valleys of California and processed by two family-owned canneries. I love knowing that what I’m feeding my family came from just another family. There’s just some kinda comfort that I get from family-owned companies. Aren’t these little spiders so cute? Perfect for Halloween since it’s just right around the corner!

There is a nifty sweepstakes happening and you’ll want to enter before it’s too late! The California Ripe Olives Back-To-School Sweepstakes runs August 18- September 12th. Follow California Ripe Olives on Facebook, visit the custom tab, and enter once per day for the chance to win an Amazon Kindle Fire HDX!

Want to make the cute little olive art from above? Here’s how:

California Ripe Olives Spiders
Write a review
Print
Ingredients
  1. California Ripe Olives
  2. Cream Cheese
  3. Round Crackers
Instructions
  1. Spread a little cream cheese (or dip of your choice) onto a cracker.
  2. Cut an olive in half and place one half on the cream cheese.
  3. Using a knife, cut the other half into 8 small thin pieces.
  4. Place the small pieces around the "body" olive on the cracker.
  5. Tah-dah!
Notes
  1. This one is super easy and they taste amazing! Perfect for Halloween!
Pennywise Cook http://www.pennywisecook.com/
California Ripe Olives Penguins
Write a review
Print
Ingredients
  1. California Ripe Olives
  2. 1 Big Carrot, sliced
  3. Cream Cheese
Instructions
  1. Cut a small wedge out of the carrot and set aside.
  2. Cut an olive just to the middle creating a small gap. Fill with cream cheese.
  3. Take your small carrot wedge and poke it into a new olive.
  4. Assemble your penguin but sticking a toothpick first down the olive with the beak (carrot wedge), then through the cream cheese filled olive, and then into the leftover carrot slice.
  5. Tah-dah!
Notes
  1. This one can get kinda messy with the cream cheese involved, but after assembling you can use a paper towel to wipe off the excess cream cheese.
Pennywise Cook http://www.pennywisecook.com/
California Ripe Olives Bumble Bees
Write a review
Print
Ingredients
  1. California Ripe Olives
  2. Cheddar Cheese Slices
  3. Provolone Cheese Slices
  4. Cream Cheese
Instructions
  1. Slice your olives into 4-5 sections.
  2. Using a small circular object, cut out circles to place between the olive slices.
  3. Place your cheese circles between the olive slices and then stick a toothpick down the middle to keep it all together.
  4. Using the same circular object, cut out circles from the provolone cheese.
  5. Place a small dab of cream cheese on the back of the top slice.
  6. Stick the provolone circles to the back like wings.
  7. Tah-dah!
Notes
  1. I just used things that I had on-hand to cut out the circles. I believe I used the bottom of a piping tip and it was just the right size.
  2. It doesn't have to be perfect! This is your creation to look however you'd like!
Pennywise Cook http://www.pennywisecook.com/
 

I was selected for this opportunity as a member of Clever Girls Collective and the content and opinions expressed here are all my own.


Like this post? SHARE it!

Related Posts Plugin for WordPress, Blogger...

Mini Thin Crust Pizzas

Mini Pizzas 9

 A little over a year ago, I did a post on an Affordable Mickey Party. It was very popular post, but the most popular thing inside that post was the “Minnie” Pizzas that I did. When I was making them, I had no idea how tasty they would end up and since then they have become one of my family’s favorite appetizers. 

And after a year, it’s about time that I shared it with you, right?

My oldest wanted to help out and she made such a fantastic little cooking assistant and picture model! She had a lot of fun helping me whip these up for lunch today. And of all 24 of these, only 4 were left. 

I don’t expect those to make it to the evening…

Mini Pizzas 8

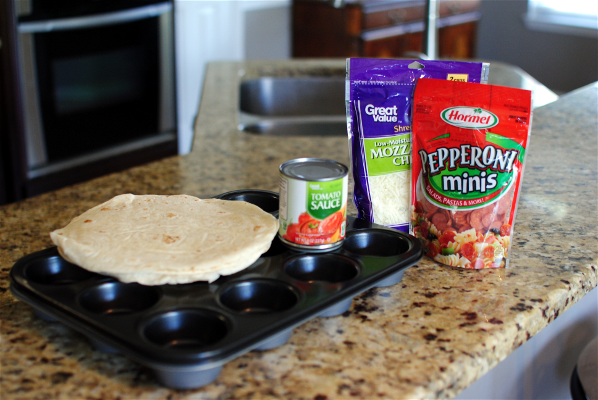
 This is what you’ll need for these. Off brand, on brand, whatever you can find on sale will work. You will need two muffin tins or you can make a pan at a time.

Mini Pizzas 7

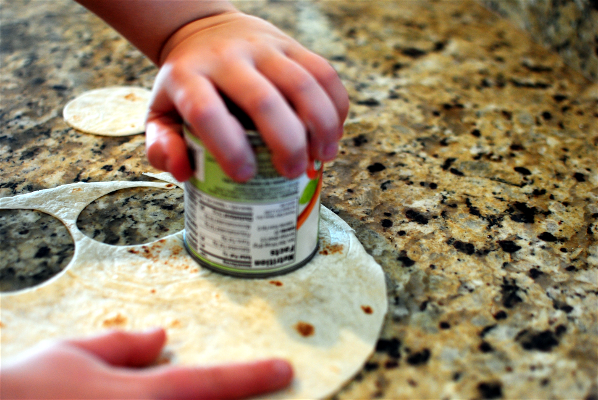
 Start by using your tomato sauce can to cut out the perfect size circles for these. Remember, you’ll need 24 circles in all. And if your can isn’t doing the job, grab a similar size cookie cutter.

Mini Pizzas 6

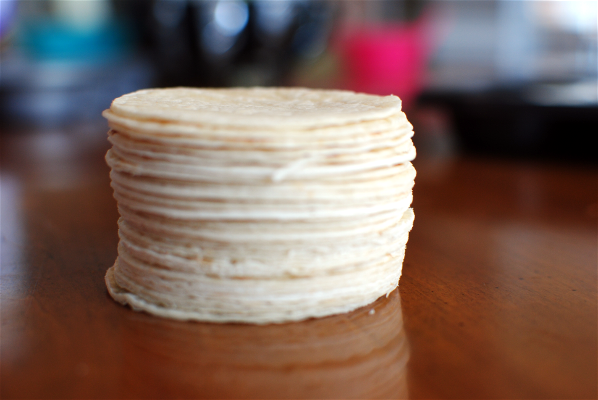
 My OCD enjoyed lining these up. And then of course, I had to take a pic.

Mini Pizzas 5

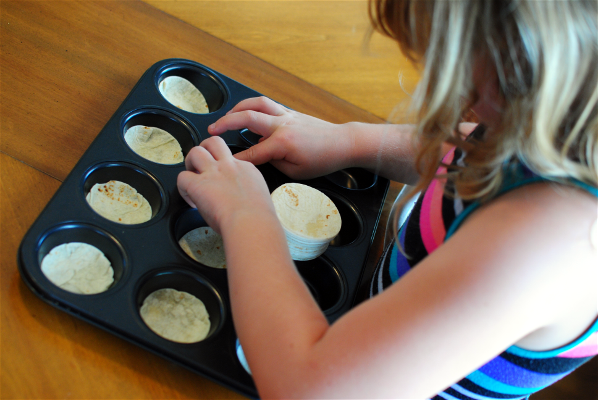
 Then push each little circle into the bottom of the muffin tin. My lovely assistant did a fabulous job at this!

Mini Pizzas 4

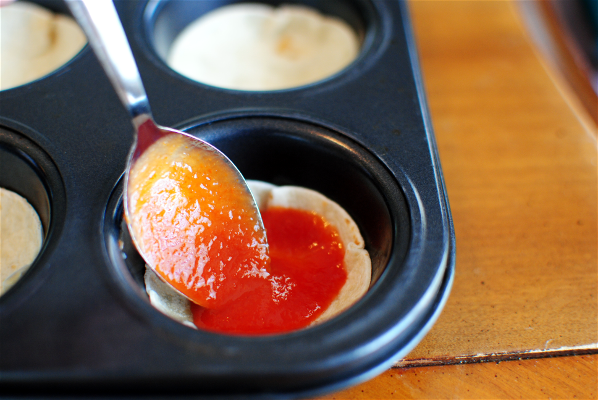
 On each little crust, drop about a teaspoon of tomato sauce on top. Spread it out a little.

Mini Pizzas 3

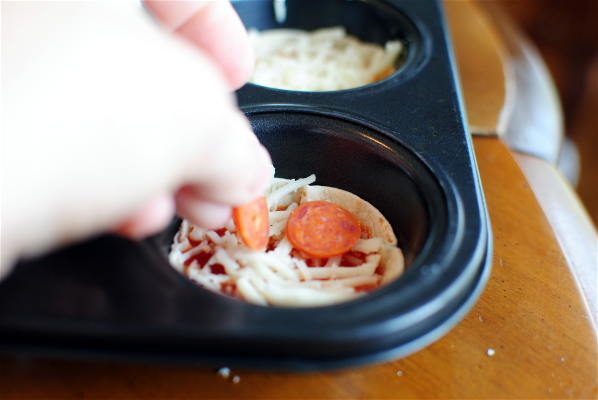
 Top that with a tablespoon of cheese and then some mini pepperoni.

Mini Pizzas 2

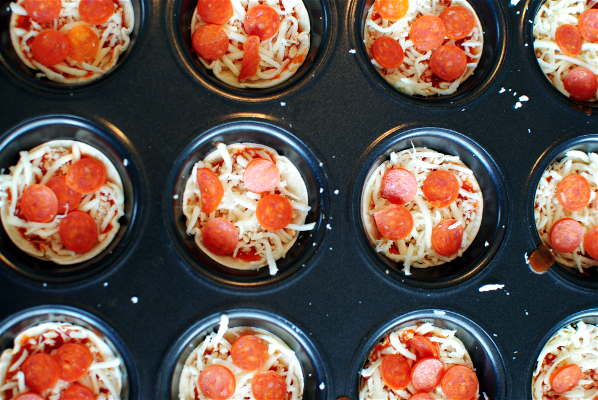
 MMmmmmmm, MMMmmmmmmm. They are ready for the oven! 

The waiting is the hardest part.

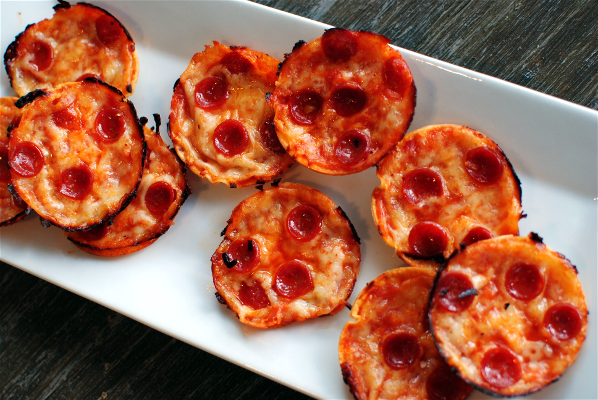
Mini Pizzas

Mini Thin Crust Pizzas
Serves 4
A simple way to present pizza as finger food!
Write a review
Print
Prep Time
10 min
Cook Time
15 min
Total Time
25 min
Prep Time
10 min
Cook Time
15 min
Total Time
25 min
Ingredients
  1. 5-6 flour tortillas
  2. 1 8 oz can tomato sauce
  3. 1 and 1/2 c shredded mozzarella cheese
  4. 1 pkg mini pepperoni
Instructions
  1. Preheat oven to 350°.
  2. Using the edge of the tomato sauce can, cut out 24 circles for the crusts.
  3. Push them into the bottoms of 2 muffins tins making slightly curved.
  4. Drop about 1 tsp of tomato sauce onto each mini crust.
  5. Sprinkle 1 tbsp of mozzarella cheese on top of each crust.
  6. Place 4-5 mini pepperoni onto each crust.
  7. Place in oven and bake for 10-15 minutes depending on your oven. (See notes)
Notes
  1. The sauce can doesn't always cut it. (pun intended) You can always use a similar sized cookie cutter instead.
  2. When baking, I found that the crunchier they are the better. They are easier to get out and are easier for handling as appetizers. I had to cook mine close to 15 or 18 minutes to get them completely done. Though your oven may take less time, be sure to watch them after 10-12 minutes. The cheese may seem completely melted, but the crust may not be done.
Pennywise Cook http://www.pennywisecook.com/

Like this post? SHARE it!

Related Posts Plugin for WordPress, Blogger...

Easy Slow Cooker Green Beans

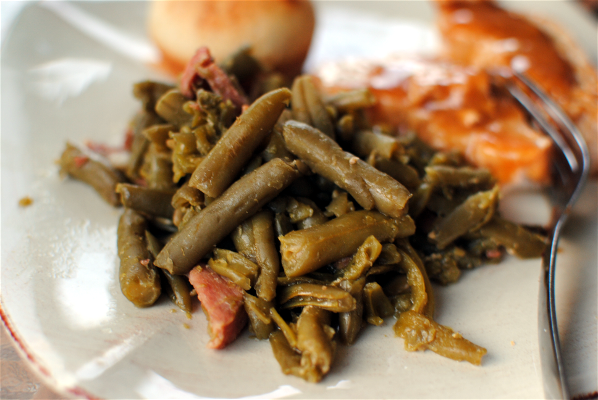
green beans 1

Today’s recipe is one that came from my grandmother! She has always been innovative when it comes to cooking and making things easier and tastier. This one is one that she came up with when having to feed a crowd. Seems like she is always having a get together with family and friends. It doesn’t matter what time of day it is when I stop by to see her, she will offer me FOOD! That’s what grandmothers are for, right?

So this recipe. It’s SO easy and will feed a crowd. It’s easy on the wallet as well. You can make this to take to an event or serve right out of the slow cooker when you have folks over.

It’s a fix it and forget it kinda side dish that honestly, I could eat as a meal. My Addie doesn’t think fond of my veggies, but this is her absolute favorite. It’s almost bribe-worthy. Almost, I mean come on, they are green beans.

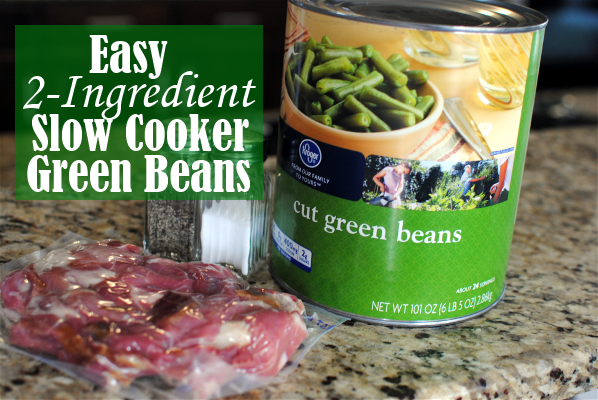
It starts with everything above. 1 LARGE can of green beans. It’s a 101 oz or 6 lbs, 5 oz can that you can get at Walmart, Kroger, or most grocery stores. Sam’s Club usually has the best price on these around $3.68 (ish). You will also need a 12 oz package of country ham seasoning pieces. This is fairly inexpensive too. I got this package for just $1.88. That makes this entire side dish around $6 bucks total. Not bad!

green beans 2

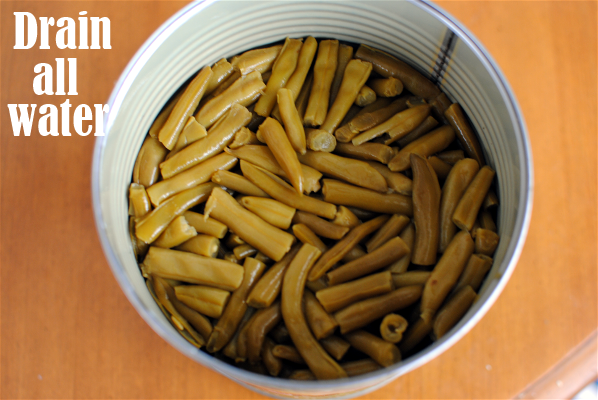
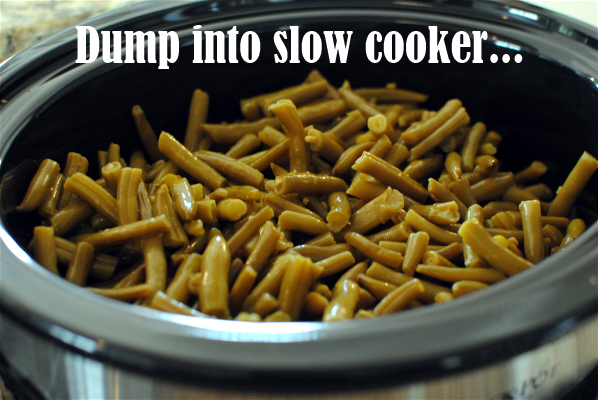
Ok, so start by opening up your can of green beans and draining out EVERY LAST DROP OF WATER. This is essential. The green beans will create their own water while cooking and if they have too much moisture, they will become mushy. Draining them gives just the right amount of juice.

green beans 3

This is so hard so far, right?

Refrain from complaining too much.

green beans 4

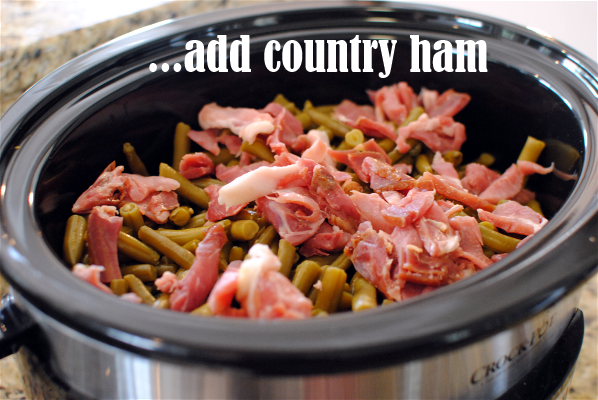
The country ham is already in pieces, but I usually cut it into smaller pieces. I also DO NOT remove the fat from the pieces. You could, if you were really serious about fat, but honestly it gives it even tastier flavor.

green beans 5


We had these last night and Addie was so excited to be getting her favorite beans. I’m pretty sure that I had 3 helpings and many bites of them while putting the leftovers away. Do you do that? It’s hard not to steal a few tastes while getting it all prepared for the refrigerator. Even though I was stuffed to the gills!

Let me know if you try these!

Slow Cooker Green Beans
Serves 15
A simple 2-ingredient slow cooker recipe for making A LOT of tasty green beans.
Write a review
Print
Prep Time
10 min
Total Time
8 hr 10 min
Prep Time
10 min
Total Time
8 hr 10 min
Ingredients
  1. 1 (6 lb, 5 oz) large can of Green Beans, DRAINED
  2. 1 (12 oz) package country ham seasoning pieces, cut into small pieces
  3. Pepper to taste
  4. Garlic powder to taste (optional)
Instructions
  1. Place drained green beans and chopped country ham pieces into slow cooker. Set to low and cook 8 hours.
  2. After a few hours, add pepper to taste.
Notes
  1. I usually add a little garlic powder to mine. I just eye ball it.
  2. You can also cook these on high for 4-5 hours in a pinch.
  3. You could also make these overnight for a gathering the next day if you wanted to. No one would ever know they cooked while you slept!
Pennywise Cook http://www.pennywisecook.com/

Like this post? SHARE it!

Related Posts Plugin for WordPress, Blogger...

Simple & Sweet Chili Mac

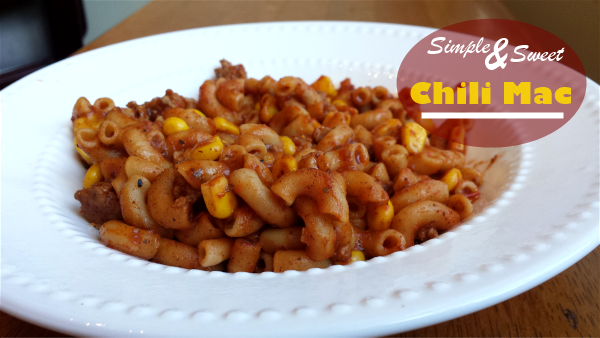
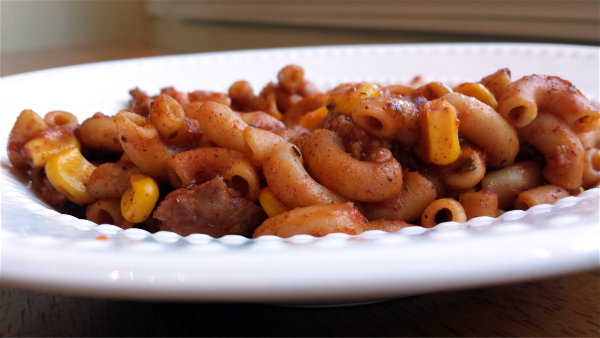
Simple and Sweet Chili Mac


In our penny-wise minds, there are few dishes that scream frugal more than macaroni and cheese. Don’t you agree? Some nights there just isn’t enough energy or even time to give to a full-on, oven-baked, gourmet dinner. And some nights you just bust out a box of the mac.

It’s ok. I promise, I do it too.

And if you aren’t one of us closet macaroni makers, then you are way ahead of the game and I need you to teach me your ways!

tradish_logo_300x300

I’m a big fan of taking simple recipes and throwing in a little of this or a little of that to make them a little bit different. You can call me inventive if you’d like. One of my recent inventive meals was a little twist on Ragu’s Family Favorite Chili Mac. It honestly is already so yummy like it is, but a big favorite with my girls is corn sometimes in our chili so I thought why not add a little sweetness?

This entire recipe has only 5 ingredients and can be whipped up before you can say Bob’s your uncle.

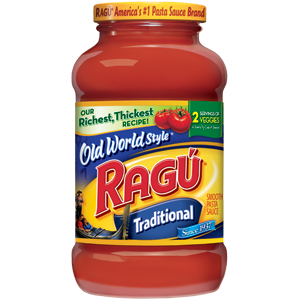
Ragu Old World Sauce

It’s really easy to use Ragu Old World Style Traditional Sauce to create the base for the mac. You simply season it to create whatever flavor you going for and in this case, it’s chili mac!

Each jar of Ragú® Old World Style® Traditional Sauce is made with 11 juicy tomatoes making it its richest,  thickest recipe. Ragú® has the Authentic Italian taste American family’s love and a variety of great tasting, quick and easy to make family favorite recipes.

Chili Mac 1


And of course if you aren’t a huge fan of corn in your chili then you can leave that out. But I really like the sweetness that it adds to the kick of the chili powder!

You can visit Ragu’s facebook for additional quick, easy and delicious recipe ideas too. And be sure to enter the Ragú Better and Better Sweepstakes for a chance to win great Authentic Italian themed prizes and a grand prize trip to Venice for a family of four!

Simple & Sweet Chili Mac
Recipe Type: Main Dish, Pasta
Cuisine: American
Author: Adapted from Ragu’s Recipe
As easy as macaroni and cheese, this chili mac takes the cake!
Ingredients
  • 1 lb lean ground turkey or beef
  • 1 jar (1 lb 8 oz) Ragu Old World Style Pasta Sauce
  • 1 and 1/2 tbsp chili powder
  • 8 oz elbow macaroni, cooked and drained
  • 1 can (15 oz) whole kernel corn, drained
Instructions
  1. Cook ground meat in a large skillet over medium-high heat until browned.
  2. Stir in pasta sauce and chili powder. Bring to a boil over high heat. Reduce heat and simmer about 10 minutes.
  3. Stir in macaroni and can of corn and heat through.
  4. Serve with shredded cheese and sour cream, if desired!

Abbreviated Sweepstakes Rules: NO PURCHASE NECESSARY.  Legal residents of the 50 United States (D.C.) 18 years and older.  Ends 5/6/14.  To enter and for Official Rules, including odds, alternate method of entry, and prize descriptions, visit www.RaguSweeps.com.  Void where prohibited.

This is a sponsored post written by me on behalf of Ragu brought to you by Yummly. All of the opinions expressed are 100% my own.


Like this post? SHARE it!

Related Posts Plugin for WordPress, Blogger...

Easy Spasagna

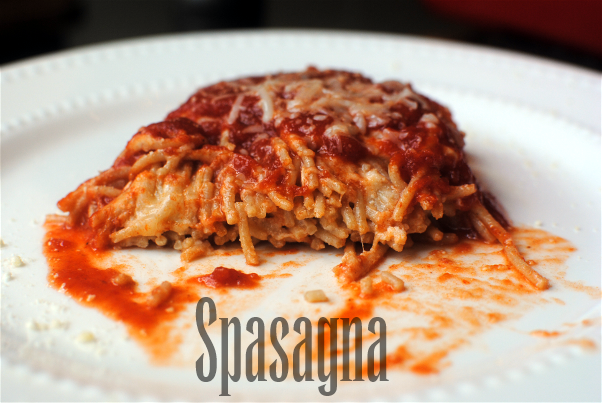
Spasagna

 It’s been an awfully crazy last few months here in the Pennywise Cook household. You may have noticed by my lack of posts. I’ll catch you up soon.

In the meantime, I have managed to create a really tasty spin on an original Ragu recipe that I wanted to share with you guys. I made a few changes to this recipe for Ragu No Boiling Lasagna that was a huge hit at our house. At one of our favorite restaurants around here, they have this dish that is a mix of lasagna and spaghetti and it is absolutely to die for. It has something to do with the way the noodles are mixed with the cheesy goodness that makes it so amazing.

You know me. I like a challenge.

Spasagna


If we’re being honest here, and I’m not ashamed of honesty, I kinda made it up as I went. And you never know if things like this will actually be edible so it was a 50/50 situation. This one made it in our Hall of Fame for yummy dishes!

Side story: As I’m preparing to take pictures of this tasty dish (and trying my darnedest not to eat it),  there wasn’t enough light inside so I took my Spasagna outside on the balcony to take pictures. My 2 year-old comes outside and shoots a very inquisitive look my way. Then in a very puzzled tone says, “Momma, why are you taking pictures of macaroni?”. I died laughing!

You know you’re a food blogger when….your 2 year-old asks why you’re taking pictures of macaroni! I won’t even get into the conversation I had with her informing her it wasn’t macaroni, but “spasagna”. Talk about a really confused toddler.

Ragu Tra-dish

 Back to the recipe! This one is SUPER easy. It uses Ragu Old World Style Traditional Sauce so you know it has to be simple. I love that stuff. I used the meat flavored kind since I didn’t plan to add any meat. Each jar of Ragú® Old World Style® Traditional Sauce is made with 11 juicy tomatoes making it its richest,  thickest recipe. It’s affordable (especially with coupons, y’all!), tastes great, and makes any recipe a breeze. Ragú® has the Authentic Italian taste American family’s love and a variety of great tasting, quick and easy to make family favorite recipes.

Besides that, there are just 4 other ingredients in this recipe. And it isn’t very time consuming either. That’s a big thing for us these days. My girls have no patience and neither do I!

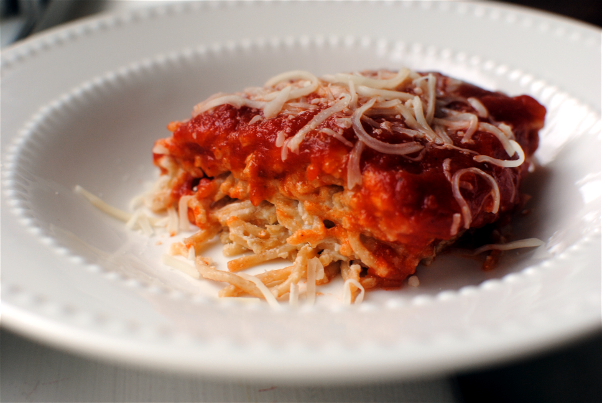
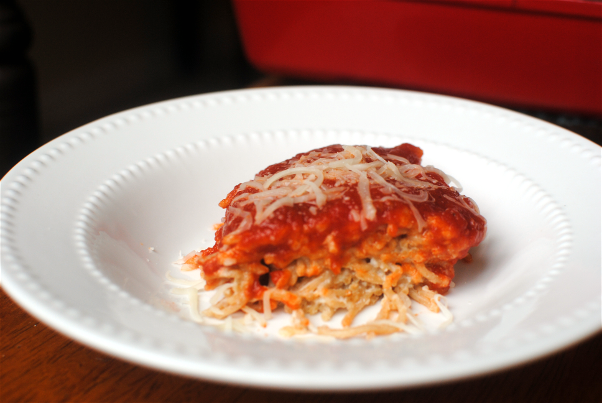
Spasgna

You can visit Ragu’s facebook for additional quick, easy and delicious recipe ideas too. And be sure to enter the Ragú Better and Better Sweepstakes for a chance to win great Authentic Italian themed prizes and a grand prize trip to Venice for a family of four!

Easy Spasagna
Recipe Type: Main Dish
Author: Pennywise Cook
Spaghetti never tastes so much like lasagna! This twist on a traditional lasagna is an easy go-to meal for the family.
Ingredients
  • 1 package whole wheat spaghetti noodles
  • 1 jar Ragu Old World style Pasta sauce
  • 1 15 oz Ricotta Cheese
  • 1 and 1/2 c mozzarella cheese
  • 2 eggs
Instructions
  1. Preheat oven to 375°.
  2. Prepare 1 package whole wheat spaghetti noodles according to package directions.Be sure to season the water with a little salt before dropping your pasta!
  3. Once cooked, let cook in strainer.
  4. Meanwhile, in a large bowl, combine tub of ricotta cheese, 2 eggs, and 1 cup mozzarella cheese.
  5. Mix cheese mixture with cooled noodles and flatten into a greased baking dish.
  6. Sprinkle with 1/2 c. mozzarella cheese. Bake 10 minutes.
  7. Remove from oven and pour entire jar of Ragu over noodles. Bake an additional 10 minutes.
  8. Cut into squares and serve!
Notes
You can use regular noodles, but I prefer whole wheat for added nutrition!

Abbreviated Sweepstakes Rules: NO PURCHASE NECESSARY.  Legal residents of the 50 United States (D.C.) 18 years and older.  Ends 5/6/14.  To enter and for Official Rules, including odds, alternate method of entry, and prize descriptions, visit www.RaguSweeps.com.  Void where prohibited.

This is a sponsored post written by me on behalf of Ragu brought to you by Yummly. All of the opinions expressed are 100% my own.


Like this post? SHARE it!

Related Posts Plugin for WordPress, Blogger...

4-Ingredient Fudge Cookies

It has been cookie mania at my house for the last month or so. It could be that Christmas is coming up. It could be that we’ve had a lot of parties to make them for.

…Or it could just be that we really like cookies.

Whatever the case, we’ve made a LOT of cookies lately. One of my most favorite that I’ve made are these Fudge Cookies. Not only are they incredibly fudgy and tasty, but they are also super easy. Only 4 ingredients!

And here are Pennywise Cook, we really like recipes that call for little ingredients don’t we? That means that there is little moolah involved and that keeps smiles on our little cookie-making faces. I think I spent about $2.50 to make these because I already had eggs and oil on-hand.

Fudge Cookies 4


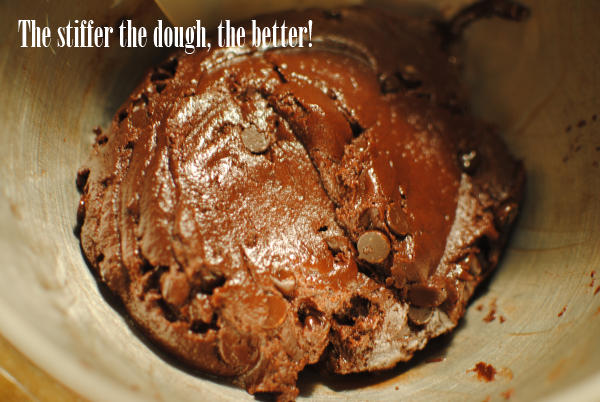
The dough is made from devil’s food cake mix, 2 eggs, 1/2 cup oil, and 1 cup of chocolate chips. After mixing all the ingredients together it becomes very thick and easy to roll into balls. So when you’re making these, don’t be concerned when your mixer starts to slow down and the mixture is very thick.

The stiffer that the dough, the better!

Fudge Cookies 3

Hey, who knows. Santa may just like to have these Fudge Cookies this year.

I can tell you that this Santa is making Rice Krispie Treats this year, because this Santa may just be cookied out! 😉

4-Ingredient Fudge Cookies
Recipe Type: Cookies, Dessert
Author: The 4-Ingredient Cookbook
Homemade cookies don’t have to be hard! These fudge cookies are simple and taste great!
Ingredients
  • 1 pkg devil’s food cake mix
  • 2 eggs
  • 1/2 c. oil
  • 1 c. semi-sweet chocolate chips
Instructions
  1. Preheat oven to 350°.
  2. Mix Cake mix, eggs, and oil until combined. Stir in chocolate chips. Mixture will be stiff.
  3. Shape dough into small balls and place 2 inches apart on a cookie sheet.
  4. Bake 10-12 minutes. Let cool on a wire cooling rack.


Like this post? SHARE it!

Related Posts Plugin for WordPress, Blogger...

Triple Thick Banana Cranberry Smoothie

This is a Sponsored post written by me on behalf of Carton Smart for SocialSpark. All opinions are 100% mine.

One of the forgotten ingredients around the holidays that can tend to get a bad rep is of course, the cranberry sauce. Typically at the family gatherings that I attend, someone always buys it "just in case" and then it never makes it to the table. However, this all changed last year when my oldest realized that she is in love with such cranberry sauce.

Now it is simply a requirement. 

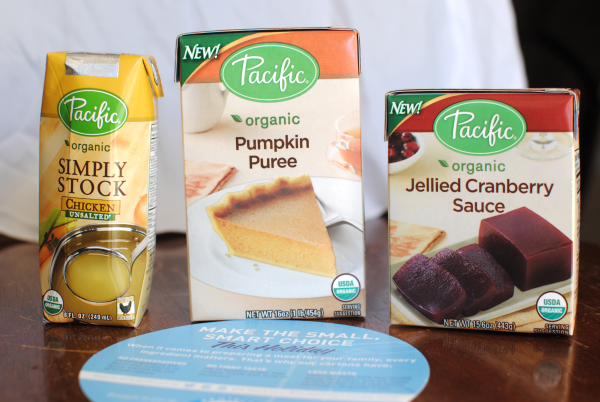
Don't get me wrong, I like cranberry sauce. I'll even eat the kind out of the can. Although sometimes it can have a tinny taste to it depending on the brand. I got to try out some pretty cool products from Tetra Pak that are packaged in cartons, not cans! How perfect is that? No tinny taste and not only that, but they use 1/3 less packaging compared to cans.

 photo 62adf36b-e1dc-4d93-98c1-aa80d97a468d_zps600d562e.jpg

Tetra Pak doesn't just package cranberry sauce either. You can find a variety of products for making your upcoming holiday meals!

 photo 1898ca76-3272-4baf-a8df-07abf60e15e3_zps1bf425e9.jpg

The products that I got to try out seemed so much more compact in their little cartons. I love the fact that they make less waste than your regular everyday food packaging.

 photo d1d52bb8-c150-4f19-9a7c-b8c9ab3c8df3_zpsac6b75dd.jpg

 photo 795e421d-1ec8-414e-b1b8-dde8f5f23ded_zps62983f0a.jpg

Here are the beauties I got to try out. Look at that cranberry sauce. You can even enjoy a different shape than the famous can circle when you get it from a carton.

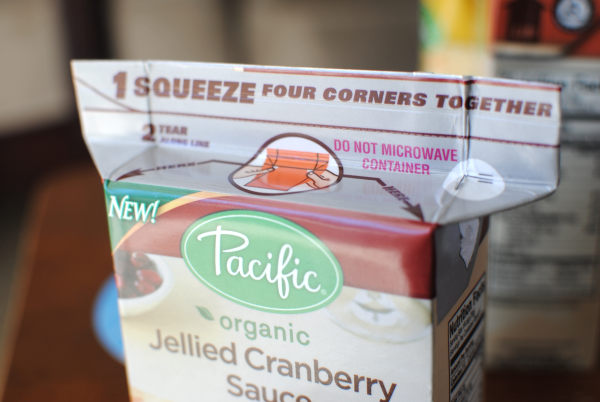
I think what I loved most about the carton was how easy it was to open

I used some of my cranberry sauce to surprise my daughter with as an afterschool snack. We found out that my youngest is also a very big fan of cranberry sauce now too. Had to break up a sibling fight over it!

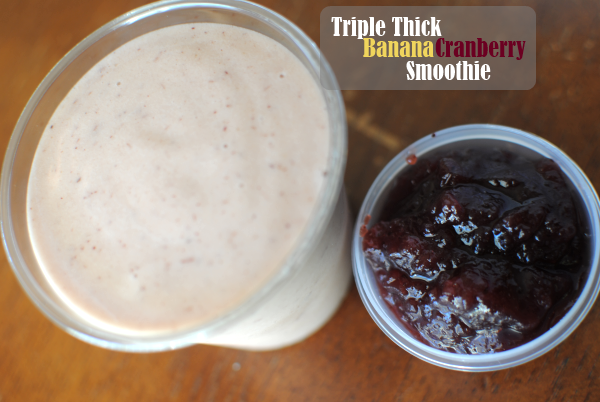
How can you be Carton Smart this holiday season? Well, you could make something up like I did! I some of the cranberry sauce to whip up a quick smoothie for my hubby while he was working. You know me and my experimentations. I threw this together in about 5 minutes and it was really good! A great way to use up leftoever cranberry sauce if you ever need to. 

Triple Thick Banana Cranberry Smoothie

Ingredients

1 whole banana, frozen
1/4 c. cranberry sauce
1/4 c. water

Directions

Blend all ingredients in a blender until smooth. Viola! 

In the meantime, you should Become Carton Smart and check out the other products that you can get in a carton. It makes a difference, it really does!

You can also follow them here:

Tweet @CartonSmart and Follow #CartonSmart on Pinterest

Visit Sponsor's Site


Like this post? SHARE it!

Related Posts Plugin for WordPress, Blogger...

Ideas for the Lunchbox: Grilled Cheese Rollups

The budget cuts aren’t just for the US government these days. Here at our house, we’re working on a new budget with the intent to save as much as humanly possible! I’ve always considered us a money-minded and frugal family, but we are working to try and be even more watchful about unnecessary spending.

Man, I really do sound like the US government now.

What is more frugal than a grilled cheese sandwich? Hmmm, I wonder if grilled cheese could be the answer to the US’s debt crisis?! Maybe if all the lawmakers up in Washington would agree to eat them, then we could start saving some REAL money around here. They could put them in their lunchboxes. Now THAT would be a sight!

I saw this idea over at Chin Deep as I was preparing some ideas for Addie’s lunchbox. I can’t claim I came up with these gems, but I knew I had to make them as she has recently found a deep love for grilled cheese. She gets that from her father. I hated them as a kid!

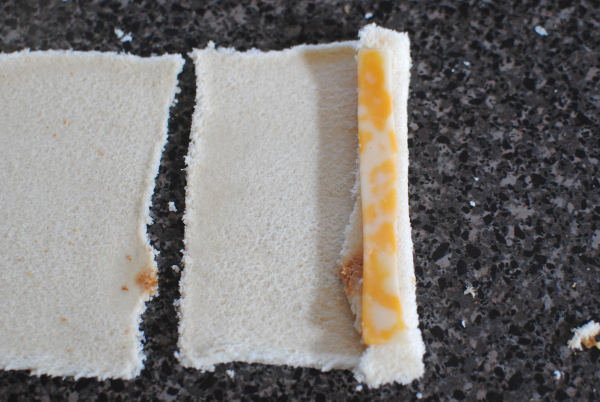
It all starts with some plain and simple sandwich bread. Whatever you can find or afford. Cut off all of the crust leaving as much of the meat of the bread as you can. You’ll also need the sliced cheese of your choice. I cut mine in half and then cut those halves 2 more times to equal about 8 small pieces from each slice.

It’s a pretty simple process. I spared you most of the step by step pictures as to not insult your intelligence. Place a piece of cheese on the very end. Roll. Add another little piece. Roll. And continue in this manner until you’ve come to the end of the bread. I used about 4 pieces for each of mine. Yours may differ depending on the size of your bread.

You can use a little bit of water on the end to help attach it and close it up for frying.

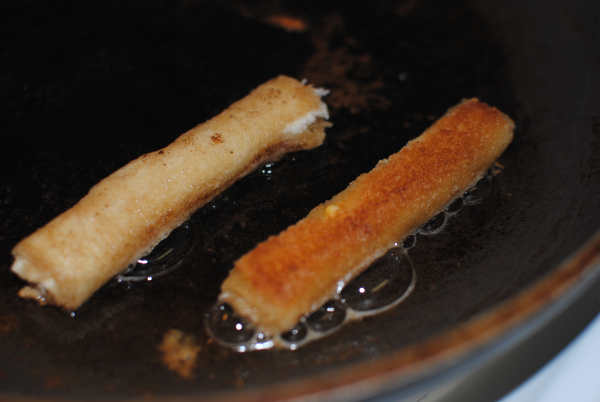
Heat up 2 tbsp of butter over medium heat.

This is where things get hot. The butter absorbs, the cheese melts, and the bread browns! It’s heavenly. It’s around 2 minutes or less on each side. You’ll just need to watch it and determine your favorite color of brown. 🙂

As a side note: you may need more butter depending on how many of these you are planning to make. The butter does absorb pretty quick so it’s possible you’ll have to refill a few times.

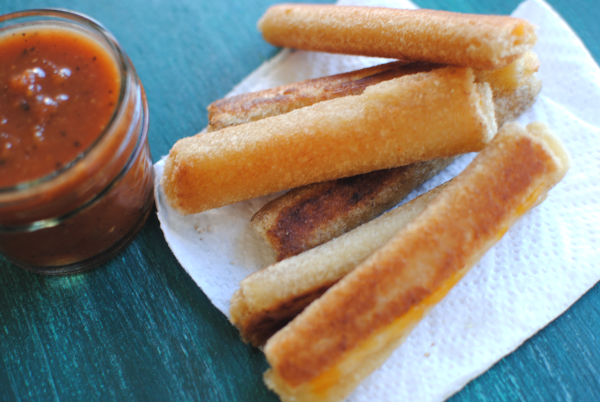
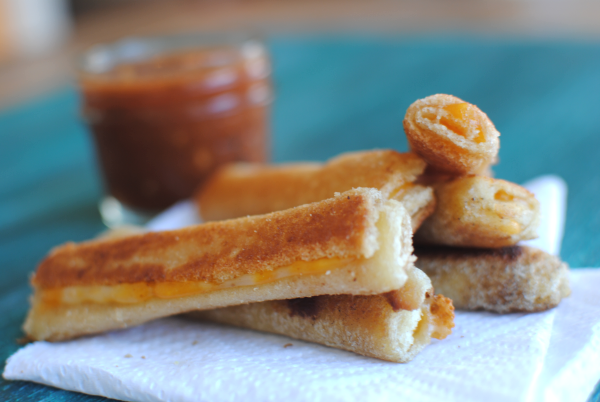
Voila! These are so simple and tasty. They would be great for eating with my Homemade Tomato Soup! These would also make a great finger food for a kid’s party.

UPDATE: After seeing how these fared in her lunchbox, we have decided that putting them in the microwave for a few seconds before placing them in the lunchbox helps. My Addie doesn’t prefer them to be cold, but room temp is fine. We’re going to keep trying and figure out a way to make them work. And if you have any ideas, they are surely welcome!

Ideas for the Lunchbox: Grilled Cheese Rollups

Recipe Type: Snack, Lunchbox

Cuisine: American

Author: Adapted a little from Chin Deep

A new way to enjoy grilled cheese and the perfect idea for the lunchbox!

Ingredients

  • 6 pieces white bread
  • 3 pieces sliced cheese of your choice
  • 2 tbsp butter
  • Tomato soup or marina sauce for dipping (optional)

Instructions

  1. Remove the crusts from your bread leaving as much as you possibly can.
  2. Roll them flat with a rolling pin or with your preferred method of flattening.
  3. Cut your slices of cheese into smaller little slits. I was able to get about 8 out of each of my slices.
  4. Heat 2 tbsp butter in a skillet over medium heat.
  5. Layout your bread and place a piece of cheese longways on the edge of the bread. Roll inward. Place another piece of cheese and then roll inward again. Until you’ve come to the end of your bread. Using a little bit of water, try to crimp the end so it attaches and closes up the rollup. It doesn’t have to be perfect, it just helps the frying process.
  6. Place the rollups in the skillet and fry each side for about 2 minutes or until desired brownness.
  7. Let cool on paper towels and serve with tomato soup or marina sauce!


Like this post? SHARE it!

Related Posts Plugin for WordPress, Blogger...