Hot Boiled Peanuts: It’s a Southern Thang

Sometimes you feel like a nut…

And sometimes you feel like a boiled nut.

My husband and I are doing the Daniel Fast right now. We’re on day 11 of 21 right now. If you’re not familiar with the Daniel Fast, I’ll sum it up by telling you some of the guidelines.

  • No meat, dairy, sugar or artificial sweeteners, leavened bread, or caffeine
  • You can have all vegetables, fruits, nuts, beans, and whole grains
  • No fried foods
  • Only water to drink
  • It’s based on the book of Daniel in the Bible and 2 of his fasting experiences
  • It’s not only physical, but meant to be a spiritual experience

The first time that Daniel did this fast was for 10 days. The second time was for 21 days. We’ve done the 10-day before without issue so we’ve challenged ourselves to try the 21-day. It’s gone really well so far. Considering that my husband is a cheeseburger and french fry kinda guy, it’s VERY surprising how he gets along with this type of fast. Praise God!

And me? What do I do about my sweets you say? Well let’s just say that bananas and raisins are my best friend these days. Remember my Peanut Butter Choco-Banana Ice Cream? I can actually eat that on this fast! But I have to eat it out of a bowl instead of a cone. Darn…

But I digress…

We’ve also been eating a lot of nuts lately. Almonds and peanuts mostly. You can get these HUGE, I mean HUGE bags of salted and roasted peanuts (in-shell) at Sam’s Club for around $5. It’s amazing how much peanuts will fill you up while providing you with energy.

If you’re from the south or have visited the south before, you’ve probably heard of folks offering Boiled Peanuts. There are signs just about everywhere once you get into Alabamer (yes, Alabamer) and Misippi (yes, Misippi). No need to pronounce words correctly around here, we’re too busy enjoying our boiled peanuts. I wish I could insert an audio clip of how I say boiled for y’all. Words like coil, boil, toilet all come out of my mouth a little on the Paula Deen side. Oh who am I kidding? It sounds a LOT like Paula Deen says boil. 🙂

So with all the nuts we’ve been eating, I wanted a little change in the nut department. So I though why not boil them?

Since the Hamptom Farms peanuts that I bought were already salted, I knew I didn’t need to salt them again. And I didn’t want them swimming in a bunch of oil (once again, just imagine a little Paula Deen accent). So I used water!

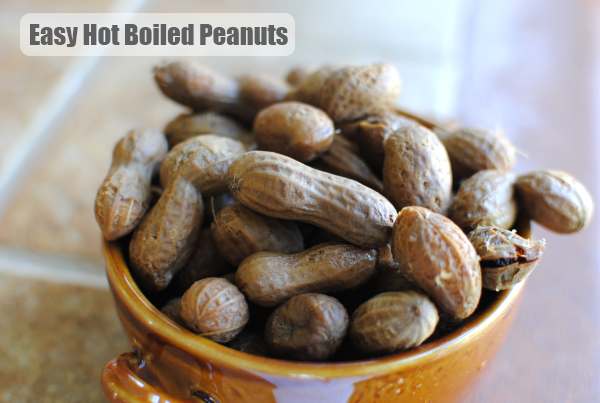
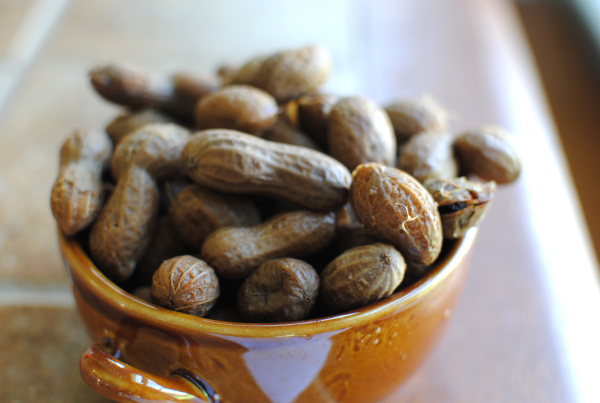
1 big pot full of water, a huge amount of salted and roasted peanuts, and 5 hours later you have hot boiled peanuts good enough to make you slap yo mama! It honestly didn’t get any easier than that.

And we didn’t even have to make a trip down to Alabamer!

Hot Boiled Peanuts: It’s a Southern Thang
 
Recipe Type: Snack, Appetizer
Author: Pennywise Cook

There is nothing to making hot boiled peanuts just like they make on those road-side stands in the south!
Ingredients
  • Any amount of in-shell roasted and salted peanuts
  • Water- to cover the entire amount of peanuts
Instructions
  1. Place the amount of desired peanuts into a large pot.
  2. Cover with water.
  3. Bring to a boil, then lower the temp to a simmer.
  4. Cover and let simmer for 4-5 hours or until the shells begin to give a little and the peanuts inside are soft.
 
Notes

You can of course get peanuts that aren’t salted already, just be sure to salt your water when boiling them.
Your water will evaporate throughout the boiling process, be sure to continue adding more hot water in order to keep the peanuts covered.


Like this post? SHARE it!

Related Posts Plugin for WordPress, Blogger...

Homemade Strawberry Belgian Waffles

It is MAY! Where in the wide world of sports did March and April get off to? I remember thinking wow, it’s already March and then BOOM it’s  May. I’m mostly caught off-guard because both of my girl’s birthdays are in May which means that mommy has a lot of work to do. My oldest’s birthday is next week and I decided not to procrastinate this year by asking her cake preference a week before instead of, oh, the night before.

These are Mom Of The Year qualities, you know.

She chose My Little Pony with a Rainbow Dash emphasis. For those of you who don’t know about these girly things, just know that I have a lot on my plate next week.

There’s probably a chance that you’d like to know about those big, fluffy waffles up there. I could tell you many stories about when my mom used to make these for me. Without exaggerating, I probably ate 4 of these in one sitting when I was younger.

I could do the same now, but I try to practice self-control.

My mom always made them from a box. Do not get me wrong, that is normally the very method that I would use. However, since I do have a tendency to eat a redonkulous amount of them, I wanted to make sure and healthify them up just a bit.

These Homemade Strawberry Belgian Waffles contain no butter, oil, or eggs. You could use soy milk or almond milk in place of the milk and you’d have them dairy free! They aren’t artificially made to taste like strawberries like some boxed mixes might work. They are literally made with fresh strawberries which give them a more natural flavor.

I almost called these Strawberry-Banana Belgian Waffles because I used bananas instead of the oil/butter/egg, but the banana taste didn’t come through as much as I was expecting. Even the strawberry taste didn’t become as potent as I would have liked. But if you’re brave and don’t mind a little sugar, you can add a tsp of sugar to the strawberries before adding them to the batter and I’m sure that it will bring out the strawberry flavor a little more.

I think my favorite part about Belgian waffles as opposed to regular waffles is the fact that they are super fluffy.

I love fluffy food.

Does that sound weird? I’m sure it does, but I don’t care. I like whipped cream, cotton candy, mousse of all kinds, lighter-than-air angel food cakes. You name it, if it’s an ounce away from losing it’s gravity and joining the angels, then I probably enjoy eating it. The key to eating them, at least in my opinion, is to top them with fresh (or sliced and sweetened) strawberries and then give them a few squirts of Reddi Whip. I’m not sure that I could be in the presence of a Belgian waffle that didn’t contain whipped cream. That’s just the way that I was taught to eat them. I wonder what the Belgians think of me…

My waffle iron makes 2 of these at a time. With the amount of batter that I mixed up, I got 4 total. To help you know how many of these you’ll get out of 1 batch. I’d recommend doubling the recipe if you have a hungry bunch.

Believe me, they won’t eat just one.

Recipe adapted from Vegan Heartland.

Homemade Strawberry Belgian Waffles
 
Recipe Type: Breakfast
Author: <span class=”mceItemHidden”><span class=”mceItemHiddenSpellWord”>Pennywise</span> Cook- Adapted from Vegan Heartland</span>

Serves: 4
Strawberries add a summery flavor to sweet and tasty belgian waffles! You’d never know these were healthy. There are only about 150 calories per waffle!
Ingredients
  • 1 c flour (I used about 1/4 c whole wheat)
  • 1/4 tsp salt
  • 2 tsp baking powder
  • 1 tbsp maple syrup (I used sugar free)
  • 1/4 c mashed banana (about 1 banana)
  • 3/4 c skim milk
  • 1 tsp vanilla extract
  • 1/2 c fresh strawberries, finely chopped
Instructions
  1. In a small bowl, stir together flour, salt, and baking powder until combined. Set aside.
  2. In a separate mixing bowl, combine maple syrup, banana, milk, and vanilla. Mix on low until fluffy.
  3. Slowly add the dry ingredients to the wet and mix well.
  4. Then gently fold in the strawberries.
  5. Cook according to your waffle iron’s directions.
  6. Optional) Top with fresh strawberries and Reddi Whip!
 
Notes

– If you wanted to bump up the nutrition, you could also add some flax to these. I used about a 1/4 c whole wheat flour in mine.

– You can use pretty much any type of milk in place of the dairy milk if you’d like. Even coconut milk. It’s just a matter of your preference!

– These don’t have a strong strawberry taste (what’s in a name anyways?), so if you want to bump that up, add about a tsp of sugar to the strawberries. OR you could add the strawberries in the at the beginning and let them mix in well with the wet ingredients. The flavor would disperse a little more there. (I will be trying this myself)

– Or if you have any other suggestions for these, I’d love to hear! They are a work in progress. 🙂


Facts (per waffle not including toppings): 147 calories, 40 carbs, 0 grams fat, 5 grams protein, 417 gram sodium, 3 grams sugar.


Like this post? SHARE it!

Related Posts Plugin for WordPress, Blogger...

Crockpot Chicken Tacos

Well hello there! Long time no….er….blog?

As I was preparing the pictures for this post, even my husband made the comment about my lack of my snapping of photos of our dinners. Yes, I am usually known as the papparazi of food around here, but for the past couple of months there have been some awesome things happening around here and needless to say, I’ve been just a bit preoccupied.

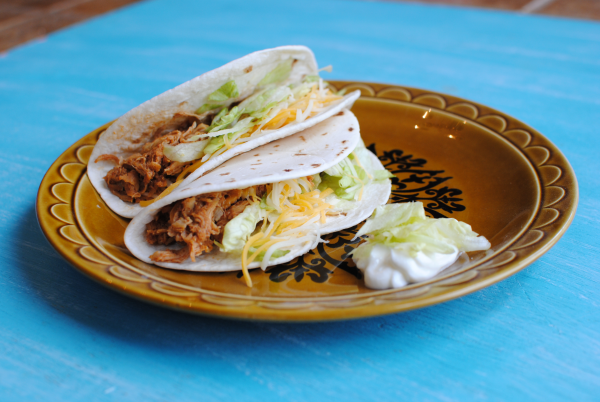
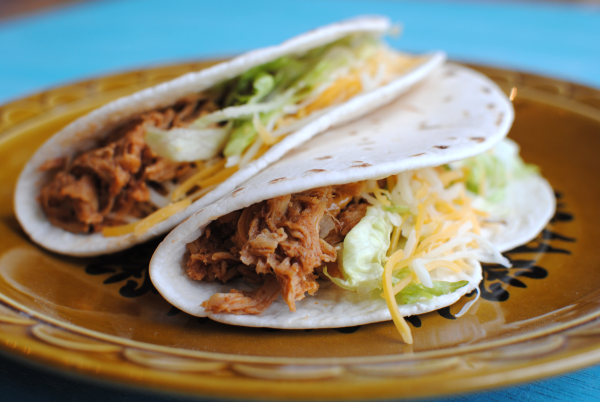
But have no fear! I have a recipe today. One that even the least of cooks can throw together in minutes and makes for a family pleasing meal. Crockpot Chicken Tacos only take 3 ingredients and one of them is water. Your HUSBAND could make these.

He might get a big head afterwards. Just tell him that he did fabulous on dinner and that you adore his culinary skills. You didn’t realize that Crockpot Chicken Tacos could help you stroke your husband’s ego did you?

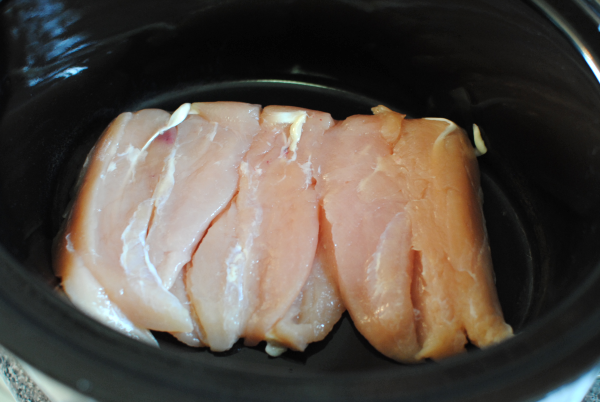
The most important ingredient in this one is, well, chicken! You need about a pound to a pound and 1/2. I used fresh because I got some on clearance, but frozen will also work. You’ll just need to adjust your crockpot setting depending on how fast you’d like it to cook.

Use tenderloins, breasts, thighs, whatever you’d like. It’s going to get tender and you’ll shred it anyways.

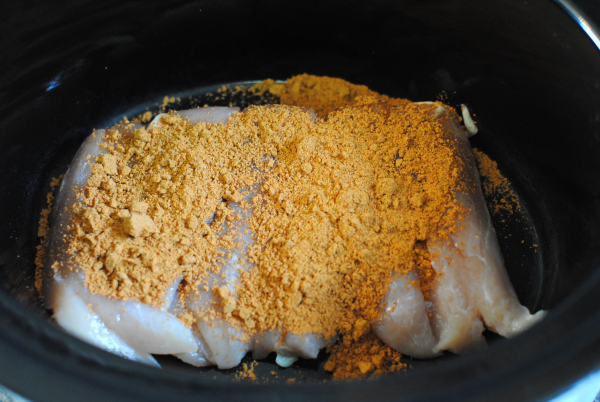
Brace yourself, this is where it gets a little tough. You must open a packet of taco seasoning and sprinkle over the chicken. I know, I know. How could I ask you to do such a laborious thing? Well suck it up. You’ll live.

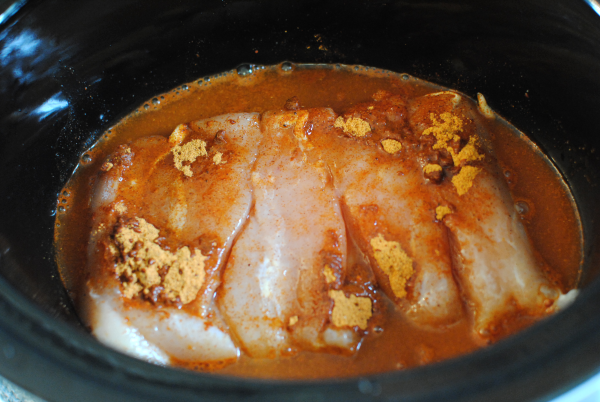
Here’s the last step. Add the amount of water listed on your taco seasoning packet to the crockpot.

Place the top on your crockpot and walk away. Go update your status. Take out the trash. Clip your toenails (you know who you are). Hey look, now you have time to make a dessert! Might I suggest Salted Caramel Brownies

I usually let it cook for about 6 hours on low when I’m using fresh chicken. Towards the end of the cooking, I usually add just a tad bit more water and then shred up the chicken. It’s so tender that just stirring it usually shreds it without hassle.

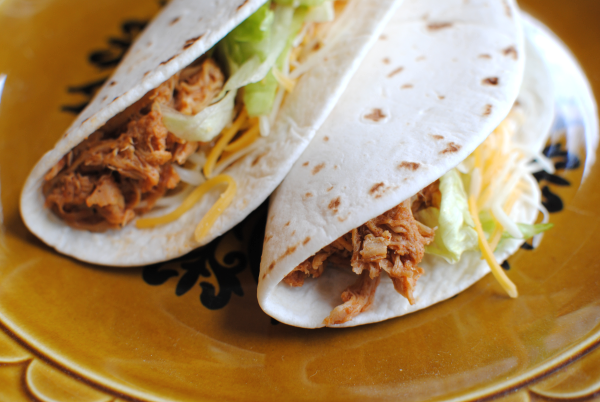
Add your favorite toppings and enjoy.

We’ve started having what we’re calling Taco Tuesday. Some form of taco will be made on Tuesdays. Whether casserole, soup, or plain tacos, that’s our theme. And beef is good, but sometimes chicken feels a bit healthier. Plus, it’s a nice change.

Crockpot Chicken Tacos
 
Recipe Type: Main, Crockpot
Author: Pennywise Cook

With only 3 ingredients (one of which is water) and a crockpot, you can have chicken tacos for dinner tonight!
Ingredients
  • 1- 1.5 pounds fresh or frozen chicken breasts, tenders, or thighs (your choice)
  • 1 package taco seasoning
  • Water listed on taco seasoning packet + a bit more
  • Toppings of your choice
Instructions
  1. Place fresh or frozen chicken into crockpot.
  2. Sprinkle with taco seasoning.
  3. Add the amount of water listed on the seasoning packet.
  4. Cook on low for about 6 hours (fresh chicken) or medium/high for 6 hours (frozen).
  5. Add a little water, about 1/4 cup towards the end. Let absorb then stir and shred.
  6. Serve with tortillas or shells and add your favorite toppings!


Like this post? SHARE it!

Related Posts Plugin for WordPress, Blogger...

Oven Roasted Green Beans

On any given day here in our household, anything green won’t be eaten by the kiddos and sometimes even by the husband.

What is it about the color green that turns folks off?

It’s quite sad that it’s gotten such a bad rep when it’s one of the most nutritious colors to eat. This just makes the challenge for cooks like me to make those things that are green taste good enough to eat. Both of my girls wouldn’t touch green baby food. You know, those green peas and green beans all pureed and mushy. I can’t say that I blame them. I don’t think I’ll be indulging in a big ole jar of mushy green peas myself. When we went to England, that was a common side dish there. Of course I had to try it while I was there. But I was over it after my first taste.

With a bag of frozen green beans in my freezer, I decided it was time to use those babies up. I went for the roasting option hoping that they would taste good enough for the family to enjoy. After all, they always like my roasted broccoli and roasted cauliflower.

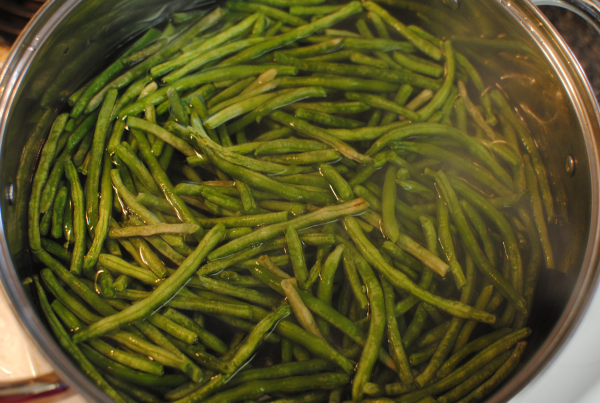
I started by parboiling the green beans straight from frozen. I wanted to get them thawed and mostly cooked and then finish them in the oven. I was surprised at how quick these cooked.

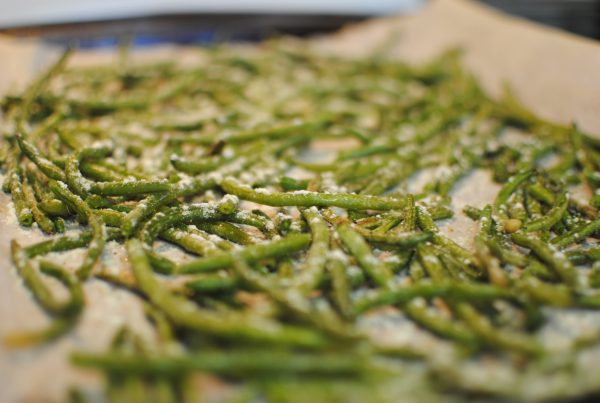
Then I drained them and spread them out onto a baking sheet lined with parchment paper. A little olive oil, salt, and pepper and into the oven they went.

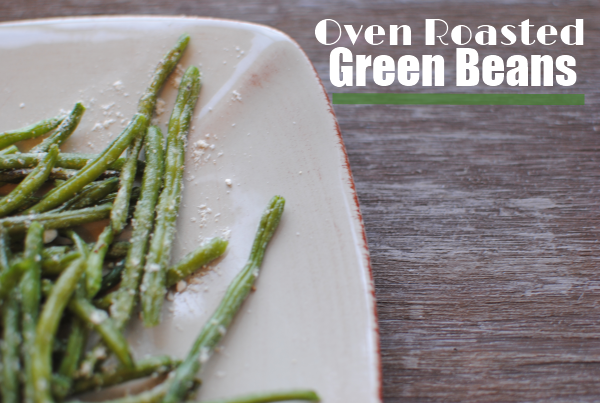
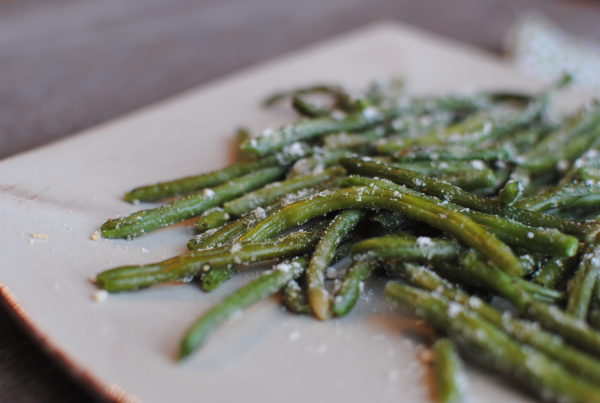
After a nice stint in the green bean sauna (I know my analogies are ridiculous), they came out just perfect. Just roasted enough that some of them had a crunch, but still soft like you’d expect.

And what would make anything roasted taste better than parmesan cheese? Not a thing. A good sprinkling of that and you are set with the tastiest green beans this side of Mason Dixon Line.

When I was finished with these, I took one of them to my picky daughter for her approval. She gave me a look when she saw how green it was and I was fully expecting her to pass on the taste test.

Then it came….

She let out a “mmmmmm”. And I knew I was onto something. We had these with our dinner and they were a big hit.

Even though they were green. 🙂

Oven Roasted Green Beans
Recipe Type: Side Dish, Vegetable
Author: Pennywise Cook
Try a new take on everyday green beans by popping them into the oven to roast. Here’s how!
Ingredients
  • 16 oz Pkg Frozen Extra Fine Green Beans
  • 1 tsp Salt
  • 1/2 tsp Pepper
  • 2 Tbsp Olive Oil
  • 1/4 c. Parmesan Cheese
Instructions
  1. Preheat oven to 425°.
  2. Bring pot full of water to boil. Add green beans and boil for 5 minutes. Drain and dry.
  3. Lay green beans on baking sheet lined with parchment paper in a flat layer.
  4. Drizzle with olive oil and sprinkle with salt and pepper.
  5. Cook for 10 minutes. Remove from oven and toss. Return to oven for additional 5 minutes.
  6. Top with parmesan cheese and serve immediately!


Like this post? SHARE it!

Related Posts Plugin for WordPress, Blogger...

YumEarth Organic Candy Review and Giveaway

We’re at the grocery store picking up our weekly groceries. There’s but one thing that I can guarantee that my daughter is going to ask for….

Gummy snacks.

We’re talking fruit snacks, fruit roll-ups, gummy bears, and you name it. She’s going to request that we throw it in the buggy. Yes buggy. That’s what we call them here in the south y’all. I don’t usually mind grabbing some for her snack box at school or perhaps something to snack on in the afternoons. But sometimes, I have to draw the line. She would eat them every second of every day if I let her.

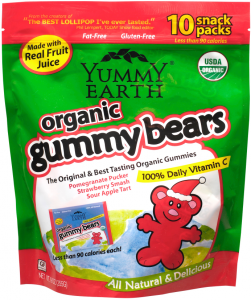
I often find awesome deals on YumEarth Organic Gummy Bears on Amazon so I was thrilled to get a chance to try these out for myself. And to let my little gummy connoisseur try them for herself.

I didn’t actually tell her that these were organic before she tried them. I didn’t think it would matter and I was right! She loved them and so did I.

I will say that I was a little thrown off by their color. They seemed a little drab in color and not as bright as most gummy bears, but that didn’t mean they tasted bad. They were still really yummy. They reminded me of a cross between gummy bears and fruit snacks. Gummy bears tend to be tougher and fruit snacks are usually soft. This was a blend of the two. Either way, it only took us a couple of days to go through our tasty bag of 10 packs.

Come to find out, YumEarth was founded by two DADS who were on a mission to share wholesome treats with their kids. YumEarth is dedicated to making delicious treats and sweets with all-natural ingredients, no artificial colors, no artificial flavors, and no major allergens, such as gluten, nuts and dairy. Pretty sure that most anyone can eat these and not have to worry about any funky ingredients.

There are tons of everyday stores that carry these. So be on the lookout at your store or find out where you can locate them here.

In the meantime, you wanna win a FREE bag of these for yourself? It’s a GIVEAWAY!

____________________________________________________________________

YumEarth Organic Gummy Bear Bag Giveaway

Mandatory Entry: Leave a comment on this post telling me who you think would eat these if you won!

Optional Additional Entries:

This giveaway will end on December 20th at 11:59pm CT. I will contact the winner on December 21st and they will have 24 hours to respond. If I have not heard from them in 24 hours, I will name a new winner. This giveaway is open to those in the US only.

This review was made possible by Mom Spark Media. Thoughts are 100% my own. All prizing for MSM giveaways is handled by a third party unless otherwise noted. For this reason prize fulfillment can take up to 90 days after the winners information is received.


Like this post? SHARE it!

Related Posts Plugin for WordPress, Blogger...

Stuffed Pizza Cupcakes

I’ve finally started Christmas shopping. Last year I had most of it done by the very first week in December. Yeah, I was a little nuts wasn’t I? Nuts or extremely genius I’d say. This year, I’m probably going to do a lot of my shopping online. Since I’ve stopped blogging at Saving with Amy, I’m very much less in-tune with the current deals and steals across the web.

It’s a weird feeling not being on top of the latest deals.

But my sanity is currently intact so I’m not going to complain. It took a long time to make my decision to quit blogging deals and in the end, it was best for me and my family. And now I get to spend my time making yummy food and fun DIY projects to share with you!

These, my friends, might just be your family’s new favorite snack. When I made these, I had no idea how excited that my family would get about them. They have been requested over and over again. Hubby even wants me to make some for him to take for lunches.

There is nothing better than making something that is requested a second time. Well at least in my book anyways.

I made these earlier in the day and just reheated them for dinner and they were perfect. You could just make them on demand, but I needed the daylight for my pictures. But it goes to show that these are great for making ahead of time for a party or lunches.

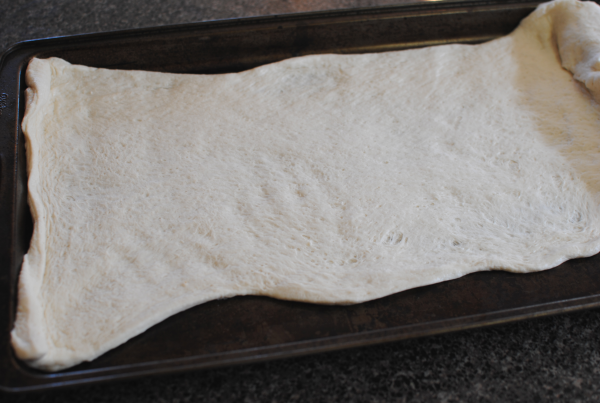
You start by rolling out a store-bought pizza dough. Get it as long and flat as you can. It doesn’t have to be perfect.

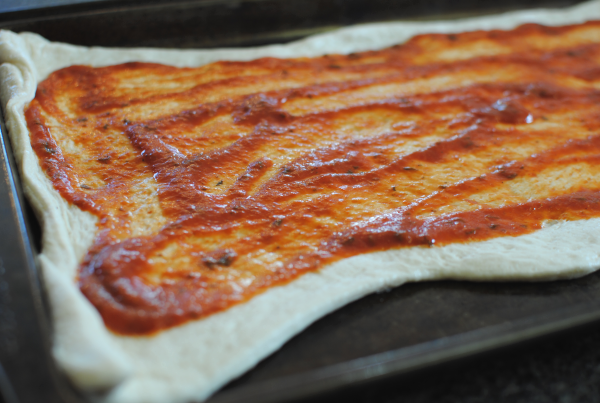
Next, spread about 1/2 a jar of pizza sauce over the entire pizza dough, leaving about an inch around the edges.

Then sprinkle the entire thing with mini pepperonis. I was going to use the regular size, but when I came across these, I thought they might work better for this. And I was right! So glad that I used the smaller. It made it possible to get a bite of pepperoni in each bite without them trying to separate.

Then cut the dough in half.

Place about 4-5 pieces of cut up string cheese across the dough like this.

Then proceed to roll the dough up. Once rolled, cut it into 1 inch pieces doing your best to keep all the fillings inside.

Place the rolled up pieces into a greased muffin pan with the swirled part facing up.

You’ll top with a little more mini pepperonis and some shredded cheese before baking. Then bake them up and you’re done!

SO amazingly yummy! Everyone will be bound to love these. Come on, pizza dough filled with sauce, pepperoni, and cheese? I think so!

Stuffed Pizza Cupcakes
Recipe Type: Main Dish, Snack
Author: Pennywise Cook
5 simple ingredients lead to the tastiest of all cupcakes. STUFFED Pizza Cupcakes!
Ingredients
  • 1 pkg Store-Bought Pizza Dough
  • 1/2 Jar Pizza Sauce
  • 1 c. Mini Pepperonis, Divided
  • 1/2 c. Shredded Mozzarella Cheese
  • 6 Mozzarella String Cheese, cut into 1 inch pieces
Instructions
  1. Preheat oven according to pizza dough’s directions.
  2. Begin by rolling out the pizza dough flat. Spread the pizza sauce over the dough, leaving 1 inch around the edges. Sprinkle with 1/2 c. mini pepperonis. Cut the dough in half.
  3. Lay 4-5 pieces of string cheese across the dough, adding more as you roll. Do this with both of the pizza doughs.
  4. Cut into 1 inch pieces and place in a greased muffin pan with the swirled side up.
  5. Bake according to your pizza dough’s directions checking after about 12 minutes. When tops begin to brown, remove from oven.
  6. Use a knife to separate from the pan and cool.

Like this post? SHARE it!

Related Posts Plugin for WordPress, Blogger...

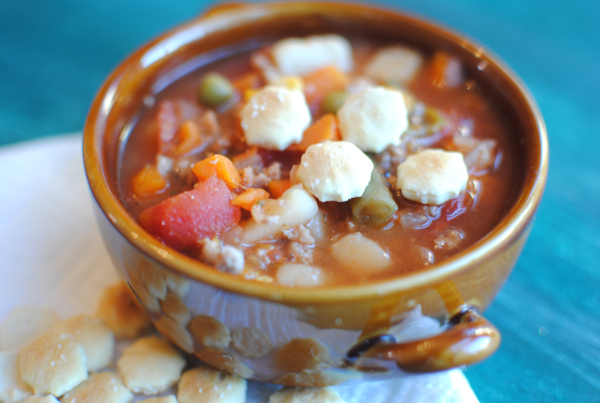
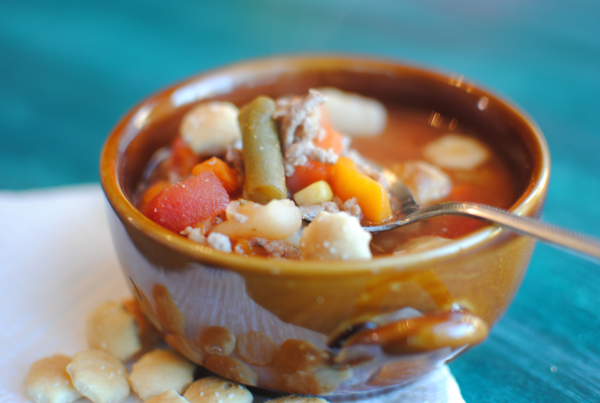
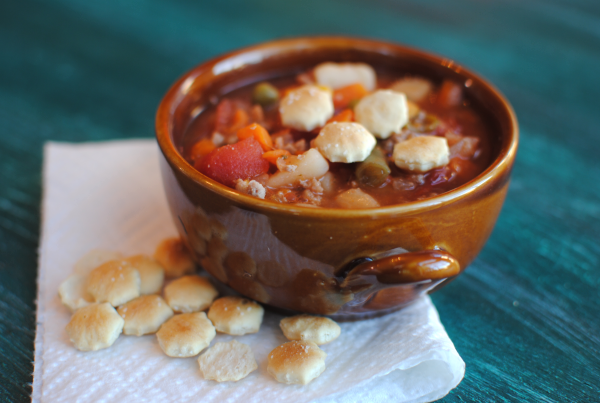
Easy Vegetable Beef Soup

I sincerely apologize for not getting on here last week and wishing you guys a very Happy Thanksgiving! I’m normally a lot better about that, but this year I decided to truly disconnect from the outside world. Well, everything except for Words with Friends. I’m not sure that I could live without that.

So even though this is very late and you’re probably tired of hearing it, HAPPY THANKSGIVING! And now I can officially move on into the Christmas season. I’m just not the type to feel Christmas-y until I’ve digested my turkey and dressing. Anyone else feel that way?

We had a very fun-filled Thanksgiving with family and friends. I got to see my best friend from high school and even ran a 5k on Thanksgiving morning. It really was a great Thanksgiving. I hope that you enjoyed yours as much as I did!

I’ve got another recipe for you today that comes from my momma. It’s funny how our cooking skills and what we learn in the kitchen usually comes from those we are closest to. When I was little, watching my mom cook was nothing but dinner for my belly. But these days I look back on those days as valuable knowledge. And it’s especially fun to cook with her now.

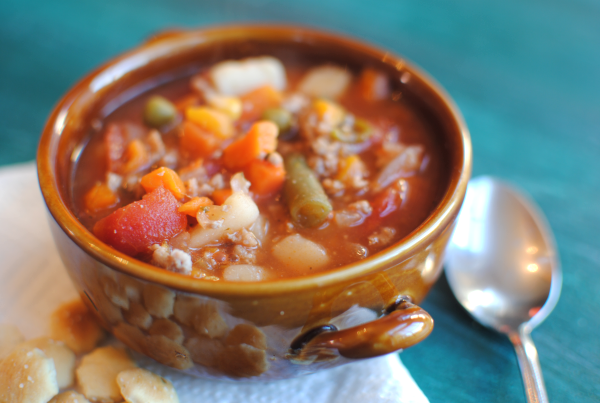
This Vegetable Beef soup is a regular when I visit my mom and also here in our home. It’s simple, it’s fast, and it’s incredibly tasty.

The absolutely perfect soup to warm your soul on a chilly night.

This soup can be whipped up in no time. Even on those last minute weeknights when you have no idea what to make for supper. In fact, most of the ingredients are things you’ll probably already have on-hand.

The bulk of this recipe is the beef and plain old canned veggies. It really doesn’t get much easier than cracking open a can or two and making a soup that tastes like you’ve been working hard on it all day long.

I can’t wait for you to try this recipe out! Let me know what you think if you do…

Easy Vegetable Beef Soup
Recipe Type: Main Dish, Soup
Author: Pennywise Cook’s Momma
Warm up on chilly nights with this super easy, yet tasty vegetable beef soup!
Ingredients
  • 1 lb Lean Ground Beef
  • 1 Medium Onion, Chopped
  • 4 Cans Veg-All
  • 1 (28 oz) Can Diced Tomatoes, Undrained
  • 1 (15 oz) Can Tomato Sauce
  • 6 Beef Bouillon Cubes
  • 6 Cups Water
  • 1 and 1/2 tsp Garlic Powder
  • 1/2 tsp Salt
  • 1/4 tsp Pepper
  • 1 tsp Italian Seasoning
Instructions
  1. In a large dutch oven or soup pot, brown ground beef along with onion. Drain.
  2. Stir in the remaining ingredients and heat over medium heat until boiling. Reduce heat and simmer for 10-15 minutes.
  3. Serve with crackers and enjoy!

Like this post? SHARE it!

Related Posts Plugin for WordPress, Blogger...

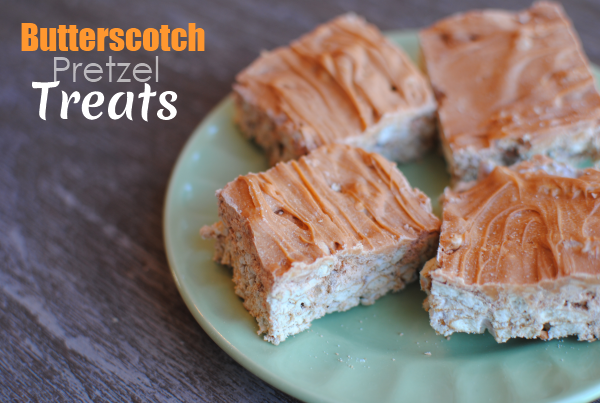
Butterscotch Pretzel Treats

Thanksgiving is in TWO days! This year has just flown by. Have you finished all your big feast shopping? I sure hope so, because the stores are nuts about now. I was in a few stores the other day and just gave up. You know those trips to the store when you have only a couple of items. Then you get in line only to realize that for those 2 items you’ll have to wait in line for 20 minutes. That’s about the time that I start to justify whether or not it’s absolutely necessary that I get those items.

I usually just give up.

I wanted to share with you guys these awesomely yummy treats that I made the other day. When I’m feeling experimental, I pick up things I think might go well together and then kinda throw it together. As you know, sometimes it works well and other times, well, it completely bombs.

I’m human and a novice cook, so what can I say?

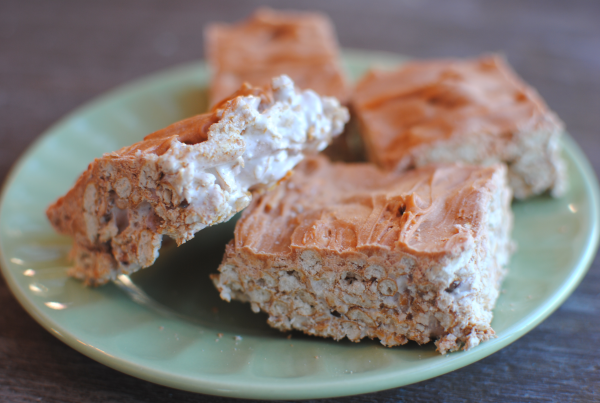
So this is why I was so very happy when these tasty Butterscotch Pretzel Treats turned out so yummy! So easy with just 4 simple ingredients and they take literally minutes to make.

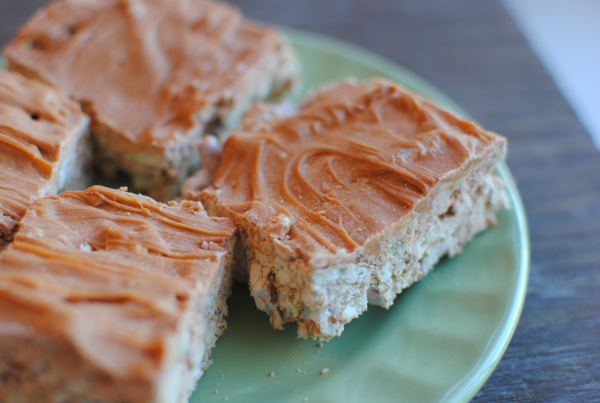
They resemble that of rice krispie treats, but I used pretzels instead of the rice krispies. And oh did that make them yummy. I just love the hint of salty that  you get with these sweet treats.

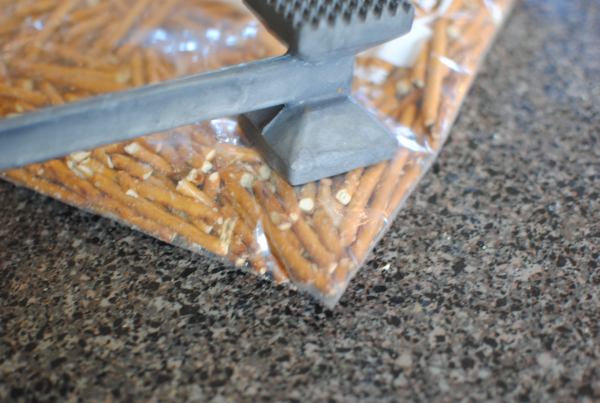
The first thing you want to do is get all of the pretzels out of the bag. The reason that I want to unscore pretzels is because the bag tends to have a ton of salt at the bottom, so don’t just pour the entire bag of pretzels into your ziploc. Use your hand to get them out leaving all the salt at the bottom of the bag.

Use meat mallet or something heavy to break up the pretzels a bit.

It’s really not essential that you make them super small. Just get them fairly broken and be done. Put them in a bowl.

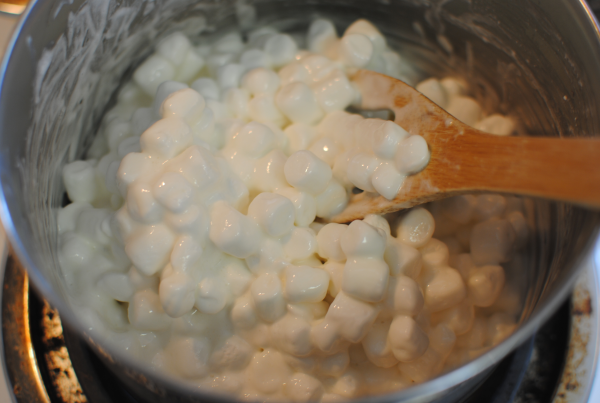
Then it’s time to melt up your marshmallows with a little bit of milk. This may be the longest step in the whole process.

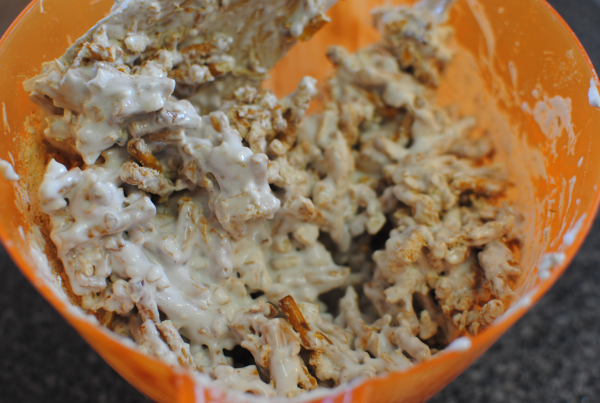
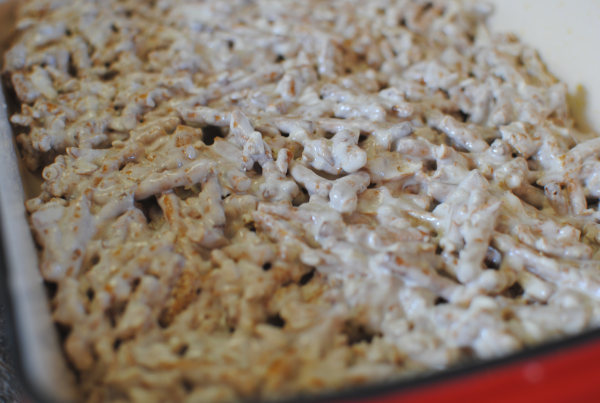
Pour the melted marshmallows in with the pretzels and use your spoon to mix it all up really well. There tends to be pretzel crumbs at the bottom, so make sure to incorporate those too.

Pour it all into a greased 9×13 dish and flatten out. Set that aside while you get the butterscotch going.

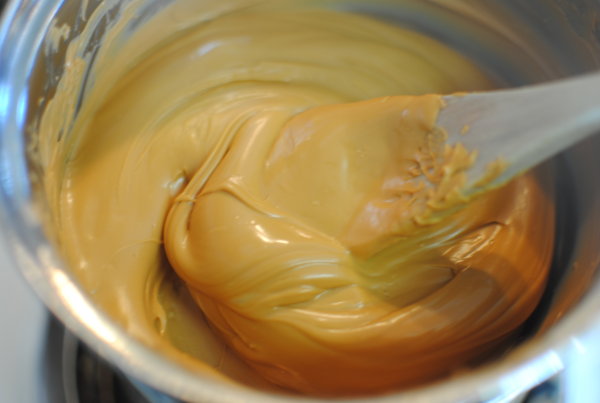
Using your preferred method, melt the butterscotch chips until smooth. Some people feel comfortable using the microwave, but I’m not good at that so I always use a make-shift double boiler for this.

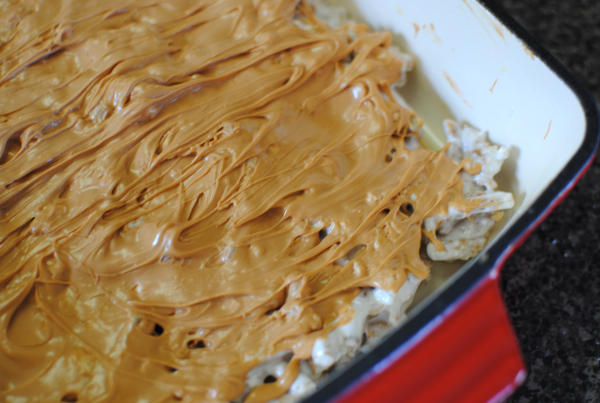
Pour the melted chips over the marshmallowey pretzels and place in the refrigerator to set.

Cut into bars and serve! It’s so easy to make these and they are SO good. A nice little change from your everyday rice krispie treats, don’t ya think?

Butterscotch Pretzel Treats
Recipe Type: Dessert, Snack
Author: Pennywise Cook
With only 4 ingredients, these Butterscotch Pretzel Bars and easy AND incredibly yummy!
Ingredients
  • 1 12 oz Package Butterscotch Chips
  • 1 12 oz Package Pretzel Sticks
  • 1 10 oz Package Mini Marshmallows
  • 2 Tbsp Milk
Instructions
  1. Remove the pretzels from their bag and transfer to a large ziploc bag. Make sure to use your hands to remove them and not pour the entire bag in. This will avoid getting all of the salt into your treats.
  2. Using something heavy, break the pretzels inside the ziploc until fairly small. Pour into a mixing bowl.
  3. Place the milk into a large saucepan. Pour in marshmallows and melt over medium heat until smooth.
  4. Pour the marshmallows into the pretzels and combine well. Making sure to get the pretzel crumbs incorporated well. Pour into a greased 9×13 dish and flatten with the back of a wooden spoon.
  5. Meanwhile, melt bag of butterscotch chips in microwave or over a double boiler until smooth. Pour over pretzel mixture and spread completely over top.
  6. Place in refrigerator to set. Cut into bars and serve!


Like this post? SHARE it!

Related Posts Plugin for WordPress, Blogger...

Ridiculously Easy Brown Bag Popcorn

I wish I had a dime for all of the “duh” moments that I’ve had in my life. I will not go into any specifics with you, but just know that sometimes I’m not the brightest crayon in the box. 🙂

Now that I’ve thoroughly dissed myself, we’ll move on to this awesome new revelation that I’ve made! It’s been a long time, but a friend of mine guest posted on Saving with Amy about how to make your own popcorn. I remember reading it and thinking oh that’s neat and looks really easy. And then I just moved on with my life to never try it out for myself.

Not sure why I didn’t because I am HOOKED on this stuff now!

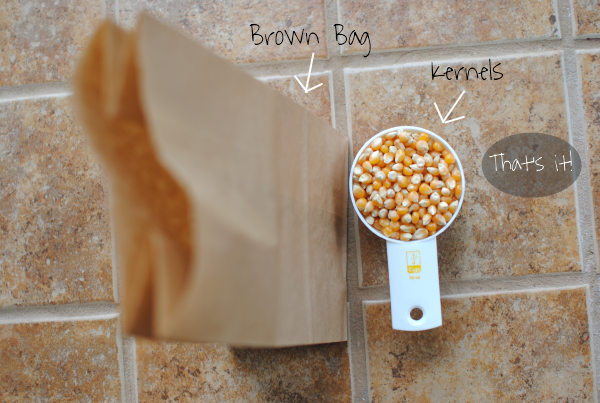
You see, to make about 8 or 9 cups of your very own popcorn, all you need is a brown bag like this one. You can get 50 of them at Dollar Tree for a buck! And you need 1/3 cup of unpopped kernels. You can also get these at Dollar Tree for a buck!

For $2, you’ll have popcorn coming out of your ears…

Have you ever looked inside one of those prepackaged bags of popcorn? There are all sorts of things in there that are pretty much unnecessary. Sure it’s nice to have salt or butter flavor, but with all the added fat too? This easy brown bag method makes it easy to make pure popped corn without adding any extra nonsense. In fact, I actually like it plain just like this. No butter or salt needed!

Just try it once and you’ll be hooked like me. It’s too incredibly simple not to.

Ridiculously Easy Brown Bag Popcorn
Recipe Type: Snack
Author: Pennywise Cook
A brown paper sack and popcorn kernels are all you need to make your very own popcorn!
Ingredients
  • 1 Brown Paper Bag
  • 1/3 c. Unpopped Kernels
Instructions
  1. Pour to kernels into the brown bag. Fold the top down about 2 times.
  2. Place in microwave and heat on full power for 1:45- 2 minutes. This will depend on your microwave, but 2 minutes is about right for mine. Just stop it once there is about 2-3 seconds between kernel pops.

Like this post? SHARE it!

Related Posts Plugin for WordPress, Blogger...

My Momma’s Chili

The day has finally come when I get to share with you one of my favorite recipes of all time. Now that it’s getting chillier outside, it’s time to make up a big pot of chili! I look forward to this part of the year practically all year long.

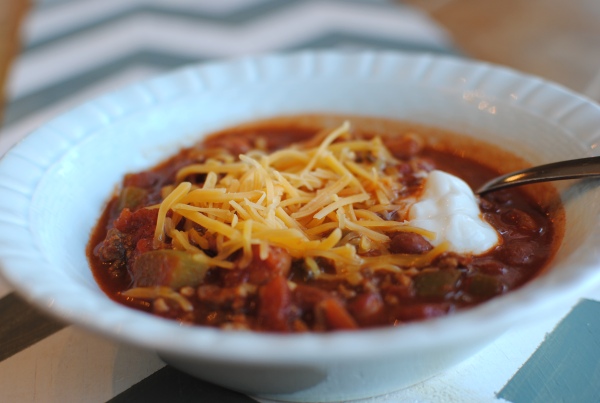
This my friends, is my momma’s chili recipe. She’s been making it for us since I can remember and it’s the best that I’ve ever eaten. It could be that I’m biased because, well, it is my momma’s. But I’m going to say that this isn’t the case because I’ve tried a lot of chili in my time. I even had the opportunity to go to Cincinnati recently and try the “world famous” Skyline Chili.  It was just ok to me. I don’t really understand the hype behind it to be honest.

Maybe I’m just a southern gal, but I like my chili to be extra chunky. It’s got to be hearty and fill me up and keep me warm. After all, what’s the point in eating chili otherwise?

I asked you guys on the Pennywise Cook Facebook Community recently if you enjoy your chili with corn chips or cornbread. I guess I should’ve included crackers because many of you said that’s what you eat yours with.

I have grown up eating chili with corn chips. I just couldn’t imagine eating chili any other way. They are like peanut butter and jelly to me. However, it was pointed out that this is almost more like a Frito Pie rather than chili. So if you prefer, eat your chili with whatever you’d like. Cornbread, crackers, corn chips, or nothing at all!

No matter what you eat your chili with, I highly recommend this recipe if you’re going to make chili. It’s full of flavor and perfect for a weekday or weekend meal. Plus a pot of this stuff will last you all week! That’s one of my favorite things about making up a big pot. We’ll have lunches covered for days. And because it’s so good, you won’t hardly get tired of eating it.

This is a crockpot-friendly meal, but I can assure you that it comes together rather quickly. The key is to brown your ground beef along with the onion, green pepper, and garlic. This saves so much time. Then it’s just a matter of heating everything else through.

You may never make another chili recipe again…

My Momma’s Chili
Recipe Type: Main Dish
Author: Pennywise Cook’s Momma!
This chili recipe is hearty and filling and may be the last chili recipe you ever make!
Ingredients
  • 1 lb Lean Ground Beef
  • 1 Onion, Chopped
  • 1 Green Pepper, Chopped
  • 3 tsp Minced Garlic
  • 28 oz Can Diced Tomatoes (undrained)
  • 6 oz Can Tomato Paste
  • 3 cans water
  • 15 oz Can Light Kidney Beans (drained)
  • 15.5 oz Can Pinto Beans (drained)
  • 3 Tbsp Chili Powder
  • 1 Tsp Salt
  • 1/4 Tsp Pepper
  • 1/2 Tsp Garlic Powder
  • 1 Tsp Cumin
  • Dash salt and pepper
Instructions
  1. In a large pot or dutch oven, brown ground beef along with onion, green pepper and garlic. Add salt and pepper to taste. Drain if needed.
  2. Stir in diced tomatoes, tomato paste, 3 tomato paste cans of water, kidney beans, pinto beans. Heat oven medium high for about 10 minutes.
  3. Stir in chili powder, salt, pepper, garlic powder, and cumin. Stir well and bring to a boil. Lower heat and simmer for about 5-10 minutes or until heated through.

Like this post? SHARE it!

Related Posts Plugin for WordPress, Blogger...