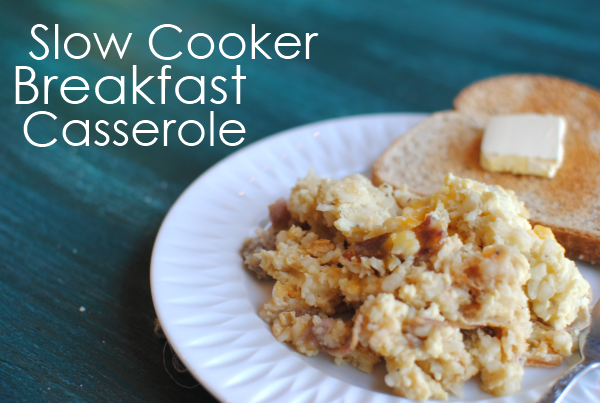
Slow Cooker Breakfast Casserole

We’ve made it to Friday my friends! I start looking forward to Friday beginning on Monday, don’t you?  I love Saturdays especially because there’s no rush to wake up and you can eat breakfast whenever you prefer. It’s always a good day of the week for a big breakfast since you can usually sit down as a family unit to eat without rushing off to work or school.

But who in the heck wants to slave over the skillet, or oven, or even microwave on a Saturday morning? Well that last one isn’t that difficult, but I must admit that I find it a little laborious sometimes. 😉 That’s when a slow cooker comes in handy. Making something up ahead of time to enjoy later is a win-win situation no matter how you look at it.

But for breakfast you say? Yep. Even breakfast. Your Christmas morning may never be the same again.

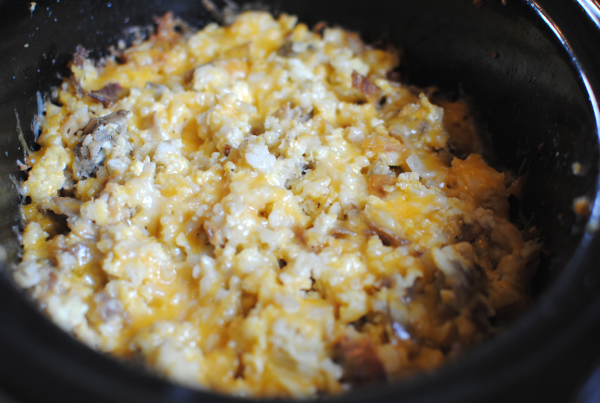
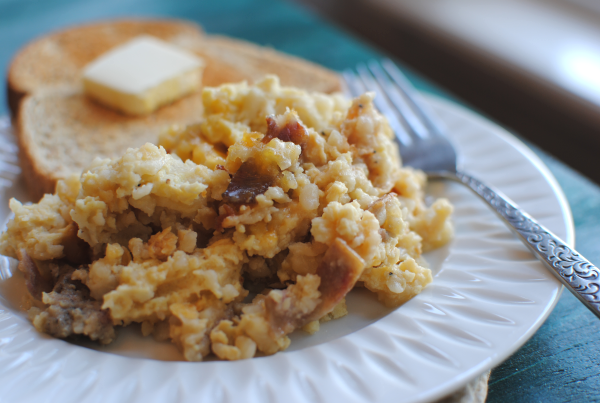
This is my version of a simple Slow Cooker Breakfast Casserole. This is made with things that I had on-hand. Very cheap to make and best of all, simple. My favorite part? It makes a TON! I’m able to make more than just 1 breakfast out of this which saves time and hassle for a few days to come.

I love Save-A-Lot’s 10 for $10 sales. You can’t go wrong with turkey bacon for a $1.You could also buy precooked bacon to make life easier if you’re willing to shell out the extra dough. Otherwise, it’s just a matter of cooking up the bacon before adding it to the crockpot.

Enjoy your weekend! I’ve got a special giveaway coming next week. I can’t wait to share!

Slow Cooker Breakfast Casserole
Recipe Type: Breakfast, Main Dish
Author: Pennywise Cook
Breakfast doesn’t get any easier than creating it the night before and have it wait for YOU in the morning!
Ingredients
  • 1 Package 24 oz Frozen Hashbrowns
  • 1 c. Onions, Chopped
  • 1 12 oz Package Sausage
  • 10 Pieces Turkey Bacon, Chopped
  • 12 Eggs, Scrambled
  • 3 Tbsp Chicken Broth
  • 1/4 Tsp Salt
  • 1/4 Tsp Pepper
  • 1 c. Shredded Cheddar Cheese
Instructions
  1. In a skillet, cook onions, bacon, and sausage until no longer pink.
  2. In slow cooker, place the hashbrowns and top with meat mixture.
  3. In a large bowl, scramble eggs and add the chicken broth and s&p. Pour over hashbrowns and meat mixture in slow cooker.
  4. Put lid on and cook on low for 4-6 hours. You can choose to stir it halfway through the cooking time if you prefer or leave it be. I did stir mine, but I think I’ll leave it next time.
  5. minutes or so until you plan to serve, sprinkle the shredded cheese over and replace the lid to let it melt.
Notes

If you’re making this overnight, you might even use the “warm” setting on your slow cooker to avoid overcooking.

I made this during the day (to have breakfast for dinner) and did not cook my meats through before hand. Mine cooked for 8 hours and I stirred halfway through.


Like this post? SHARE it!

Related Posts Plugin for WordPress, Blogger...

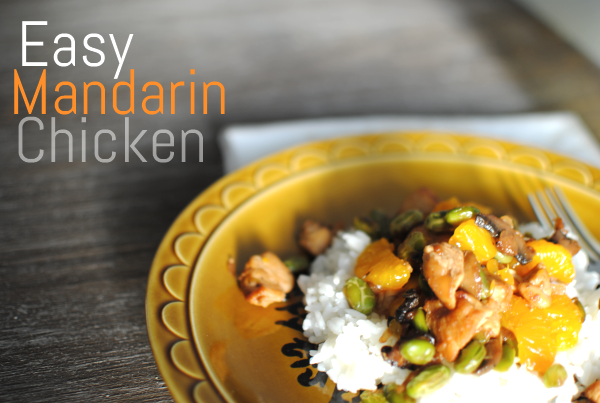
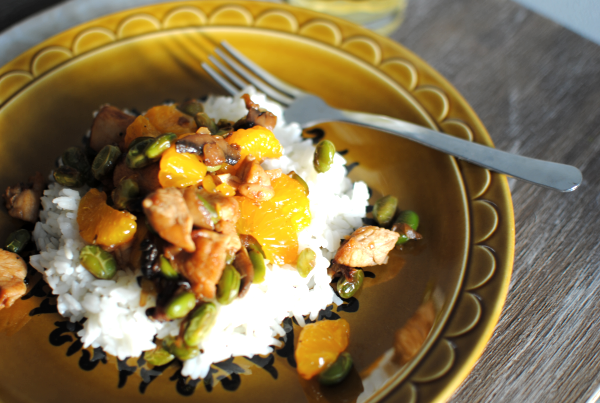
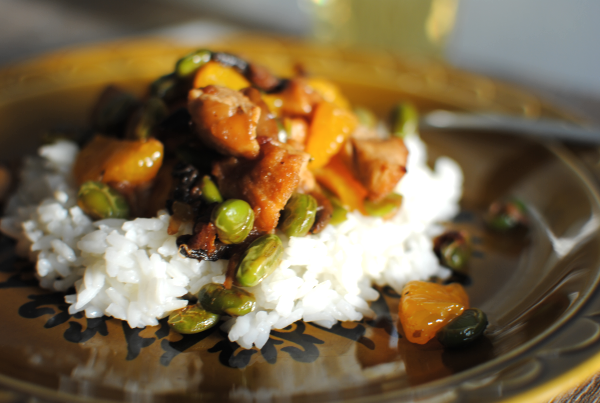
Easy Mandarin Chicken

My girls have recently discovered mandarin oranges. Ever since I was a kid, I’ve always loved fruit in any form. Even canned fruit strikes my fancy every now and then. I picked up a few cans of mandarin oranges the other day to see if my girls would enjoy it as much as I used to. I think ended up rekindling my love for the fruit myself. And as expected, they absolutely loved them. I really need to find myself a good sale to stock up on them.

In keeping with their latest obsession, I decided to make something that showcased two things that I know they’ll both like. Chicken and the new-found love, mandarin oranges.

To my utmost surprise, my ENTIRE family (including my incredibly picky husband and 5-year old) loved this meal! The 1-year old even cleaned her plate.  I cleaned mine and an entire 2nd plate as well. Hubby was really concerned about the sweet oranges being used with savory chicken, but when he was done he told me that he thought it worked really well together. SCORE!

I used edemame to kick up the nutrition and hid mushrooms with the onions. The mushrooms were quite stealth and the kiddos loved the edemame! In fact, Addie asked me at one point what kinda beans they were. I told her edemame and she replied “I really like edemame!”.

Those are words that I never expected to come out of my 5-year old’s mouth…

By the time dinner was over, I was floored. This was a meal that the whole family loved and it was actually healthy and good for them. That only happens in my dreams and on commercials doesn’t it?

Recipe adapted from 366 Low-Fat Brand-Name Recipes in Minutes Cookbook.

Easy Mandarin Chicken
Recipe Type: Main Dish
In just minutes, you’ll have a mouth-watering Asian meal with little effort!
Ingredients
  • 1 11 oz Can Mandarin Oranges
  • 2 & 1/2 tbsp Soy Sauce
  • 2 Boneless, Skinless Chicken Breasts, Cut into Bite-size Pieces
  • 1 Tbsp Canola Oil
  • 1/4 Tsp Garlic Powder
  • 1 Cup Chopped Onion
  • 1 & 1/2 c. Frozen Edemame
  • 8 Baby Bella Mushrooms, Sliced
Instructions
  1. Drain oranges, reserving 3 tbsp of the liquid. Mix together the reserved liquid with the soy sauce and set aside.
  2. Heat oil in a large skillet and cook chicken in the oil over medium-high heat until chicken is no longer pink. Remove chicken from skillet. Add in the onions, edemame and mushrooms. Cook until onions are tender.
  3. Add the chicken back in along with the soy sauce mixture. Cook and stir to heat all of it through.
  4. Gently stir in the mandarin oranges right before serving.
  5. Goes well over rice!
Notes

If your group is not a fan of edemame, you can always use frozen snap peas in their place.

Teriyaki sauce can also be substituted in soy sauce’s place.

The addition of a couple drop of sesame oil would also make a nice addition.

Be prepared for a quick meal! This one takes no time at all to whip up!


Like this post? SHARE it!

Related Posts Plugin for WordPress, Blogger...

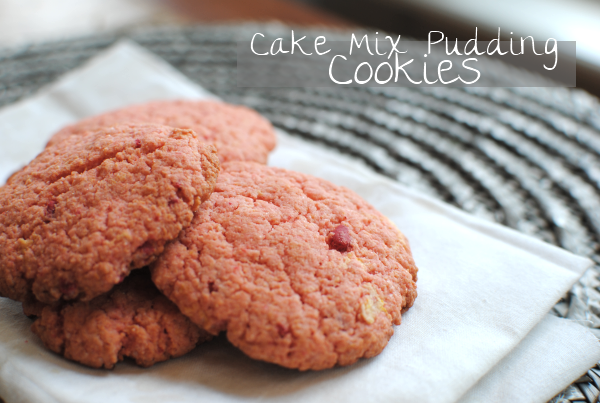
Cake Mix Pudding Cookies

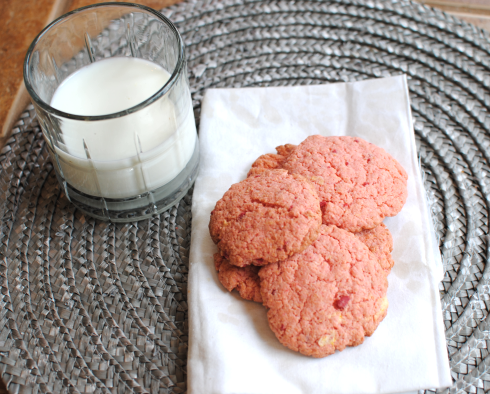
I’ve been on one of those simple kicks lately. You know, when you just want to make things involving little ingredients (and little money) that don’t take much time or effort? Yeah, those dishes make life so much easier. I posted some yummy Strawberry Cake Mix Cookies a while back. They are oh so incredibly yummy I must say.

Not to take away from their tastiness, but I decided to fiddle with that recipe a bit. I omitted the cool whip, egg, and powdered sugar. Then I replaced the egg and cool whip with cream cheese, and the powdered sugar with pudding mix! Much less time to prepare and the possibilities are endless.

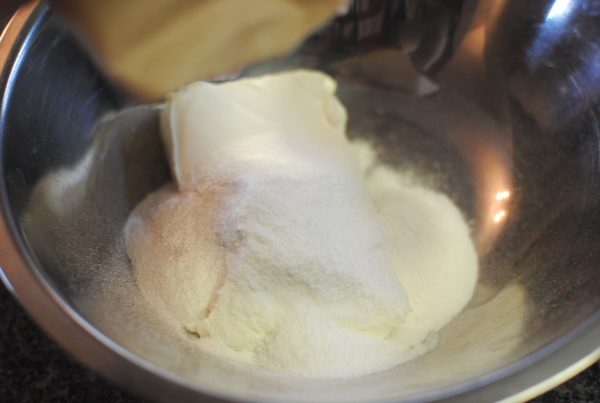
I think my favorite part was that I could put it all in one bowl, pop them on a baking sheet and bake. You simply mix softened cream cheese (I use the 1/3 less fat one) with the pudding of your choice (I used sugar-free french vanilla). Just THINK of those possibilities. I’m so excited to try different flavors. Then slowly blend in the cake mix of your choice.

I went the strawberry route. I thought that the cream cheese and strawberry thing would make them like strawberry cheesecake. But I should have used cheesecake pudding mix. Will do that next time for sure!

The one tip that I will give you to make your life easier when making these, is to flatten them into cookie form before placing them on the cookie sheet. Treat this more like a sugar cookie. They will not rise or go far from how you place them on the cookie sheet. You could flatten the dough out on the counter and then cut perfect little circles out.

If you make a flavor of these, will you share it with me? I’d love new ideas for other kinds!

Cake Mix Pudding Cookies
Recipe Type: Cookies, Dessert
Author: Pennywise Cook
Serves: About 24 Cookies
3 Ingredients and 12 minutes later you have the best cookies with little effort!
Ingredients
  • 1 Box Cake Mix (Your Choice)
  • 1 Box Instant Pudding Mix (Your Choice- Even Sugar Free!)
  • 1 8 oz Package Cream Cheese, Softened
Instructions
  1. Preheat oven to 375 degrees. Cream together the cream cheese and pudding mix. Slowly mix in the cake mix.
  2. Form into balls and then into 2 inch flat cookies and place on greased cookie sheet.
  3. Bake 12 minutes or until they begin to brown.
  4. Let cool and serve!

Like this post? SHARE it!

Related Posts Plugin for WordPress, Blogger...

Sugar-Crusted Blueberry Muffins

I’ve always been a fan of blueberry muffins. You’d never know it. I can probably count on 1 hand the times that I’ve ever made them from scratch. The box mixes just make life  so much easier don’t they? Sure, but do they give as much satisfaction as saying that you “made them from scratch”? Sometimes it really just doesn’t matter though. You’re tired, the kids are hungry, you just want a muffin!  A very sweet friend of mine mentioned how much she loved Perkin’s muffins the other day. There’s one in my hometown where we visit often, but there aren’t any around here.

Apparently their Mammoth Blueberry Muffins are to die for.

My sweet friend seemed like she needed a little pick me up, so I decided to check around for a copy cat recipe of their famous muffins and whip some up. To my dismay, none of them really seemed to sound like they actually mimicked Perkin’s muffins. I decided to shy away from getting them just like Perkin’s and come up with my own kinda muffins.

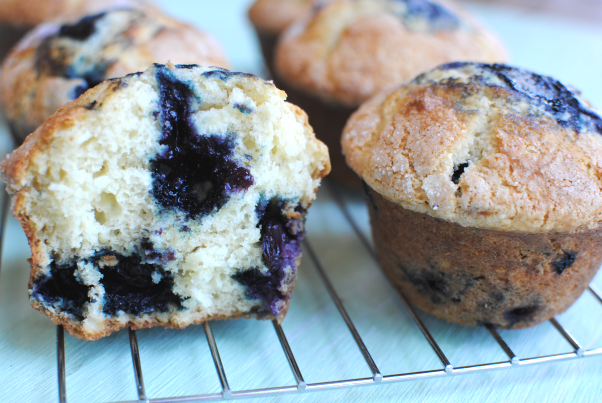
These turned out so absolutely fantastic! I really love when that happens. The stress of trial and error is surpassed with success. And boy were these a success. The breading part of these muffins is almost cakey thanks to a secret ingredient (which is not so secret anymore), sour cream. Not exactly something you’d expect to pair with blueberries, but tasty all the same. They boast a gooey blueberry jam filling and that’s in addition to the blueberries themselves, dispersed among the batter. What could top these better than a coating of sugar that has baked into a crust on top of the blueberry goodness?

A smear of butter while they are still warm, maybe.

Oh and I forgot to mention that these are in fact, mammoth. The batter only made 6 of a huge pan of muffins. So you’ll either have to make a second batch or prepare to share.

Sugar-Crusted Blueberry Muffins
Recipe Type: Breakfast, Dessert
Author: Pennywise Cook
Ingredients
  • For the Muffins
  • 2 cups flour
  • 1 cup sugar
  • 1 tsp baking soda
  • 1 tsp baking powder
  • 1 tsp vanilla
  • 1/2 tsp lemon extract
  • 2 eggs
  • 1 c sour cream
  • 1 cup blueberries
  • For the Filling
  • 1/4 c blueberries
  • 1/4 tsp cornstarch
  • 1 1/2 tsp sugar
  • For the Topping
  • 1/4 Tsp Sugar
Instructions
  1. Preheat oven to 375 degrees.
  2. Combine all muffin ingredients except blueberries in a bowl and mix well. Stir in1 c. blueberries.
  3. Meanwhile, microwave 1/4 c. blueberries with cornsstarch and sugar for 20 seconds at 50% power. Remove, much and stir and then continue microwaving for increments of 20 seconds until thicken and jam-like.
  4. Pour muffin batter in large, 6-ct muffin pan and create small wells in each.
  5. Using a piping bag or ziploc bag, fill each muffin’s well with filling.
  6. Sprinkle each with 1/4 tsp sugar.
  7. Bake for 22 minutes or until tops are golden brown.
Notes

Note- if you use smaller muffin tins, you may need to adjust your cooking times down.


Like this post? SHARE it!

Related Posts Plugin for WordPress, Blogger...

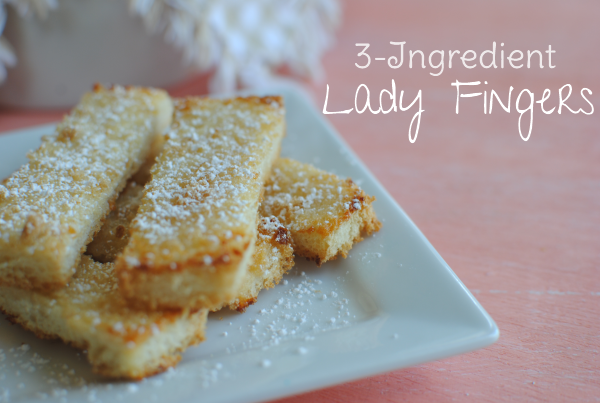
3-Ingredient Lady Fingers

Y’all know I’m a big fan of my sweets. Did you see yesterday’s recipe? I especially love recipes that don’t include many ingredients. In most cases that means that it will cost less to make and it will take less time. Cheaper and I can eat it sooner? My kinda recipe.

I can’t take credit for these sweeties today. I found this one inside the Fite for Your Life II cookbook by Janis Forbes Fite, RN. It’s a really good cookbook for low-fat and simple recipes. And she’s from my home town!

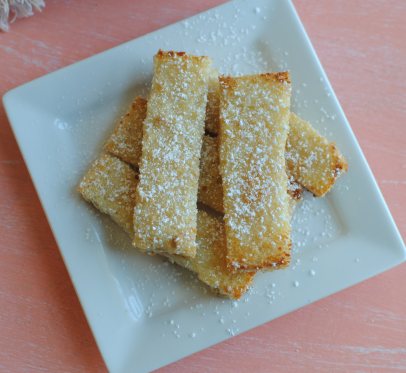
These are SO simple and perfect for a brunch, baby shower, or tea. Very light and airy and made out of things you probably have on-hand. It starts with day old white bread. Now I’m not going to lie. My bread wasn’t old. In fact, I bought it the day that I made these. So I just popped them into the toaster for a taddy bit to get them a little “stale”. Worked like a charm, but had me considering the need for a 4-piece toaster. It took a while to toast up all that bread.

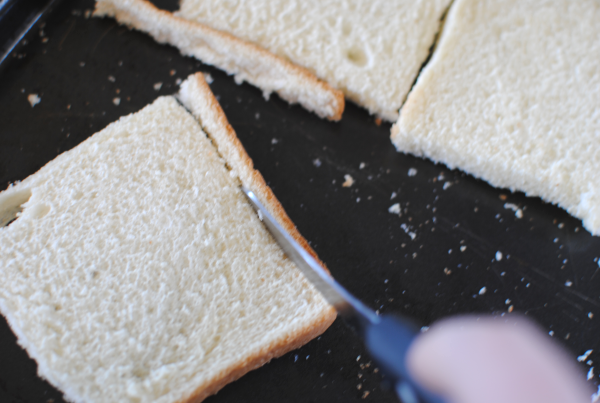
So, start by cutting the crust off every piece. This will leave you with a lot of leftover crusts. You can simply eat them as you cut them off as I did. Or consider some of the options below:

  • Pop them into the food processor to make your own bread crumbs.
  • Dip them in melted butter and sprinkle with cinnamon and brown sugar, then bake at 350 degrees for 20 minutes or so. Tasty sweet treat!
  • Use them to make stuffing (or dressing as we call it in the south)
  • Use them to make bread pudding.
  • Freeze for later to make any of the above!

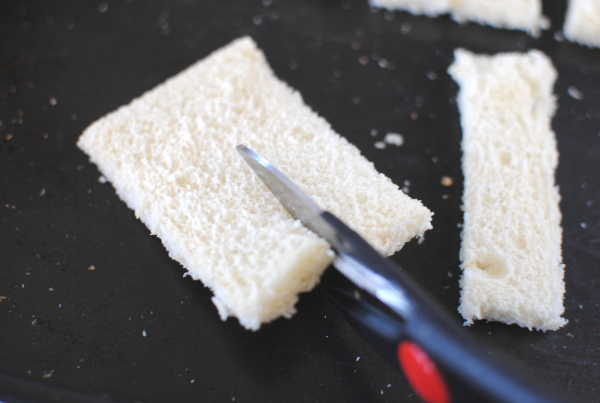
Cut each piece into 3 “fingers”. I used my kitchen shears and that worked really well to get straight pieces. Nobody wants a crooked finger! 😉

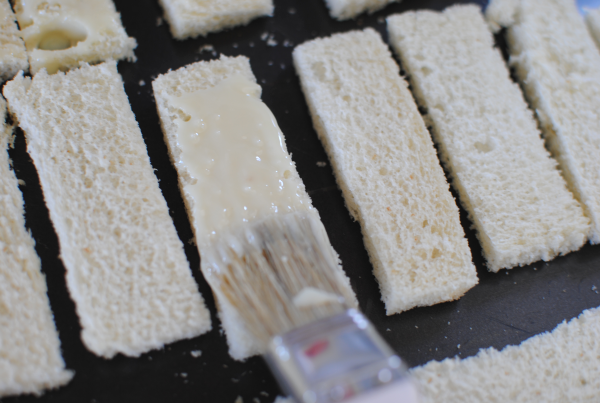
Enter, sweetened condensed milk. The fat-free kind that is. Using a pastry brush or whatever kinda brush you’d like, spread a generous amount onto each piece. This is what gives it that yummy sweetness.

Sprinkle on some brown sugah too…

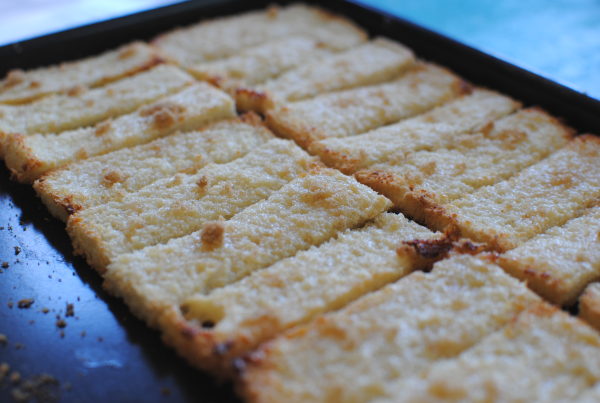
Oh yeah. Pop those loves into the oven and let them get all brown and crusty.

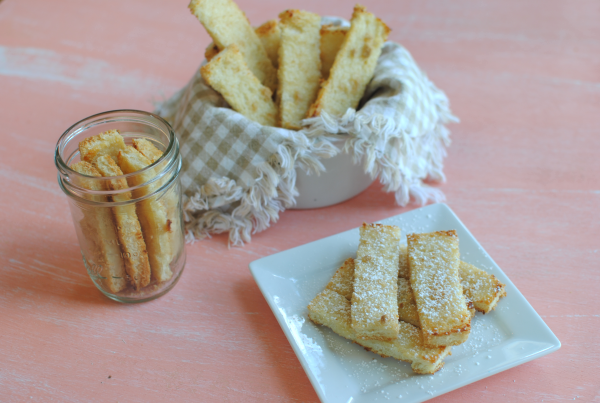
And if you’re like me, you’ll sprinkle on a little powdered sugar just because. They are so good! Maybe not exactly like other Lady Fingers that you’ve had. But hey, with plain old (literally) white bread and a couple other simple ingredients, you just can’t beat it.

3-Ingredient Lady Fingers
Recipe Type: Dessert, Snack
Author: Fite for Your Life II Cookbook- Janis Forbes Fite, RN
Using day old white bread, sweetened condensed milk, and brown sugar you can create Lady Fingers in no time flat.
Ingredients
  • Day Old White Bread
  • Sweetened Condensed Milk (Fat-Free)
  • Brown Sugar
Instructions
  1. Preheat oven to 350 degrees. Trim the crust off bread. Cut each piece into 3 fingers.
  2. Brush each generously with sweetened condensed milk. Sprinkle each with brown sugar.
  3. Bake for 10 minutes or so until golden and bubbly.
Notes

The reason there are no specifics amounts listed on this recipe is because it is completely up to you how many you make. I didn’t use an entire loaf of bread or an entire can of sweetened condensed milk. 1 can will go a very long way. You can probably make 50- 100 with 1 can.

Store in an air-tight container or bag.


Like this post? SHARE it!

Related Posts Plugin for WordPress, Blogger...

Chocolate-Covered Strawberry Pizza

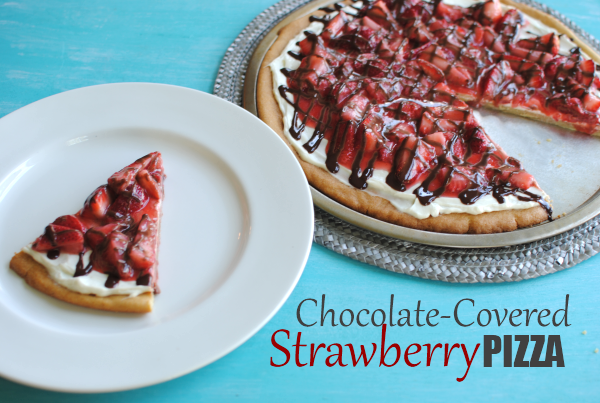
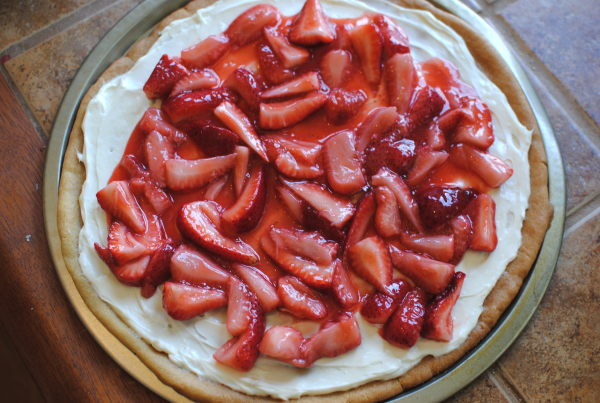
There are two things that you’ll notice right off the bat about the picture above. 1) That it’s pizza and 2) there are strawberries on that pizza! But the one thing you won’t exactly pick up from that picture is that crust isn’t just any crust.

It’s COOKIE.

Yes, we’re talking a soft and sweet tasty cookie to make the base for this incredible dessert pizza. And who needs tomato sauce when you can have a vanilla cream cheese sauce on top of your cookie crust? And instead of anchovies or ridiculous pepperoni, let’s top it with strawberries and then drizzle those with creamy chocolate ganache shall we?

And the next step is to make sure to alert the others in your household that it’s there. Otherwise you might find yourself eating this entire pizza yourself.

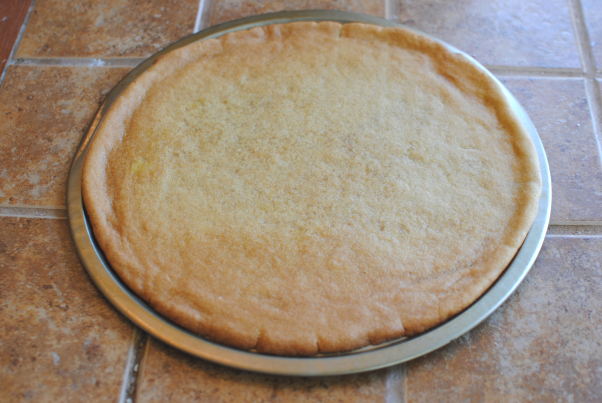
It all starts with something extremely easy, (dare I say) store-bought sugar cookie dough. I got lazy and this whole idea came to me when I was staring at the cookie dough section at the store. So feel free to make yours from scratch if you wish. I’m sure it will make it all that much tastier.

Simply place it onto a pizza pan and flatten away. Bake it according to the directions on the package or your recipe, you overachiever. 😉 I left mine just a tad bit soft so that it would still have some give similar to breaded crust.

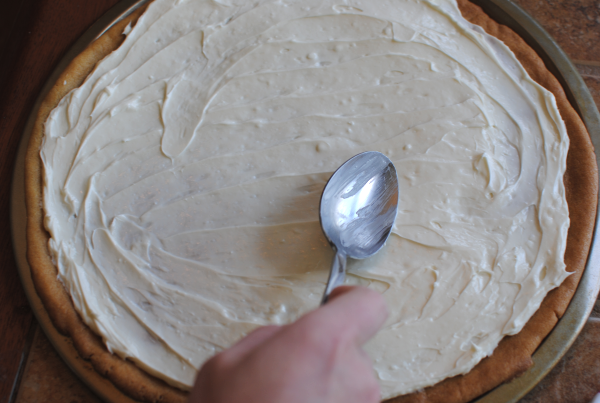
Then using a spoon that you’ve clearly been licking, spread the yummy vanilla cream cheese onto your crust.

After making up your strawberry sauce, spoon it onto your cream cheese and get ready for the chocolate baby.

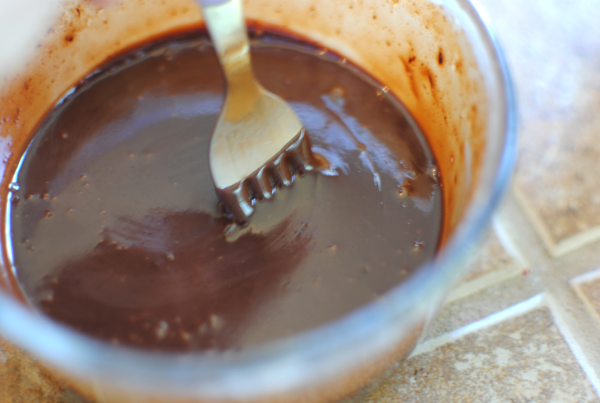
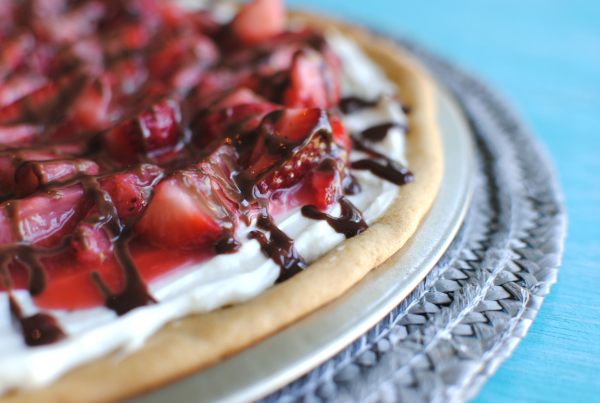
This chocolate ganache is as simple as it gets. Cream and semi-sweet chocolate chips are a match made in heaven. Drizzled over strawberries on this pizza, they are heavenly for sure.

Do you see what I’m talking about? It just doesn’t get any better than this.

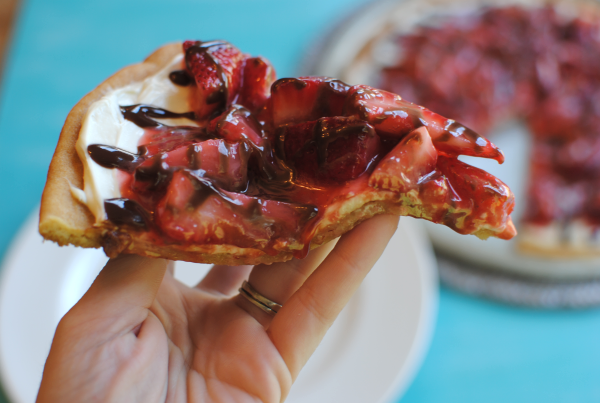
Well maybe it does. If you had a piece like this in your hand! Check out Aldi and their strawberry deals. They always have them cheap!

Chocolate-Covered Strawberry Pizza
Recipe Type: Dessert, Pizza
Author: Pennywise Cook
Pizza isn’t just dinner anymore, it’s dessert too!
Ingredients
  • 1 Package Sugar Cookie Dough
  • 2 Cups Capped, Hulled, and Chopped Stawberries
  • 1 8 oz Package Cream Cheese (I use 1/3 less fat kind)- Softened
  • 1/2 Cup Splenda + 1 and 1/2 Tbsp Splenda
  • 1/2 Cup Heavy Cream
  • 1/4 Semi-Sweet Chocolate Chips
  • 2 Tbsp Water
  • 1 Tsp Cornstarch
  • 1/2 Tsp Vanilla Extract
Instructions
  1. Prepare cookie dough according to directions, but place on pizza pan to cook. Let cool.
  2. Meanwhile, whip cream cheese, vanilla, and 1/2 c. Splenda together. Spread onto cooled cookie crust.
  3. In a small saucepan, combine 1 and 1/2 tbsp Splenda, strawberries, water, and cornstarch. Bring to boil, then simmer for 5-6 minutes. Let cool.
  4. Pour over cream cheese taking care to not cover the entire cream cheese area.
  5. In a microwave safe dish, heat cream for 1 minute or until boiling. Place chocolate chips in cream and let sit for 2 minutes. Begin to shake the bowl allowing the chips to begin to melt. Don’t stir just yet. Microwave another minute, then stir together. Allow to cool for a bit.
  6. Drizzle chocolate over pizza. Cut into slices and serve!
  7. Keep refrigerated.

Like this post? SHARE it!

Related Posts Plugin for WordPress, Blogger...

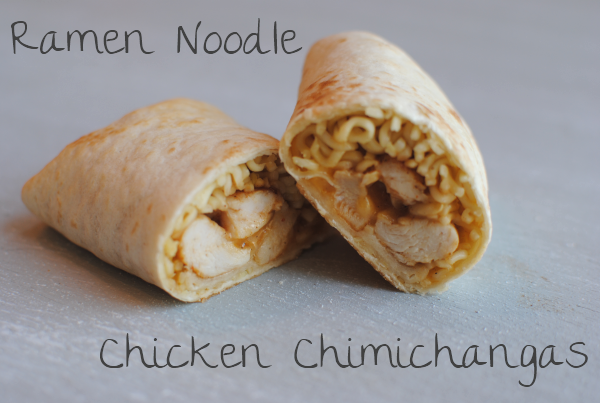
Ramen Noodle Chicken Chimichangas

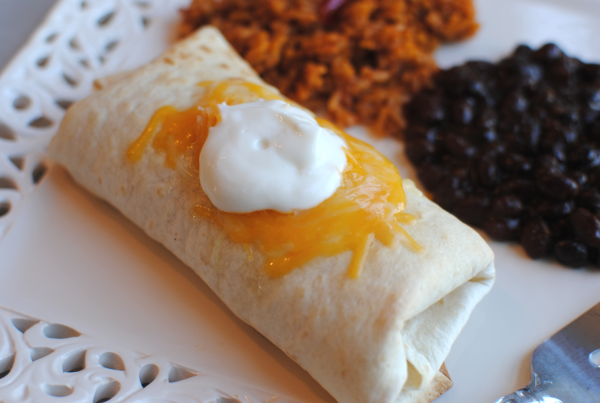
Ramen Noodle Chicken Chimichangas 9 Ramen Noodle Chicken Chimichangas

We’re going to go low budget today. We’re talking way low budget. Like Ramen Noodle budget low. You know what I’m talking about…the magical noodles that come in handy when money is tight or you just don’t want to cook. I got this idea from my step brother who was low on ingredients for a chimichanga and came up with this concoction. He shared one with me and I was pleasantly surprised at how yummy they were.

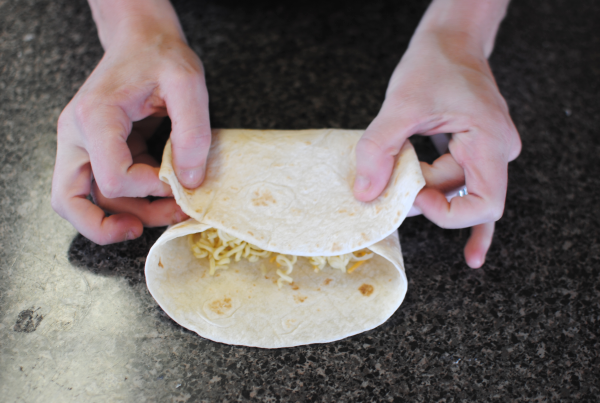
I have to admit that the thought of Ramen noodles in a chimichanga didn’t exactly sound that amazing to me. But once I tried, I was actually excited to make my own. Even if you’re not too keen on putting Ramen noodles in your chimichanga, you can at least see below from instructions on how to fold a chimichanga. But I think you’ll want to give these a chance y’all. They are surely worth it!

Price breakdown:

4 Flour Tortillas $.40
4 Fresh Chicken Tenders $.80
1 Package Chicken Ramen Noodles $.18
2 Cups Shredded Cheese $1.79
Total= $.79 per chimichanga

Ramen Noodle Chicken Chimichangas 1 Ramen Noodle Chicken Chimichangas

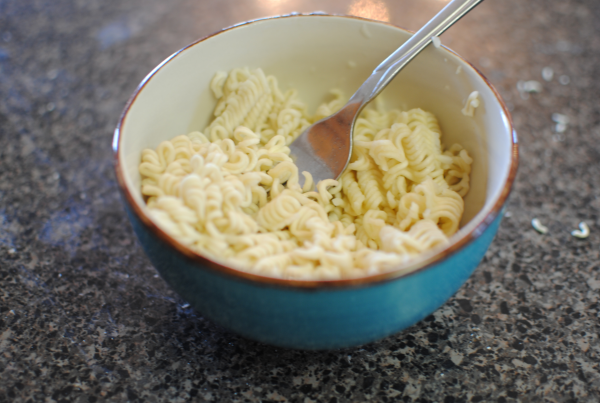
It all starts with those college-esq Ramen noodles. Which by the way, are quite tasty! I haven’t made them in so long and when these came out of my microwave, I seriously had to stop myself from eating them all. Cook them up according to the package including the seasoning. Easy and cheap way to get that great flavor inside the chimi.

Ramen Noodle Chicken Chimichangas 2 Ramen Noodle Chicken Chimichangas

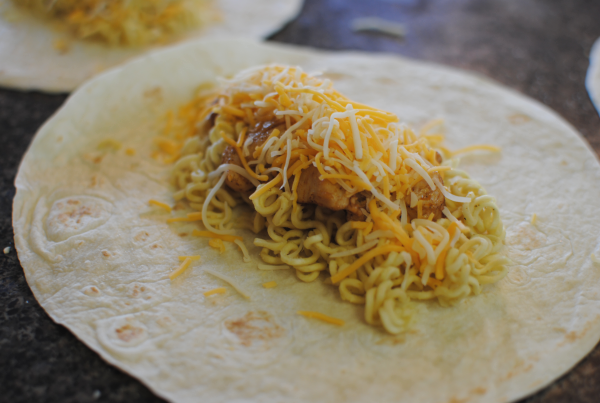
On each tortilla, you place some of those Ramen noodles along with some seasoned grilled chicken and shredded cheese. YUM!

Then it’s time to roooooooooll them up for baking.

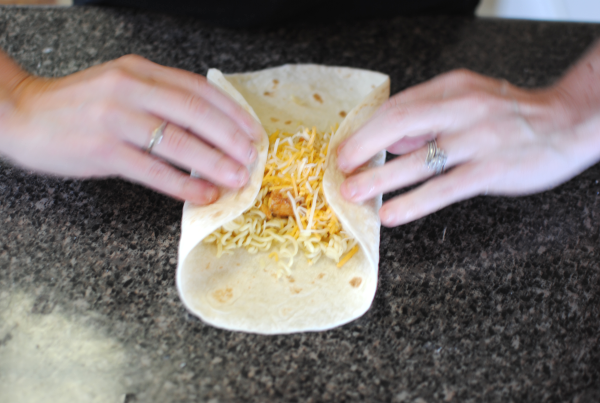
Ramen Noodle Chicken Chimichangas 3 Ramen Noodle Chicken Chimichangas

Lay your tortilla flat. Fold the sides in towards the middle.

Ramen Noodle Chicken Chimichangas 4 Ramen Noodle Chicken Chimichangas

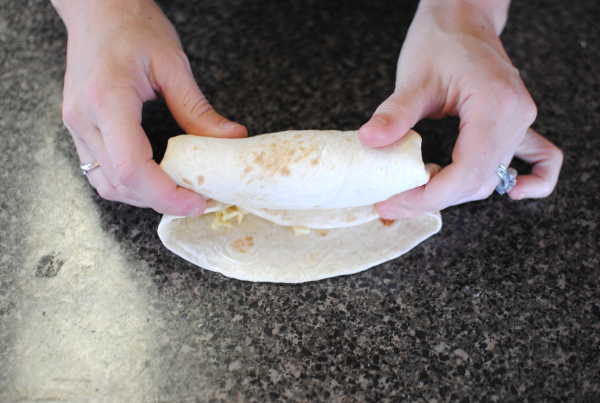
Then fold the bottom towards the top, but only halfway. Fold the edge towards the inside and begin to roll.

Ramen Noodle Chicken Chimichangas 5 Ramen Noodle Chicken Chimichangas

…like so.

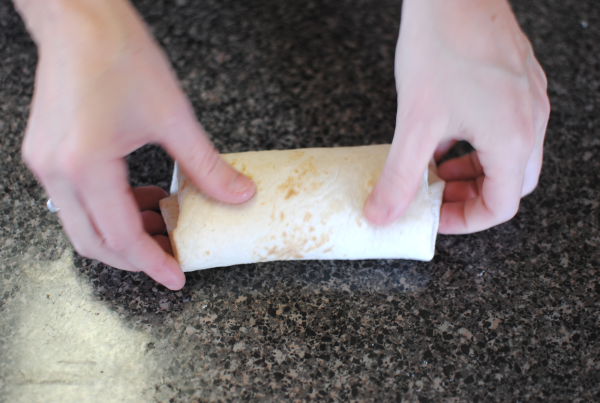
Ramen Noodle Chicken Chimichangas 6 Ramen Noodle Chicken Chimichangas

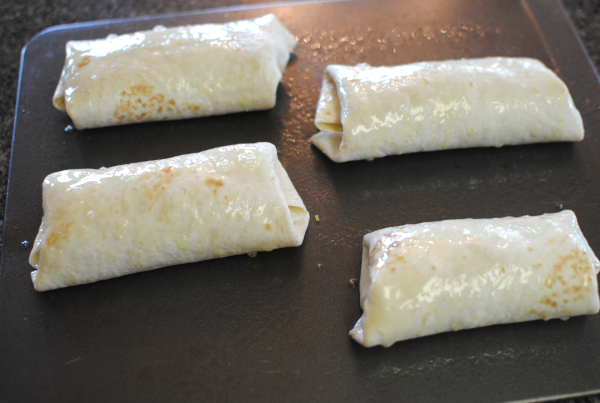
Once you get the rolling down, it will look like this. Place them seam side down on your baking sheet.

Ramen Noodle Chicken Chimichangas 7 Ramen Noodle Chicken Chimichangas

Spray them with a little cooking spray to help them brown and get a little crunchy.

Ramen Noodle Chicken Chimichangas 8 Ramen Noodle Chicken Chimichangas

Serve with your favorite fix-in’s like more cheese or sour cream on top and viola. So easy, cheap, and great for freezing too!

Ramen Noodle Chicken Chimichangas
Recipe Type: Main Dish
Author: Pennywise Cook
Serves: 4
Using a low budget ingredient, Ramen noodles make a great addition to chicken chimichangas!
Ingredients
  • 4 Flour Tortillas
  • 4 Fresh Chicken Tenders, Cut into Bite-Size Pieces
  • 1 Pkg Chicken Flavored Ramen Noodles
  • 1 Tbsp Olive Oil
  • 1 Tsp Minced Garlic
  • 1/2 Tbsp Chili Powder
  • 8 Tbsp Shredded Cheddar Cheese
  • Cooking Oil
Instructions
  1. Preheat oven to 350 degrees.
  2. Cook Ramen Noodles according to the package directions. Drain all liquid from the noodles and set aside.
  3. Meanwhile, in a skillet heated to medium-high cook chicken in olive oil along with the minced garlic and chili powder until no longer pink.
  4. On each tortilla place 1/4 of the Ramen noodles, 1/4 of the to chicken, and 2 tbsp shredded cheese.
  5. Roll up into chimichangas and place seam side down on a greased baking sheet.
  6. Spray tops with cooking spray and bake for 10-15 minutes until browned and crunchy.
Notes

If you like spicy things, you can use jalapeno cheese like my step brother to add a little kick!


Like this post? SHARE it!

Related Posts Plugin for WordPress, Blogger...

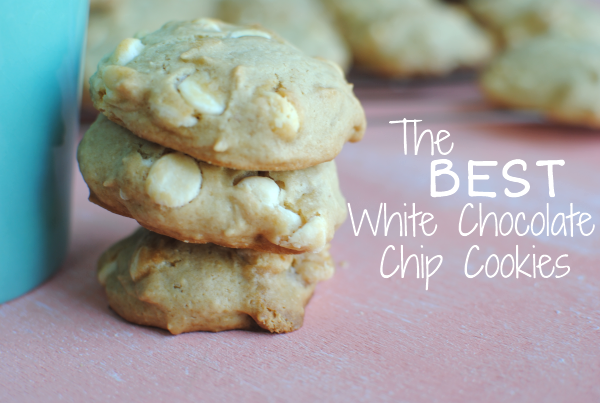
The Best White Chocolate Chip Cookies

It takes a lot to make a cookie worth the title The BEST White Chocolate Chip Cookies. Believe me, I’ve tried my share of them. I can’t tell you that these are the best in the world, but I can tell you that they are the best that I’ve made and I’ve been working on my recipe for a little while now. I am head over heels in love with white chocolate, but it doesn’t love me back. I cannot cook with it for anything so the fact that I was able to accomplish these cookies is a feat in itself. Therefore, they have been dubbed The BEST White Chocolate Chip Cookies.

…and because they also happen to be absolutely fabulous as well.

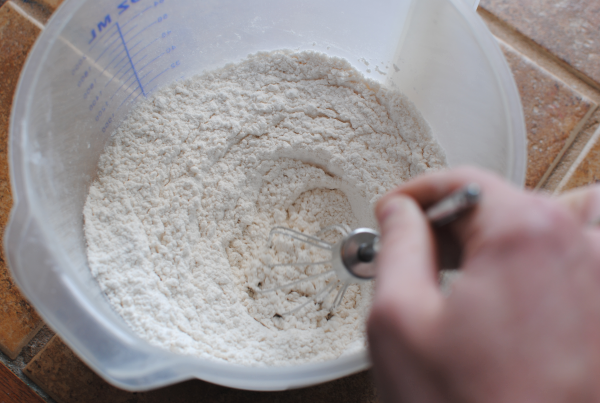
It starts with what you would expect from a cookie recipe, flour. Sift it together with some baking soda and a little salt. It would be good to use a sifter, but seeing as how mine is a piece of crap and the top won’t release itself from the bottom, I opted to use a wisk in a bowl.

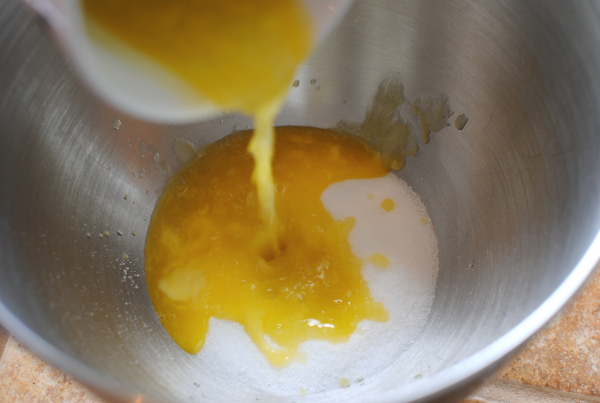
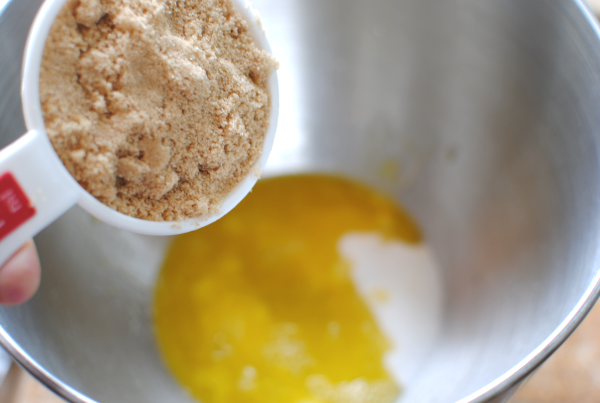
Here comes the yumminess. In your mixing bowl you’re going to add 2 different kinds of sugar (brown and white) along with some melted butter. I always use the Blue Bonnet Light because it makes me feel less guilty for using butter. Hey, whatever it takes right?

Oh look, there’s the brown sugar!

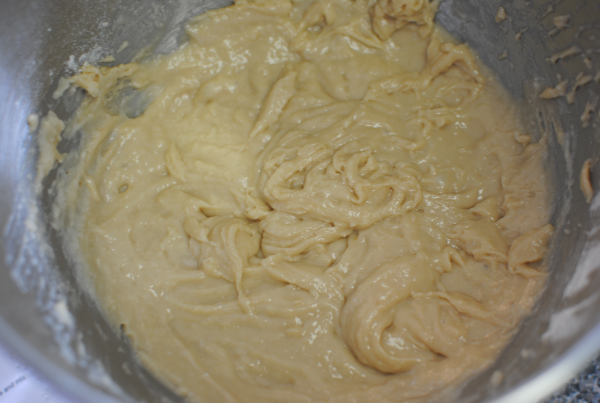
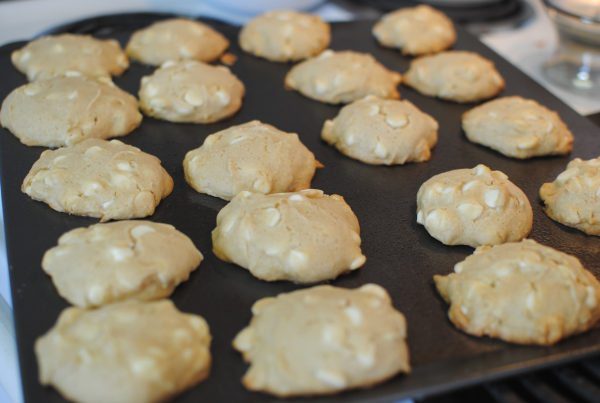
We’re going to fast forward just a bit. After you’ve mixed the sugars and the butter with the flour mixture, some eggs, and a secret ingredient- applesauce, this is what it will look like. It’s quite runny for cookie dough, but understand that this is normal. It’s going to be soft and cakey and that’s why.

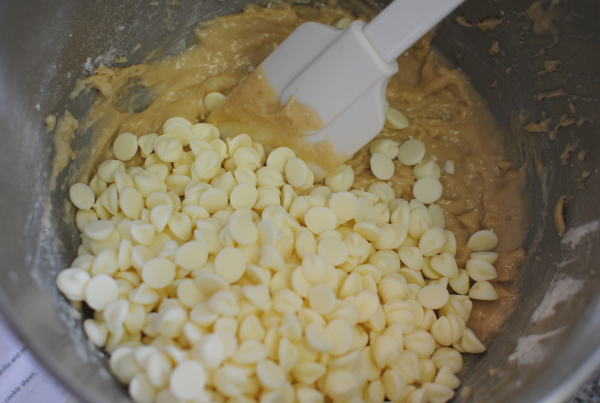
Then comes the star of our dough, the white chocolate baby! At this point, it takes everything I have not to just grab a spoon and inhale all of those white chocolate chips.

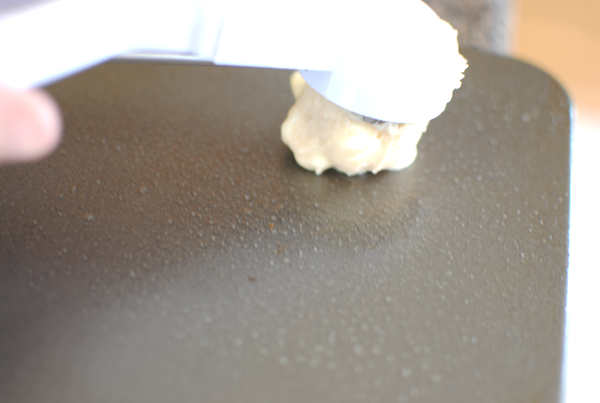
Then, I use my little cookie dough scooper to make perfect little dough balls on the baking sheet.

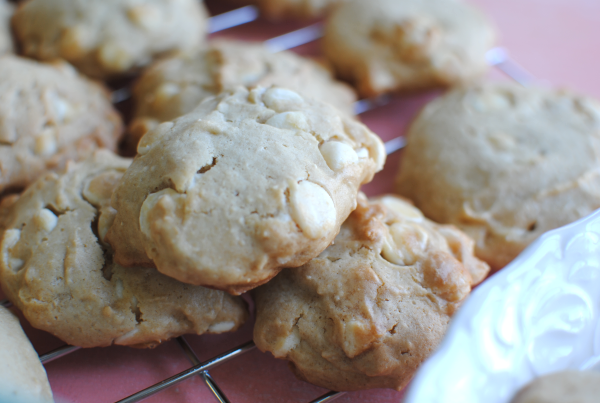
Within about 13 minutes, they will have made your home smell heavenly and your tummy rumble for their white chocolatey goodness. Always best when eaten a little warm, of course.

Tah dah! Enjoy 🙂

The Best White Chocolate Chip Cookies
Recipe Type: Dessert, Cookies
Author: Pennywise Cook
Yep. These are the BEST White Chocolate Cookies.
Ingredients
  • 2 c. All-Purpose Flour
  • 1/2 Tsp Baking Soda
  • 1/2 Tsp Salt
  • 6 Tbsp Butter, Melted
  • 1/2 c. Packed Brown Sugar
  • 1/2 c. Sugar
  • 1/2 Tbsp Vanilla Extract
  • 1/3 c. Applesauce
  • 2 Egg Whites
  • 2 c. White Chocolate Chips (1 bag)
Instructions
  1. Preheat your oven to 325 degrees. Grease your cookie sheets.
  2. Sift the flour, baking soda, and salt together and set aside.
  3. In a mixing bowl, cream the sugars and butter together. Add in the egg whites, vanilla, and applesauce and combine well.
  4. Add the sifted flour mixture slowly to the sugar mixture until just combined.
  5. With a spoon, stir in the white chocolate chips.
  6. Drop 1/8 cup or so of the dough around 2 inches apart on baking sheet.
  7. Bake for about 13 minutes or until they have begun to brown around the edges.
  8. Cool on wire rack.
Notes

The timing for these has been 13 minutes for me each and every time. Your oven may be different so I would watch to see how done they are around 12 minutes and add more time if needed.

The last time I made these, I counted them and was going to make a point to know how many servings this recipe makes. Of course my crazy brain forgot to write it down and now I have no idea. It’s a lot though! Maybe 2 dozen or so.


Like this post? SHARE it!

Related Posts Plugin for WordPress, Blogger...

Pizza Quesadillas

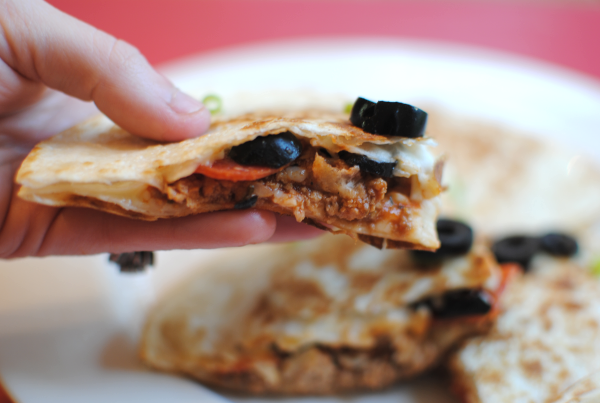
Every now and then to change lunch up just a bit, I make what my little girl what she likes to call “pizza tacos”. I use a tortilla and spoon on some pizza sauce (or sometimes just tomato sauce) along with some pepperoni and mozzarella cheese. I roll them up and microwave them for a few seconds to help the cheese melt. It makes a really tasty lunch. After making one for her the other day I got to thinking about how the same might taste good in a quesadilla.

The idea eventually made its way to my menu plan and I was excited about that night. It was another one of those dinners that I knew everyone would love.

One of the best things about making these quesadillas is that you can customize them to the eater’s liking. For instance, I like my pizzas with everything on them. Well, minus any small fish or fungi. My daughter and husband? Not so much. Strictly cheese and pepperoni. But I did add some meat to the mix for substance since this is for dinner after all.

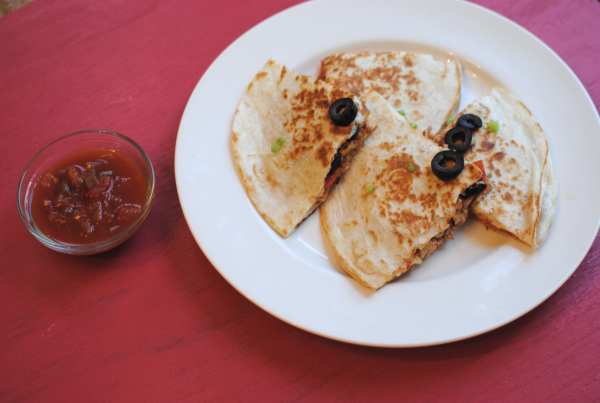
These were a major hit with the fam. I even told my hubby that I have to hand it to myself, they are pretty good. I dunked mine in salsa although some might find that a little weird. Pizza and salsa don’t exactly go together, but they tasted fine to me. You could dip them in more pizza sauce. I’m sure that would be tasty.

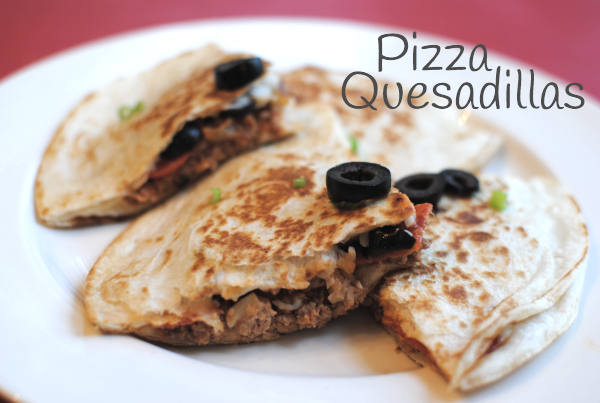
Oh yeah. That’s obviously a picture of my quesadilla with olives and all. Feel free to leave those off if you must.

Here’s the recipe.

Pizza Quesadillas
Recipe Type: Main Dish
Author: Pennywise Cook
Serves: 4
Make this every day Mexican dish and make it Italian. These Pizza Quesadillas are extra tasty!
Ingredients
  • 1 lb Ground Turkey
  • 1 Tsp Minced Garlic
  • 1 Tsp Onion Flakes
  • 1 Tsp Dried Oregano
  • 1/2 Tsp Dried Basil
  • 1 Cup Pasta Sauce
  • Sliced Olives
  • Pepperoni
  • 2-3 c. Shredded Mozzarella Cheese
  • 8 Medium tortillas
  • Cooking Spray
Instructions
  1. Brown ground turkey with garlic, onion flakes, oregano, and basil. Add pasta sauce and cook for about 5 minutes.
  2. Heat a skillet to medium high heat. Spray with cooking spray. On a tortilla place about 1/3 c. shredded cheese, then some of the meat mixture, then top with optional olives and pepperoni. End with cheese and top with second tortilla. Place into heated skillet for about 2-3 minutes.
  3. Spray top tortilla with cooking spray then flip the entire quesadilla with spatula.
  4. Repeat for next 3 quesadillas.
Notes

This makes about 4 quesadillas that make 4 squares each. They are surprisingly filling too!


Like this post? SHARE it!

Related Posts Plugin for WordPress, Blogger...

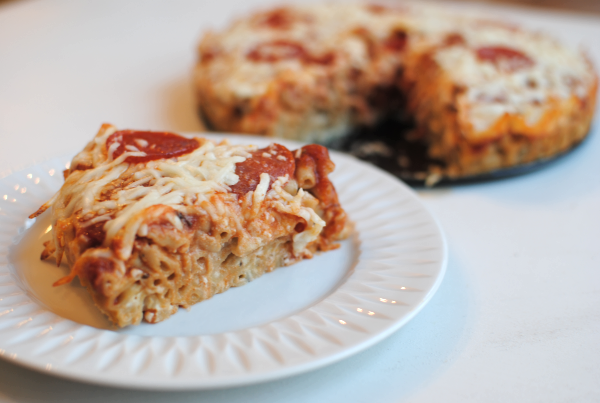
Macaroni Crust Pizza

One of the cheapest meals that I know how to make is pasta. You can always find a deal on dry pasta just about anywhere you go. Have a coupon? That’s even better! My favorite is when Publix puts pasta BOGO and you can get it next to nothing. I usually stock up and when I need something quick or easy during the week, it’s a no-brainer.

My favorite part of pasta is that it is SO versatile. You can basically make it into anything or put anything in it. This is what makes it so great for budget meals and for those who have picky eaters in the fam.

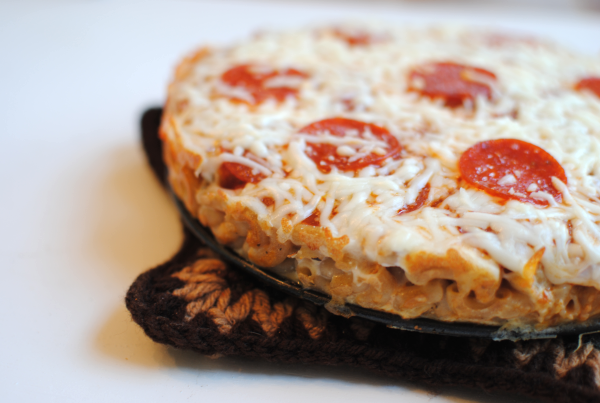
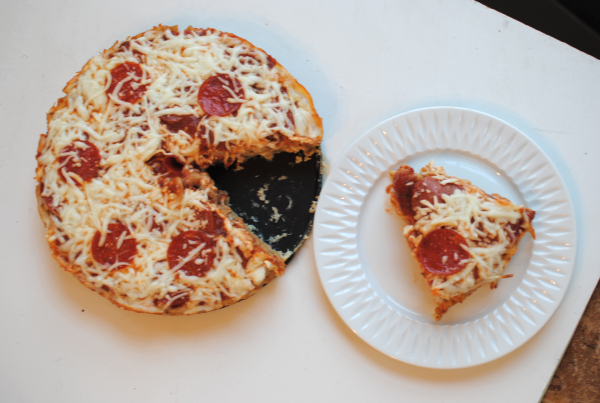
I can’t take credit for today’s recipe. I adapted this recipe from The Dieter’s Cookbook from 1982. I can’t believe that I’ve never thought of this. I’ve made pizza pasta many times before, but never thought of making macaroni the “crust” of a pizza. I cannot stress to you how much my family liked this. Easy, cheap, and incredibly tasty you really do have to try this one y’all!

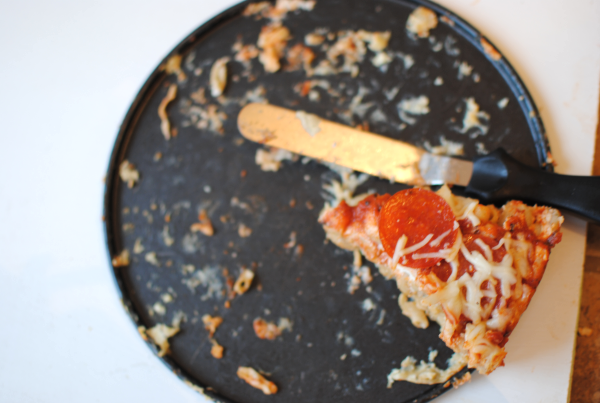
I take that back. Remember how I said that I couldn’t describe to you how much my family liked this? Well instead, here’s an illustration! This is all that was left from one sitting of this Macaroni Crust Pizza. It is that good.

And it’s actually a decent recipe for those watching their calories. Well, as long as you don’t eat as much as we did. 🙂

Just make it. Then come back here and leave a comment about your family’s reaction!

Macaroni Crust Pizza
Recipe Type: Main Dish, Pasta
Author: Pennywise Cook adapted from The Dieter’s Cookbook 1982
This cheap and easy meal is a tasty twist on regular pizza!
Ingredients
  • 2 c. Elbow Macaroni
  • 2 Eggs, Beaten
  • 1/2 c. Mozzarella Cheese
  • 1/4 c. Parmesan Cheese, Grated
  • 2 oz Pepperoni
  • 1/4 c. Skim Milk
  • 1/2 Tsp Dried Basil
  • 1/2 Tsp Dried Oregano
  • 1/8 Tsp Pepper
  • For Topping
  • 1 Egg, Beaten
  • 1/2 c. Reduced-Fat Ricotta Cheese
  • 1 Jar (8 oz) Pizza Sauce
  • 1 c. Mozzarella Cheese
Instructions
  1. Preheat oven to 375 degrees. In a large saucepan, cook macaroni according to package. Drain well.
  2. In a mixing bowl, combine 2 eggs, 1/2 c. mozzarella cheese, Parmesan Cheese, milk, basil, milk, and pepper. Add macaroni to this mixture and combine well.
  3. In a greased springform pan, place the macaroni mixture into a “crust” form. Bake for 10 minutes.
  4. Meanwhile, in a bowl combine the 1 egg and ricotta cheese. Once “crust” is out of the oven, pour this mixture over the top and evenly spread. Pour the pizza sauce over the top and sprinkle with mozzarella cheese. Top with pepperoni.
  5. Return to oven for 10- 15 minutes or until heated through. Let stand 10 minutes before slicing.
Notes

This could easily be made without any meat for vegetarians!


Like this post? SHARE it!

Related Posts Plugin for WordPress, Blogger...