Natural Lemon Vanilla Home Air Freshener


My sense of smell has always been top notch. Since having kids, it’s heightened and probably doubled in sensitivity. It’s a blessing and a curse. I can smell a dirty diaper from a mile away and I’m thankful sometimes to have a stuffy nose to get a break from that every now and then. Our house is fairly small and it doesn’t take much to make it stink.

I know the old saying, but I’ve made up a new one today. When life hands you lemons, you make air freshener. That’s got a nice ring to it doesn’t it? Lemons truly are a miracle fruit. With their sourness they conquer flavor in a host of different dishes. You can also use them to clean or turn around and throw them in a cocktail. But did you know they make a fantastic air freshener?

I had a few lemons sitting around that were going to go bad soon so I was looking for ways to use them up. I came across this home scent idea at Our Everyday Dinners and decided to give it a whirl. I didn’t have any rosemary at the time so I left that out. You would not believe how amazing this made our home smell!

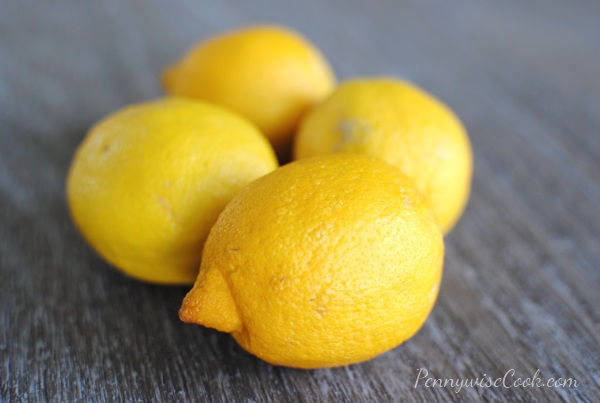
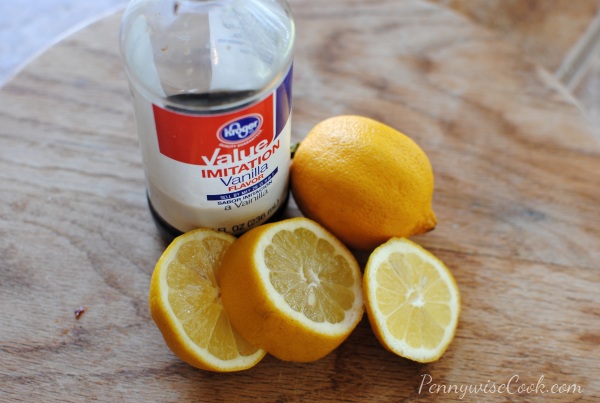
There are only 2 ingredients needed and you’re set. Lemons and vanilla extract. And of course, you can add the rosemary too!

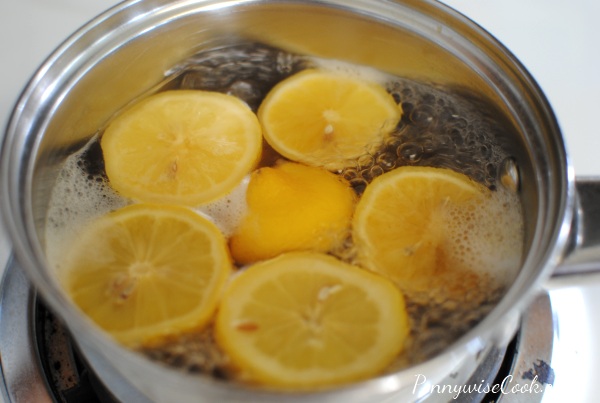
You start by filling a medium sauce pot up with water. Cut 3 lemons in half and place in the water. Add in 1 teaspoon of vanilla extract. Bring to boil and then simmer until all the water is gone.

Simple as pie!

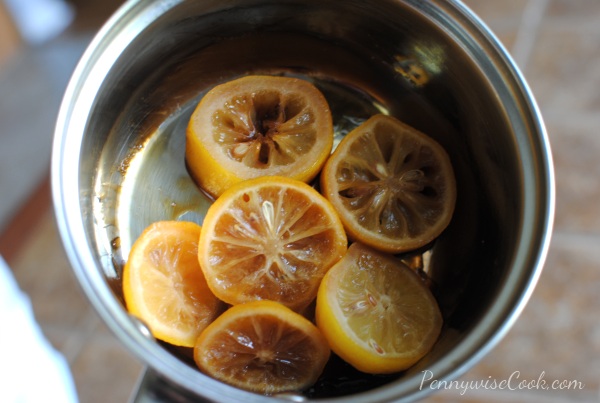
Within around an hour, your pot will look something like this. The moisture has all been sucked out, but your home smells lovely!

When I first put this on to simmer, my husband walked into the kitchen (following his nose) and asked where that smell was a couple of times. He overlooked the saucepan and I eventually told him that it was on the stove.

It’s such a fresh and tangy, yet sweet and creamy smell that the vanilla and lemon combine to make. It’s a great way to use up lemons that are going bad.

Let me know if you try it!


Like this post? SHARE it!

Related Posts Plugin for WordPress, Blogger...

Quick and Simple Taco Salads

Happy Wednesday! It’s been a really trying last few days for me. I got back from my killer Blissdom Conference here in Nashville. That was a whirlwind, will be sharing about that later! Pretty much immediately, Britton has come down with something. The poor baby. I really hate when my girls are sick. Took her to the doctor today and we’ve got an ear infection with a side of tonsillitis. I’m just glad to finally know what it is and that we can fix it fairly quickly.

I think I’ll need some quick dinners over the next few nights. Here’s one in fact, that is healthy and quick at the same time and it is a favorite at our house.

Healthy Taco Salad- Pennywise Cook

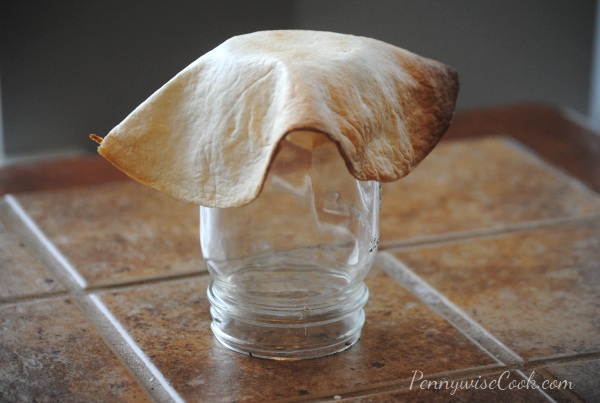
We love mexican food. I would marry it if I could. That’s how deep my love for mexican food runs. Not only is it quite tasty, but my entire family likes it which makes my life easy. When I came across this awesome Taco Salad idea at Dashing Dish, I absolutely HAD to try it. Brace yourself, it’s another duh moment. Take a flour tortilla, drape it over a jar or mug or can, bake for 8-10 minutes and voila! This isn’t as much a recipe as it is a brilliant idea for a healthy taco salad.

Most taco salads are loaded with calories because the shells are fried. Yes, they are amazingly tasty but you pay for it. So when I saw this idea, I thought to myself my life is complete. At only around 100 calories for one tortilla , depending on your toppings you can have an entire taco salad for around 300 calories. Not to mention the fact that you can buy a package of flour tortillas for $1.00- $1.25 at most stores.

I used a mason jar to drape my tortillas over. I also took the corn out of a can (to use in my taco salads) and removed the label and used it too. I made a total of 6 of these in batches.

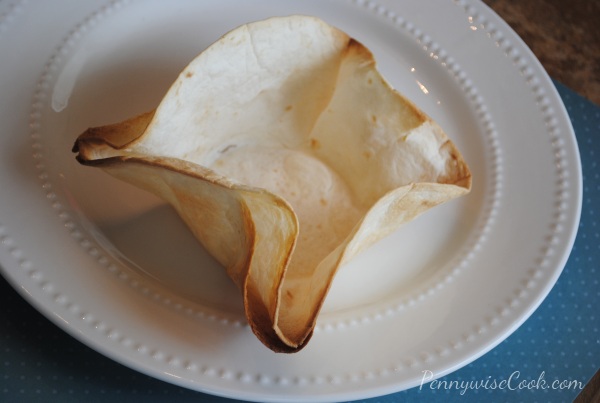
You do kinda have to finagle them to get them to stay in a pretty shape on the can or jar. Once they start to crisp in the oven, they keep their shape. This is what mine looked like when it came out of the oven. Super toasty and ready for the taco filling!

Thanks to Dashing Dish for this fantastic idea!

Quick and Easy Taco Salads

Prep Time: 5 minutes

Cook Time: 10 minutes

Serving Size: 1 Tortilla

Quick and Easy Taco Salads

This super easy and quick option for a taco salad is also healthy and tasty at the same time!

Ingredients

    For the Taco Shells
  • Flour Tortillas
  • Jar or Can (for draping tortilla over)
  • Suggestions for Filling
  • Ground Turkey or Extra Lean Ground Beef
  • Taco Sauce
  • Canned Corn
  • Black Beans
  • Reduced Fat Cheddar Cheese
  • Fat Free Sour Cream
  • Shredded Lettuce

Method

  1. Preheat oven to 450 degrees.
  2. Place jar or can on baking sheeting.
  3. Drape tortilla over jar and cup to make desired taco salad shape. You may need to hold it there until right before you place it in the oven.
  4. Bake for 8-10 minutes or until golden brown and crispy.
  5. Place desired filling inside and you're done!

Notes

Tip- you can make these ahead of time and store in the microwave until ready to use. I make them in the morning and then fill mine for dinner later on.

http://www.pennywisecook.com/quick-and-simple-taco-salads/


Like this post? SHARE it!

Related Posts Plugin for WordPress, Blogger...

Kid-Friendly Craft: Celery Art

Happy Saturday everyone! It’s been a busy week around here. I’m currently attending the Blissdom conference here in Nashville, TN at the beautiful Gaylord Opryland Hotel. It’s super swanky. I think I’m finally understanding the layout of this hotel. It only took me 3 years to figure it out. It’s HUGE! It reminds me of the Titanic for some reason. I think it’s the beauty and how some of the outside looks rounded like a boat.

But I digress…

Addie and I love doing crafts together. Addie loves not eating her vegetables. Put those two together and you have celery art! I mean come on, if you’re not going to use your veggies for nutrition and nutrients, use them for a beautiful painting right? I saw this idea in the recent issue of Family Fun and I thought how genius!

I guess I’ve never really cut celery up like this and realized how much it does sorta resemble a flower.

Add some paint and you can really see it! It’s really that simple to do. Because there aren’t really a ton of steps, kids actually pay attention long enough enjoy this craft!

This craft is especially good for using up that celery that is on the brink of going bad. Grab some paint (whatever you have on hand) and get to dipping those veggies!

The result is pretty Celery flowers that are even frame worthy! We did actually frame ours, but I didn’t get a picture yet. I may have to come back and add that later for you.

How-To: To begin, remove one stalk for making the “leaves”. Then cut your celery stalk about halfway down. Where it’s bulkiest is best. You don’t want to be too close to the top or your flower will be small. You may have to hold the celery firmly to keep the pieces from trying to move around when making the print. And to make the cute little leaves, simply use your single stalk. Also, be sure to stamp the celery a couple practice times before doing the “real thing”. The paint can often be very thick on some pieces right after you dip.

Have fun!


Like this post? SHARE it!

Related Posts Plugin for WordPress, Blogger...

Frugal Kitchen Tip: Freezing Fresh Herbs

Standing there in the produce section seeing all of those fresh herbs, I think to myself, I’d buy tons of that if it would stay fresh longer. There is no doubt that fresh herbs add a lot to a dish. I love the crisp bite and beautiful green color that parsley can add to just about any meal. I was watching Barefoot Contessa the other day and she shared this amazingly genius tip for storing fresh herbs. I usually buy it for a particular dish and then it goes bad before I can ever use it again. Then I go and buy some again for the next meal. It’s a continuous cycle that can really get costly.

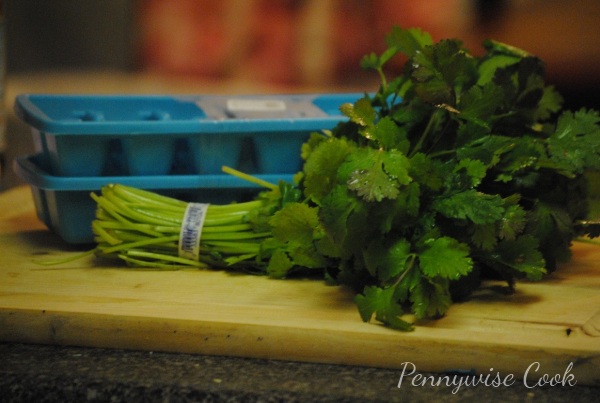
Here’s a trick for FREEZING your herbs and having them on hand for quickly adding them to your meal. You will need ice cube trays for freezing the herbs in. You can find these just about anywhere including Dollar Tree. They sell two in a pack for $1.

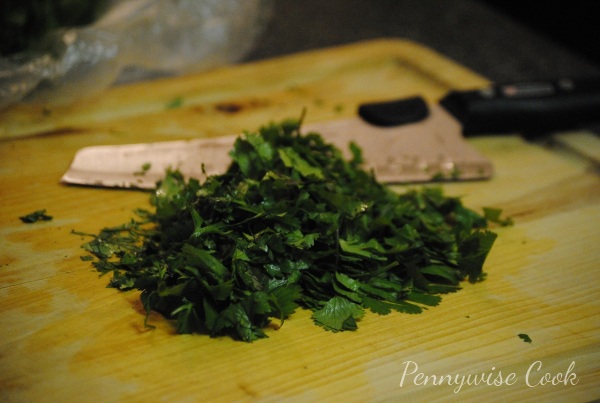
Rinse the herbs and dry well with a paper towel. Then roughly chop them up.

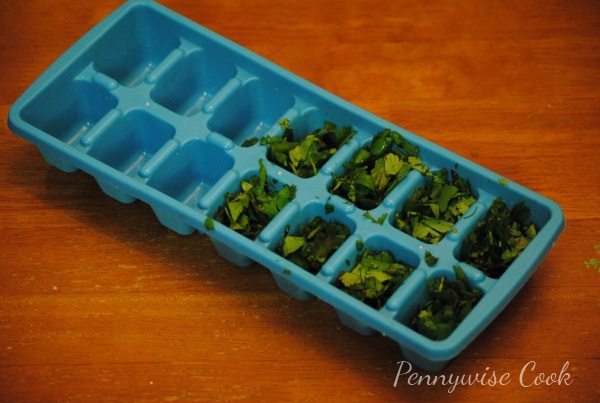
Spoon the chopped herbs into the ice cube tray and add a drop or two of water on top. Pop them in the freezer and voila! The next time that you have a meal requiring a fresh handful of herbs, pop some of your frozen herbs out and throw them in.

I have found that they generally keep their shape and color even after freezing. Barefoot Contessa didn’t mention adding a drop or two of water to the herbs in the ice cube tray, but I find this helps to keep them together more in the freezing process. If the meal you are using your herbs in isn’t a hot one (whether in the oven or on the stove) then you may want to thaw the herbs a little before hand. Otherwise, it thaws fairly fast in most. And I don’t recommend keeping them frozen for more than a few months. They do tend to lose color after a few months. But a few months is better than a few days in the refrigerator!


Like this post? SHARE it!

Related Posts Plugin for WordPress, Blogger...

Magnetic Spice Rack DIY

Happy Saturday! It’s a good day for a DIY project don’t ya think?

I have a confession. I absolutely love my spice rack. I’m not sure if it’s the stainless steel tins or the beautiful colors that it creates in my kitchen, but I have a love for my spice rack unlike any that I have for my other kitchen gadgets. My KitchenAid stand mixer is a close second though. 😉

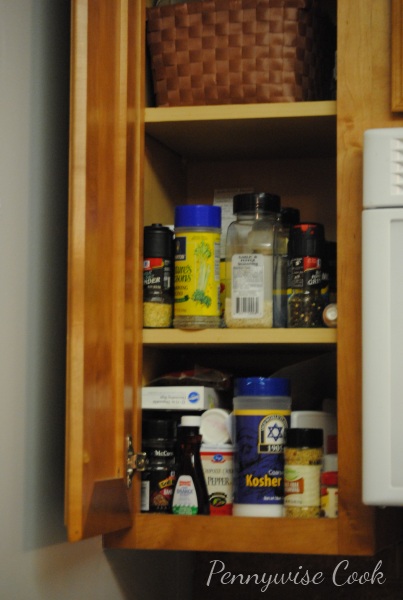
You see, this is my spices cabinet before. In this picture, I’ve actually removed quite a bit of them already so you don’t see them stacked to the top like they normally are, but you get the idea. We have a small house so there just aren’t many places for spices to go. They got the cold shoulder into the smallest possible cabinet available. So I got the bottles flying out at me every time that I went to grab my parsley flakes and one day I said enough is enough. I scoured the web looking at tutorials on how to make your own spice rack and I found some that were magnetic. A light bulb went off in my head and I was hooked. I got some fantastic ideas, but most involved expensive materials and things you had to purchase online. Unfortunately I was in a get-it-now mood so I came up with my own plan.

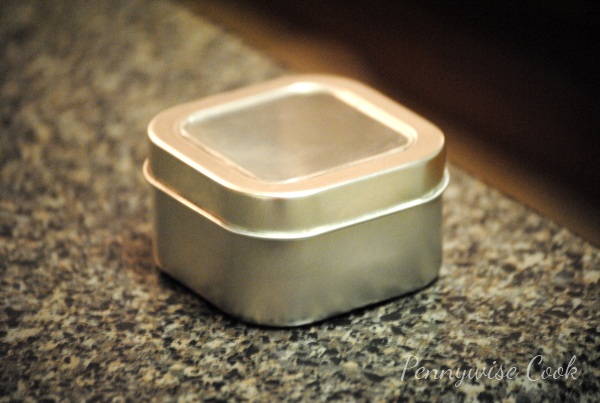
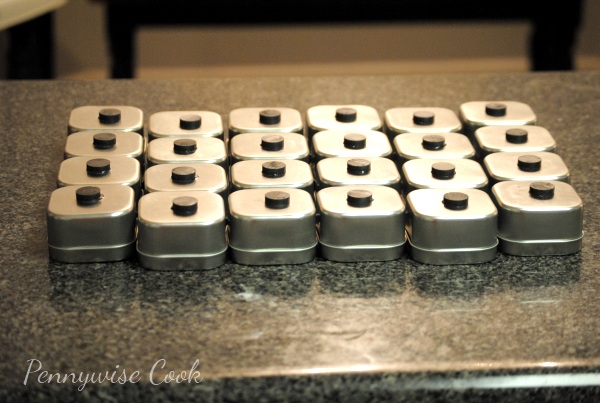
I took myself down to about 5 different stores including your obvious places like Target and Walmart looking for spice tins. Most don’t have anything close to what you see above. I did find something similar at Old Time Pottery, but for $1.99 a pop that just wasn’t going to do. I was imagining a big and magnificent spice rack and at that price, I would be completely broke. I finally settled on ordering them online from Specialty Bottle. They were a much more affordable $.64 per tin. I got the 4 oz tins and they are plenty large enough. Shipping was a bit expensive, but still cheaper than what I would have paid at Old Time Pottery.

Next I needed a piece of metal for the tins to adhere to. Most suggestions that I saw were to order stainless steel sheets online. I can’t believe how expensive those sheets of metal can get. You can’t just walk into Lowes and purchase one. Trust me, I tried. You can however, get a piece of steel at Lowes. I purchased an 18″x20″ piece of it for around $10 there. Using my noggin I realized that if its not stainless, it can rust and around the kitchen there is lots of moisture. I opted to get some Rustoleum that mimics stainless steel to coat it with that ran us another $5 bucks. I actually got the “hammered” look and it turned out wonderful! If you want something that will fit in better with your kitchen colors, they have tons of color options of Rustoleom that would be beautiful on a spice rack.

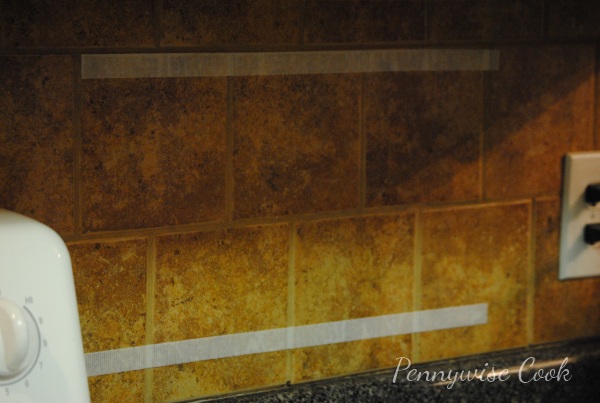
Instead of the usual method of hanging the sheet metal, we opted for using Velcro. It may sound silly, but we have a tile back splash and I didn’t want to risk breaking the tile in the process. Surprisingly enough, the Velcro has worked out fantastically. It ran us about $5 in total.

Next, I needed magnets. After all, you can’t have a magnetic spice rack without those! I purchased 4 packs of 8 ct regular plain jane magnets at Lowes for about $2.50 each. Total= $10. I also used Locktite Super Glue to adhere them to the tins. I didn’t use much at all so they didn’t look messy.

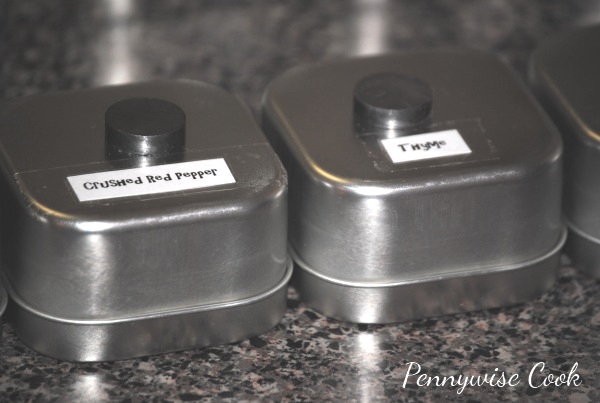
I’m pretty good at knowing what certain spices look like, but I am not great at it with others. It’s amazing how some look like others once you get them up there on that rack. I simply typed up the name of my spices on a Word document and cut them out. Then taped them on the back of the tins. When I need to be sure, I just take it off and look. Simple enough and they look clean on the front without words. They have spice labels for sale on Amazon. Most are less than $3, but these didn’t cost me a dime.

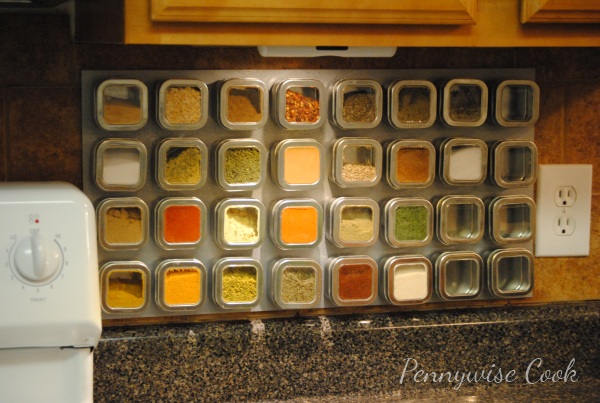
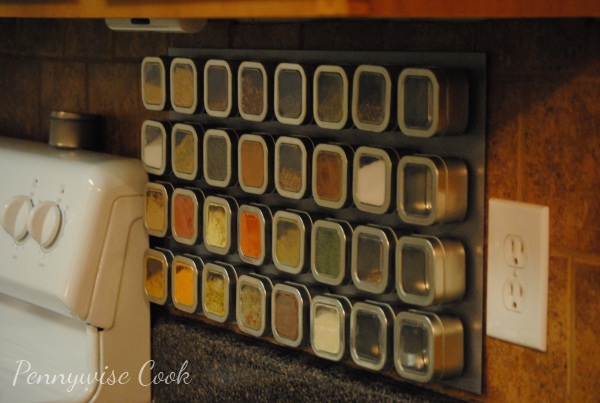
All in all, my Magnetic Spice Rack cost us about $50 plus the shipping for the tins. They have sites that sell these premade online, but I’m very happy with the result that we got for our money. And it was actually quite easy as it turns out!

If you are wanting to do one of these, use your imagination. Don’t always listen to what others suggest. I’m glad that we didn’t because this was possibly a lot cheaper than we would have paid ordering from places online or purchasing some of the other expensive materials.

Yay for DIY!


Like this post? SHARE it!

Related Posts Plugin for WordPress, Blogger...