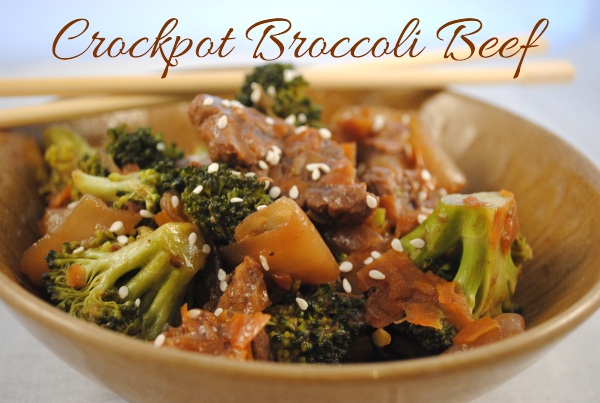
Crockpot Broccoli Beef

Happy Friday the 13th! Time for a Jason movie marathon. 🙂

I. Love. Chinese Food.

I don’t eat it too often because if I choose to eat Chinese food, I have to go to a buffet. And let’s face it, there is no control when you walk into a Chinese buffet. All inhibitions are out the window along with your diet and healthy-eating mantra. Plus, depending on the buffet, they aren’t exactly the most sanitary places. I’m not above them but choose to stay away because of my lack of self-control in the presence of combinations of soy sauce, teriyaki sauce and lo mein noodles.

It’s like my crytonite.

That and a TON of other things.

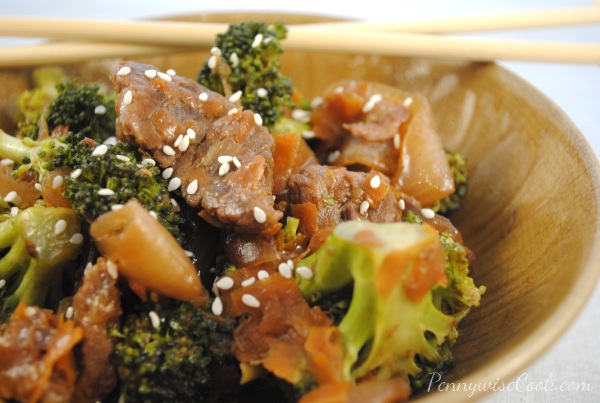
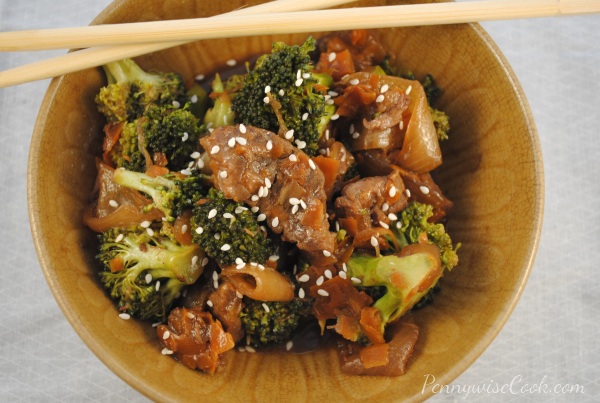
My mom loves Chinese too and for her birthday we put together a Chinese themed party. We made Crockpot Broccoli Beef and it was a-maz-ing. Everyone was asking for the recipe.

The sad part? I can’t find it anywhere! I’ve searched high and low. I’ve Googled until I could Google no longer. I just cannot locate this incredible recipe. So when my craving for this yummy beef and veggie mixture hit a few days ago, I just winged it. And it turned out pretty great! I really LOVE how easy it is.

Serve this over lo mein noodles or just eat it like it is.

…..And save yourself a trip to the buffet.
Crockpot Broccoli Beef

Crockpot Broccoli Beef

Chinese food at home is simple! Make up a yummy batch of Broccoli Beef in your crockpot while you work (or play).

Ingredients

  • 1 lb Round Thin Steak (or similar thin cut); Cut into bite size pieces
  • 2 Large Bunches Broccoli, chopped into pieces
  • 1 Medium Onion, Cut into wedges
  • 2 Carrots, Shaved into thins strips
  • 1 Package Brown Gravy Mix
  • 1 - 1 and 1/2 c. Water
  • 1 Tbsp Teriyaki Sauce
  • 1 Tsp Sesame Oil

Method

  1. Place all ingredients except for the broccoli into the slow cooker and combine. Cook on high for 4 hours or on low for 6-8 hours.
  2. In the last 30 minutes, add in the broccoli.
  3. Serve!

Notes

I really can't add much, it's simple!

http://www.pennywisecook.com/crockpot-broccoli-beef/

How often do you go to Chinese buffets?


Like this post? SHARE it!

Related Posts Plugin for WordPress, Blogger...

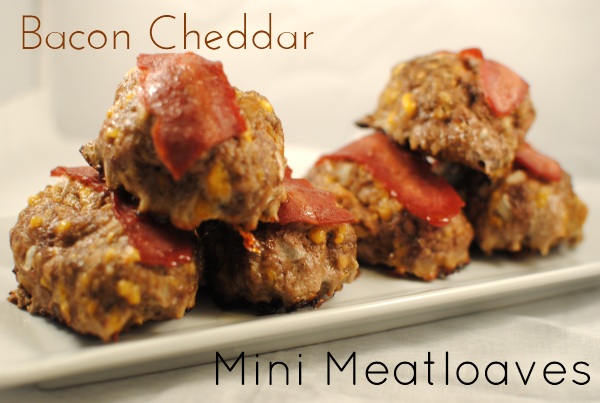
Bacon Cheddar Mini Meatloaves

My husband is one of those meat and potatoes kinda guys. He’s not too much into anything green or red that might have grown on a plant. You know, anything especially “healthy” for you. Since we’ve been married he’s starting to come around. And with a little coercion I’ve been able to get to eat things his momma probably thought he’s never stick in his mouth!

Every now and then I like to cook him something that he won’t look at funny or smell first. 😉 Like I was telling you the other day, Max’s parents were here and his dad is eating low carb so I also wanted to make something that was going to fit his diet. I settled on these amazing mini meatloaves.

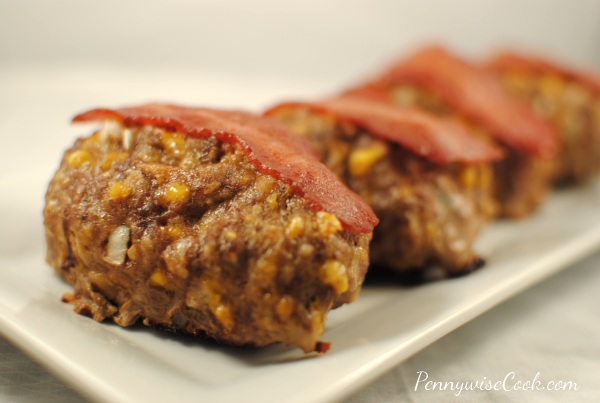
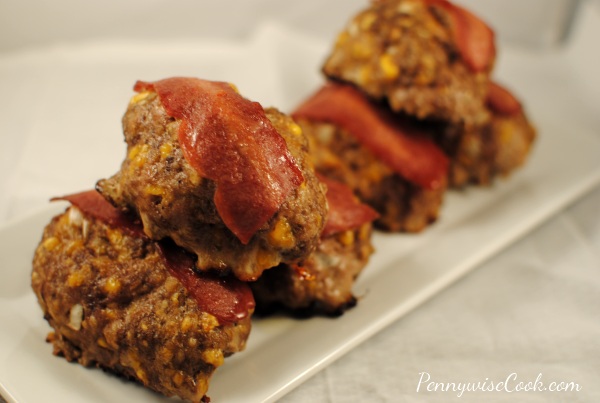
You will have to excuse how ridiculous these look. I don’t have one of those cute little loaf pans and apparently I’m not very good at making them look like loaves. They kinda look like oval hamburger patties don’t they? And technically these would make great hamburger patties too! But the one thing that separates these from being a hamburger is that I have officially dubbed these…..meatloaf. So there. 🙂

I don’t make meatloaf very often, but every now and then we just want a big hunk of meat don’t we? These will do just the trick and can be made with whatever level of meat you prefer to buy. You could even use ground turkey or chicken. For these I used 1/2 ground round and 1/2 ground turkey in fact.

With only around 300 calories per mini meatloaf you can’t go wrong! See all of those little specks of cheese in there? Yeah that’s speckled throughout each entire meatloaf along with onions and a surprising twist- reduced fat Ritz crackers. You don’t have to use the brand-name of course. Just whatever you can find cheap or have on-hand.

These are super delicious and incredibly easy too. Even the hubby was satisfied with his hunk of bacon-y and cheesy meat. One of my favorite things about making them mini instead of regular size is that they cooked up faster. I didn’t need the entire 40 minutes to get these finished. Quicker meals mean happier hungry folks!

Recipe from Taste of Home.

Bacon Cheddar Mini Meatloaves

4 Servings

Serving Size: 1 Mini Meatloaf

Bacon Cheddar Mini Meatloaves

Nothing is more comforting than a bacon and cheese meatloaf!

Ingredients

  • 4 egg whites
  • 1/2 cup crushed reduced-fat Ritz crackers (about 13 crackers)
  • 1/3 cup plus 8 teaspoons shredded reduced-fat cheddar cheese, divided
  • 1/4 cup chopped onion
  • 1/2 teaspoon salt
  • 1/4 teaspoon pepper
  • 1 pound lean ground beef (90% lean)
  • 2 turkey bacon strips, cut in half

Method

  1. Preheat oven to 350 degrees.
  2. In a big bowl, combine the egg whites, crackers, 1/3 c. cheese, onion, salt, and pepper. Crumble the beef of that and mix well.
  3. Shape into 4 small loaves and place on a greased baking dish. Top each with a piece of bacon.
  4. Bake for 35- 40 minutes or until there is no more pink. Temperature should be 160 degrees. Sprinkle with remaining cheese and bake for another 2-3 minutes for the cheese to melt.

Notes

I added 1/2 pound of ground turkey and a tad more of the other ingredients so I would end up with 6 meatloaves.

If you have a mini loaf pan, this would be a great time to use it!

In place of the crackers, you could easily use plain bread crumbs if you have them.

And if you have a picky eater, you can leave out the onions.

http://www.pennywisecook.com/bacon-cheddar-mini-meatloaves/

Question of the day:

Do you make meatloaf frequently?


Like this post? SHARE it!

Related Posts Plugin for WordPress, Blogger...

The BEST Lassagna Soup Ever

Raise your hand if you like to make easy meals. *raises hand* I’m lucky to get dinner on the table by 8pm most nights. I had a little spurt where I was getting dinner ready around 5:30, but then I had my second kid and somehow the days got a lot shorter. I feel like there’s a time burglar slowly stealing time. Do you ever feel that way? I’m fairly impatient too which makes it really hard to wait for things. Of course when I’m waiting it feels like time is moving slowly.

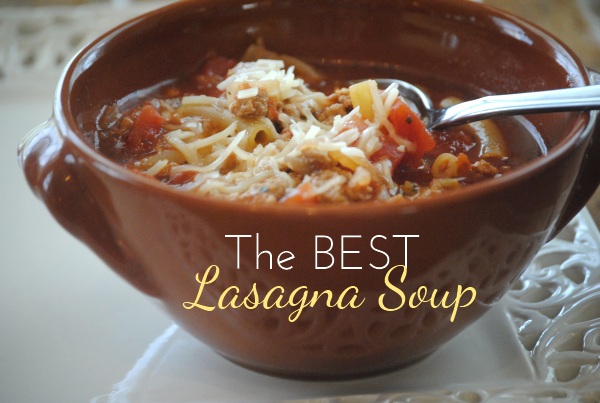
This soup is perfect for those days when you feel like time is moving too fast. When you don’t have a minute to spare but want a hearty dinner, you might try this amazing soup. My mom shared this with me a few months ago and I’ve made it several times since then. It wasn’t meant to be made in the crockpot, but I threw caution to the wind and made it that way anyways. It worked!

Not only is this an easy meal to throw in the crockpot, it’s also low in calories. And we like low in calories don’t we? And to top it all off, this soup is delicious! You’d never know that it was low cal or low fat. Those are the best kinda meals. And even the pickiest of eaters will eat this. My daughter ate every bite and I didn’t even have to bribe her (I know!).

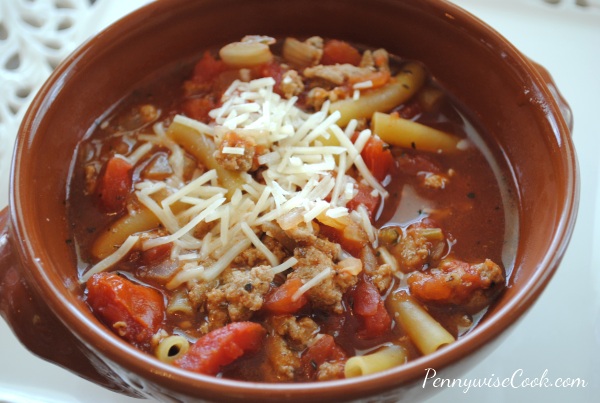
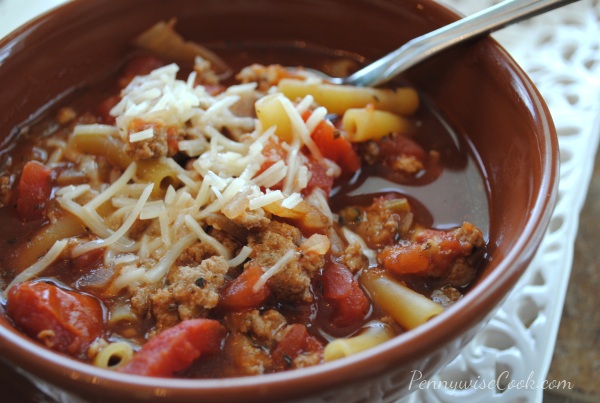
The recipe calls for spiral noodles, but I usually use whatever I have on hand. Although it does seem to look better with the spiral noodles. When making this in the crockpot, you’ll want to throw everything BUT the noodles in to cook. Then in the last 10 minutes or so, throw them in to let them cook up. This is what I’ve found to be the easiest way to make it in the crockpot. Top it with some parmesan cheese and you have incredible lasagna soup! I’m not even just saying that. It really is the BEST lasagna soup. I hope that you try it!

Recipe courtesy of Taste of Home and my momma!

The BEST Lassagna Soup Ever

Serving Size: 8 servings

The BEST Lassagna Soup Ever

Transform your lasagna into soup and make it while you work!

Ingredients

  • 1 pound lean ground beef (Preferably 90%)
  • 1 large green pepper, chopped
  • 1 medium onion, chopped
  • 2 garlic cloves, minced
  • 2 cans (14-1/2 ounces each) reduced-sodium beef broth
  • 2 cans (14-1/2 ounces each) diced tomatoes
  • 1 can (8 ounces) tomato sauce
  • 1/4 cup tomato paste
  • 2 teaspoons Italian seasoning
  • 1/4 teaspoon pepper
  • 2-1/2 cups uncooked spiral pasta
  • 1/2 cup shredded Parmesan cheese

Method

    Cook in a Saucepan
  1. In a large saucepan, cook the beef, green pepper and onion over medium heat until meat is no longer pink. Add the garlic and cook 1 minute longer. Drain.
  2. Stir in the broth, tomatoes, tomato sauce, tomato paste, Italian seasoning and pepper. Bring to a boil. Stir in pasta. Return to a boil. Reduce heat; cover and simmer for 10-12 minutes or until pasta is tender. Sprinkle with cheese.
  3. Cook in a Crockpot
  4. Place all ingredients minus the pasta and parmesan cheese into the crockpot. Cook on low for 6-8 hours or high for 4-6 hours.
  5. In the last 15 minutes add in the pasta and cook until tender.
  6. Sprinkle with cheese and serve!

Notes

The original recipe also called for 1 cup corn, but I didn't use it. Seemed a bit odd to me since you don't put corn into lasagna normally. I think it tasted just wonderful without it.

http://www.pennywisecook.com/the-best-lassagna-soup-ever/


Like this post? SHARE it!

Related Posts Plugin for WordPress, Blogger...

Chicken and Waffle Sandwiches

We had an awesome weekend. Got some yard work done, ran some errands, went to church, and had some friends over. Oh and I ran 5 miles! It felt really great too. I love runs like that.

How was your weekend?

I eat healthy most of the time. Even on the weekends when I “splurge” I find that I can’t help by choose the healthiest options. It’s a blessing and a curse I guess. Sometimes I try to substitute things for other things that just don’t turn out right. For instance, you just can’t use I Can’t Believe It’s Not Butter Fat Free in place of regular butter. It will burn and ruin whatever you’re using it for. But there are tons of other ways to make shortcuts that I use on an everyday basis. Did you catch my post about swapping mushrooms for meat? That’s a great example!

Sometimes I crave ridiculous stuff like those little chocolate covered Hostess donuts. You know the ones. OH MY are they delicious. I have no doubt that I could sit and eat an entire bag in one sitting. Or how about those cheese fries at Outback? They are so incredibly amazing. I remember when I used to go eat there and order those as an appetizer AND a meal on top of that.

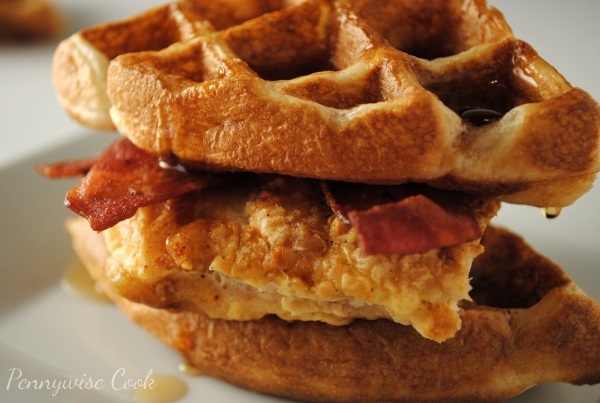
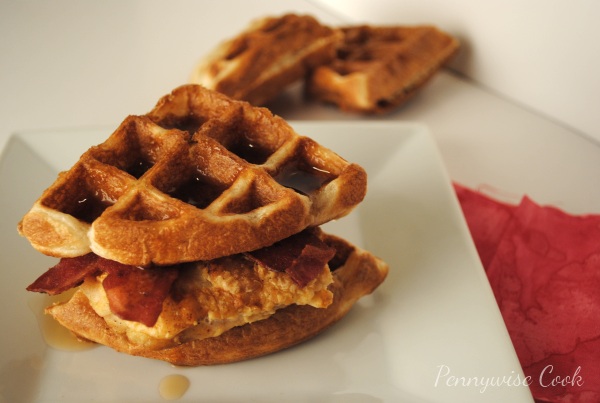
The other night I was craving a southern sandwich that is maybe a little foreign to some. A chicken and waffle sandwich. A normal sandwich like this consists of crispy fried chicken sandwiches between two waffles and slathered with maple syrup. So insanely delicious.

I decided to whip these up for the fam that night and they satisfied my craving and were really tasty! If you’ve never tried one of these and want a lighter version you might try this out for yourself. They are so yummy. These are more like mini sandwiches since I used 1/2 a Belgian waffle for each. However, each sandwich does have half a chicken breast and along with the waffle they are actually quite filling!

Chicken and Waffle Sandwiches

4 Sandwiches

Chicken and Waffle Sandwiches

A lightened up version of the Chicken and Waffle Sandwich.

Ingredients

  • 2 Belgian Waffles
  • 2 Chicken Breasts
  • 1/3 c. Egg Substitute or 1 Egg
  • 1/2 c. Flour
  • 1 Tsp. Kosher Salt
  • 1 Tsp Paprika
  • 1/4 Tsp. Pepper
  • 1/4 c. Olive Oil
  • 4 Pieces Turkey Bacon
  • Sugar Free Syrup

Method

  1. Mix the flour, kosher salt, paprika, and pepper together and place on a plate.
  2. Heat the olive oil in a skillet over medium high heat.
  3. Dredge chicken breast in the egg then in the flour and seasonings. Place in skillet and brown until crispy. About 4-5 minutes on each side.
  4. Cut each chicken breast in half and place on 1/4 of Belgian waffle. Tear 1 piece of bacon in half and place on chicken then top with another 1/4 of Belgian waffle.
  5. Pour syrup over the top and eat!

Notes

I used Batter Blaster to make my Beligan waffles, but feel free to use your favorite batter recipe or premade mix.

To cook your bacon quickly, place the 4 pieces on a paper towel and microwave for 1-2 minutes until you reach desired crispiness.

http://www.pennywisecook.com/chicken-and-waffle-sandwiches/


Like this post? SHARE it!

Related Posts Plugin for WordPress, Blogger...

Sticky Sesame Chicken

I have always been a huge fan of Chinese food. I absolutely love garlic, onions, soy sauce, you name it. The combination that is used in that ethnicity is just my kind of flavor. And what most people don’t realize is that a lot Chinese dishes are simple to make. There are two things in recipes that I look at to decide if I want to make it.

1) Does it contain ingredients that I would have on-hand or that I would actually buy and use later?
This is what makes it frugal. You don’t want to have to make a special trip to a crazy store 30 minutes away to use that ingredient just once.

2) Is the recipe simple with steps that are easy to follow?
I’m all about simple. If a recipe contains a bunch of steps that are difficult, I usually move on. I’m ok with maybe one challenging step in a recipe, but the more challenging the more time it takes and the less simple that it becomes. And we all know that time is very important too. With two kiddos and a hungry husband, there’s not a moment to spare when getting dinner on the table.

If you’ve been following this blog for a while, then you know I’m a big fan of Hungry Girl. I love her use of resources and out of the box thinking when it comes to making meals healthier. I found this recipe for Sesame Chicken over there and I was a bit turned off by the ingredients to be honest. There are a total of 15- 16 ingredients in this recipe. Yeah, exactly. It doesn’t sound like one of those easy recipes, but after actually seeing what the ingredients were I quickly changed my tune.

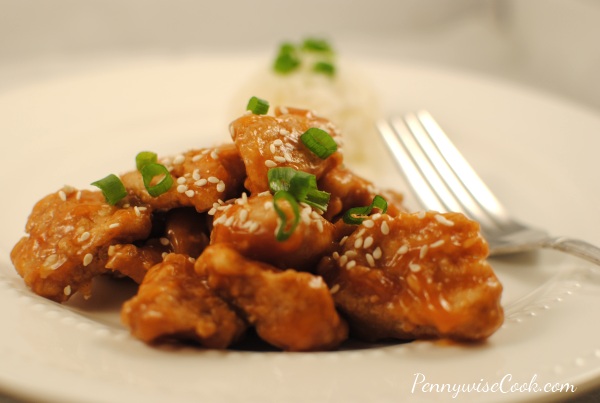
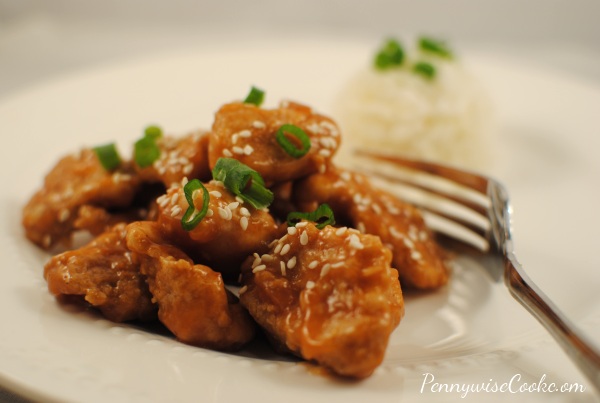
With the combination of regular everyday ingredients that you might have on hand, you can whip up this super yummy Sticky Sesame Chicken! I’m serious too, it’s healthy but it’s also amazing! The only drawback to this recipe is the time it takes to coat each piece of chicken. Just make sure that you give yourself plenty of time to do that when preparing this recipe.

Recipe adapted from Hungry Girl.

Sticky Sesame Chicken

2 Servings

Serving Size: 1 Cup

288

Sticky Sesame Chicken

Make your own yummy Sesame Chicken just like your favorite Chinese restaurant without all the extra fat!

Ingredients

  • 10 oz Boneless Skinless Chicken Tenders, chopped into bite-sized pieces
  • 1/8 tsp. salt
  • 1/8 tsp. black pepper
  • 1/4 cup fat-free liquid egg substitute
  • 1/4 cup whole-wheat flour, divided
  • 1/4 cup fat-free chicken broth
  • 1 tbsp. cornstarch
  • 2 tbsp. sugar-free pancake syrup
  • 2 tbsp. seasoned rice vinegar
  • 1 tbsp. ketchup
  • 1/2 tbsp. lite/low-sodium soy sauce
  • 1/2 tsp. sesame oil (I used olive oil)
  • 1/2 tsp. crushed garlic
  • 1 tsp. sesame seeds
  • 2 tbsp. thinly sliced scallions (optional)

Method

  1. Preheat oven to 375 degrees. Spray a baking sheet with cooking spray and set aside.
  2. Place chicken in a bowl, season with salt and pepper, and cover with egg substitute. Toss to coat and set aside.
  3. Place 2 tbsp. flour in another bowl. Use a fork to transfer half of the chicken to the flour bowl, allowing excess egg substitute to drain back into the egg bowl. Thoroughly coat chicken with flour, and then transfer to the baking sheet. Wipe the bowl clean, and then do it again with remaining flour and chicken.
  4. Bake chicken in the oven until cooked, about 10 minutes.
  5. Meanwhile, combine broth with cornstarch in a small nonstick pot and stir to dissolve. Add the syrup, vinegar, ketchup, soy sauce, oil, and garlic. Mix well and bring to medium heat on the stove. Stirring often, cook until thick, 2 - 3 minutes. Set aside.
  6. Place cooked chicken in a bowl, top with sauce, and toss to coat. Sprinkle with sesame seeds.
  7. Top with scallions or crushed red pepper if desired and serve!

Notes

This recipe is made for 2 people, but I had more than 10 oz of chicken so I added a little of each ingredient to make it go further for our family. I used vegetable oil instead of sesame oil and it turned out just fine. So don't fret if you don't have that. Make sure that your chicken is nice and warm when you serve it with the sauce. I found that it gets cold pretty quickly.

http://www.pennywisecook.com/sticky-sesame-chicken/


Like this post? SHARE it!

Related Posts Plugin for WordPress, Blogger...

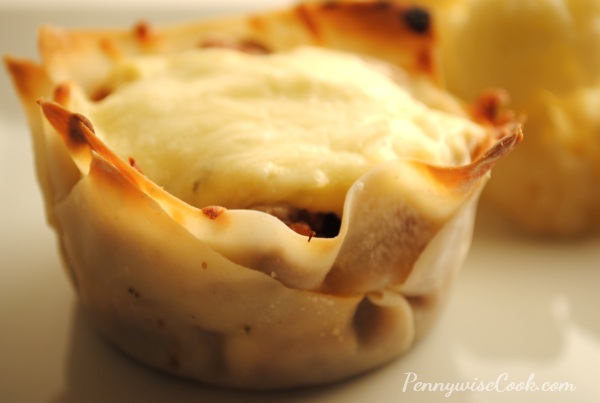
Lasagna Cupcakes

What’s the one thing that you always have to hand at all times? Milk? Cheese? Perhaps a tub of ice cream? 😉

One of my important things to have in my fridge these days is wonton wrappers. You’ve probably seen them in your grocery store before. I encourage you to pick some up the next time you’re at the store. They usually run around $2.99 for a package (give or take a little). They are so incredibly versatile when it comes to making small foods. Yes, that’s been one of my obsessions lately. Anything teeny tiny and can fit in your palm. I mean come on, how cute are cupcakes? What about Meatloaf Cupcakes? If you haven’t gotten a chance to make those yet, you’re missing out!

I first came across these Lasagna Cupcakes reading up low calorie recipes in the Hungry Girl cookbook. I was floored when I found them and could not wait to make some up. They turned out beautiful and quite tasty (even to the hubby), but they were a little bit spinach-y. I like spinach more than I ever have, but only when it’s nicely camouflaged and hidden. I don’t even mind seeing my food green because of spinach, but it just can’t taste like spinach.

So I came up with my own version of this main dish cupcake and it was fabulous!

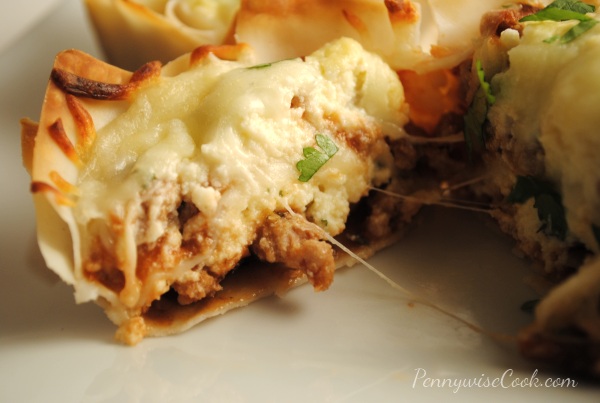
On the outside, these are adorable and so incredibly cute, but on the inside they actually taste like mini lasagna. Two words come to mind- portion control. These are the perfect idea for a party or having company over. They look like a million bucks, but it’s basically the same as lasagna without the noodles and in tiny form. Most everything is cute in tiny form and kids love that which makes this a kid-friendly dish as well!

Putting the wonton wrappers on added more prep time, so just be aware of that. But other than prep time, this is an easy meal. Serve it up along side a salad and corn and you’ve got a meal.

Lasagna Cupcakes

Lasagna Cupcakes

Ingredients

  • 1/2 Pound Ground Turkey or Extra Lean Beef
  • 1 c. Ricotta Cheese
  • 1 and 1/2 c. Mozzarella Cheese, divided
  • 1 c. Parmesan Cheese
  • 1 8 oz Can Tomato Sauce
  • 1 Large Egg or 1/4 c. Egg Substitute
  • 1 Medium Onion, Chopped
  • 1 Tsp Garlic
  • 24 Wonton Wrappers
  • 1 Tsp Italian Seasoning
  • 1/4 Tsp Salt
  • 1/8 Tsp Pepper

Method

  1. Preheat the oven to 375 degrees.
  2. Over medium-high heat, brown ground turkey, onion, garlic, salt and pepper until meat is no longer pink. Add in tomato sauce and simmer for about 5 minutes.
  3. Spray a muffin pan with cooking spray and set aside.
  4. Meanwhile, mix ricotta cheese and egg.
  5. Place a wonton in each muffin well bringing it up along the sides.
  6. Distribute 1/2 the ricotta mixture among the cups.Smooth them out with a spoon.
  7. Top those layers with 1/2 the meat mixture and evenly distribute. Add 1 tbsp mozzarella cheese on top of each meat mixture.
  8. Place another wonton wrapper in each cup.
  9. Repeat those steps and then bake them for about 10 minutes or until the cheese is all melted.
http://www.pennywisecook.com/883/


Like this post? SHARE it!

Related Posts Plugin for WordPress, Blogger...

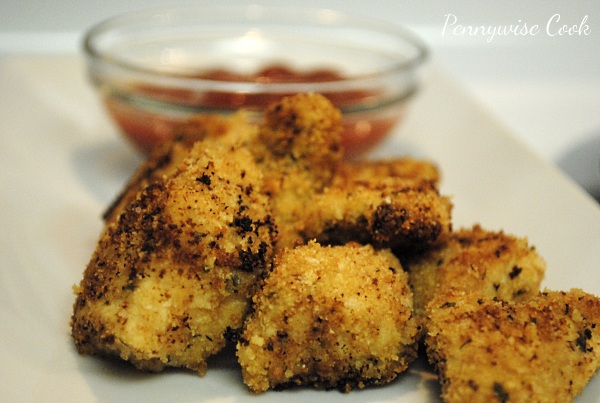
Crispy Oven Baked Chicken Nuggets

Happy Friday! This weekend is my husband and I’s 6th anniversary so we are headed out on a special little trip together. No kids allowed! We are so excited to have some time together as life gets so hectic these days. It’s going to be so nice to have an entire couple of days to reconnect. I’m actually quite giddy about it!

I’ve told you before about my fear of frying things. Whenever humanly possible I will bake something in place of frying to make it healthier. I mean if you have achieve the same general flavor and composition, what’s the use in all that unnecessary oil? One thing that I’ve always loved even since I was a kid was chicken nuggets. Who doesn’t like chicken nuggets?

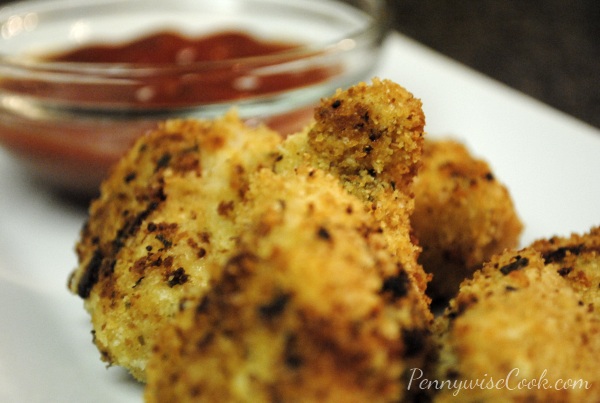
The chicken…in the form of a nugget…you just can’t beat that. I’ve made some pretty darn amazing chicken tenders in the past, but never tried the smaller bite-size nuggets before.  Why you ask? I have no earthly idea. In fact when I came across this recipe, it really made me wonder to myself why I hadn’t tried chicken nuggets before. It was well worth the wait though. These baked chicken nuggets came out crispy  and yummy. It’s so nice to eat a chicken nugget and know exactly what is inside of it. 😉

If you have never tried to make your own nuggets before, I encourage you to try this one. The one suggestion that I do have with this recipe is not to fiddle with the chicken too much until they are done. You do have to turn them over during the baking process, but I wouldn’t give them too much of a jolt as the breading tries to come off when they aren’t done yet.

Very simple recipe with things you might already have laying around the house. And since they aren’t fried and aren’t coated in thick batter, they are actually very healthy too! These would go really awesome along side some Crispy Homemade Oven Fries!

Recipe from SkinnyTaste.com

Crispy Oven Baked Chicken Nuggets

Prep Time: 15 minutes

Cook Time: 10 minutes

Crispy Oven Baked Chicken Nuggets

Don't fight the chicken nugget cravings! Just make them better for you. Try these Crispy Oven Baked Chicken Nuggets!

Ingredients

  • 1 lb Boneless, Skinless Chicken Breasts (About 2 Large), Cut into Bite-size Pieces
  • Salt and Pepper to Taste
  • 2 Tbsp Olive Oil
  • 6 Tbsp Whole Wheat Bread Crumbs (I used Regular Italian)
  • 2 Tbsp Panko Bread Crumbs
  • 2 Tbsp Grated Parmesan Cheese
  • Cooking Spray

Method

  1. Preheat oven to 425 degrees.
  2. Place olive oil in one bowl and the breadcrumbs, panko, and parmesan cheese in another.
  3. Season the chicken with salt and pepper then place in the bowl with olive oil and coat each piece well.
  4. Put a few pieces of the chicken in the breadcrumb mixture a time and toss. Place on baking sheet.
  5. Lightly spray the tops of the nuggets with cooking or olive oil spray. Bake for 8- 10 minutes then turn and cook for another 4-5 minutes.

Notes

When you're flipping them, just be sure to be extra careful. The breading will easily come off before they start to crisp.

http://www.pennywisecook.com/crispy-oven-baked-chicken-nuggets/

Kids just love these so much. My Addie is a chicken nugget connoisseur (she likes to think) and she thoroughly approves!

Let me know if you make these and how they turn out!


Like this post? SHARE it!

Related Posts Plugin for WordPress, Blogger...

Quick and Simple Taco Salads

Happy Wednesday! It’s been a really trying last few days for me. I got back from my killer Blissdom Conference here in Nashville. That was a whirlwind, will be sharing about that later! Pretty much immediately, Britton has come down with something. The poor baby. I really hate when my girls are sick. Took her to the doctor today and we’ve got an ear infection with a side of tonsillitis. I’m just glad to finally know what it is and that we can fix it fairly quickly.

I think I’ll need some quick dinners over the next few nights. Here’s one in fact, that is healthy and quick at the same time and it is a favorite at our house.

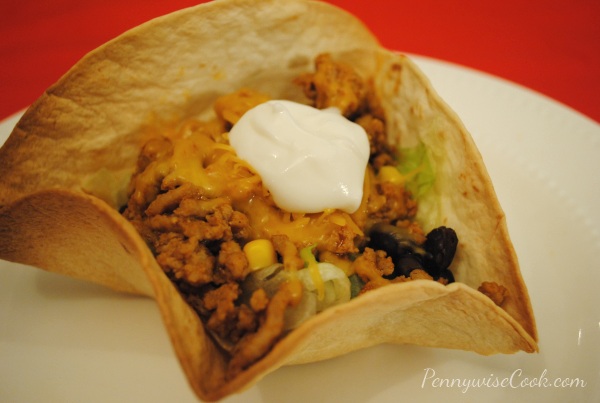
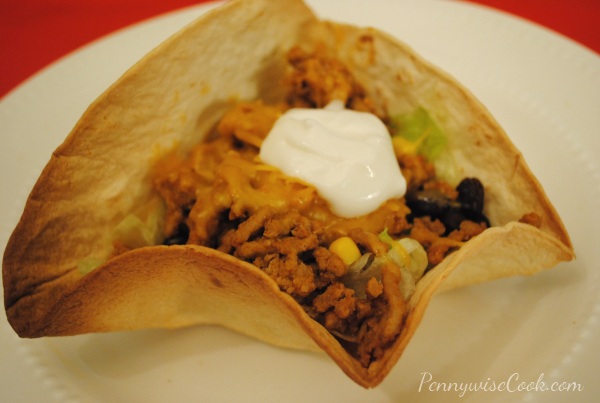
Healthy Taco Salad- Pennywise Cook

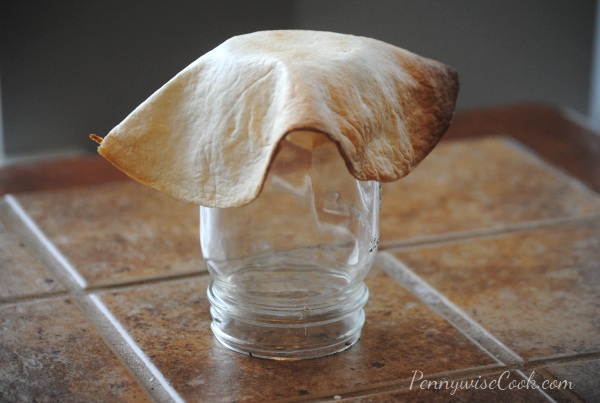
We love mexican food. I would marry it if I could. That’s how deep my love for mexican food runs. Not only is it quite tasty, but my entire family likes it which makes my life easy. When I came across this awesome Taco Salad idea at Dashing Dish, I absolutely HAD to try it. Brace yourself, it’s another duh moment. Take a flour tortilla, drape it over a jar or mug or can, bake for 8-10 minutes and voila! This isn’t as much a recipe as it is a brilliant idea for a healthy taco salad.

Most taco salads are loaded with calories because the shells are fried. Yes, they are amazingly tasty but you pay for it. So when I saw this idea, I thought to myself my life is complete. At only around 100 calories for one tortilla , depending on your toppings you can have an entire taco salad for around 300 calories. Not to mention the fact that you can buy a package of flour tortillas for $1.00- $1.25 at most stores.

I used a mason jar to drape my tortillas over. I also took the corn out of a can (to use in my taco salads) and removed the label and used it too. I made a total of 6 of these in batches.

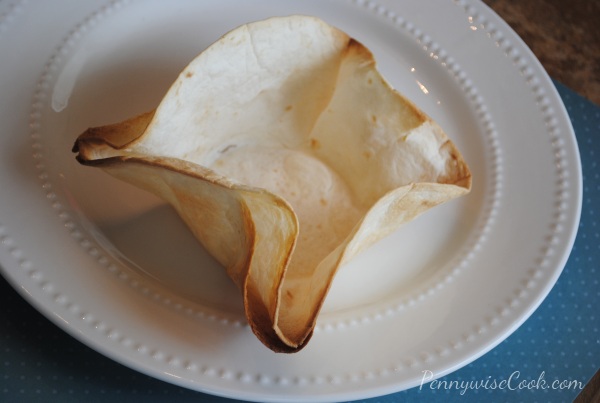
You do kinda have to finagle them to get them to stay in a pretty shape on the can or jar. Once they start to crisp in the oven, they keep their shape. This is what mine looked like when it came out of the oven. Super toasty and ready for the taco filling!

Thanks to Dashing Dish for this fantastic idea!

Quick and Easy Taco Salads

Prep Time: 5 minutes

Cook Time: 10 minutes

Serving Size: 1 Tortilla

Quick and Easy Taco Salads

This super easy and quick option for a taco salad is also healthy and tasty at the same time!

Ingredients

    For the Taco Shells
  • Flour Tortillas
  • Jar or Can (for draping tortilla over)
  • Suggestions for Filling
  • Ground Turkey or Extra Lean Ground Beef
  • Taco Sauce
  • Canned Corn
  • Black Beans
  • Reduced Fat Cheddar Cheese
  • Fat Free Sour Cream
  • Shredded Lettuce

Method

  1. Preheat oven to 450 degrees.
  2. Place jar or can on baking sheeting.
  3. Drape tortilla over jar and cup to make desired taco salad shape. You may need to hold it there until right before you place it in the oven.
  4. Bake for 8-10 minutes or until golden brown and crispy.
  5. Place desired filling inside and you're done!

Notes

Tip- you can make these ahead of time and store in the microwave until ready to use. I make them in the morning and then fill mine for dinner later on.

http://www.pennywisecook.com/quick-and-simple-taco-salads/


Like this post? SHARE it!

Related Posts Plugin for WordPress, Blogger...

Doughless Pizza Crust

I’m not sure what it is, but lately I’ve had a thing for making things out of other things. Mostly healthier things that you wouldn’t expect. For instance, my recent discovery of chickpeas being used to make cookie dough dip- completely unexpected. I’ve used cauliflower to make mashed potatoes. I’ve even been toying with the thought of using tofu in a few dishes here lately, but haven’t brought myself around just yet. I’ll be sure to let you know when I do. I’ve always been under the impression that pigs would fly or hell would freeze over before my husband put tofu in his mouth. He has yet to catch on to my sneaky ways though *evil laugh*.

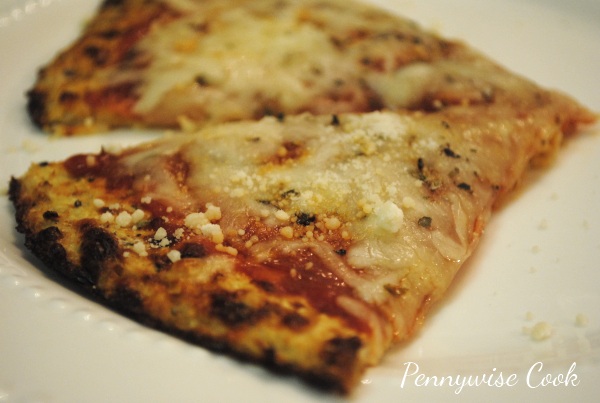
As you know, I’m a pinterest fanatic. I found a recipe at Eat Drink Smile for Cauliflower Pizza Crust. Even though I like things to be made healthy, I was less than enthused about the thought of using cauliflower to make the crust of my pizza. However, I consider pizza to be the devil in food form sometimes. I NEVER eat pizza. It’s greasy, full of bread and cheese, and taunts me to eat more. I always feel awful after I eat it, like I just ate the entirety of a large cow. I know, I’m exaggerating. But you get the point now don’t you?

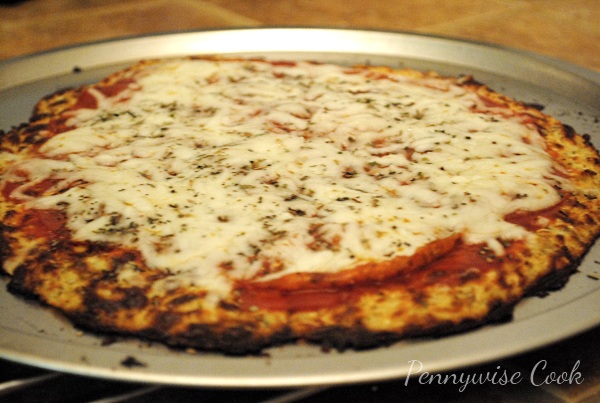
So when I found this recipe I thought I can just try it out and see. It was either going to be very good or very bad. I blog here before you tonight to tell you that I (along with my picky-eating hubby and 4 year old daughter) give this cauliflower pizza crust my complete and utter stamp of approval! If you have a food processor or blender it takes no time at all and is fantastic, especially if you’re not into eating carbs and want a healthier version of pizza. It’s obviously not your average flour pizza crust, but it doesn’t taste like it contains cauliflower either.

We made the traditional pepperoni pizza. You can’t see the pepperoni because I hid it under the cheese. I used the very large ones so that the entire pizza was covered in them. Our pizza didn’t actually turn out quite as burnt around the edges as this picture looks. It was pretty brown though because I was attempting to get the crust crispier. This type of crust will not be majorly crispy like most pizzas that you might be used to. One head of cauliflower makes 3 crusts and they aren’t huge, so they are fairly thin. I didn’t mind. We get to eat PIZZA!

We made this a couple other times since the first and it turned out the same. I think I’m going to work on figuring out a way to get it a bit crispier. Either way, this recipe is a keeper and will surely make it possible for us to have pizza a lot more frequently.

Recipe courtesy of Eat. Drink. Smile

Doughless Pizza Crust

Doughless Pizza Crust

A healthy alternative to high carb pizza dough, this cauliflower pizza crust will make you want more. I promise!

Ingredients

  • 1 c. Cooked, Riced Flower
  • 1 c. Shredded Mozzarella Cheese
  • 1 Egg, Beaten (I actually used egg whites only and it worked just fine)
  • 1 Tsp Dried Oregano
  • 1/2 Tsp Minced Garlic
  • 1/2 Tsp Garlic Salt
  • Olive Oil (Optional)
  • Pizza Sauce and Toppings of Your Choice

Method

  1. “Rice” the cauliflower by removing the stems and leaves and chopping the florets into chunks. Add the florets into the food processor and pulse until it looks like grain. Don’t over pulse or it will puree the cauliflower. Place the riced cauliflower into a microwave safe bowl and microwave for 8 minutes. No need to add any water. The cauliflower contains enough water to help it cook. One head of riced cauliflower will make approximately 3 pizza crusts to use immediately or to place in the refrigerator to use within one week.
  2. Preheat the oven to 450 degrees. Spray cookie sheet with non-stick cooking spray.
  3. In a medium bowl, stir together 1 cup riced cauliflower, 1 cup mozzarella and 1 egg. Add the oregano, garlic salt and minced garlic. Mix well, then transfer to cookie sheet. Use your hands to pat out into a 9? circle. Optional: Spray with cooking spray or brush with olive oil to help with the browning process.
  4. Bake crust for 15 minutes.
  5. Remove from the oven and top with toppings of choice.
  6. Turn on broiler and let heat up. Place pizza under broiler for approximately 3-4 minutes or until cheese has melted.

Notes

Your toppings should be completely cooked since you’re only broiling for a few minutes.

http://www.pennywisecook.com/doughless-pizza-crust/

And do let me know if you try this and how it turns out for you. I want to know that I’m not crazy in thinking this is actually comparable to regular pizza!


Like this post? SHARE it!

Related Posts Plugin for WordPress, Blogger...

Turkey Meatloaf Cupcakes

I’ve never been a meatloaf kinda person. I can’t even recall a single time that I’ve made it for my husband. I have an issue with putting meat in the form of a loaf. Why I don’t mind it in the form of meatballs or now cupcakes is something that we can ponder on. Yes, the other day I came across this recipe at First Look, Then Cook and immediately added it to my list of things to conquer. I have a new obsession with small food these days and this is right up my alley.

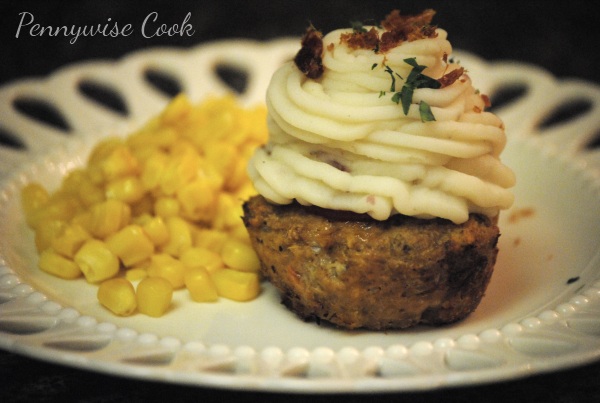
I was pretty much giddy to make these and I ran it by my husband to see what he thought of this. He’s quite the picky eater, so I also kinda wanted to prepare him. Without any hesitation, he proceeded to give me a disgusted look. The words meatloaf and cupcake in the same sentence really threw him for a loop. 😉 I then explained that no, these were meatloaf flavored cupcakes, they are literally meatloaf in the form of a cupcake with mashed potato “frosting”. He was on board then.

The night that I made these, everyone cleaned their plates. Even Addie who we usually have to set food aside (that she has to eat) for devoured hers. She doesn’t usually even like mashed potatoes, but she did that night! I didn’t make the mashed potatoes from scratch, by the way. Took a little help from the store and Betty Crocker. It was a heck of a lot easier that way! Of course, you can make your own mashed potatoes. My sister did and had fabulous results. I made mine with ground turkey, but feel free to use any ground meat that you have on hand.

You can also make these ahead of time to freeze them. Make the meat mixture (do not cook) and place the pan in the freezer for about 2 hours to keep their form. Once firm, place them in bags. To cook, bake at 350 degrees for about 30-40 minutes until temp inside is 160 degrees.

Turkey Meatloaf Cupcakes

Turkey Meatloaf Cupcakes

A spin on traditional meatloaf with a tasty yet fancy presentation!

Ingredients

  • 1 lb Ground Turkey
  • 1 c. Onion, Finely Chopped
  • 1/2 c. Carrot, Finely Chopped
  • 2 Cloves Garlic, Minced
  • 2/3 c. Ketchup, divided
  • 1/2 tsp Oregano, Dried
  • 1 Tbsp Olive Oil
  • 1/2 Tsp Worcestershire Sauce
  • 1/4 Egg Substitute or 1 Egg
  • 2/3 c. Plain Bread Crumbs
  • Salt & Pepper to Taste
  • Cooking Spray
  • Betty Crocker Potatoes for Topping (Or make your own)
  • Bacon Pieces for Topping (optional)
  • Parsley or Chives for Topping (optional)

Method

  1. Preheat Oven to 350 degrees.
  2. Saute onion, carrot, garlic and oregano in olive oil. About 2 minutes until softened. Let cool.
  3. Combine the onion mixture, 1/4 cup ketchup, and all remaining ingredients except cooking spray in a bowl. Get well incorporated.
  4. Spray muffin pan with cooking spray. Place meat mixture into the muffin cups and top each with 2 tsp ketchup (or a good circle around the top).
  5. Bake for 25- 30 minutes or until brown and the internal temp is 160.
  6. Top meatloaf cupcakes with mashed potatoes. Use a piping bag with large star tip or cut the tip of a Ziploc bag to pipe.
  7. Sprinkle with toppings and serve.

Notes

I served them with corn and Addie came up with a fabulous idea to put her corn on top of the cupcakes. She was calling it “sprinkles”. 🙂 These will for sure be a regular on our menu!

http://www.pennywisecook.com/turkey-meatloaf-cupcakes/


Like this post? SHARE it!

Related Posts Plugin for WordPress, Blogger...