Easy Fried Rice

Fried Rice 2


When my hubby and I were dating, he wouldn’t eat anything but cheeseburgers.

True story.

Date nights with candlelit quarterpounders? Pretty much. He didn’t like anything green, and he especially didn’t like anything foreign.

That is, until you sit him down at a place called Benihana and feed him fried rice. It’s the one thing “foreign” that I could always count on him to eat.

Thankfully he has outgrown most of his picky pants stage and likes to eat a variety of things. But that fried rice is still the only thing he’ll order at a Thai, Chinese, or Japanese place.

I started making this rice soon after we got married for two specific reasons. I just remembered another, so there’s really three.

1) It’s easy. It’s not something you have to think too much about. Just throw it all together in a skillet and boom!

2) It’s really quick. No need to slave over the stove all night.

3) Hubby eats it. Reason enough for me!

Fried Rice 3

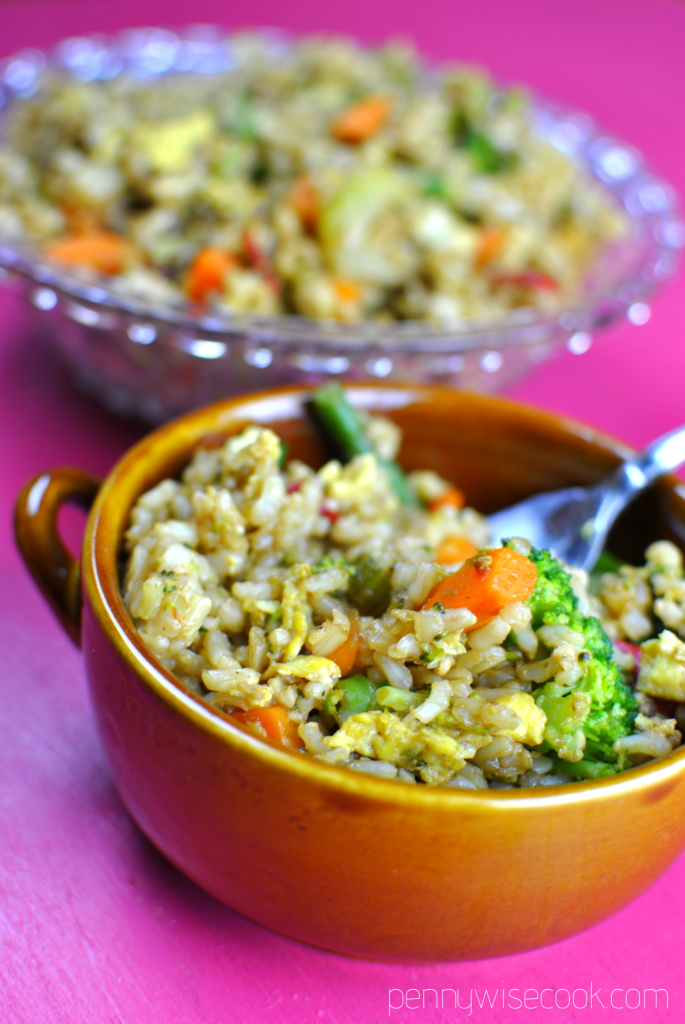
This is the perfect meal or side dish to make with leftover rice. It’s best when the rice has been refrigerated and is cold. I have been known to make rice the night before just for this meal.

It really confuses my family.

And then they understand when we have this meal the next night!

Fried Rice 1

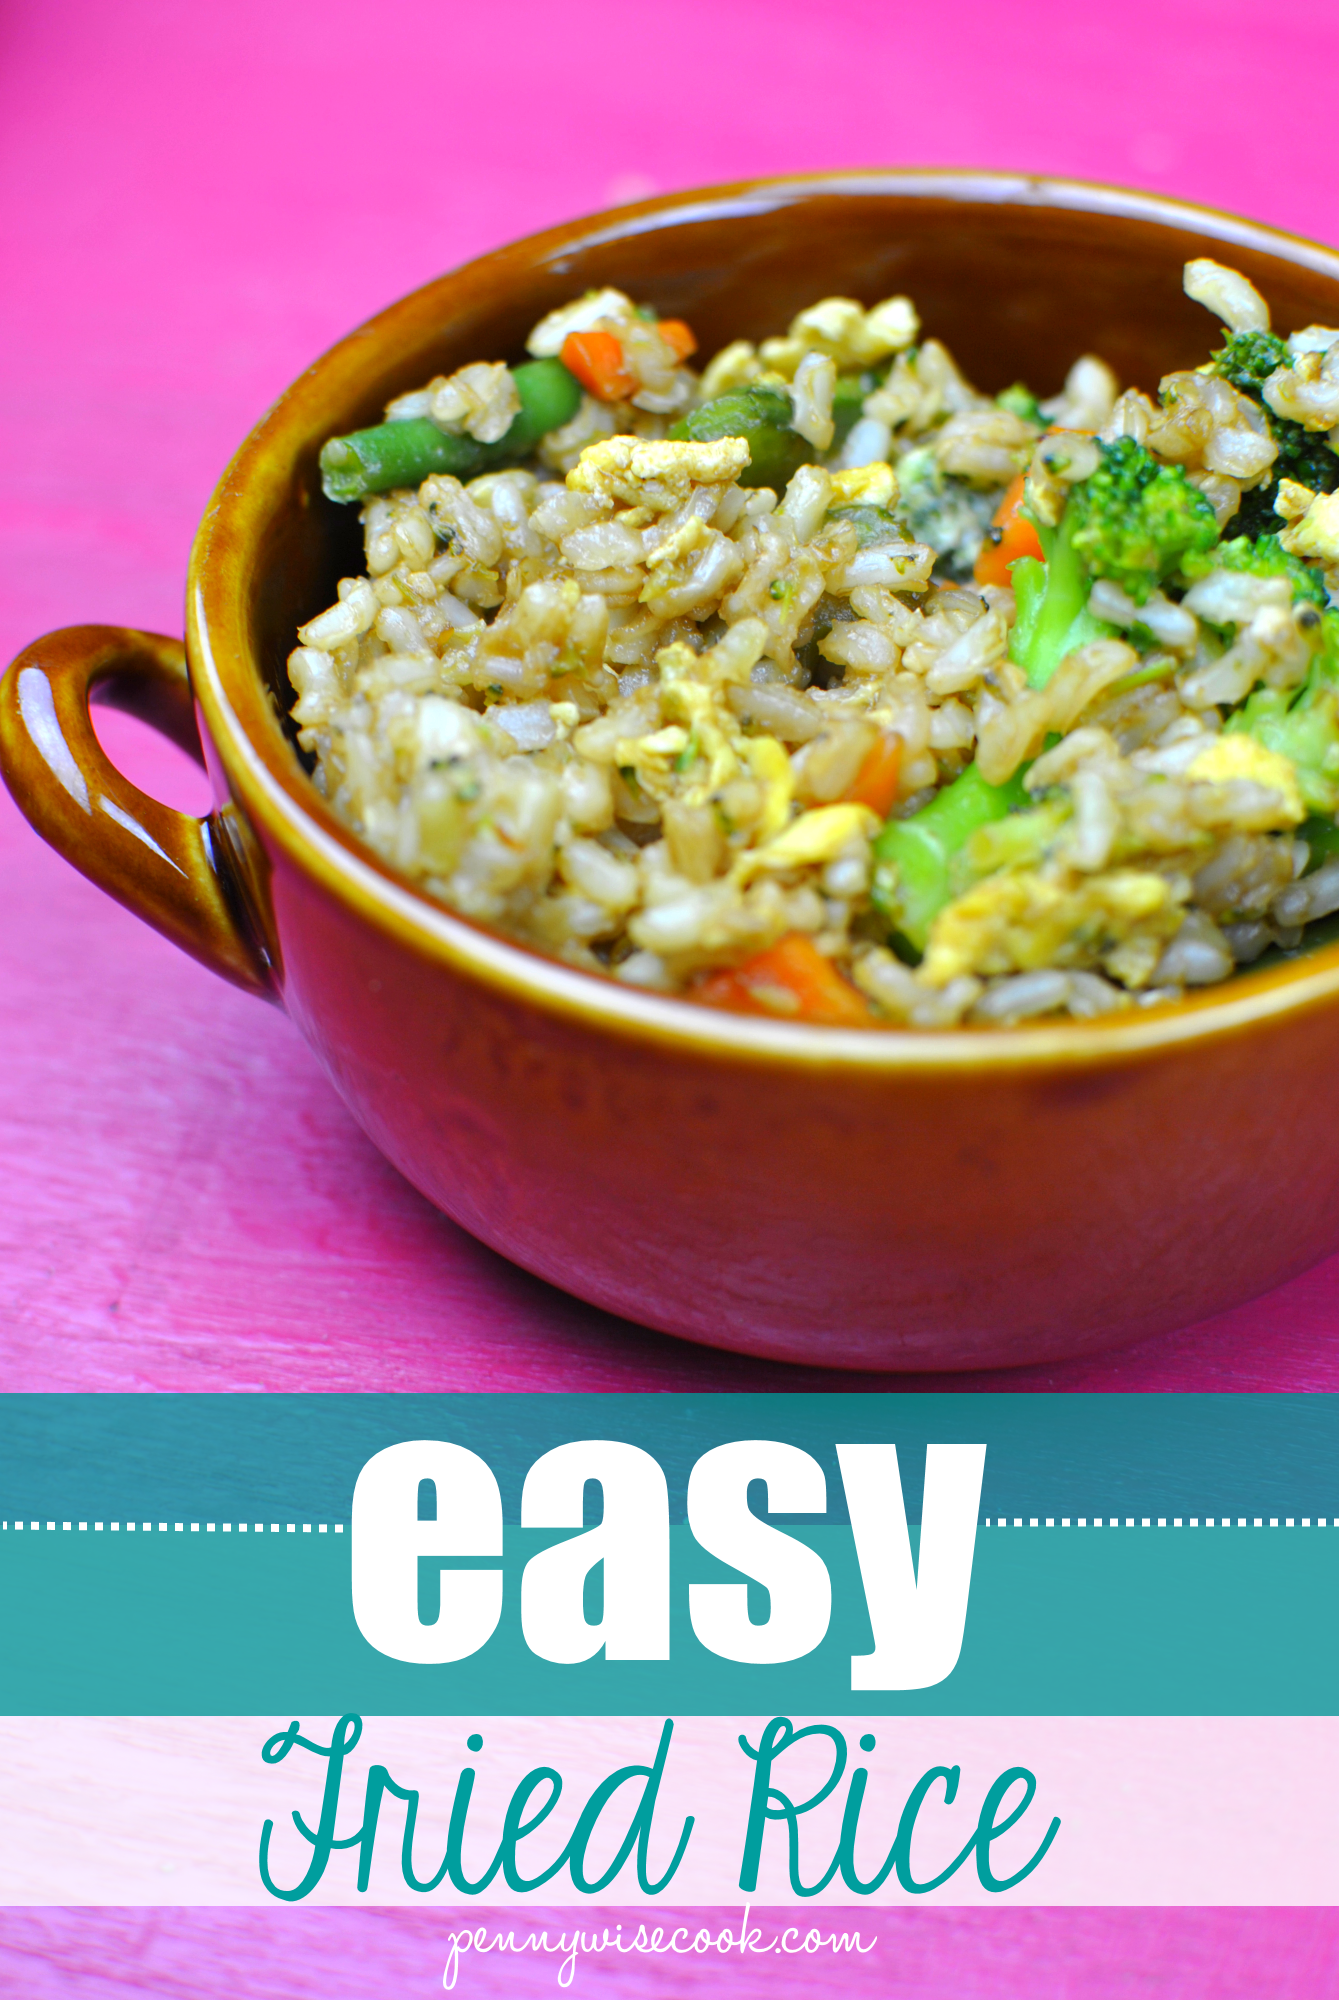
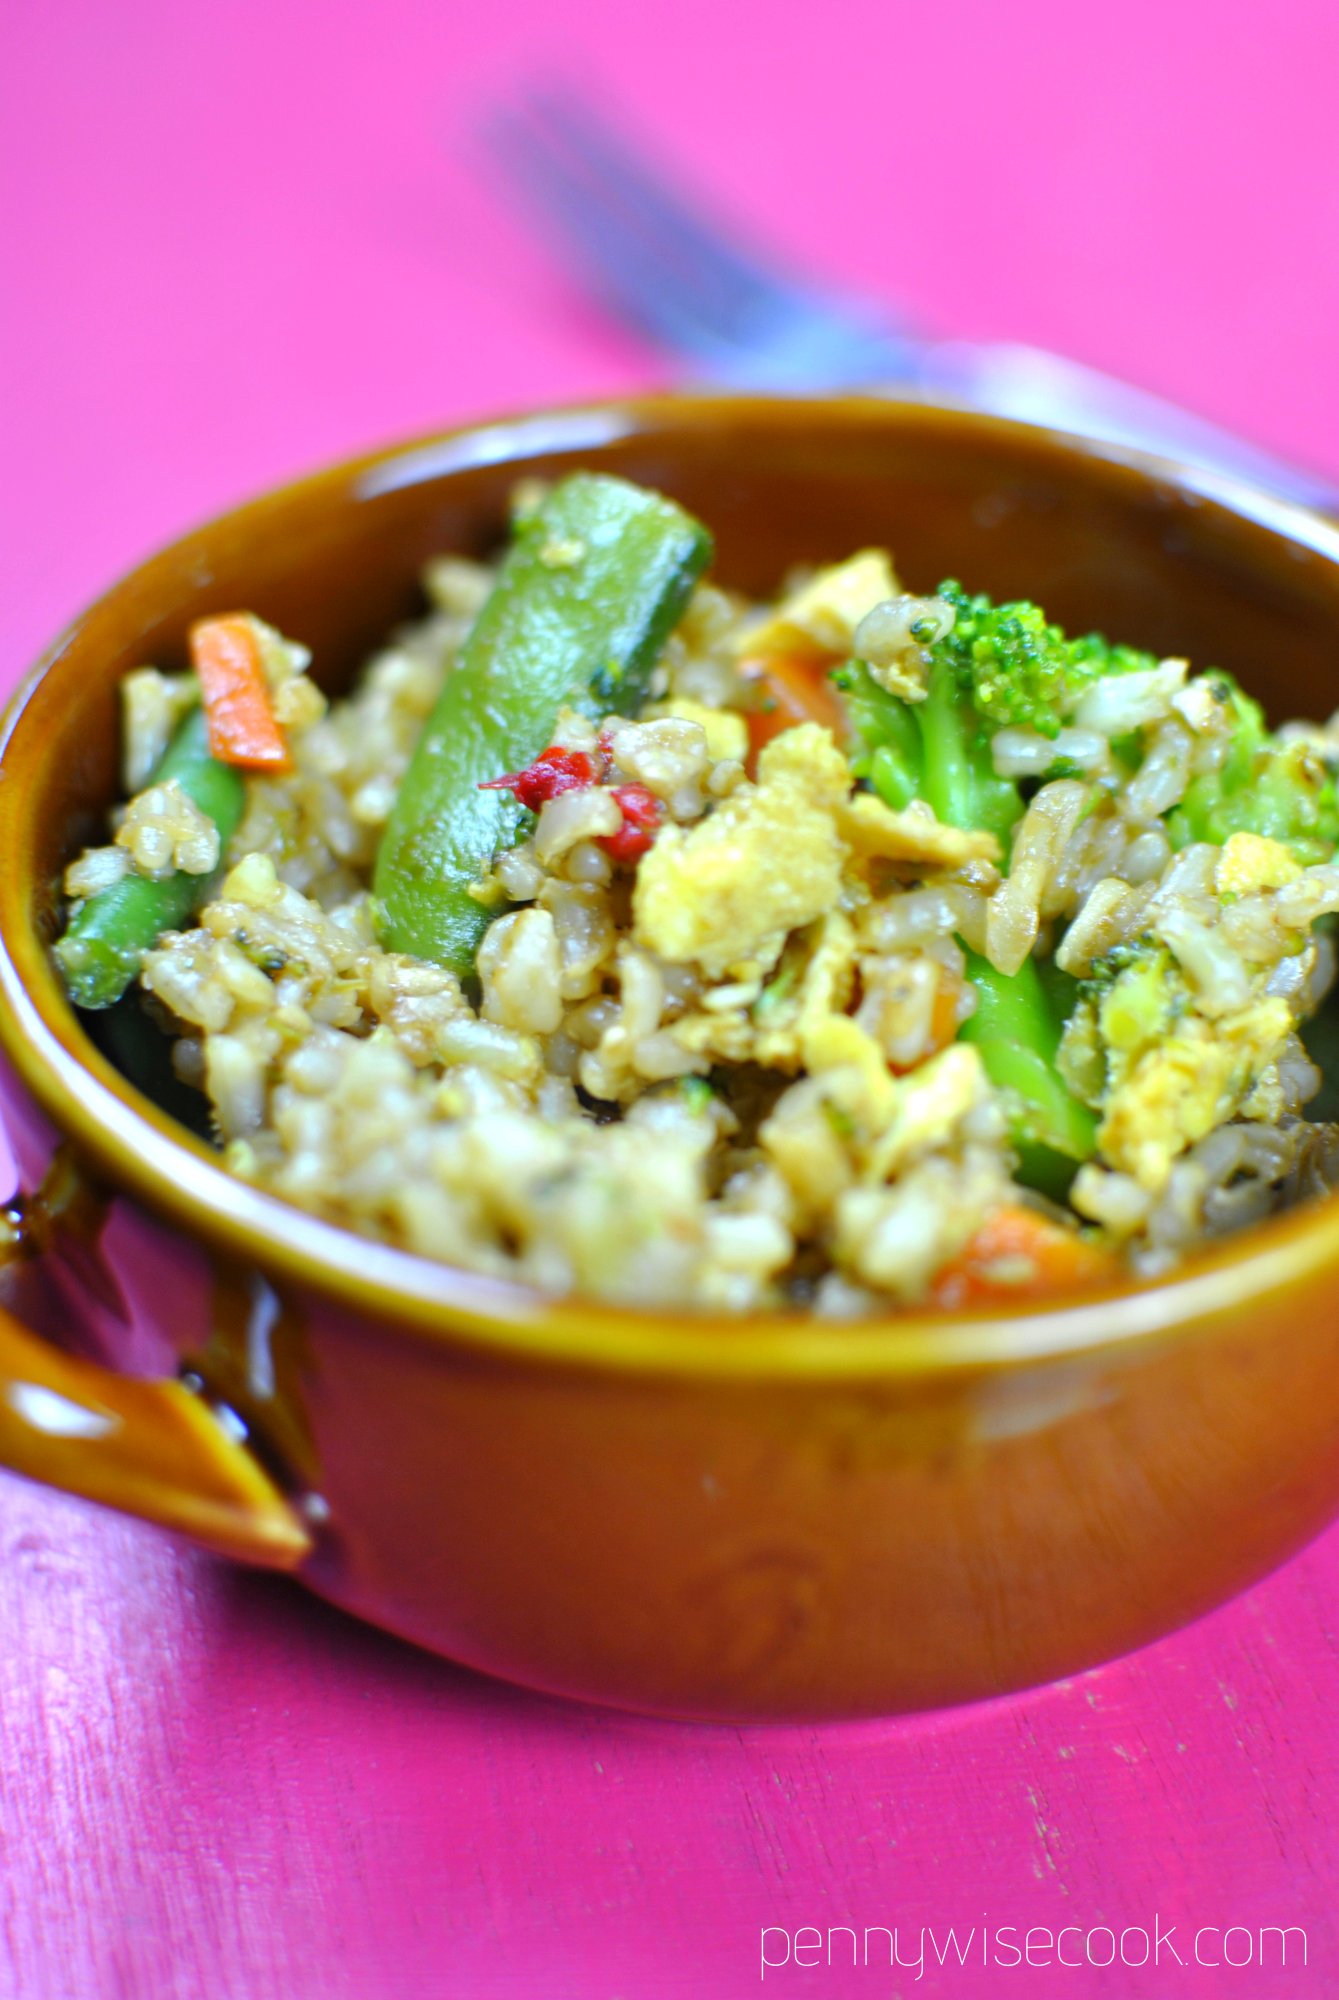
I make this with whatever frozen veggies that I can find on sale. Fresh veggies? Of course you can use them, too! It’s such a versatile and easy thing. You can’t mess it up. The variety that I got had sugar snap peas, green beans, red peppers, celery, mushrooms, broccoli, carrots, and onions in it.

Slap an egg in there with your cold rice and add some soy and teriyaki sauce and you have got a really tasty dish.

Here’s the way that I make it, but remember that you can add or take away whatever you’d like.

Simple Fried Rice
Why not make your own fried rice at home? It's simple, tasty, and easy on your wallet!
Write a review
Print
Ingredients
  1. 2 c. brown rice, cooked
  2. 1 (12 oz) bag of frozen veggies (stir fry mix is good)
  3. 2 tbsp olive oil
  4. 1 egg, scrambled
  5. 2 tsp minced garlic
  6. 1-2 tbsp soy sauce
  7. 1-2 tbsp teriyaki sauce
  8. salt & pepper to taste
Instructions
  1. Heat 2 tbsp olive oil over medium-high heat in large skillet.
  2. Add frozen veggies and cook until softened.
  3. Add garlic and cook until browned.
  4. Add egg and cook combining into veggies.Then add the cold rice.
  5. Fry over high heat. Add soy and teriyaki. Add salt & pepper to taste.
Pennywise Cook http://www.pennywisecook.com/

Like this post? SHARE it!

Related Posts Plugin for WordPress, Blogger...

Ideas for the Lunchbox: Grilled Cheese Rollups

The budget cuts aren’t just for the US government these days. Here at our house, we’re working on a new budget with the intent to save as much as humanly possible! I’ve always considered us a money-minded and frugal family, but we are working to try and be even more watchful about unnecessary spending.

Man, I really do sound like the US government now.

What is more frugal than a grilled cheese sandwich? Hmmm, I wonder if grilled cheese could be the answer to the US’s debt crisis?! Maybe if all the lawmakers up in Washington would agree to eat them, then we could start saving some REAL money around here. They could put them in their lunchboxes. Now THAT would be a sight!

I saw this idea over at Chin Deep as I was preparing some ideas for Addie’s lunchbox. I can’t claim I came up with these gems, but I knew I had to make them as she has recently found a deep love for grilled cheese. She gets that from her father. I hated them as a kid!

It all starts with some plain and simple sandwich bread. Whatever you can find or afford. Cut off all of the crust leaving as much of the meat of the bread as you can. You’ll also need the sliced cheese of your choice. I cut mine in half and then cut those halves 2 more times to equal about 8 small pieces from each slice.

It’s a pretty simple process. I spared you most of the step by step pictures as to not insult your intelligence. Place a piece of cheese on the very end. Roll. Add another little piece. Roll. And continue in this manner until you’ve come to the end of the bread. I used about 4 pieces for each of mine. Yours may differ depending on the size of your bread.

You can use a little bit of water on the end to help attach it and close it up for frying.

Heat up 2 tbsp of butter over medium heat.

This is where things get hot. The butter absorbs, the cheese melts, and the bread browns! It’s heavenly. It’s around 2 minutes or less on each side. You’ll just need to watch it and determine your favorite color of brown. 🙂

As a side note: you may need more butter depending on how many of these you are planning to make. The butter does absorb pretty quick so it’s possible you’ll have to refill a few times.

Voila! These are so simple and tasty. They would be great for eating with my Homemade Tomato Soup! These would also make a great finger food for a kid’s party.

UPDATE: After seeing how these fared in her lunchbox, we have decided that putting them in the microwave for a few seconds before placing them in the lunchbox helps. My Addie doesn’t prefer them to be cold, but room temp is fine. We’re going to keep trying and figure out a way to make them work. And if you have any ideas, they are surely welcome!

Ideas for the Lunchbox: Grilled Cheese Rollups

Recipe Type: Snack, Lunchbox

Cuisine: American

Author: Adapted a little from Chin Deep

A new way to enjoy grilled cheese and the perfect idea for the lunchbox!

Ingredients

  • 6 pieces white bread
  • 3 pieces sliced cheese of your choice
  • 2 tbsp butter
  • Tomato soup or marina sauce for dipping (optional)

Instructions

  1. Remove the crusts from your bread leaving as much as you possibly can.
  2. Roll them flat with a rolling pin or with your preferred method of flattening.
  3. Cut your slices of cheese into smaller little slits. I was able to get about 8 out of each of my slices.
  4. Heat 2 tbsp butter in a skillet over medium heat.
  5. Layout your bread and place a piece of cheese longways on the edge of the bread. Roll inward. Place another piece of cheese and then roll inward again. Until you’ve come to the end of your bread. Using a little bit of water, try to crimp the end so it attaches and closes up the rollup. It doesn’t have to be perfect, it just helps the frying process.
  6. Place the rollups in the skillet and fry each side for about 2 minutes or until desired brownness.
  7. Let cool on paper towels and serve with tomato soup or marina sauce!


Like this post? SHARE it!

Related Posts Plugin for WordPress, Blogger...

Summer Cucumber Salad

There are only about a thousand reasons to like summer. Sun, fun, vacation, strawberries, and the list could go on and on. But one of my favorite things are the cool and crisp summer salads. Cole slaw is always a great addition to any summer cookout, but is there anything cooler than a cucumber? Well sure, but they don’t have a saying about those things so we’ll stick with the chillin’ cucumber.

I was delighted to find a cucumber in my garden the other day. I have been waiting for them to grow so I could start adding them to my salads. If your garden is brimming with cucumbers, you might like this Summer Cucumber Salad recipe. There are many variations of this type of salad, so don’t feel like you have to follow it to the T. But this is my favorite combination of flavors.

I was at a family get-together a little while back when my stepsister brought a salad like this. I asked her what she put in hers and I remember thinking how simple it was. It was so tasty! Within a few days I had made my own and within a couple of days it was gone. I ate the entire thing myself.

I have no shame in admitting that.

After all, we’re talking about healthy foods here, right? Not chocolate cake.

It took me a few times making this to perfect the combination of flavors. And you may want to give or take some of the ingredients to get it to your liking. Also, might I suggest making this up the day or night before an event. The longer the cucumbers and onions get to marinate in the vinegar mixture, the better they taste. And oh do they taste lovely!

My family isn’t really the cucumber-eating type. They don’t eat onions that aren’t cooked and you can also bet they won’t munch on anything marinate in vinegar. But hey, more for me! I’ve probably eaten 4 or 5 whole Summer Cucumber Salads by myself this summer…

Wow, it sounds a lot more when typed out…

Summer Cucumber Salad
Recipe Type: Side Dish, Salad
Author: Pennywise Cook
Super easy summer ingredients come together to make a tasty, cool, and crisp summer salad!
Ingredients
  • 2-3 Cucumbers, peeled & cut into halves or quarters
  • 1 Medium Red Onion, cut into chunks and then peeled
  • 1 can Whole Kernel Corn, Drained
  • 1/4 c. + 3 tbsp Apple Cider Vinegar
  • 3 tbsp Olive Oil
  • 1/4 tsp Salt
  • 1/8 tsp Pepper
Instructions
  1. Place all ingredients into a medium bowl and cover with plastic wrap. Allow to marinate overnight or for at least 2 hours. Serve!
Notes

Some people like to also add tomatoes cut into chunks to this dish as well!

Feel free to use any onion for this. I just like to use red onion because it adds pretty color!

I would eat this within a few days of making. The vinegar breaks down the veggies.


Like this post? SHARE it!

Related Posts Plugin for WordPress, Blogger...

Broccoli Cheese Soup

How was your 3-day weekend? Get a little R&R in? I was kinda forced into some R&R this weekend when a very random illness struck. It wasn’t something that had been going around as far as I know, but thankfully it’s going away fairly quickly. We didn’t have big plans for the holiday so it was nice to have some time to just be lazy.

One of my favorite comfort foods is broccoli cheese soup. There is just nothing like the thick, cheesy, stick-to-your-ribs soup. Especially when it starts to get cold outside. But honestly, I could care less what time of year it is. I’ll eat it any day!

There are some really great recipes out there for this kinda soup. Just about anywhere you look, somebody has their own version. But they all come down to the same ingredients: broccoli and cheese! Most of which contain Velveeta. There’s nothing wrong with that, but sometimes I do like to skip the processed blocks of cheese and use the good stuff. So I adapted my potato soup recipe to include a little more cheese and swapped out the potatoes to create this yummy version of broccoli cheese soup!

I also added barley for added fiber!

This has got to be one of the easiest soups out there to make. It tastes like it’s slow-cooked but only takes minutes. My absolute favorite kind of recipes.

You start with a 16 oz package of frozen broccoli and carrots, broccoli and cauliflower, or broccoli and both! Whatever you can find at the store for cheap. Throw that into a pot along with a chopped onion, your barley, and can of chicken broth. The veggies just simmer away. Believe it or not, but this is the most time-consuming part of the entire process! (Besides chopping the onion, of course)

Whisk together cornstarch and part of a can of evaporated milk to begin your thickening agent and add that in.

We’re starting to get creamy y’all.

Pour in the rest of your milk and then it’s time to get cheesy.

Oh yeah. Cheeeeeeeeese always makes things better.

That’s 2 cups right there. Let that melt and you’re ready to serve! This goes really great in a bread bowl or along with some yummy rolls.

I’m not sure why it makes me happy to know that there’s no Velveeta in it, but it does! Somehow it just feels healthier.

I’m sure there’s a recipe that you love or that you’ve heard of. I urge you to give this one a try next time you’re in the mood for a warm, broccoli cheese soup.

Broccoli Cheese Soup
Recipe Type: Main Dish, Soup
Author: Pennywise Cook
It is possible to make broccoli cheese soup without Velveeta! Try this recipe for a tasty alternative!
Ingredients
  • 16 oz Package Frozen Broccoli (or variation of broccoli and cauliflower or carrots)
  • 1 Medium onion, chopped
  • 1 can Reduced-sodium, fat-free chicken broth
  • 1/4 c. Barley (Kroger has this for around $1)
  • Dash pepper
  • 3 tbsp cornstarch
  • 1 can fat-free evaporated milk, divided
  • 2 c. reduced-fat shredded cheddar cheese
Instructions
  1. In a large pot, combine frozen veggies, onion, chicken broth, barley, and pepper. Bring to boil, then simmer for about 20 minutes.
  2. Combine 3 tbsp cornstarch with 1/4 c. evaporated milk. Pour into veggie mixture and stir well. Pour in the rest of the evaporated milk. Bring to a boil and let cook for about 2 minutes.
  3. Remove from heat. Stir in cheese and serve!
Notes

Makes a great meal for having a vegetarian friend over!


Like this post? SHARE it!

Related Posts Plugin for WordPress, Blogger...

Slow Cooker Corn on the Cob

So I told you how I’ve been keeping things on the easy side the last few weeks. With Addie starting kindergarten and with family in town off and on these last couple weeks, the cooking has been a little out of routine. Out of routine meaning that I didn’t want to bore my guests with my food portraiture and involvement with my food. So I opted for easy yet tasty.

The other day I was talking to my mom about the Crockpot Baked Potatoes when she mentioned that she had also used her Crockpot to make up some corn on the cob. We usually just pop our corn on the grill when we’re grilling out, but it’s been so hot lately that we haven’t wanted to be outside for more than 10 minutes. Though, it’s FINALLY beginning to cool down just a bit around here. So to save a little propane and heat from the stove or oven, I decided to throw some ears in my slow cooker.

I seasoned them up with a little mayo concoction that I put together, then rolled them up in foil and placed them straight down into the slow cooker. I didn’t add water, I didn’t put anything inside to raise them away from the sides. I didn’t do anything at all, but just let them go. It worked great! The steam from the moisture in the corn is what cooks it.

With sweet corn being so cheap (in places not affected by the droughts), it’s an easy and tasty side dish for just about anything. Plus you can use corn on the cob to make up creamed corn, corn bread or muffins, and more. If you need cooked corn for a recipe and want it fresh, throw some ears into your slow cooker overnight and in the morning you’ll be ready with slow cooked and perfect corn!

Slow Cooker Corn on the Cob
Recipe Type: Side Dish, Crockpot
Author: Pennywise Cook (and Momma!)
Another shortcut idea that makes corn as simple as 1,2, 3 to make!
Ingredients
  • 4 Ears Corn on the Cob
  • 2 Tbsp Reduced Fat Mayonnaise
  • 1/4 Tsp Garlic Powder
  • 1/4 Tsp Onion Powder
  • Dash Salt and Pepper
Instructions
  1. Whip ingredients together and rub 1/4 mixture onto each ear of corn. Wrap in foil and place in slow cooker. Cook on lowest setting for 4-6 hours.
Notes

I used the low setting on my slow cooker, but if you have a “warm” you might consider using that for longer cook times.


Like this post? SHARE it!

Related Posts Plugin for WordPress, Blogger...

Oven “Fried” Squash And Another Reason I Don’t Like Bees

I absolutely cannot grow a squash to save my life. I started a little garden for herbs and a few veggies earlier this spring and for some reason, mother nature refuses to help me produce even one sign of a squash in my garden. I checked out Google and the only explanation that I can come up with is that we have no bees. Well, at least no bees that want to help me grow some squash. The bees have to transfer pollen to the blossoms while they are open in the mornings in order for the blossoms to produce a squash. Apparently the bees around here don’t like me and don’t want me to have yummy squash this year.

I see them flying around all happy and landing on the weeds, probably pollinating the weeds in place of my squash. Forgive me, I’m a little bee bitter right now…

On a less bee-hater note, Aldi does have great prices on squash and my in-laws have a bountiful garden that we get veggies from. So I don’t have to go without. I love my squash fried, but you know me and my frying. Unlike Nike, I just don’t do it. I usually try to find a way to make things taste fried without the actual frying process. This recipe gives you exactly that!

See how crunchy they are? If you bake them too long, they are almost like chips because they are so crunchy. But you won’t have that problem because you’ll bake them just right.

They are oh so yummy. These definitely satisfy that hunger for “fried” squash. I got this recipe from that cookbook that I told you about the other day and come to find out this particular recipe came from a cookbook from 1983! Southern Living’s Cook Light.

Only 64 calories per serving and worth every one.

Oven “Fried” Squash
Recipe Type: Side Dish, Vegetable
Author: MTEMC Company Gifts of Christmas Cookbook,
Crunchy, tasty “fried” squash from the oven.
Ingredients
  • 1/2 c. Cornmeal
  • 1/2 Tsp Salt
  • 1/4 Tsp Pepper
  • 2 Egg Whites
  • 1 Tbsp Water
  • 3 Medium-sized Yellow Squash, cut into 1/4 in. slices
  • Cooking Spray
Instructions
  1. Preheat oven to 450 degrees.
  2. Combine cornmeal, salt, and pepper. Set Aside.
  3. Combine egg whites and water; beat well.
  4. Dip squash into egg and then dredge into cornmeal mixture.
  5. Lightly coat a baking pan with cooking spray. Place squash in a single layer.
  6. Bake for 30- 40 minutes turning once.
Notes

Ok here are my notes on this one:

I would use LESS pepper than this calls for. It was a little spicy with 1/2 teaspoon if you ask me. You might even use a different spice like paprika in it’s place.

I considered my squash to be medium-sized, but I could fit only 2 of them on my pan. You may not really need 3.

I ended up needing more like 1 cup of cornmeal so have more on-hand in case. There was plenty of egg whites, however.

30 minutes was too long. I would say more like 10 minutes, then flip and then another 10 minutes. Or perhaps reduce the temperature.

Enjoy!


Like this post? SHARE it!

Related Posts Plugin for WordPress, Blogger...

White Bean Cheddar Burgers

First of all, Happy 4th of July! I love summer and the 4th of July always tells me it’s definitely summer! Well that and the ridiculous sweat provoking heat. Either way, today is a great day to celebrate our independence and enjoy our freedom. If you got the day off, enjoy your time! And if you didn’t well shame on your boss. 😉

What better thing to cook today than a burger, right?

I tell you, this cooking stuff has its highs and lows. I get a lot of ideas all the time and it’s like the gears in my brain start turning trying to think of ways to make something new or different. Just the other night I made something that was not very good. The idea of it was brilliant, but the execution was not so much. Hubby said it was good and even took the leftovers for lunch the next day, even when I insisted on chunking them. But He was just being sweet. I’m sure of it. 🙂

While undoubtedly, I have some cooking failures lows, I also have some things that end up really great! Today’s recipe is one of them.

You may never think about a black bean burger again. This my friends is my absolute favorite new burger. I saw mention of the words “white” bean burger the other day in passing. Without even looking at the recipe, I knew that I could create one similar to my black bean burger but creamier, as white beans tend to be. Normally I kinda jot down what I might put in the recipe, but this time I decided to wait until it was time to start making them to jot down the ingredients. You know, a little bit of this and a little bit of that.

What my brain (and food processor) produced was yummy y’all! I’m so excited about these burgers! Not only are they made with the creamiest beans, they are loaded with cheese and even have an added bonus- mushrooms! If you’re not a mushroom person, please don’t write these burgers off just yet. I’m not a huge mushroom fan either. You cannot even tell that they are there. It’s a great way to get the kids to eat them without suspecting a thing.

White Bean Cheddar Burgers
Recipe Type: Main Dish, Burger
Author: Pennywise Cook
Take a break from the ordinary and enjoy a meaty white bean and cheddar burger!
Ingredients
  • 1 (19 oz) Can Cannelini Beans, Rinsed and Drained
  • 1/4 c. Mushrooms, chopped
  • 1/4 c. Bread Crumbs
  • 1 Egg White
  • 2 Tbsp Olive Oil
  • 1/2 c. Shredded Cheddar Cheese
  • 1 Tsp Minced Garlic
  • 1/4 Tsp Salt
  • Dash of Pepper
  • Dash of Onion Powder
Instructions
  1. Place all ingredients in a food processor and pulse until combined well.
  2. Heat olive oil in a skillet over medium high heat. Form “meat” into 4 patties and place into skillet.
  3. Cook for about 4-7 minutes on each side until browned.
  4. Serve with your favorite toppings!
Notes

I put green onions on top of my burger and it went really well. If you like green onions, it would be a fantastic addition to add 2 tbsp chopped green onion to your burger “meat”!

I used cannelini beans, but you could also use any other white bean such as great northern beans or even pinto beans.

I used jarred mushroom pieces or you could use canned.

If you are concerned about what a “dash” is, then just use about 1/8 tsp.


Like this post? SHARE it!

Related Posts Plugin for WordPress, Blogger...

Easy Taco Pizza

My littlest baby, Britton has begun to walk! And things are quickly changing around here. I’m running to take things out of her mouth that I wasn’t expecting her to be able to reach. I’m running to help her up when she stumbles. I’m basically, running. I love every minute of it. It’s so precious to see her starting her independence, but then come wobbling back to me so we can snuggle. I really love this age!

My other, on the other hand, is very much independent. She loves to help out in the kitchen and is finally helping out with cleaning her room. Well, that is with a little coaxing, bribing, and other shameless attempts to get her to clean. I do love meals that we can all make as a family so that everyone feels like they contributed.

Today’s recipe is a very simple one and you may already make this at your house. But if you don’t and want a quick and easy meal that everyone will love, you might want to make this soon! My mom and I have recently noticed that Dollar Tree carries 2 packs of smaller pizza crusts, for $1 of course. I’ve been experimenting with all kinds of things to do with these crusts because they are so darn cheap. I thought….Taco Pizza! My husband hadn’t had it in so long that he had forgotten what all it included, but he was thrilled to find out what went on these beauties….beans.

Yes beans are the single ingredient that make these pizzas taste like a taco. Well, that and the…..

Salsa. Those two take the place of your everyday pizza’s tomato sauce.

Then it’s just a matter of adding all the yummy stuff that your family likes on your tacos. A good amount of cheese, some tomatoes, and lettuce are a great choice. Even a dollop of sour cream.

You can either buy your refried beans or you can buy pinto beans and create your own with your own flavors. Heat up the pinto beans, place in a food processor with garlic, cumin, and chili powder. Either way, you should be able to find them for $1 or less. In fact, this whole meal should cost you less than $5 in total! I only had to buy 1 tomato to chop up for the top. I didn’t really even need that much since my family doesn’t really like them. But I enjoyed it.

You can most definitely make one big pizza with these ingredients instead of the smaller ones. I just have a very picky family so it’s easiest this way to please everyone.

Easy Taco Pizza

Easy Taco Pizza

Simple taco pizzas that the whole family will love!

Ingredients

  • 4 Small Pizza Crusts (or make your own!)
  • 1 Can Refried Beans
  • 1 Cup Salsa, Divided
  • 1 and 1/2 Cups Shredded Cheddar Cheese + 1/4 cup for topping
  • 1 Cup Lettuce
  • 1 Tomato, Chopped

Method

  1. Preheat oven to 350 degrees or the temp suggested by your pizza crust.
  2. Start by brushing your pizza crusts with olive oil.
  3. Equally disperse the refried beans among the 4 pizza crusts. Next equally disperse salsa.
  4. Add a layer of equals amounts of cheddar cheese to the tops.
  5. Bake pizzas for 8-10 minutes or the amount suggested by your pizza crust.
  6. When pizzas are finished, add equal amounts of lettuce and tomato to each pizza and top each equally with the remaining 1/4 c cheddar cheese.

Notes

There are endless possibilities to these pizzas. Add black beans, corn, chicken, taco meat, chilis, peppers, whatever you'd like! The refried beans are a must though!

http://www.pennywisecook.com/easy-taco-pizza/


Like this post? SHARE it!

Related Posts Plugin for WordPress, Blogger...

Cinnamon Sugar Roasted Chickpeas

My sister has been making fun of me lately. This isn’t really anything new because she has always done this. We’re 4 years apart so it’s what you would expect. Back in the day she would make fun of me for the way I walked or the way I’d say something. You know, silly, ridiculous picking-on-your-sister kinda stuff. Now that we’re older, I’m used to it. It came with the territory of being the family baby.

Nowadays it’s things like her latest picking about my use of chickpeas in recipes. She thinks I’m silly for using them in so many dishes and in things that you wouldn’t normally expect to find them in. It’s alright, she can just pick away because I love my chickpeas! And for the record, I love my sister too.Very much so. It’s her birthday today so I want to wish her a happy one! I might just buy her a can of chickpeas! 😉


Yes, I admit it. I am a fan of chickpeas, otherwise known as garbanzo beans. I like them right out of the can on salads, mixed into cookies or cakes, and my newest favorite- roasted in the oven for a snack! The best part of roasting them is that they can go savory or sweet. I have a sweet tooth the size of Texas so I usually go that route.

I came across a recipe for Sweet and Salty Roasted Chickpeas over at The Cupcake Project and HAD to make them! I made a few slight changes and they were incredible. These are so incredibly cheap and easy to make and it’s awesome that these make for such a healthy snack too.

The first step is the easiest. Bake them for 30 minutes without doing a thing. Of course you’ll want to bake them on parchment paper or a nonstick baking mat. It’s only after they cook that you add the yumminess.

Then you transfer them to a bowl to mix in the olive oil, cinnamon and brown sugar. The next step isn’t as simple. Trying to not eat the entire batch is the hardest step of all.

I failed at this step.

I ate every single last chickpea.

Recipe adapted from The Cupcake Project.

Cinnamon Sugar Roasted Chickpeas

Cinnamon Sugar Roasted Chickpeas

Cheap, easy and incredibly delicious, chickpeas make an awesome roasted snack!

Ingredients

  • 1 Can 14 or 15 oz Chickpeas (Garbanzo Beans), Drained and Rinsed
  • 2 Tsp Olive Oil
  • 1 Tsp Cinnamon
  • 2 Tsp Brown Sugar

Method

  1. Preheat oven to 450 degrees.
  2. Place chickpeas on parchment paper or nonstick baking mat and bake for 30 minutes.
  3. Transfer chickpeas to bowl and mix in the olive oil, cinnamon, and brown sugar until coated.
  4. Serve or store in an air-tight container.

Notes

IF (that is a big if) your chickpeas are still around the next day, they probably won't taste as good. They are best eaten right away or within a few hours, just FYI.

http://www.pennywisecook.com/cinnamon-sugar-roasted-chickpeas/

P.S.- A very BIG Happy Birthday to my sister! I love you!


Like this post? SHARE it!

Related Posts Plugin for WordPress, Blogger...

Crockpot Baked Potatoes

If I had a dime for every time that I’ve said Why didn’t I think of that, I would probably be rich. Do you ever have those duh moments when something so simple jumps right out at you that could’ve made your life easier years ago? Oh yeah, I have those all the time. You see my brain is a little foggy after birthing my 2 children. It’s permanent and I don’t expect it to go away anytime soon. Or at least that’s what I like to blame it on anyways.

I love me a big ole baked potato sometimes. I like to fill them with whatever I have in the fridge. Whether it’s lunch meat, herbs, or just plain old butter I just love baked potatoes. They have a place here called McAllister’s that serves the most gigantic potatoes. Those are my kinda potatoes.

Aldi had a 10 lb bag of russet potatoes on sale for only $.99 the other day. There were some that were huge so I thought what better to do with those than make baked potatoes. Then I thought about the hard labor of turning on the oven and waiting and waiting for the potatoes to cook. I did not look forward to that. So I got this bright idea to slow cook them in the crockpot.

I know. It’s genius really.

I may be the last person on earth who figured this out, but I’m quite happy about it to say the least.

If you figured this out a long time ago that’s great, just let me enjoy the moment.

So I set out to try this new (less labor intensive) method of baking potatoes in the crockpot. First, just LOOK at the size of that potato. It is towering over my Misto isn’t it?

(Which by the way, if you don’t have a Misto you should really get one! They are so awesome. If you use olive oil a lot, you may never need cooking spray again. You can find one here at Amazon for around $10.)

Back to the potato. It’s large and in charge and I let my husband eat that one.

So I just prepared the potatoes much like I would the ones I put in the oven. Washed them, slathered them with olive oil, salted them….

….then poked them just like they were my facebook friend. (wow, that was bad) Then of course I rolled them up in foil and placed them in the crockpot.

Look at those cute little potatoes all snug in the crockpot. This was so easy!

I’m not exactly sure how long that I cooked them because I was off doing more important things like Goodwill shopping or updating my facebook status. But I do think it was around 6 hours or so. This is what they looked like when they came out. PERFECT potatoes. And I didn’t break a sweat or barely lift a finger.

This is a life-changing epiphany in my household. My daughter even asked why we were having dinner so early that night. I felt like super mom. I did make up a quick little chili to put on top of these and broke up some microwaved bacon to go on top.

And I also placed a chub of ground turkey (in foil too) in the crockpot with the potatoes to see how it would cook with them so I didn’t even have to cook that and it worked! So that night, all I had to do was add a few things to the ground turkey to make the chili. The turkey did drip into the bottom of the crockpot, but since the potatoes were covered it wasn’t a big deal. Not sure if I will always do that.

Crockpot Baked Potatoes

Crockpot Baked Potatoes

You don't even have to turn on your oven for a hearty baked potato. Cook them in your crockpot!

Ingredients

    For the Potatoes
  • Russet Potatoes
  • Olive Oil (or Butter)
  • Salt to Taste
  • Foil for Wrapping
  • For the Chili
  • Not quite a whole lb of ground turkey
  • 1/2 Can of Black Beans
  • 1/2 Can Diced Tomatoes (or 8 oz can tomato sauce)
  • Chili Powder to Taste
  • Bacon Pieces for Topping
  • Shredded Cheddar Cheese for Topping

Method

    To make the Potatoes
  1. Wash the potatoes and rub them down with olive oil or butter. Salt and then poke holes in the top of each potato.
  2. Wrap in foil and place in slow cooker for 6-8 hours on low or 4-6 hours on high.
  3. To make the Chili
  4. Brown the ground turkey in a medium skillet Add in the black beans, tomatoes and chili powder and simmer until warm.
  5. Place on potatoes and top with bacon pieces and shredded cheese.

Notes

I would recommend cooking them on low just to make sure they get cooked really slowly and come out soft and fluffy inside.

Use whatever fillings that you see fit! The sky is the limit.

http://www.pennywisecook.com/crockpot-baked-potatoes/


Like this post? SHARE it!

Related Posts Plugin for WordPress, Blogger...