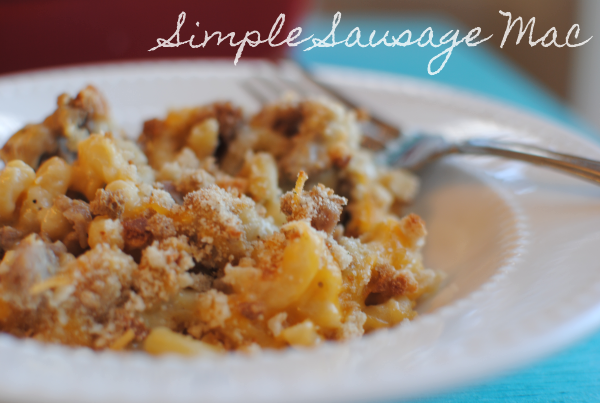
Simple Sausage Mac

Are you ready for Halloween yet? Well you better get that way because it’s on Wednesday! Can you really believe that we have already reached the end of October? I’d really love for someone to explain to me where the rest of this month has slipped away to. Maybe I’m just getting old or maybe time is speeding up. Either way, I’m going to hold on tight.

The weather is finally starting to cool off around here. I absolutely love the fall. Well, let me just say I love being cozy. I hate being cold, but I love being cozy. I’ve got a bunch of warm and comforting recipes coming up that I can’t wait to share with you. The fall is really when I have the most fun cooking. You can make up a big pot of something that sticks to your bones.

One of the first “comfort foods” that comes to mind practically anytime I hear that phrase is macaroni and cheese. It doesn’t get much more comforting than that. I’ve seen mac & cheese turn a frown completely upside down! Especially when it’s homemade. The boxes are good, but homemade is better.

And you know that here in the south, macaroni and cheese is considered a vegetable at most meat and threes….

The only issue that I’ve ever had with macaroni and cheese is that it’s so good that I eat too much. Well that and the fact that it needs a little bulking up so that it can be worthy of being called a meal. After all, we wouldn’t want to make mac & cheese only a side dish. It’s worthy of being the main attraction with a little adjustment.

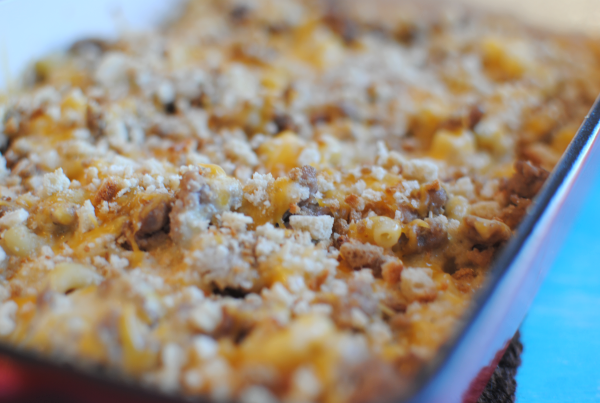
One of my favorite things about this macaroni and cheese is the secret topping. No longer a secret because I’m about to share it with you! We’re heading for Thanksgiving and there will be deals out the wazoo on stuffing mix. THAT my friend is a little something extra that can give macaroni and cheese a little spice. Breadcrumbs are great, but stuffing mix adds a little more crunch and even some nice flavor. I used Stove Top’s version for this. You can use whatever you’d like of course.

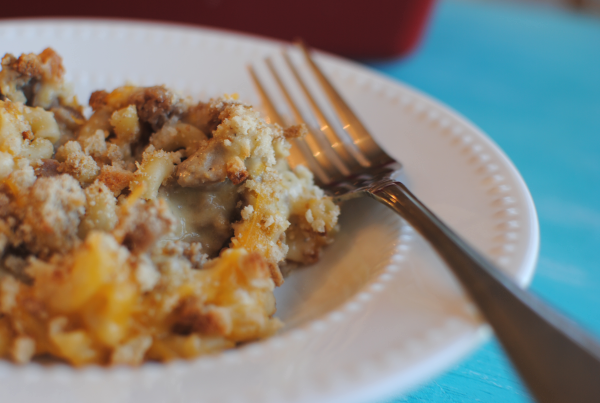
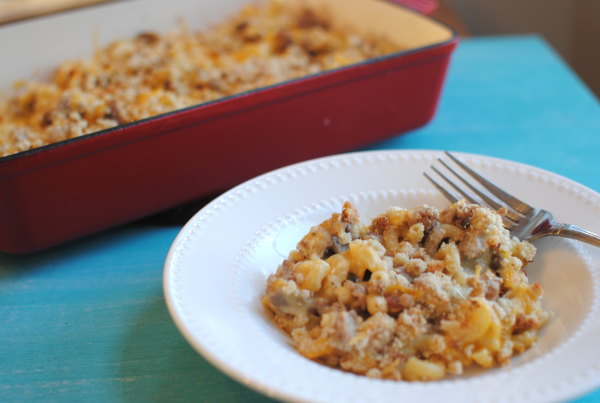
I bulked this up with sausage to give it a little flavor and to make it meaty. So yummy and extra comforting. I’d almost make this for a brunch!

Recipe adapted from Butter Busters Cookbook.

Simple Sausage Mac
Recipe Type: Side Dish, Main Dish
Author: Adapted from Butter Busters Cookbook
Bulk up your everyday mac & cheese and make it meaty. Perfect for dinner any night of the week!
Ingredients
  • 1 lb Turkey Sausage, Browned and Drained
  • 3 tbsp Melted Butter (light)
  • 1 and 1/2 tbsp flour
  • 1/2 tsp salt
  • 1/2 tsp pepper
  • 2 cups Skim Milk
  • 1 tbsp Melted Butter (light)
  • 2 cups Elbow Macaroni, Cooked
  • 1 tbsp Onion, Grated
  • 1/2 tsp salt
  • 1/4 tsp pepper
  • 2 cups Reduced fat Shredded Cheddar Cheese
  • 1/2 c. Crushed Cubed Style Stuffing Mix
Instructions
  1. Preheat oven to 350°.
  2. Combine 3 tbsp melted butter, flour, salt, and pepper in a small sauce pan. Slowly add skim milk and whisk well. Bring to boil, then lower temp until thickens. Set aside.
  3. Spray a 2 quart baking dish with non-stick cooking spray. Place half of the macaroni in the dish. Spread half of the cooked sausage over the noodles. Sprinkle half of the grated onion, salt, pepper, sauce, and cheese. Repeat layer. Drizzle 1 tbsp melted butter over top. Sprinkle with remaining cheese. Sprinkle crushed stuffing over the top. Cover and baked for 30 minutes. Then uncover and bake an additional 10 minutes.

Like this post? SHARE it!

Related Posts Plugin for WordPress, Blogger...

Sloppy Joe Stuffed Shells

I am always on the lookout for ways to change up everyday meals. Meatloaf and pizza are good. Don’t get me wrong. But sometimes, they just get old and boring. I have a lot of fun experimenting with food. It’s kind of a hobby of mine. It’s why this blog exists!

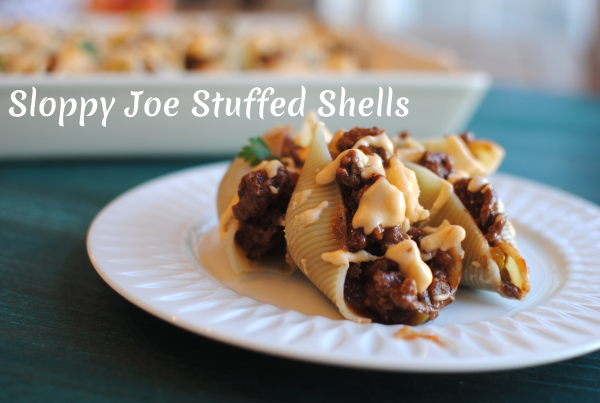
Stuffed shells are a family favorite. There are so many variations and concoctions that you can stuff them with. My latest creation? Sloppy Joe Stuffed Shells.

Sloppy Joes are so simple to whip up on a week night for dinner, but guess what? They are sloppy! (whodathunkit?) I was thinking that if we could eat them in shells, they might stay contained and actually be easy to eat.

Hey, we could get rid of that sloppy and just call them Joes! Joe Stuffed Shells……hmmm. Nah. You could possibly call them Not-So-Sloppy Joe Stuffed Shells. That’s too long. I give up. We’ll stick with Sloppy Joe Stuffed Shells.

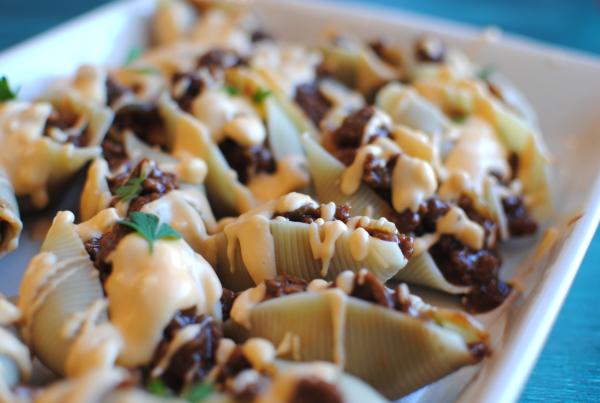
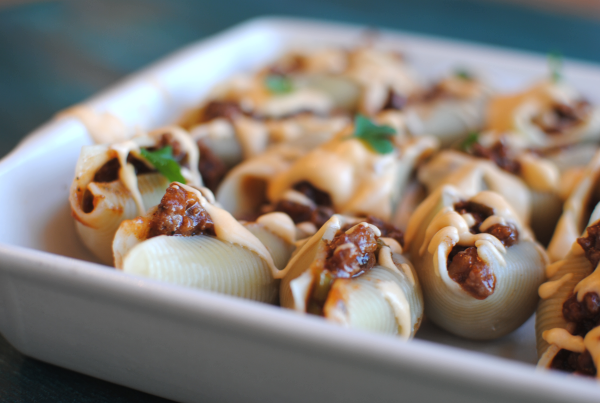
These aren’t made with the canned Sloppy Joe sauce. It’s homemade and extra easy. I even got to use a green pepper from my garden in it. I’m sure that you’re wondering about the cheese sauce on top there. Well, you see, my husband likes to add cheese to just about everything. And following suit, he asked if I could drizzle some cheese sauce on top of the shells too. I did this for him. Feel free to add it if you like, but they are still just as great without the cheese sauce.

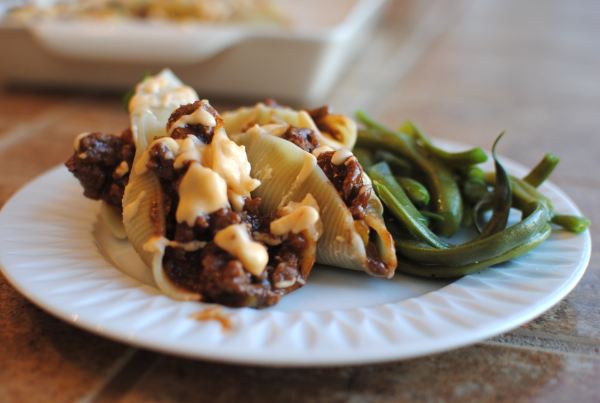
Just as I suspected, these were quite neat to eat! Much neater than a messy old Sloppy Joe Sandwich. My husband isn’t a huge fan of Sloppy Joes themselves. We came to the conclusion after this meal that it was in fact, because they are sloppy. The shells make it really easy to keep all the yummy and sweet meat inside. Which means that you’ll most likely end up eating them with your fingers.

We did and we’re not ashamed!

The best part about this meal is that it’s super affordable. With the meat of your choice (ie ground beef, ground turkey, even chicken!), a few handy sauces, and simple spices, these shells comes together in no time and don’t even require baking.

Sloppy Joe Stuffed Shells
Recipe Type: Main Dish,
Author: Pennywise Cook
Believe it or not, Sloppy Joes don’t have to be sloppy when you make them in shells like this!
Ingredients
  • 1/2 Package Jumbo Shells (you can make an entire box, but you won’t need it)
  • 1 lb Extra lean Ground Beef
  • 1/2 c. Onion, chopped
  • 1/2 c. Green Onion, Chopped
  • 1 Clove Garlic, minced
  • 1/4 tsp salt
  • 1/2 c. Ketchup
  • 1/2 c. BBQ sauce (your choice)
  • 2 tbsp Brown Sugar (I used Splenda Brown)
  • 1/2 tsp Italian Seasoning
  • For Cheese Sauce
  • 2 tbsp Butter
  • 1/4 c. Skim Milk
  • 4 oz Cream Cheese
  • 1 c. Shredded Cheddar Cheese (Reduced Fat)
Instructions
  1. Prepare noodles according to package. Drain and set aside to cool.
  2. In a large skillet, brown ground beef with onion and green pepper. Drain and add in all other ingredients. Simmer for 5-10 minutes or until warmed through.
  3. Stuff shells with meat mixture.
  4. For cheese sauce- melt butter in a small sauce pan. Add the skim milk. Melt in the cream cheese stirring until smooth. Add in shredded cheese until melted and smooth. Drizzle over stuffed shells.
Notes

These could even make little appetizers at a party!


Like this post? SHARE it!

Related Posts Plugin for WordPress, Blogger...

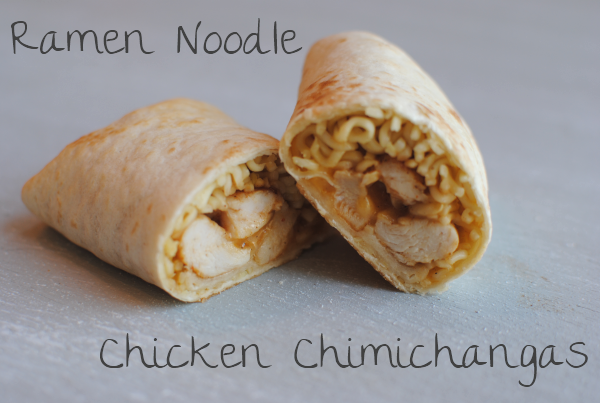
Ramen Noodle Chicken Chimichangas

Ramen Noodle Chicken Chimichangas 9 Ramen Noodle Chicken Chimichangas

We’re going to go low budget today. We’re talking way low budget. Like Ramen Noodle budget low. You know what I’m talking about…the magical noodles that come in handy when money is tight or you just don’t want to cook. I got this idea from my step brother who was low on ingredients for a chimichanga and came up with this concoction. He shared one with me and I was pleasantly surprised at how yummy they were.

I have to admit that the thought of Ramen noodles in a chimichanga didn’t exactly sound that amazing to me. But once I tried, I was actually excited to make my own. Even if you’re not too keen on putting Ramen noodles in your chimichanga, you can at least see below from instructions on how to fold a chimichanga. But I think you’ll want to give these a chance y’all. They are surely worth it!

Price breakdown:

4 Flour Tortillas $.40
4 Fresh Chicken Tenders $.80
1 Package Chicken Ramen Noodles $.18
2 Cups Shredded Cheese $1.79
Total= $.79 per chimichanga

Ramen Noodle Chicken Chimichangas 1 Ramen Noodle Chicken Chimichangas

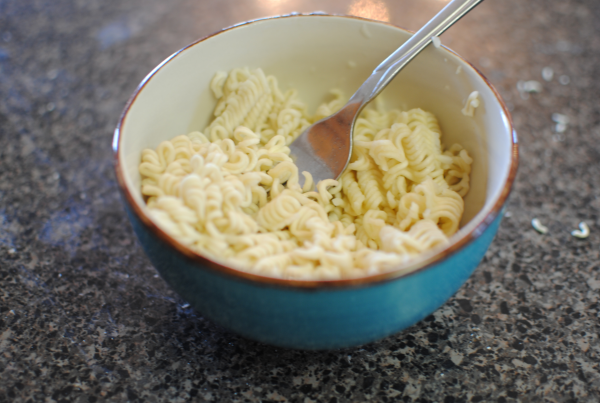
It all starts with those college-esq Ramen noodles. Which by the way, are quite tasty! I haven’t made them in so long and when these came out of my microwave, I seriously had to stop myself from eating them all. Cook them up according to the package including the seasoning. Easy and cheap way to get that great flavor inside the chimi.

Ramen Noodle Chicken Chimichangas 2 Ramen Noodle Chicken Chimichangas

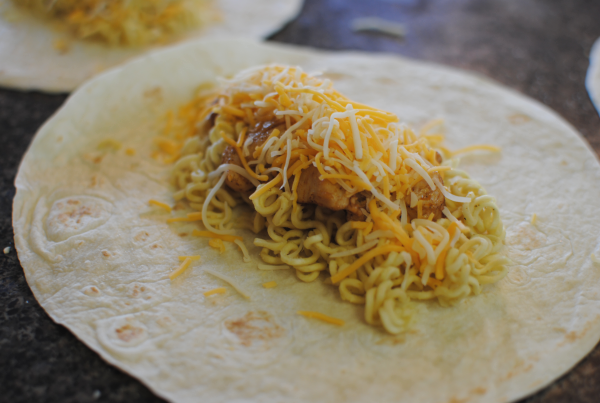
On each tortilla, you place some of those Ramen noodles along with some seasoned grilled chicken and shredded cheese. YUM!

Then it’s time to roooooooooll them up for baking.

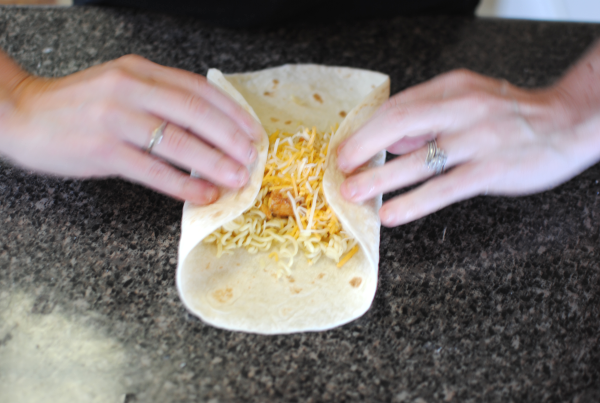
Ramen Noodle Chicken Chimichangas 3 Ramen Noodle Chicken Chimichangas

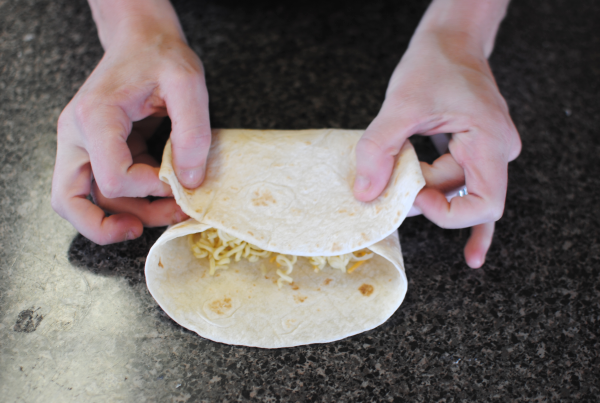
Lay your tortilla flat. Fold the sides in towards the middle.

Ramen Noodle Chicken Chimichangas 4 Ramen Noodle Chicken Chimichangas

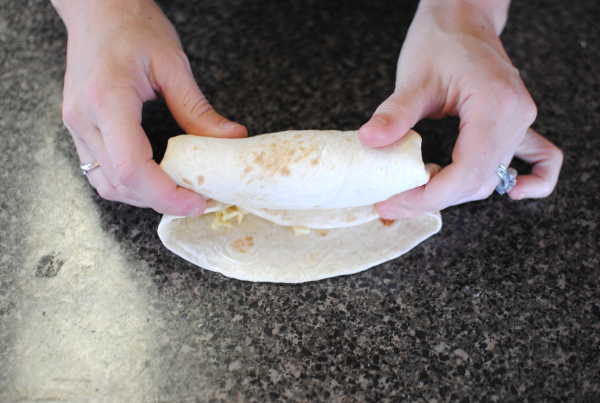
Then fold the bottom towards the top, but only halfway. Fold the edge towards the inside and begin to roll.

Ramen Noodle Chicken Chimichangas 5 Ramen Noodle Chicken Chimichangas

…like so.

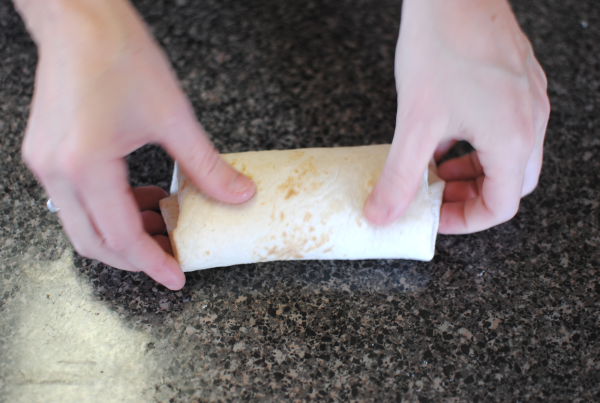
Ramen Noodle Chicken Chimichangas 6 Ramen Noodle Chicken Chimichangas

Once you get the rolling down, it will look like this. Place them seam side down on your baking sheet.

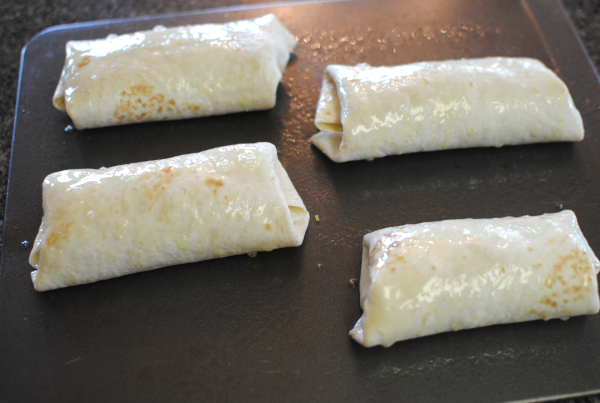
Ramen Noodle Chicken Chimichangas 7 Ramen Noodle Chicken Chimichangas

Spray them with a little cooking spray to help them brown and get a little crunchy.

Ramen Noodle Chicken Chimichangas 8 Ramen Noodle Chicken Chimichangas

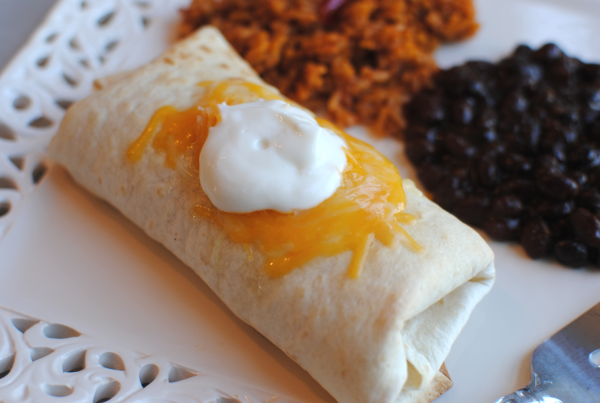
Serve with your favorite fix-in’s like more cheese or sour cream on top and viola. So easy, cheap, and great for freezing too!

Ramen Noodle Chicken Chimichangas
Recipe Type: Main Dish
Author: Pennywise Cook
Serves: 4
Using a low budget ingredient, Ramen noodles make a great addition to chicken chimichangas!
Ingredients
  • 4 Flour Tortillas
  • 4 Fresh Chicken Tenders, Cut into Bite-Size Pieces
  • 1 Pkg Chicken Flavored Ramen Noodles
  • 1 Tbsp Olive Oil
  • 1 Tsp Minced Garlic
  • 1/2 Tbsp Chili Powder
  • 8 Tbsp Shredded Cheddar Cheese
  • Cooking Oil
Instructions
  1. Preheat oven to 350 degrees.
  2. Cook Ramen Noodles according to the package directions. Drain all liquid from the noodles and set aside.
  3. Meanwhile, in a skillet heated to medium-high cook chicken in olive oil along with the minced garlic and chili powder until no longer pink.
  4. On each tortilla place 1/4 of the Ramen noodles, 1/4 of the to chicken, and 2 tbsp shredded cheese.
  5. Roll up into chimichangas and place seam side down on a greased baking sheet.
  6. Spray tops with cooking spray and bake for 10-15 minutes until browned and crunchy.
Notes

If you like spicy things, you can use jalapeno cheese like my step brother to add a little kick!


Like this post? SHARE it!

Related Posts Plugin for WordPress, Blogger...

Macaroni Crust Pizza

One of the cheapest meals that I know how to make is pasta. You can always find a deal on dry pasta just about anywhere you go. Have a coupon? That’s even better! My favorite is when Publix puts pasta BOGO and you can get it next to nothing. I usually stock up and when I need something quick or easy during the week, it’s a no-brainer.

My favorite part of pasta is that it is SO versatile. You can basically make it into anything or put anything in it. This is what makes it so great for budget meals and for those who have picky eaters in the fam.

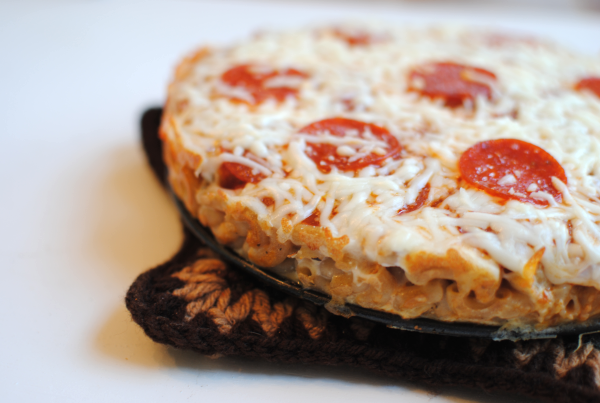
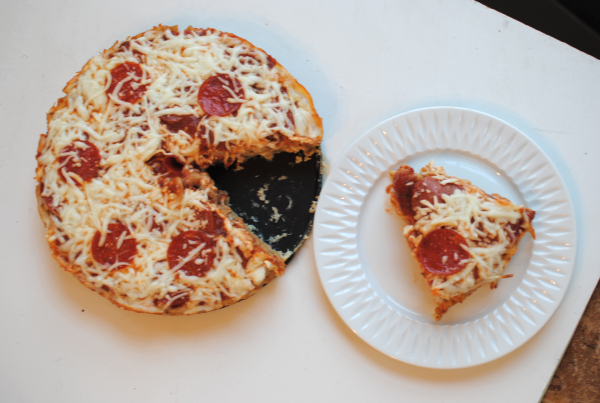
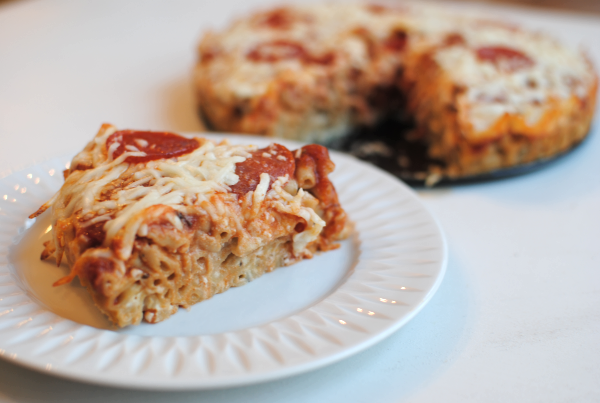
I can’t take credit for today’s recipe. I adapted this recipe from The Dieter’s Cookbook from 1982. I can’t believe that I’ve never thought of this. I’ve made pizza pasta many times before, but never thought of making macaroni the “crust” of a pizza. I cannot stress to you how much my family liked this. Easy, cheap, and incredibly tasty you really do have to try this one y’all!

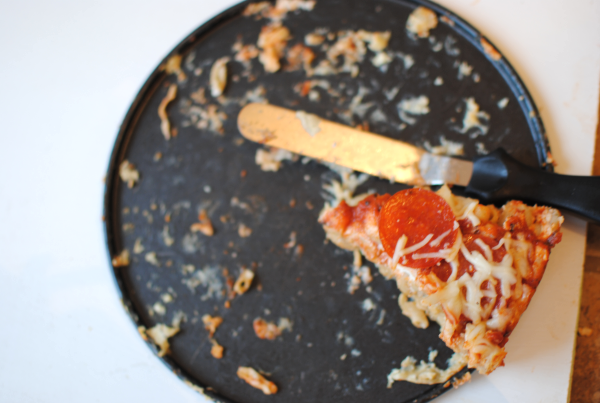
I take that back. Remember how I said that I couldn’t describe to you how much my family liked this? Well instead, here’s an illustration! This is all that was left from one sitting of this Macaroni Crust Pizza. It is that good.

And it’s actually a decent recipe for those watching their calories. Well, as long as you don’t eat as much as we did. 🙂

Just make it. Then come back here and leave a comment about your family’s reaction!

Macaroni Crust Pizza
Recipe Type: Main Dish, Pasta
Author: Pennywise Cook adapted from The Dieter’s Cookbook 1982
This cheap and easy meal is a tasty twist on regular pizza!
Ingredients
  • 2 c. Elbow Macaroni
  • 2 Eggs, Beaten
  • 1/2 c. Mozzarella Cheese
  • 1/4 c. Parmesan Cheese, Grated
  • 2 oz Pepperoni
  • 1/4 c. Skim Milk
  • 1/2 Tsp Dried Basil
  • 1/2 Tsp Dried Oregano
  • 1/8 Tsp Pepper
  • For Topping
  • 1 Egg, Beaten
  • 1/2 c. Reduced-Fat Ricotta Cheese
  • 1 Jar (8 oz) Pizza Sauce
  • 1 c. Mozzarella Cheese
Instructions
  1. Preheat oven to 375 degrees. In a large saucepan, cook macaroni according to package. Drain well.
  2. In a mixing bowl, combine 2 eggs, 1/2 c. mozzarella cheese, Parmesan Cheese, milk, basil, milk, and pepper. Add macaroni to this mixture and combine well.
  3. In a greased springform pan, place the macaroni mixture into a “crust” form. Bake for 10 minutes.
  4. Meanwhile, in a bowl combine the 1 egg and ricotta cheese. Once “crust” is out of the oven, pour this mixture over the top and evenly spread. Pour the pizza sauce over the top and sprinkle with mozzarella cheese. Top with pepperoni.
  5. Return to oven for 10- 15 minutes or until heated through. Let stand 10 minutes before slicing.
Notes

This could easily be made without any meat for vegetarians!


Like this post? SHARE it!

Related Posts Plugin for WordPress, Blogger...

Basil Ricotta Mac and Cheese

Isn’t it funny how there is never enough time in the day? I can have a completely clear day planned with maybe one thing on my to-do list and half the time I don’t even get that one thing accomplished. Of course, I do have a tendency to go off on tangents. My husband makes fun of me beceause I can barely get a sentence out. In fact, the other day I was telling him something and in the middle of my sentence remembered something else and began to tell him about that instead. He looked at me with the funniest face and said, “Did you just interupt yourself?”. I stopped and thought about it for a moment and then decided yes, I did in fact interupt myself! Leave it to me!

Much like my thoughts getting side-tracked, I easily get distracted when I’m cleaning the house. I’ll be cleaning one thing and come across something that just bothers me and I have to clean that. All the while forgetting about my original intention. It may take me the whole day (and sometimes week) to get the original mission accomplished.

A near future goal of mine is to create a cleaning list for the week. I’ll let you know how that works out. 🙂

Needless to say, time gets away from me sometimes. And on those days, we either have a fend for yourself night for dinner or I whip something up that doesn’t need a lot of work. Mac and cheese is always a great go-to option. Always a pleaser for the kiddos and the picky husband as well.

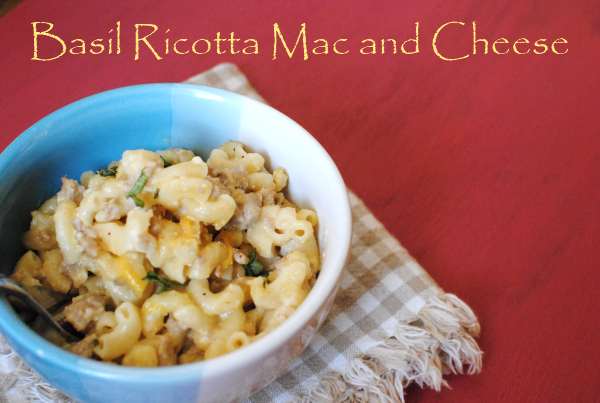
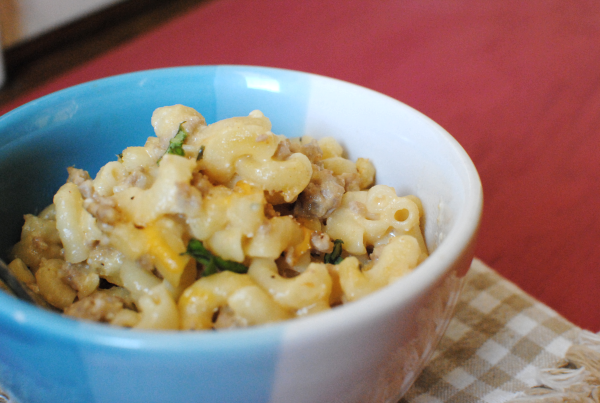
It’s not exactly the best grown up meal. So when I was having a “day” the other night I decided to liven it up a bit and use up some ricotta cheese that I had in the refrigerator and add a little bit of basil. And to make it more of a meal I added some ground turkey. It was fantastic and even pleased my 5 year old!

Hey, maybe she’ll eat her peas now. Nah….

Basil Ricotta Mac and Cheese
Recipe Type: Pasta, Main Dish
Author: Pennywise Cook
This grown up version of everyday mac and cheese is sure to please everyone!
Ingredients
  • 2/3 Box Elbow Macaroni
  • 1 lb Ground Turkey
  • 1/4 c. Flour
  • 2 c. Milk
  • 2 c. Shredded Cheddar Cheese + additional for topping
  • 1/4 c. Bread Crumbs
  • 1/2 c. Ricotta Cheese
  • 1/2 Tsp Onion Powder
  • 1/2 Tsp Garlic Powder
  • 1 Tsp Basil, Chopped
  • Salt and Pepper to Taste
Instructions
  1. {reheat oven to 350 degrees.
  2. Prepare macaroni a couple minutes less than directed on the box. Drain and set aside.
  3. Meanwhile, brown ground turkey and stir in ricotta cheese. Add in seasonings and basil.
  4. In a saucepan, stir together flour and milk and cook to a boil until thickened. Then stir in shredded cheese. Mix well.
  5. Mix together pasta, ground turkey mixture, and cheese mixture. Pour into a greased baking dish and top with additional shredded cheese and bread crumbs. Bake for about 10 minutes until cheese is melted and breadcrumbs begin to crisp.


Like this post? SHARE it!

Related Posts Plugin for WordPress, Blogger...

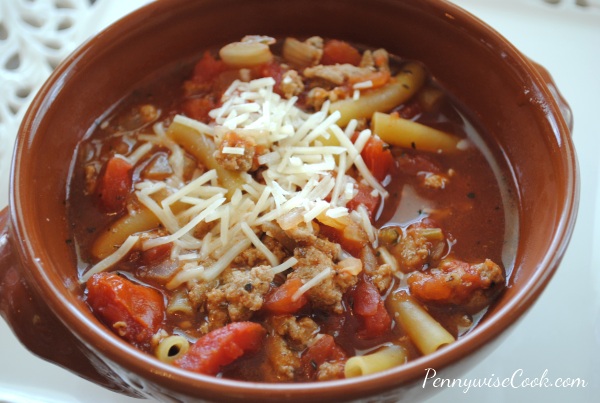
The BEST Lassagna Soup Ever

Raise your hand if you like to make easy meals. *raises hand* I’m lucky to get dinner on the table by 8pm most nights. I had a little spurt where I was getting dinner ready around 5:30, but then I had my second kid and somehow the days got a lot shorter. I feel like there’s a time burglar slowly stealing time. Do you ever feel that way? I’m fairly impatient too which makes it really hard to wait for things. Of course when I’m waiting it feels like time is moving slowly.

This soup is perfect for those days when you feel like time is moving too fast. When you don’t have a minute to spare but want a hearty dinner, you might try this amazing soup. My mom shared this with me a few months ago and I’ve made it several times since then. It wasn’t meant to be made in the crockpot, but I threw caution to the wind and made it that way anyways. It worked!

Not only is this an easy meal to throw in the crockpot, it’s also low in calories. And we like low in calories don’t we? And to top it all off, this soup is delicious! You’d never know that it was low cal or low fat. Those are the best kinda meals. And even the pickiest of eaters will eat this. My daughter ate every bite and I didn’t even have to bribe her (I know!).

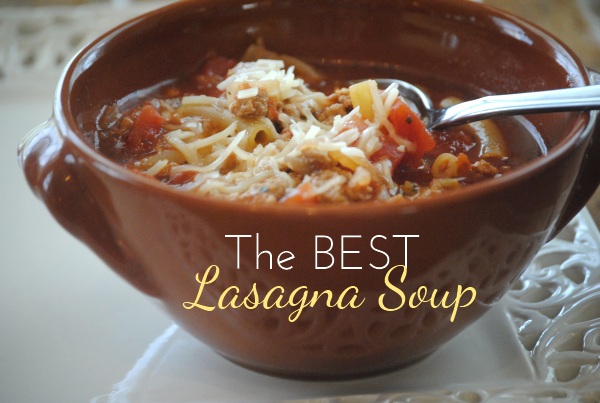
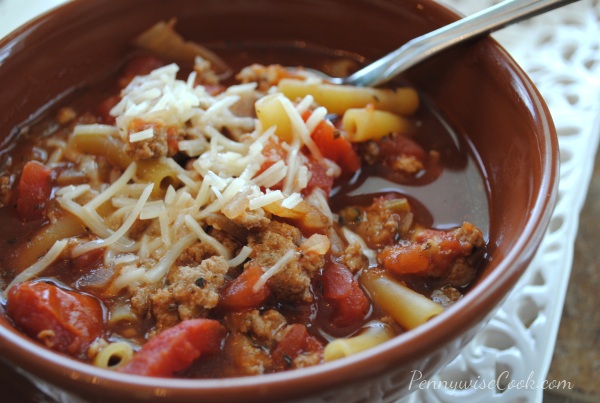
The recipe calls for spiral noodles, but I usually use whatever I have on hand. Although it does seem to look better with the spiral noodles. When making this in the crockpot, you’ll want to throw everything BUT the noodles in to cook. Then in the last 10 minutes or so, throw them in to let them cook up. This is what I’ve found to be the easiest way to make it in the crockpot. Top it with some parmesan cheese and you have incredible lasagna soup! I’m not even just saying that. It really is the BEST lasagna soup. I hope that you try it!

Recipe courtesy of Taste of Home and my momma!

The BEST Lassagna Soup Ever

Serving Size: 8 servings

The BEST Lassagna Soup Ever

Transform your lasagna into soup and make it while you work!

Ingredients

  • 1 pound lean ground beef (Preferably 90%)
  • 1 large green pepper, chopped
  • 1 medium onion, chopped
  • 2 garlic cloves, minced
  • 2 cans (14-1/2 ounces each) reduced-sodium beef broth
  • 2 cans (14-1/2 ounces each) diced tomatoes
  • 1 can (8 ounces) tomato sauce
  • 1/4 cup tomato paste
  • 2 teaspoons Italian seasoning
  • 1/4 teaspoon pepper
  • 2-1/2 cups uncooked spiral pasta
  • 1/2 cup shredded Parmesan cheese

Method

    Cook in a Saucepan
  1. In a large saucepan, cook the beef, green pepper and onion over medium heat until meat is no longer pink. Add the garlic and cook 1 minute longer. Drain.
  2. Stir in the broth, tomatoes, tomato sauce, tomato paste, Italian seasoning and pepper. Bring to a boil. Stir in pasta. Return to a boil. Reduce heat; cover and simmer for 10-12 minutes or until pasta is tender. Sprinkle with cheese.
  3. Cook in a Crockpot
  4. Place all ingredients minus the pasta and parmesan cheese into the crockpot. Cook on low for 6-8 hours or high for 4-6 hours.
  5. In the last 15 minutes add in the pasta and cook until tender.
  6. Sprinkle with cheese and serve!

Notes

The original recipe also called for 1 cup corn, but I didn't use it. Seemed a bit odd to me since you don't put corn into lasagna normally. I think it tasted just wonderful without it.

http://www.pennywisecook.com/the-best-lassagna-soup-ever/


Like this post? SHARE it!

Related Posts Plugin for WordPress, Blogger...

Homemade Instant Potato Gnocchi

Feeling a bit adventurous? How about homemade gnocchi? You can do it with a little help from Betty Crocker. Believe me, if I can do this anyone can!

Gnocchi is beginning to be found at many restaurants these days. It’s a very fluffy potato pasta that is incredibly indulgent and yummy. I’ve been buying it pre-made for a few years and it wasn’t until recently that I got up enough courage to attempt it myself. Mind you, I’ve never made any type of pasta before. I decided to give it a try and to my surprise, I found out that I do have the ability to create these fluffy potato pillows of yummy goodness! You most certainly can too and I encourage you to do it!

The version that I’m going to give you will make it super easy for you to give it a try. It’s made with instant potatoes instead of having to peel and boil and mash real potatoes.

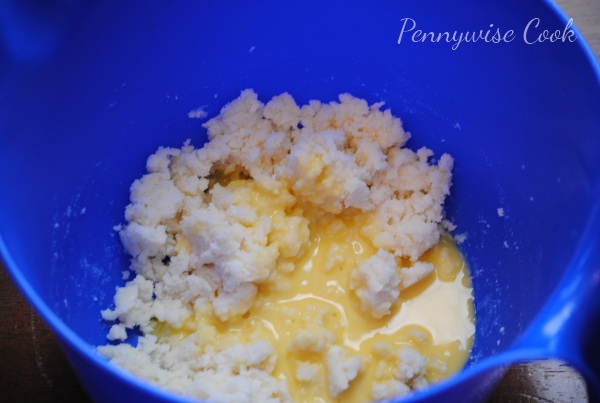
Start out by mixing dry potato flakes (instant potatoes) with water and then adding an egg and a little bit of salt. Can you believe that you’re almost done?! That’s how easy it is to make these!

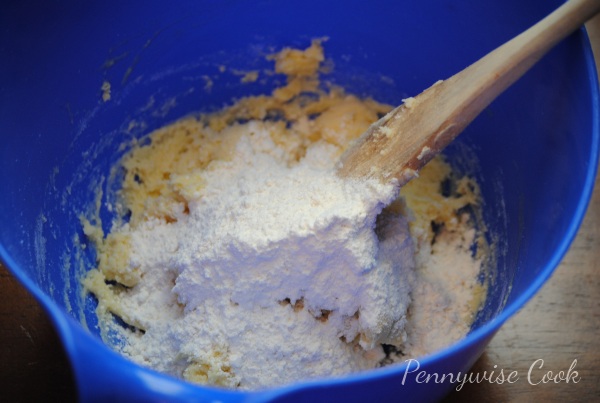
Next, you add in the flour slowly which starts to turn the potatoes into dough.

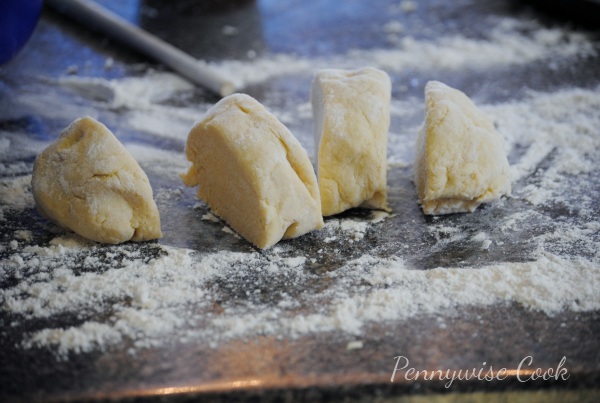
You knead the dough and then divide it into sections for rolling out.

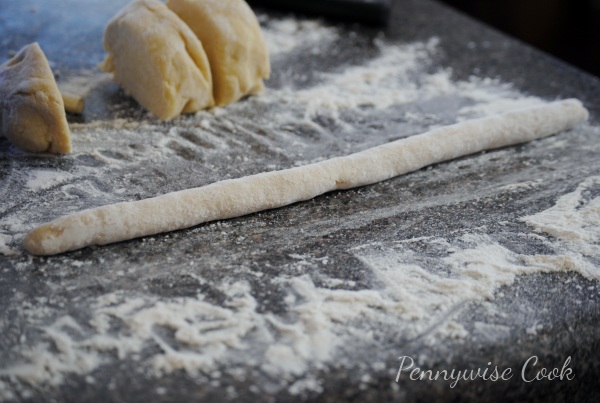
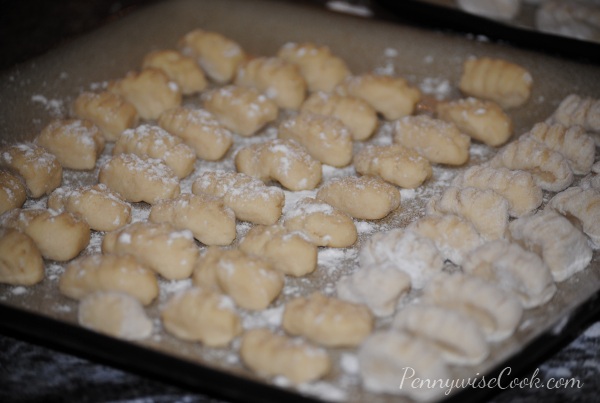
Roll each section into long cylinders the size of your thumb. Then cut into small bite-size pieces.

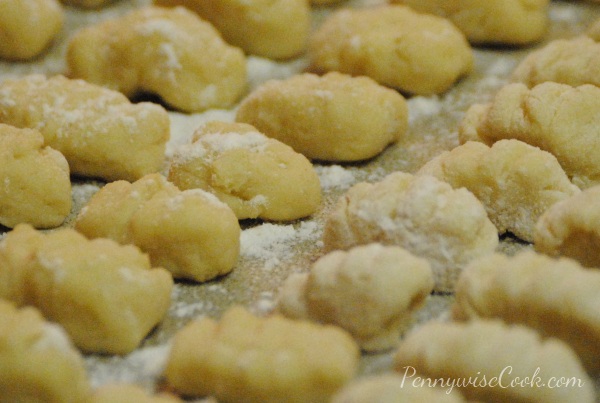
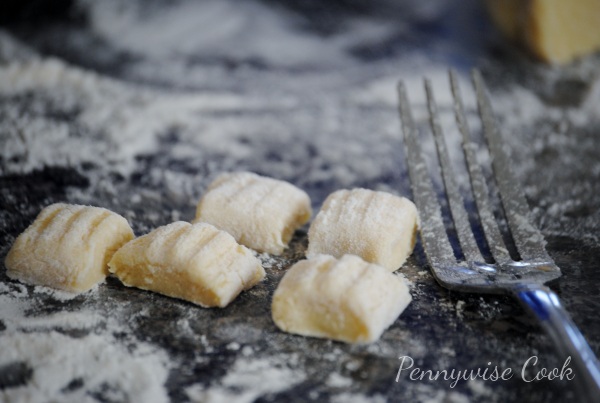
Use your fork to make imprinted lines across the gnocchi. This is how your yummy sauce will stick to them. Then you can shape them to look more like gnocchi which is generally more round and not squared. Don’t get hung up on the shape. They will taste like gnocchi no matter what shape they are in. They are wonderful served with a tomato basil sauce, cheese sauce, or brown butter sauce.

Or you could always toss into Zesty Zucchini and Squash Over Gnocchi!

Recipe courtesy of Food.com

Homemade Instant Potato Gnocchi

Homemade Instant Potato Gnocchi

Ingredients

  • 2/3 c. Dry Instant Potatoes
  • 2/3 c. Boiling Water
  • 1 Egg at Room Temp, beaten slightly
  • 1/2 Tsp Salt
  • 1 1/2 c. All-Purpose Flour

Method

  1. In a medium bowl, stir instant potatoes into boiling water until blended.
  2. Fold the egg and salt in.
  3. Slowly add in the flour, a third at a time. Dough will become thick and won’t stick to the bowl anymore.
  4. Place the dough on a well-floured surface and knead well. You want it to not stick to anything, but you don’t want to add too much flour. The thicker the dough the denser your pasta will be.
  5. Cut the dough into 4 sections. Roll each section into cylinder rolls about the thickness of your thumb. Cut them into bite-size pieces.
  6. Using your fork tines, make indentions on the gnocchi and form to your liking.
  7. To cook- place gnocchi into boiling salted water. Do not crowd the pot. Gnocchi is done when it floats to the top.
  8. Serve with your favorite sauce.
http://www.pennywisecook.com/easy-homemade-potato-gnocchi/

Simple enough and you can say that you made it from “scratch” without hesitation. 😉


Like this post? SHARE it!

Related Posts Plugin for WordPress, Blogger...

Easy Fried (Yes Fried!) Ravioli

Happy Valentine’s Day! Need a quick, but fancy meal tonight? These might just do the trick!

I’m not usually one for fried things. My mind associates the word “fried” with evil. Evil as in, this food is going to devilishly make you gain 5 pounds. I haven’t always had these feelings about fried things. Like most people, I really do love my french fries and fried chicken, but actually seeing the process makes me feel so dirty and well, evil. I may not like frying things very often, but I am most definitely not above it on occasion, especially when it involves a pasta filled with something yummy.

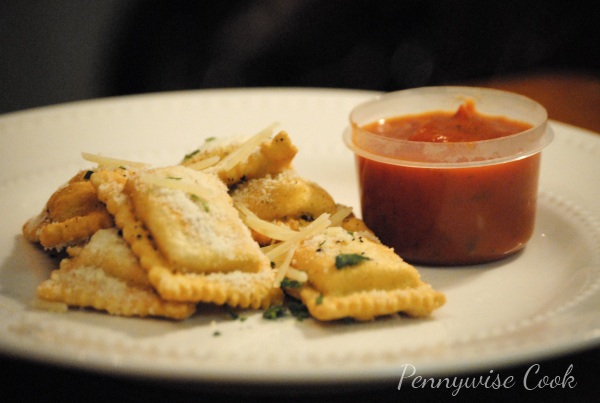
At your local grocery store, pick up a bag of the frozen ravioli. I found that Walmart has the cheapest prices of any place I looked. They were around $2.50 there. Of course, you don’t have to use frozen, but the Pennywise method surely does call for the cheapest means and honey, that’s Walmart! Technically that’s the only ingredient you really need. Besides the oil to fry it in, but you may want to have some parmesan cheese for sprinkling and marinara sauce for dipping when they are done. As for the ravioli themselves, you can do this with any that you like. They have several varieties at the stores to choose from. Spinach and Ricotta, Four Cheese, Beef…you name it.

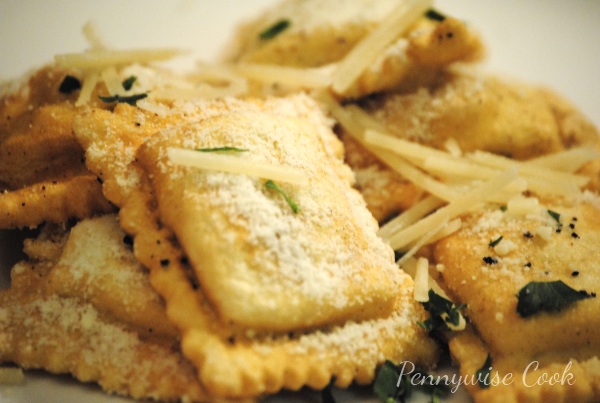
These little guys were a huge hit at my house and I can’t honestly tell you that they will make a regular appearance at my house. But I can tell you that Ravioli is absolutely delicious fried and would make a GREAT get appetizer at a party or get together.

Easy Fried Ravioli

Easy Fried Ravioli

Chang up the same old ravioli by frying them up and serving them as an appetizer.

Ingredients

  • 1 Bag Frozen or Fresh Ravioli (if using frozen, thaw in refrigerator ravioli completely before frying)
  • Vegetable Oil
  • Parmesan Cheese

Method

  1. Place oil in fry machine or about 2 inches of oil into a medium sauce pan. Heat to medium-high heat. (Be careful it’s hot!)
  2. Place thawed ravioli into hot oil (carefully!) until it puffs up and begins to brown on one side. Then turn over to brown the other. This is a VERY fast process.
  3. Place on paper towels to drain excess oil. Sprinkle parmesan cheese on each and serve with marinara sauce!

Notes

Be sure to be very careful when placing and removing the ravioli from the hot oil. It can burn you and it’s very brutal if it does. These will fry very quickly so be sure to watch them like a hawk through the entire process. Do not crowd your pan. I fried no more than 4 at a time. This is so they won’t stick together and you have room to flip them.

http://www.pennywisecook.com/easy-fried-yes-fried-ravioli/


Like this post? SHARE it!

Related Posts Plugin for WordPress, Blogger...