Cheesy Cauliflower with Better Bakery Melts!

The following is a sponsored post written by me on behalf of Better Bakery. It is 100% my own opinion. 

Better Bakery in frontWell happy New Year to you! I am not used to this 2016 yet. It feels futuristic to write 2016. Am I the only one? So weird with that 6 there. 

Did you make any resolutions? I made a few. To lose weight is one. Not that original, eh? I’ve got more, like to get my youngest to eat anything more veggies. Picky McPickerson she is.

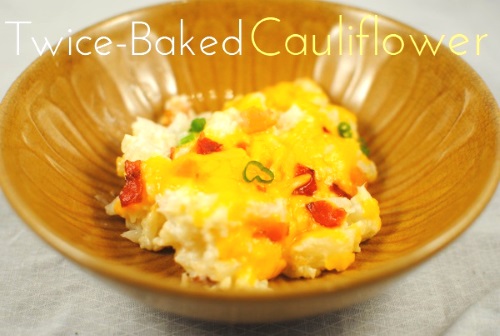
What do you do when your daughter won’t eat her veggies? Throw CHEESE on it!

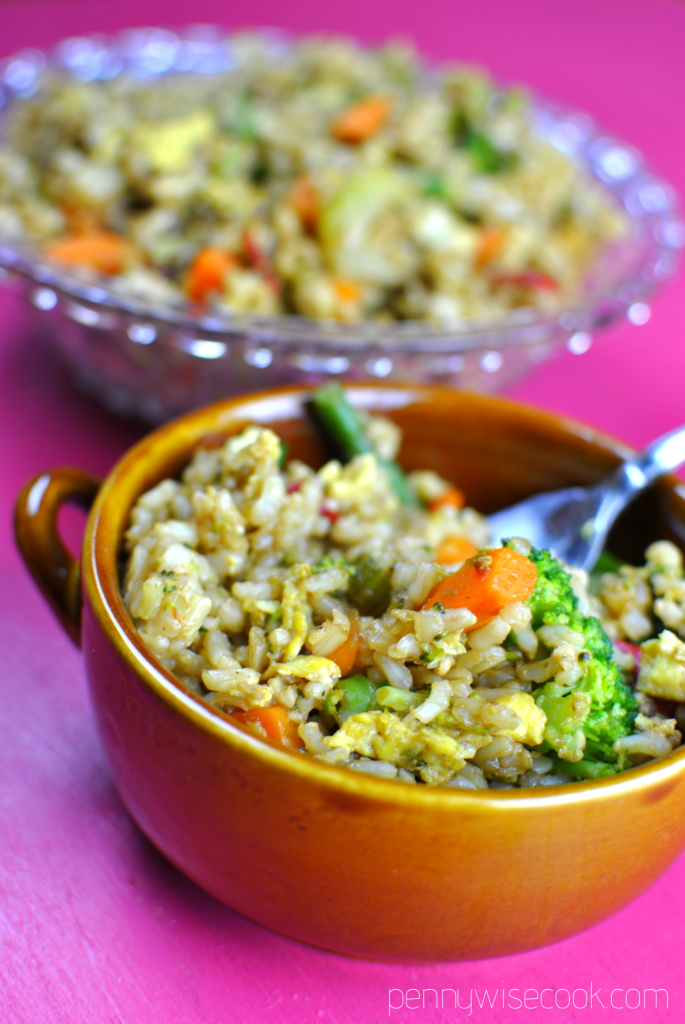
Cauliflower is already one of my go-to veggies because of the mild flavor and tenderness. But with cheese? I mean. Yaaaassss! And I love that you can grab them in the frozen food aisle and they are ready to prepare. Easy peasy lemon squeezy!

Cheesey Cauliflower for post

This cauliflower is bound to turn Picky McPickerson into Veggie McVeggieson. You want to know how cheesy it is? My daughters thought it was Mac & Cheese!

Did you happen to catch that super tasty looking stuffed sandwich there in the front? Of course you did. It’s pretty magnificent. Oh. My. Goodness. This is something new I found that has quickly become a family fave- Better Bakery Artisan Melts. 

Packaging Pic low res

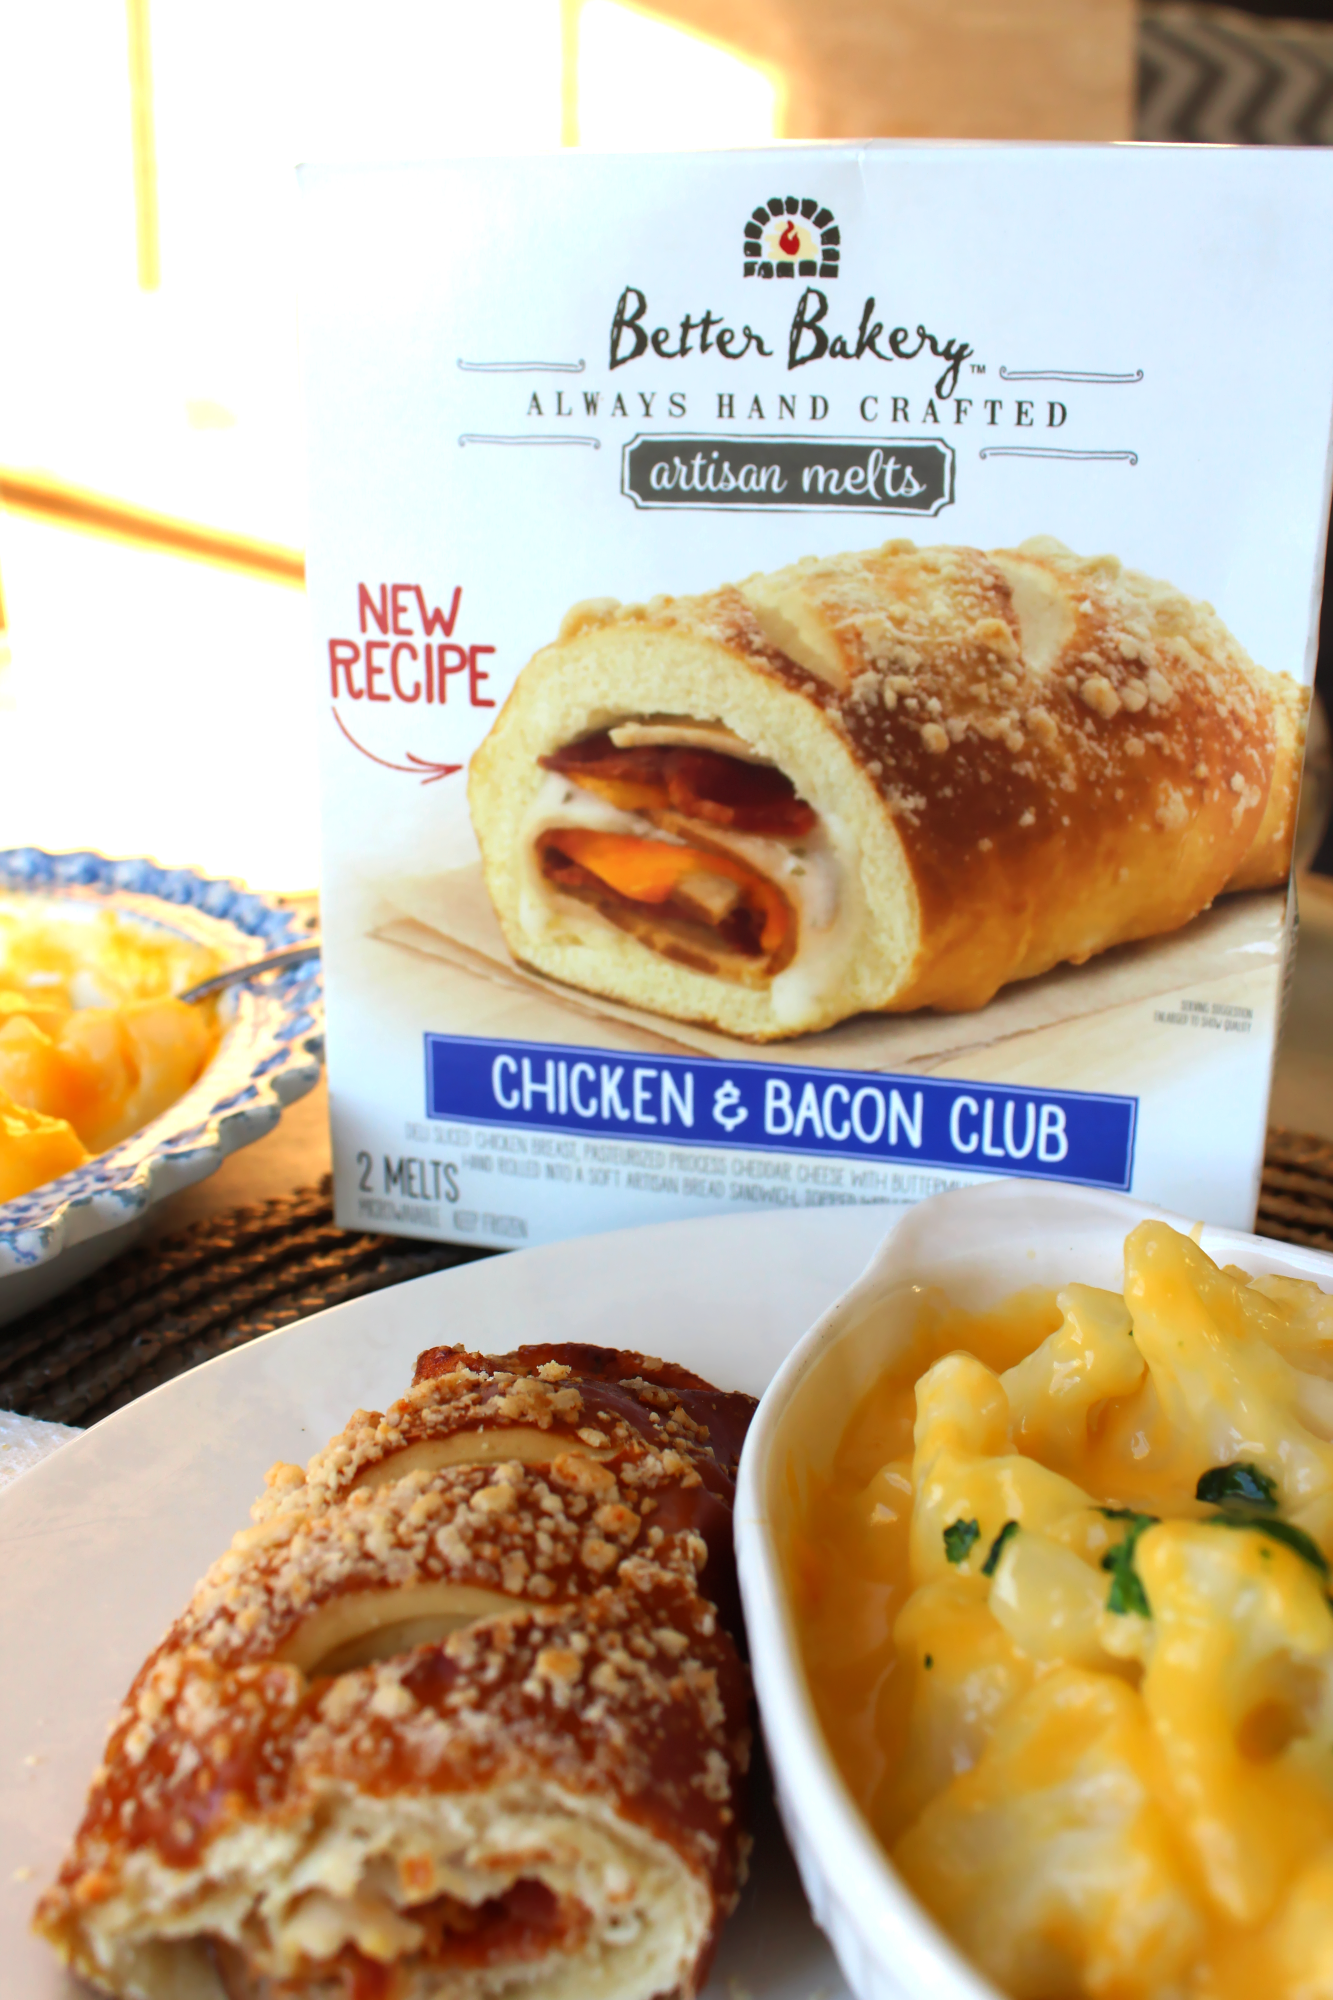
The bread on the outside looks like a pretzel and even sorta tastes like a pretzel, but it’s artisan bread. Heaven on a plate and the ultimate main dish to the Cheesy Cauliflower side. My favorite kind of Better Bakery Artisan Melt was the Chicken & Bacon Club. It is so good! I was pretty impressed at how closely the sandwich matched the picture on the box. That just doesn’t happen with some products.

These handcrafted artisan melts are made by bakers who are committed to the Better Bakery art and want to make better food. How nice that? They truly love what they do and make a quality product that reflects that!

Cheese and Pepperoni Pizza PRoduct pac low res

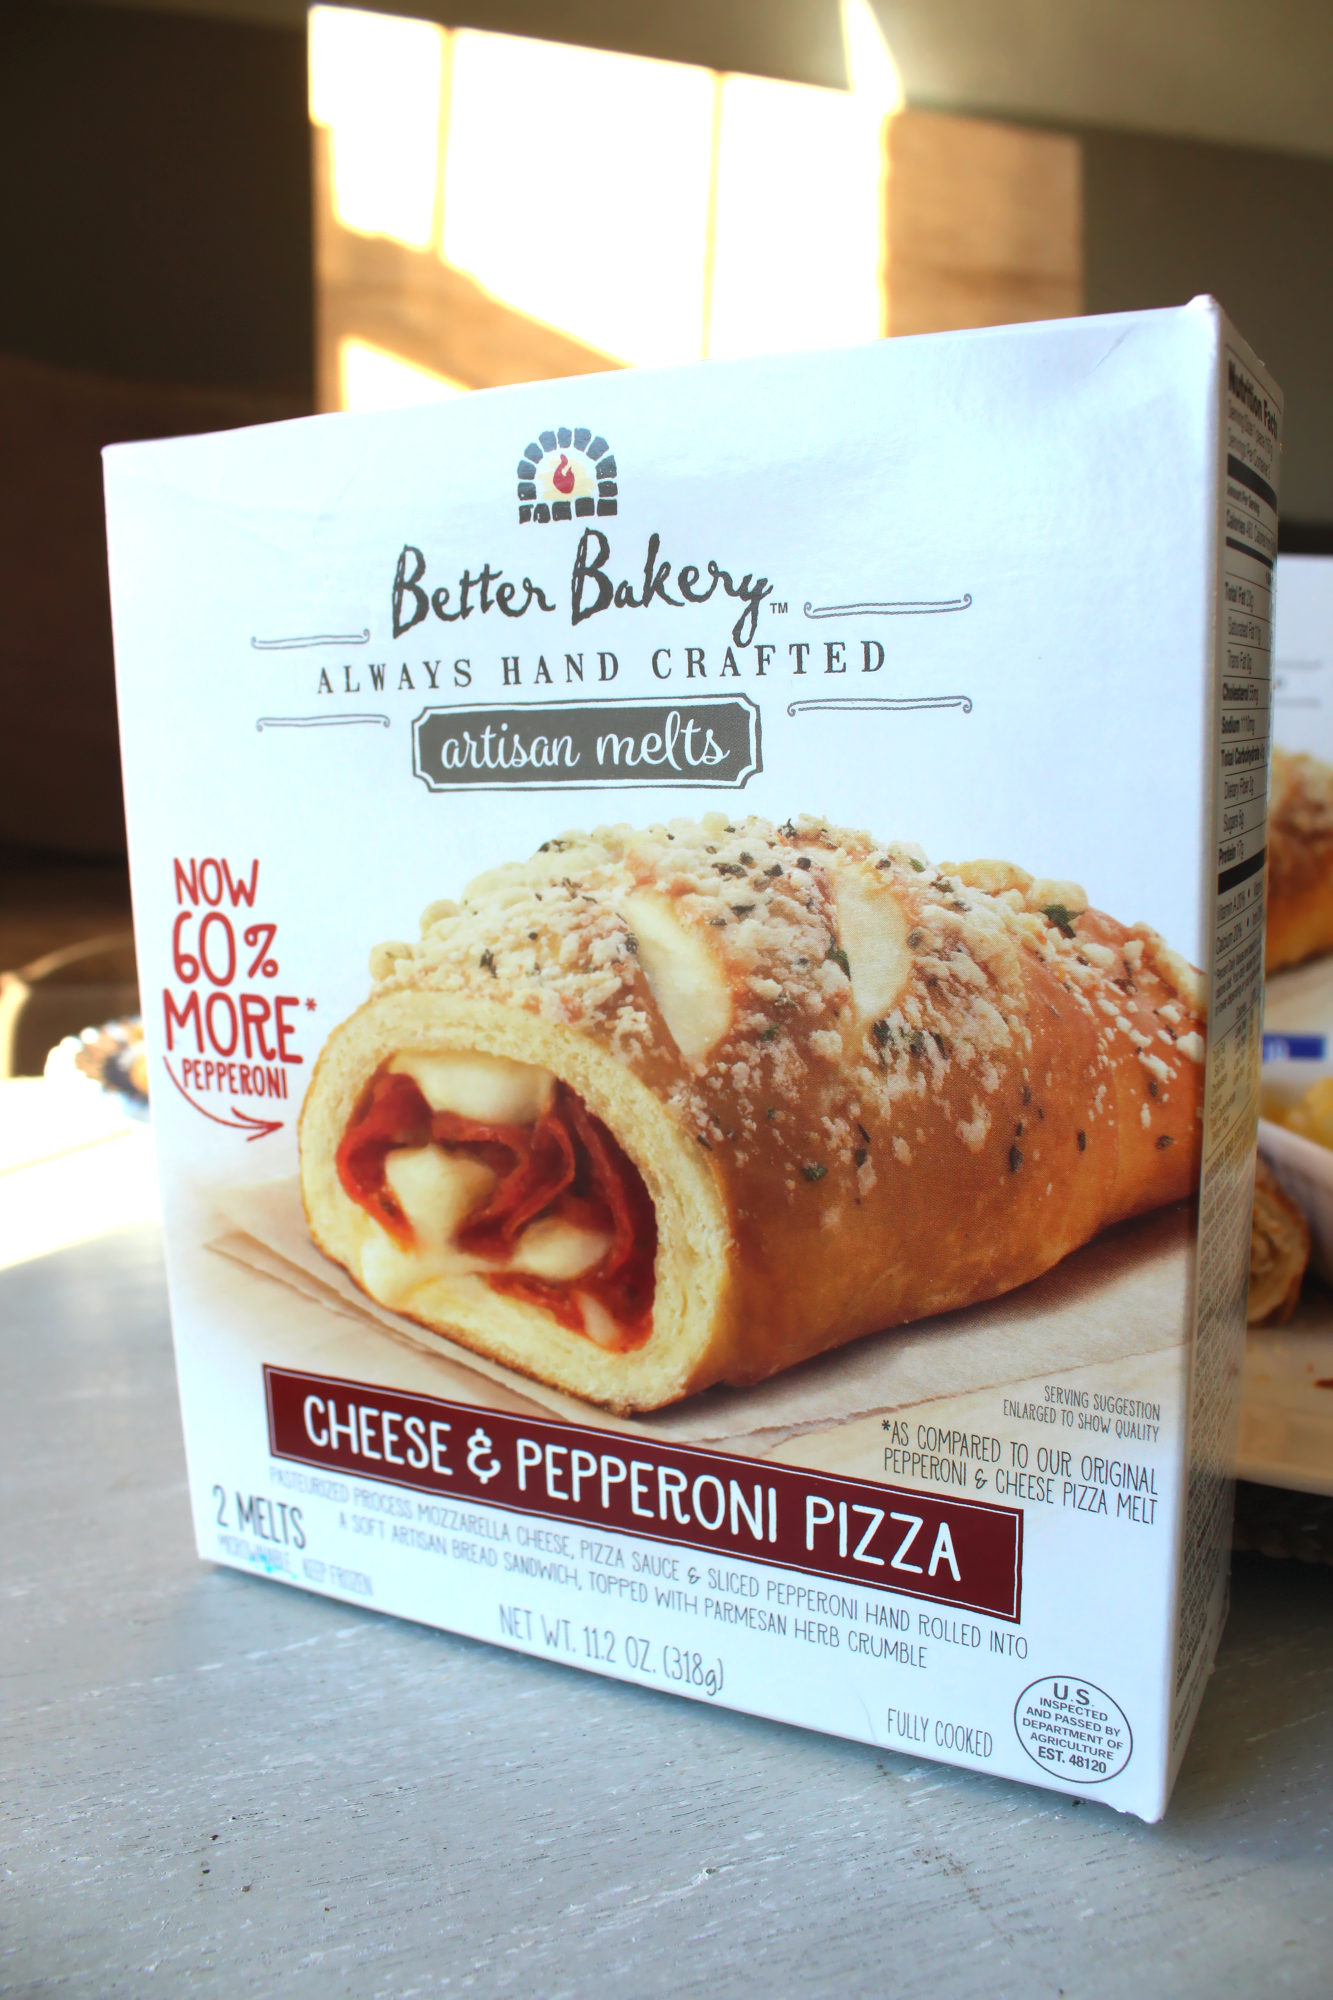
The  Cheese & Pepperoni Pizza kind  was also tasty! They are a great quick and easy lunch or dinner idea when you’re in a hurry.

Freezer Section

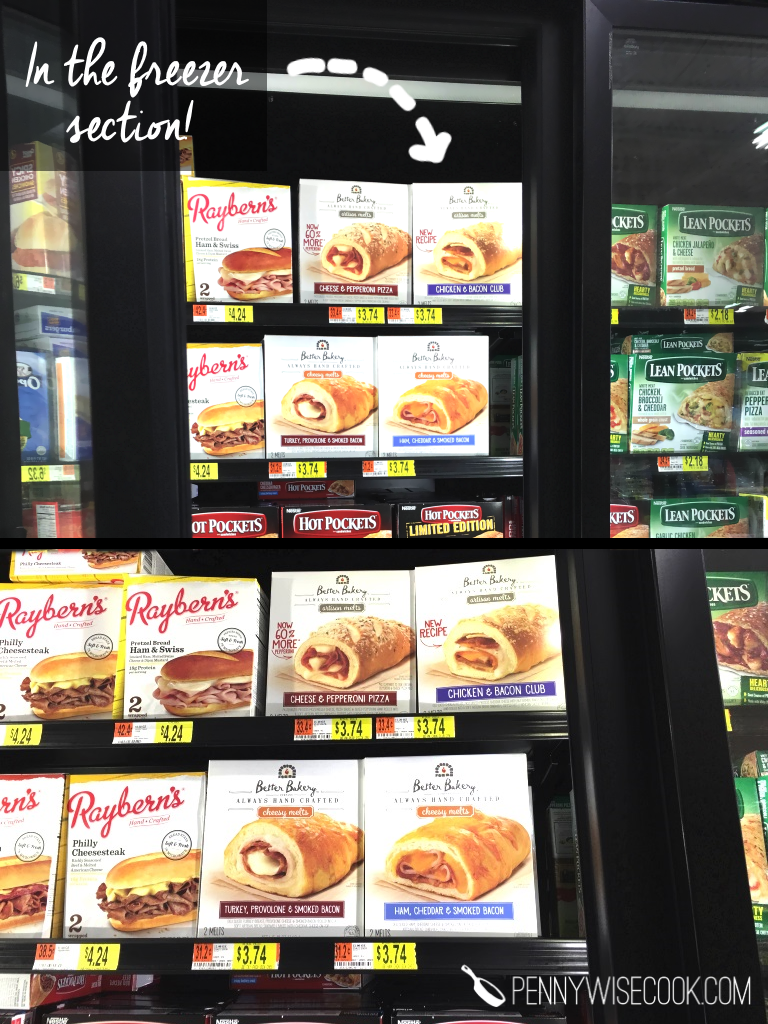
You can pick them up in the freezer section of your grocery store. I found them at Walmart! Better Bakery stands by it’s promise of “Always Handcrafted” with each sandwich hand cut, rolled, topped, and picked.

You can get a coupon for $1.50 off 1 Better Bakery Artisan Melts and locate a retailer near you, here!

To make those, it’s as easy as popping them into the oven or microwave. The recipe for the Cheesy Cauliflower is below! Here’s to the new year with successful resolutions!

Cheesey Cauliflower for post 1


Cheesy Cauliflower
Write a review
Print
Ingredients
  1. 1 (16 oz) pkg Frozen Cauliflower
  2. 1 c. Cream of Chicken Soup
  3. 1 c. shredded cheese
  4. 3 tbsp milk
  5. 1 tsp salt
  6. 1/4 tsp pepper
Instructions
  1. Preheat oven to 350°.
  2. Cook cauliflower according to directions. Place in small baking dish. Add salt and pepper.
  3. Mix together the soup, milk, and cheese. Pour and spread over cauliflower.
  4. Bake for 10 minutes.
Notes
  1. I tweaked this recipe a little. The original recipe called for an entire can of cream of chicken and more milk, but I found it wasn't need so I reduced amounts. Feel free to play with seasonings!
Adapted from Four Ingredient Cookbook
Pennywise Cook http://www.pennywisecook.com/

Like this post? SHARE it!

Related Posts Plugin for WordPress, Blogger...

Easy Fried Rice

Fried Rice 2


When my hubby and I were dating, he wouldn’t eat anything but cheeseburgers.

True story.

Date nights with candlelit quarterpounders? Pretty much. He didn’t like anything green, and he especially didn’t like anything foreign.

That is, until you sit him down at a place called Benihana and feed him fried rice. It’s the one thing “foreign” that I could always count on him to eat.

Thankfully he has outgrown most of his picky pants stage and likes to eat a variety of things. But that fried rice is still the only thing he’ll order at a Thai, Chinese, or Japanese place.

I started making this rice soon after we got married for two specific reasons. I just remembered another, so there’s really three.

1) It’s easy. It’s not something you have to think too much about. Just throw it all together in a skillet and boom!

2) It’s really quick. No need to slave over the stove all night.

3) Hubby eats it. Reason enough for me!

Fried Rice 3

This is the perfect meal or side dish to make with leftover rice. It’s best when the rice has been refrigerated and is cold. I have been known to make rice the night before just for this meal.

It really confuses my family.

And then they understand when we have this meal the next night!

Fried Rice 1

I make this with whatever frozen veggies that I can find on sale. Fresh veggies? Of course you can use them, too! It’s such a versatile and easy thing. You can’t mess it up. The variety that I got had sugar snap peas, green beans, red peppers, celery, mushrooms, broccoli, carrots, and onions in it.

Slap an egg in there with your cold rice and add some soy and teriyaki sauce and you have got a really tasty dish.

Here’s the way that I make it, but remember that you can add or take away whatever you’d like.

Simple Fried Rice
Why not make your own fried rice at home? It's simple, tasty, and easy on your wallet!
Write a review
Print
Ingredients
  1. 2 c. brown rice, cooked
  2. 1 (12 oz) bag of frozen veggies (stir fry mix is good)
  3. 2 tbsp olive oil
  4. 1 egg, scrambled
  5. 2 tsp minced garlic
  6. 1-2 tbsp soy sauce
  7. 1-2 tbsp teriyaki sauce
  8. salt & pepper to taste
Instructions
  1. Heat 2 tbsp olive oil over medium-high heat in large skillet.
  2. Add frozen veggies and cook until softened.
  3. Add garlic and cook until browned.
  4. Add egg and cook combining into veggies.Then add the cold rice.
  5. Fry over high heat. Add soy and teriyaki. Add salt & pepper to taste.
Pennywise Cook http://www.pennywisecook.com/

Like this post? SHARE it!

Related Posts Plugin for WordPress, Blogger...

13 Thanksgiving Side Dish Ideas

13 Thanksgiving Side Dish Ideas

There are years when Thanksgiving draws near and I completely go blank when coming up with a menu. There are always staples that everyone expects to be on the table each year, but sometimes you just want some inspiration. I have come up with some yummy side dishes in this post consisting of 13 Thanksgiving Side Dish Ideas. Check them out! 

P.S.- *whispers* You can really make these anytime of year!

Hashbrown Casserole

Get a little taste of the country with Easy Cheesy Hashbrown Casserole. Comfort food at it’s best!

Creamed Spinach

Your kiddos might even enjoy this Cheesy Creamed Spinach this year!

Bacon Green Beans

Can you go wrong with this Bacon and Green Beans Saute?

Sweet Potato Casserole

Is Thanksgiving even Thanksgiving without Sweet Potato Casserole?

Butternut Squash

This Roasted Apple Butternut Squash with Maple Cardamom Glaze looks amazing!


Slow Cooker Green Beans

Save yourself some time with these 2-Ingredient Slow Cooker Green Beans. SO tasty!

Roasted Broccoli

Here’s a healthy spin. Roasted Broccoli is an easy side dish!

Loaded Potato Cheesecake

This one is to die for. Loaded Potato CHEESECAKE! Need I say more?

Dinner Rolls

What’s a Thanksgiving feast without rolls? Check out these Perfect Wheat Dinner Rolls!

Broccoli Casserole

This Super Cheesy Broccoli Casserole looks so tasty!

Twice Baked Cauliflower

This Twice-Baked Cauliflower is great for those watching their carbs!

Mashed potatoes

And of course, you can’t forget the mashed potatoes! This recipe for Roasted Garlic Mashed Potatoes is a great addition to turkey and dressing!

Traditional Green Been Casserole

You can’t go wrong with Traditional Green Bean Casserole!


Like this post? SHARE it!

Related Posts Plugin for WordPress, Blogger...

Family Christian Dress Like A Veggie Event

veggie-tales-event2[1] copy

I cook with them quite often, but I must admit that I’ve never dressed like one. If the “you are what you eat” thing were true, I would most definitely be an edamame bean.

Or a cob of corn.

Or broccoli.

Honestly, I would probably be a new breed of veggie. Like a tomcobbrocame. This would be pronounced: Tom-cob-broc-ah-may. I’m so good at this that I could start a new language. Veggie language! YES!

Let’s move on shall we?

I know you guys are always looking for a good deal and also for a FREEBIE so I wanted to share this awesome contest happening through Family Christian stores! This may take some creativity so put your thinking caps on.

We are huge VeggieTales fans around here. I have been since I was young. I sound like an old fart referring to when I was young, don’t I? I’ve been a fan for a long time, but not too long if you know what I mean. ANYWHO! Family Christian is proud to announce their Dress Like A Veggie Event at ALL of their locations!

Here are the details:

When: Friday, October 31st 2014
Where: At ALL Family Christian Stores (find a location near you)
What to do: Dress like a veggie, take a photo in-store, post it to their Twitter and/or Instagram using the hastag #FCVeggies and tagging @FamilyChristian

The grand prize winner will receive a $250 gift card to Family Christian. FIVE runner ups will receive $50 appreciation certificates.

Your child does NOT have to dress like a VeggieTales veggie, just any veggie to qualify. You must have at least ONE child dressed up to enter the contest. 

And ALL children that stop by during the Dress Like A Veggie Event will receive small goodies!

You can find some great costume inspiration on this Pinterest board. I know you guys are creative so see what you can come up with! This is so exciting, I know my girls are going to be stoked.

They’ve always wanted to dress up like a cucumber you know…they just never knew it.

This post is written by me on behalf of myself and Family Christian Stores. All opinions expressed are 100% mine.


Like this post? SHARE it!

Related Posts Plugin for WordPress, Blogger...

Parmesan Peas

Parmesan Peas


I’m not exactly sure what it is about peas that makes them seem so unappealing. Did you see what I did there? For most kids I think it may be because they are green. Both of my girls have a strong aversion to green food no matter what it is. So when my oldest came home from school one day and told me that she liked peas, you can just imagine my confusion. 

1. She ate peas. Willingly. Without bribery or threatening. 

2. She ate peas at school of all places. This is also the place that she discovered she likes green beans. (Which I promise are the only two green foods that she likes.) I mean. What are the schools doing to their green foods to make them so enticing? They have new standards for how healthy things have to be so I know it’s not that they are slathering it all in butter. 

3. I gotta come close to making them at least half as good as the school. Woah. What is this world coming to with the statement that I just made?

I came across this recipe for Parmesan Peas and I figured it was worth a shot. If it doesn’t work then I may need to call my daughter’s cafeteria. Again. What weird statements I’m making.

PArmesan Peas1


I liked these peas, but I have a feeling that they weren’t as amazing as my daughter is used to. I will be tweaking these a little as I make them more. But for the most part, they are really tasty! The most important tip that I can give is to make sure that you serve them immediately after making. They do not taste the same after they get cold and sit there for a while. Just from my experience anyways. 

Also, be sure to use freshly grated parmesan and not the powered stuff. It works, but is not near as good.

Parmesan Peas
Write a review
Print
Ingredients
  1. 16 oz Bag of Frozen Peas or 4 cups Fresh Peas
  2. 1 tbsp Butter
  3. 1/2 cup Freshly grated parmesan cheese
  4. Little squeeze of lemon juice
  5. Dash of pepper
Instructions
  1. Fill a big saucepan 2/3 of the way full and bring to a boil.
  2. Add the peas and cook for 3 minutes if fresh and 1 minute if frozen. This will be your call as to if you think they are ready enough. I like mine to be really tender.
  3. Remove from heat and save a little amount of the cooking water. Drain.
  4. Put them back in the saucepan and add a little of the reserved water. Add the butter. Stir until melted.
  5. Stir in the parmesan cheese and make sure that all the peas get coated.
  6. Squeeze a tad of lemon juice and add a dash of pepper.
  7. Serve immediately!
Adapted from Ezra Pound Cake
Pennywise Cook http://www.pennywisecook.com/

Like this post? SHARE it!

Related Posts Plugin for WordPress, Blogger...

Fun and Easy Crafts With Olives!

Olive Art

 My oldest has only recently figured out that she likes black olives. It was by mistake that she realized that she did, but I’ll take what I can get. She grabbed a big handful of “grapes” only to come tell me “momma, those aren’t grapes”. Thanks honey for letting me know. I fully expected her to leave them on my plate while saying the everso common “I don’t liiiiiiiike it”. To my surprise, she ate every one of them. Small victories people. Small victories. 

I haven’t done just a lot to foster her new relationship with black olives, but somehow it’s blossomed. She now gets them on her sub sandwiches and even requires them on her pizza. I just grin ear to ear when I hear her telling anyone about her love for olives. My husband can hardly believe it. 

I got to pick up some California Ripe Olives in order to create to super duper cute little characters. I was just thrilled at how easy and adorbs they turned out. But I honestly think that the very best part was eating the creations. There is just something about cheese and olives man. A match made in hors d’oeuvres  heaven. The versatile California Ripe Olive is the ideal ingredient for home chefs and food artists. Not that I consider myself a chef or a food artist even, but they are pretty versatile and are something easy I can add to most meals. 

 Olive Bumble Bees 1

California Ripe Olives are kid-friendly and the perfect option for creating tasty and creative food art for the back to school season. Think about lunch boxes and after school snacks. How cute would it be to put one of these little bumble bees in your kiddos lunch box? Sweet surprise at the lunch table. These may have been my favorite olive creatures.

Olive Penguins

 California Ripe Olives provide a pop of color, texture, and flavor to a variety of dishes—including fun and delicious food art. Like these penguins for instance. Kids won’t even realize that they are eating healthy! These little guys were so easy to make and even tastier to eat! California Ripe Olives are the perfect pantry staple. They are good right out of the can, but mixing it up with little guys like this makes them even more fun.

Olive Spiders

 California Ripe Olives are grown on over 1,000 multigenerational family farms that crisscross the warm inland valleys of California and processed by two family-owned canneries. I love knowing that what I’m feeding my family came from just another family. There’s just some kinda comfort that I get from family-owned companies. Aren’t these little spiders so cute? Perfect for Halloween since it’s just right around the corner!

There is a nifty sweepstakes happening and you’ll want to enter before it’s too late! The California Ripe Olives Back-To-School Sweepstakes runs August 18- September 12th. Follow California Ripe Olives on Facebook, visit the custom tab, and enter once per day for the chance to win an Amazon Kindle Fire HDX!

Want to make the cute little olive art from above? Here’s how:

California Ripe Olives Spiders
Write a review
Print
Ingredients
  1. California Ripe Olives
  2. Cream Cheese
  3. Round Crackers
Instructions
  1. Spread a little cream cheese (or dip of your choice) onto a cracker.
  2. Cut an olive in half and place one half on the cream cheese.
  3. Using a knife, cut the other half into 8 small thin pieces.
  4. Place the small pieces around the "body" olive on the cracker.
  5. Tah-dah!
Notes
  1. This one is super easy and they taste amazing! Perfect for Halloween!
Pennywise Cook http://www.pennywisecook.com/
California Ripe Olives Penguins
Write a review
Print
Ingredients
  1. California Ripe Olives
  2. 1 Big Carrot, sliced
  3. Cream Cheese
Instructions
  1. Cut a small wedge out of the carrot and set aside.
  2. Cut an olive just to the middle creating a small gap. Fill with cream cheese.
  3. Take your small carrot wedge and poke it into a new olive.
  4. Assemble your penguin but sticking a toothpick first down the olive with the beak (carrot wedge), then through the cream cheese filled olive, and then into the leftover carrot slice.
  5. Tah-dah!
Notes
  1. This one can get kinda messy with the cream cheese involved, but after assembling you can use a paper towel to wipe off the excess cream cheese.
Pennywise Cook http://www.pennywisecook.com/
California Ripe Olives Bumble Bees
Write a review
Print
Ingredients
  1. California Ripe Olives
  2. Cheddar Cheese Slices
  3. Provolone Cheese Slices
  4. Cream Cheese
Instructions
  1. Slice your olives into 4-5 sections.
  2. Using a small circular object, cut out circles to place between the olive slices.
  3. Place your cheese circles between the olive slices and then stick a toothpick down the middle to keep it all together.
  4. Using the same circular object, cut out circles from the provolone cheese.
  5. Place a small dab of cream cheese on the back of the top slice.
  6. Stick the provolone circles to the back like wings.
  7. Tah-dah!
Notes
  1. I just used things that I had on-hand to cut out the circles. I believe I used the bottom of a piping tip and it was just the right size.
  2. It doesn't have to be perfect! This is your creation to look however you'd like!
Pennywise Cook http://www.pennywisecook.com/
 

I was selected for this opportunity as a member of Clever Girls Collective and the content and opinions expressed here are all my own.


Like this post? SHARE it!

Related Posts Plugin for WordPress, Blogger...

Easy Slow Cooker Green Beans

green beans 1

Today’s recipe is one that came from my grandmother! She has always been innovative when it comes to cooking and making things easier and tastier. This one is one that she came up with when having to feed a crowd. Seems like she is always having a get together with family and friends. It doesn’t matter what time of day it is when I stop by to see her, she will offer me FOOD! That’s what grandmothers are for, right?

So this recipe. It’s SO easy and will feed a crowd. It’s easy on the wallet as well. You can make this to take to an event or serve right out of the slow cooker when you have folks over.

It’s a fix it and forget it kinda side dish that honestly, I could eat as a meal. My Addie doesn’t think fond of my veggies, but this is her absolute favorite. It’s almost bribe-worthy. Almost, I mean come on, they are green beans.

It starts with everything above. 1 LARGE can of green beans. It’s a 101 oz or 6 lbs, 5 oz can that you can get at Walmart, Kroger, or most grocery stores. Sam’s Club usually has the best price on these around $3.68 (ish). You will also need a 12 oz package of country ham seasoning pieces. This is fairly inexpensive too. I got this package for just $1.88. That makes this entire side dish around $6 bucks total. Not bad!

green beans 2

Ok, so start by opening up your can of green beans and draining out EVERY LAST DROP OF WATER. This is essential. The green beans will create their own water while cooking and if they have too much moisture, they will become mushy. Draining them gives just the right amount of juice.

green beans 3

This is so hard so far, right?

Refrain from complaining too much.

green beans 4

The country ham is already in pieces, but I usually cut it into smaller pieces. I also DO NOT remove the fat from the pieces. You could, if you were really serious about fat, but honestly it gives it even tastier flavor.

green beans 5


We had these last night and Addie was so excited to be getting her favorite beans. I’m pretty sure that I had 3 helpings and many bites of them while putting the leftovers away. Do you do that? It’s hard not to steal a few tastes while getting it all prepared for the refrigerator. Even though I was stuffed to the gills!

Let me know if you try these!

Slow Cooker Green Beans
Serves 15
A simple 2-ingredient slow cooker recipe for making A LOT of tasty green beans.
Write a review
Print
Prep Time
10 min
Total Time
8 hr 10 min
Prep Time
10 min
Total Time
8 hr 10 min
Ingredients
  1. 1 (6 lb, 5 oz) large can of Green Beans, DRAINED
  2. 1 (12 oz) package country ham seasoning pieces, cut into small pieces
  3. Pepper to taste
  4. Garlic powder to taste (optional)
Instructions
  1. Place drained green beans and chopped country ham pieces into slow cooker. Set to low and cook 8 hours.
  2. After a few hours, add pepper to taste.
Notes
  1. I usually add a little garlic powder to mine. I just eye ball it.
  2. You can also cook these on high for 4-5 hours in a pinch.
  3. You could also make these overnight for a gathering the next day if you wanted to. No one would ever know they cooked while you slept!
Pennywise Cook http://www.pennywisecook.com/

Like this post? SHARE it!

Related Posts Plugin for WordPress, Blogger...

Easy Homemade Croutons

Happy Veteran’s Day! I am so very thankful for the men and women who served our country to give us our freedom. I don’t think that we show this enough all year. It’s a huge sacrifice to put your life on the line for people all around the country that you don’t even know and I am eternally grateful for those who have done so!

I’m a bit of a crazy salad person. I have been ever since high school. I love the crunch of crisp lettuce mixed with creamy dressing and other tasty components that go along with a salad. When we’re picking out a place to eat, my daughter will judge if I will like a restaurant by if they serve salad or not. And then she’ll say “Mom, you’ll love this place. They have salad!”. Thanks darling…

While I do like my salad, I also really like croutons. Like, really really like croutons. They are kinda like potato chips to me. Once I start, I can’t stop.

Do you have kiddos who don’t like the crust on their sandwiches? Or perhaps you make things that require you to cut off the crusts.

For instance:
Grilled Cheese Rollups
3-Ingredient Lady Fingers
White Bread Cinnamon Rolls

It’s recycling in a way. You can even freeze the crusts and make croutons later if you don’t have time right away. Just thaw them out before preparing to make croutons. How awesome is that?

Try to line them up and then just cut them into smaller pieces like above. They already look just like croutons don’t they? And in minutes they will be! Preheat the oven to 400°.

Spread them quite evenly onto a cookie sheet. Spray them well with olive oil cooking spray or butter cooking spray like me. Sprinkle with seasonings of your choice. I used italian seasoning and garlic powder.

Bake for about 4-8 minutes depending on your oven and you’re done. Store them in an airtight container and pop them out when you’re ready to eat a salad.

Or just eat handfuls of croutons…

….I don’t do that.

…Ok, maybe I do. Don’t judge.

Easy Homemade Croutons
Recipe Type: Salad Topping, Snack
Author: Pennywise Cook
Prep time:
Cook time:
Total time:
Here’s a double duty tip when you have leftover bread crusts. Make up a batch of healthy and homemade croutons!
Ingredients
  • Crusts cut off the bread of your choice
  • Seasonings of your choice (1 tsp italian seasoning and 1/2 tsp garlic powder are great!)
  • Cooking Spray
Instructions
  1. Preheat oven to 400°.
  2. Cut crusts into smaller square pieces or desired size.
  3. Spread evenly onto a cookie sheet.
  4. Sprinkle with seasonings.
  5. Bake for 4-8 minutes watching during baking to make sure they don’t burn. Mine took about 8 minutes.


Like this post? SHARE it!

Related Posts Plugin for WordPress, Blogger...

Homemade Tortilla Chips: 3 Ways

First of all, just let me say HELLO THERE! I’ve been just a little preoccupied lately with some personal things and have neglected you. I know…bad blogger, bad. But I’m going to work real hard to make it up to you…I promise.

I thought I’d start this back-to-school season with a simple recipe for something that everyone likes, tortilla chips! The reason that I ever made these in the first place can be credited to my husband. Bless his heart, he almost never gets an urge to cook anything. So when he came to me and said he wanted to “cook up” some homemade tortilla chips, I was ON IT!

There could not be a simpler thing to make that tastes so very close to what you buy in the store. And they are so much cheaper this way as well. One big bag of corn tortillas will run you between $1- $2, but will make the equivalent to probably 2-3 bags of tortilla chips from the store.

Plus, YOU get to take the credit for calling them homemade!

Here are 3 different ways to make your crunchy corn tortilla beauties. I’ll tell you my favorite when we’re done…

As you can probably imagine, this is the quickest and easiest method for making your chips. No preheating, no baking sheet, no chips, and no oil. Are you paying attention? Of course you need chips, you silly head. Get it together!

Just making sure you’re paying attention…

You’re going to need to make these in batches, a tortilla or two at a time.

1) Cut the tortillas into desired chip size.

2) Place tortilla pieces evenly (not overlapping) on a large microwave-safe plate.

3) Heat 45 seconds. Remove and flip. Heat another 45 seconds.

4) Remove from microwave, salt (if desired) and let sit for a minute or two. They will crisp even more!

Voila! It’s simple. Each microwave is different, so your microwave may need less or perhaps more cooking time to get them just right. You want the chips to brown, but not burn so be sure to keep your eye on the batches as you make them.

Ok, I said I was going to wait until the end to tell you my favorite method, but I’m sure by now that you realize I have no patience. And if you didn’t know that, you do now! This was my favorite method. The perfect crispness with a light and airy feel. These taste most like what you buy at the store. To me anyways..

Let’s do this:

1) Preheat oven to 350°.

2) Cut your tortillas into desired size.

3) Place pieces evenly over baking sheet. No need to grease it.

4) Bake for 6-8 minutes. Flip chips over and bake for another 6-8 minutes until golden and crispy.

5) Remove from oven. Season and serve! They will crisp a little more as they cool.

Once again, you’ll want to be sure to keep an eye on them. If they are turning dark brown, they are close to burning. You want them golden, not brown.


The last method is from your skillet or fryer! This is still a really simple way to make them. It’s also fairly quick. It’s just not as healthy as the other methods. My husband liked these the best!

1) Cut tortillas into desired size pieces. Place a few paper towels on a large plate to dry the chips when they finish frying.

2) Pour enough oil of choice (I used vegetable oil) into skillet that it goes 2/3 the way to the top. You need enough for the chips to swim in. Heat to medium-high. I didn’t check the temperature of my oil, I just made sure that the oil bubbled when I placed my wooden spoon in it.

3) Place 4-5 chips at a time into the oil. You don’t want to overcrowd, so make sure they aren’t overlapping. Fry them for approximately 2 minutes flipping them over to brown both sides if desired. I did this at first, but got lazy and quit flipping eventually. The chips lived.

4) Place on paper towels and continue frying in batches.

Voila!

All of these methods can be adjusted based on your microwave, oven, and oil temperature. You may even come up with tricks and techniques to make them better. This is just a good starting point for making your own homemade tortilla chips.

Let me know what you think about these in the comments below! 🙂


Like this post? SHARE it!

Related Posts Plugin for WordPress, Blogger...

Summer Cucumber Salad

There are only about a thousand reasons to like summer. Sun, fun, vacation, strawberries, and the list could go on and on. But one of my favorite things are the cool and crisp summer salads. Cole slaw is always a great addition to any summer cookout, but is there anything cooler than a cucumber? Well sure, but they don’t have a saying about those things so we’ll stick with the chillin’ cucumber.

I was delighted to find a cucumber in my garden the other day. I have been waiting for them to grow so I could start adding them to my salads. If your garden is brimming with cucumbers, you might like this Summer Cucumber Salad recipe. There are many variations of this type of salad, so don’t feel like you have to follow it to the T. But this is my favorite combination of flavors.

I was at a family get-together a little while back when my stepsister brought a salad like this. I asked her what she put in hers and I remember thinking how simple it was. It was so tasty! Within a few days I had made my own and within a couple of days it was gone. I ate the entire thing myself.

I have no shame in admitting that.

After all, we’re talking about healthy foods here, right? Not chocolate cake.

It took me a few times making this to perfect the combination of flavors. And you may want to give or take some of the ingredients to get it to your liking. Also, might I suggest making this up the day or night before an event. The longer the cucumbers and onions get to marinate in the vinegar mixture, the better they taste. And oh do they taste lovely!

My family isn’t really the cucumber-eating type. They don’t eat onions that aren’t cooked and you can also bet they won’t munch on anything marinate in vinegar. But hey, more for me! I’ve probably eaten 4 or 5 whole Summer Cucumber Salads by myself this summer…

Wow, it sounds a lot more when typed out…

Summer Cucumber Salad
Recipe Type: Side Dish, Salad
Author: Pennywise Cook
Super easy summer ingredients come together to make a tasty, cool, and crisp summer salad!
Ingredients
  • 2-3 Cucumbers, peeled & cut into halves or quarters
  • 1 Medium Red Onion, cut into chunks and then peeled
  • 1 can Whole Kernel Corn, Drained
  • 1/4 c. + 3 tbsp Apple Cider Vinegar
  • 3 tbsp Olive Oil
  • 1/4 tsp Salt
  • 1/8 tsp Pepper
Instructions
  1. Place all ingredients into a medium bowl and cover with plastic wrap. Allow to marinate overnight or for at least 2 hours. Serve!
Notes

Some people like to also add tomatoes cut into chunks to this dish as well!

Feel free to use any onion for this. I just like to use red onion because it adds pretty color!

I would eat this within a few days of making. The vinegar breaks down the veggies.


Like this post? SHARE it!

Related Posts Plugin for WordPress, Blogger...