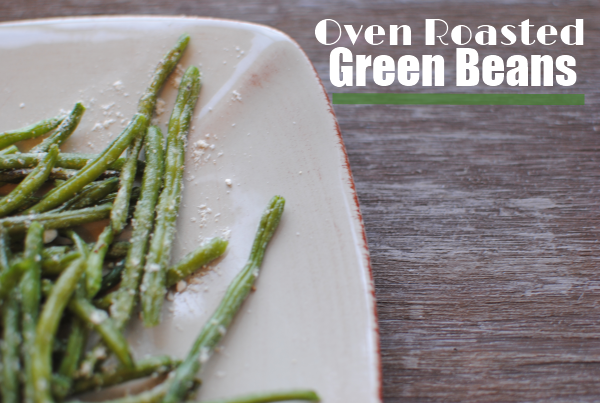
Oven Roasted Green Beans

On any given day here in our household, anything green won’t be eaten by the kiddos and sometimes even by the husband.

What is it about the color green that turns folks off?

It’s quite sad that it’s gotten such a bad rep when it’s one of the most nutritious colors to eat. This just makes the challenge for cooks like me to make those things that are green taste good enough to eat. Both of my girls wouldn’t touch green baby food. You know, those green peas and green beans all pureed and mushy. I can’t say that I blame them. I don’t think I’ll be indulging in a big ole jar of mushy green peas myself. When we went to England, that was a common side dish there. Of course I had to try it while I was there. But I was over it after my first taste.

With a bag of frozen green beans in my freezer, I decided it was time to use those babies up. I went for the roasting option hoping that they would taste good enough for the family to enjoy. After all, they always like my roasted broccoli and roasted cauliflower.

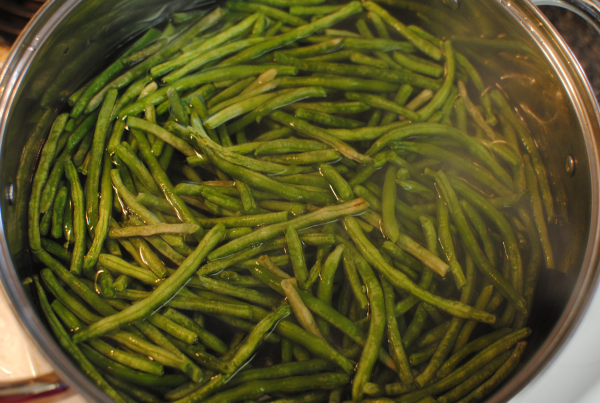
I started by parboiling the green beans straight from frozen. I wanted to get them thawed and mostly cooked and then finish them in the oven. I was surprised at how quick these cooked.

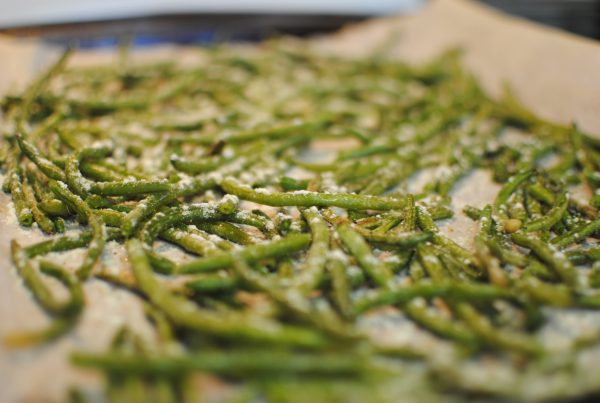
Then I drained them and spread them out onto a baking sheet lined with parchment paper. A little olive oil, salt, and pepper and into the oven they went.

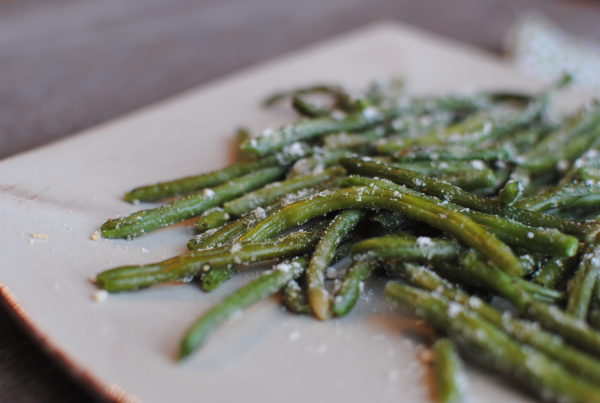
After a nice stint in the green bean sauna (I know my analogies are ridiculous), they came out just perfect. Just roasted enough that some of them had a crunch, but still soft like you’d expect.

And what would make anything roasted taste better than parmesan cheese? Not a thing. A good sprinkling of that and you are set with the tastiest green beans this side of Mason Dixon Line.

When I was finished with these, I took one of them to my picky daughter for her approval. She gave me a look when she saw how green it was and I was fully expecting her to pass on the taste test.

Then it came….

She let out a “mmmmmm”. And I knew I was onto something. We had these with our dinner and they were a big hit.

Even though they were green. 🙂

Oven Roasted Green Beans
Recipe Type: Side Dish, Vegetable
Author: Pennywise Cook
Try a new take on everyday green beans by popping them into the oven to roast. Here’s how!
Ingredients
  • 16 oz Pkg Frozen Extra Fine Green Beans
  • 1 tsp Salt
  • 1/2 tsp Pepper
  • 2 Tbsp Olive Oil
  • 1/4 c. Parmesan Cheese
Instructions
  1. Preheat oven to 425°.
  2. Bring pot full of water to boil. Add green beans and boil for 5 minutes. Drain and dry.
  3. Lay green beans on baking sheet lined with parchment paper in a flat layer.
  4. Drizzle with olive oil and sprinkle with salt and pepper.
  5. Cook for 10 minutes. Remove from oven and toss. Return to oven for additional 5 minutes.
  6. Top with parmesan cheese and serve immediately!


Like this post? SHARE it!

Related Posts Plugin for WordPress, Blogger...

Simple Sausage Mac

Are you ready for Halloween yet? Well you better get that way because it’s on Wednesday! Can you really believe that we have already reached the end of October? I’d really love for someone to explain to me where the rest of this month has slipped away to. Maybe I’m just getting old or maybe time is speeding up. Either way, I’m going to hold on tight.

The weather is finally starting to cool off around here. I absolutely love the fall. Well, let me just say I love being cozy. I hate being cold, but I love being cozy. I’ve got a bunch of warm and comforting recipes coming up that I can’t wait to share with you. The fall is really when I have the most fun cooking. You can make up a big pot of something that sticks to your bones.

One of the first “comfort foods” that comes to mind practically anytime I hear that phrase is macaroni and cheese. It doesn’t get much more comforting than that. I’ve seen mac & cheese turn a frown completely upside down! Especially when it’s homemade. The boxes are good, but homemade is better.

And you know that here in the south, macaroni and cheese is considered a vegetable at most meat and threes….

The only issue that I’ve ever had with macaroni and cheese is that it’s so good that I eat too much. Well that and the fact that it needs a little bulking up so that it can be worthy of being called a meal. After all, we wouldn’t want to make mac & cheese only a side dish. It’s worthy of being the main attraction with a little adjustment.

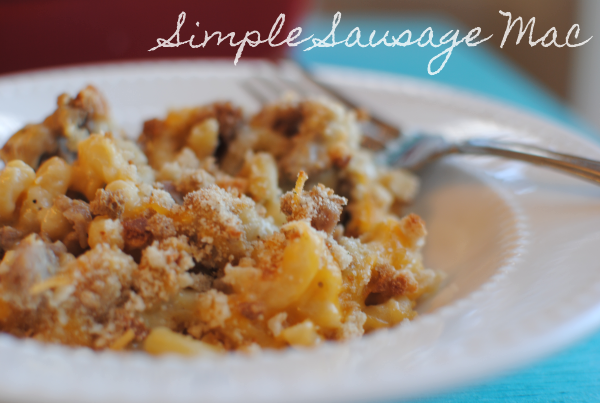
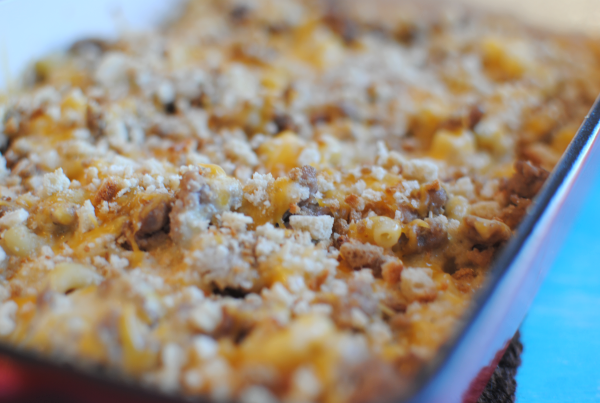
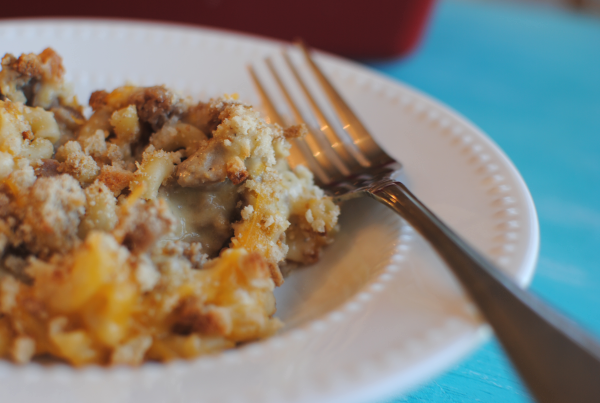
One of my favorite things about this macaroni and cheese is the secret topping. No longer a secret because I’m about to share it with you! We’re heading for Thanksgiving and there will be deals out the wazoo on stuffing mix. THAT my friend is a little something extra that can give macaroni and cheese a little spice. Breadcrumbs are great, but stuffing mix adds a little more crunch and even some nice flavor. I used Stove Top’s version for this. You can use whatever you’d like of course.

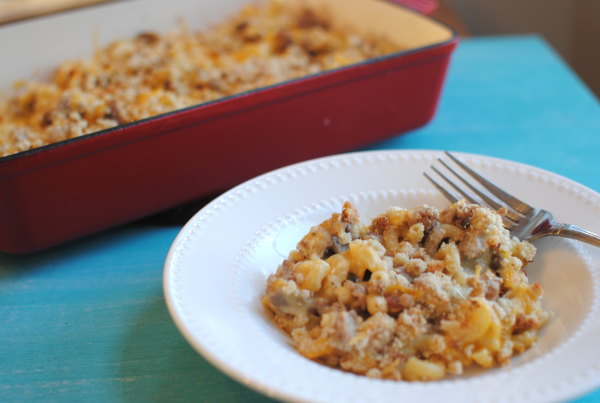
I bulked this up with sausage to give it a little flavor and to make it meaty. So yummy and extra comforting. I’d almost make this for a brunch!

Recipe adapted from Butter Busters Cookbook.

Simple Sausage Mac
Recipe Type: Side Dish, Main Dish
Author: Adapted from Butter Busters Cookbook
Bulk up your everyday mac & cheese and make it meaty. Perfect for dinner any night of the week!
Ingredients
  • 1 lb Turkey Sausage, Browned and Drained
  • 3 tbsp Melted Butter (light)
  • 1 and 1/2 tbsp flour
  • 1/2 tsp salt
  • 1/2 tsp pepper
  • 2 cups Skim Milk
  • 1 tbsp Melted Butter (light)
  • 2 cups Elbow Macaroni, Cooked
  • 1 tbsp Onion, Grated
  • 1/2 tsp salt
  • 1/4 tsp pepper
  • 2 cups Reduced fat Shredded Cheddar Cheese
  • 1/2 c. Crushed Cubed Style Stuffing Mix
Instructions
  1. Preheat oven to 350°.
  2. Combine 3 tbsp melted butter, flour, salt, and pepper in a small sauce pan. Slowly add skim milk and whisk well. Bring to boil, then lower temp until thickens. Set aside.
  3. Spray a 2 quart baking dish with non-stick cooking spray. Place half of the macaroni in the dish. Spread half of the cooked sausage over the noodles. Sprinkle half of the grated onion, salt, pepper, sauce, and cheese. Repeat layer. Drizzle 1 tbsp melted butter over top. Sprinkle with remaining cheese. Sprinkle crushed stuffing over the top. Cover and baked for 30 minutes. Then uncover and bake an additional 10 minutes.

Like this post? SHARE it!

Related Posts Plugin for WordPress, Blogger...

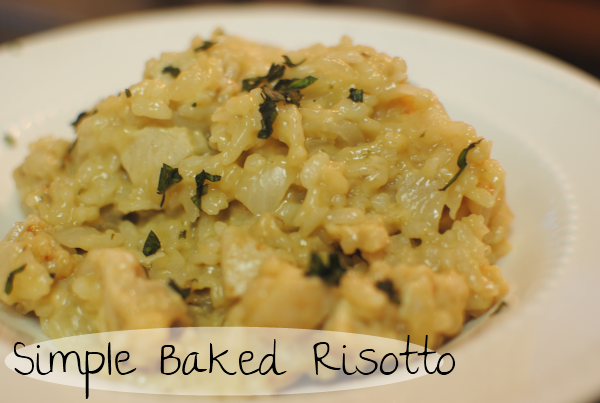
Simple Baked Risotto

Please excuse the incredibly horrible picture. Once again, it was another night pic with horrible lighting. We’re going to have to start eating dinner at lunchtime!

Rewind back a few years. I’m sitting in my living room watching (a favorite of our’s) Hell’s Kitchen. Like most episodes, all I hear is screaming about the risotto. But in my head, I’m thinking what in the heck is risotto? Maybe I’m just a bit sheltered or perhaps it’s not common, but I had never ever heard of it before. To me, it seemed like a bunch of rice.

In reality, that’s really all that it is. Just a really creamy and rich Italian rice that has to be stirred a lot. Creamy you say? Yes, creamy because of cheese and broth. Are you listening yet?

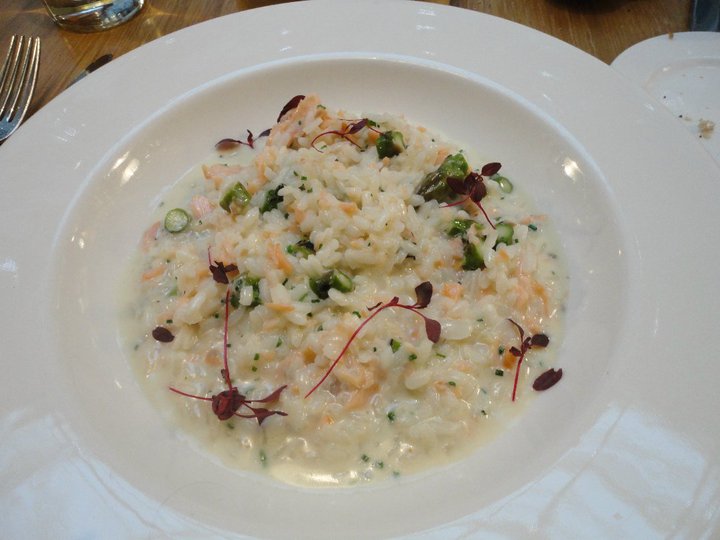
It wasn’t until I took a trip to England that I got to actually enjoy a bowl of creamy risotto. It was at this glorious place that I got to try it. This is the Piazza inside the Corn Exchange in Leeds. It is one of the most beautiful places that I’ve ever stepped foot inside. Starting in the 1800’s as a place for the trading of corn, it’s now a popular shopping center with a fine dining restaurant down below.

This is a picture of the Smoked Salmon Risotto with Chargrilled Asparagus that I had when we ate there. Doesn’t it look divine? My risotto didn’t look quite as amazing, but it did make me reminisce a bit about my trip.

Here we were watching the changing of the guards at Buckingham Palace. One of the coolest experiences that I may ever have! I even messed with a few of the fuzzy-headed guards while we were there. In case you were wondering…..no. They did not move a muscle.

If I could, I’d be back in England in a heartbeat. So much history and interesting places to see. Oh yeah, and the food was incredible too!

Risotto is generally cooked in large skillet and tended to for a while. I just don’t have the patience, so I took the easy way out…..in the oven. The entire family loved it! I was complimented not once, but twice for this one (it’s a big deal at our house). The version that I made ended up being the main course since I put chicken in it. Though for many, it might just be a side dish. I did take a very big shortcut with this. I used Tyson grilled chicken cubes from the refrigerated section of the store. You could also use a rotisserie chicken if you want to pull it off the bone. Or perhaps just cook up your own chicken breast. Either way, chicken adds a meaty touch.

I don’t consider myself to be an expert at risotto (or anything dish at that, well maybe pb&j). I’ve got some perfecting to accomplish on this one for sure. But it sure is tasty work!

Recipe adapted from My Recipes.

Simple Baked Risotto
Recipe Type: Side, Main Dish
Forget stirring, whip up creamy risotto by utilizing the oven instead of your elbow!
Ingredients
  • 1 and 1/2 c. Arborio Rice (or other short grain rice)
  • 2 cups cooked and cubed chicken
  • 1 small onion, chopped
  • 2 Minced Garlic Cloves
  • 1/2 c. White Wine
  • 2 and 1/2 c. Chicken Broth
  • 2 tbsp Butter
  • 3/4 tsp salt
  • 1/8 tsp pepper
  • 1/2 tsp Italian Seasoning
  • 1/2 c. Parmesan cheese
  • 1/2 c. Mozzarella Cheese
Instructions
  1. Preheat oven to 400°.
  2. In a large high-sided skillet or dutch oven, melt butter. Place rice, garlic, and onion into pot and saute for about 3-4 minutes.
  3. Stir in the wine, chicken broth, salt & pepper, italian seasoning and transfer to the oven. Bake for about 30-35 minutes until most liquid has been absorbed. Remove from oven.
  4. Stir in the chicken and cheese until the cheese is melted. Serve immediately.
Notes

The texture should be creamy with a little liquid. Though mine ended up a bit sticky. Gonna work on it a bit more.

Have YOU ever made risotto, be it baked or the traditional way? I’d love to hear how it turned out!


Like this post? SHARE it!

Related Posts Plugin for WordPress, Blogger...

Easy Roasted Broccoli

When I was a kid, I never remember thinking I really want broccoli. In fact, I don’t really remember eating it ever as a kid. The word itself had some type of unappealing association with it so we just never spoke of it. Props to my mom for not shoving it down my throat! Luckily I grew up to love it and I’ve passed on that love to my daughter. Though she won’t touch most things that are green, broccoli is something that she will gladly gobble up in a moment’s notice.

Parental mission, accomplished.

We like to make broccoli many ways around here. Steamed, chopped, swimming in cheese sauce, and in a plethora of casseroles. But mostly, it’s easiest to just roast it to go along with a meal.

When you get a good price on a head of broccoli, stock up and make it for dinner. And if you need an idea for how to make it, consider this roasting method if you haven’t tried this before. It’s quite tasty.

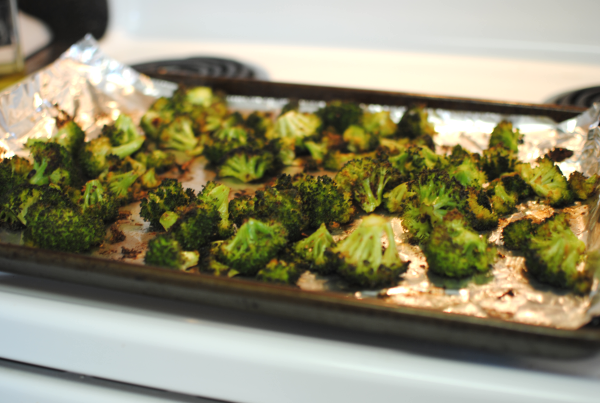
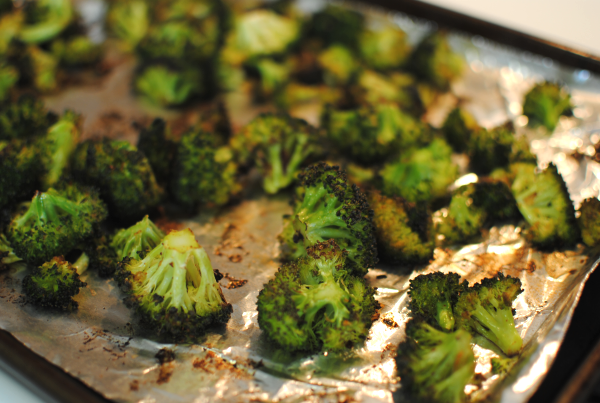
Cut up the head into bite-size pieces. Throw it in a bowl with some salt, garlic (oooooooh, aaaaaahhhhh), chili powder, and of course olive oil. Toss it up and pop it in the oven to get roasted and toasted.

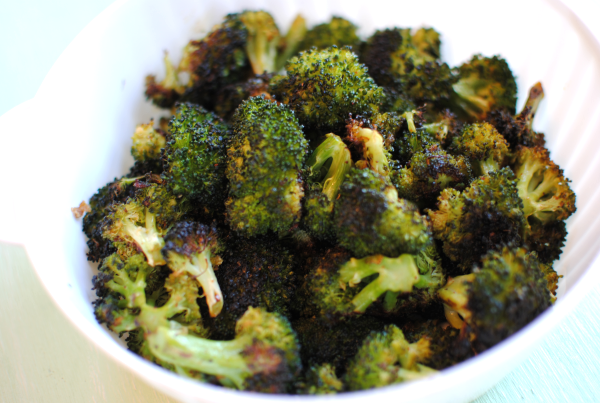
What comes out of the oven is nothing short of amazing. Yummy, flavorful broccoli.

It’s that simple and frugal too!

Easy Roasted Broccoli
Recipe Type: Side Dish, Vegetable
Author: Pennywise Cook
This simple method for roasting broccoli makes for an easy side dish that’s full of flavor!
Ingredients
  • 4 c. Fresh Broccoli (Cut into bite-size pieces)
  • 1/4 Tsp Salt
  • 1 Tsp Chili Powder
  • 4 Cloves Garlic, Minced
  • 1/4 c. Olive Oil
Instructions
  1. Preheat oven to 425°.
  2. In a large bowl, combine all the ingredients and toss well.
  3. Place on a foil-lined cookie sheet. Bake for 20-22 minutes flipping once halfway through cooking.

Like this post? SHARE it!

Related Posts Plugin for WordPress, Blogger...

Slow Cooker Corn on the Cob

So I told you how I’ve been keeping things on the easy side the last few weeks. With Addie starting kindergarten and with family in town off and on these last couple weeks, the cooking has been a little out of routine. Out of routine meaning that I didn’t want to bore my guests with my food portraiture and involvement with my food. So I opted for easy yet tasty.

The other day I was talking to my mom about the Crockpot Baked Potatoes when she mentioned that she had also used her Crockpot to make up some corn on the cob. We usually just pop our corn on the grill when we’re grilling out, but it’s been so hot lately that we haven’t wanted to be outside for more than 10 minutes. Though, it’s FINALLY beginning to cool down just a bit around here. So to save a little propane and heat from the stove or oven, I decided to throw some ears in my slow cooker.

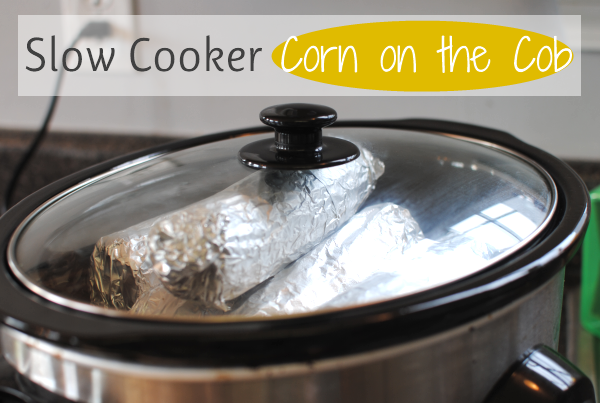
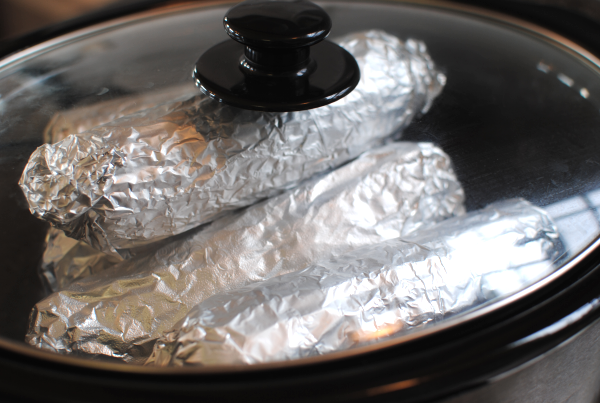
I seasoned them up with a little mayo concoction that I put together, then rolled them up in foil and placed them straight down into the slow cooker. I didn’t add water, I didn’t put anything inside to raise them away from the sides. I didn’t do anything at all, but just let them go. It worked great! The steam from the moisture in the corn is what cooks it.

With sweet corn being so cheap (in places not affected by the droughts), it’s an easy and tasty side dish for just about anything. Plus you can use corn on the cob to make up creamed corn, corn bread or muffins, and more. If you need cooked corn for a recipe and want it fresh, throw some ears into your slow cooker overnight and in the morning you’ll be ready with slow cooked and perfect corn!

Slow Cooker Corn on the Cob
Recipe Type: Side Dish, Crockpot
Author: Pennywise Cook (and Momma!)
Another shortcut idea that makes corn as simple as 1,2, 3 to make!
Ingredients
  • 4 Ears Corn on the Cob
  • 2 Tbsp Reduced Fat Mayonnaise
  • 1/4 Tsp Garlic Powder
  • 1/4 Tsp Onion Powder
  • Dash Salt and Pepper
Instructions
  1. Whip ingredients together and rub 1/4 mixture onto each ear of corn. Wrap in foil and place in slow cooker. Cook on lowest setting for 4-6 hours.
Notes

I used the low setting on my slow cooker, but if you have a “warm” you might consider using that for longer cook times.


Like this post? SHARE it!

Related Posts Plugin for WordPress, Blogger...

Life Is Like An Onion…

…you peel it off one layer at a time and sometimes you weep.

A quote from Carl Sandburg and boy he wasn’t kidding! It’s almost impossible for me to cut an onion without tearing up. Well it just depends on the circumstances. If the onion is very small, sometimes I can manage to chop without weeping.

But the tears aren’t the only problem that I have with onions. My favorite grocery stores like Aldi and Save-A-Lot tend to have 2-3 pound bags of onions on sale a lot. I find that I need a couple onions for my meals during the week and then I don’t use the last 4 or 5 and they go bad! Then the very next week, I’d need more onions and I’d grab another bag and the cycle continued. The frugalista inside me won’t let me just buy how many onions I know I need so just buying a few isn’t an option.

But those days are over folks. This is one of those “duh” tips that I’m sharing today. Even if you’ve thought about it, this might just make you wanna go ahead and actually do it.

Go ahead, buy that bulk bag of onions and feel no shame. Know that not one of those onions will go unused. Know that you have weeks and even months to create a masterpiece with those flavorful veggies.

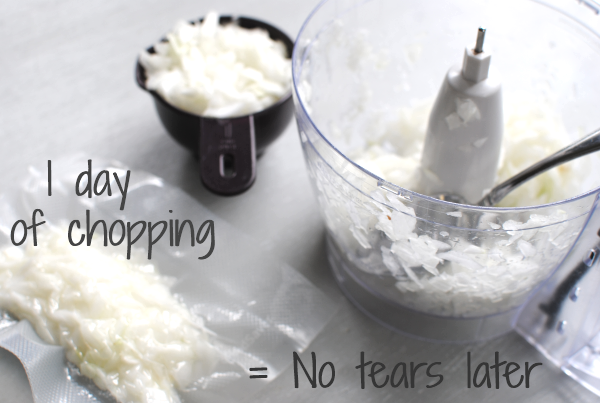
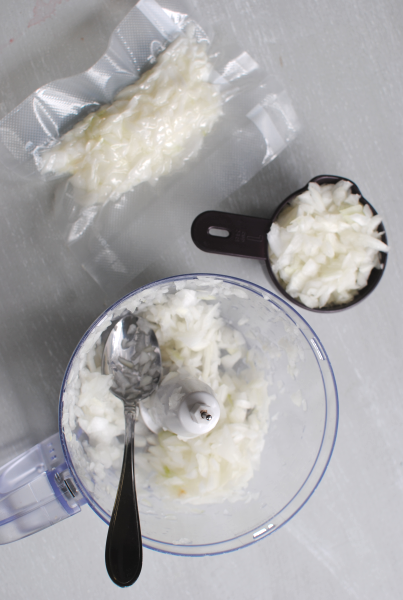
Bust out the food processor and pop your onions in. Chop them up to your liking and then place them in a freezer bag, making sure to remove all the air.

I measured mine into 1 cup portions since that’s the frequent amount that I use. After my day 30 minutes of chopping, I ended up with 12 cups of pre-chopped onions ready to place into a tasty meal. I’ve already used a couple of the portions and I didn’t even thaw them to use them.  Though some recipes may need them to be thawed.

So there you have it. A simple tip from a simple mind. Save your time, tears, and most of all MONEY.

And by the way, this would also work with anything other vegetable that you use frequently of course. 🙂


Like this post? SHARE it!

Related Posts Plugin for WordPress, Blogger...

Slow Cooker Pizza Dip

It’s almost football season. Are you jumping up and down? Or are you grunting at the thought of all the money you’ll be spending on beer and the time you’ll lose with hubby because he’s glued to the tube?

We are not sports folk.

My husband could care less about who is playing what or when the game is on. Frankly, neither am I. But there is one thing that I do enjoy and it’s game food. I love making snacks and treats for the big game even though I probably won’t even lay one eye on the TV set. I’ve even thought about having a mock football party just to make cute little treats.

Is that silly? Maybe, but not really if you know how much I love food.

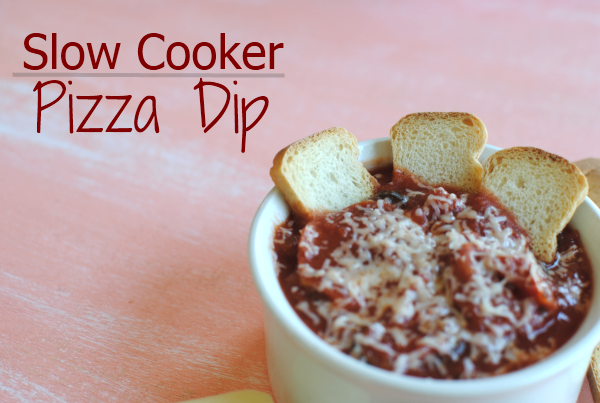
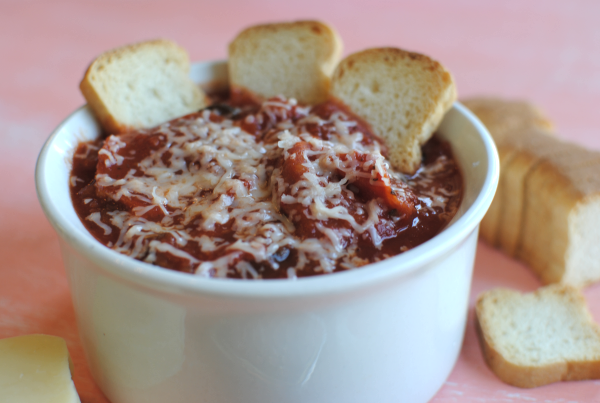
This Pizza Dip is so easy. No crazy ingredients needed and your crockpot does all of the work. You may have seen recipes for Pizza Dip before, but most of them contain cream cheese. Nothing wrong with that, but often times it can add just a bit of fat and calories that aren’t always necessary. I’ve adapted this from the Fix It and Forget It Lightly Cookbook.

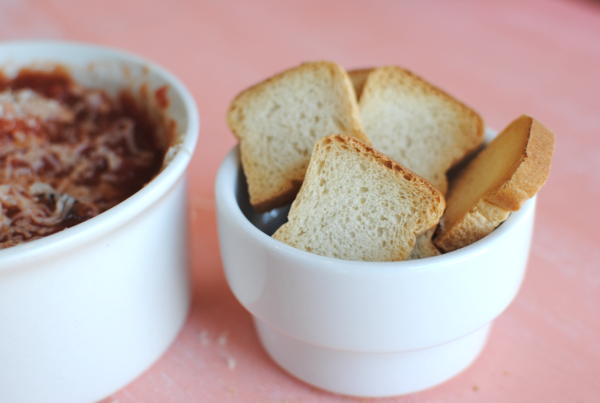
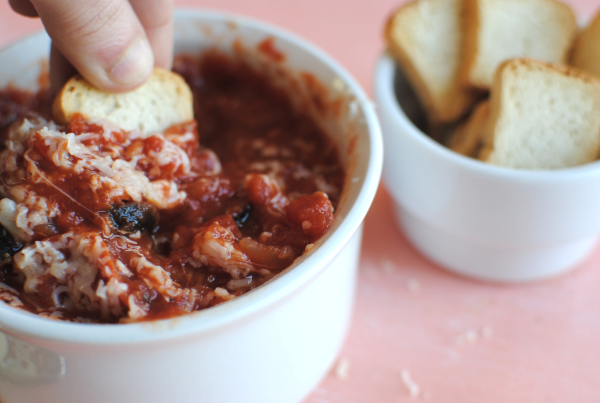
I made this dip recently for a gathering that I had. I had no idea what to serve it with, so I just grabbed some of those little toasts that you find in the deli section of the grocery store. They are like a $1 and are so incredibly cute! I think this is the absolutely best thing to serve this dip with. If you can’t find them, I think that little crunchy bread sticks would also do the trick.

The best part about this dip? It’s low in calories! Less than 100 calories per serving and you can feel absolutely no guilt for eating it. I even used turkey pepperoni to keep it lean. Top it with a little shredded mozzarella and it’s just like eating a pizza but without all of that breading to weigh you down.

It’s the perfect game day snack! Even if you’re not going to watch the game…

Slow Cooker Pizza Dip
Recipe Type: Crockpot, Dip, Side Dish, Appetizer
Author: Pennywise Cook
The satisfaction of pizza without all of the calories and perfect to make for a get together!
Ingredients
  • 28 oz Can Crushed Tomatoes
  • 1 Small Can Sliced Black Olives
  • 1 c. Onion, Chopped
  • 5 oz Turkey Pepperoni, Chopped (or the mini version)
  • 1 and 1/2 tsp Italian Seasoning
  • 1 Tsp Garlic, Minced
  • Shredded Mozzarella Cheese for Sprinkling
Instructions
  1. Combine all ingredients in a slow cooker and cook on low for 2-4 hours.
Notes

My crockpot tends to overheat things, so I have even made this and put my crockpot on warm before and it worked just fine. It also made it possible for me to cook it longer without overcooking it.


Like this post? SHARE it!

Related Posts Plugin for WordPress, Blogger...

Oven “Fried” Squash And Another Reason I Don’t Like Bees

I absolutely cannot grow a squash to save my life. I started a little garden for herbs and a few veggies earlier this spring and for some reason, mother nature refuses to help me produce even one sign of a squash in my garden. I checked out Google and the only explanation that I can come up with is that we have no bees. Well, at least no bees that want to help me grow some squash. The bees have to transfer pollen to the blossoms while they are open in the mornings in order for the blossoms to produce a squash. Apparently the bees around here don’t like me and don’t want me to have yummy squash this year.

I see them flying around all happy and landing on the weeds, probably pollinating the weeds in place of my squash. Forgive me, I’m a little bee bitter right now…

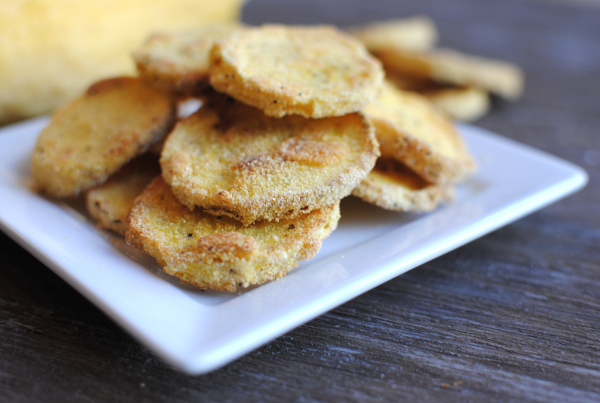
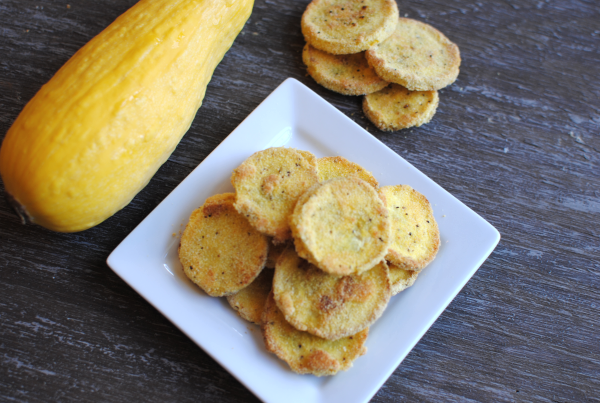
On a less bee-hater note, Aldi does have great prices on squash and my in-laws have a bountiful garden that we get veggies from. So I don’t have to go without. I love my squash fried, but you know me and my frying. Unlike Nike, I just don’t do it. I usually try to find a way to make things taste fried without the actual frying process. This recipe gives you exactly that!

See how crunchy they are? If you bake them too long, they are almost like chips because they are so crunchy. But you won’t have that problem because you’ll bake them just right.

They are oh so yummy. These definitely satisfy that hunger for “fried” squash. I got this recipe from that cookbook that I told you about the other day and come to find out this particular recipe came from a cookbook from 1983! Southern Living’s Cook Light.

Only 64 calories per serving and worth every one.

Oven “Fried” Squash
Recipe Type: Side Dish, Vegetable
Author: MTEMC Company Gifts of Christmas Cookbook,
Crunchy, tasty “fried” squash from the oven.
Ingredients
  • 1/2 c. Cornmeal
  • 1/2 Tsp Salt
  • 1/4 Tsp Pepper
  • 2 Egg Whites
  • 1 Tbsp Water
  • 3 Medium-sized Yellow Squash, cut into 1/4 in. slices
  • Cooking Spray
Instructions
  1. Preheat oven to 450 degrees.
  2. Combine cornmeal, salt, and pepper. Set Aside.
  3. Combine egg whites and water; beat well.
  4. Dip squash into egg and then dredge into cornmeal mixture.
  5. Lightly coat a baking pan with cooking spray. Place squash in a single layer.
  6. Bake for 30- 40 minutes turning once.
Notes

Ok here are my notes on this one:

I would use LESS pepper than this calls for. It was a little spicy with 1/2 teaspoon if you ask me. You might even use a different spice like paprika in it’s place.

I considered my squash to be medium-sized, but I could fit only 2 of them on my pan. You may not really need 3.

I ended up needing more like 1 cup of cornmeal so have more on-hand in case. There was plenty of egg whites, however.

30 minutes was too long. I would say more like 10 minutes, then flip and then another 10 minutes. Or perhaps reduce the temperature.

Enjoy!


Like this post? SHARE it!

Related Posts Plugin for WordPress, Blogger...

Caramel Apple Salad

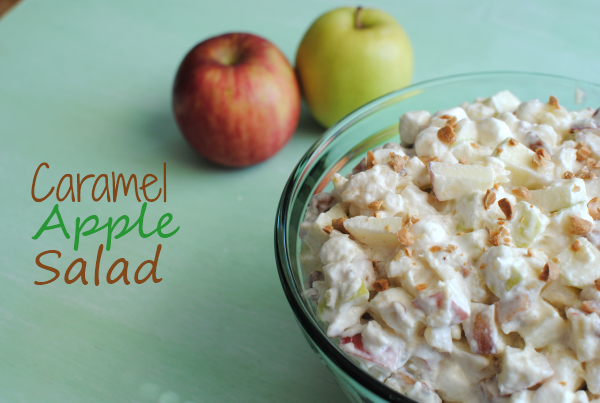
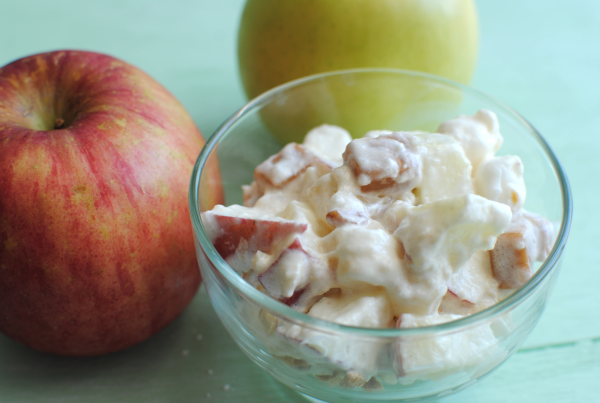
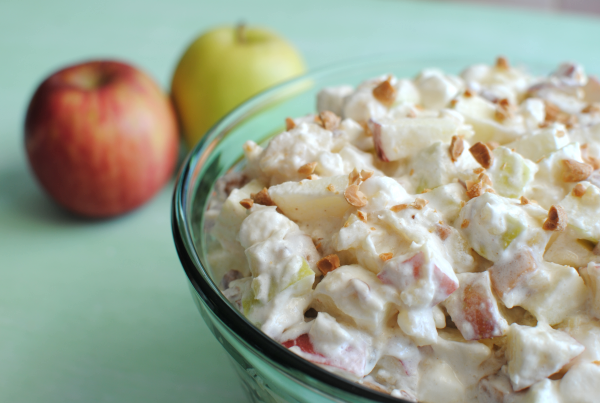
Did you ever eat caramel apples as a kid? Heck when I find them, I like to eat them now! They are kinda healthy aren’t they? Big juicy apples covered in gooey caramel and crunchy nuts. Mainly apples, so I think that’s worthy of calling “healthy”.

And of course, the fact that they are on sticks makes them that much more appealing. It’s amazing what putting something on a stick will do to it’s allure. I watched an entire show dedicated to bacon on a stick the other day. There’s a huge market for that you know.

Whether you like your caramel apples on a stick or not, this salad is very similar to that tasty treat. It’s got it all, plus a little extra like marshmallows and crushed pineapple. I will have to admit that when I was making this, I wasn’t sure about adding those things into it. I thought it might take away from the theme. It turned out that those things just enhanced it a bit.

This salad would be perfect for a summer get together. Just don’t set it next to the potato salad. There might be a little confusion…

I made this one morning and by the following day, it was completely gone. Between my little one who loves apples and us big kids who love the caramel and marshmallows, it was the perfect treat on a hot day.

Caramel Apple Salad
Recipe Type: Side dish, Dessert
Author: MTEMC Gifts of Christmas Company Cookbook
Ingredients
  • 1 c. Sugar
  • 2 Eggs
  • 2 Tbsp Flour
  • 1/2 c. Chopped Peanuts
  • 1 (8 oz) Container Cool Whip
  • 1 Can (20 oz) Crushed Pineapple, Drained
  • 2 and 1/2 c. Mini Marshmallows
  • 2 Red Apples, Unpeeled and diced
  • 2 Green Apples, Unpeeled and diced
  • 1 Pkg Caramels, Cut into fourths
Instructions
  1. Mix sugar, eggs, flour, and peanuts into a small saucepan over medium heat. Cook until thick. Let cool and then fold into cool whip. Set aside.
  2. Combine crushed pineapple, marshmallows, apples, and caramels and stir in cool whip mixture.
  3. Serve chilled and store covered in refrigerator.
Notes

You will most likely want to make this close to the time that you intend on serving it. The apples can begin to brown after a couple days.


Like this post? SHARE it!

Related Posts Plugin for WordPress, Blogger...

Bacon Cream Cheese Pinwheels

How was your weekend? Our goal since our yard sale a few weeks ago has been to clean out the garage. Has it happened yet? Nope. I will get my van back in the garage before it’s all said and done! I have to!

Do you park in your garage or am I the only one with junk taking over?

I came across this recipe in a company cookbook that I’ve had for years. If I could link to this book so you could get a copy, I would. It’s a great cookbook. I just love ones like that from folks that you know have amazing recipes.

This week I gave Addie a little break from eating peanut butter and jelly sandwiches by making her up some of these Bacon Cream Cheese Pinwheels! She was less than enthusiastic about eating them when she saw me preparing them.

“Moooooooom, I don’t want onions in mine.” She said. Somehow I knew that was coming the moment that I began to chop. Even still, I had confidence that she was going to like these with onions and all.

These snacks are so easy to make and have awesome flavor. Bacon, onions, and cream cheese all melt together inside a crescent roll. Hello! You simply mix up a block of cream cheese along with some crumbled bacon (or even bacon bits) and chopped onions and slather it onto some pinched together crescent rolls.

You can almost always find a coupon for Pillsbury Crescent Rolls here. Combine it with a sale and you have a deal!

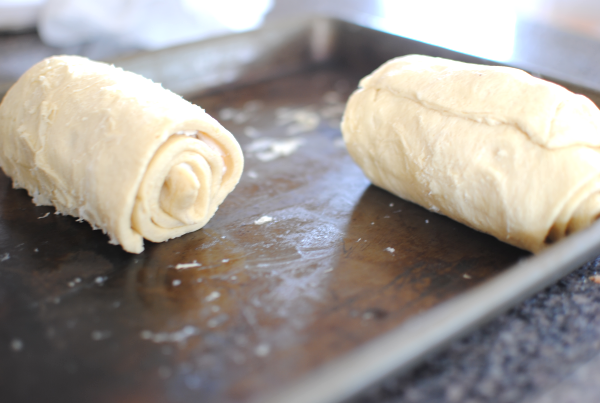
After the slathering process, roooooooooooooll the gooeyness up into 2 little bundles of goodness. Then slice them into separate pinwheels.

Note: I tried baking these before slicing them and trust me, you will want to slice them BEFORE you bake them. They cook much faster and get a better crust.

In a matter of minutes you have crusty, cream cheesey pinwheels. These are perfect for a snack, lunch, and even appetizers for a party!

And for the record, Addie LOVED them. Daddy did too. The onions add flavor without being very onion-y.

Bacon Cream Cheese Pinwheels
Recipe Type: Appetizer, Snack
Author: MTEMC Gifts of Christmas Cookbook- Kathie Davies
Spice up your everyday crescent rolls by rolling up bacon and cream cheese inside!
Ingredients
  • 1 Pkge (8 oz) Cream Cheese, Softened
  • 1/4 c. Crumbled Bacon
  • 2 Tbsp Chopped Onions
  • 1/2 Tsp. Black Pepper
  • 1 Can Crescent Rolls
Instructions
  1. Preheat oven to 350 degrees.
  2. Combine cream cheese, bacon, onions and pepper together. Set aside.
  3. Separate crescent rolls into 2 rectangles by pinching the seams together.
  4. Spread mixture onto each rectangle and roll up from the long end.
  5. Bake for 15 minutes or until golden brown.

Like this post? SHARE it!

Related Posts Plugin for WordPress, Blogger...