Parmesan Peas

Parmesan Peas


I’m not exactly sure what it is about peas that makes them seem so unappealing. Did you see what I did there? For most kids I think it may be because they are green. Both of my girls have a strong aversion to green food no matter what it is. So when my oldest came home from school one day and told me that she liked peas, you can just imagine my confusion. 

1. She ate peas. Willingly. Without bribery or threatening. 

2. She ate peas at school of all places. This is also the place that she discovered she likes green beans. (Which I promise are the only two green foods that she likes.) I mean. What are the schools doing to their green foods to make them so enticing? They have new standards for how healthy things have to be so I know it’s not that they are slathering it all in butter. 

3. I gotta come close to making them at least half as good as the school. Woah. What is this world coming to with the statement that I just made?

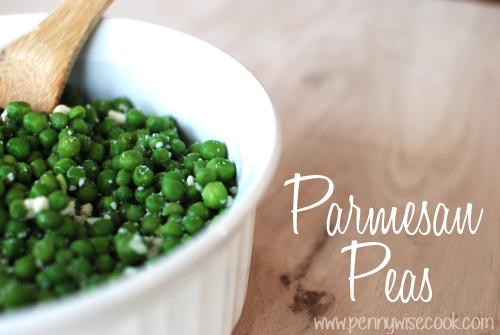
I came across this recipe for Parmesan Peas and I figured it was worth a shot. If it doesn’t work then I may need to call my daughter’s cafeteria. Again. What weird statements I’m making.

PArmesan Peas1


I liked these peas, but I have a feeling that they weren’t as amazing as my daughter is used to. I will be tweaking these a little as I make them more. But for the most part, they are really tasty! The most important tip that I can give is to make sure that you serve them immediately after making. They do not taste the same after they get cold and sit there for a while. Just from my experience anyways. 

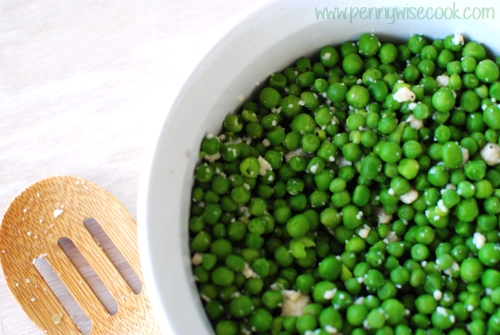
Also, be sure to use freshly grated parmesan and not the powered stuff. It works, but is not near as good.

Parmesan Peas
Write a review
Print
Ingredients
  1. 16 oz Bag of Frozen Peas or 4 cups Fresh Peas
  2. 1 tbsp Butter
  3. 1/2 cup Freshly grated parmesan cheese
  4. Little squeeze of lemon juice
  5. Dash of pepper
Instructions
  1. Fill a big saucepan 2/3 of the way full and bring to a boil.
  2. Add the peas and cook for 3 minutes if fresh and 1 minute if frozen. This will be your call as to if you think they are ready enough. I like mine to be really tender.
  3. Remove from heat and save a little amount of the cooking water. Drain.
  4. Put them back in the saucepan and add a little of the reserved water. Add the butter. Stir until melted.
  5. Stir in the parmesan cheese and make sure that all the peas get coated.
  6. Squeeze a tad of lemon juice and add a dash of pepper.
  7. Serve immediately!
Adapted from Ezra Pound Cake
Pennywise Cook http://www.pennywisecook.com/

Like this post? SHARE it!

Related Posts Plugin for WordPress, Blogger...

Ideas for the Lunchbox: Grilled Cheese Rollups

The budget cuts aren’t just for the US government these days. Here at our house, we’re working on a new budget with the intent to save as much as humanly possible! I’ve always considered us a money-minded and frugal family, but we are working to try and be even more watchful about unnecessary spending.

Man, I really do sound like the US government now.

What is more frugal than a grilled cheese sandwich? Hmmm, I wonder if grilled cheese could be the answer to the US’s debt crisis?! Maybe if all the lawmakers up in Washington would agree to eat them, then we could start saving some REAL money around here. They could put them in their lunchboxes. Now THAT would be a sight!

I saw this idea over at Chin Deep as I was preparing some ideas for Addie’s lunchbox. I can’t claim I came up with these gems, but I knew I had to make them as she has recently found a deep love for grilled cheese. She gets that from her father. I hated them as a kid!

It all starts with some plain and simple sandwich bread. Whatever you can find or afford. Cut off all of the crust leaving as much of the meat of the bread as you can. You’ll also need the sliced cheese of your choice. I cut mine in half and then cut those halves 2 more times to equal about 8 small pieces from each slice.

It’s a pretty simple process. I spared you most of the step by step pictures as to not insult your intelligence. Place a piece of cheese on the very end. Roll. Add another little piece. Roll. And continue in this manner until you’ve come to the end of the bread. I used about 4 pieces for each of mine. Yours may differ depending on the size of your bread.

You can use a little bit of water on the end to help attach it and close it up for frying.

Heat up 2 tbsp of butter over medium heat.

This is where things get hot. The butter absorbs, the cheese melts, and the bread browns! It’s heavenly. It’s around 2 minutes or less on each side. You’ll just need to watch it and determine your favorite color of brown. 🙂

As a side note: you may need more butter depending on how many of these you are planning to make. The butter does absorb pretty quick so it’s possible you’ll have to refill a few times.

Voila! These are so simple and tasty. They would be great for eating with my Homemade Tomato Soup! These would also make a great finger food for a kid’s party.

UPDATE: After seeing how these fared in her lunchbox, we have decided that putting them in the microwave for a few seconds before placing them in the lunchbox helps. My Addie doesn’t prefer them to be cold, but room temp is fine. We’re going to keep trying and figure out a way to make them work. And if you have any ideas, they are surely welcome!

Ideas for the Lunchbox: Grilled Cheese Rollups

Recipe Type: Snack, Lunchbox

Cuisine: American

Author: Adapted a little from Chin Deep

A new way to enjoy grilled cheese and the perfect idea for the lunchbox!

Ingredients

  • 6 pieces white bread
  • 3 pieces sliced cheese of your choice
  • 2 tbsp butter
  • Tomato soup or marina sauce for dipping (optional)

Instructions

  1. Remove the crusts from your bread leaving as much as you possibly can.
  2. Roll them flat with a rolling pin or with your preferred method of flattening.
  3. Cut your slices of cheese into smaller little slits. I was able to get about 8 out of each of my slices.
  4. Heat 2 tbsp butter in a skillet over medium heat.
  5. Layout your bread and place a piece of cheese longways on the edge of the bread. Roll inward. Place another piece of cheese and then roll inward again. Until you’ve come to the end of your bread. Using a little bit of water, try to crimp the end so it attaches and closes up the rollup. It doesn’t have to be perfect, it just helps the frying process.
  6. Place the rollups in the skillet and fry each side for about 2 minutes or until desired brownness.
  7. Let cool on paper towels and serve with tomato soup or marina sauce!


Like this post? SHARE it!

Related Posts Plugin for WordPress, Blogger...

Chili Cheese Pizza

If any of you, or those that you know, are being affected by Sandy, we are praying for you. I hope that you are safe. This is some crazy storm.

When it comes to chili, there are those that eat their chili with cornbread and there are those that eat theirs with corn chips. This might just spark a controversy. It’s hard to get someone to cross the line between chips and bread when they have been eating their chili this way for years.

And then of course there are those who theirs with saltines or perhaps the Ohioans who eat theirs oven spaghetti. However you do prefer to eat your chili, I want to suggest that you try this awesome and SIMPLE recipe for Chili Cheese Pizza.

You may just have to convert to be a corn bread eater to enjoy this pizza. But I promise you, you won’t miss those corn chips.

This recipe starts by mixing up a very simple cornbread dough that will be the crust of the pizza.

Roll it out and onto a pizza pan. The key to keeping all of the chili inside the pizza is to make ridges around the edges. Just take your fingers and squish up a ridge that goes all the way around.

Once the crust bakes up, you’ll have a small ridge around the edges that will hopefully do it’s job and keep the yummy chili inside the pizza. This isn’t like a gigantic loaf of corn bread. It’s much flatter than cornbread and makes the perfect pizza crust.

Whipping up the chili part is really simple as well. When I first read over this recipe, I didn’t get the impression that this was going to be chili. The recipe seemed to go a different direction. But once I made it and tasted, it’s just a very simple chili recipe. It includes taco sauce which I’ve never put in my chili, but turned out pretty good.

Place all of that incredibly tasty chili over your homemade pizza crust.

It’s already looking like heaven on a pizza pan…

Cover that chili with mounds of cheese. No, NOW it’s looking like heaven on a pizza pan…

Oh. Em. Gee. When it comes out of the oven, it is nothing short of an amazing site. You’ve got your corn bread, chili, and cheese all in one place. No spoon needed! Just the two utensils that God blessed us with…your hands!

You may eventually need a fork to capture those pesky beans that try to get away from ya. But this pizza can mostly be eaten just like a regular pizza. And it is oh so tasty!

Oh yes, and P.S.-

Recipe from Butter Busters Cookbook.

Chili Cheese Pizza
Recipe Type: Main Dish
Author: Butter Busters Cookbook (1994)
No need for a spoon, this Chili Cheese Pizza has it all in one piece of pizza!
Ingredients
  • 1 cup + 1 tbsp Cornmeal
  • 1 and 1/2 c. Flour
  • 1 tbsp Baking Powder
  • 1/2 tsp Salt
  • 3/4 c. Milk
  • 1/4 c. Melted Butter (light)
  • 1 (12 oz) jar Taco Sauce
  • 1 can (15.5 oz) Milk Mexican Style Chili Beans (undrained)
  • 1/2 lb Ground Turkey
  • 1 can (4 oz) Green Chilies (drained)
  • 2 c. Reduced-Fat Shredded Cheddar Cheese
Instructions
  1. Preheat oven to 450°. Spray a 14″ pizza pan with non-stick cooking spray. Sprinkle the 1 tbsp of cornmeal all over the pizza pan. Combine 1/2 c. cornmeal, flour, baking powder, and salt in a medium bowl. Add the milk and melted butter. With a fork, stir until the mixture starts to form a ball. Remove the dough from the bowl and press into pizza pan. Shape the edges to form a ridge around the outside. Bake for 15 minutes.
  2. Meanwhile, cook the ground turkey in a microwave for 5 minutes on high. Take out and stir. Cover and cook for 1-3 minutes more. Drain off any excess fat. In a bowl, combine turkey, beans, green chilies, and taco sauce. Pour mixture over the cooked crust. Sprinkle the cheese over the entire pizza.
  3. Bake for 10 minutes or until the cheese is melted.
  4. Slice and serve!
Notes

The recipe calls for the ground turkey to be cooked in the microwave, but feel free to brown it in a skillet if you prefer. You could even do this step ahead of time to save time.


Like this post? SHARE it!

Related Posts Plugin for WordPress, Blogger...

Simple Sausage Mac

Are you ready for Halloween yet? Well you better get that way because it’s on Wednesday! Can you really believe that we have already reached the end of October? I’d really love for someone to explain to me where the rest of this month has slipped away to. Maybe I’m just getting old or maybe time is speeding up. Either way, I’m going to hold on tight.

The weather is finally starting to cool off around here. I absolutely love the fall. Well, let me just say I love being cozy. I hate being cold, but I love being cozy. I’ve got a bunch of warm and comforting recipes coming up that I can’t wait to share with you. The fall is really when I have the most fun cooking. You can make up a big pot of something that sticks to your bones.

One of the first “comfort foods” that comes to mind practically anytime I hear that phrase is macaroni and cheese. It doesn’t get much more comforting than that. I’ve seen mac & cheese turn a frown completely upside down! Especially when it’s homemade. The boxes are good, but homemade is better.

And you know that here in the south, macaroni and cheese is considered a vegetable at most meat and threes….

The only issue that I’ve ever had with macaroni and cheese is that it’s so good that I eat too much. Well that and the fact that it needs a little bulking up so that it can be worthy of being called a meal. After all, we wouldn’t want to make mac & cheese only a side dish. It’s worthy of being the main attraction with a little adjustment.

One of my favorite things about this macaroni and cheese is the secret topping. No longer a secret because I’m about to share it with you! We’re heading for Thanksgiving and there will be deals out the wazoo on stuffing mix. THAT my friend is a little something extra that can give macaroni and cheese a little spice. Breadcrumbs are great, but stuffing mix adds a little more crunch and even some nice flavor. I used Stove Top’s version for this. You can use whatever you’d like of course.

I bulked this up with sausage to give it a little flavor and to make it meaty. So yummy and extra comforting. I’d almost make this for a brunch!

Recipe adapted from Butter Busters Cookbook.

Simple Sausage Mac
Recipe Type: Side Dish, Main Dish
Author: Adapted from Butter Busters Cookbook
Bulk up your everyday mac & cheese and make it meaty. Perfect for dinner any night of the week!
Ingredients
  • 1 lb Turkey Sausage, Browned and Drained
  • 3 tbsp Melted Butter (light)
  • 1 and 1/2 tbsp flour
  • 1/2 tsp salt
  • 1/2 tsp pepper
  • 2 cups Skim Milk
  • 1 tbsp Melted Butter (light)
  • 2 cups Elbow Macaroni, Cooked
  • 1 tbsp Onion, Grated
  • 1/2 tsp salt
  • 1/4 tsp pepper
  • 2 cups Reduced fat Shredded Cheddar Cheese
  • 1/2 c. Crushed Cubed Style Stuffing Mix
Instructions
  1. Preheat oven to 350°.
  2. Combine 3 tbsp melted butter, flour, salt, and pepper in a small sauce pan. Slowly add skim milk and whisk well. Bring to boil, then lower temp until thickens. Set aside.
  3. Spray a 2 quart baking dish with non-stick cooking spray. Place half of the macaroni in the dish. Spread half of the cooked sausage over the noodles. Sprinkle half of the grated onion, salt, pepper, sauce, and cheese. Repeat layer. Drizzle 1 tbsp melted butter over top. Sprinkle with remaining cheese. Sprinkle crushed stuffing over the top. Cover and baked for 30 minutes. Then uncover and bake an additional 10 minutes.

Like this post? SHARE it!

Related Posts Plugin for WordPress, Blogger...

Slow Cooker Cheeseburger Soup

There’s a time and a place for soup. At least at my house it’s that way. When planning meals, soup is never an option. I honestly think that my family would rather eat cardboard than eat such a thing called soup. It’s not because soup is such a bad thing. It’s probably just because when put up against a hearty casserole or grilled steak, soup just doesn’t compare. And therefore usually ends up being bypassed and never even a consideration. This is something that I’d loved to change here in my family.

I love soup! For many reasons too. You can make huge amounts at once, it freezes well, and best of all it’s cheap to make! All of my favorite traits of a good meal. So when I came across this Weight Watchers Cheeseburger Soup recipe, I knew I had to make it.

It’s contains the word, cheeseburger. I knew my family would have to love it.

It’s really easy to make. I healthified mine up a bit with ground turkey in place of the beef. The fam didn’t even know it. I take that back. They know me enough by now that all I use is ground turkey so maybe they did know. Either way, they didn’t care! It turned out really yummy and there are plenty of reasons why I love this particular soup. Not only was it cheap, but I made it in the crockpot so there was no slaving over the stove all evening.

Not to mention that it’s low-calorie. I mean come on, something that the family will eat that’s actually low-cal too? It’s a winner!

I made a few small changes to the recipe and it turned out really good. Mine doesn’t look near as yummy as theirs does, but I can assure you that it was just as tasty I’m sure!


Recipe adapted from Weight Watchers.

Slow Cooker Cheeseburger Soup
Author: Adapted from Weight Watchers
A meal that the whole family will love, this cheeseburger soup is easy and low-calorie too!
Ingredients
  • Cooking Spray or Crockpot Liner
  • 1 and 1/2 tsp Minced Garlic
  • 1 Medium Onion, Chopped
  • 1 lb Ground Turkey (see notes)
  • 2 Tbsp Flour
  • 3 Cups Low-Sodium Chicken Broth (see notes)
  • 1 c. Reduced Fat Evaporated Milk
  • 8 oz Cubed Cheese (I used Colby Jack)
  • 1/2 Tsp Paprika
  • Salt and Pepper to Taste
  • Tortilla Chips for crumbling on top
Instructions
  1. Spray a skillet with cooking spray. Saute garlic and onions until tender. Spray the inside of a slow cooker with cooking spray and pour the garlic and onions into it.
  2. In same skillet, brown the ground turkey and break into small crumbles as it cooks. Pour off any grease and place into slow cooker.
  3. In a cup, combine 2 tbsp flour with 1/2 cup broth until there are no more lumps.Pour into the same skillet. Then add remaining 2 and 1/2 cup broth.Bring to a simmer making sure to scrape up the browned bits on the bottom of the skillet. Pour into the slow cooker.
  4. Add evaporated milk, cheese, paprika, and salt & pepper to the slow cooker and stir. Cook on low for 2-3 hours.
  5. Serve with broken up chips on top.
Notes

I used a pound of ground turkey in this soup, but after making it and seeing how “soupy” it actually was, I would probably add another 1/2 pound next time. If you like your soups like this meaty, you might consider it.

This recipe originally called for chicken broth. I think that I will try part beef broth next time since after all, it is cheeseBURGER soup. Seems to me there needs to be more beefiness.

And honestly, the picture of this soup does not do it justice. It’s a lot more appetizing than the picture lets on. 🙂

Just notes from my brain about this dish! Enjoy!


Like this post? SHARE it!

Related Posts Plugin for WordPress, Blogger...