Crockpot Chicken Tortilla Soup

Today is my daughter’s last day of school. I can already hear the words “I’m booooooored mom”. You’d think that we live in a box without any toys, coloring books, or that all addicting boob tube contraption they call a TV. My goal is to do whatever I possibly can to try and keep those words from seaping out of my kiddo’s mouth.

So we’ll plan playdates, trips to the splash pad, fun at the Y, and anything and everything else that I can come up with to combat bordem.

Dinner sometimes plays second fiddle in the summer around here. The sun is out later and we’re outside enjoying our days which means either mom has to miss out on the fun to cook or mom has to get creative. So creative I’ll get! This recipe is one that I put together in a pinch and is super simple to make.

Who doesn’t like making dinner in the crockpot? Most of the ingredients in this recipe are from cans which also makes for easy prep. This reminds me of a 7 can soup with a little twist. One ingredient that I’ve always kinda been leary of, is canned chicken. I don’t use it that often because, well, it’s called canned chicken. It smells a lot like tuna to me in the can which most of the time turns me off. But every now and then I’ll place it in a recipe that makes the chicken transform with the other flavors. And sometimes it actually tastes great. Hey, don’t knock it ’til ya tried it! If you’re not too keen on the canned chicken idea, use leftover rotisserie chicken or something along those lines if you’d like.

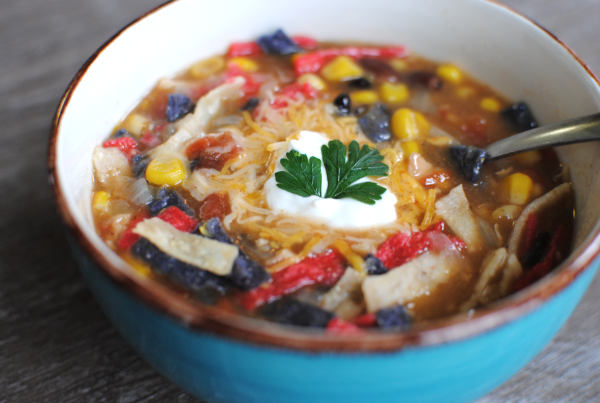
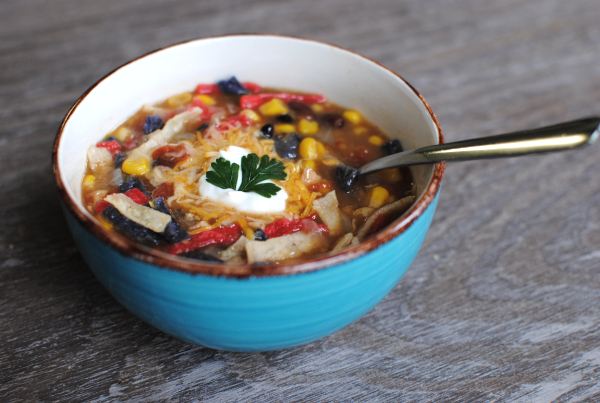
I love the crunch of the crispy tortilla strips on top at the very end. If you’re lucky enough, you’ll find some colorful ones like I did!

 It’s your turn: Do your kids get bored during the summer? Or do they enjoy the freedom?

Crockpot Chicken Tortilla Soup
 
Recipe Type: Soup, Main Dish, Crockpot
Author: Pennywise Cook

A few cans and seasonings and you’re on your way to a tasty Chicken Tortilla Soup!
Ingredients
  • 1 onion, chopped
  • 2 tsp garlic, minced
  • 1 (14 oz) can vegetable broth- could also use chicken
  • 1 (15.5 oz) can black beans, drained & rinsed
  • 1 (15.25 oz) can whole kernel corn, drained
  • 1 (12.5 oz) can chunk chicken breast, drained
  • 1 (10.5 oz) can cream of celery soup
  • 1 (10 oz) can rotel
  • 1 rotel can of water
  • 1 tsp coriander
  • 1/2 tsp cumin
  • 1 tsp chili powder
  • salt & pepper to taste
  • 1 c. tortilla strips for topping
Instructions
  1. Place all ingredients into crockpot and cook on high for 4-6 hours or low for 6-8 hours.
 
Notes

– The first time I made this, I sauted my onion and garlic before placing it in the crockpot. You can do this first if you are going to be cooking your soup for less time. If not, they should soften up enough while cooking.
– If you would rather, you can use chicken broth in place of the vegetable broth
– If you have leftover chicken, you can use that in place of the canned chicken
– Finally, if you prefer, you can use more broth in place of the water in the rotel can. I found it tastes just as good with the water.


Like this post? SHARE it!

Related Posts Plugin for WordPress, Blogger...

Crockpot Chicken Tacos

Well hello there! Long time no….er….blog?

As I was preparing the pictures for this post, even my husband made the comment about my lack of my snapping of photos of our dinners. Yes, I am usually known as the papparazi of food around here, but for the past couple of months there have been some awesome things happening around here and needless to say, I’ve been just a bit preoccupied.

But have no fear! I have a recipe today. One that even the least of cooks can throw together in minutes and makes for a family pleasing meal. Crockpot Chicken Tacos only take 3 ingredients and one of them is water. Your HUSBAND could make these.

He might get a big head afterwards. Just tell him that he did fabulous on dinner and that you adore his culinary skills. You didn’t realize that Crockpot Chicken Tacos could help you stroke your husband’s ego did you?

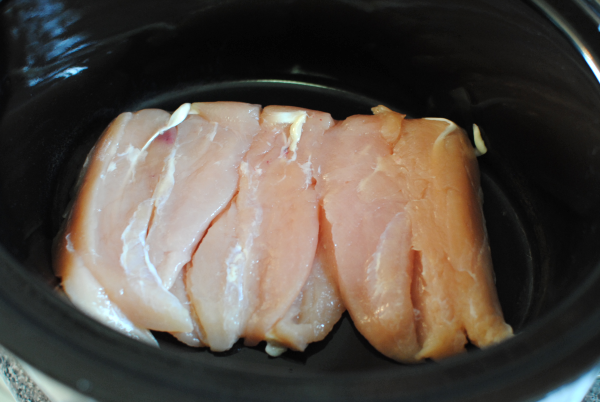
The most important ingredient in this one is, well, chicken! You need about a pound to a pound and 1/2. I used fresh because I got some on clearance, but frozen will also work. You’ll just need to adjust your crockpot setting depending on how fast you’d like it to cook.

Use tenderloins, breasts, thighs, whatever you’d like. It’s going to get tender and you’ll shred it anyways.

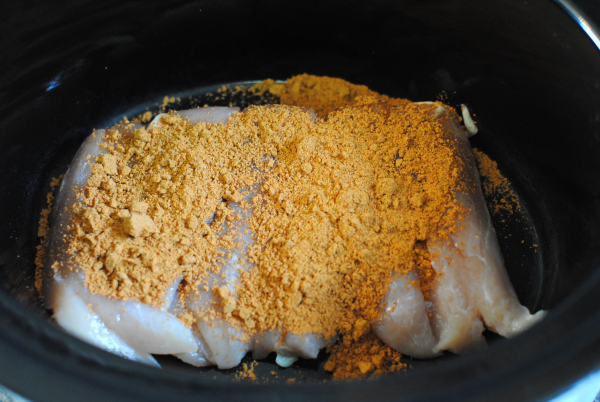
Brace yourself, this is where it gets a little tough. You must open a packet of taco seasoning and sprinkle over the chicken. I know, I know. How could I ask you to do such a laborious thing? Well suck it up. You’ll live.

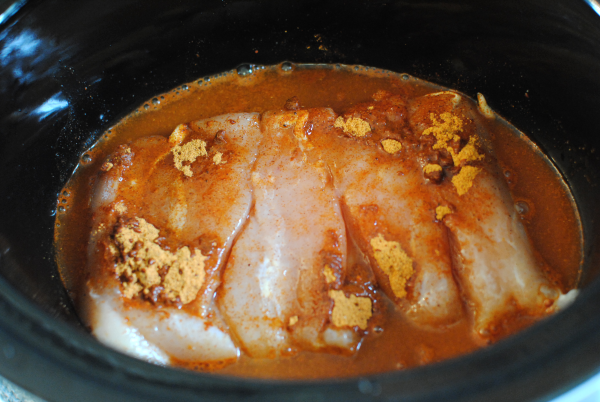
Here’s the last step. Add the amount of water listed on your taco seasoning packet to the crockpot.

Place the top on your crockpot and walk away. Go update your status. Take out the trash. Clip your toenails (you know who you are). Hey look, now you have time to make a dessert! Might I suggest Salted Caramel Brownies

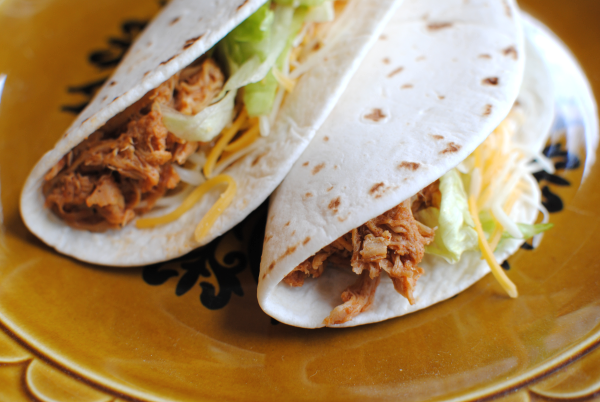
I usually let it cook for about 6 hours on low when I’m using fresh chicken. Towards the end of the cooking, I usually add just a tad bit more water and then shred up the chicken. It’s so tender that just stirring it usually shreds it without hassle.

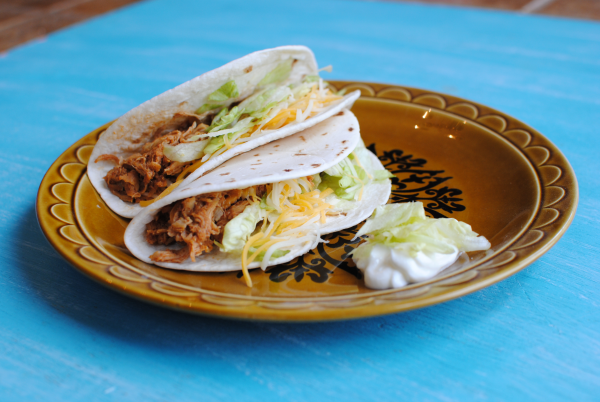
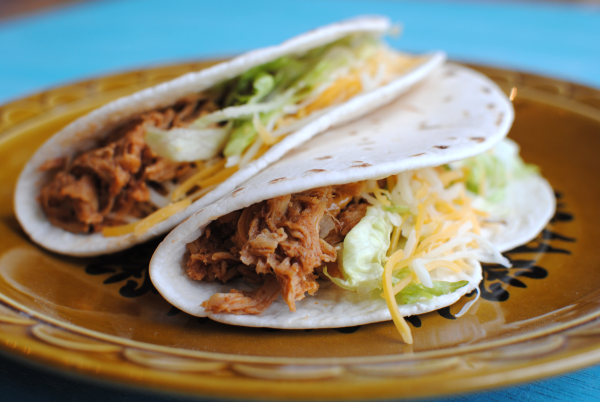
Add your favorite toppings and enjoy.

We’ve started having what we’re calling Taco Tuesday. Some form of taco will be made on Tuesdays. Whether casserole, soup, or plain tacos, that’s our theme. And beef is good, but sometimes chicken feels a bit healthier. Plus, it’s a nice change.

Crockpot Chicken Tacos
 
Recipe Type: Main, Crockpot
Author: Pennywise Cook

With only 3 ingredients (one of which is water) and a crockpot, you can have chicken tacos for dinner tonight!
Ingredients
  • 1- 1.5 pounds fresh or frozen chicken breasts, tenders, or thighs (your choice)
  • 1 package taco seasoning
  • Water listed on taco seasoning packet + a bit more
  • Toppings of your choice
Instructions
  1. Place fresh or frozen chicken into crockpot.
  2. Sprinkle with taco seasoning.
  3. Add the amount of water listed on the seasoning packet.
  4. Cook on low for about 6 hours (fresh chicken) or medium/high for 6 hours (frozen).
  5. Add a little water, about 1/4 cup towards the end. Let absorb then stir and shred.
  6. Serve with tortillas or shells and add your favorite toppings!


Like this post? SHARE it!

Related Posts Plugin for WordPress, Blogger...

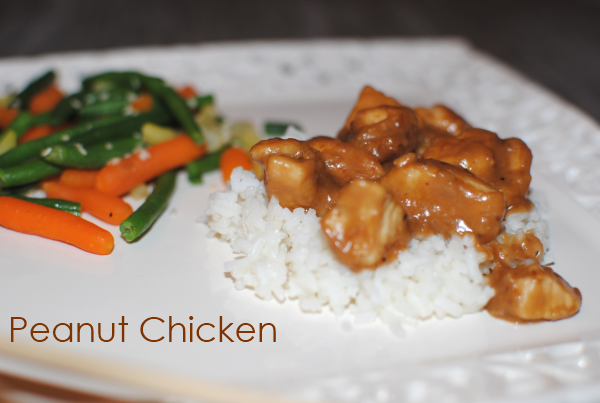
Easy Peanut Chicken

How was your weekend? Is it really Monday already? The weekend just goes by way too fast. It’s Saturday morning and you’re thinking oh this is nice, I still have Sunday. Then all of the sudden it’s Sunday night and you’re like crap, tomorrow is Monday. Such is life.

I have some good news for you. Well actually, it’s a good recipe for you. It’s definitely good news for those of you who enjoy a little Asian flare. This recipe is via Coach Nicole at Spark People. Which means it’s healthy too! Always a bonus when you like something AND it’s not sky high with calories.

I’m a bad food blogger. I didn’t take many pictures and the ones that I did take are very dark. It was a late night, what can I say. Natural light is very hard to come by when you’re eating dinner at 8:00. So please enjoy the one halfway decent picture that I have for you. 🙂

My family LOVED this chicken. You’ve probably gotten to know a little about my family by now (they’re picky) and so you know that this is big! The only real complaint I have with this sauce recipe is that it doesn’t make very much. I would definitely suggest that you double it if you’re feeding a family of 4. Also, you’ll want to make sure and eat it soon after making it. I placed the sauce in my crockpot while we went to the Y and when we came back it had kinda thickened up in consistency.

This meal came together really fast. No really, it was extremely quick to make. Browning the chicken was the most time-consuming step. And you know how fast you can brown up bite-size pieces of chicken.

Isn’t it nice to learn from someone else’s mistakes?

Easy Peanut Chicken
Recipe Type: Sauce, Main Dish
Author: Coach Nicole (Spark People)
Don’t sacrifice flavor to make something healthy. Enjoy creamy peanut sauce with your chicken in minutes!
Ingredients
  • 1/4 c. Peanut Butter (creamy)
  • 2 tbsp Soy Sauce (low-sodium is best)
  • 1-2 Garlic Cloves, Minced
  • 1/8 tsp Ground Ginger (optional)
  • 1/3 c. Warm Water
  • 2 Fresh Chicken Breasts, Cut into bite-size pieces
  • Salt & Pepper to taste
  • 1 tbsp olive oil
Instructions
  1. Heat olive oil over medium-high heat. Season chicken pieces with salt and pepper and cook until browned.
  2. In a small bowl, whisk together all sauce ingredients. Pour over chicken and heat through.
  3. Serve over rice!
Notes

Like I said in the post, I would suggest doubling the recipe. I also added a little bit more water (maybe 2 tbsp) to make it just a little runnier. You can adjust that to your liking.

If you like a little crunch, you can also add a few peanuts to your chicken in the end.

This would also be very tasty with tofu, veggies, or just plain pasta!


Like this post? SHARE it!

Related Posts Plugin for WordPress, Blogger...

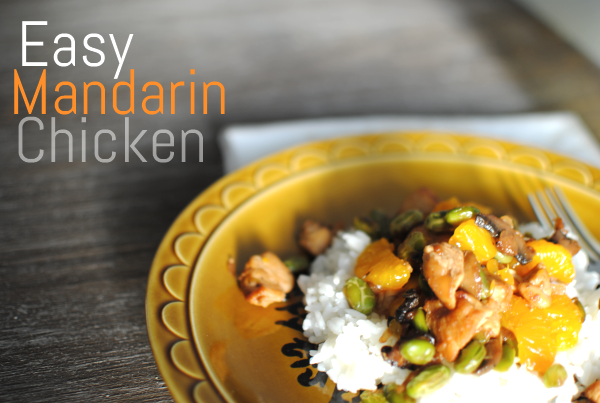
Easy Mandarin Chicken

My girls have recently discovered mandarin oranges. Ever since I was a kid, I’ve always loved fruit in any form. Even canned fruit strikes my fancy every now and then. I picked up a few cans of mandarin oranges the other day to see if my girls would enjoy it as much as I used to. I think ended up rekindling my love for the fruit myself. And as expected, they absolutely loved them. I really need to find myself a good sale to stock up on them.

In keeping with their latest obsession, I decided to make something that showcased two things that I know they’ll both like. Chicken and the new-found love, mandarin oranges.

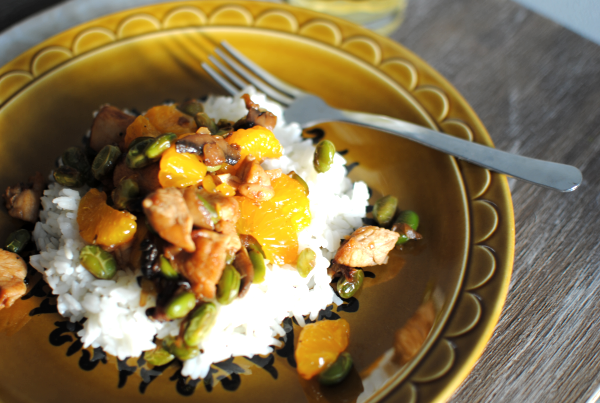
To my utmost surprise, my ENTIRE family (including my incredibly picky husband and 5-year old) loved this meal! The 1-year old even cleaned her plate.  I cleaned mine and an entire 2nd plate as well. Hubby was really concerned about the sweet oranges being used with savory chicken, but when he was done he told me that he thought it worked really well together. SCORE!

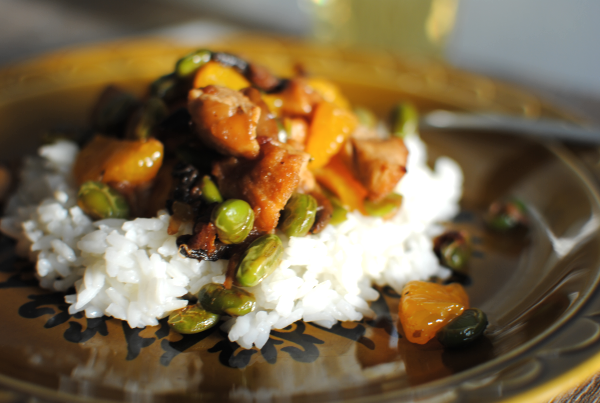
I used edemame to kick up the nutrition and hid mushrooms with the onions. The mushrooms were quite stealth and the kiddos loved the edemame! In fact, Addie asked me at one point what kinda beans they were. I told her edemame and she replied “I really like edemame!”.

Those are words that I never expected to come out of my 5-year old’s mouth…

By the time dinner was over, I was floored. This was a meal that the whole family loved and it was actually healthy and good for them. That only happens in my dreams and on commercials doesn’t it?

Recipe adapted from 366 Low-Fat Brand-Name Recipes in Minutes Cookbook.

Easy Mandarin Chicken
Recipe Type: Main Dish
In just minutes, you’ll have a mouth-watering Asian meal with little effort!
Ingredients
  • 1 11 oz Can Mandarin Oranges
  • 2 & 1/2 tbsp Soy Sauce
  • 2 Boneless, Skinless Chicken Breasts, Cut into Bite-size Pieces
  • 1 Tbsp Canola Oil
  • 1/4 Tsp Garlic Powder
  • 1 Cup Chopped Onion
  • 1 & 1/2 c. Frozen Edemame
  • 8 Baby Bella Mushrooms, Sliced
Instructions
  1. Drain oranges, reserving 3 tbsp of the liquid. Mix together the reserved liquid with the soy sauce and set aside.
  2. Heat oil in a large skillet and cook chicken in the oil over medium-high heat until chicken is no longer pink. Remove chicken from skillet. Add in the onions, edemame and mushrooms. Cook until onions are tender.
  3. Add the chicken back in along with the soy sauce mixture. Cook and stir to heat all of it through.
  4. Gently stir in the mandarin oranges right before serving.
  5. Goes well over rice!
Notes

If your group is not a fan of edemame, you can always use frozen snap peas in their place.

Teriyaki sauce can also be substituted in soy sauce’s place.

The addition of a couple drop of sesame oil would also make a nice addition.

Be prepared for a quick meal! This one takes no time at all to whip up!


Like this post? SHARE it!

Related Posts Plugin for WordPress, Blogger...

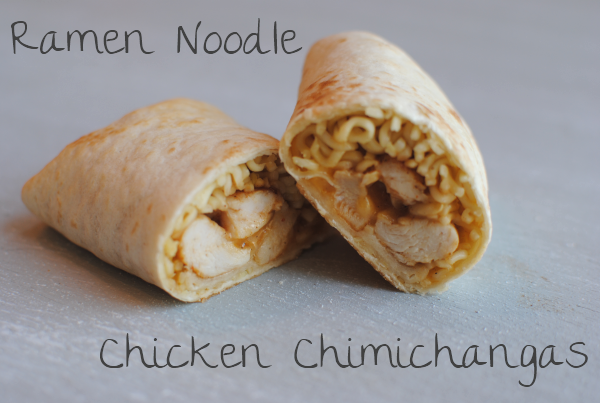
Ramen Noodle Chicken Chimichangas

Ramen Noodle Chicken Chimichangas 9 Ramen Noodle Chicken Chimichangas

We’re going to go low budget today. We’re talking way low budget. Like Ramen Noodle budget low. You know what I’m talking about…the magical noodles that come in handy when money is tight or you just don’t want to cook. I got this idea from my step brother who was low on ingredients for a chimichanga and came up with this concoction. He shared one with me and I was pleasantly surprised at how yummy they were.

I have to admit that the thought of Ramen noodles in a chimichanga didn’t exactly sound that amazing to me. But once I tried, I was actually excited to make my own. Even if you’re not too keen on putting Ramen noodles in your chimichanga, you can at least see below from instructions on how to fold a chimichanga. But I think you’ll want to give these a chance y’all. They are surely worth it!

Price breakdown:

4 Flour Tortillas $.40
4 Fresh Chicken Tenders $.80
1 Package Chicken Ramen Noodles $.18
2 Cups Shredded Cheese $1.79
Total= $.79 per chimichanga

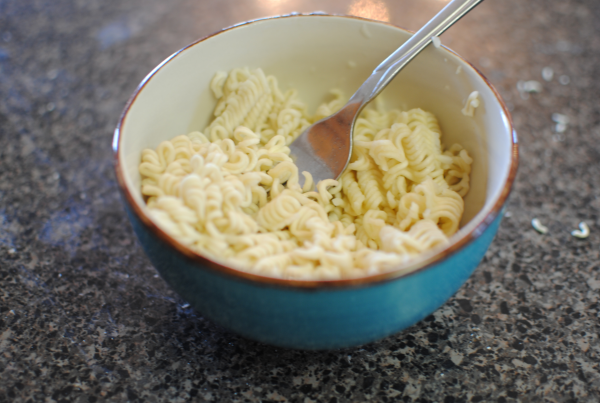
Ramen Noodle Chicken Chimichangas 1 Ramen Noodle Chicken Chimichangas

It all starts with those college-esq Ramen noodles. Which by the way, are quite tasty! I haven’t made them in so long and when these came out of my microwave, I seriously had to stop myself from eating them all. Cook them up according to the package including the seasoning. Easy and cheap way to get that great flavor inside the chimi.

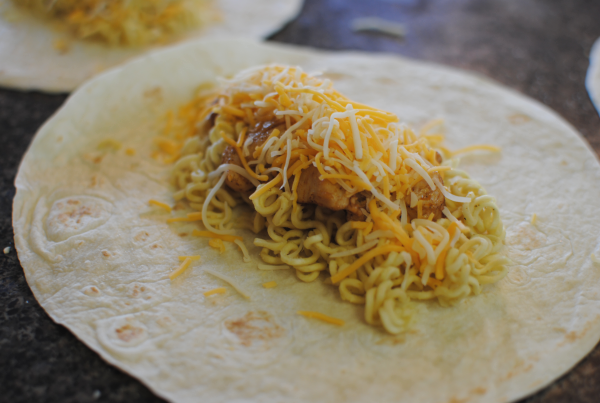
Ramen Noodle Chicken Chimichangas 2 Ramen Noodle Chicken Chimichangas

On each tortilla, you place some of those Ramen noodles along with some seasoned grilled chicken and shredded cheese. YUM!

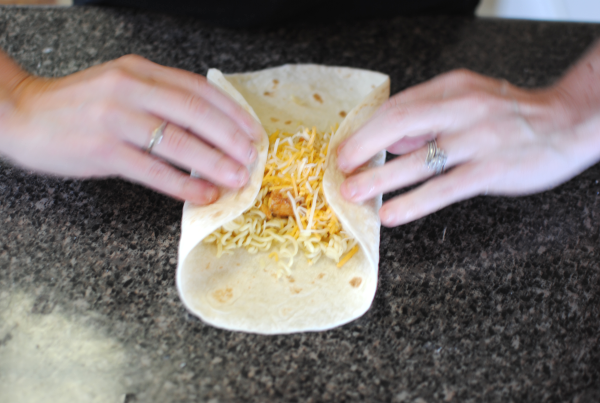
Then it’s time to roooooooooll them up for baking.

Ramen Noodle Chicken Chimichangas 3 Ramen Noodle Chicken Chimichangas

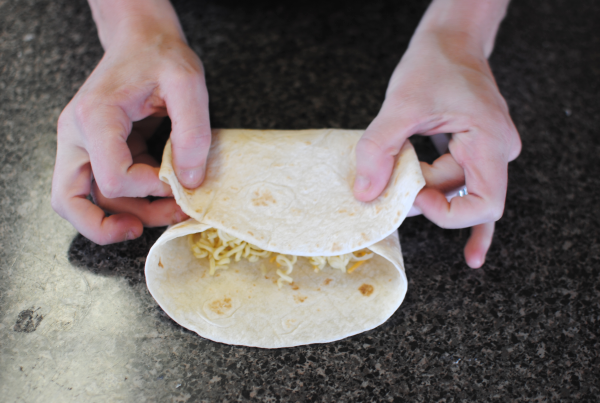
Lay your tortilla flat. Fold the sides in towards the middle.

Ramen Noodle Chicken Chimichangas 4 Ramen Noodle Chicken Chimichangas

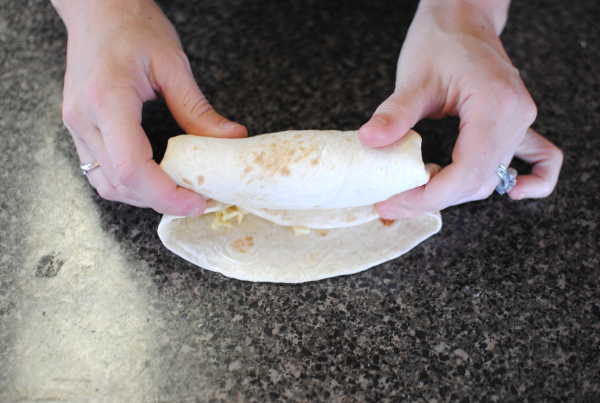
Then fold the bottom towards the top, but only halfway. Fold the edge towards the inside and begin to roll.

Ramen Noodle Chicken Chimichangas 5 Ramen Noodle Chicken Chimichangas

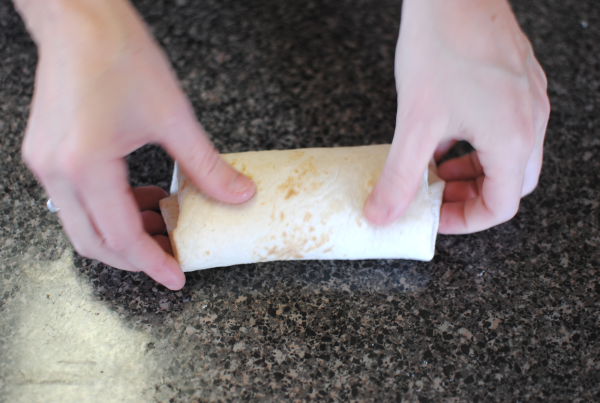
…like so.

Ramen Noodle Chicken Chimichangas 6 Ramen Noodle Chicken Chimichangas

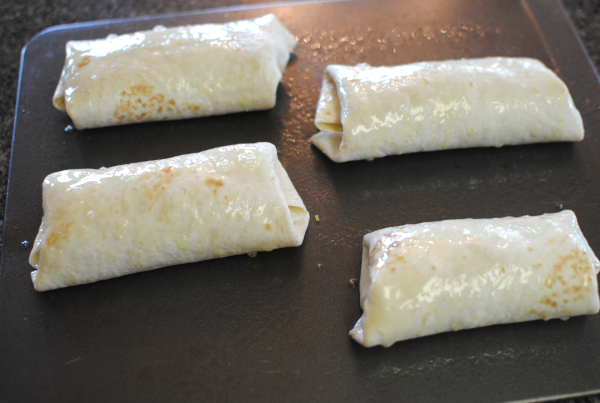
Once you get the rolling down, it will look like this. Place them seam side down on your baking sheet.

Ramen Noodle Chicken Chimichangas 7 Ramen Noodle Chicken Chimichangas

Spray them with a little cooking spray to help them brown and get a little crunchy.

Ramen Noodle Chicken Chimichangas 8 Ramen Noodle Chicken Chimichangas

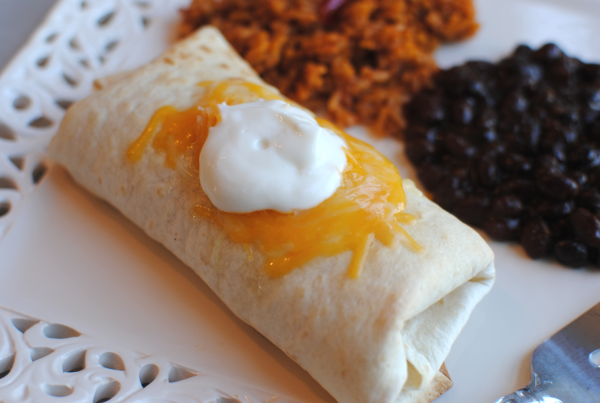
Serve with your favorite fix-in’s like more cheese or sour cream on top and viola. So easy, cheap, and great for freezing too!

Ramen Noodle Chicken Chimichangas
Recipe Type: Main Dish
Author: Pennywise Cook
Serves: 4
Using a low budget ingredient, Ramen noodles make a great addition to chicken chimichangas!
Ingredients
  • 4 Flour Tortillas
  • 4 Fresh Chicken Tenders, Cut into Bite-Size Pieces
  • 1 Pkg Chicken Flavored Ramen Noodles
  • 1 Tbsp Olive Oil
  • 1 Tsp Minced Garlic
  • 1/2 Tbsp Chili Powder
  • 8 Tbsp Shredded Cheddar Cheese
  • Cooking Oil
Instructions
  1. Preheat oven to 350 degrees.
  2. Cook Ramen Noodles according to the package directions. Drain all liquid from the noodles and set aside.
  3. Meanwhile, in a skillet heated to medium-high cook chicken in olive oil along with the minced garlic and chili powder until no longer pink.
  4. On each tortilla place 1/4 of the Ramen noodles, 1/4 of the to chicken, and 2 tbsp shredded cheese.
  5. Roll up into chimichangas and place seam side down on a greased baking sheet.
  6. Spray tops with cooking spray and bake for 10-15 minutes until browned and crunchy.
Notes

If you like spicy things, you can use jalapeno cheese like my step brother to add a little kick!


Like this post? SHARE it!

Related Posts Plugin for WordPress, Blogger...

Easy Chicken Tortilla Casserole

We went on a bike ride last night with the girls. I love riding during the sunset. I feel all nostalgic and corny riding off into the sunset like a cowboy.

Don’t you always get that feeling when you ride your bike in the evening? No? Just me? I digress…

You know that saying:

I can only please one person per day. Today is not your day. Tomorrow isn’t looking good either.

There are many days when I feel like just saying that to folks. Especially my picky eaters. It’s not always easy pleasing those who don’t like green or even red things on their plate. It’s a matter of trial and error and you just try different things until you find something they like! And sometimes you just say eat it or starve! 😉

Luckily most children grow out of their I don’t like that stage as their taste buds mature. Even I remember tons of things I never used to like that I love now. For instance of all things, onion bagels. I remember my momma forcing me to eat an onion bagel one morning and it was traumatizing to say the least. I mean come on, why else would I remember this? But now I love them. That is if I can find them in the store. Where are those things anyways? Have they stopped making them?

Today’s recipe is one that most every person will love. Simple enough for those who hate to cook, but fancy enough to make if you have company coming. It’s quite tasty too!

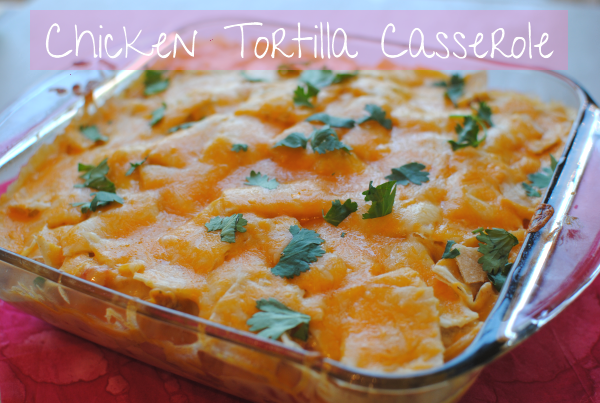
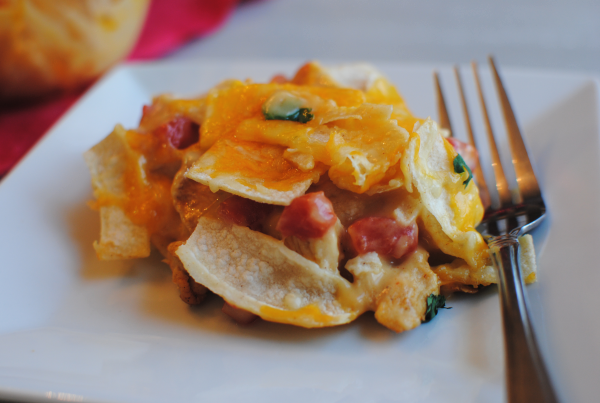
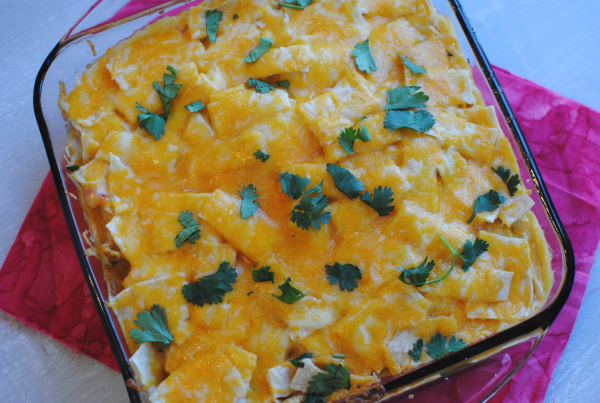
This Chicken Tortilla Casserole is brimming with juicy chicken breast, spicy rotel, and corn tortillas are what this whole dish is all about.

One word of warning. Use MILD rotel if your family doesn’t like things hot. We used original and it was way too spicy for us. I will be using mild next time.

Recipe adapted from Homemaking Challenged.

Easy Chicken Tortilla Casserole
Simple ingredients lead to a pleasing chicken meal even for the pickiest of eaters!
Ingredients
  • 2 Large Boneless, Skinless Chicken Breasts, Cut into Bite-size Pieces
  • 1 (10 oz) Can Rotel
  • 2 Cans Cream of Chicken Soup
  • 12 (6 in) Corn Tortillas, Cut into bite-size pieces.
  • 1/2 Tbsp Chili Powder
  • 1 Cup Mexican Blend Shredded Cheese
  • 1 Tbsp Olive Oil
  • 1 Tsp Garlic, Minced
Instructions
  1. Preheat oven to 350 degrees.
  2. In a large skillet brown chicken pieces in oil with chili powder and garlic. Remove from heat.
  3. Meanwhile in a large bowl, mix 2 cans cream of chicken with 1 can rotel.
  4. In bottom of a greased 8×8 baking dish, place 1/3 tortilla pieces. Place half of chicken on top evenly. Place 1/2 the cream of chicken mixture over top.
  5. Repeat layers ending with tortilla pieces. Cover with foil and bake for 40 minutes.
  6. Place shredded cheese on top and bake an additional 5 minutes once cheese melts.
Notes

This might even be possible with canned chicken in a pinch.

You could also make this ahead the night before and then bake when ready to serve! It could freeze well too.

If you want to get fancy like me and add cilantro on top you can. I won’t hold you back…


Like this post? SHARE it!

Related Posts Plugin for WordPress, Blogger...

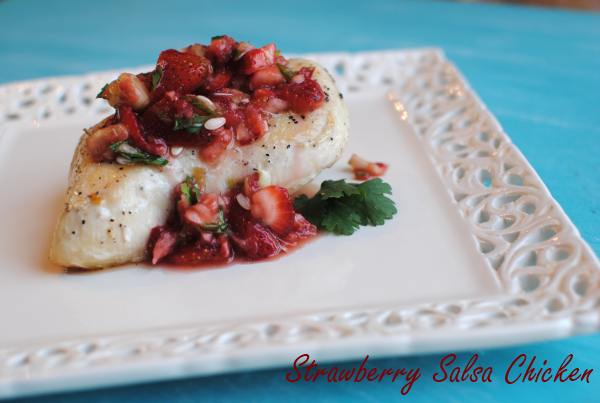
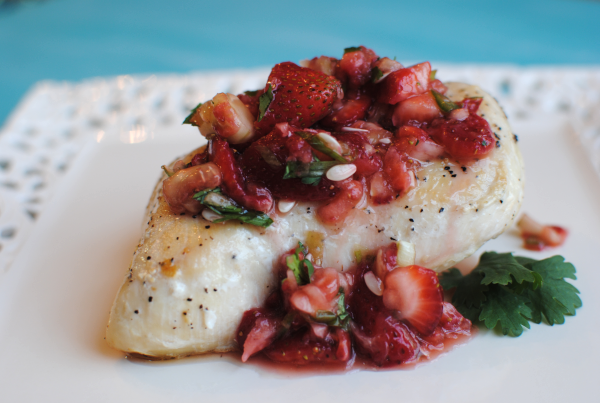
Strawberry Salsa Chicken

Take me or leave me, but I like weird things to eat. Well, what some might call weird anyways. I was making a hot dog the other night and was so excited while I prepared my ingredients. My husband watched as I drug out the relish, mustard, and ketchup. Then I decided that it wasn’t complete without chopped onions. Almost in awe of my condiment concoction, he asked “Did you chop that entire onion just for a little for your hot dog?”. Why yes, I in fact had chopped a very small amount of onion just for my hot dog. That’s how me and my dogs roll you know. He thinks I’m a bit odd, but I know there are others out there like me.

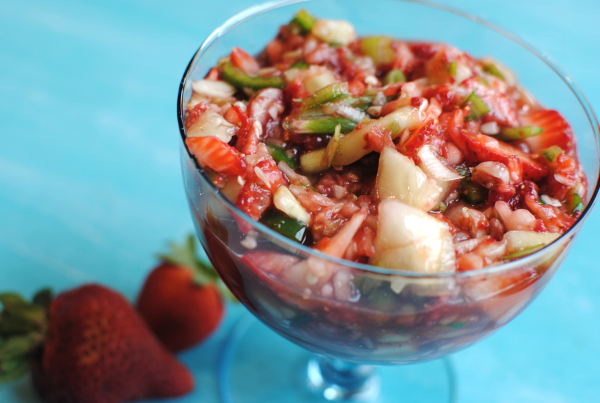
Like someone else who might like strawberry salsa? That’s another weird thing that might be perplexing to some. We’re talking replacing your tomatoes with juicy and summery strawberries instead. It’s absolutely divine I tell you. I had no idea that it would be so incredible.

And then I ate it with chicken.

Just imagine me kissing my fingers like the Italians do. It’s that marvelous.

Complete with cool and crisp cucumbers, lime juice, brown sugar and even jalapeno, I can almost guarantee that you will like this. Oh and if you don’t like hot salsa, don’t worry. The one jalapeno that is in this will not be hot. It’s really the one thing that makes this a “salsa”.

I’ve also learned a fancy smancy teqnique for making oven baked chicken PERFECT. The key is to brown it in a skillet a few minutes on each side. Not enough to cook it through, but just enough to get it browned a bit. Then finish it off in the oven. Works everytime to get the most perfectly cooked chicken ever.

AND I also highly recommend pounding your meat first. Yes, it seems like a lot of work but trust me. You will not only enjoy the task, but you’ll also enjoy the chicken a lot more than going without. I told my mom about this recently and she always beats her chicken first now! Just do it next time and you’ll see.

Ready for the most perfect summer chicken recipe ever? See below!

Strawberry Salsa Chicken

Strawberry Salsa Chicken

Celebrate summer with this baked chicken with strawberry salsa!

Ingredients

  • Boneless, Skinless Chicken Breasts
  • 1 Tbsp Olive Oil
  • 1 and 1/2 c. Strawberries, Chopped
  • 1/2 c. Cucumber, Chopped
  • 2 Green Onions, Chopped
  • 1 Jalapeno, Chopped
  • 1 Tbsp Cilantro, Chopped
  • The Juice of 1 Lime
  • 2 Tbsp Brown Sugar

Method

  1. Preheat oven to 350 degrees. Season chicken with salt and pepper. Brown chicken over medium high heat in oil for a few moments on each side. Just until browned, no need to cook through. Bake 20 minutes.
  2. Meanwhile, mix all salsa ingredients and combine well. Place in refrigerator until chicken is done.
  3. Remove chicken from oven. Serve salsa over chicken!

Notes

There's no much to it! Simple as pie.

The salsa would be divine with tortilla chips too!

Enjoy!

http://www.pennywisecook.com/strawberry-salsa-chicken/

Question of the day: What do you like on your hot dogs?


Like this post? SHARE it!

Related Posts Plugin for WordPress, Blogger...

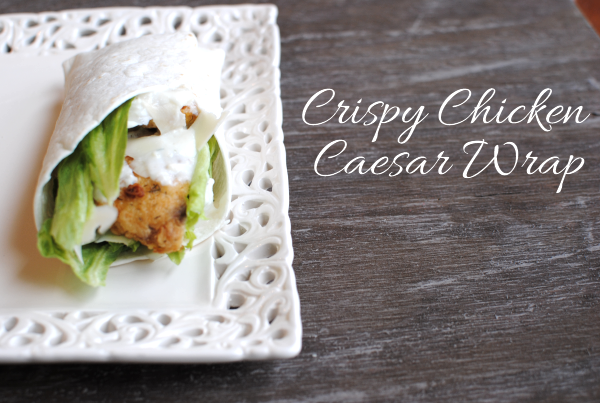
Crispy Caesar Chicken Wraps

Do you ever have those days when you start thinking about dinner and your mind just goes completely blank? This happens to me a lot so I do my best to prepare a meal plan for the week. Though we rarely actually stick to it. Most weeks I come up with my menu on my own, but some weeks I go to the family to see what they would like. I recently asked my husband if he had any suggestions for dinners and of all things that he could come up with, he asked for crispy chicken caesar wraps.

Yes, like the ones at Wendy’s. Very original right?

Honestly, he had a great idea. I love those things! He often gets those on his lunch breaks. He thinks they are “healthy”. You know, because they are wraps. And not burgers. I love man-thinking don’t you? I’ll just let him keep thinking that. But I did want to try and create them at home so that I could know exactly what was going into them and to make them healthier.

All I can say is YUM. Being a frugal person, I can’t tell you that these are going to be cheaper than spending the $.99 on ones at Wendy’s. But I can tell you that the ones you make at home will be bigger, homemade, and a bit healthier.

These wraps are made with a cheese that I’ve never really worked with before- Asiago. I’m not too fond of it by itself. You really don’t want to take a big bite out of that block of cheese. But in these wraps with the caesar dressing and lettuce and crispy chicken, it’s wonderful!

The caesar dressing that I made was a healthier version that I adapted a bit from Cooking Light. It uses nonfat yogurt, dijon mustard, and other yummy lowfat ingredients to create this familiar dressing. I suggest using this recipe on your salads too! It’s fabulous.

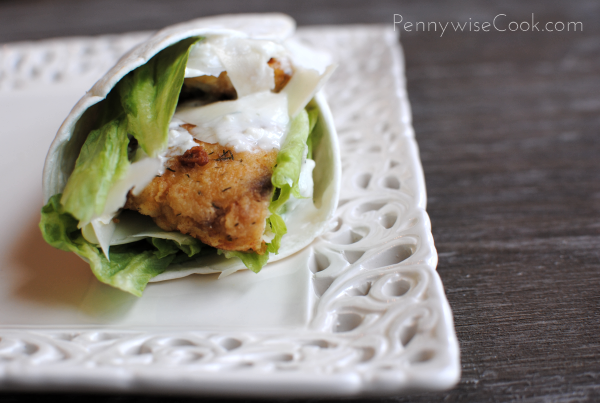
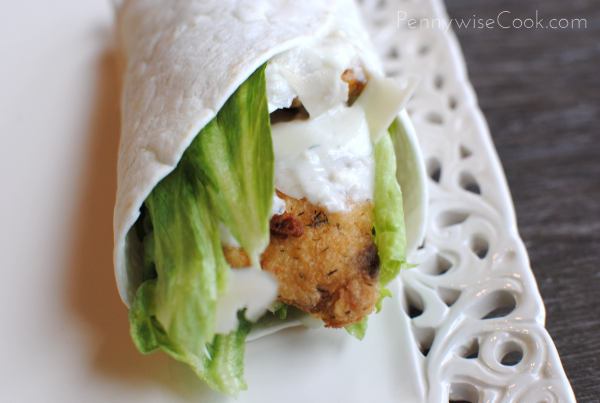
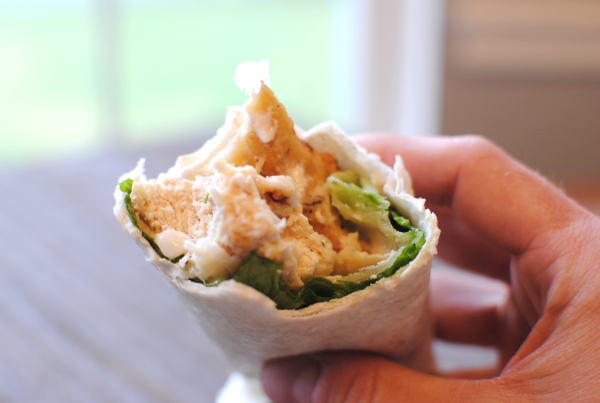
The chicken breasts that I used were quite large so they ended up only being crispy on the outside. Hubby commented that it was almost like they weren’t crispy because there was so much meat inside them making them seem grilled. So I do suggest using smaller chicken breasts in order to get a crispier crunch.

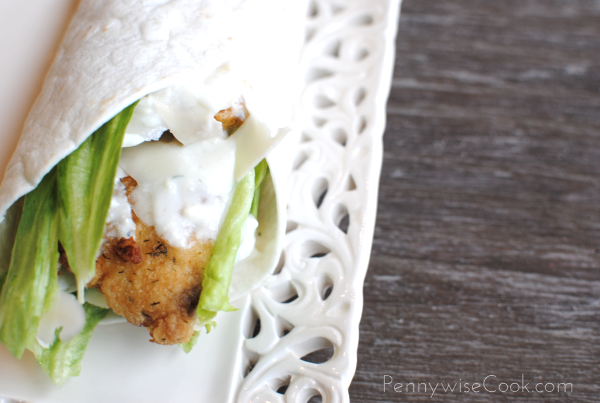
I used the shallow fried chicken recipe from my Chicken and Waffles post but added some dill to the breading to give it a green and caesar flavor. It was a great addition. See those flecks of dill on the chicken?

Skip the drive-thru and try these next time!

Crispy Caesar Chicken Wraps

Crispy Caesar Chicken Wraps

A healthy alternative to Wendy's Crispy Chicken Caesar Wrap.

Ingredients

    For the Chicken
  • 4 Boneless, Skinless Chicken Breasts- Pounded Flat
  • 1/3 c. Egg Substitute or 1 Egg
  • 1/2 c. Flour
  • 1 Tsp. Kosher Salt
  • 1 Tsp Paprika
  • 1/4 Tsp. Pepper
  • 1/4 c. Olive Oil
  • For the Caesar Dressing
  • 1 cup plain nonfat yogurt $
  • 1/2 cup grated Parmesan cheese
  • 1/2 cup low-fat buttermilk
  • 2 tablespoons 1% low-fat milk $
  • 1 tablespoon reduced-calorie mayonnaise $
  • 1 tablespoon Dijon mustard $
  • 1/4 teaspoon salt
  • 1/4 teaspoon pepper
  • 2 garlic cloves, minced
  • For the Assembly
  • Flour Tortillas
  • Lettuce
  • Asiago Cheese, Shaved

Method

  1. Combine all of the ceasar dressing ingredients in a small bowl and whisk well. Set aside.
  2. Mix the flour, kosher salt, paprika, and pepper together and place on a plate.
  3. Heat the olive oil in a skillet over medium high heat.
  4. Dredge chicken breast in the egg then in the flour and seasonings. Place in skillet and brown until crispy. About 4-5 minutes on each side. Cut chicken breasts in half.
  5. Assemble wraps by laying tortillas flat. Next, tear a few pieces of lettuce and place on tortillas. Next place a few pieces of shaved Asiago cheese, then chicken breast. Top with more Asiago cheese and then drizzle desired amount of caesar dressing over chicken.
  6. Roll each tortilla up starting with the bottom and folding upwards, then rolling the sides in.

Notes

You won't need a ton of Asiago cheese, so feel free to buy the smallest amount that you can find.

http://www.pennywisecook.com/crispy-ceasar-chicken-wraps/


Like this post? SHARE it!

Related Posts Plugin for WordPress, Blogger...