DIY Roadside Dresser Transformation

photo1

Driving down the road you pass a dirty old dresser with missing drawers by the curb, and the remains of someone’s stinky trash. You might look at it and think that is one ugly dresser. You might look at its missing drawers and consider it rendered useless. You might think how in the world would I ever get this in my van even if I could get past the fact that its butt ugly?

You MIGHT even slow down long enough to get a good gander at its bones…

Not this girl. I stopped in my tracks and got out of my van to look it over. My suspicions of its stankiness were confirmed. There was a good reason someone was getting rid of this stinker. I made room in the back and gave hubby a call for help to load ‘er up.

I didn’t have a clue what the plan was for this piece of roadside furniture, but you know Pinterest came into play. I had a plan by that evening. Time was most definitely not wasted.

Then we made a huge move into our new and amazing home and this little guy with all its potential was locked up in our shed for a couple of months before I could get my hands on him. The anticipation was killing me and then finally one day, I got him out and began his road to transformation. Why I’m dubbing this dresser a he? I’m not sure. I’ve never called it a he before now, but it feels right so let’s go with it.

photo2

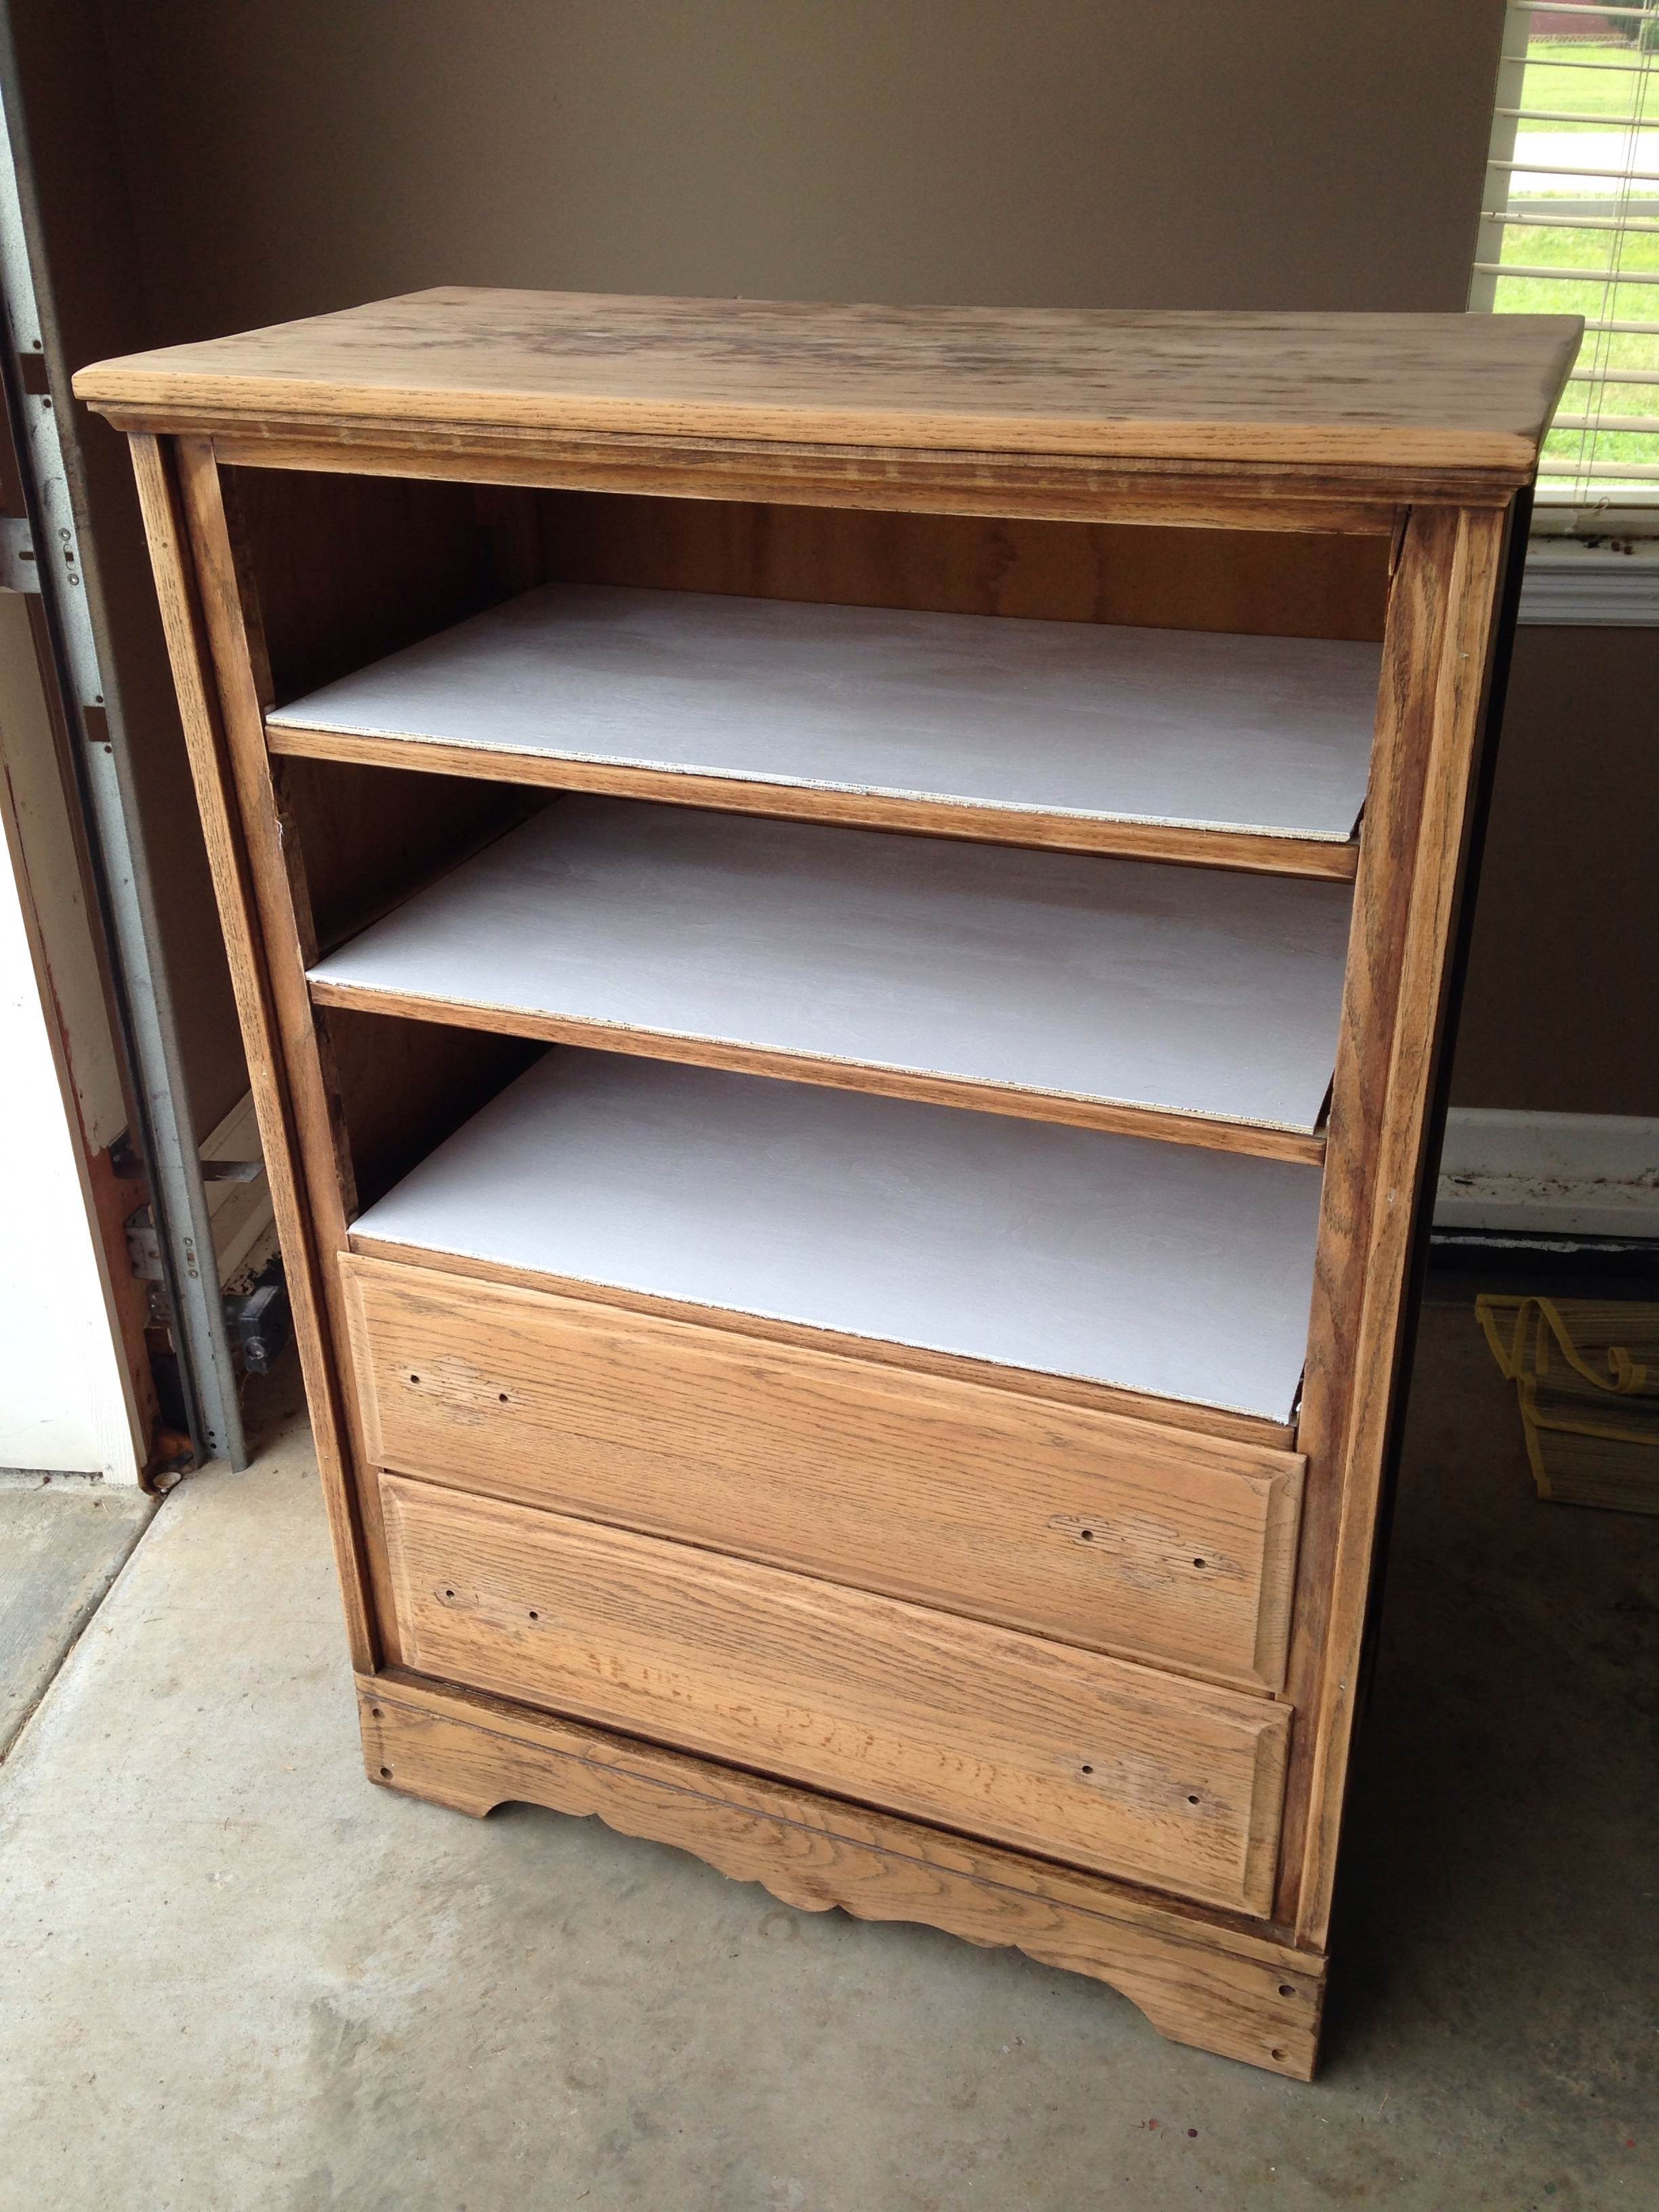
The first thing that I had to do with this thing was to wipe it down really good. It was absolutely disgusting inside and out. It was as though someone had used it for housing small stinky animals and then, to cover up the smells, had sprayed it heavily with a chemical solution. Y’all. Y’aaaaaaall. It was bad.

After that, I removed all the hardware from the drawers. Then I sanded every inch of the dresser that I could. Some parts were solid wood and other parts were particle board type stuff so I did the best I could. Not my favorite part of the transformation I must say. It’s for real getting down to the nitty gritty. And then getting it all up in your eyeball. Should I have worn goggles? Maybe.

I decided to only use the bottom two drawers since they were really the only ones functioning anymore. I removed the drawer tracks for the other three. Then I measured the space on top of each drawer and tacked in very thin plywood as a new base. Nothing fancy here. I could’ve made this part look better. This part literally was a little rough around the edges. And as you can see, I painted the plywood before placing as to access them easier.

photo3

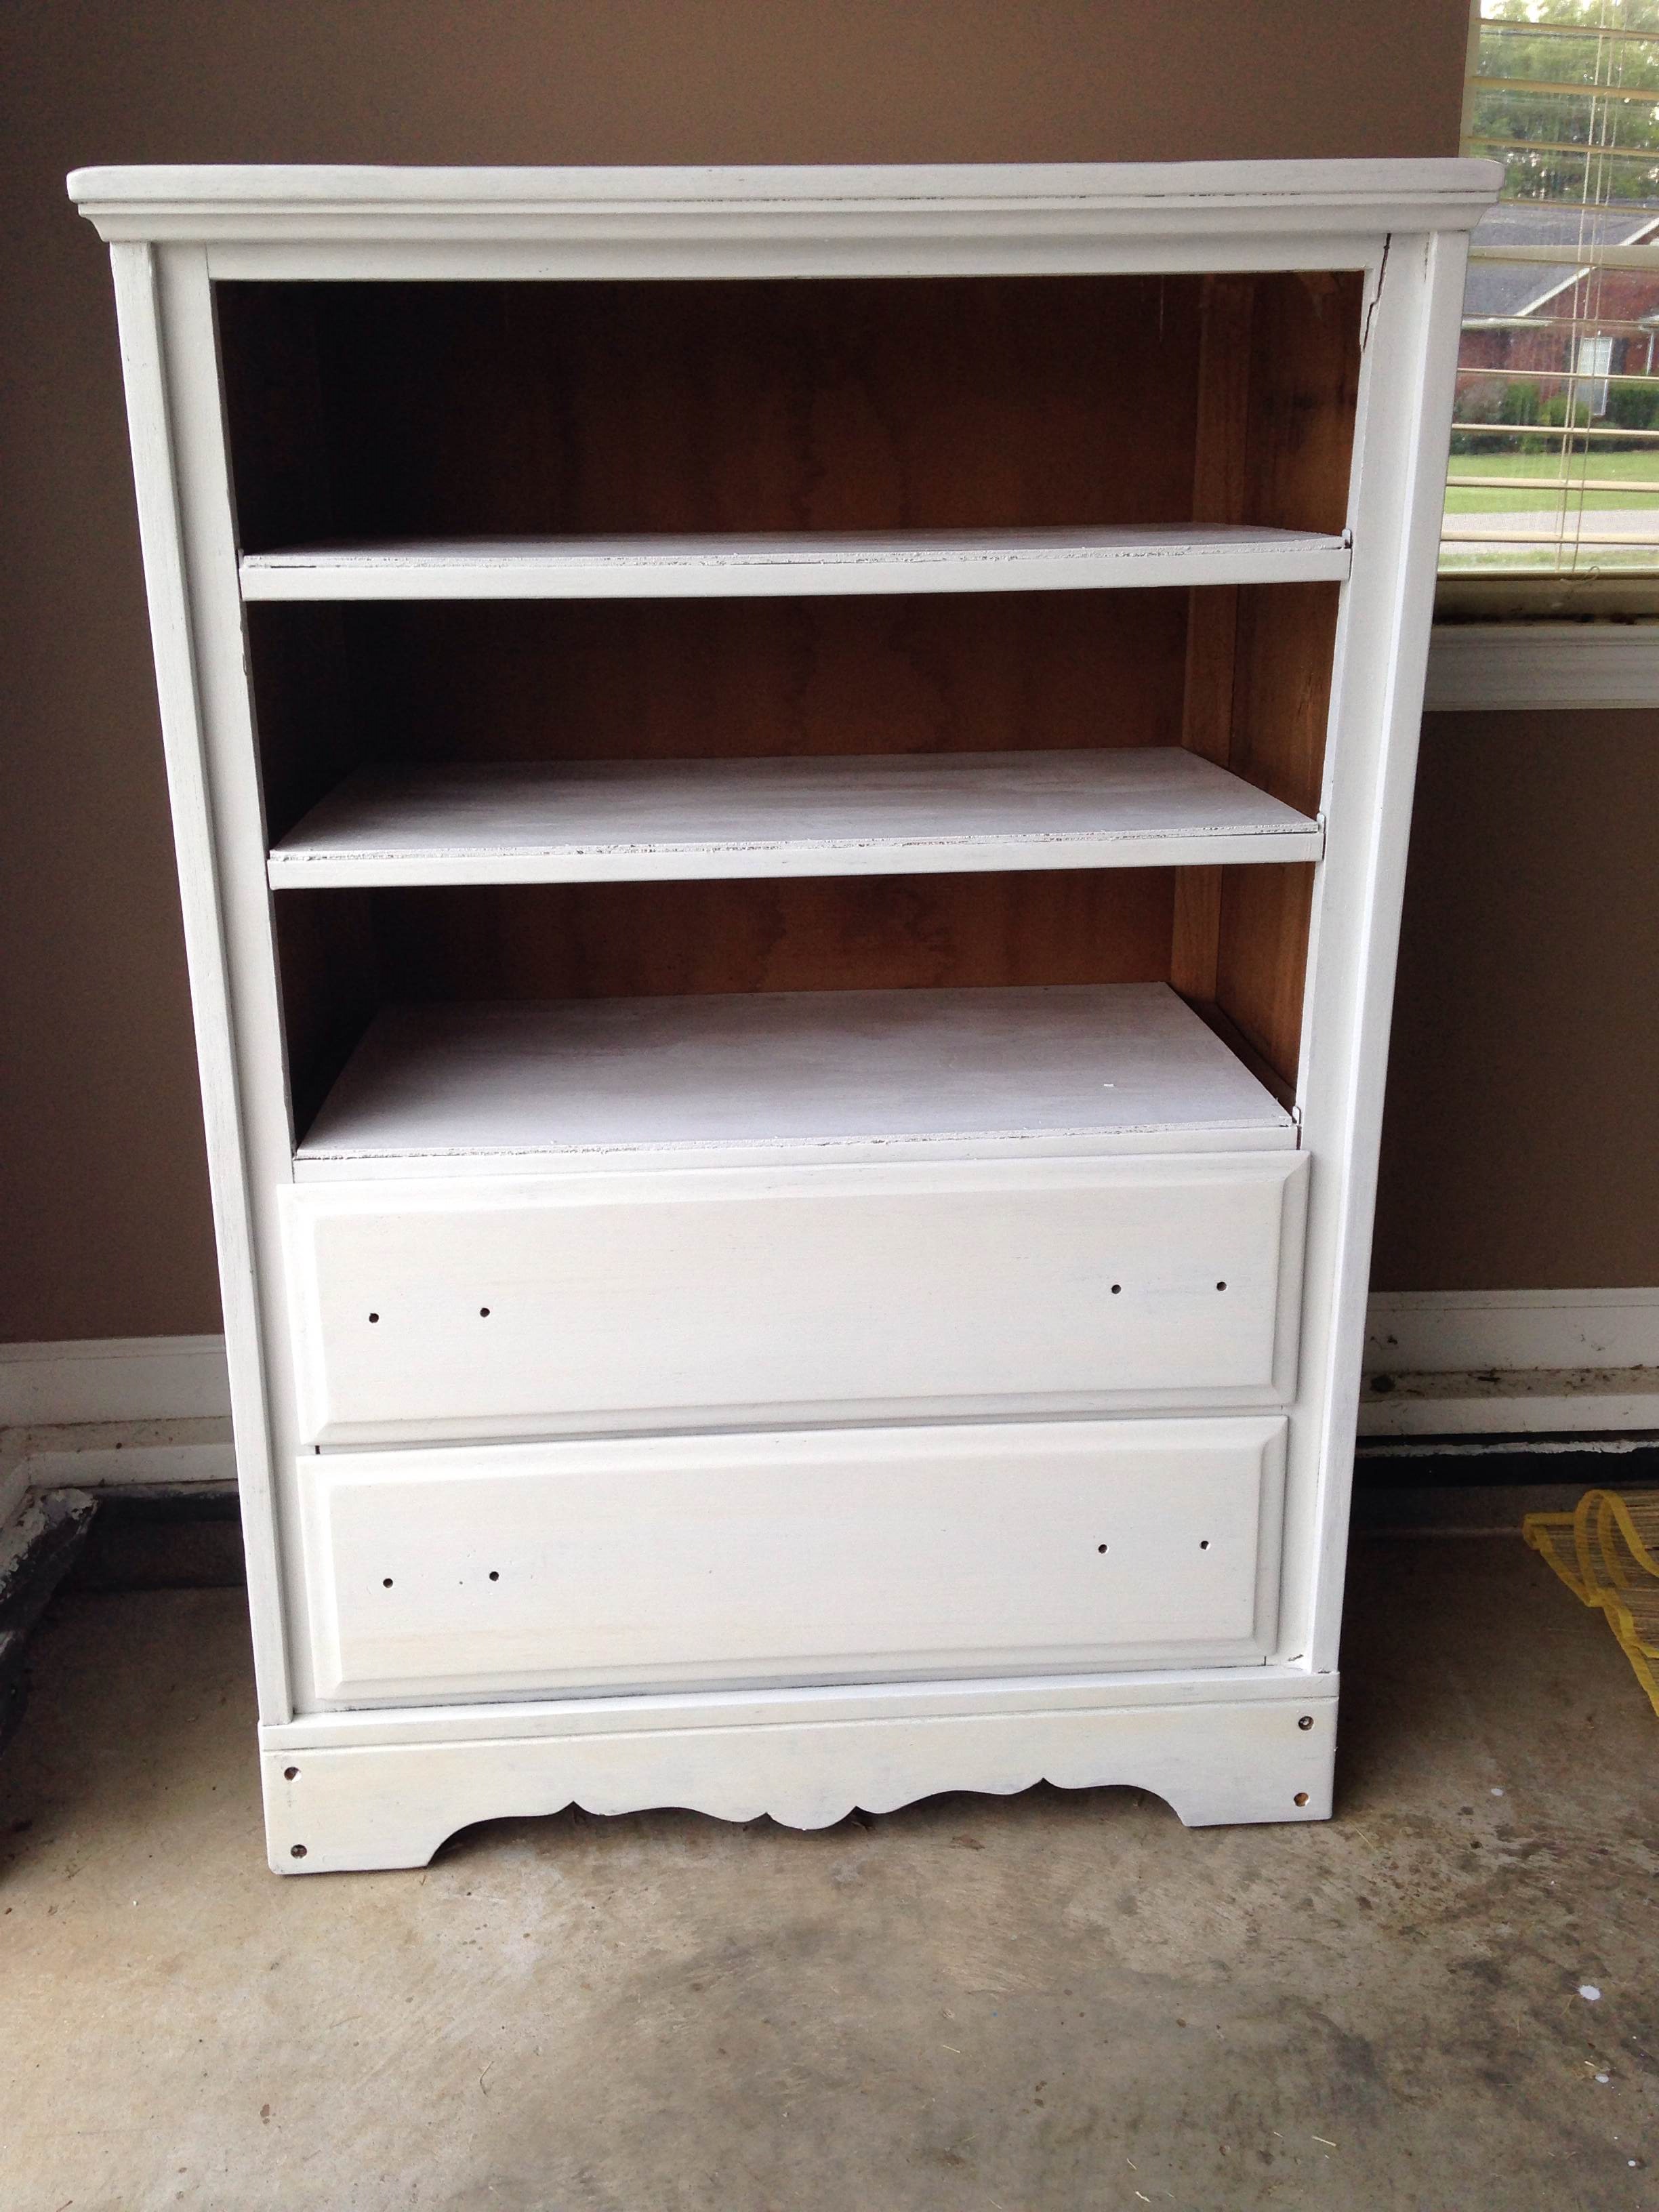
 Then I began the process of painting the whole thing. I didn’t use any special paint. Just some simple Rustoleum Ultra White latex paint. It may have been trim paint? I also bought new hardware for the drawers to match the hardware in my living room. Dark and bold to contrast the stark white.

photo4

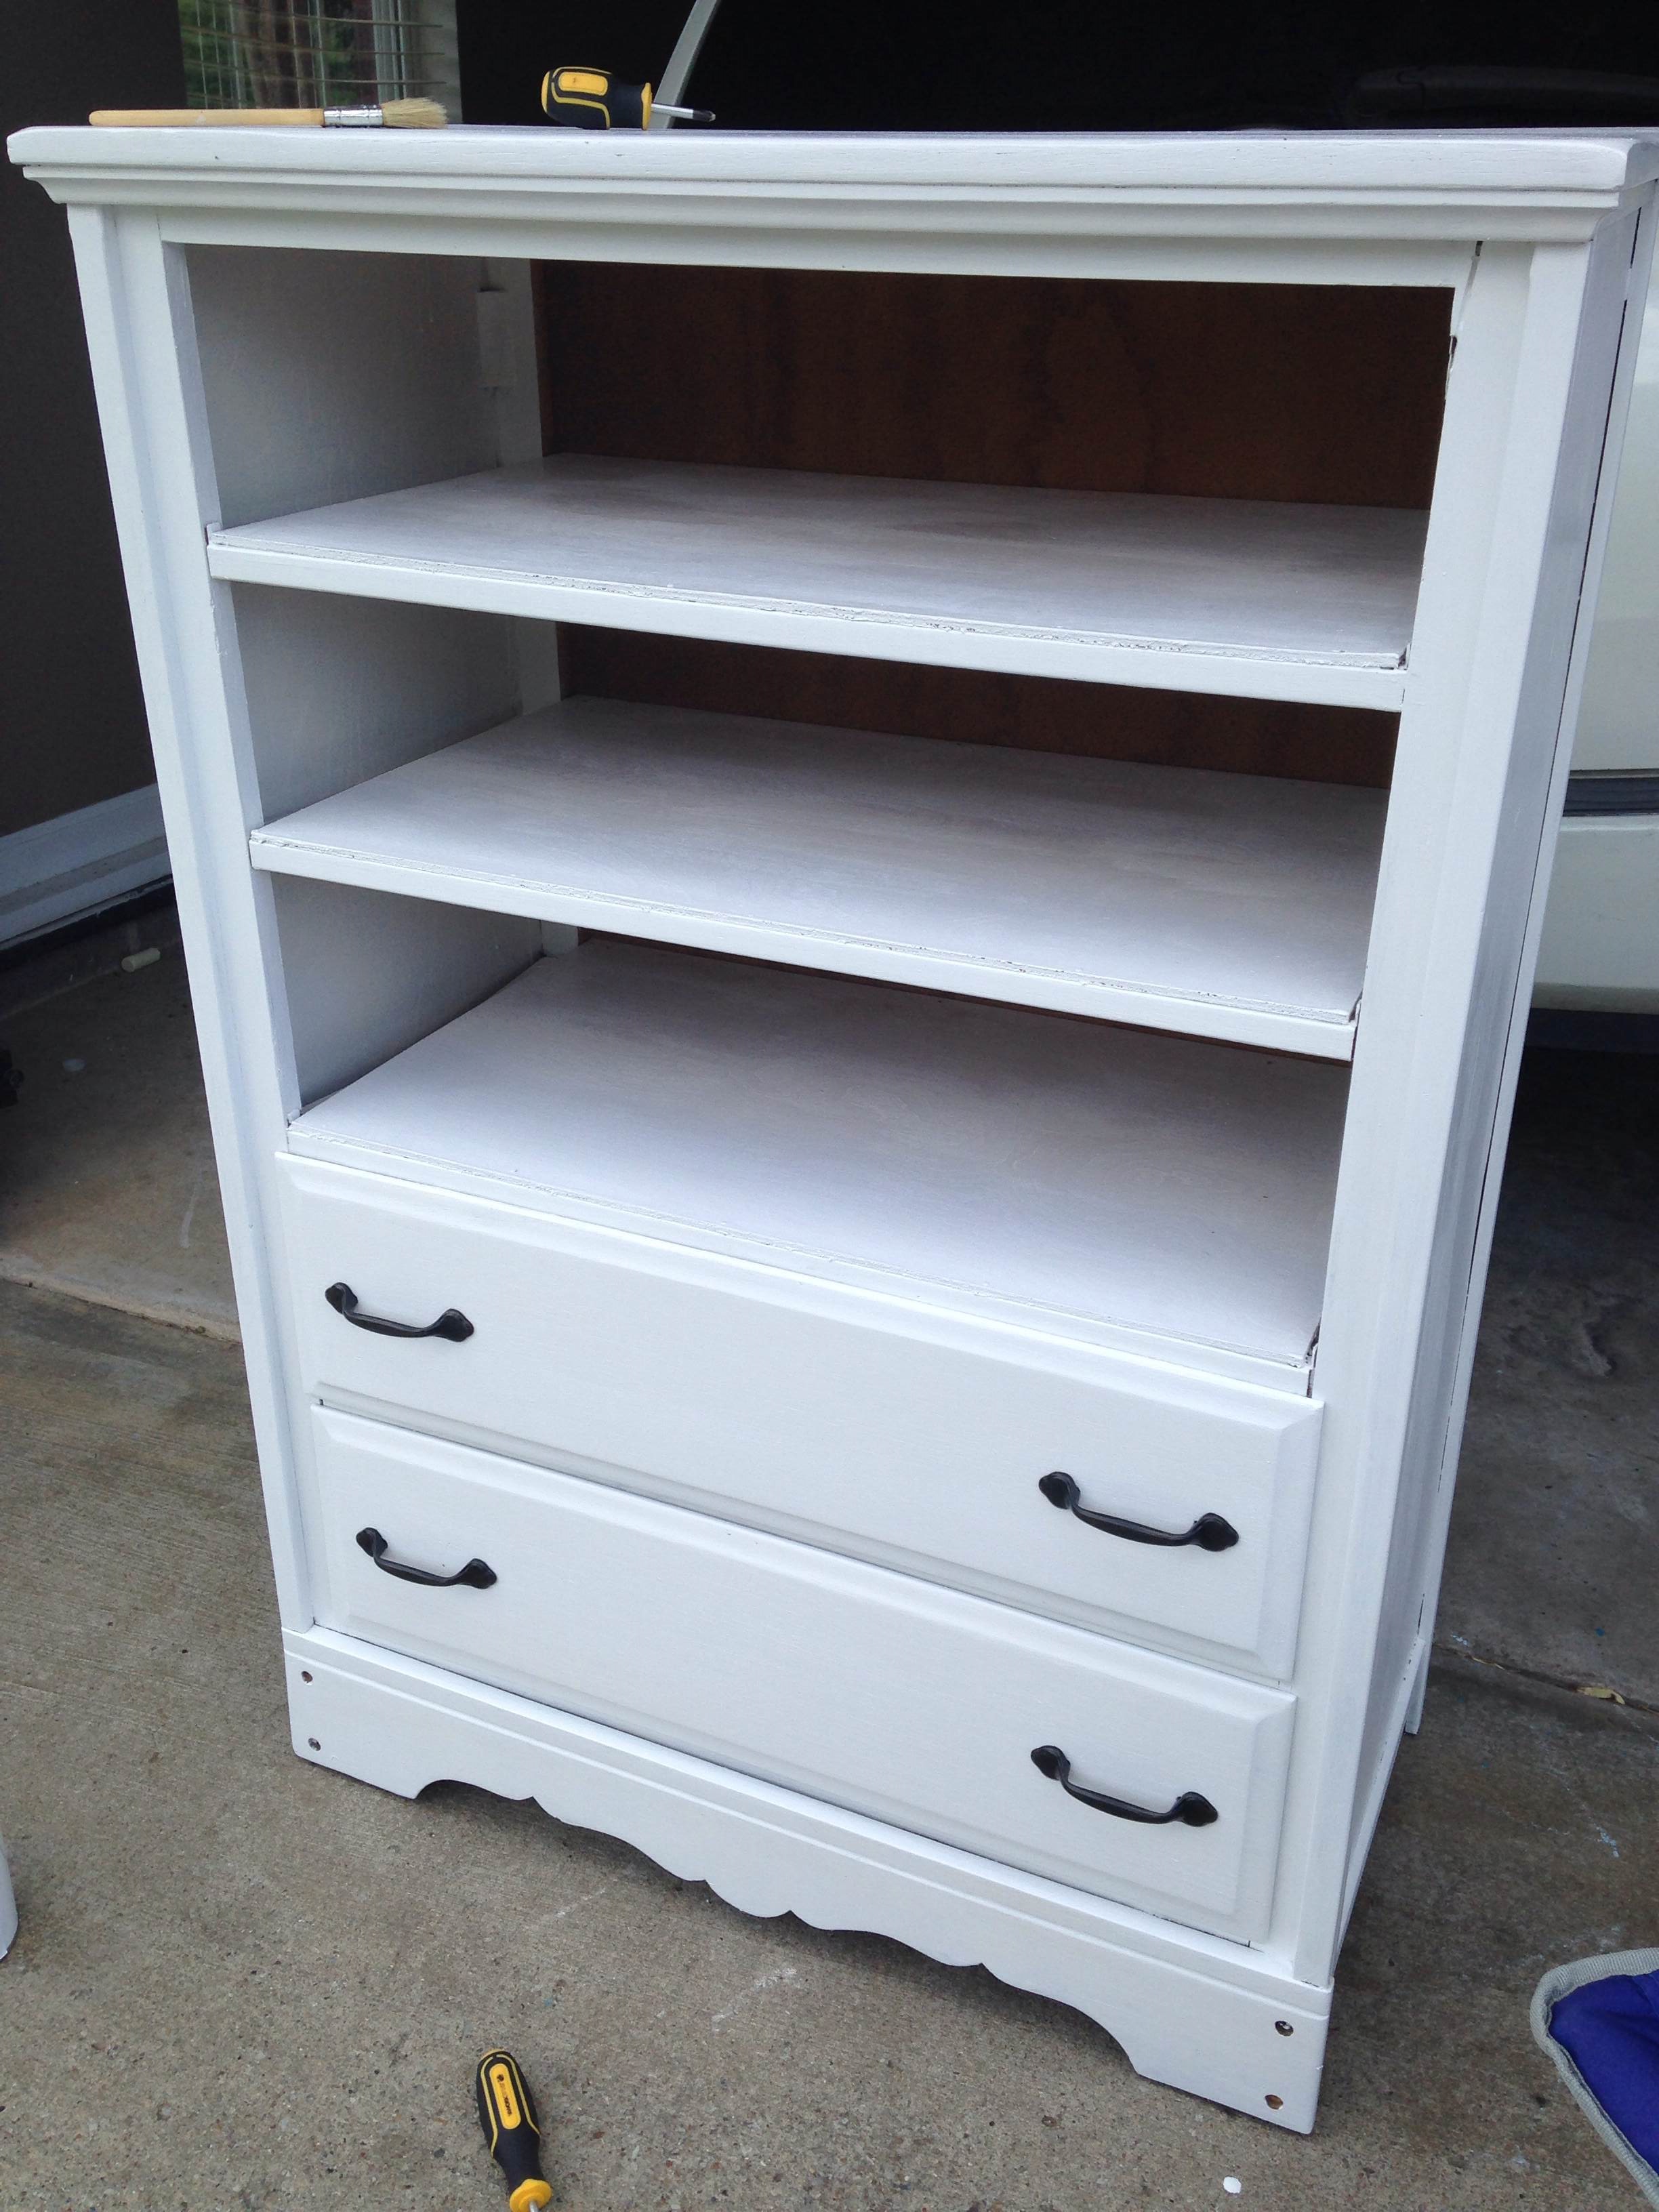
 Here she is with added hardware. (Why is this dresser changing sex all of the sudden?)

And here’s a bonus- you get to see my screwdriver!

photo5

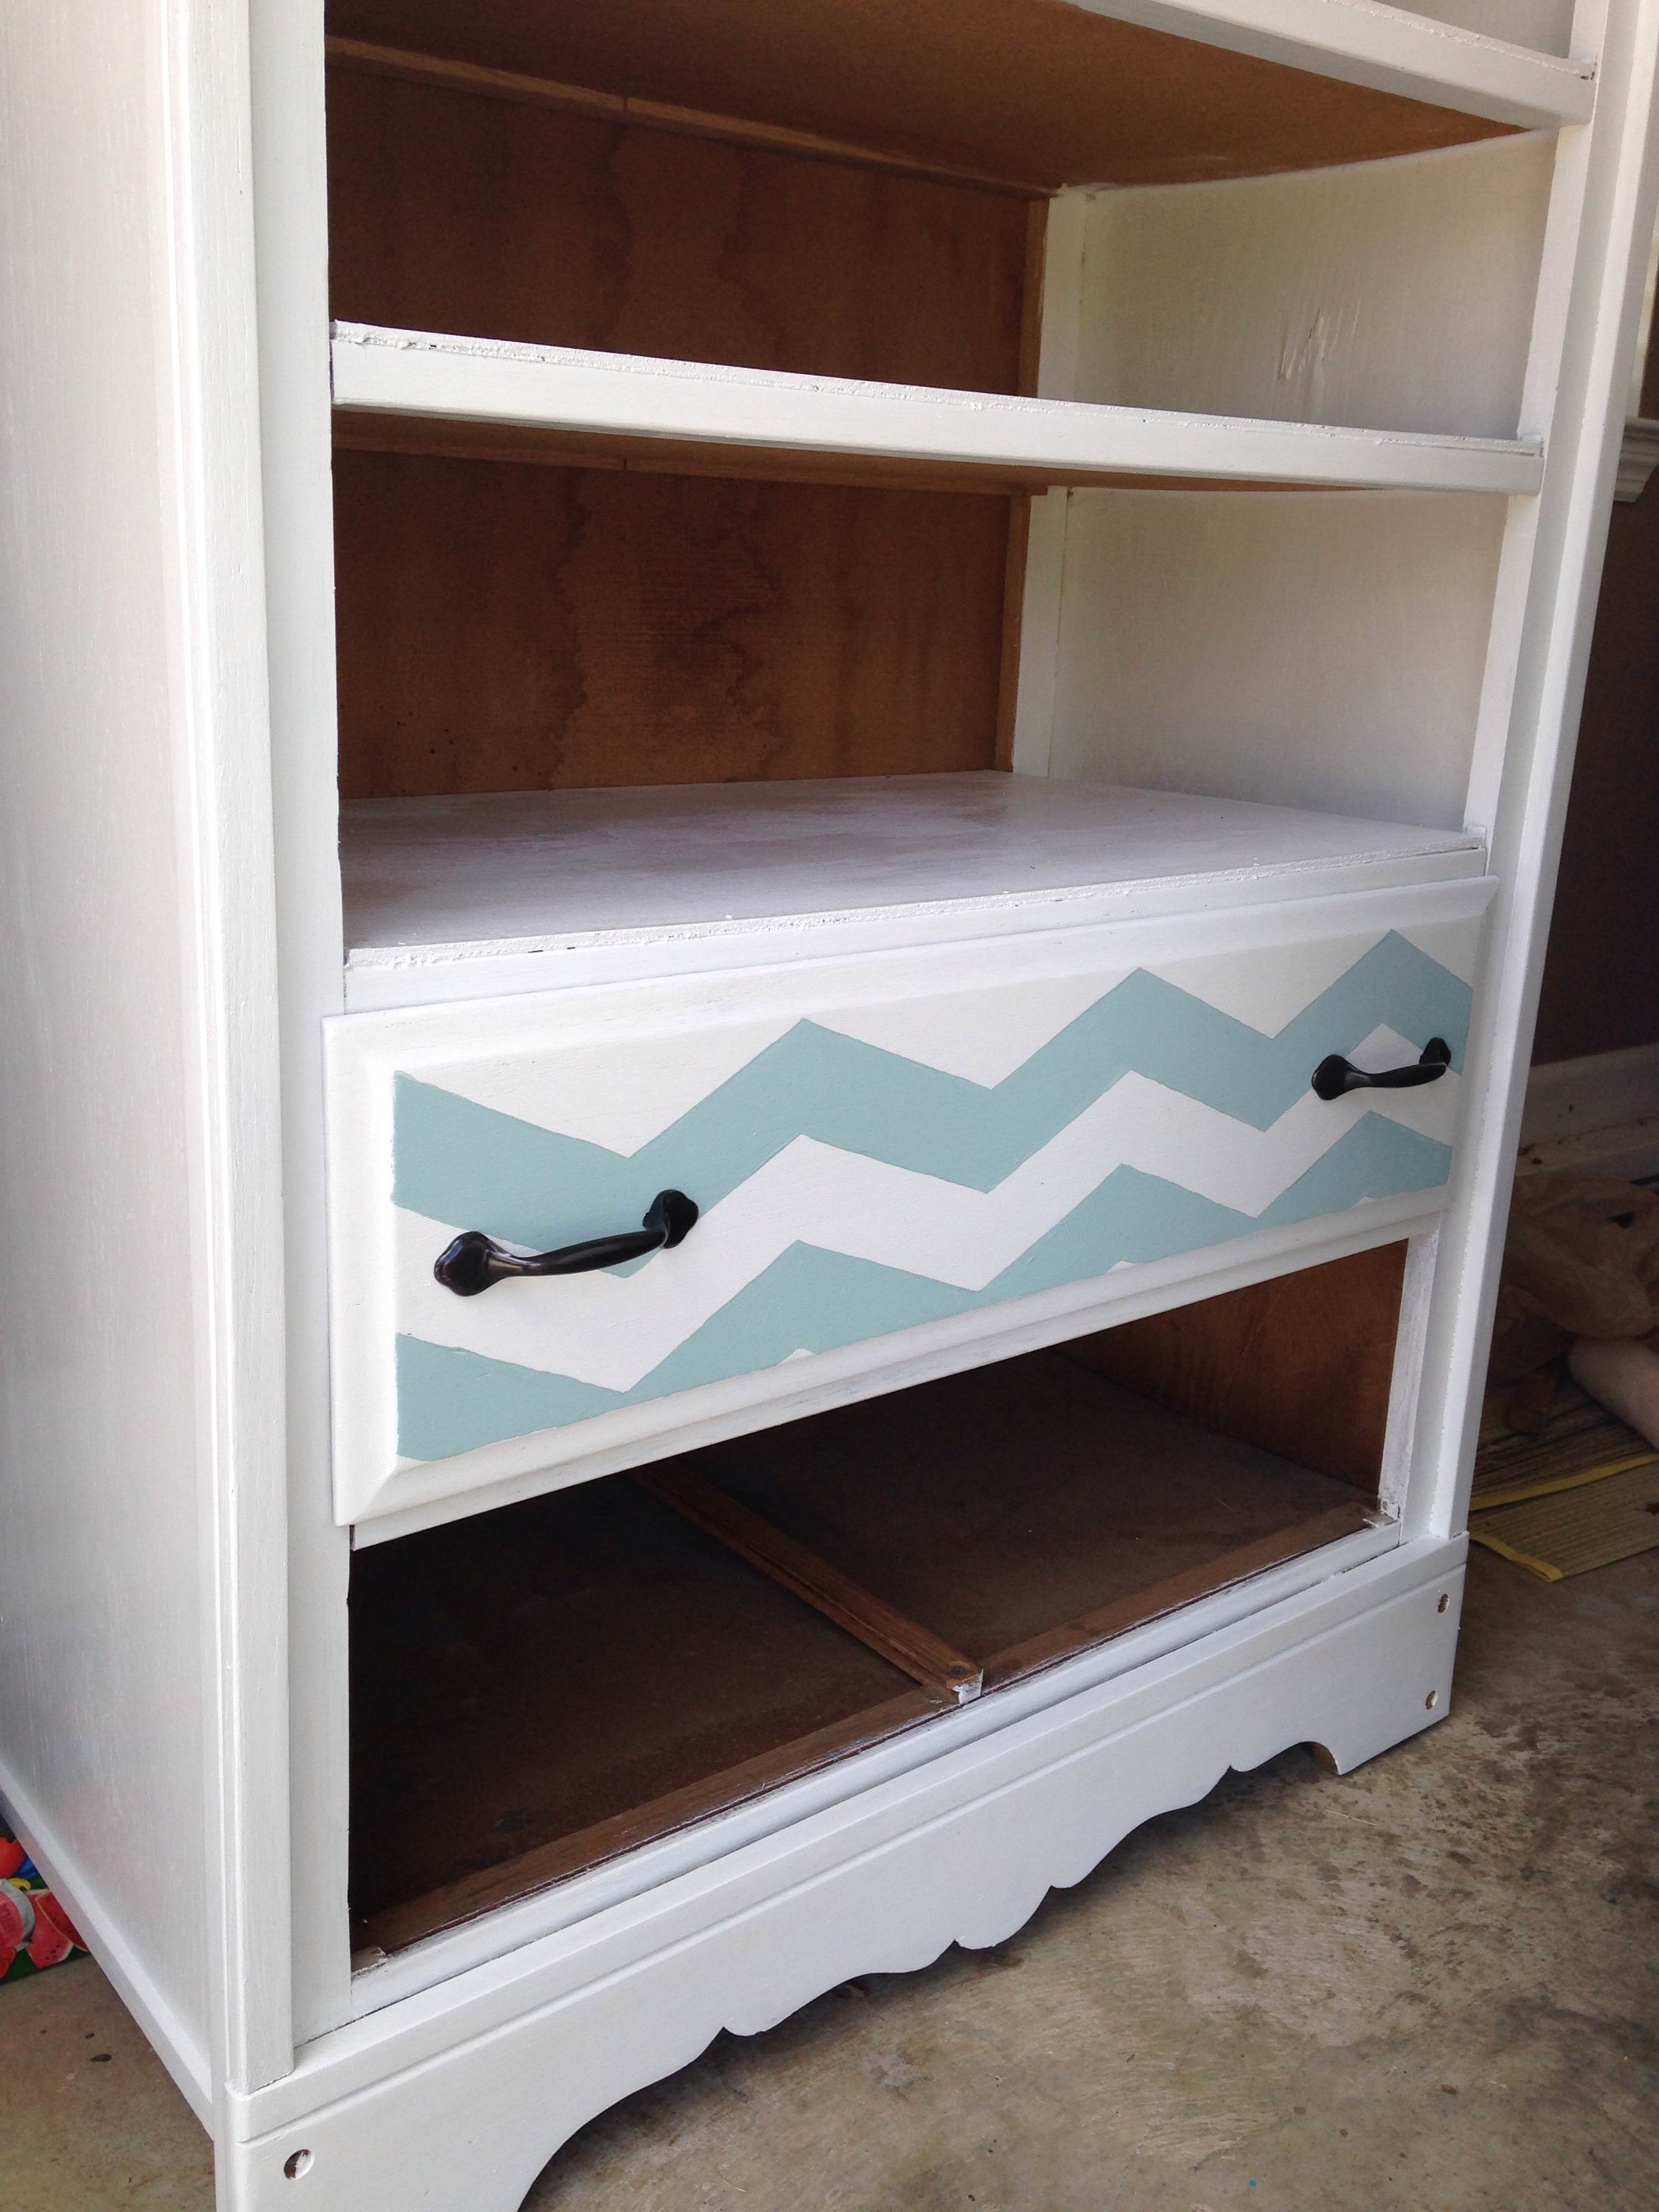
 I do have a teenie tiny little obsession with chevron, so I added that to the drawers. I think it gave it some serious style. Don’t you?

photo6

 Finished product! I searched for days for baskets and bins to use in place of the drawers for this thing. I’m horrible at making decisions. Absolutely. Horrible. I wanted to make sure they were not too dark and went ok with the chevron and color of the room, etc. I gave into these cute chevron baskets at Old Time Pottery after days of looking and complete discouragement at the price of these boogers. Not cheap!

photo7

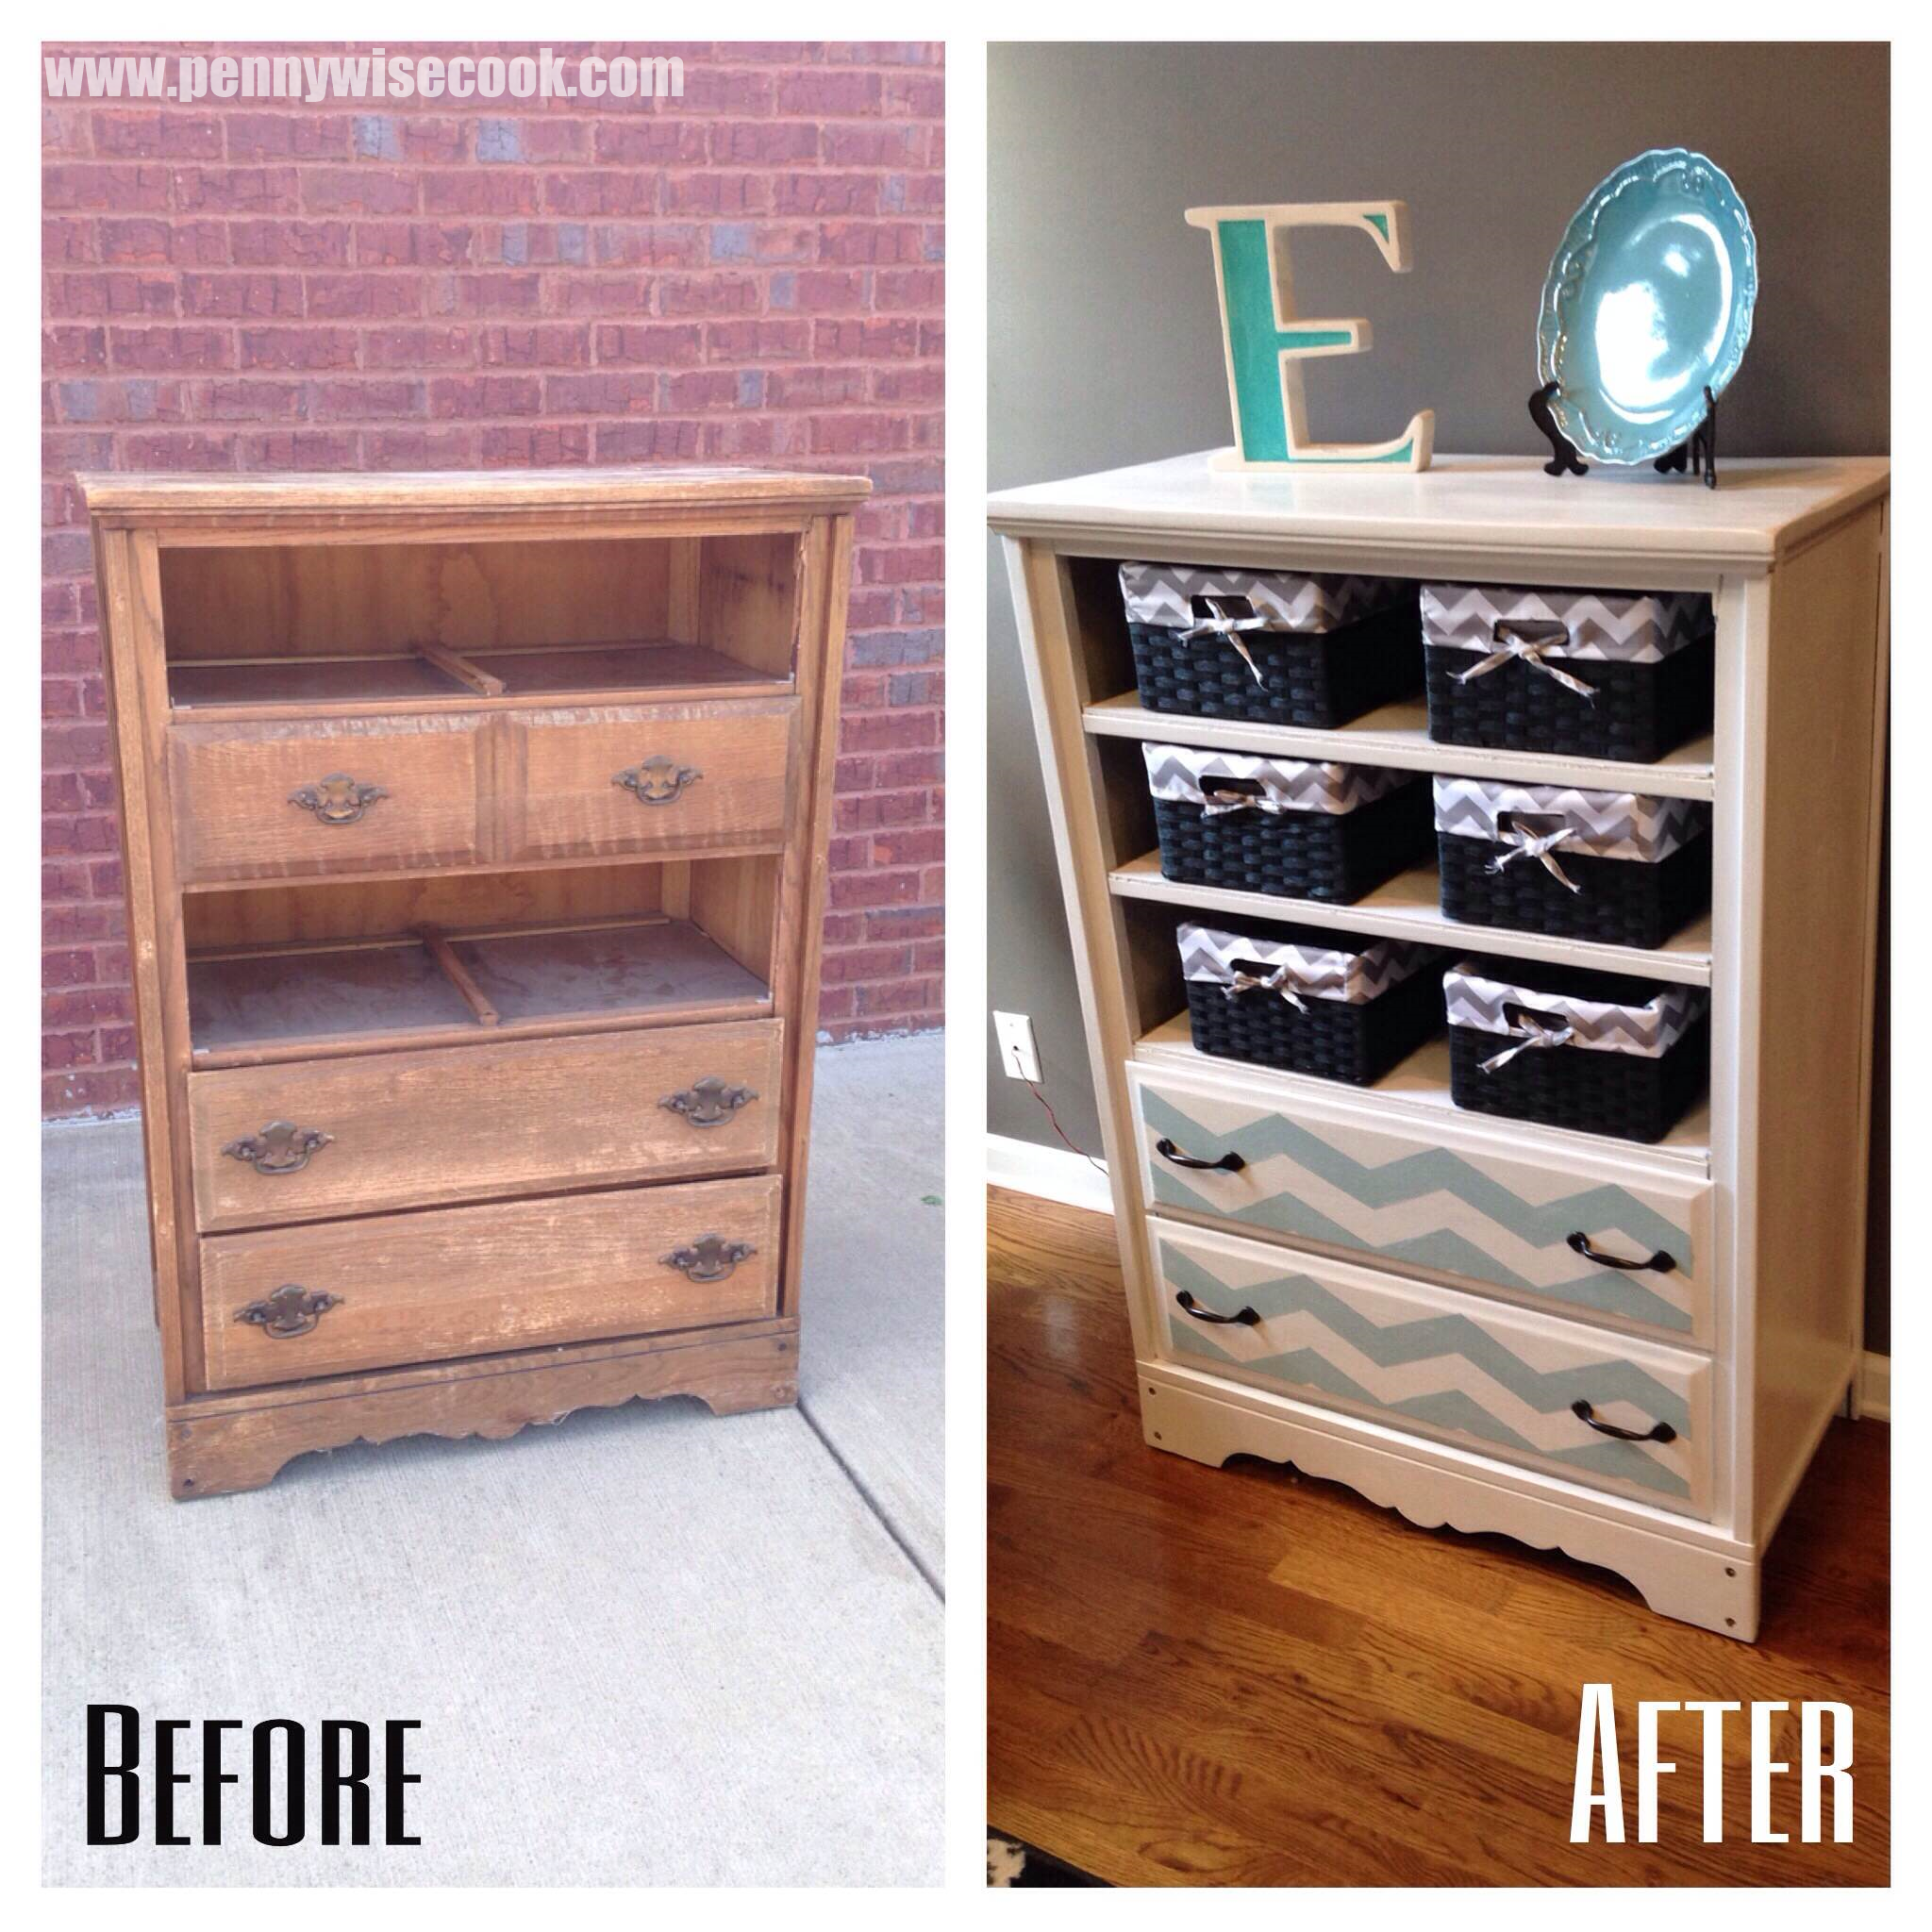
 It is by no means perfect, but it makes for lots of storage space for my crafts! I had it in our living room for a bit. Now it’s in the bonus providing ample and stylish storage for our craft stuff. HE turned out so good!

What do YOU think?!


Like this post? SHARE it!

Related Posts Plugin for WordPress, Blogger...

A”Door”able Hall Tree

Do you have a spot in the house where everyone leaves their stuff? Perhaps the entryway or foyer area. In my house, the living room and kitchen are the drop zone. We come into out house through the garage and on the way to the living room, we tend to expel our belongings as we go. And by we, I mainly mean the children. One of our biggest problems is finding shoes. Yes, I know this may sound silly to some, but for some reason my Addie likes them off the very moment that she arrives at home. This isn’t one of those “Take your shoes off at the door” kinda situations.

We have hard floors.

This leads to shoes that go missing. Under the couch. IN the couch. Around the couch. Under random toys. IN random toys. You name it, we’ve probably found a shoe there. So I wanted an easier solution for keeping the family’s shoes in one place.

I originally wanted one of those storage benches with matching shelf and hook above. I spent countless hours on Pinterest looking for ideas. I even found a few that I liked, but I cannot justify paying the price for those sets. Many are upwards of $300-$500. Then I came across numerous ideas for hall trees made from old doors on there. What a genius idea, huh? Plus this gave me a reason to visit one of my favorite stores on earth, Habitat Restore! That place is brimming with old building materials, paint, light fixtures and all for awesomely affordable prices.

This is my creation! When I started, I really had no idea what it was that I wanted to do with this door. I knew that I wanted to have a bench, a place for bins, and hooks. I didn’t even have plans for HOW this was going to occur. I kinda just winged it to be honest.

It all started with this door. I liked this one because it was really wide and in great shape. No big scratches or gauges. It only set me back $25 bucks.

Knowing that the bench wouldn’t need a back (the door is the backing), I knew building the box for it would be fairly simple. I measured the door and the estimated height that I would want the bench and created this box that is 36 inches long and 13.25 inches high. We used a drilled to screw the boards directly into each other.

The wood for this cost about $14 at Lowes.

I also knew that I wanted to have sweet little spindle feet on the bottom of the hall tree to dress it up. I found these 3.25 inch feet at Lowes for $1.47 each for a total of $5.88. I had really only planned to have the 4, but hubby brought up that it might be more sturdy to do ahead and put on 4. It didn’t look as silly as I was expecting it to look once we got them on. Though next time, I’d probably go for thicker legs.

Then it was time to dress the bench up a bit. I got these exterior house accessories at Lowes as well. Not exactly what I was hoping for, but they made nice and delicate arm pieces for the bench. They were a whopping $8.50 each for a total of $17 bucks.

Then we attached the bench to the door using long wood screws through the backside of the door. This included one each directly into the pretty little arms.

This picture is absolutely horrific, but you can see that we added the shelf on top. We didn’t make this as wide as the door, leaving a couple inches on each side. I used wooden shelf pieces to give it some pizazz. The shelf was around $11 total including the support pieces. They were surprising inexpensive!

I knew that it had to get difficult at some point and this is where it did. Getting the shelf to line up perfectly with the screws in the back was the hardest part. In the end, we didn’t do it perfectly and the shelf is not flush on both sides, but it holds and we aren’t very concerned about it. You’d have to be looking to really notice it.

We also added framing around the bench’s opening to finish off the edges a bit. I simply got a thin framing piece and we cut with a handsaw to fit, then tacked it on. It gives the box a sort of “lip” around the edges. I also primed and painted at this point. I used paint that I found at the Habitat Restore. I got a gallon of this beautiful aqua/greenish color for just $4!

Then came the finishing touches. I splurged on these hooks at Lowes for $4.50 each for a total of $13.50. I really didn’t want to spend that much on simple hooks, but I liked the color and knew that I wanted the bins to be dark like this too.

Now for the biggest function of this hall tree—bins! I got these smaller bins at Lowes for $7 each or $21 total. They look wicker but are an eco substance that mimics it. Nice and durable for the ravaging that our family might put them through.

I am in love with this hall tree for many reasons. It was so easy to make, even for the wood-working challenged. We didn’t even have to break out a big saw. I love the color that we painted it. So cheery and such a beautiful accent to the entryway. And I love that it was completely custom and not out of a box.

Did I mention that I love its functionality? I have been working on making sure that backpacks get hung along with coats and purses. I also have a rule to make sure all shoes go in the shoe bins. Once the deep winter hits, we’ll also keep scarves and gloves here too.

And my fancy shelf? I can use it for more storage with smaller bins or maybe even just place a seasonal item up there like a pumpkin to be festive!

Yay for DIY! What do you think?


Like this post? SHARE it!

Related Posts Plugin for WordPress, Blogger...

DIY Coffee Mug Holder

One thing that you may not know about me is that I have an obsession with mugs. No, not with faces, but with the ceramic formations that hold the most incredible substance that keeps me going every day, coffee. I only started to drink coffee about a year and a 1/2 ago and yet it sucked me in so fast that I didn’t even know what was happening!

I now enjoy scouring flea markets, thrift stores, and any other places finding the most unique and eclectic mugs that I can. I’d call it a “hobby”, but that would be giving in and I’m afraid that my obsession would deepen so I’m just going to pretend that it’s just something that I do. 🙂

When I noticed that there wasn’t any place to put regular glasses in my cabinet, I decided that something need to be done.

I needed a place just for mugs. After all, they are worthy.

So I thought up this mug holder idea and got to work. I knew that I wanted it to be inexpensive and semi-simple to make since I’m no carpenter. Brace yourself, I took a lot of photos for this one…

I started with cheap board from Lowes. I had them cut it to 2 feet so that it would fit on the side of my cabinet. I didn’t want anything too thick, but I wanted it thick enough to hold screw hooks well. I believe this board is 1 inch thick which turned out just right. I painted the board with a light blue before lightly painting over it with an off-white. Then I sanded it a bit to distress it.

And in the process I got paint on the garage floor. It needed some color anyways.

I found this fantastic technique for transferring text onto wood at Elm Street Life. It doesn’t get any simpler than your printer, a pencil, and a pen.

Print off the text of your choice from your printer. No need for reversing the text or anything. Cut out most of the white surrounding the text. Then using a lead pencil, color the back of each letter like the picture above. The need for a cheetah print pencil is not necessary, but it helps to make you feel awesome.

I may have gone a bit overkill, but here’s what it will look like on the back.

Tape your words lightly to your wood so it won’t try coming up on you. Using a pen, trace around each letter firmly. The lead will transfer to the wood and you’ll be left with an outline of your words.

Like this! Then you can use a brush (if you’re brave) or a paint pen to fill in the outline. They actually make an assortment of paint pens these days which is nice.  Just remember that it doesn’t have to be perfect. You can always sand it a little and if you’re going for a vintage feel anyways, it wouldn’t look perfect either.

Use your paint pen to go around the letters and then fill them in. When buying your paint pens, be sure to look at what kind of tip you are getting. Some are made for calligraphy and others for painting. I don’t suggest the calligraphy tips for this.

Tah dah! We have a board. We have text on the board. now we just need hooks and mugs for our mug holder!

You may have seen my post on Toilet Paper Roll Art. It’s quite genius and is so simple and fun. I used a paper towel roll to create this flower and then dipped it into some of my favorite aqua paint.

I gave the board a little detail with my flowers and I even added an orange one on top to give it some more color.

I let it dry and then screwed in the hooks in an unexpected way. Or at least it was unexpected to my husband. He thought I would have made it a little more uniform, but as I started hooking them in, it seemed to make more room with them being offset this way.

UPDATE: We hung this by screwing screws directly through the backside of the cabinet into the board itself. We used 4 screws total and it holds just fine.

And there you have it! A simple yet cute way to display your coffee mug obsession (if you have one) and to give your cabinets a little more room.

It’s not just functional, but it looks really cool too. We’re going to make one for my husband’s mugs for the other side too.

Happy DIYing!


Like this post? SHARE it!

Related Posts Plugin for WordPress, Blogger...